check engine light AUDI Q7 2010 Owner´s Manual
[x] Cancel search | Manufacturer: AUDI, Model Year: 2010, Model line: Q7, Model: AUDI Q7 2010Pages: 390, PDF Size: 93.04 MB
Page 302 of 390
___ C_ h_e _c_ k_ i_ n _ g_ a_ n _ d_ f_il _l _in ____ g ___________________________________________ _
Applies to vehicles with diesel engine only : Only if the level of t he
oil is a t or be low the m inimum m ark o n the o il d ipstick -and no o il
that express ly conforms to A udi o il standard VW 507 00 spec ifica
tions is available -may you top off with a high q ua lity engine oil , that
meets ACEA C3 o r API CF spec ifications, but even then, on ly in
viscosity gra des SAE 5W- 40, SAE SW -30, or SAE OW -40 . However,
dur ing t he e ntire time between o il change i nte rvals, neve r top off
w ith more than a tota l of 0.5 qt/liter engine oil that does not
c onfor m to Audi o il specification VW 5 07 00.
For more information about eng ine oi l th at has been approved for
your vehicle, please con tact either your au thorized A udi dea le r or
Aud i Customer Relations at 1 (800) 822 -2834 or vis it our web site at
www.aud iusa .com or www .aud icanada.ca . He re yo u w ill also find a
cu rrent list of oils (manufactu rers, brand names e tc.) that co nform to
Audi oil standard VW 502 00 (vehicles with gaso line e ngine) or VW
507 00 (vehicles w it h die sel eng ine).
Changing the engine oil
The eng ine oil and oil fi lter mus t be changed according to the mileage
(kilome ters) and t ime intervals specified i n your vehicle 's Warranty &
Ma intenance booklet . Do not exceed these interva ls - harmful
deposi ts from o ld engi ne oil can reduce engine pe rfo rmance and ca n
lead to expensive engine repa irs.
C hangi ng the oil at the recommende d interva ls is so very imp ortant
because the lubricating properties of o il decrease gradually during
normal ve hicl e use. If yo u ar e not sure w hen you have yo ur oil
changed, ask your author ized Audi Service Adv isor .
Under some circumstances the eng ine o il should even be changed
more fr eq uent ly. Chang e oil mor e of ten if you d rive mostly short
distances, operate the veh icle in d usty areas or mostly under stop
and -go t raff ic condi tion s, or when you use yo ur vehicle where tempe r
atures stay be low free zing po int for long periods.
De tergen t ad dit ives in the o il wi ll m ake fres h oil look dark a fter the
eng ine has bee n ru nning for a short t ime . This is normal and is not a
reason to ch ang e the oil mo re of ten t han re commended.
Damage or malfunctions due to lack of maintenance
It is essentia l that you change your o il at the recommended intervals
using only en gine oil th at com plies wi th A udi o il st and ard VW 502 0 0
(vehicles w ith gasoline eng ine) o r VW 507 00 (vehicles with d iesel
eng ine) . Your Limited New Vehicle Wa rranty does not cover damage
or ma lfunct ions due to fa ilure to follow recomm ended maintena nce
and use requirements as set forth in t he Au di Owner's Man ua l and
W arranty
& M aintenance boo klet. Y ou r deale r will have to deny
wa rranty coverage unless yo u present to the dealer proof i n th e form
of Se rvice o r Rep air O rders tha t al l sche dul ed main tena nce was
performed in a time ly ma nner. •
Engine oil consumption
To provide effective lubr ication a nd cooling for interna l eng ine parts,
a ll in ter na l c omb ustion e ngines use some oil. Oil cons umption v aries
from engine to engine and may change over the life of the eng ine .
E ngines te nd to use m ore oi l dur ing the b re a k-i n period t han t hey do
after ward, when oil consumption has stab ilized. Depending on t he
way the vehicle is driven and the operatin g cond itions, oi l cons ump
tion ca n be up to a 1 quart per 1,200 miles
(I lite r per 2,000 km) .
Consumptio n may be higher withi n th e first 3,000 m iles (5, 000 km) .
Under nor mal co ndi tions, the rate o f oi l consu mptio n depe nds o n oil
quality as well as viscosity, engine speed ( rpm), o utside tempe rature,
roa d condi tion s, the amou nt of o il d ilution caused by co nde nsed
water or fu el residue, and oxidation of the oil. O il cons umption may
increase wi th en gine we ar ove r time, un til repl aceme nt of worn
eng ine pa rts may become necessa ry.
Because of all these var ia bles, there is no standa rd o r "norma l" rate
of oil consumption .
We urge you to check the engine oil level at
regular intervals, preferably every time you fill the fuel tank, and
always before a long trip .
The oil pressure warning light
~ is not an indicator of low eng ine
oil level. If the warning light does not go out after starting, or
flashes while driving (above 1500 rpm), a buzzer will sound . It
indicates that the oil pressure is too low. Stop the engine immedi- _.,,
Page 303 of 390

_____________________________________________ C_h _ e_ c_ k_in --= g'-- a_n _d_ f_i _ll _i_n -=g ::;__ ____.fflll
ately, check the engine oil level and add oil if necess ary. If the
engine oil level i s normal, but the light continues to flash , do not
keep driving or l et the engine idle , as damage may occur .
If you believe your engine uses too much oil, we recommend that you
cons ult your au thor ized Audi dealer so that the cause of yo ur conce rn
can be properly diagnosed. Keep in m ind that accurate measurement
of oil consump tion req uires gre at care a nd may ta ke some time. You r
Audi dealer has instructions for how to measure o il consumption
a ccu rately.
& WARNING
Stop! Befor e working in the engine compartment, alw ay s read and
heed all WARNINGS ~
& in "Working in the engine compart
ment " on
page 297. The engine compartment of any motor
vehicle is a potentially dangerous area and can cause ser ious
per sonal injury .
0 Note
• The engine depends on o il to lubr icate and coo l all of i ts mov ing
parts . The engine oil must be checked regularly and kept at the
req uire d level.
• Make it a hab it to have the engine oil level checked every t ime you
fill the f uel tank.
• Too little engine oil may cause severe eng ine damage .•
Vehicle OP-eration
Checking the engine oil level
The dipstick indi cates the engine oil level.
F ig. 232 Illu st rati on
o f prin ciple 1 : M arke rs
o n oil dipsti ck
Fig . 233 I llustration
o f prin ciple 2 : M arker s
o n oil dip sti ck
Before you check anyt hing i n th e eng ine compartment ,
always read and heed all WARNINGS=> & in " Workin g in
t h e e ng ine compa rtme nt" on
page 297.
Determining oil level
- Park you r veh ic le so tha t it is h orizo ntally lev el.
- While at operating state te mperature, briefly let the
engine ru n at id le and then shut it of f.
- W ait appro x. two minutes .
Vehicle care Do-it-yourselt service iTechnical data
Page 307 of 390
_____________________________________________ C_h _ e_ c_ k_in --= g:-. a_n _d_ f_i _ll _i_n -=g =-- ____.•
- We recommend using only coolant additive Gl2 ++ (check the
l a bel) for yo ur vehicle. This coolant ad dit ive is available at au tho·
r ized Audi dealers . Other types of antifreeze can s ignificantly
reduce corrosion protection. The resulting corrosion can cause a
loss of coolant and serious engine damage .
• Do not add any type of radiator leak sealant to your vehicle's
eng ine coo lant . Adding radiator repa ir fluid may adversely affect the
function and performance of your cooling system and could result in
damage not covered by your New Vehicle Limited Warranty .•
Checking the engine coolant Level
The engine coolant level can be checked with a quick
glance .
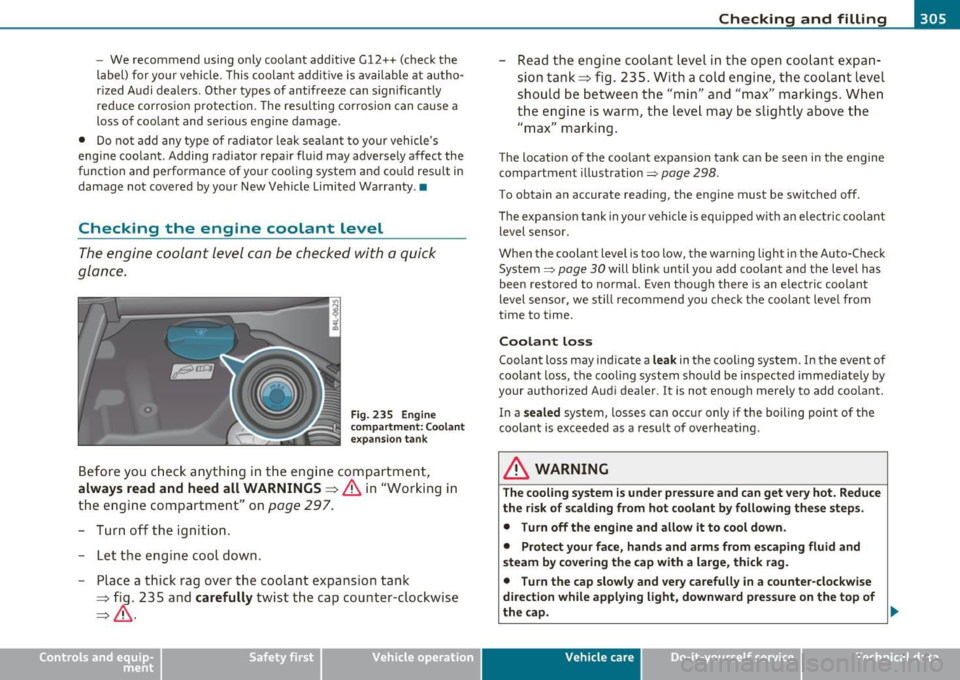
Fig. 2 35 En gin e
c o mpar tmen t: C oolant
ex pansion tank
Before you c heck anything in the eng ine compartment,
always read and heed all WARNINGS~ & in "Working in
the e ngine compartment" on
page 297.
- Turn off the ignit ion .
- Let t he eng ine cool down .
- Place a thick rag over the coolant expans ion tank
~ fig . 235 and carefully twist the cap counter ·clockwise
~ & -
Vehicle OP-eration
-Read the engine coolant level in th e open coo lant expan ·
sion tank ~ fig . 235 . With a cold engine, the coolant level
should be between the "min" and "max" ma rkings . Whe n
the engine is warm , the level may be slight ly above the
"max" marking .
The location o f the coo lant expansion tank can be seen in the engine
compartment illustration=>
page 298 .
To obt ain an accurate reading , the engine must be sw itched off.
Th e expans ion t an k in your vehicle is equippe d with an electric coolant
level sensor.
When the coolant lev el is too low, the warning light in the Auto·Check
System=>
page 30 will blink until you add coolant and t he level has
been resto red to normal. Even though there is an electric coolant
level sensor, we st ill recommend you check the coolant leve l from
time to time.
Coolant loss
Coolant loss may indicate a leak in the coo ling system . In the event of
coo lant loss , the cooling system sho uld be inspected immed iate ly by
your authorized Aud i dea ler . It is not enough mere ly to add coolant.
In a
s ealed system, losses can occu r only if the boiling point of the
coolant is exceeded as a result of ove rheating .
& WARNING
The cooling system is under pressure and can get ve ry hot. Reduce
the ri sk of scalding from hot coolant by following the se steps.
• Turn off the engine and allow it to cool down .
• Protect your face, hand s and arms from e scaping fluid and
s team b y co ve ring the cap with a large, thi ck r ag.
• Turn the cap slowly and ver y carefully in a counter-clo ckwise
direction whil e applying light , downward pre ssure on the top of
thecap .
~
Vehicle care Do-it-yourselt service iTechnical data
Page 308 of 390

___ C_ h_ e_c _k _i _ n _g ~ a_n _d_ f_il _l_in _ g _________________________________________ _
& WARNING (conti nu ed )
• To avoid being burned, do not spill antifreeze or coolant on the
exhaust system or hot engine part s. Under certain condit ion s, the
ethylene glycol in engine coolant can catch fire.
0 Note
Do not add any type of radiator leak sealant to yo ur vehicle's engine
c oo lant. Addi ng radia tor repa ir fluid m ay adverse ly affe ct the func
tion and performance of your cooling system and could result in
damage not cove red by y our New Vehicle Lim ited Warr anty. •
Adding coolant
Be very careful when adding engine coolant.
Before you check anyt hing in th e eng ine co mpart ment ,
always read and heed all WARNINGS => & in "Wor king i n
t h e e ngine compa rtment" on
page 297.
- Tur n off the eng ine.
- Let t he engi ne c ool d ow n.
- Place a thic k rag over th e coolan t expans ion tank
=> pag e 305, fig. 235 and carefully twist t he cap cou nter
cl ockwi se
=> &.
- Add coo lant.
- Tw ist the ca p on aga in
tightly .
Replacement eng ine coolant must conform to exact specifications
=>
page 304, "Coolant". Even in a n emergency, if coolant addi tive
Gl2 ++, Gl2 + or Gl2 is not available, do not use a different addit ive.
Use plain wate r in st ead until you can get the cor rec t additive an d can
restore the correct ratio. This shou ld be done as soon as possible. If
you have lost a considerable amount of coolant, then you sho uld
a d d c old an tifr ee ze and cold wa ter only when the e ngine is cold.
Always use
new engine coo la nt when refilling.
Do not fill coolant above the "MAX" mark. Excess coolant will be
fo rced o ut thr ough the p re ssur e relief v alve in the c ap w hen the
eng ine becomes hot.
& WARNING
• The cooling system is under pressure and can get very hot.
Reduce the risk of scalding from hot coolant by following these
steps.
-Turn off the engine and allow it to cool down.
- Protect your face , hands and arms from escaping fluid and
s team by covering the cap with a large, thi ck rag .
- Turn the cap slowly and very carefully in a counter-clockwise
direction while applying light, downward pre ssure on the top
of the cap.
- To avoid being burned, do not spill antifreeze or coolant on
the exh aust system or hot engine parts . Under certain condi
tions , the ethylene glycol in engine coolant can catch fire.
• Antifreeze is poisonous. Always store antifreeze in its original
container and well out of the reach of children.
• If you drain the coolant , it mu st be caught and safely stored in
a proper container clearly marked "poison ".
0 Note
• Coolant poll utes the environment and could cause an engine fire.
Excess coolant w ill be forced o ut thro ugh the pressure relief va lve in
t he c ap when t he e ngine becomes hot.
• If, i n an emergency, only water can be added, the co rrect ratio
between wate r and an tifreeze=>
page 304 mus t be res to red as soo n
as possib le. _..
Page 309 of 390

___________________________________________ C_ h _ e_c _k _ i_n -=g .._ a_n _ d_ f_i _ll _i _ n -=g '-- ....... JIII
<£> For the sake of the environment
Dra ined coolant sho uld not be reused. A lways dispose of used coolan t
w hile observing a ll enviro nmental regulations .•
Radiator fan
T he radia tor fa n switc hes on a utoma tically by itself
The radiator fan is driven by the engine via the V-belt. The v iscous
cl utch reg ulates the spee d of t he fan accord ing to t he tem pera ture o f
the coolant.
An aux ili ar y e lec tric r adi ator fan* sw itches on and o ff depend ing o n
coo la nt temperat ure and other vehicle operating conditions.
After you switch the engine off, the auxiliary fan can continue r unning
for up to 10 minutes -eve n w it h t he igni tion o ff.
It can even swit ch on
again later by itse lf => & , if
• t he tem pera ture of the e ngi ne coola nt rises due to the hea t build
up from the eng ine in the engine compa rtment, o r
• th e engine compar tmen t heats up because the ve hicl e is parked in
intense s unlight.
& WARNING
• To reduce the risk of personal injury never touch the radiator
fan .
• The auxiliary electric fan is temperature cont rolled and can
switch on suddenly even when the engine i s not running.
• The auxiliary radiator fan switche s on automatically when the
engine coolant reaches a certain temperatu re and will continue to
run until the coolant temperature drops. •
~ehicle OP-eration
Brake fluid
Checking brake fluid level
The brake flu id l eve l can be checke d with a quick gl ance .
Fig . 236 Engine
compa rtment : Brake
fluid rese rvoir
Before you check a nyt hin g i n th e eng ine compa rtment ,
always read and heed all WARNINGS~ & in " Working in
the e ng ine co mpartmen t" on
page 297.
- Read the brake fluid level f rom t he bra ke flu id reservoir
~ fig. 2 36 . The bra ke fluid leve l must be between the
" MIN " and "MAX" markings.
Th e brake fl uid rese rvoir is located at the rear partition of t he engine
compartment on the left side=>
page 298.
The fluid level may drop slightly after some time due to the auto
m atic adjus tmen t of th e br ake pads. This is no t ca use for alarm .
If the brake fluid level falls
considerably below the "MIN" mark, t he
brake warn ing/i nd icator lig ht ( U.S. models :
BRAKE, Canadian mode ls:
ill ) will come on=> page 20 and=> page 29 . Do not continue to
operate the vehicle . The complete brake system s hould be thorough ly
che cked by an au thori zed Aud i dea le r o r q ua lified wor kshop a nd the
cause corrected.
If t h e brake fl uid leve l is too low, the brake .,,_
Vehicle care Do-it-yourselt service iTechnical data
Page 314 of 390
-Checking and filling .,,,, _ _..::::.__-=-----------------
& WARNING (continued)
• To reduce the danger of explosion, never connect or disconnect
charger cables while the charger is operating.
• Fast charging a battery is dangerous and should only be
attempted by a competent technician with the proper equipment.
• Battery acid that may spill during charging should be washed
off with a solution of warm water and baking soda to neutralize
the acid.
0 Note
Never use a fast charger as a booster to start the engine. This will seri
ously damage sens it ive electronic components, such as control units,
relays, radio, etc ., as well as the battery charger.•
Battery replacement
The new battery must have the same specifications and
dimensions as the original equipment battery.
Intelligent energy management in your veh icle is responsible for
distributing the electrical energy throughout your vehicle
~ page 259. T he intelligent energy management system will keep
the engine battery charged better then vehicles without this system .
To make sure the additional electrical energy is available once again
after you have changed the battery, we recommend that you install
batteries of the same type and manufacture only (the same as those
installed at the time your vehicle was delivered). Specifications are
listed on the battery housing. Your authorized Audi dealer will then
code the battery management control unit.
If it is not poss ible to use a battery of this type, the new battery must
have the same capacity, vo ltage (12 volts), amperage, construction
and plug sea ling .
When installing the battery, make sure the ignition and all electrica l
consumers are turned off.
0 Note
Make sure the vent ilation hose on the side of the battery is
connected, otherwise fumes or battery acid can leak out.
mend your authorized Audi dealer change the battery for you.
Batteries contain sulfuric acid and lead and must always be disposed
of properly in compliance with all environmental regulat ions.
Disposing of vehicle batteries improperly is very dangerous to the
environment. •
Windshield/headlight washer
container
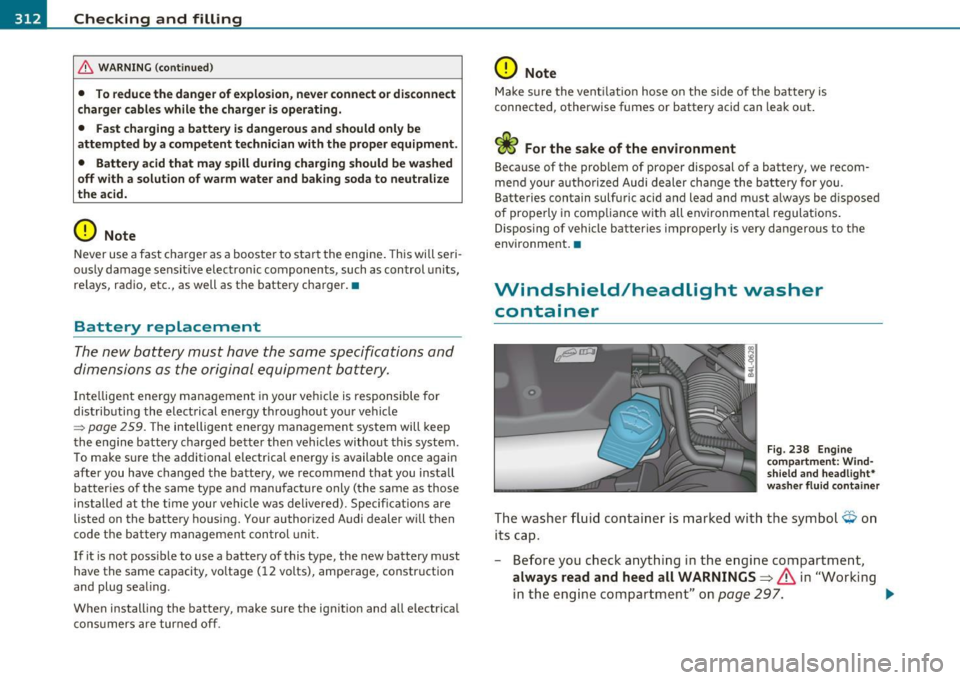
Fig. 238 Engine
com partm ent : Wind·
shield and headlight"
wash er fluid container
The washer fluid container is marked with the symbol~ on
its cap.
- Before you check anything in the engine compartment,
always read and heed all WARNINGS~ & in "Working
in the engine compartment" on page
297. ..,_
Page 355 of 390
_____________________________________________ E_ m___;, e_r-=g ~ e_ n_c,_:!y:.__: s_i:..:t ..:..u :..:a;;,. t.:.; i...: o :..: n...:..:. s _ __,J_
& WARNING (continued)
• Before you check anything in the engine compartment, always
read and heed all WARNINGS~
page 286, "Engine compart
ment".
0 Note
• Applying a higher voltage booster battery will cause expensive
damage to sensitive electronic components, such as control units,
relays, radio, etc.
• There must be no electrical contact between the vehicles as other
wise current could already start to flow as soon as the positive(+)
terminals are connected.
[I] Tips
• The discharged battery must be properly connected to the
vehicle's electrical system . When jump starting or charging the
battery, never connect the negative ground cable to the battery nega
tive post because the battery manager system must be able to detect
the battery's state of charge. Always connect the negative ground
cable to the negative ground post of the battery manager control
unit. •
Vehicle OP-eration
Use of jumper cables
Make sure to connect the jumper cable clamps in exactly
the order described below!
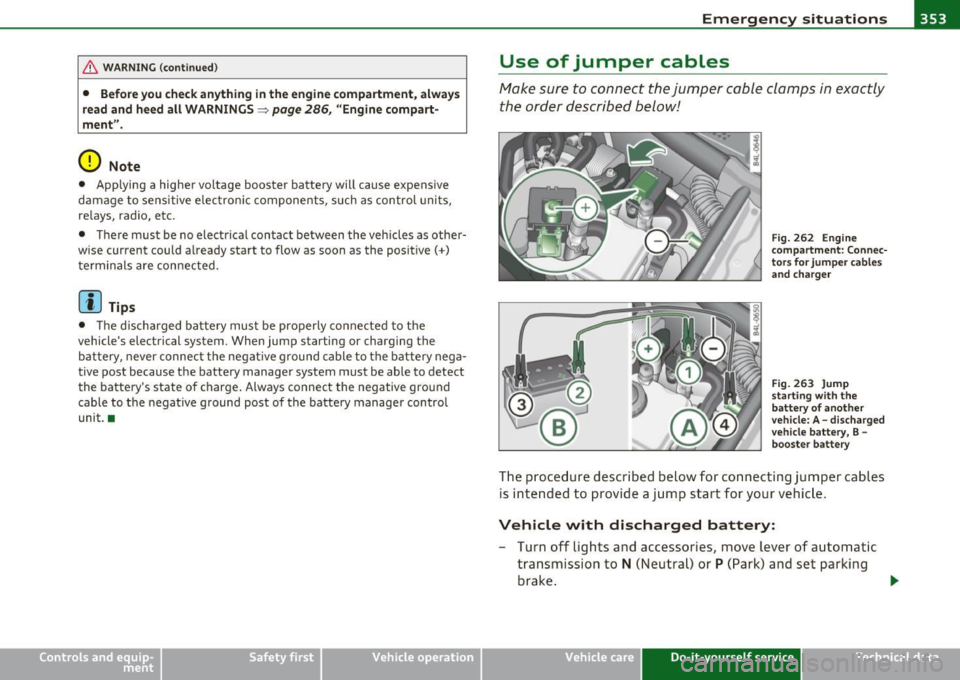
Fig. 262 Engine
compartment: Connec
tors for jumper cables and charger
Fig. 263 Jump
starting with the
battery of another
vehicle: A -discharged
vehicle battery, B -
booster battery
The procedure described below for connecting jumper cables
is intended to provide a jump start for your vehicle.
Vehicle with discharged battery:
- Turn off lights and accessories, move lever of automatic
transmission to
N (Neutral) or P (Park) and set parking
brake.
~
Vehicle care Do-it-yourself service iTechnical data
Page 375 of 390
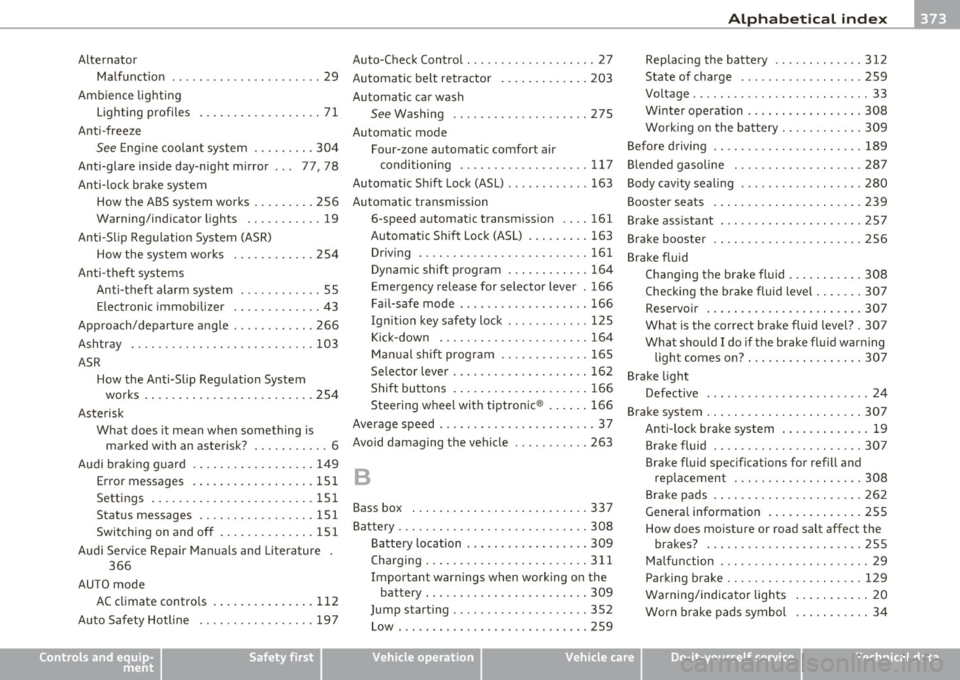
Alphabetical index -________________ fWI
Alternator Auto-Check Control ..... .. .. .... ...... 27 Replacing the battery .. .... .. .. .. . 312
Malfunction ............. ........ . 29 Automatic belt retractor ............. 203 State of charge
.................. 259
Ambience lighting Lighting profiles ................. . 71
Anti -freeze
See Engine coolant system ......... 304
Anti-glare inside day-night mirror ... 77, 78
Anti -lock brake system
How the ABS system works ......... 256
Warning/indicator lights ... .. .... .. 19
Anti-S lip Regulation System (ASR)
How the system works ... .... .. .. . 254
Anti-theft systems
Anti-theft alarm system ........ .. .. 55
Electronic immobilizer ............. 43
Approach/departure angle ............ 266
Ashtray . ............. .. .. .. .. .... . 103
ASR How the Anti-Slip Regulation System works . ..... ... ... .. .. ......... 254
Asterisk What does it mean when something is
marked with an asterisk? ........... 6
Audi braking guard .................. 149
Error messages ............... ... 151
Settings ................ ..... ... 15 1
Status messages ................. 151
Switching on and off .............. 151
Audi Service Repair Manuals and Literature
366
AU TO mode
AC climate contro ls ...... .... .. .. . 112
Auto Safety Hotline .... ... ... ....... 197
Controls and equip
ment Safety first
Automatic car wash
See Washing
.................... 275
Automatic mode Four-zone automatic comfort air
conditioning ........... ...... .. 117
Automatic Sh ift Lock (ASL) ............ 163
Automatic transmission
6-speed automatic transmiss ion .. .. 161
Automatic Shift Lock (ASL) ......... 163
Driving ......................... 161
Dynamic shift program ............ 164
Emergency release for selector lever . 166
Fail-safe mode ................ ... 166
Ignition key safety lock .... ... .. .. . 125
Kick-down . ...... .. .. .. .. ....... 164
Manual shift program .. .. .. .. .. .. . 165
Selector lever ............ ........ 162
Shift buttons .................... 166
Steering wheel with tiptronic ® .... .. 166
Average speed ....................... 3 7
Avoid damaging the vehicle ........... 263
B
Bass box ... .. .. ................. .. 337
Battery . .. .. .. .. .. ........ ......... 308
Battery location .. ... ............. 309
Charging ................ .. ... ... 311
Important warnings when working on the battery . .. .... ....... ..... .. ... 309
Jump start ing ................. ... 352
Low . .. .... .. .. .... ... ...... .... 259 Voltage
............. .... ... ...... 33
Winter operation ............... .. 308
Work ing on the battery ............ 309
Before driving .. .... .. ...... ....... . 189
Blended gasoline . .. .. ...... ....... . 287
Body cavity sealing .................. 280
Booster seats .................... .. 239
Brake ass istant . .. .... .............. 257
Brake booster ..................... . 256
Brake fluid Changing the brake fluid ........... 308
Checking the brake fluid level ....... 307
Reservoir ...................... . 307
What is the correct brake fluid level? . 307
What should I do if the brake fl uid wa rning
light comes on? ... .. .. .. ........ 307
Brake light
Defective .... .................... 24
Brake system ..... .......... ...... .. 307
Anti -lock brake system ............. 19
Brake fluid .. ...... ...... ....... . 307
Brake fluid specificat ions for refill and
replacement ................. .. 308
Brake pads .. .. ................ .. 262
General information ............ .. 255
How does moisture or road salt affect the
brakes? . ...................... 255
Malfunction ........ ...... ...... .. 29
Parking b rake .................... 129
Warning/indicator lights ..... .. .. .. 20
Worn brake pads symbol ........... 34
Vehicle operation Vehicle care Do-it-yourself service Technical data
Page 376 of 390

___ A_ l_. p_ h _ a_b_ e_ t_ic _a_ l_ in_ d_e _ x ____________________________________________ _
Braking guard
See Audi braking guard ............ 149
Break-in period .... .. .. .. .. ...... ... 261
Brake pads ..... .. .... .. ..... .... 262
T ires .. .... .. ................... 261
Brea kove r angle . .. .. ...... ....... .. 266
Bulbs ...................... .... ... 350
B umper cover
Caution when parking near a parking barri-
er or curb ............. .. .... .. 130
C
Ca lifo rnia Proposition 65 Warn ing ... .. 298
Batte ry spe cific . .... ........... .. 310
Capacities ................. ...... .. 363
Car -Sys tems
Ambience lighting ... .. .. ...... .. .. 71
Lighting profiles . ... .. .. ... .... ... 71
Car care .. .. .. .. .. .. ............. .. 2 7 4
Interior ................ .. .... .. 281
Plastic and vi ny l .. .. .. .. ..... .... 278
Weatherstrips . ... .. ...... ... . .. . 279
Care of exterior .. ......... ... ....... 274
Cargo area
See Loading the luggage compartment ..
195
Cargo floor ................ .. .... .. . 97
Cargo net . ... .. ...... .. . ... ... .. .. . 96
Catalyt ic converter ........ ....... ... 262
Center armrest Cup holder ... .... .... .. .......... 92
Storage compartment . .. .......... 92 Center console
in rear .... ..... .... ... 93
Centra l loc king
Emergency locking ... ... . ... .. .. .. 48
Panoramic sliding sunroof . ... .... .. 61
Central loc king system
Filler flap .......... .... .. .. .. .. . 29 4
Cert ificat ion ........... ... ... .... .. 369
Changing a flat tire ..... ...... .. ... . 339
Cha ng ing a wheel ............. ... .. . 339
Changing engine oil . ................ 303
Chassis Under coati ng ....... ... . ... .. .. . 280
See also Adaptive Air S uspension . .. 176
CHECK button .. .................. ... 13
Checking Engine coo lant level ....... .. .. .. . 305
C hecking tire press ure . ..... .. .. .... . 320
Chi ld restra int system anchors ..... .. . 244
Child restraints Danger of us ing child restraints in the front
seat .. .... .. ........... .. .. .. . 21 1
Whe re can I get add itiona l information
about child restra ints and their use? .. .
2 51
Ch ild safety ... ... ... ... ... .. .. .. .. . 231
Convert ible lock ing retractor .. ... .. 24 1
Guidance fixtures fo r lower anchorages
246
Important safety instructions for using
child s afety seats .... .... .. .. .. . 234
Important things to know whe n dr iving
with children ............... ... . 231 Installing a child restrai
nt us ing the LA TCH
syste m ....... .... .. .. .. .. .. .. 248
M ounting and re leasing the anchorage
hook ............ .. . ... ... .. .. 248
T ethe r anchors ........... ... .... 249
T ethe r str aps . ....... ...... .. .. .. 249
Chi ld safety lock
rear doo rs (power) .. .............. 52
Chi ld safety seats . ....... ... .. .... .. 236
Booster seats . ... .. .. ... .. .. .. .. 239
Convert ible chi ld seats ... ......... 237
Convert ible lock ing retractor ....... 241
Danger of us ing child restraints in the front
sea t ... ........... ...... ... ... 211
How do I properly ins tall a child s afe ty se at
in my vehicle? .... ... .... ... .. .. 234
Infant seats ...... ............... 236
Insta lling ............ ... .. .. .... 241
LA TC H system . . . . . . . . . . . . . . . . . . . 248
Safety inst ruct ions .. ....... .... .. 23 4
Child seats Lower anchorages . .. ............. 245
Clean diesel
See Ad B lue . ... .. .. ..... ..... . .. 292
Cleaning Alcanta ra (synthe tic suede) .. .. .. .. 285
E ngine comp artmen t ....... .. . ... 286
Exha ust ta il pipes ... .. .. .. ...... . 281
Fabrics and fab ric coverings . ... .... 28 1
Instrument pane l ... .. .. ... ..... . 282
Interior . ........... .. .. .. .. . ... 281
Leather ........ .. .. .. .. .. .. .. .. 284
M MI control console . ............. 281
MMI display .. .. ... ....... ... . ... 281
Page 378 of 390
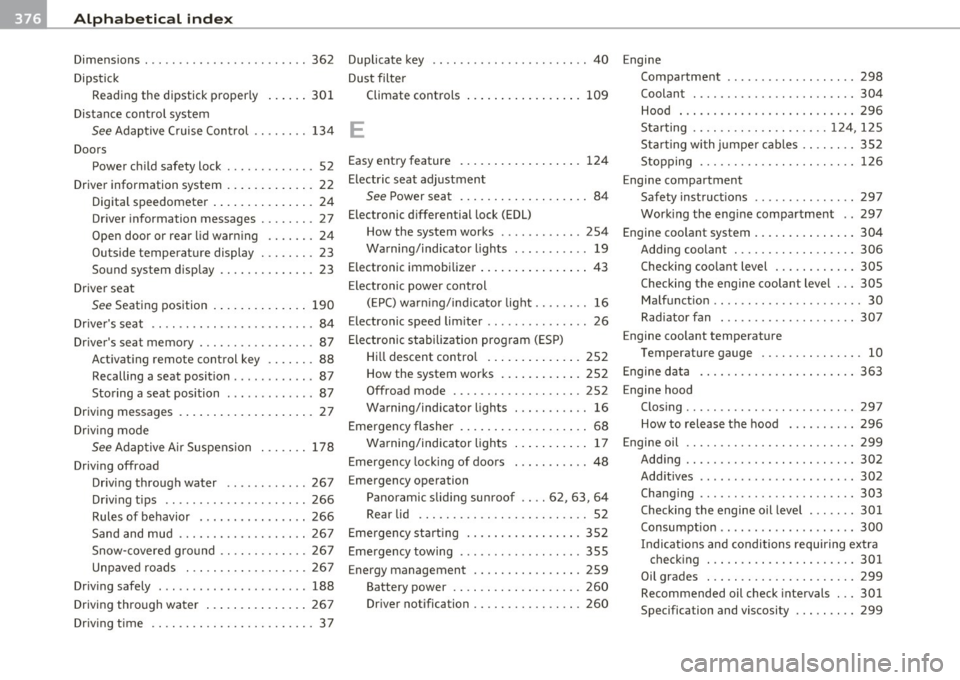
-Alphabetical inde x _ ___,_ ______ .::..:....=.:..:..__ __________________________ _
Dimensions ... ............ ....... .. 362
Dipstick
Reading the dipstick properly ......
301
Distance control system
See Adaptive Cruise Control ...... .. 134
Doors
Power child safety lock .............
52
Driver information system ......... .... 22
Digital speedometer ............... 24
Driver information messages ........ 27
Open door or rear lid warning ....... 24
Outside tempera ture display ..... ... 23
Sound system display .. .. ..... ..... 23
Drive r seat
See Seating position .............. 190
D. , river s seat . . . . . . . . . . . . . . . . . . . . . . . . 84
Driver's seat memory .............. ... 87
Activating remote control key .... ...
88
Recalling a seat position ............ 87
Storing a seat position ... .... .. .... 87
Driving messages .................... 27
Driving mode
See Adaptive Air Suspens ion . .... .. 178
Driving offroad
Driving through water .... .. ... ...
267
Dr iving tips .. ............ .... ... 266
Rules of behavior ........ .... .... 266
Sand and mud ................. .. 267
Snow -covered g round .. .. .... ..... 267
Unpaved roads . .. .. .. .. .... ..... 267
Driving safely . .. ..... ... ........... 188
Driving through water ... .. .. .. .... .. 267
D. . t· riving 1me .... .... ...... .......... 37
Duplicate key .. .. .. ..... ..... ... .. .. 40
Dust filter
Climate controls .................
109
E
Easy entry feature 124
Electric seat adjustment
See Power seat . . . . . . . . . . . . . . . . . . . 84
Electronic differential lock (EDL)
How the system works . ......... ..
254
Warning/indicator l ights ... ... ... .. 19
Electronic immobilizer ................ 43
Electronic power control
(EPC) warn ing/indicato r light ...... ..
16
Electronic speed limiter ... ..... ..... .. 26
Electronic stabilization program (ESP)
Hill descent control ........ ... .. . 252
How the system works .......... .. 252
Offroad mode ............ .. ..... 252
Warning/indicator l ights . .. .. .. .. .. 16
Emergency flasher . . . . . . . . . . . . . . . . . . . 68
Wa rning/indicator l ights ... .. .... .. 17
Emergency locking of doors ... .. .. .. .. 48
Emergency operation
Panoramic sliding sunroof .. ..
62, 63, 64
Rear lid ....... .. .... .. .. .. .... .. 52
Emergency start ing ........... ... .. . 352
Emergency towing .... ..... .... .. .. . 355
Energy management ........... .... . 259
Battery power .. .. .. .. .. .... ..... 260
Driver notification ............... . 260
Engine
Compartment ............... .. ..
298
Coolant ................. ... ... . 304
Hood . .. .. ..... .......... .. .. .. 296
Starting .. .... .. .. .. .. .. .... 124, 125
Starting with jumper cables .. .... .. 352
Stopping ........... ...... .... .. 126
Engine compartment
Safety instructions ...............
297
Working the engine compartment .. 297
Engine coolant system ............... 304
Adding coolant ............ .. .. .. 306
Checking coolant level ............ 305
Checking the engine coolant level . .. 305
Malfunction .. .. .. .. .... ... ..... .. 30
Radiator fan . .. .. ............... 307
Engine coolant temperature
Temperature gauge .. .... .. .. .. .. . 10
Engine data ................. .. .. .. 363
Engine hood
Closing ........ ... ... ... .. .. ....
297
How to release the hood .......... 296
Engine oil ............. ...... .... .. 299
Adding ............. .. .... .... .. 302
Additives .. ............ .... ... .. 302
Changing .. ..... ...... ... ... .. .. 303
Checking the engine oil level .... . .. 301
Consumption .. .. .... .. ...... .. .. 300
Indicat ions and conditions requiring extra
checking . .. .. .. .. .............
301
Oil grades . .. .. .... ............. 299
Recommended oil check intervals ... 301
Specifica tion and viscosity ..... .. .. 299