battery AUDI Q7 2011 Owner´s Manual
[x] Cancel search | Manufacturer: AUDI, Model Year: 2011, Model line: Q7, Model: AUDI Q7 2011Pages: 392, PDF Size: 93.29 MB
Page 28 of 392
Driver information display
Trip computer
Introduction
The trip computer gives you information on current and
average fuel mileage, avera ge speed, fuel range and
driving time .
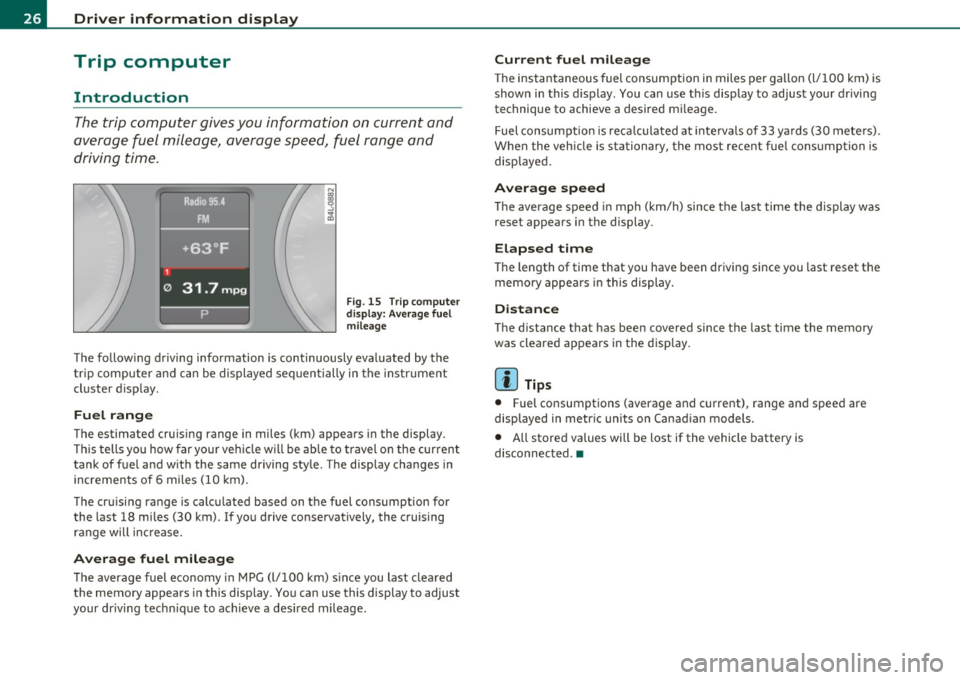
Fig . 1 5 T rip c om pute r
di sp la y: Av erag e fuel
mile age
T he fo llow ing driving information is continuously eva luated by the
t rip co mpute r and can be displayed se quen tially in the instr ument
cl uster d isplay.
Fuel range
The estimated cru ising range in miles (km) appea rs in the display.
Thi s tells you how far your veh icle w ill be ab le to travel o n the cur rent
tank of fuel a nd w ith the same driving sty le . The display changes in
in cremen ts of 6 miles (1 0 km).
Th e cru ising range is calc ulated based on t he f uel consumption for
the last 18 mi les (30 km). I f yo u drive conservatively, the cruising
r an ge will increase.
Average fuel mileage
T he average fuel economy in MPG (l/100 km) s ince you last clea red
the memory appears in this display . You can use this display to adjust
your dr iv ing tech nique to achieve a des ired mileage .
Current fuel mileage
The ins tan taneous fuel consumption in miles pe r ga llon (l/ 100 km) is
shown in this display . You can use t his disp lay to ad jus t your d riving
technique to achieve a desired m ileage.
Fuel consumpt io n is reca lculated at inte rvals of 33 y ards (30 me te rs).
When the veh icle is stationary, the most recent fue l consumption is
disp laye d.
Average speed
Th e average s peed in mph (km/h) since t he last ti me the display was
reset appea rs i n the display .
Elapsed time
The length of time that you have been dr iving since you last reset the
memory appea rs in this display.
Distance
Th e d istance tha t has bee n covered since t he last time the memory
was cleare d appears in the disp lay.
[ i ] Tips
• Fuel consumpt ions (average and current), range an d spee d are
displayed in metr ic units o n Canad ian models.
• All store d values will be lost if the vehicle battery is
disconn ected .•
Page 30 of 392
Driver info rmation d isplay
S ett ing values to zero
T o erase the single or total trip computer values, select the des ired
function and press and hold the
I RESET) button@ for at least one
second. You can also erase the va lues with the MMI
=> page 28.
All values currently disp layed in the efficiency program* are also
erased with the single trip computer.
[ i ] Tips
All stored values will be lost if the vehicle battery is disconnected. •
MMI settings
Basic settings for the trip computer can be made in the
MMI.
-Select: Function button [CAR]> System s*> Instrument
cluster > On -bo ard computer 1 or On-board computer 2.
The values in the s ingle-trip or the total-trip memory can all be reset
to zero at the same time under
Reset in the menu.
In addit ion, you can determine what information from the trip
computer should be shown in the instrument cluster display. If one
of the pieces of dr iver information is turned
Off, that dr iver informa
tion will not be shown in the display. The information will continue to
be ca lculated by the trip computer and can be turned back
On at any
time.
rn Tips
The driving information in the efficiency program* is also reset to
zero with the single-trip memory.•
Efficiency program
Applies to veh icles: w ith effi ciency p rog ram
Description
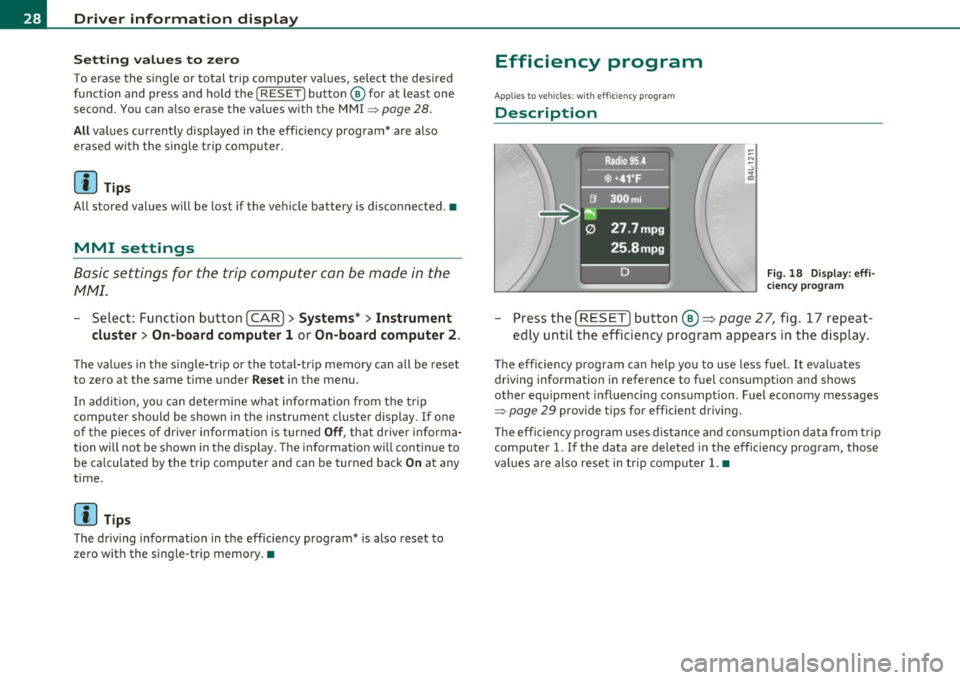
Fig. 18 Display: eff i
ciency p rog ra m
Press the [ RESET] button@~ page 27, fig. 17 repeat
ed ly until the efficiency program appears in the display.
The efficiency program can help you to use less fuel. It evaluates
driving information in reference to fuel consumption and shows
other equipment influencing consumption . Fuel economy messages
~ page 29 provide tips for efficient driving.
T he effic iency program uses distance and cons umption data from trip
computer
1. If the data are deleted in the efficiency program, those
values are also reset in trip computer
1. •
Page 36 of 392

Driver information d isplay
0 Alternator ma lfunction =>page 34
BRAKE
USA model s: =>page 34
Brake system malfunction
Can ad a m odel s: ::>page 34
Brake system malfunction
- --
-~-
Engine coolant level too => page 35
low/engine coolant temperature
-too high
~ Engine o il pressure too low ::> page36
Ad Blue /7 =>page296
Ad Blue c,,,.c AdBlue malfunction * =>page296
•
~ ....
Faulty steering =>page 36
© Faulty ignition switch =>page37
~
[ i J Tips
• If the warning/indicator light BRAKE (USA models)/ «D> (Canada
mode ls) in the instrument cluster flashes, the re is a brake system
malfunction. By press ing the [ CHECK] button, you can bring up a
dr iver message which explains the ma lfunct ion in more deta il. Please
note =>
page 34 .
• Speed wa rnings threshold 1 9 (USA mode ls)/ 0 (Canada models)
and threshold 2
8 , (USA mode ls)/ 8, (Canada models) are also shown
as red symbols . T he warning is a lways shown as a sma ll symbol in the
upper area of the display=>
page 31. •
Alternator malfunction 0
If the D symbol in the instrument panel display flashes, then there
is a malfunction in the a lternato r or the veh icle electronics. A warning
to the driver will appear, too. The driver warning goes out after about
5 seconds, but it can be b ro ught up at any time by pressing the
I CHECK] button again .
Usua lly, you can still drive to the next dealership. Turn off a ll but the
most necessary electr ica l consumers, since these drain the veh icle's
battery.
0 Note
If the _ f_ warning symbol (coolant system malfunction) also lights up
on the instrument panel dur ing the trip=>
page 35, then you have to
stop immediately and turn off the engine. The coolant pump is not
working anymore -danger of damage to the engine! •
Brake system malfunction
A malfunction in the brake system must be repaired as
soon as possible.
If the warning /indicator light BRAKE (USA models)/ (CD)
(Canada models) in the instrument cluster flashes, there is a
brake system malfunction. By pressing the
[CHECK] button,
you can bring up a driver message which explains the malfunction in more detail.
Stop v ehicle and check brake fluid level
- Pull off the road.
- Stop the vehicle.
- Turn off the engine .
- Check the brake fluid level:::::,
page 311.
Page 40 of 392
Driver information display
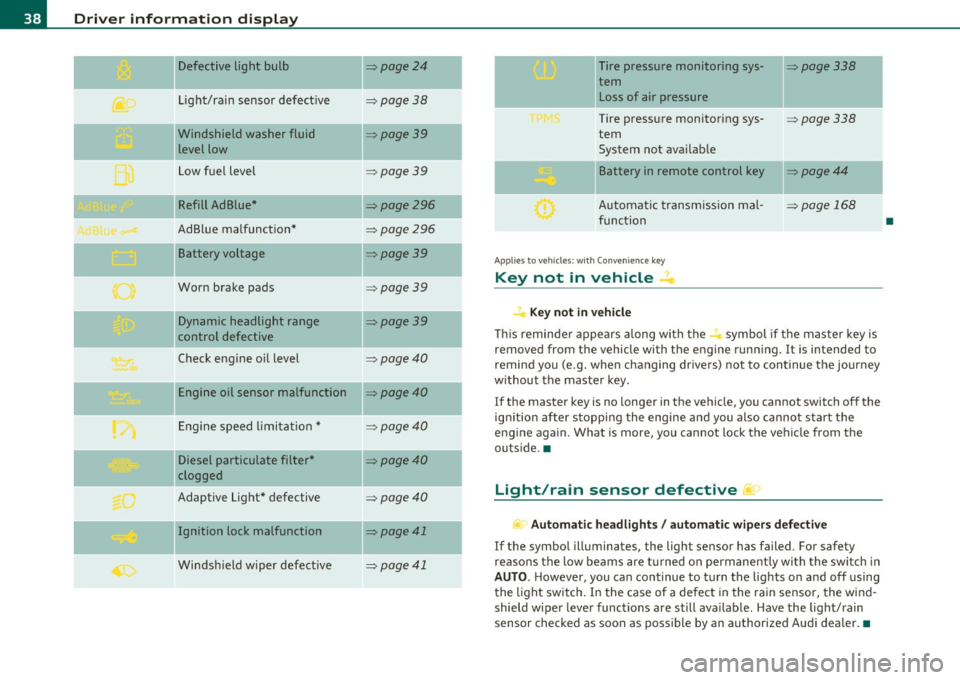
Defective light bulb ::::>page24
._ -
Light/rain sensor defective :::>page 38
-Windshield washer fluid =>page39
level low
Low fuel level
::::>page39
Refill Ad Blue* ::::>page296
AdBlue malfunction* =>page 296
-Battery voltage ::::>page39
Worn brake pads ::::>page39
Dynamic headlight range ::::>page39
control defective
-
Check engine oil level ::::>page40
Engine oil sensor malfunction =>page40
Engine speed limitation* ::::>page40
Diesel particulate filter* ::::>page40
clogged
Adaptive Light* defective
=>page40
Ignition lock malfunction ::::>page41
--
Windshield wiper defective => page 41
-
-
-
-
-
-
Tire pressure monitoring sys-::::>page338
tern Loss of air pressure
Tire pressure monitoring sys-=> page338
tern
System not available
- -
11
sattery in remote control key ::::>page44
Automatic transmission mal-=> page 168
function
Applies to veh icles: with Conven ience key
Key not in vehicle ..Z..
Key not in vehicle
This reminder appears along with the -i. symbol if the master key is
removed from the vehicle with the engine running. It is intended to
remind you (e.g. when changing drivers) not to continue the journey
without the master key.
If the master key is no longer in the vehicle, you cannot switch off the
ignition after stopping the engine and you also cannot start the
engine again. What is more, you cannot lock the vehicle from the
outside. •
Light/rain sensor defective ~'j.
Automatic headlights/ automatic wipers defective
If the symbol illuminates, the light sensor has failed. For safety
reasons the low beams are turned on permanently with the switch in
AUTO. However, you can continue to turn the lights on and off using
the light switch. In the case of a defect in the rain sensor, the wind
shield wiper lever functions are still available. Have the light/rain
sensor checked as soon as possible by an authorized Audi dealer. •
•
Page 41 of 392
Windshield washer fluid Level too Low :5
Please refill washer fluid
If the symbol illumi nates, add winds hield washe r fluid to the washer
system and also to the headlight washer system=>
page 316. •
Fuel supply too Low ""~
A Plea se refuel
When t his symbo l illuminates for t he first time, the fuel reserve in
your vehicle is still between 2 .6 and 3 .2 gallons (10- 12 li te rs) . Refuel
as soon as possible =>
page 293.
If the symbol lights up, even whe n there is ample fue l in the t ank, and
the text Tank system malfunction! Contact workshop appears in the
displ ay, the re is a fa ult in the system. Con tact a qualified workshop to
have the fault rectified .•
Battery voltage U
If the battery's state of charge is not in the optima l range, the -,
s ymbo l is show n in the display and the d river mess age Low battery
charge: battery will be charged while driving appears.
Wh ile this driver notification is displayed, you have to be prepared for
limited sta rting capabili ty .
Driver message appears and goes out again
If th is driver message appears a fter the ignit ion is t urned on or while
driving and it goes o ut again after a while, the battery has been
adequate ly recharged.
Driver message appears and does not go out again
If th is dr iver no tification appears after the ign ition is turned o n or
whi le driving and does not go ou t agai n, the battery 's s ta te of charge
Controls and equip
ment Safety first
Driver information display
is not in the opt
imal range . Starting capability is restricted. Have the
ba ttery che cked by an au thor ized A udi dealer as soon as possible. •
Worn brake pads ~
-Brake pad s !
If the warning light illum inates, immediately contact your a uthorized
Audi dealer or qualified wo rkshop to have all brake pads inspected.
On USA mode ls the warn ing light
t comes o n together w it h the
warning light
BRAKE . Both sets of brake pads on an axle must a lways
be re place d at the same time.
& WARNING
Driving with bad brakes can cause a collision and serious personal
injury.
• If the warning light', and the warning light
8RAKE1l with the
me ssage Brake pads! comes on in the in strument cluster display ,
immediately contact your authorized Audi dealer or qualified
workshop to have all brake pads checked or replaced if necessary. •
Headlight range control 1©
"'Headl ight range control defective !
If the symbo l illuminates, the dynamic headlight range contro l is no
longer wo rking prope rly. Have the syste m checked and repaired at
your authorized Aud i dea ler. •
ll BRAKE : USA mode ls on ly
Vehicle care Technical data
Page 46 of 392

Opening and closing
Check Light in the master key
The check light in the master key provides information
about different conditions.
Check light functions in the master key:
Vehicle within range of the key
Fig. 28 Check light in
the master key
If the vehicle is within range of the key, the check light comes on
briefly once when a button is pressed.
Vehicle outside the range of the key
If the vehicle is outside the range of the key, the check light comes on
briefly once and then shows the status of the vehicle door locks:
• If the light is flashing quickly, the vehicle is not locked.
• If the light is flashing slowly, the vehicle is locked.
State of master key battery
If the check light does not come on, the battery is dead and has to be
replaced. In addition, when the battery is dead the symbol appears
in the instrument cluster display as well as the message:
Please change key battery
Battery replacement=:> page 44.
[I] Tips
Please note that the current state of the vehicle door locks can only
be recalled with the master key that was last used to lock the vehicle.
It is possible that a different state is shown for the door locks on the
other master key which is not the same as that of the vehicle. •
Master key battery replacement
Each master key contains a battery housed under the
cover.
Fig. 29 Master key:
opening the cover
We recommend having the battery changed by an authorized
Audi dealer. However, if you wish to replace the dead battery
yourself, proceed as follows:
- Pry apart the base~ fig. 29
© and the cover @ carefully
with a coin.
- Remove the cover (arrow).
- Remove the dead battery from the cover.
- Install the new battery. Please make certain that the"+"
sign on the battery faces down. Correct polarity is shown
on the cover. _..
Page 47 of 392

- Place the cov er w ith t he new battery on t he k ey bas e and
press bot h parts together .
For the sake of the environment
Dispose of dead batter ies proper ly so as not to po llute the envi ron
ment.
(I) Tips
Th e replaceme nt ba ttery mus t be the same spec ifica tion as the
orig inal. •
Electronic immobilizer
The immo bili zer helps t o prevent unauth ori zed use of
your v ehicl e.
A compu ter chip ins ide you r key au toma tically deac tiva tes the elec
tr on ic immob ilizer whe n you inse rt the key in the ignition lock, o r on
vehicles with Convenience key *, when the key is inside the ve hicle.
W hen you remove the key from the ignition lock, or on vehicles with
Conven ience key, when you remove the key from the vehicle, the elec
tr on ic immo biliz er is a utomat ic al ly activa ted once aga in.
& WARNING
Always take the key with you when you leave the vehicle . The key
can di sarm the elect ronic engine immobilizer and permit an unau
thor ized per son to start the engine and enable operation of the
vehicle systems such a s power w indow or Panoramic sliding
s unroof* leading to serious personal injur y.
Controls and equip
ment Safety first
Opening and closing
(I) Tips
• Th
e vehicle ca nnot be started if an unauthori zed key is u sed. The
vehicle may not start if anothe r rad io device such as a key for another
vehicle o r a tra nsponder is loca ted o n the key r ing.
• For Declaration of Compliance to United States FCC an d Industry
Canada regulations=:>
page 371. •
Valet key function
The valet key function prevents unauthorized persons
from opening the glove compartment.
Fig . 30 Ce nter
con sole: button for
v alet ke y fu nctio n
Activating and deactivating the function
- Ins ert th e master key into the ig nition lock a nd swi tch on
t he ign it ion .
- P ress the
[V AL ET] butto n~ fig . 30 to activate/ deacti
vate the fu nct ion as desire d. The ind icator light in the
bu tto n illumina tes whe n the f unct ion is ac tiv e.
- Remove t he m aster key f rom t he ign it ion lock.
- Hand ove r onl y the
valet key~ page 42, fig. 26 to t he
person w ho will ta ke charge of the veh icle.
Vehicle care Technical data
Page 58 of 392

Opening and closing
Applie s to veh icl es : wi th Conv enie nce key
Unlocking the vehicle
The doors and the rear lid can be unlocked without oper
ating the master key.
Fig. 43 Convenience
key: unlocking vehicle
door
- Take hold of the door handle . The door is unlocked auto-
matically.
- Pull the handle to open the door.
A door is unlocked as soon as you approach the door handle and the
system recognizes an authorized master key . The vehicle can be
unlocked at any door. The authorized master key only has to be within
a range of about 5 feet (1.5 meters) from the respective door.
When a door is unlocked, the driver's door is always unlocked as well.
It depends on the settings in the central locking menu in the MMI
whether the entire vehicle is unlocked or only certain doors
~ page 49.
[I] Tips
If your vehicle has been standing for an extended period, please note
the following : •
The proximity sensors are deactivated after a few days to save
power . You then have to pull on the door handle once to unlock the
vehicle and a second t ime to open the vehicle.
• To prevent the battery from being discharged and to preserve your
vehicle 's ability to start for as long as possible, the energy manage
ment system gradually switches off unnecessary convenience func
tions . It is possible that you will not be able to unlock your veh icle
using these convenience functions. •
Appli es to vehicles : wit h Con venie nce key
Locking the vehicle
The vehicle can be locked without operating the master
key.
Fig . 44 Convenience
k ey: Locking the
vehicle
- Move the selector lever to the P position .
- Press the locking button in the door handle to lock the
vehicle =>& .
The vehicle can be locked at any door . The authorized master key only
has to be within a range of about 5 feet (1.5 meters) from the parti c
ular door.
T he selector lever must be in the P position, otherwise the vehicle
cannot be locked.
Page 63 of 392

& WARNING
• Be careful when closing the windows . Check to see that no one
is in the way , or seriou s injury could re sult!
• Always read and heed WARNING~
& in "General description "
on
page 46. •
Reactivating the system after battery
disconnection
If the vehicle batt ery is disco nnec ted and then reconnec ted,
the automat ic closing and open ing f unction will not wor k
unt il it is react ivated . To reactivate th is feature , perform the
fo llow ing steps :
Reactivating close/open feature
-Pu ll an d ho ld t he power window switc h until t he window is
com pletely clo sed .
- Release the swi tch.
- Pull t he switch again for one second . The a utomat ic
closi ng/opening is now reactivated .•
Panoramic sliding sunroof
Ap plies to ve hicle s: w ith Panor am ic s lidin g sunr oof
Description
The Pano ram ic sli ding sunroof of two individual glas s roof segments,
w hich can be adjusted e lec trically independen tly of each ot he r.
T he front segmen t can be tilted and s lid open . The rear segmen t ca n
be tilted, but it cannot be slid open .
Contro ls a nd e quip
m en t Vehicle
OP-eration
Opening and closing
The Panoramic slid ing sunroof is operated by the driver or pa ssen ger
w hen the ig nitio n is o n with a rot ary switch ( for the fro nt roof
segment) and a rocker switch (rear roof segment) .
After the ignition has b een switch ed off , the Panoramic slid ing
s u nroof can still be ope ned o r closed for abo ut 10 minu tes. Howeve r,
as soon as the d rive r's o r pa ssenger's door is opened, the sw itches for
t he Panoram ic sliding s unroof are i noperative .
0 Note
You should always close the Pa n oramic slid ing su nroo f whe n you
leave your vehicle. Sudden ra in can drench the in terior equ ipmen t and
damage the electronic conven ience feat ures in your vehicle .
[ i ] Tips
If you park your ve hicle in the s un, we recommen d that you clo se both
s u n blinds ~
page 63. •
App lies to v ehicl es: w ith P anoramic sl id in g sun roof
Tilting/sliding open Panoramic sliding
sunroof
Vehicle care
F ig . 4 8 Se ction of
fr ont headliner : Switch
for Pa no ram ic sl id ing
sunroof ...
Do-it-yourselt service iTechnical data
Page 74 of 392
Clear vision
0 Note
Do no t use the hig h beam or hea dlight fl asher if you know that these
cou ld blind oncoming traffic.•
Interior lights
Front interior Lights
The interior lights include reading lights for both the
driver and the f ront passenger .
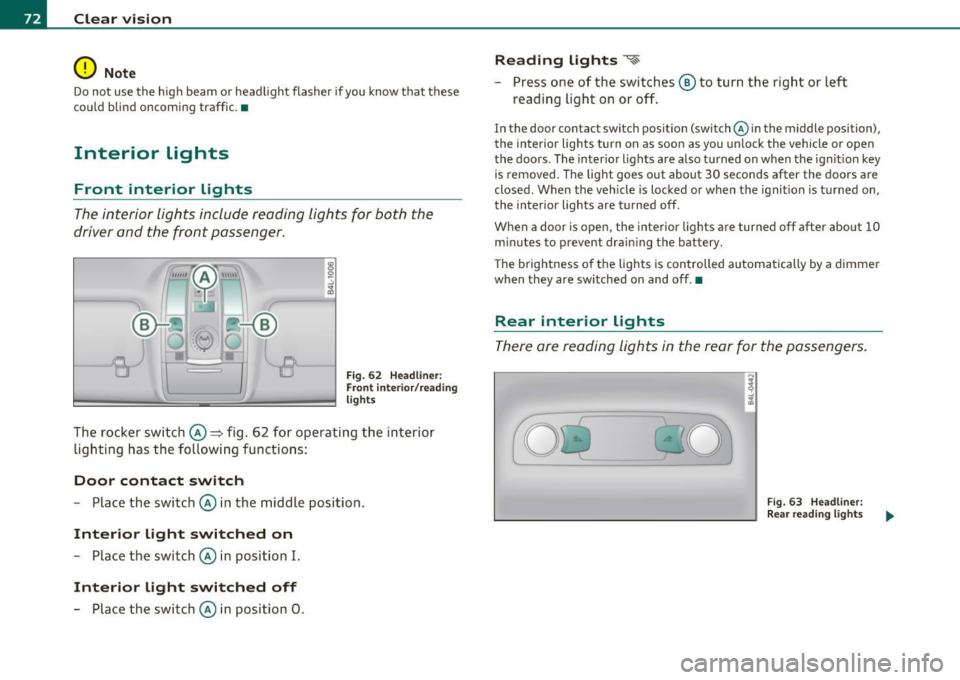
Fig . 62 Headlin er:
Fr ont inte ri or/ rea ding
lights
The rocker switch©=> fig . 62 for operating the interior
lighti ng has the followi ng functions :
Door contact switch
-Place the switc h© in the middle position.
Interior light switched on
-Place the switch © in position I.
Interior light switched off
- Place the switch © in position 0 .
Reading lights ~
- Press one of the switches ® to turn the right or left
reading light on or off.
In the door contact sw itch position (switch @in the middle position),
the interior lights turn on as soon as you un lock the vehicle or open
the doors . The inter io r lights are also t urned on when the ign it ion key
is removed . The light goes out about 30 seconds after the doors are
closed. W hen the vehicle is locked or when the ignit ion is t urned on,
the interior lights are turned off.
When a door is ope n, the interior lights a re turned o ff afte r about 10
m inutes to prevent dra in ing the battery.
T he brightness o f the lights is controlled automatica lly by a dimmer
when they are sw itched on and off. •
Rear interior Lights
The re are reading lights in the rear for the passengers.
Fi g. 63 Headli ner:
Rear re a din g ligh ts