fuel pressure AUDI Q7 2013 Owner´s Manual
[x] Cancel search | Manufacturer: AUDI, Model Year: 2013, Model line: Q7, Model: AUDI Q7 2013Pages: 348, PDF Size: 87.72 MB
Page 5 of 348
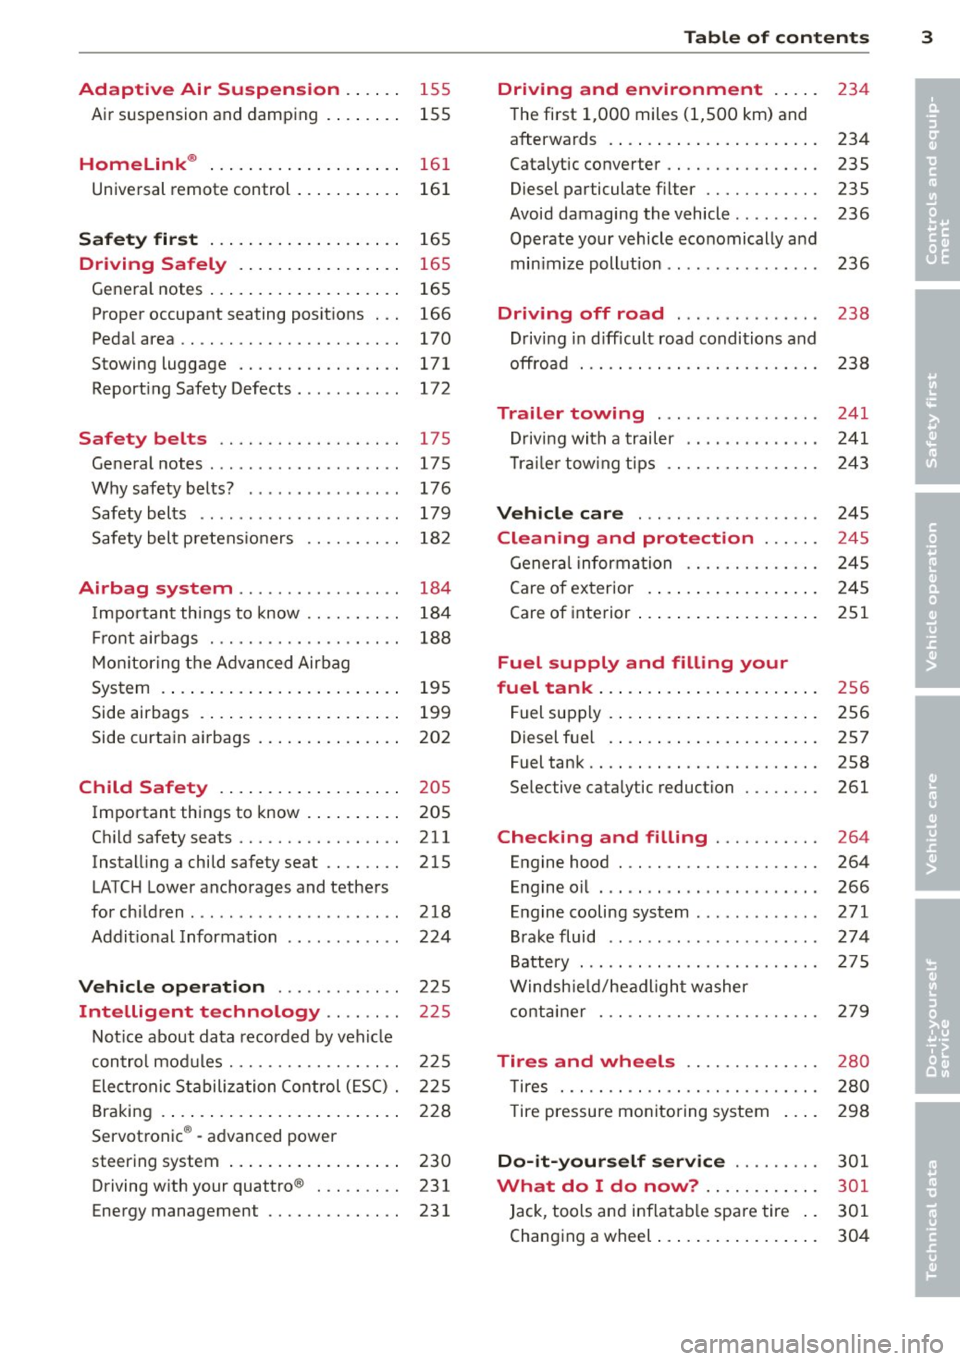
Adaptive Air Suspension .. .. . .
Air suspension and damping
Homelink ® ... .. .... ... .. .. .. . .
Universal remote control ... .. .. .. . .
S afet y fir st ... ...... ... .. .. .. . .
155
155
161
16 1
165
Driving Safely . . . . . . . . . . . . . . . . . 165
Gene ral notes . . . . . . . . . . . . . . . . . . . . 165
Proper occupant seating posit ions . . . 166
Ped al area . . . . . . . . . . . . . . . . . . . . . . . 170
Stowing luggage . . . . . . . . . . . . . . . . . 171
Report ing Safety Defects . . . . . . . . . . . 172
Safety belts . . . . . . . . . . . . . . . . . . . 175
General notes . . . . . . . . . . . . . . . . . . . . 17 5
Why safety belts? . . . . . . . . . . . . . . . . 176
Safety belts . . . . . . . . . . . . . . . . . . . . . 179
Safety bel t pretens ioners . . . . . . . . . . 182
Airbag system .......... ... ... .
Important things to know ......... .
Fr ont airbags ............ .... .. . .
M on itoring the A dvanced Airbag
System .... .. ... .. ..... ... .. .. . .
Side airbags .... ...... ... .. .. .. . .
Side curtain airbags .... ... .. .. .. . .
Child Safety .. .. .... ... .. .. .. . .
Important things to know . ... .. .. . .
Ch ild safety seats ................ .
Instal ling a child safety seat .. .. .. . .
LATC H Lower anchorages and tethers
for chi ldren .... .. .. ..... ... .. .. . .
Addit ional Information
Vehicle operation ....... .. .. . .
Intelligent technology .... ... .
184
184
188
195
199
202
205
205
211
215
218
224
225
225
Not ice about data recorded by vehi cle
con trol mod ules . . . . . . . . . . . . . . . . . . 225
E lect ronic S tabiliz ation Control ( ESC) . 225
Braking . . . . . . . . . . . . . . . . . . . . . . . . . 228
Servotronic ® -advanced power
steering system . . . . . . . . . . . . . . . . . . 230
Driving w ith your quattro ® . . . . . . . . . 231
Energy management . . . . . . . . . . . . . . 231
Table of contents 3
Driving and environment . . . . .
234
The first 1,000 miles (1,500 km) and
afterwa rds . . . . . . . . . . . . . . . . . . . . . . 234
Catalytic co nverter . . . . . . . . . . . . . . . . 235
Diesel particulate filter . . . . . . . . . . . . 235
Avoid damaging the vehicle . . . . . . . . . 236
Operate your vehicle eco nomically and
min imize poll ution . . . . . . . . . . . . . . . . 236
Driving off road . . . . . . . . . . . . . . . 238
Driving in d ifficult road conditions and
offroad . . . . . . . . . . . . . . . . . . . . . . . . . 238
Trailer towing . . . . . . . . . . . . . . . . . 241
D riving with a trailer . . . . . . . . . . . . . . 241
T rai le r tow ing tips . . . . . . . . . . . . . . . . 243
Vehicle care . . . . . . . . . . . . . . . . . . . 245
Cleaning and protection . . . . . . 245
General information . . . . . . . . . . . . . . 245
Care of exterior . ... .. .. .. .... ... .
Care of inte rior ... .. . .. .. ..... ... .
Fuel supply and filling your
fuel tank ... .... .. . .. .. ..... ... .
Fuel supply ...... .. . .. .. ..... ... .
Diesel f uel .. .. .. .. .. ... ..... ... .
Fuel tank ....................... .
Se lective catalytic reduction ....... .
Checking and filling .......... .
Engine hood ... .. ............... .
E n gine oi l ... .... ..... .... ..... . .
Engine cooling system .. .. ..... ... .
B rake fluid ....... .............. .
B attery ... .. .. .. .. . ............ .
Windsh ie ld/headl ight washer
conta iner . .. .. .. .. ............. . 2
4 5
251
256
256
257
258
261
264
264
266
271
274
2 75
2 79
Tires and wheels . . . . . . . . . . . . . . 280
T ires . . . . . . . . . . . . . . . . . . . . . . . . . . . 280
T ire pressure monitoring system 298
Do -it -yourself service . . . . . . . . . 301
What do I do now? ...... ... .. . 301
Jack , tools and inflatable spare tire . . 301
Changing a wheel . . . . . . . . . . . . . . . . . 304
•
•
Page 35 of 348
~ Contact your authorized Audi dea ler fo r as -
sistance if necessary.
If the engine coolant level is co rrect, then the
radiato r fan may be the cause of the malfunc
tion.
If the . warning symbol (alternator ma l
f u nction) a lso l ights up on the instr ument
panel ¢
page 31, then the fan belt may be
damaged .
A WARNING
- If your vehicle should break down for
mechanica l or other reasons, park at a
safe distance from moving traffic, turn off the engine and turn on the hazard
warning lights¢
page 60, Emergency
flasher.
-
- Never open the hood if you see or hear
steam o r coolant escap ing from the en
gine compartment - you risk being scald
ed. Wait until you can no longe r see or
hear steam or coo lant escaping.
- The e ngine compartment of any veh icle
is a da ngerous a rea. Before you perfo rm
any wor k in the engine compar tment,
t ur n o f the eng ine and allow it to cool.
Follow the warning stickers¢
page 255,
Engine compartment .
(D Note
Do not cont in ue d riving if the . symbol
illuminates. There is a ma lf u nct ion in the
engine cooling system -you co uld damage
your eng ine.
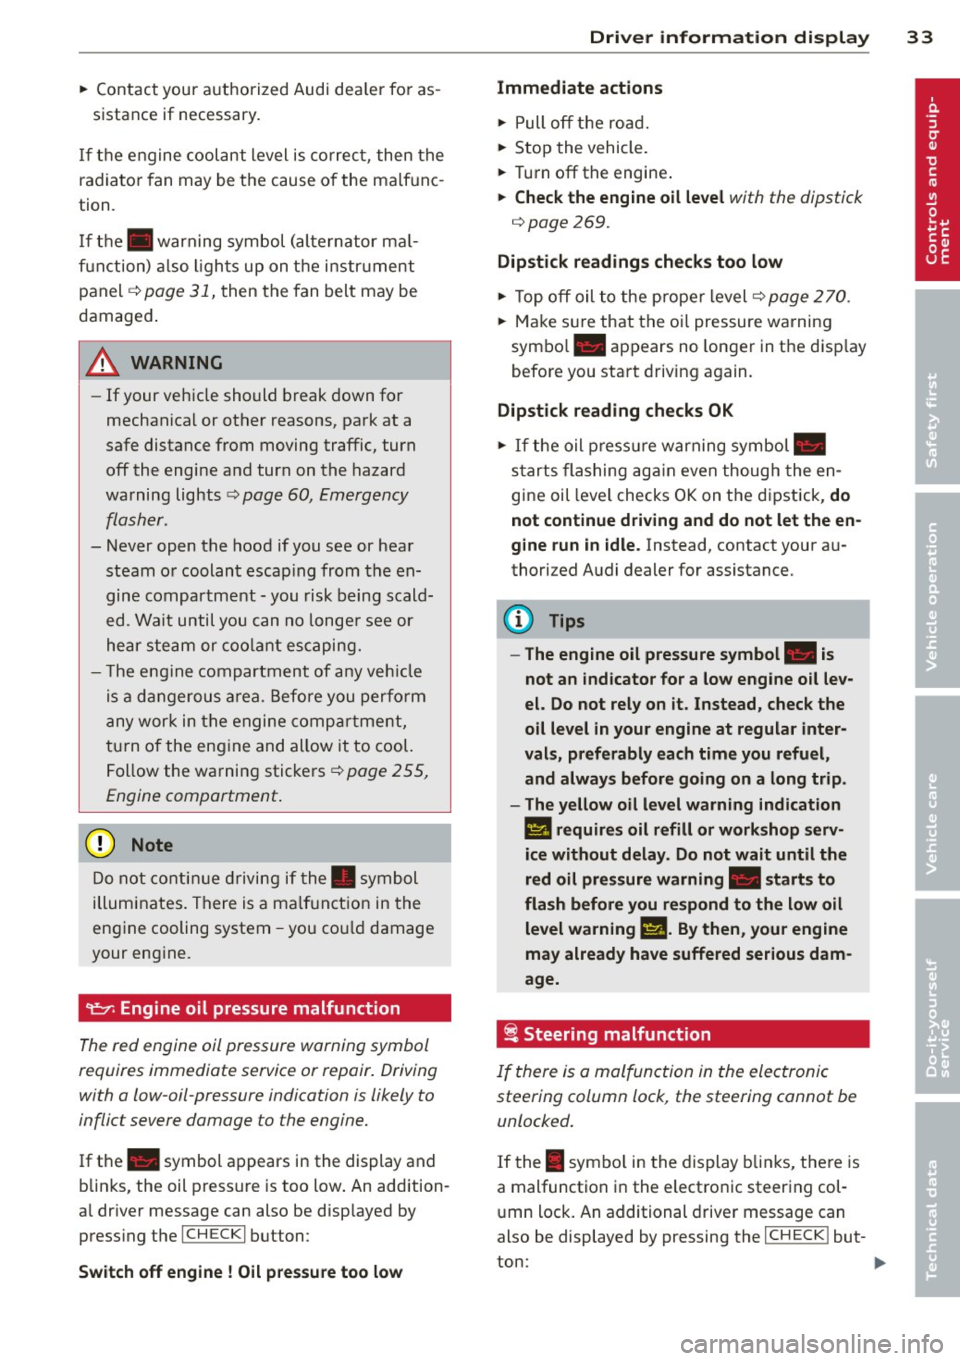
9=:7-Engine oil pressure malfunction
The red engine oil pressure warning symbol
requires immediate service or repair. Driving
with a low-oil -pressure indication is likely to
inflict severe damage to the engine.
If the . symbol appears in the display and
b links, the oil press ure is too low . An addition
a l dr iver message can also be disp layed by
press ing the
I CH ECKi button:
Switch off engine! Oil p ressure too low
Dri ver information di spla y 33
Immediate act ions
~ Pull off the road.
~ Stop the vehicle.
~ T ur n off the engine .
~ Check the engine oil level with the dipstick
¢ page
269 .
Dipstick readings check s too low
~ Top off oil to the prope r level ¢ page 2 70 .
~ Make sure that the oil pressure wa rning
symbo l. appears no longer in the d isp lay
before you sta rt driving again.
Dipstick read ing checks OK
~ If the oil p ress ure warning symbol.
s t arts flashing aga in even though the en
gine oil level checks OK on t he dipstick,
do
not continue d riving and do not let the en
gine run in idle .
Instead, contact your au
thorized A udi dealer for assistance.
(D Tips
- The engine oil pressure symbol. is
not an indi cator for a low eng ine o il lev
el. Do not rely on it . Instead, check the
oil level in your engine at regula r inter
vals, preferably each time you refuel,
and always before going on a long trip .
- The yellow oil lev el warn ing indication
II requires oil r efill or work shop serv
i ce without delay . Do not wait until th e
red oil pressure warning. start s to
flash bef ore you re spond to th e low oil
le vel warning
l!I . By then , your engine
ma y already have suffe red serious dam
age.
i Steering malfunction
If there is a malfunction in the electronic
steering column lock, the steering cannot be
unlocked .
If the . symbo l in the display b links, there is
a malfunction in the electro nic steering col
u mn lock. An additional driver message can
also be displayed by pressing the
ICHECK I but-
ton:
~
Page 37 of 348
![AUDI Q7 2013 Owner´s Manual II
AdBlue ,/
II
•
•
•
m
m
-
[I]
Low fuel level
¢page 35
Refill Ad Blue*
¢page261
AdBlue malfunction*
¢poge261
Battery voltage
¢page36
Worn brake pads ¢page36
Dynam AUDI Q7 2013 Owner´s Manual II
AdBlue ,/
II
•
•
•
m
m
-
[I]
Low fuel level
¢page 35
Refill Ad Blue*
¢page261
AdBlue malfunction*
¢poge261
Battery voltage
¢page36
Worn brake pads ¢page36
Dynam](/img/6/40278/w960_40278-36.png)
II
AdBlue ,/'
II
•
•
•
m
m
-
[I]
Low fuel level
¢page 35
Refill Ad Blue*
¢page261
AdBlue malfunction*
¢poge261
Battery voltage
¢page36
Worn brake pads ¢page36
Dynamic headlight range
control defective
¢page36
Check engine oil level
¢poge36
Engine oil sensor malfunc
tion ¢poge36
Engine speed limitation*
¢page36
Diesel particulate filter*
clogged
¢poge37
Adaptive light* defective
¢poge37
Ignition lock malfunction
¢poge37
Windshield wiper defective
¢poge37
-Tire pressure monitoring
system
Loss of air pressure
¢poge299
Tire pressure monitoring
system
System not available
¢poge299
Driver information display 35
Battery in remote control
key
¢page39
Automatic transmission
malfunction
¢ page 141
...?c, Key not in vehicle
Applies to vehicles: with Convenience key
I!! Key not in vehicle
This reminder appears along with the I!! sym
bol if the master key is removed from the
ve
hicle with the engine running. It is intended
to remind you (e.g . when chang ing drivers)
not to continue the journey without the mas
ter key.
If the master key is no longer in the vehicle,
you cannot switch off the ignit ion after stop
ping the engine and you also cannot start the
engine again. What is more, you cannot lock
the vehicle from the outside.
@. D Light/rain sensor defective
E;I Automatic headlights/ automatic wipers
defective
If the symbol illuminates, the light sensor has
failed. For safety reasons the low beams are
turned on permanently with the switch in
AU
TO. However, you can continue to turn the
lights on and off using the light switch. In the
case of a defect in the rain sensor, the wind
shield wiper lever functions are still available.
Have the light/rain sensor checked as soon as
possible by an authorized Audi dealer .
c)3 Windshield washer fluid level too low
~ Please refill washer fluid
If the symbol illumina tes, add windshield
washer fluid to the washer system and also to
the headlight washer system
¢ page 2 79.
Eli) Fuel supply too low
II) Please refuel
Page 68 of 348
66 Clear vis ion
Headlight washer system
Applies to vehicles: with hea dli ght washer system
The headlight washer system cleans the
headlights.
.. Operate the windsh ield wiper/washer sys
tem
c:> page 63, fig. 65 ® with the head
lights turned on by holding the lever for lon
ger than one second.
The washer jets extend forward out of the
fro nt bumper driven by water pressure to
spray the front headlights with water .
You should inspect the headlights regularly
(for example when refueling) and clean off
any solid dirt or insects from the lenses .
To ensure the system works properly in winter,
keep the washer jets free of snow and remove
any ice using a de- ic ing spray.
Service position
The wiper blades can only be changed in the
service position.
.. If the wiper blades are not frozen to the
windshield, bring the windshield wiper lever
to the basic position@c:>
page 63 , fig. 65 .
.. Select: ICARI function button > Systems *
control button> Windshield w ipers > S erv
i c e posit ion.
Or
.. Se lect:
ICARI funct ion button > Car s ys
tems *
control button > Servicing & check s >
Wiper service po sition .
-On -changing the windsh ie ld w iper blades
can on ly be done if you bring the wiper a rms
to the se rv ice position. You w ill also avoid
paint damage to the hood when wo rking on
the wipers in this pos ition.
- Off -the w indshield wipe rs a re moved to
their initial pos ition aga in.
(D Note
Never maneuve r your vehicle with the
fro nt windshield wipe r arms r aised since
they will a utomat ically be moved back to the
ir basic position above a speed of 3
mph
(6 km/h) and can scratch the hood.
(D Tips
- Yo u ca n also use the se rvice posi tion, for
example, if you want to protect the
w indshield from icing by using
a cover .
- T he service posit ion automatically
switches to
Off when you operate the
w indshield wiper lever, o r speed exceeds
3 mph (6 km/h) .
Replacing windshield wiper blades
Wiper blades in good condition help keep the
windshield clear.
®
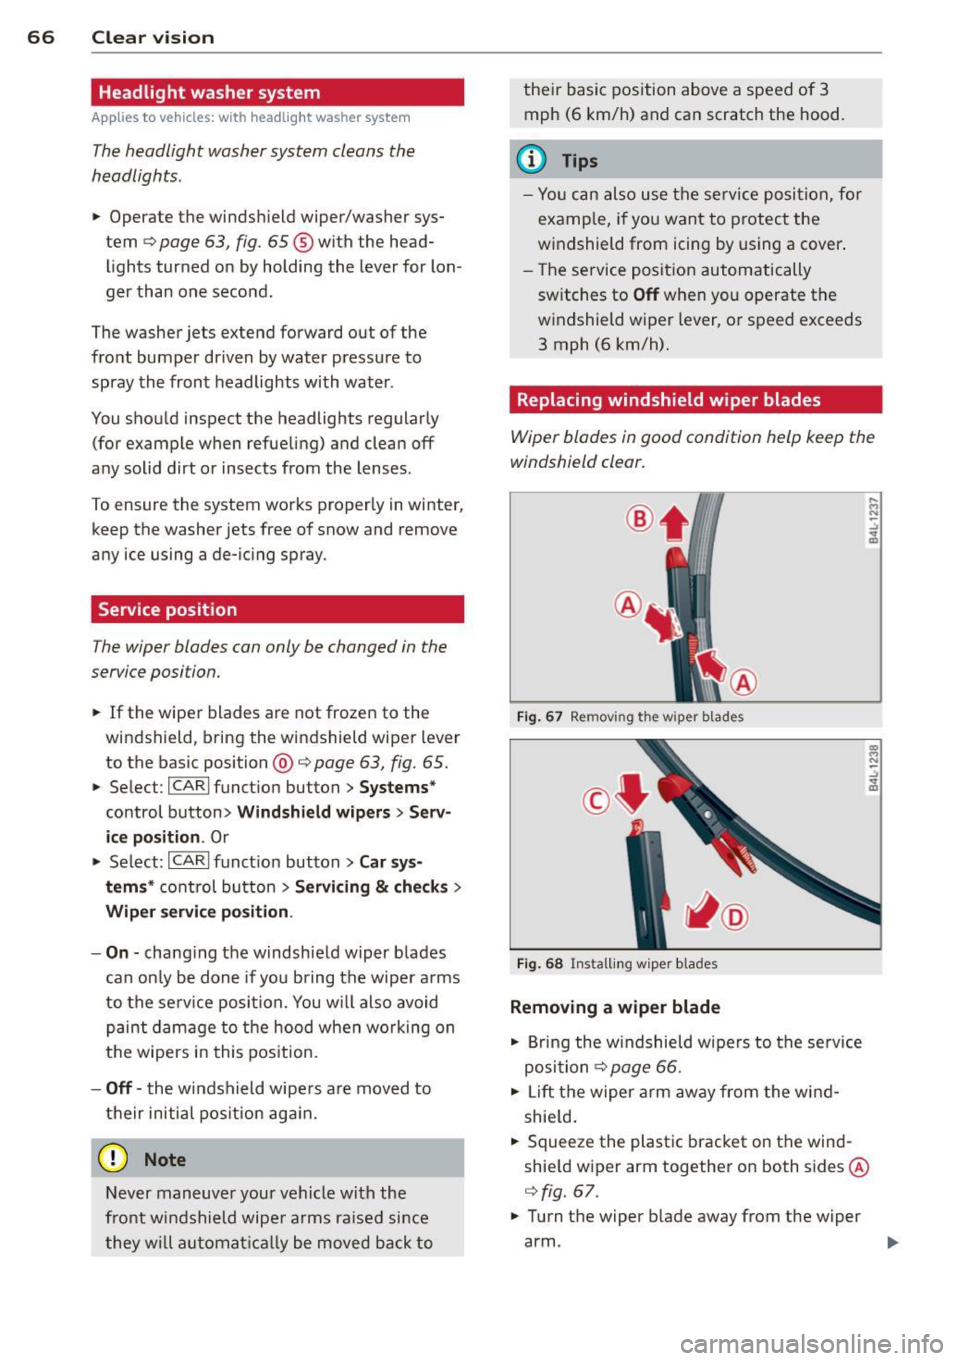
F ig . 67 Removing the wiper blades
F ig . 68 Instal ling wiper b lades
Removing a wiper blade
.. Bring the w indshield wipe rs to the se rvice
posi tion
c:> page 66.
.. Lift the wiper arm away from the wind
shie ld .
.. Squeeze the plast ic bracket on the wind
shie ld wiper arm together on both sides @
c:>
fig. 67 .
.. Turn the wiper blade away from the wiper
arm . ..,.
Page 249 of 348

directly at locks, or at door or hatch
openings -they can freeze shut.
- Never use sponges designed to remove
insects , or any kitchen scouring sponges
or similar products. They can damage
your paint finish .
- You should remove debris (such as in
sects) from the headlight lenses on a
regular basis, for example when refuel
ing your vehicle. Never use a dry cloth or
sponge to clean the headlights . Only use
wet cloths or sponges to prevent
scratches . It is best to use soapy water .
@) For the sake of the environment
In the interest of the environment, the ve
hicle should only be washed in special
wash bays .
Washing your vehicle with a power
washer
Cleaning the exterior of your car with a high
pressure power washer is safe as long as you observ e a few simple rules.
" Before using the power washer , make sure
you have read and understood the WARN
INGS ~.&.
in General information on
page 245.
" Always follow the operating instructions for
the pow er wash er.
" Make su re that the jet on the spray hose
produces a "fan shaped spr ay" .
" Do
not hold the spray nozzle too close to
soft materials .
When cleaning the vehicle with a power wash
er
always follow the operating ins truc tions.
T his applies particularly to the
operating
pressure
and the spraying distance. Maintain
a sufficient distance to soft materials such as
rubber hoses and sound/vibration deadening
materials (particularly on the underside of the
engine hood). Do not use a jet which sprays
water in a
direct stream or one that has a ro
tating
jet.
Water temperature should not exceed 140 °F
(60 °().
Cleaning and protection 247
A WARNING
Never wash tires with a jet that sprays wa
ter in a direct stream . This could cause in
visible damage to the tires and weaken
them, even if the spray is from a relatively
long distance and for a short time . Dam
aged and weakened tires can fail and cause
accidents and personal injury.
(D Note
To avoid damaging your vehicle, always make sure that there is sufficient distance
between the spray head and soft materials
like rubber hoses, plastic parts and sound
deadening materials. Never aim the spray
head at the same point for a long time.
This also applies to cleaning headlights
and painted bumpers. Remember : the
closer the nozzle is to the surface of the
material, the greater the stress on the ma
terial.
Sensors and camera lenses
- Remove snow with a hand brush and remove
ice with a de-icing spray that does not con
tain solvents.
- Clean the sensors (adaptive cruise control*,
parking system*) with a cleaning solution
that does not contain solvents and a soft
cloth.
- Dampen the camera lens with a household
alcohol-based glass cleaner, and then wipe
the lens clean with a dry cloth.
(D Note
- If you wash your vehicle with a pressure
washer,
- make sure there is enough distance to
sensors in the rear bumper .
- do not clean the camera lenses and the
area around them with the pressure
washer .
- Never use warm or hot water to remove
snow or ice from the camera lens. This
could cause the lens to crack .
•
•
Page 270 of 348
268 Checking and filling
VW 502 00 (vehicles with gasoline engine) or
VW 507 00 (vehicles with diesel engine).
Changing the engine oil
The engine oil and oil filter must be changed
according to the m ileage (ki lometers) and
time intervals specified in your vehicle 's War
ranty
& Maintenance booklet. Do not exceed
these intervals -harmful deposits from old
engine oil can reduce engine performance and
can lead to expensive engine repairs.
Changing the oil at the recommended inter
va ls is so very important because the lubricat
ing properties o f oi l decrease gradually during
normal vehicle use. If you are not sure when
you have your o il changed, ask your author
i z ed Audi Service Advisor.
Under some ci rcumstances the engine oi l
should even be changed more frequently .
Change oi l more often if you drive mostly
short distances, operate the vehicle in dusty
areas or mostly under stop-and-go traffic con
d itions, or when you use your vehicle w here
temperatures stay below freez ing point for
l ong periods .
Detergent additives in the o il w ill make fresh
oil look dark after the engine has been run
ni ng for a short time . This is normal and is not
a reason to change the oil more often than
recommended.
Damage or malfunctions due to lack of
maintenance
It is essential that you change your oil at the recommended intervals using only engine oil
that complies with Audi oi l standard
VW 502 00 (vehicles with gasoli ne engine) or
VW 507 00 (veh icles with diese l engine) . Your
Limited New Vehicle Warranty does not cover
damage or malf unctio ns due to failure to fol
lo w recommended maintenance and use re
quirements as set forth in the A udi Owner's
Manual and Warranty
& Maintenance booklet.
Your dea ler will have to deny warranty cover
age unless you present to the dealer proof in
the form of Service or Repa ir Orders that all scheduled maintenance was
performed in a
timely manner.
Engine oil consumption
To provide effective lubrication and cooling for
internal engine parts, all internal combustion
engines use some o il. Oil consumption varies
from engine to engine and may change over
the life of the engine. Engines tend to use
more o il during the break-in period tha n they
do afterward, when oil consumption has sta
bilized. Depending on the way the vehicle is
driven and the operating conditions, oil con
s u mption can be up to 1 quart per 1,200
miles (1 liter per 2,000 km) . Consumption
may be higher within the first 3,000 m iles
(5,000 km) .
Under normal conditions, the rate of oil con
sumption depends on oil quality as well as vis
cosity, engine speed (rpm), outs ide tempera
ture, road conditions, the amount of oil dilu
t ion caused by condensed water or fue l resi
due, and ox idat ion of the oil. Oil co nsumption
may increase with engine wear over time, un
t il replacement of worn engine pa rts may be
come necessary.
Because of all these variables, there is no
standard or "norma l" rate of oil consumption .
We urge you to check the engine oil level at
regular intervals, preferably every time you
fill the fuel tank, and always before a long
trip.
The oil pressure warning light. is not an
indicator of low engine oil level. If the warn
ing light does not go out after starting, or
flashes while driving (above 1500 rpm), a
buzzer will sound. It indicates that the oil
pressure is too low . Stop the engine immedi·
ately, check the engine oil level and add oil if
necessary. If the engine oil level is normal,
but the light continues to flash, do not keep
driving or let the engine idle, as damage may
occur .
II-
Page 283 of 348
-Never mount used tires on yo ur vehicle if
you are not sure of their "previous histo
ry." Old used tires may have bee n dam
aged even though the damage cannot be
seen that can lead to sudden tire failure
and loss of vehicle control.
Glossary of tire and loading terminology
Accessory weight
means the comb ined weight (in excess of
those standard items wh ich may be rep laced)
of automati c transmission, power steering,
power br akes, power wi ndows, power sea ts,
radio, and heater, to the ex tent that these
items are avai lab le as factory -installed equip
ment (whether installed or not).
Aspect ratio
means the ratio of the height to the w idt h of
the tire in percent. Numbers of 55 or lower in
d icate a low sidewall fo r improved s teer ing re
sponse and better overall handling on dry
pavement.
Bead
means the pa rt of the t ire that is made of
s teel wires, wrapped or re inforced by ply cor ds
and that is shaped to fit the r im.
Bead separation
means a b reakdown of the bond between
components in the bead.
Cord
means the strands forming the plies in the
tire.
Cold t ir e infl ation pr essure
means the tire pressure recommended by the
vehicle manufacturer for a t ire of a designated
size that has not been dr iven for more than a
couple of miles (kilometers) at low speeds in
the three hour period before the tire pressure i s measu red or adjusted.
Tire s an d wheel s 281
-If you notice un usua l vibration or if the
veh icle pulls to one side when driv ing, a l
ways stop as soon as it is safe to do so and check the wheels and tires for dam
age.
Curb weight
mea ns the weight of a motor ve hicle w ith
standard equipment includ ing t he maximum
capa city of fuel, o il, and coolant, ai r cond i
tion ing a nd addi tional weig ht o f optiona l
equipment .
Extra load tire
means a tire design to operate at higher loads
and at higher inflation pressures than the cor
respondi ng s tanda rd tire. Extra load tires may
be identified as "X L", "xl", "EXTRA LOAD", o r
"R F" on the sidewall .
Gross Axle Weight Rating ( "GAWR ")
mea ns the load-carrying capacity of a single
axle system, measured at the tire-ground in
te rfaces.
Gross Vehicle Weight Rating ( "GVWR ")
means the maximum total loaded we ight of
t h e ve hicle.
Groo ve
means the space between two adjacent tread
ribs.
Load rating (code )
means the maximum load tha t a t ire is rated
to carry for a given inflation pressure. Yo u
may not find this information on all tires be
ca use it is not required by law.
Maximum load rating
me ans the load r ating for a tire at the maxi
mum pe rm issi ble inflat ion pressure for that
ti re .
•
•
...
Page 289 of 348
pressure label lists the recommended cold
tire inflatio n pressures for the vehicle at its
maximum capacity we ight a nd the tires that
were on your vehicle at the time it was man
ufactured . For recommended t ire pressures
for normal load condit ions, please see chap
ter ~
page 284 .
-Turn the valve stem cap counter-clockwise
to remove it from the tire valve .
- Place the air pressure gauge on the valve.
- The tire pressures should only be checked
and adjusted when the tires are cold . The
s light ly raised pressures of warm tires must
not be reduced .
- Adjust the tire pressure to the load you are
carrying.
- Re insta ll the va lve stem cap on the valve .
When should I check the tire pressure ?
The correct tire pressure is especially impor
tant at high speeds . The pressure sho uld
therefo re be checked at least once a month
and a lways before start ing a journey. Do not
forget to check the tire pressure for the spare
wheel.
When should I adju st the tire pre ssures?
Ad just the tire pressure to the load you are
carrying. After changing a wheel
or replacing
wheels you have to adjust the tire pressures
on all wheels. In addition, you must then
store the new tire pressures i n the t ire pres
sure mon itor ing system
~ page 300.
A WARNING
Incorrect tire pressures and/or unde rinfla
tion ca n lead sudden tire failure, loss of
cont ro l, col lision, ser ious persona l inju ry
or even death.
- Whe n the wa rning symbo l
[ti] appears in
the instrume nt cl uster, s top and inspect
the tires.
- Incorrect tire pressure and/or underinfl a
t ion can ca use inc reased t ire wear and
can affect the handling o f the veh icle and
stopp ing ability .
- Incorrect tire pressures and/or underin
flation ca n also lead to sud den tire fa il-
Tires an d wheel s 287
ure, including a blowout and sudden de
flation, ca using loss of veh icle contro l.
- The driver is responsi ble for the co rrect
tire pressures for all tires on the veh icle.
The applicable pressure values are locat
ed on a sticker o n the dr iver's s ide B-pil
lar .
- Onl y when all tires on the vehicle are fil
led to the correct pressure, the t ire pres
sure mon itor ing system can work cor
rectly .
- The use of incorrect tire pressure va lues
can lead to acc idents or other damage .
Therefore it is ess ential that th e drive r
observe t he spec ified t ire p ress ure val ues
for the tires and the cor rect pressures for
the func tion of the t i re p ress ure moni to r
ing system.
- Always in flate tires to the recommen ded
a nd correct t ire p ress ure be fore dr iv ing
off .
- D riving with unde rinf lated tires bend
mo re, letting them get too hot resulting
in tread separation, s udden tire failure
and loss of control.
- Excessive speed and/overloading can
cause heat b uild- up, sudden tire failure
and loss of control.
- If the tire pressure is too low or too high,
the t ires will wear premat urely and the
veh icle w ill not handle well.
- If the tire is not flat and you do not have
to change a wheel immediately, d rive at
red uced speed to the nearest service sta
tion to check the t ire press ure and add
air as requ ired .
(D Note
Driving w ithout valve stem caps can cause
damage to the tire valves. To prevent this,
a lways make sure that factory installed
valve s tem caps o n all whee ls are sec urely
mounted o n the valve .
@ For the sake of the environment
Underinflated tires will also increase the
fuel consumpt ion.
•
•
Page 290 of 348
288 Tires and wheels
Tires and vehicle load limits
There are limits to the amount of load or
weight that any veh icle and any t ire can carry.
A vehicle that is overloaded wi ll not handle
well and is more difficult to stop. Overload ing
can not on ly lead to loss of vehicle control
,
but can a lso damage important parts of the
vehicle and can lead to sudden tire failure in-
,
eluding a blowout and sudden deflation that
can cause the vehicle to crash .
Your safety and that of your passengers a lso
depends on making sure that load limits are
not exceeded. Vehicle load includes everybody
and everyth ing in and on the vehicle . These
load limits are tech nically referred to as the
vehicle's
Gross Vehicle Weight Rating
("GVWR").
The "GVWR" includes the we ight of the basic
vehicle, all factory installed accessories , a full
tank of fuel , oi l, coo lant and other fluids plus
maximum load. The maxim um load includes
the number of passengers that the vehicle is intended to carry ("seating capacity") with an
assumed weight of 150 lbs (68 kg) for each
passenger at a designated seating position
and the tota l weight of any l uggage in the ve
hicle. If you tow a trailer, the weight of the
trailer hitch and the tongue weight of the
loaded trailer must be included as part of the
veh icle load .
The
Gross Axle Weight Rating ("GAWR") is
the maximum load that can be applied at each
of the vehicle's two axles .
The Gross Vehicle Weight Rating and the
Gross Axle Weight Rating are listed on the
safety compliance st icker label located on the
driver's side B -pillar. Your Audi has 5 seating
positions, 2 in the front and 3 in the rear for
total seating capacity of 5. On vehicles w ith
six seats*, your veh icle has two front seats,
two seats in the second row seating and two
seats in the third row seating. On vehicles
with seven seats*, your vehicle has two front
seats, three seats in the second row seating
and two seats in the third row seating . Each seating
position has a seat belt
q page 175,
Safety belts .
The fact that there is an upper limit to your
vehicle's Gross Vehicle Weight Rating means
that the total weight of whatever is being car
ried in the vehicle (including the weight of a
trailer hitch and the tongue weight of the
loaded trailer) is lim ited. The more passen
gers in the vehicle or passengers who are
heavier than the standard we ights assumed
mean that less weight can be carr ied as lug
gage .
The tire pressure label on your Audi also lists
the maximum combined weight of all of the
occupants and luggage or other cargo that
the vehicle can carry . For the location of the
label
q page 284, fig. 251.
_& WARNING
Overloading a vehicle can cause loss of ve
h icl e control, a crash or other accident, se
rious personal injury, and even death.
- Carrying more weight than your vehicle
was designed to carry will prevent the
vehicle from handling properly and in
crease the risk of the loss of vehicle con
trol.
- The brakes on a vehicle that has been
overloaded may not be able to stop the
veh icle w ith in a safe distance.
- Tires on a vehicle that has been over load
ed can fail suddenly, including a blowout
and sudden deflation, causing loss of
control and a crash .
- Always make sure that the total load be
ing transported -including the weight of
a trailer hitch and the tongue we ight of a
loaded trailer -does not make the vehi
cle heavier than the vehicle's Gross Vehi
cle Weight Rating.
Determining correct load limit
Use the example below to cal
culate the total weight of the
passengers and luggage or
Page 300 of 348
298 Tires and wheels
month and alway s before a long trip
~ page 286, Checking tire pressure.
What you can do to avoid tire and rim
damage
L ow aspect ratio tires can be damaged more
eas ily by impact with potho les, curbs, gu llies
or ridges on the road, particularly if the tire is
underinflated.
I n order to minimize the occu rrence o f impact
damage to the tires of your vehicle, we recom
mend that you observe the following precau
tions:
- Always maintain recommended inflation pressures. Check your tire pressure every
2,000 miles (3,000 km) and add a ir if neces
sary.
- Drive carefu lly on roads with potholes, deep
gullies or ridges. The impact from driving
through or over such obstacles can damage
your tires. Impact with a curb may also
cause damage to your tires.
- After any impact, immediately inspect your
tir es or have them inspected by the nearest
authorized Aud i dealer . Replace a damaged
t ir e as soon as possible .
- Inspect your t ires every 2,000 miles (3,000
km) for damage and wear . Damage is not al
ways easy to see. Damage can lead to loss of
air and unde rinflation, wh ich could eventu
ally cause tire failure. If yo u be lieve that a
tire may have been damaged, replace the
tire as soon as possible.
- T hese tires may wear more quickly than oth
ers.
- Please also remember that, while these tir es
deliver responsive handling, they may ride
l ess comfortably and make more noise than
other choices.
Reduced performance in winter/cold
season conditions
All tires are designed for certain purposes .
The low aspect ratio, ultra high performance
tires originally installed on your vehicle are in
tended for maximum dry and wet road per
formance and handling . They are not suitable
for cold, snowy or icy weather conditions . If you drive
under those circumstances, you
shou ld equip your vehicle with all-season or
winter tires , which offer better traction under
those conditions. We suggest you use the rec ommended snow or all-season t ires specified
for your vehicle, or their equivalent .
Refer to
~ page 295 for more detailed infor
mation regarding winter tires.
Tire pressure
monitoring system
ill General notes
Each tire, including the spare (if provided),
should be checked monthly when co ld and in
flated to the inflation pressure recommended
by the vehicle manufacturer on the vehicle
placard or tire inflation pressure label. (If your
vehicle has tires of a different size than the
s iz e indicated on the vehicle placard or tire in
flation pressure label, you should determ ine
the proper tire inflation pressure for those
tires).
As an added safety feature, your ve hicle has
been equipped with a tire pressure monitoring
system ( TPMS) that illuminates a low tire
pressure telltale when one or more of your
tires is significantly under-inflated. According
l y, when the low tire pressure te lltale illumi
nates, you should stop and check your tires as
soon as possible, and inflate them to the proper pressure . Driving on a sign ificantly un
der- inflated t ire causes the tire to overheat
and can lead to tire fa ilure. Under-inflation al
so reduces fuel efficiency and tire tread life,
and may affect the vehicle's hand ling and
stopping ability .
Please note that the TPMS is not a substitute
for proper tire ma intenance, and it is the driv
er's responsibility to maintain correct tire
pressure, even if under-inflation has not
reached the leve l to trigger illuminat ion of the
T PMS low tire pressure tellta le .
Your vehicle has also been equipped with a
T PMS ma lfunction indicator to indicate when
the system is not operating properly. The
ll>