stop start AUDI Q7 2014 Owner´s Manual
[x] Cancel search | Manufacturer: AUDI, Model Year: 2014, Model line: Q7, Model: AUDI Q7 2014Pages: 340, PDF Size: 85.02 MB
Page 4 of 340
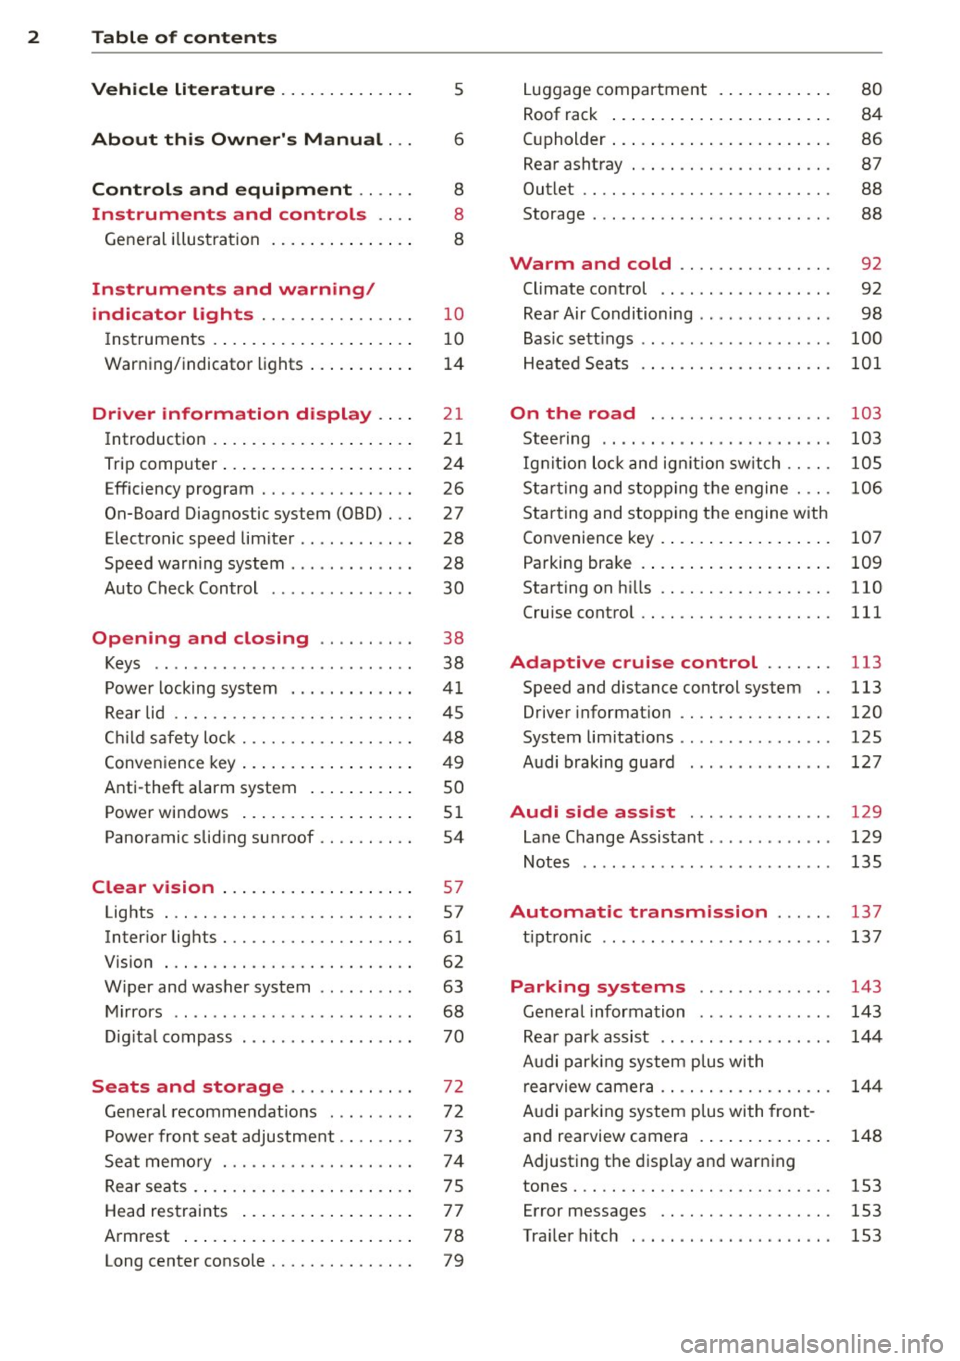
2 Table of contents Vehicle literature .. .. .. .. .. ... .
About this Owner's Manual ...
Controls and equipment .. ... .
Ins truments and controls .. . .
General illus tration .... ... .. .. ... .
Instruments and warning /
indicator lights ........ .. .. .. . .
Ins truments . .. .. ..... ... .. .. ... .
War ning/ indi cator lights ... .. ... .. .
Driver information d isplay .. . .
Introduct ion . .. .. ..... ... .. .. ... .
Trip computer .. .. ..... ... .. .. ... .
Efficiency program ........ .. .. ... .
On-Board Diagnostic system (OBD) . . .
Elect ronic speed limiter .. .. .. .. .. . .
Speed war ning system ...... ..... . .
Auto Check Control ........ ... .. . .
Opening and closing .. .. .. .. . .
Keys .. .. .. ................ ... . .
P owe r locking system . .. .. .. .. .. . .
R ear lid .. .. .. . .......... .. .. .. . .
C hild sa fety lo ck .......... .. .. .. . .
Conven ien ce key .. ..... ... .. .. ... .
Anti-theft alarm system ... .. ... .. .
Power win dows .. ..... ... .. .. ... .
Panoramic slid ing sun roof .. .. .. ... .
Clear vision .. .. ..... ... .. .. ... .
Lights . .. .. .. . .......... .. .. ... .
Inter ior lights ............. ... ... .
V 1s 1on . ...... ........... .... ... .
W iper and washer system . ... .. .. . .
M ir rors .. .. ................ ... . .
D ig ita l compass . ...... ... .. .. .. . .
Seats and storage ......... .. . .
G en eral recomme ndat ions ... .. .. . .
P owe r fron t seat adjus tment .. .. .. . .
Se at mem ory ............ .. .. ... .
Rear seats . ... . .. ..... ..... .. ... .
Head res traints .. ..... ... .. .. ... .
A rmrest .... .. .. ..... ... .. .. ... .
5
6
8
8
8
10
10
1 4
21
21
24
26
27
28
28
30
38
38
41
4 5
48
49
so
5 1
54
57
57
61
62
63
68 70
72
72 7 3
74
7 5
7 7
78
Long center conso le . . . . . . . . . . . . . . . 79
Lugga ge compartment . ..... .... . .
Roof rack ..... .. .. ... ..... ... .. .
( upholder ... .. .. .. ... .. .. .. .. .. .
Rear asht ray ..... ............. .. .
Out let .... .... .. ............. .. .
Storage ...... ... .. ............. . 80
84
86
87
88
88
Warm and cold . . . . . . . . . . . . . . . . 92
Climate control . . . . . . . . . . . . . . . . . . 92
Rea r Air Conditioning . . . . . . . . . . . . . . 98
Bas ic sett ings . . . . . . . . . . . . . . . . . . . .
100
Heated Sea ts . . . . . . . . . . . . . . . . . . . . 101
On the road . . . . . . . . . . . . . . . . . . . 103
Stee ring .. .. ... . .. ... .. ... ... .. . 103
Ig nition lo ck and ig nition sw itch . . . . . 105
St arti ng and sto pp ing t he engine . . . . 10 6
S tar ting and stopping the engine with
Co nvenience key . . . . . . . . . . . . . . . . . .
107
Pa rking bra ke . . . . . . . . . . . . . . . . . . . . 109
Starting on h ills . . . . . . . . . . . . . . . . . . 110
Cru ise contro l . . . . . . . . . . . . . . . . . . . . 111
Adaptive cruise control . . . . . . . 113
Speed and distance control system . . 113
Driver informat io n . . . . . . . . . . . . . . . . 120
System limitations . . . . . . . . . . . . . . . . 125
Audi braking gua rd . . . . . . . . . . . . . . . 127
Audi side assist . . . . . . . . . . . . . . . 129
Lane Change Assistant. . . . . . . . . . . . . 129
Not es . . . . . . . . . . . . . . . . . . . . . . . . . . 135
Automatic transmission ... .. .
tip tron ic ... ... .. .. ........ ... .. .
Parking systems
General information
Rea r park assist .. ... ... .... ... .. .
Audi par king syste m plus with
re arview c amer a .. ............... .
A udi par kin g sys tem p lus with fron t-
and rearview camera . .. ..... ... .. .
137
137
143
143
144
14 4
148
Adjusting the display and warn ing
tones..... .... .. .. ........... ...
153
Err or messages . . . . . . . . . . . . . . . . . . 153
Traile r hitc h . . . . . . . . . . . . . . . . . . . . . 153
Page 17 of 340
Instrument s and warnin g/indic ator ligh ts 15
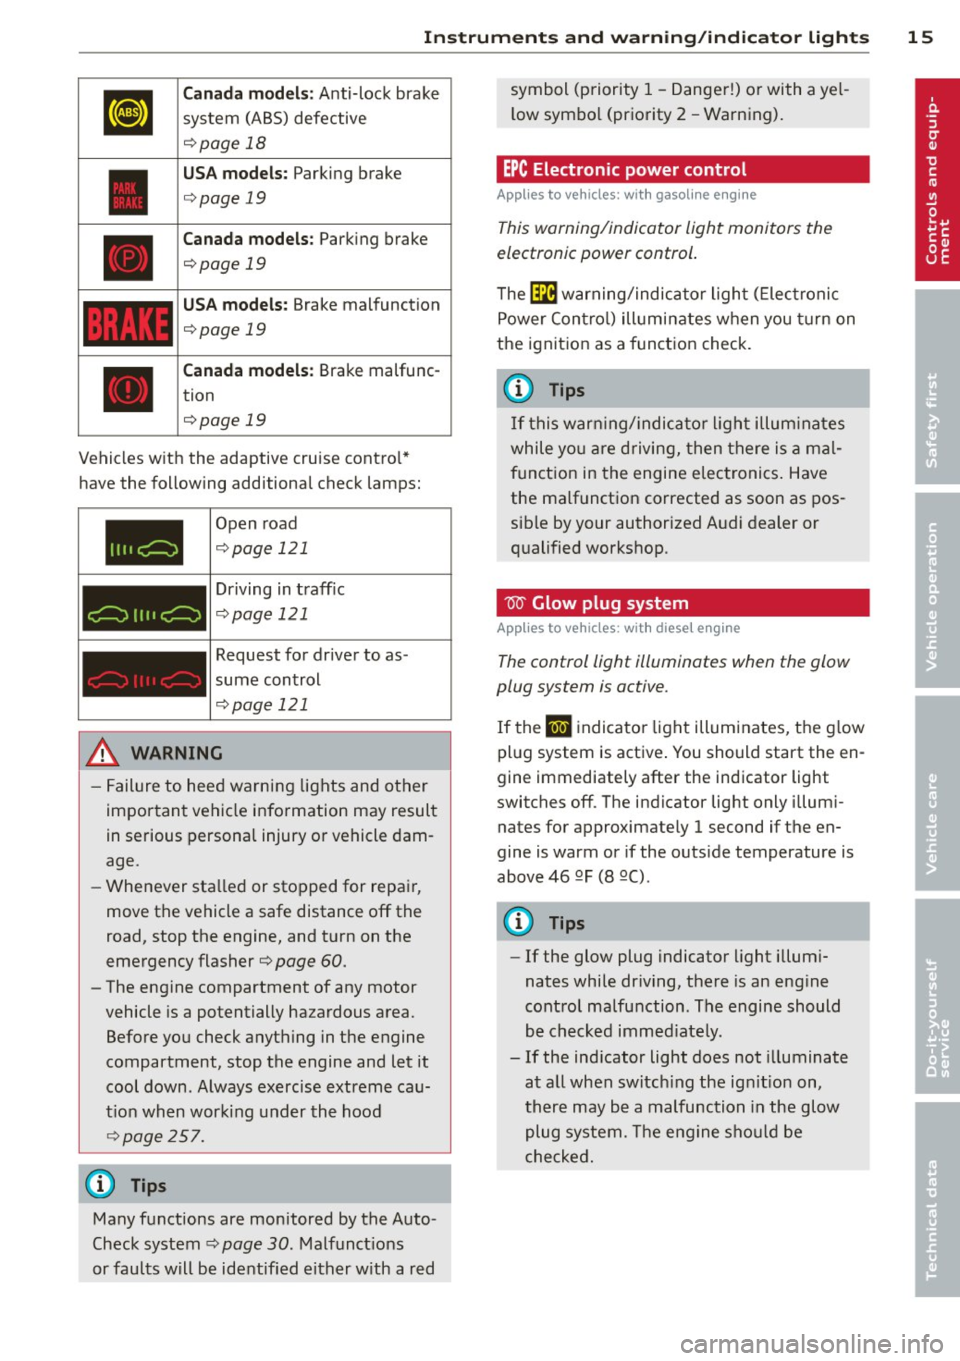
Canada m od els: Anti-lock brake
system (ABS) defective
¢ page 18
USA mode ls: Parking brake
¢page 19
Canada models : Parking brake
¢page 19
USA models: Brake malfunction
¢page 19
Canada m odels : Brake malfunc
tion
¢page 19
Vehicles w ith the adaptive cruise contro l*
have the following additiona l check lamps:
I I II c:=:)
c:=:)
I I I I c:=:)
Open road
¢ page 121
Driving in traff ic
¢ page 121
Request for driver to as
sume control
¢page 121
_& WARNING
- Failure to heed warning lights and other
important vehicle info rmation may result
in serious persona l injury or vehicle dam
age.
- Whenever sta lled or stopped for repair,
move the vehicle a safe distance off the
road, stop the engine, and turn on the
emergency flasher¢
page 60.
- The engine compartment of any motor
vehicle is a potentially hazardous area.
Before you check anything in the engine
compartment, stop the engine and let it cool down . Always exercise extreme cau
t ion when working under the hood
~ page 257.
Many functions are monitored by the Auto
Check system ¢
page 30. Malfunct ions
or faults will be identified e ither w ith a red symbol (priority 1
-Danger!) or with a ye l
l ow symbo l (priority
2 - Warning).
EPC Electronic power control
Applies to vehicles : with gasoline e ngine
This warning/indicator light monitors the
electronic power control .
The ~ warning/indicator light ( Electronic
Power Contro l) illuminates when you turn on
the ignition as a function check.
(D Tips
If this warn ing/ indica tor light illum inates
while yo u are d riving, then there is a mal
funct ion in the engine electronics. Have
the malfunct ion corrected as soon as pos
sib le by your authorized A udi dealer or
qualified workshop .
W Glow plug system
Applies to vehicles: wit h diese l eng ine
The control light illuminates when the glow
plug system is active.
If the lml indicator light illuminates, the g low
pl ug system is active . You should start the en
gine immediately after the indicator light
switches off. The indicator light only illum i
nates for approximately 1 second if the en
gine is warm or if the outs ide temperature is
above 46 QF (8 QC) .
(D Tips
-If the glow plug indicator light i llum i
nates while dr iving, there is an eng ine
cont rol malfunction . The engine should
be checked immed iate ly .
- If the ind icator light does not illuminate
at all when switch ing the ig nition on,
there may be a malfunction in the glow
plug system. The engine sho uld be
c hecked.
Page 19 of 340
Instrument s and warnin g/indic ator ligh ts 17
¢1.~ Trailer turn signal assembly
Applies to vehicles: with towing hitch
The indicator light also blinks if the turn sig
nal is operated when towing a trailer .
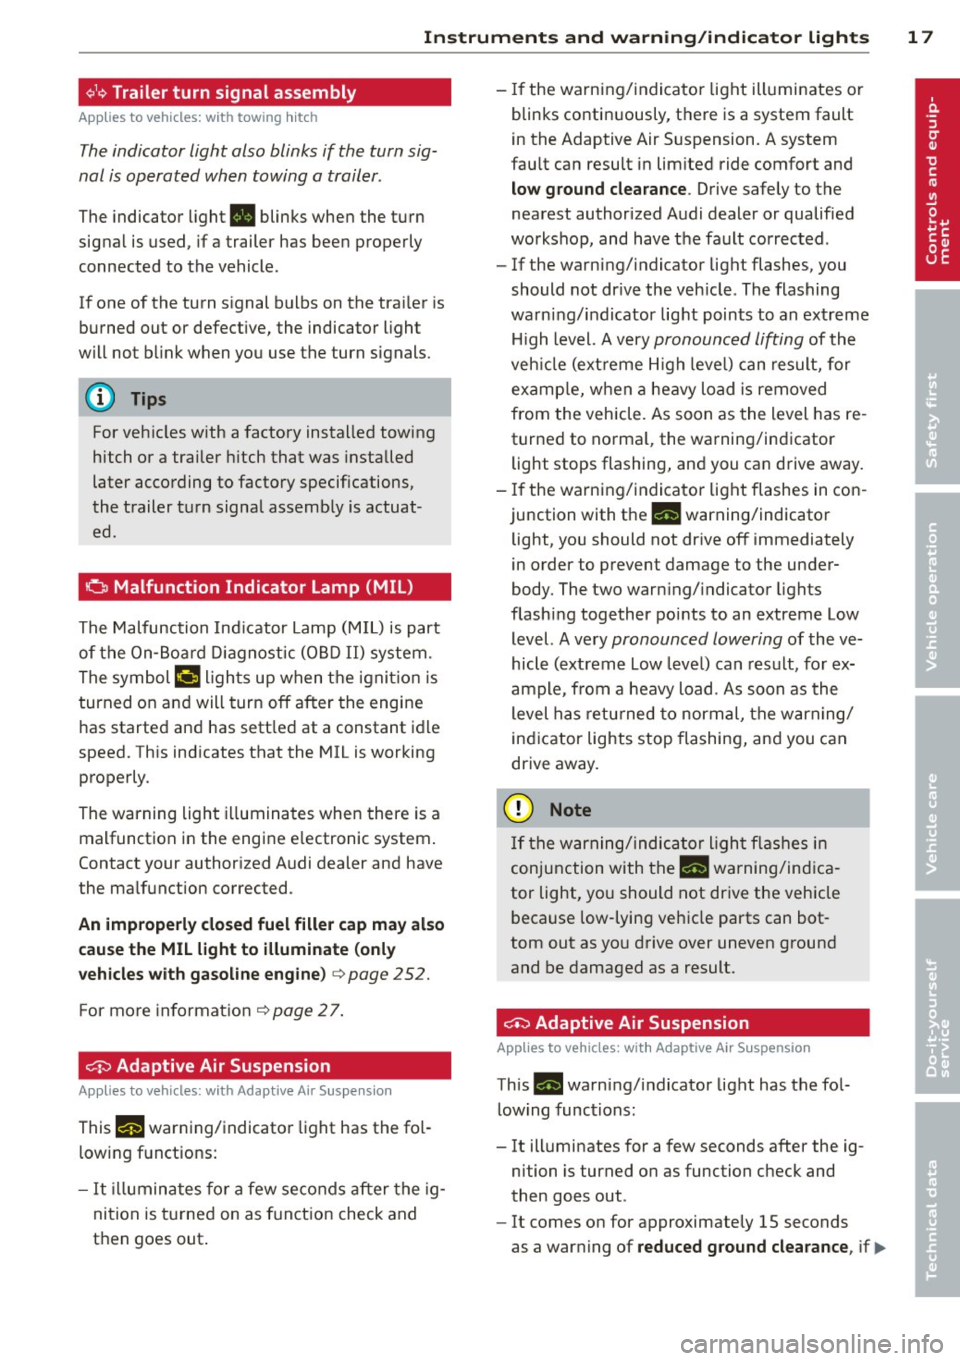
The indicator light. blinks when the turn
signal is used, if a trailer has been properly
connected to the vehicle .
If one of the turn signal bulbs on the trai ler is
burned out or defective, the indicator light
will not blink when you use the turn signals.
{!) Tips
For vehicles with a factory installed towing
hitch or a trailer h itch that was installed
later according to factory specifications,
the trailer tu rn signal assembly is actuat
ed.
o Malfunction Indicator Lamp (MIL)
The Malfunction Indicator Lamp (M IL) is part
of the On-Boa rd D iagnostic (OBD II) system.
The symbol
(.j ligh ts up when the ignit ion is
turned on and will turn off after the engine has started and has sett led at a constant idle
speed. This ind icates that the MIL is working
properly .
The warning light i lluminates when there is a
malfunction in the engine e lectronic system .
Contact your authorized Audi dealer and have
the malfunction corrected .
An improperly cl osed fuel fill er cap m ay al so
c au se the MIL light to illumi nate (onl y
v ehicles with ga soline eng ine)
c:> page 252.
F or more in format ion c:> page 2 7 .
Ci:> Adaptive Air Suspension
Applies to vehicles: with Adaptive Air Suspens ion
This f!I warning/indicato r light has the fo l
l owing f unctions:
- It illuminates fo r a few seconds after the ig
nition is t urned on as f unction check and
then goes out . -
If the warning/indicator light illuminates or
blinks contin uously, there is a system fault
in the Adaptive Air Suspension. A system
fau lt can result in lim ited ride comfort and
low ground clea rance . Drive safely to the
nearest authorized Audi dealer or qualified
workshop, and have the fault corrected .
- If the warning/indicator light flashes, you
should not dr ive the veh icle . The flashing
warning/indicator light points to an extreme H igh level. A very
pronounced lifting of the
veh icle (ext reme H igh leve l) can result, for
examp le, when a he avy load is removed
from the vehicle. As soon as the level has re
turned to norma l, the wa rning/indicator
light stops flashing, and you can d rive away.
- If the warning/indicator light flashes in con
junction with the
II warning/indicator
light, you should not drive off immediately
in order to prevent damage to the under
body. The two warn ing/ indicator lights
flashing together points to an extreme Low level. A ve ry
pronounced lowering of the ve
hicle (extreme Low leve l) can result, for ex
ample , from a heavy load. As soon as the
level has retu rned to normal, the warn ing/
indicator lights stop flashing, and you can
drive away.
(D Note
If the warning/ indic ator l igh t flashes in
conjunction with the
B warning/ind ica
tor light, you should not drive the vehicle
because low-lying veh icle parts can bot
tom out as yo u drive over uneven ground
and be damaged as a result.
~ Adaptive Air Suspension
App lies to vehicles: with Adaptive Air Suspension
This B warning/i ndicator light has the fo l
low ing functions:
- It illuminates for a few seconds after the ig
nition is turned on as function check and
then goes out .
- It comes on for approximately 15 seconds
as a warning of
reduced ground clearance , if .,,.
Page 21 of 340
Instruments and warning/indicator lights 19
The ABS warning light and the brake warn ing light come on together. The ABS will not
work and you will notice a change in braking response and performance.
Malfunction in the brake system
If the brake warning light <=>page 19 and
the ABS warning illuminate
together there
may be a malfunction in the ABS, and there
may also be a malfunction in the brake system
itself <=>,&. .
In the event of a
malfunction in the brake
system
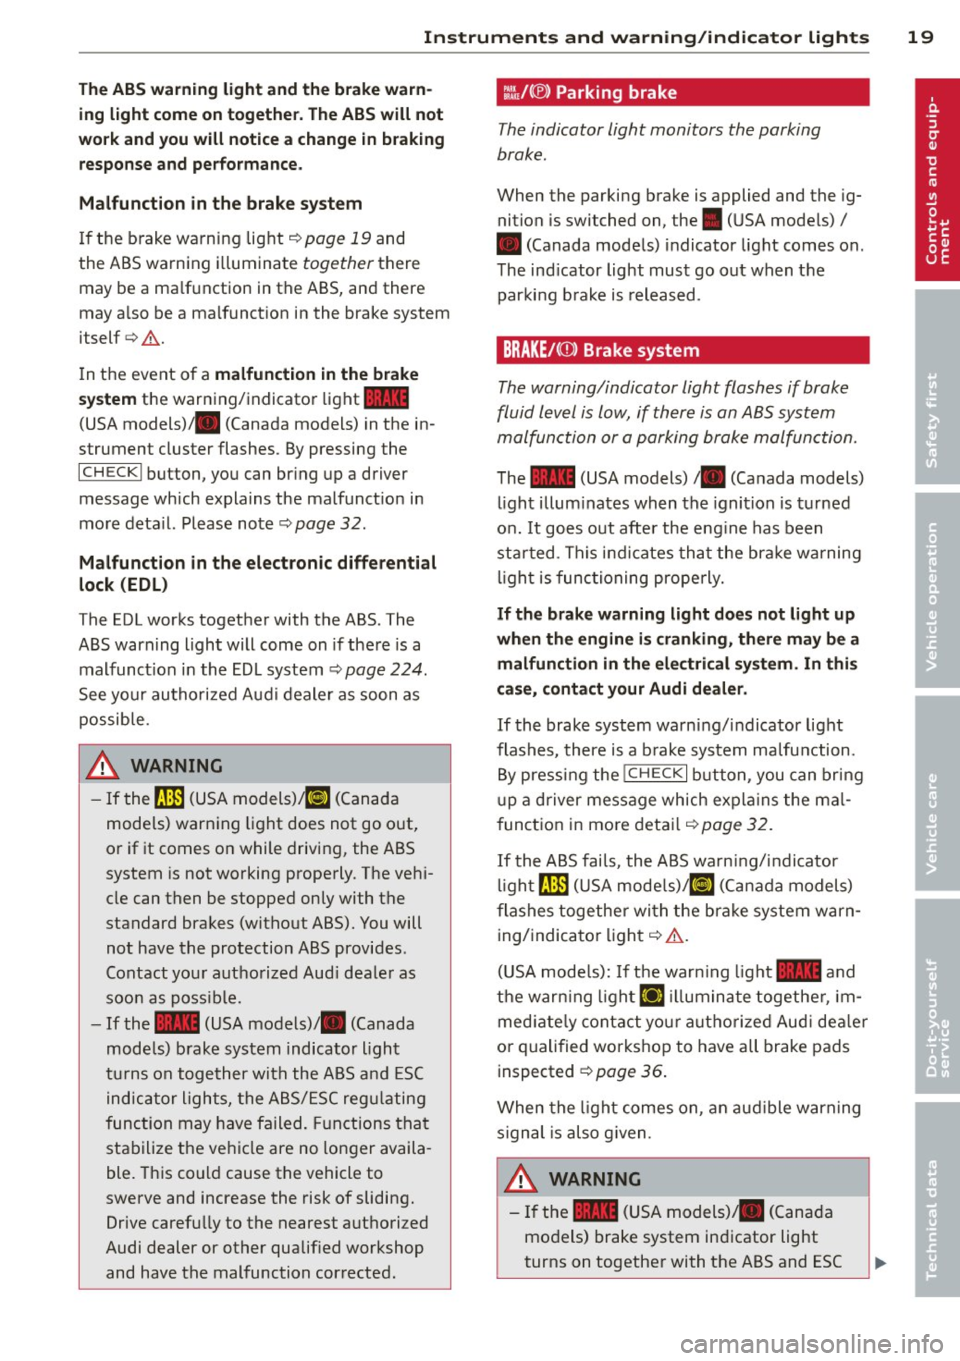
the warning/indicator light 1111
(USA models);III (Canada models) in the in
strument cluster flashes. By pressing the
ICHECKI button, you can bring up a driver
message which explains the malfunction in
more detail. Please note
<=>pag e 32.
Malfunction in the electronic differential
lock (EDL)
The EDL works together with the ABS. The
ABS warning light will come on if there is a
malfunction in the EDL system
<=> page 224.
See your authorized Audi dealer as soon as
possible.
.&, WARNING
-
- If the f!B (USA models);tlJ (Canada
models) warning light does not go out,
or if it comes on while driving, the ABS
system is not working properly. The vehi
cle can then be stopped only with the
standard brakes (without ABS). You will
not have the protection ABS provides.
Contact your authorized Audi dealer as
soon as possible.
- If the
1111 (USA models)/ . (Canada
models) brake system indicator light
turns on together with the ABS and ESC
indicator lights, the ABS/ESC regulating
function may have failed. Functions that
stabilize the vehicle are no longer availa
ble. This could cause the vehicle to
swerve and increase the risk of sliding.
Drive carefully to the nearest authorized
Audi dealer or other qualified workshop
and have the malfunction corrected.
:l~ /(® ) Parking brake
The indicator light monitors the parking
brake.
When the parking brake is applied and the ig
nition is switched on, the. (USA models) /
• (Canada models) indicator light comes on.
The indicator light must go out when the
parking brake is released.
BRAKE/CCDl Brake system
The warning/indicator light flashes if brake
fluid level is low, if there is an
ABS system
ma/function or a parking brake ma/function.
The 1111 (USA models)/ . (Canada models)
light illuminates when the ignition is turned
on.
It goes out after the engine has been
started . This indicates that the brake warning
light is functioning properly.
If the brake warning light does not light up
when the engine is cranking, there may be a malfunction in the electrical system. In this
case, contact your Audi dealer.
If the brake system warning/indicator light
flashes, there is a brake system malfunction .
By pressing the
I CH ECK i button , you can bring
up a driver message which explains the mal
function in more detail
<=>page 32.
If the ABS fails, the ABS warning/indicator
light~ (USA
models)/KCJ (Canada models)
flashes together with the brake system warn
ing/indicator light<=>,&. .
(USA models): If the warning light
1111 and
the warning light
El illuminate together , im
mediately contact your authorized Audi dealer
or qualified workshop to have all brake pads
inspected ¢
page 36.
When the light comes on, an audible warning
signal is also given .
.&, WARNING ~ ~
-If the 1111 (USA models) ;III (Canada
models) brake system indicator light
turns on together with the ABS and ESC
Page 35 of 340
& WARNING
-If your veh icle should break down for
mechanical or other reasons, park at a
safe distance from moving traffic, turn off the engine and turn on the ha zard
warning lights¢
page 60, Emergency
flasher .
-
-Never open the hood if you see or hear
steam or coolant escap ing from the en
gine compartme nt -you risk being scald
ed . Wa it until you can no longe r see or
hear stea m or coo la nt escaping.
- The eng ine compartment of a ny veh icle
is a dangerous a rea . Before you perfo rm
any wor k in the engine compa rtme nt,
t ur n o f the eng ine and allow it to cool.
F ollow the warning stick ers ¢
page 257.
(D Note
Do not co nti nu e d riving if the . symbol
illumi nates. T here is a m alf unct io n in the
eng ine cooling system -you co uld dam age
your eng ine .
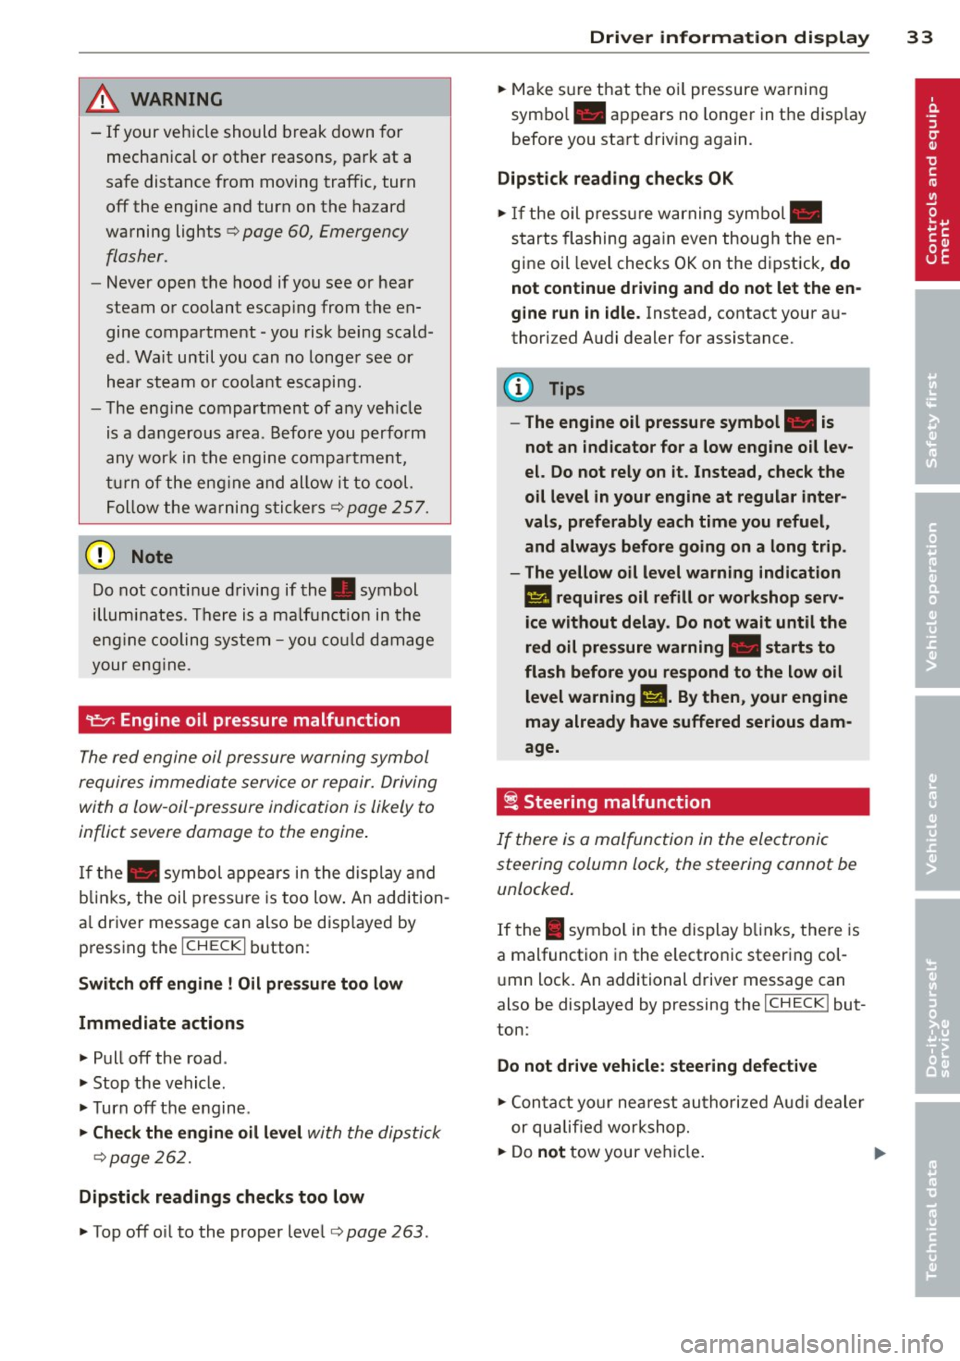
"t:::7: Engine oil pressure malfunction
The red engine oil pressure warning symbol
requires immediate servi ce or repair. Driving
with a low -oil -pressure indication is likely to
inflict severe damage to the engine .
If the. symbol appe ars in the display and
b links, the oil press ure is too low . An addition
a l driver message can also be disp layed by
pressing the
I CH ECK i button :
Switch off engine! Oil pre ssure too low
Immediate actions
~ Pull off the road .
~ Stop the vehicle.
~T urnoff the engine .
~ Check the engine oil lev el with the dipsti ck
¢page 262.
Dipstick readings checks too low
~ Top off o il to the proper level¢ page 263 .
Driver information di spla y 33
~ Make s ure that the oi l pressure wa rning
symbo l. appears no longer in the disp lay
befo re you sta rt driv ing again.
Dipstick reading checks OK
~ If the oil press ure warning symbol.
starts flashing aga in even thoug h the en
gine oil leve l checks OK on the dipstick,
do
not continue driving and do not let the en
gine run in idle .
Instead, contact your au
thori zed A udi dealer for assistance.
(D Tips
- The engine oil pressure symbol. is
not an indicator for a low engine o il lev
el. Do not rely on it . Instead, check the
oil level in your engine at regular inter
vals, preferably each time you refuel,
and always b efore going on a long trip .
- The yellow oil level warning indication
l!I requires oil refill or workshop serv
ice without delay . Do not wait until the
red oil pressure warning. start s to
fla sh before you. respond to th e low oil
level warning l!I. By then, your engine
may already have suffered serious dam
age.
i Steering malfunction
If there is a malfunction in the electronic
steering column lock, the steering cannot be
unlocked .
If the . symbo l in the display b links, the re is
a malfunction i n the elect ro nic steer ing col
u mn lock. An additional driver message can
also be displayed by pressing the
ICHECK I but
ton:
Do not drive vehicle: steering defective
~ Contact your nea rest au thori zed Aud i deale r
or qu alified worksho p.
~ Do not tow your ve hicle. .,..
Page 36 of 340
34 Driver in formation d isplay
A WARNING -
Your vehicle must not be towed in the
event of a malfunction in the electron ic
steering column lock because it cannot be
steered due to the locked steering. If it is
t owed w ith the stee ring locked, there is
the risk of an accident.
~ Ignition lock malfunction
A malfunction in the ignition lock must be re
paired immediately.
If the . symbo l in the d isplay blinks, there is
a malf unct ion in the electronic ignition lock.
A n addit ional driver message ca n also be d is
p layed by pressing the
! CHECK I button:
Ignit ion lo ck def ect ive . C ontact work shop !
• Do not turn the eng ine off.
• Drive immediate ly to an authorized Audi
dealer to have the ma lfunction corrected.
If there is a ma lfunction in the e lectronic igni
tion lock, the ign ition cannot be turned off.
Drive immediately to an a uthorized Audi dea l
e r to have the cause of the ma lfunction co r
rected .
On vehicles w ith Convenience key*, the engine
should not be sw itched
off using the ! STOP !
button because the eng ine cannot be started
aga in after the ignition is switched
off .
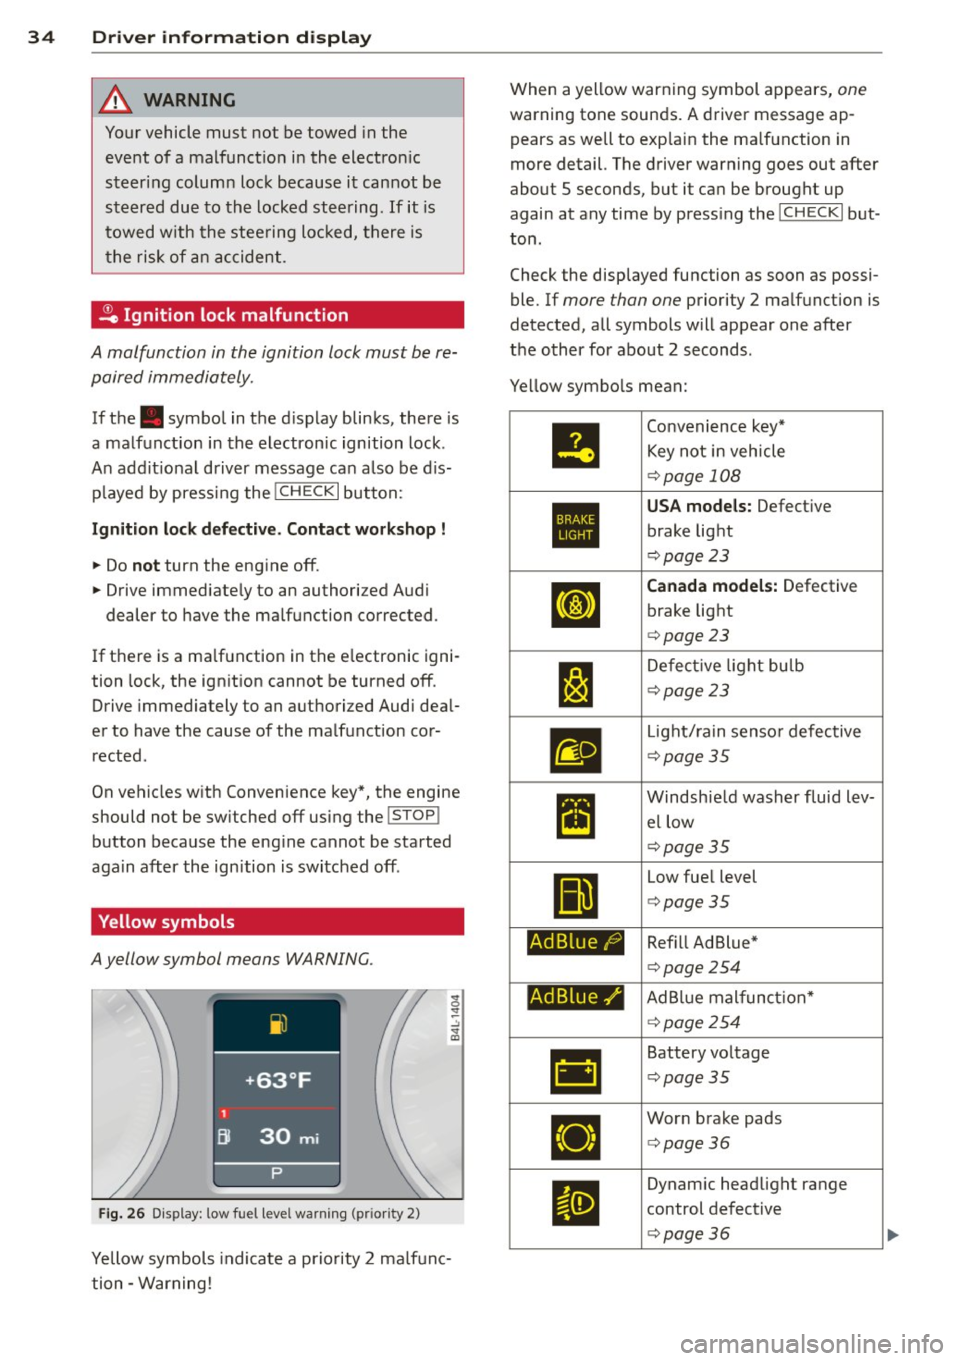
Yellow symbols
A yellow symbol means WARNING.
Fig . 26 Display: low fuel level warning (pr io ri ty 2)
Yellow symbols indicate a priority 2 ma lfunc
tion -Warning! When a yellow warning symbol appears,
one
warning tone sounds. A driver message ap
pears as well to exp lain the ma lfunction in
more detail. The driver warning goes out after
about 5 seconds, but it ca n be brought up
again at any time by press ing the
! CHECK I but
ton .
Check the displayed function as soon as possi
ble. If
more than one priority 2 ma lfunction is
detected, all symbols will appear one after
the o ther for about 2 seconds .
Ye llow symbo ls mean:
•
1:1
Ad Blue/)
Ad Blue,/'
•
Convenience key*
Key not i n veh icle
¢ page 108
USA models: Defect ive
brake light
¢ page 23
Canada model s: Defective
brake light
¢ page 23
De fect ive l ight bulb
¢page23
Light/ rain senso r defective
¢ page35
Windsh ie ld washer fluid lev
el low
¢page35
Low fue l level
¢ page35
Ref ill Ad Blue *
¢page 254
AdBlue mal funct ion*
¢ page254
Battery vo ltage
¢ page35
Wor n brake pads
<=> page36
Dynam ic headlight range
control defect ive
¢ page36
Page 37 of 340
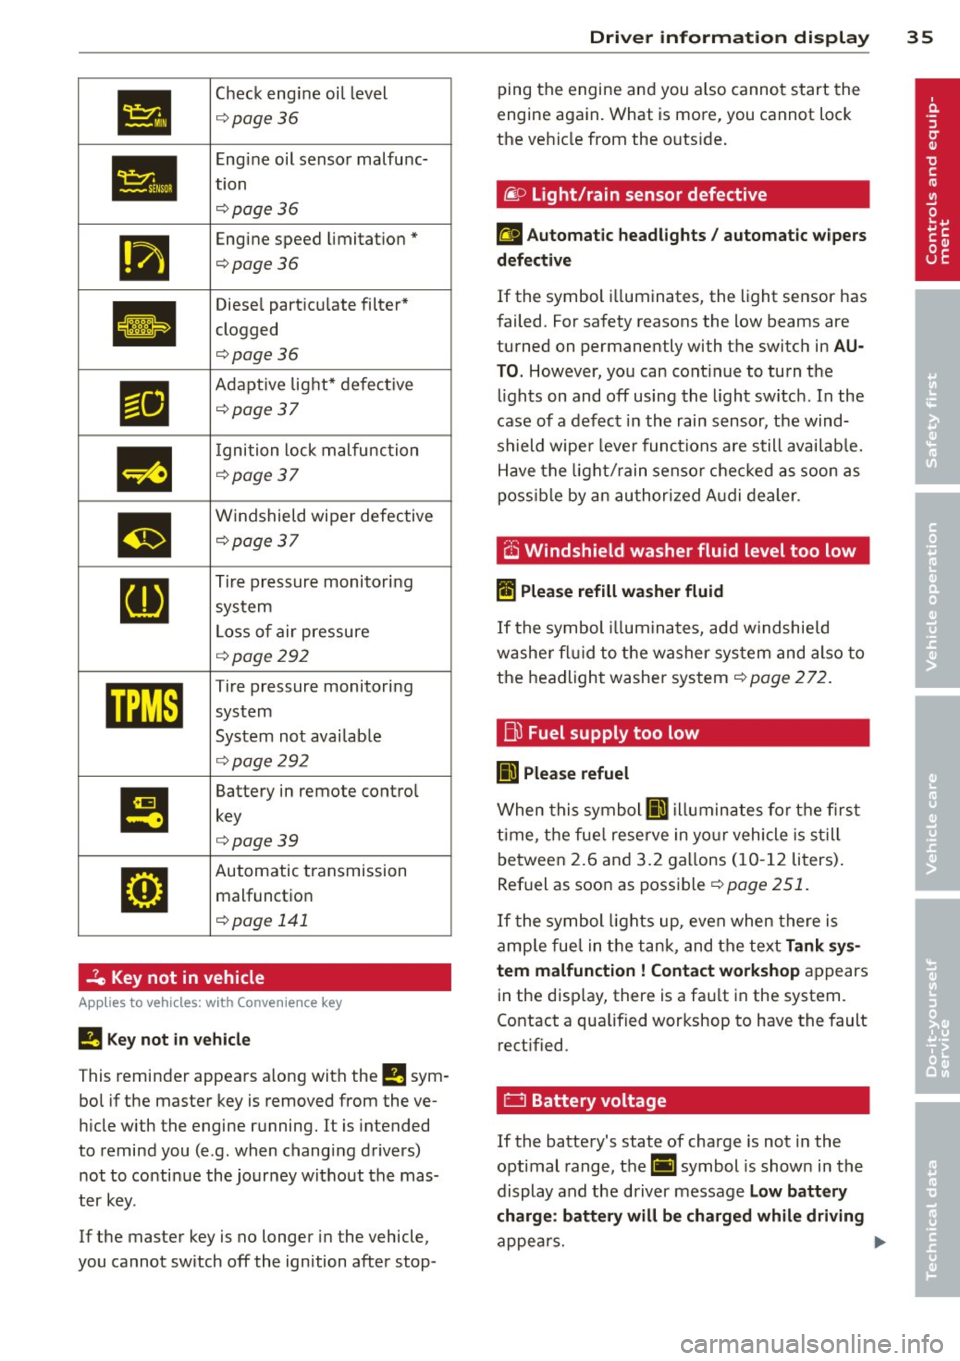
•
Check engine oi l level
¢ page36
•
Engine oil sensor malfunc-
tion
¢page 36
111
Engine speed limitation*
¢page36
Ill
Diesel particu late filter*
clogged
.
¢page36
Ill
Adapt ive light* defective
¢page37
m
I gnition lock malfunction
¢page 37
m
Windshield wiper defective
¢page37
[I]
Tire pressure monitoring
system
L oss of air pressure
¢ page292
mm
Tire pressure monitoring
system
System not avai lab le
¢ page292
I!
Battery in remote contro l
key
¢page39
•
Automatic transmission malfunction
¢ page 141
2e Key not in vehicle
Applies to vehicles: with Convenience key
!I Key not in ve hicle
This reminder appears a long with the !I sym
bo l if the master key is removed from the ve
hi cle with the engine running.
It is intended
to remind you (e.g. when changing drivers) not to continue the journey w ithout the mas
ter key.
If the master key is no longer in the vehicle,
you cannot sw itch
off the ignition after stop-
Dri ver information di spla y 35
ping the engine and you also cannot start the
engine again. What is more, you cannot lock
the ve hicle from the outs ide .
liP Light/rain sensor defective
£I Automatic headlights / automatic w ipers
d efe ctiv e
If the symbol i lluminates, the light sensor has
failed. For safety reasons the low beams are
turned on permanently with the switch in
AU
T O . However, you can cont inue to turn the
l ights on and
off using the l ight sw itch. In the
case of a defect in the rain sensor, the wind
shield wipe r lever functions a re still availab le.
Have the light/ rain senso r chec ked as soon as
poss ib le by an au thorized A udi dealer .
.-v ~,
O Windshield washer fluid level too low
II Plea se refill wa she r fluid
If the symbol illum ina tes, add w indshie ld
washe r fl ui d to the washer sys tem and also to
the headlight washer system¢
page 272.
fj)
Fuel supply too low
II) Ple ase refuel
When this symbol II) illuminates for the first
t ime, the fue l reserve in yo ur vehicle is s till
between 2.6 and 3.2 ga llons (10- 12 liters).
Ref uel as soon as possible¢
page 251.
If the symbol lights up, even when there is
amp le fue l in the tank, and the text
Tank sy s
tem malfuncti on! Contact work shop
appears
in the disp lay, there is a fa ult in the system.
Contact a qualified workshop to have the fault
rect ified.
0 Battery voltage
If the battery's state of charge is not in the
optimal range, the(•] symbol is shown in the
display and the driver message
Low battery
charge : batt ery will be char ged whil e driving
appea rs. .,.
Page 49 of 340
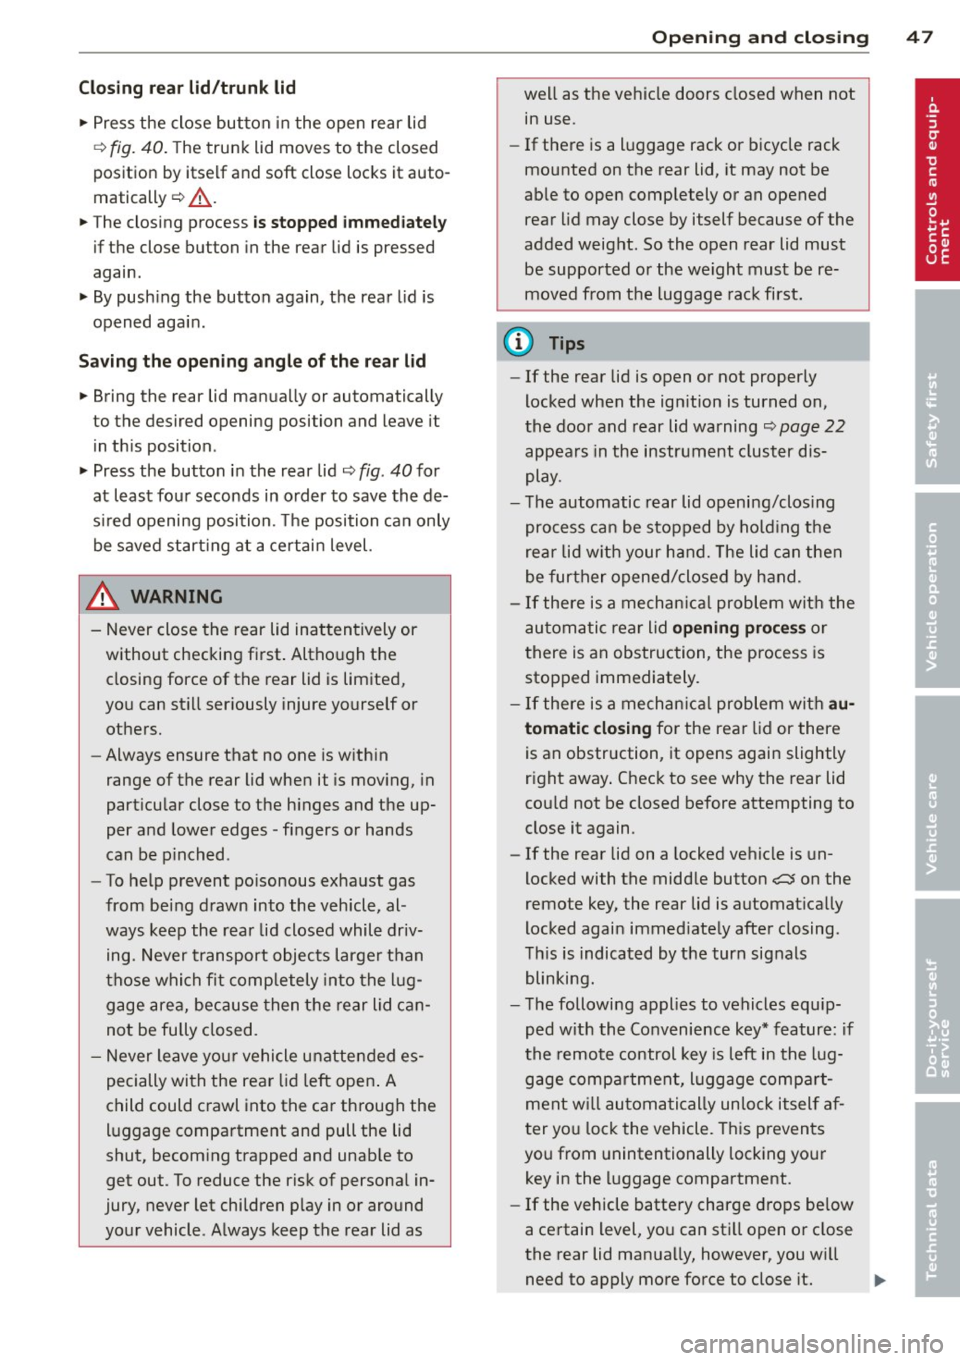
Clos ing re ar lid /trunk lid
"' Press the close button in the open rear lid
~ fig. 40. The trunk lid moves to the closed
posit ion by itself and soft close locks it auto
matically~ &_.
"' The closing process
is stopp ed immediately
if the close button in the rear lid is pressed
again.
"' By push ing the button again, the rear lid is
opened again .
Sa ving the open ing a ngle of the rear lid
"' Bring the rear lid manua lly or automatically
to the desired opening position and leave it i n th is position.
"' Press the button in the rear lid~
fig. 40 for
at least four seconds in order to save the de
s ired opening position. The position ca n only
be saved start ing at a certain level.
A WARNING
- Never close the rear lid inattentively or
without checking fi rst . Altho ugh the
closing force of the rear lid is lim ited,
yo u can st ill ser iously injure yourself or
others.
- Always ensure that no one is w ith in
range of the rear lid when it is moving, in
part icu lar close to the hinges and the up
per and lower edges -fingers or hands
can be p inched.
- To help prevent po isonous exhaust gas
from being d rawn into the vehicle, al
ways keep the rear lid closed while driv ing. Never transport objects larger than
those which fit completely into the lug
gage area, because then the rear lid can
not be fully closed.
- Never leave you r vehicle unattended es
pecially with the rea r lid left open . A
child could crawl into the car th rough the
l u ggage compa rtment and pull the lid
shut, becom ing trapped and unab le to
get out. To reduce the risk of persona l in
jury, never let children p lay in or around
your vehicle. A lways keep the rear lid as
-
Opening and clo sin g 47
well as the vehicle doors closed when not
in use.
- If there is a l uggage rack or bicycle rack
mounted on the rear lid, it may not be
ab le to open completely or an opened
rear lid may close by itself because of the
added weight. So the open rear lid must
be supported or the weight must be re
moved from the luggage rac k first.
@ Tips
- If the rear lid is open or not properly
locked when the ign ition is turned on,
the door and rear lid warning~
page 22
appears in the instrument cluster dis-
play.
- T he automatic rear lid opening/clos ing
process can be stopped by ho ld in g the
re ar lid w ith your hand. The lid can then
be further opened/closed by h and.
- I f there is a mechan ica l problem wit h the
automatic rear lid
opening proces s or
t here is an obstruction, the process is
stop ped immediately.
- I f there is a mechan ica l problem wit h au
tomatic closing fo r the rea r lid or there
is an obstr uction, it opens again slightly
r ight away . Chec k to see why the rear lid
cou ld not be closed before attempting to
close it again.
- If the rear lid on a locked vehicle is un
locked with the midd le button~ on the
remote key, the rear lid is automat ically
locked again immed iate ly after closing.
T his is indicated by the turn signals
blinking.
- The followi ng applies to vehicles equ ip
ped w ith the Convenience key* feature: if
the remote control key is left in the lug
gage compa rtment, l uggage comp art
ment w ill autom atic ally unlo ck itsel f af
ter yo u lock the vehicle. This preven ts
you from unintentionally locking you r
key in the luggage compartment.
- If the vehicle battery charge drops be low
a certain level, yo u can sti ll open o r close
the rear lid manually, however, you w ill
need to apply more force to close it. ..,.
Page 57 of 340

Opening front r oof segment to comf ort
se ttin g
"Turn the rotary switch ¢ fig. 49@ to posi
tion ©, you will feel the switch engage . The
roof segment is slid open only to a comfort
position w ith low wind noise. This is the rec
ommended standard sett ing for normal
driv ing cond itions .
Sliding front roof segment full y open
" Rotate and hold the switch @ in position @
unt il the roof segment has reached the de
s ired pos it ion. There may be increased wind
noise in this pos it ion.
(D Tips
- In posit ion @, the switch jumps back to
pos ition © again as soon as the switch is
released .
- When dr iv ing with the Panoramic slid ing
sunroof open, open the front roof seg
ment to the comfort setting to m inim ize
wind noise .
Closing Panoramic sliding sunroof
Applies to vehicles: with Panoram ic sliding sunroof
Clos ing tilted front roof segm ent
" Pull the switch¢ page 54, fig . 49 @ and
ho ld it until the roof segment has reached
the des ired pos ition.
" Pull the switch
brie fly to close the roo f seg
ment automatica lly. By activating the switch
briefly again, the roof segment can be stop
ped in any position ¢
.&_.
Clos ing front r oof s egment wh en slid
o p en
" Rotate switch ¢ page 54, fig. 49@ to posi
t ion @ to close the roof segment
c::> .&_. To
move to an intermediate posit ion, rotate the
switch to the corresponding click-stop .
Clos ing tilt ed r ear roof segm ent
" Tap the rocker switch ¢ page 54, fig. 49 ®
or
c::> page 54, fig. 50 © in the front area Q
br iefl y to close the roof segment completely
c::> .&_.
Opening and clo sin g 55
"To set an intermediate position manually,
press the rocker switch in the front area~
until the roof segment has reached the de
sired tilt posit ion
c::> .&_ .
A WARNING
Improper use of the Panoram ic sliding
sunroof can cause serious personal injury.
- Be careful when closing the Panoramic
-
sliding sunroof . Not paying attention
could cause you or others to be trapped
and injured as the Panoram ic sliding sun
roof closes.
- Always take the key w ith you when you
leave the vehicle to prevent injur ies
caused by the Panoramic slid ing sunroof
clos ing
- Never leave children or persons requiring
assistance alone in the vehicle, especially
when they could access the vehicle keys .
Unsupervised use of the keys can result
in the engine being started or use of ve
hicle systems such as the power win
dows, etc. wh ich could result in serious
injury. The doors could be locked with
the remote key, de laying help in an
emergency.
- The Panoramic slid ing sunroof will con
tinue to operate until the ign ition key
has been removed and one of the front
doors has been opened.
Convenience closing feature
Applies to vehicles: wit h Pa noramic slid ing sunroof
The Panoramic sliding sunroof can be closed
from outside with the key in the driver's door lock .
" Insert the key into the dr iver's door lock.
" Turn and hold the key in the lock pos it ion ®
c::> page 43, fig . 33 until the Panoramic slid
ing sunroof is complete ly closed
c::> A in
Closing Panoramic sliding sunroof on
page 55.
T he power s un blind is a lso closed . .,..
Page 108 of 340
106 On the road
Starting and stopping
the engine
Starting the engine
The engine can only be started with your orig
inal Audi key.
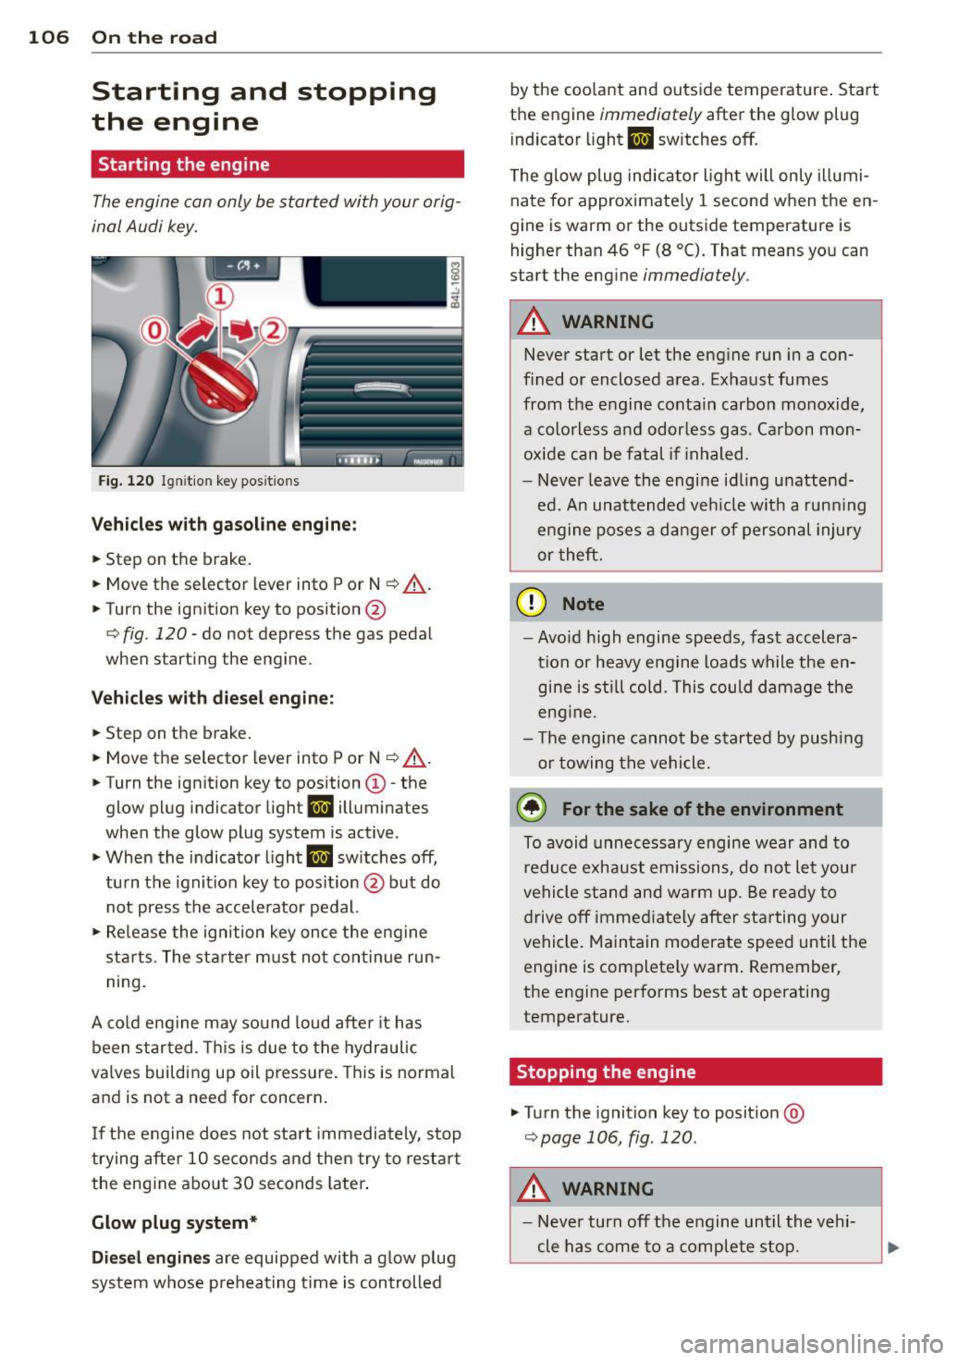
Fig. 120 I gni tion key positio ns
Vehicles with gasoline engine:
.. Step on the brake .
.. Move the selector lever into P or N
~ ,&. .
.. Tu rn the ignition key to position @
~ fig. 120 -do not depress the gas pedal
when starting the engine.
Vehicles with diesel engine:
.. Step on the brake .
.. Move the selector lever into P or N
~ ,&..
.. Turn the ign ition key to position ©- the
glow plug indicator light
m illuminates
when the glow plug system is act ive .
.,. When the indicator l ight
I.I sw itches off,
turn the ignition key to pos it ion @ but do
not press the accelerator pedal.
.,. Re lease the ignition key once the engine
sta rts. The starter must not continue run
ning.
A cold engine may sound loud after it has
been started . This is due to the hydraulic
va lves building up oil pressure. This is normal
and is not a need for concern.
If the engine does not start immediately, stop
trying after 10 seconds and then try to restart
the engine about 30 seconds Later.
Glow plug system*
Diesel engines are equipped with a glow plug
system whose preheating t ime is controlled by the coo
lant and outs ide temperature . Start
the engine
immediately after the glow plug
indicator light
m sw itches off.
The glow plug indicator light will only illumi
nate for approximate ly 1 second when the en
gine is warm or the outside temperature is
higher than 46 °F (8 °C). That means you can
start the engine
immediately .
A WARNING
-Never start or let the engine run in a con-
fined or enclosed area. Exhaust fumes
from the engine contain carbon monoxide,
a colorless and odorless gas . Carbon mon
oxide can be fatal if inhaled.
- Never leave the engine idling unattend
ed. An unattended veh icle w ith a runn ing
engine poses a danger of personal injury
or theft .
(D Note
- Avo id high engine speeds, fast accelera
tion or heavy engine loads while the en gine is still cold. This could damage the
eng ine .
- Th e engine cannot be started by pushing
or towing the vehicle .
@ For the sake of the environment
To avoid unnecessary engine wear and to
reduce exhaust emissions, do not let your
vehicle stand and warm up. Be ready to
drive
off immediately after starting your
vehicle. Maintain moderate speed until the
engine is completely warm . Remember,
the engine performs best at operating
temperature.
· Stopping the engine
.,. Turn the ignition key to posit ion @
~page 106, fig . 120 .
A WARNING
-
-Never turn off the engine until the vehi-
cle has come to a complete stop.