door AUDI Q7 2018 Owner´s Manual
[x] Cancel search | Manufacturer: AUDI, Model Year: 2018, Model line: Q7, Model: AUDI Q7 2018Pages: 398, PDF Size: 185.58 MB
Page 48 of 398
Lights and Vision
The emergency flashers also work when the igni
t ion is turn ed off .
(D Tips
You s hou ld sw itch the emergency flashers on
if:
- you are the last car in a traff ic jam so that
a ll other vehicles approaching from behind
can see your vehicle
- your ve hicle has bro ke n down or you are
having an eme rgency
- you r vehicle i s being towed or if yo u are tow
ing another vehicle
Interior lighting
Front interior lighting
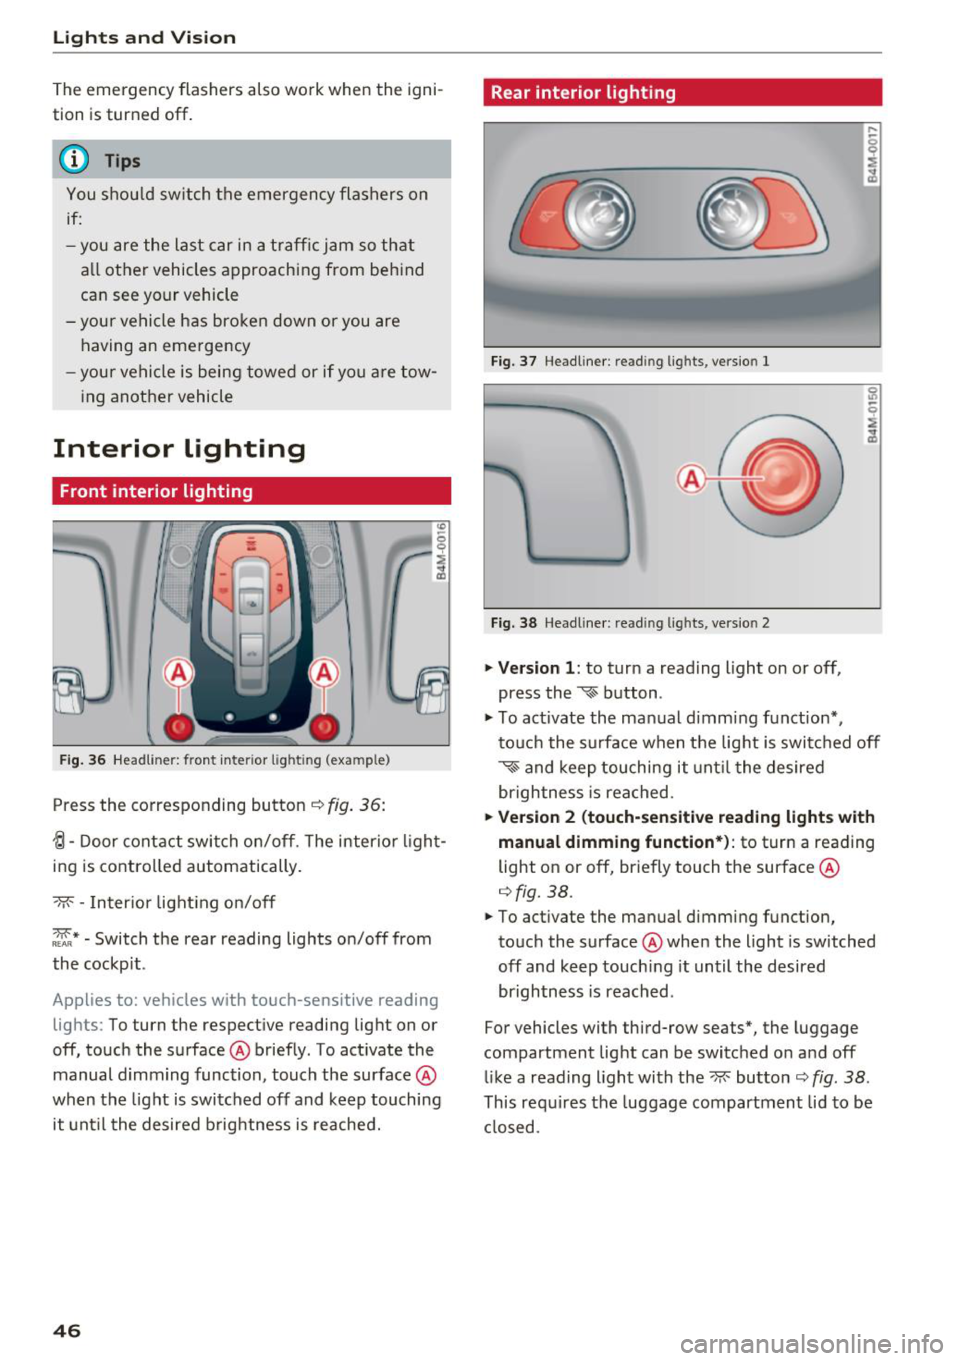
F ig. 36 Headlin er: fr ont in te ri or l ig htin g (exa mple)
Press the co rresponding button ¢ fig. 36:
{l-Door contac t swi tch on/off . T he interior ligh t
ing is controlled automatically.
- M- -In ter ior light ing o n/off
~ * -Switch the rear reading lights on/off from
the cockpit .
App lies to: ve hicles w ith to uch-se nsiti ve reading
lig hts: To turn the respect ive reading light on or
off, touch the surface @ briefly . To act ivate the
manual d imm ing function , touch the surface @
when the light is switched off and keep touching
it unt il t he desired b rightness is reached.
46
Rear interior lighting
Fi g. 3 7 Headline r: re ad in g light s, ve rs io n l
Fi g. 38 Headline r: re ad in g l igh ts , vers io n 2
.. Version 1 : to turn a read ing l ight on or off,
press the
~ b utton .
.. To ac tivate the ma nual dimming f unct ion* ,
t o uch the s urface when the lig ht is swi tc h ed off
~ and keep touching it unt il t he de sired
brigh tness is reached.
.. Ver sion 2 (touch-sensiti ve reading light s with
manual dimming function* ):
to turn a reading
light on or off, br iefly touch the surface @
¢fig. 38 .
.. To activate the manual dimming function,
to uch the surface @whe n the light is switched
off and keep touch ing it until the desired
brightness is reached .
For vehicles with third-row seats*, the luggage
compartment lig ht can be switc hed o n and off
li ke a reading light with the~ button ¢
fig. 38 .
This re quires the luggage compartment lid to be
cl osed.
Page 49 of 398
a co ...... N r--. N ...... 0
0
:E '
Applies to: vehicles with inter ior lighting
.. Se lec t in the Info tainmen t system: !M ENUI but
ton
> Vehi cle> left contro l button > Vehicle
s ettings > Int erior lighting.
The interior lighting turns on when you switch
the head ligh ts on whi le the igni tion is on .
T he storage compartment in the doo r is i llum i
nated when yo u reach your hand in to the storage
compartment .
Version 1
To adjust the b rightness of individua l zones, se
l ect
Front brightness *, Door br ightness or Foot
well brightness .
Turn the control knob to the left
or to the r ight . Press the co ntro l knob to conf irm
the br ightness .
Version 2
Select and confirm one of the displayed profiles
by pressing the con trol knob.
Individual : you can customize the br ightness and
colo r of individual zones. Press the right control
button. P ress the cont rol knob again to confirm
the settings.
Audi drive select: the interior and contour light
ing color changes depending on the driving mode
selected in drive select*¢ page 128.
{!) Tips
The setting is a utomat ica lly stored and as
signed to the remote contro l key that is be ing
used.
Lights and V ision
Instrument illumination
T he brightness of the illumination for the instru
ments, display and head-up display* can be ad
justed .
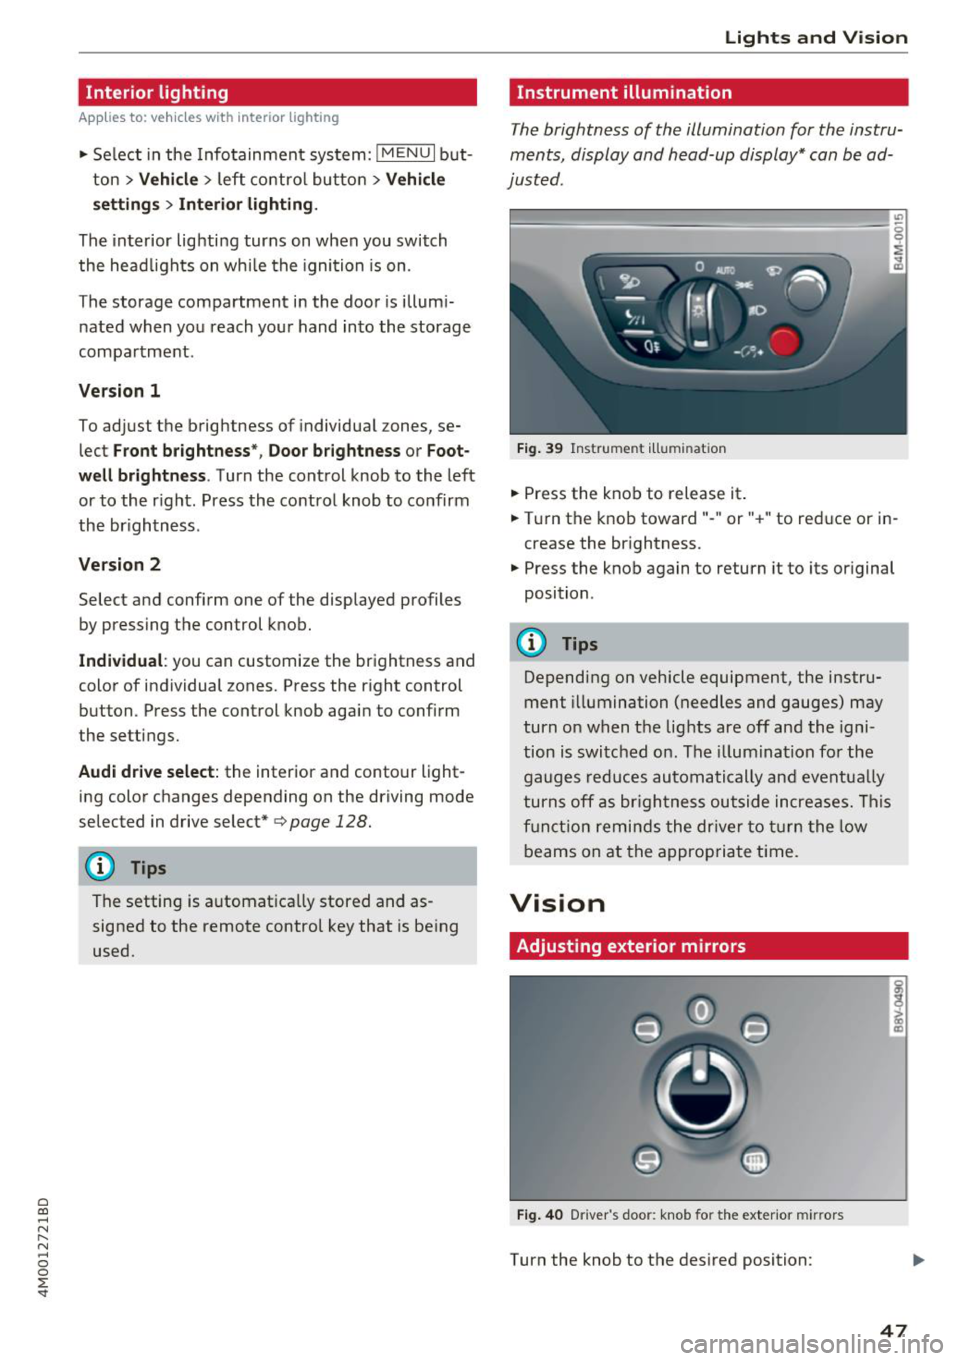
"' t==~====:::::::::'.=== ===:::::=:::::::===- -!
i
Fig. 39 Instrume nt illumin ation
.. Press the knob to release it .
.. Tur n the knob toward" -" or" +" to reduce or in
crease the br ightness.
.. Press the knob again to return it to its or iginal
position .
(D Tips
Depending on vehicle equipment, the instru
ment illumination (needles and gauges ) may
turn on w hen t he lig hts are off and the igni
tion is swi tched on. The illuminat ion fo r the
gaug es reduc es au toma tically and eventua lly
t urns off as br igh tness ou tside in crea se s. Th is
f u ncti on re mind s the dr iver t o turn the low
beams on at the appropriate ti me.
Vision
Adjusting exterior mirrors
Fig. 4 0 Driver 's doo r: knob fo r the exter io r mir rors
Turn the knob to the des ired position:
i CD
47
Page 50 of 398
Lights and Vi sion
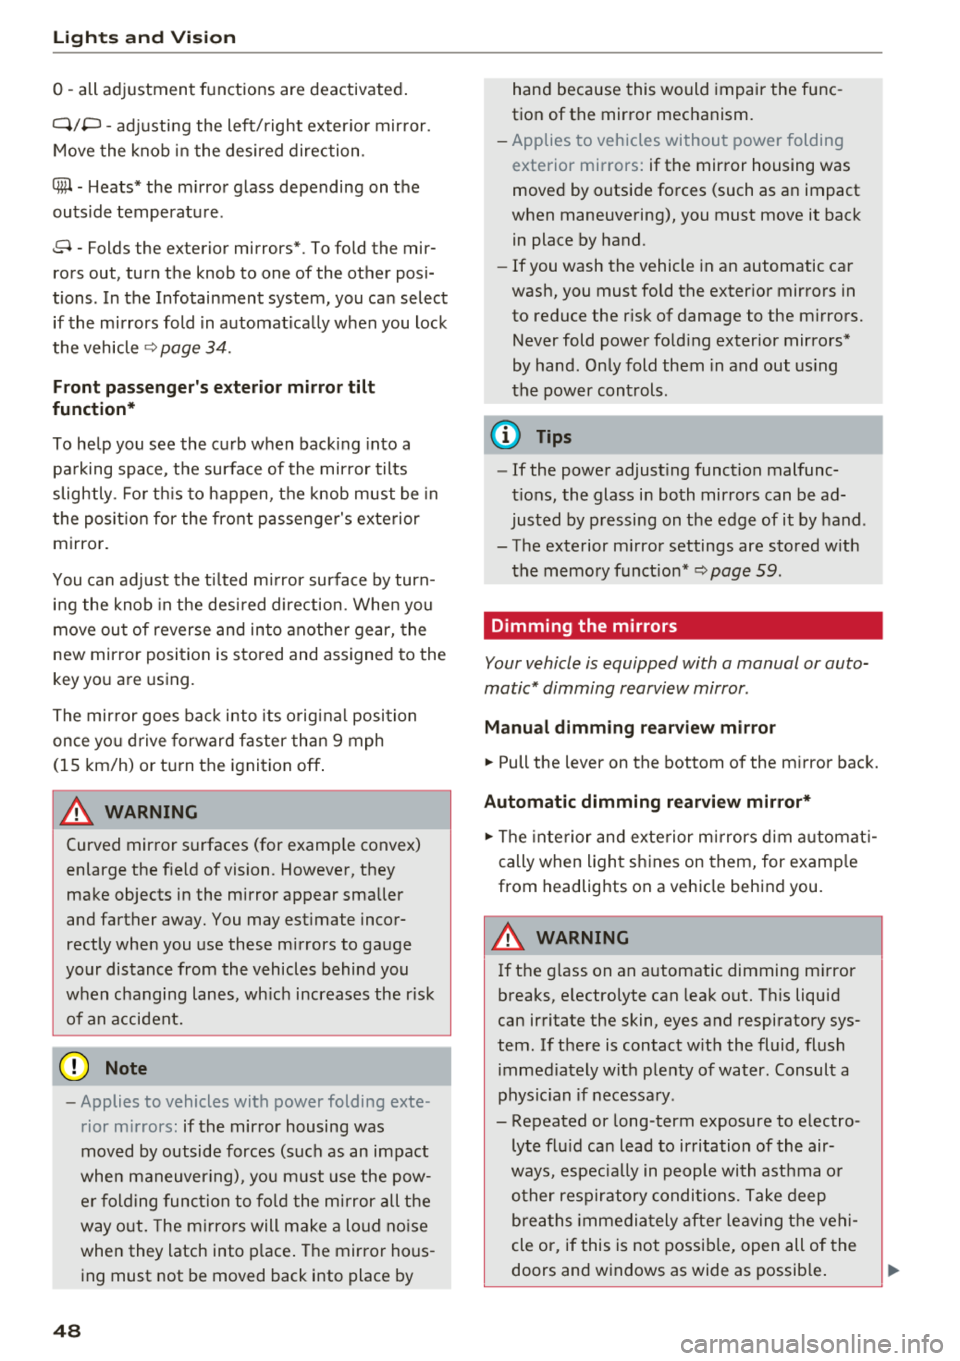
0 -all adjustment functions are deactivated .
Q/P -adjusting the left/right exter io r mir ror.
Move the knob in the desired direction .
4iil -Heats * the m irror glass depending on the
outside temperature .
8 - Folds the exterior mirrors*. To fold the mir
rors out, turn the knob to one of the other posi
tions . In the Infotainment system, you can select
if the mirrors fold in automat ica lly when you lock
the vehicle
~ page 34.
F ront pas senger 's e xterior mirror tilt
function*
To help you see the curb when back ing into a
pa rking space, t he surface of the mir ror tilts
slightly . Fo r thi s to happen, t he knob must be in
t he pos it io n for the front passenger's exterior
mirror.
You can adjust the t ilted m irror surface by turn
i n g the knob in the des ired direction. Whe n you
move ou t of reverse and in to anothe r gear, the
new mirror position is stored and assigned to the
key yo u are using.
The mir ror goes back into its o rig inal posi tion
once yo u drive forward faster than 9 mph
(15 km/h) or tu rn the ignition
off .
A WARNING
Curved mir ror surfaces (for examp le convex)
enlarge t he f ie ld of vision . Howeve r, they
make objects i n the mirror appear sma ller
and farther away. You may est imate inco r
rectly when you use these mirrors to ga uge
your distance from the vehicles behind you
when c hanging lanes, wh ic h increases the r is k
of an a ccident.
@ Note
- Applies to vehicles with power folding exte
rior m irrors : if the mirror housing was
moved by outside forces (such as an impact
whe n m aneuver ing), you m ust use the pow
e r fold ing func tion to fo ld the m irror all t he
way o ut. The m irro rs will make a loud no ise
when they latch into p lace . The mirror hous
ing must not be moved back i nto place by
48
hand because this would impair the func
tion of the mirror mechanism.
- Applies to vehicles wi thou t power folding
exterior mirrors : if the mirror housing was
moved by outside forces (such as a n impact
when maneuvering), you must move it back
in place by hand.
- If you wash the vehicle in a n automatic ca r
wash, you must fold the exter ior mirrors in
to reduce the r isk of damage to the m irrors.
Never fold power fo ld ing exterior mirrors*
by hand. On ly fold them in and out using
the power cont rols.
(D Tips
- If the power adjust ing function malfunc
t ions, the glass in both mir rors can be ad
justed by p ressing on t he edge of it by hand .
- The exterior m irror settings are sto red w ith
the memory fu nct io n* ~
page 59.
Dimming the mirrors
Your vehicle is equipped with a manual or auto
matic* dimming rearview mirror .
Manual dimming rear view mirror
.,. Pull the lever on the bottom of the m irror back.
Automatic dimming rearvi ew mirror*
.,. The inte rior and exte rior m irrors d im a utomat i
cally when ligh t shi nes on them, for examp le
from headlig hts on a vehicle behind you.
A WARNING
If th e g lass on an a utomatic dimming m irror
b reaks, e lectrolyte can lea k out. T his liquid
can irritate the skin, eyes and respiratory sys
tem . If there is contact w it h the fluid, flush
i mmediately with p lenty of water. Consult a
phys ic ian if necessa ry .
- Repeated or long-term exposure to e lectro
ly te fl uid ca n lead to ir ritation of the air
ways, espec ia lly in people with ast hma o r
o ther resp iratory condi tions. Take deep
b re at hs immedia tely afte r leav ing t he veh i
cle or, if this is no t possib le, open all of the
doors and windows as wide as possib le .
Page 51 of 398
a co ...... N r--. N ...... 0
0
:E '
them thoroughly with a large amount of
clean water for at least 15 minutes and then
seek medical attention .
- If electrolyte flu id comes into contact with
the skin, flush the affected area with clean
water for at least 15 minutes and then clean
with soap and water and seek medical at
tention. Clean affected clothing and shoes
thoroughly before wearing again .
- If the fluid was swallowed and the person is
conscious, flush the mouth with water for at
least 15 minutes. Do not induce vomiting
unless this is recommended by medical pro
fessionals. Seek medical attention immedi
ately.
(D Note
If the glass on an automatic dimming mirror
breaks, electrolyte can leak out. This liquid
damages plastic surfaces and paint. Clean
this liquid as quickly as possible, for example
with a wet sponge.
(D Tips
- If the light reaching the rearview mirror is
obstructed, the automatic dimming mirror
will not function correctly,
- The automatic dimming mirrors do not dim
when the interior lighting is turned on or
the reverse gear is selected .
Sun visors
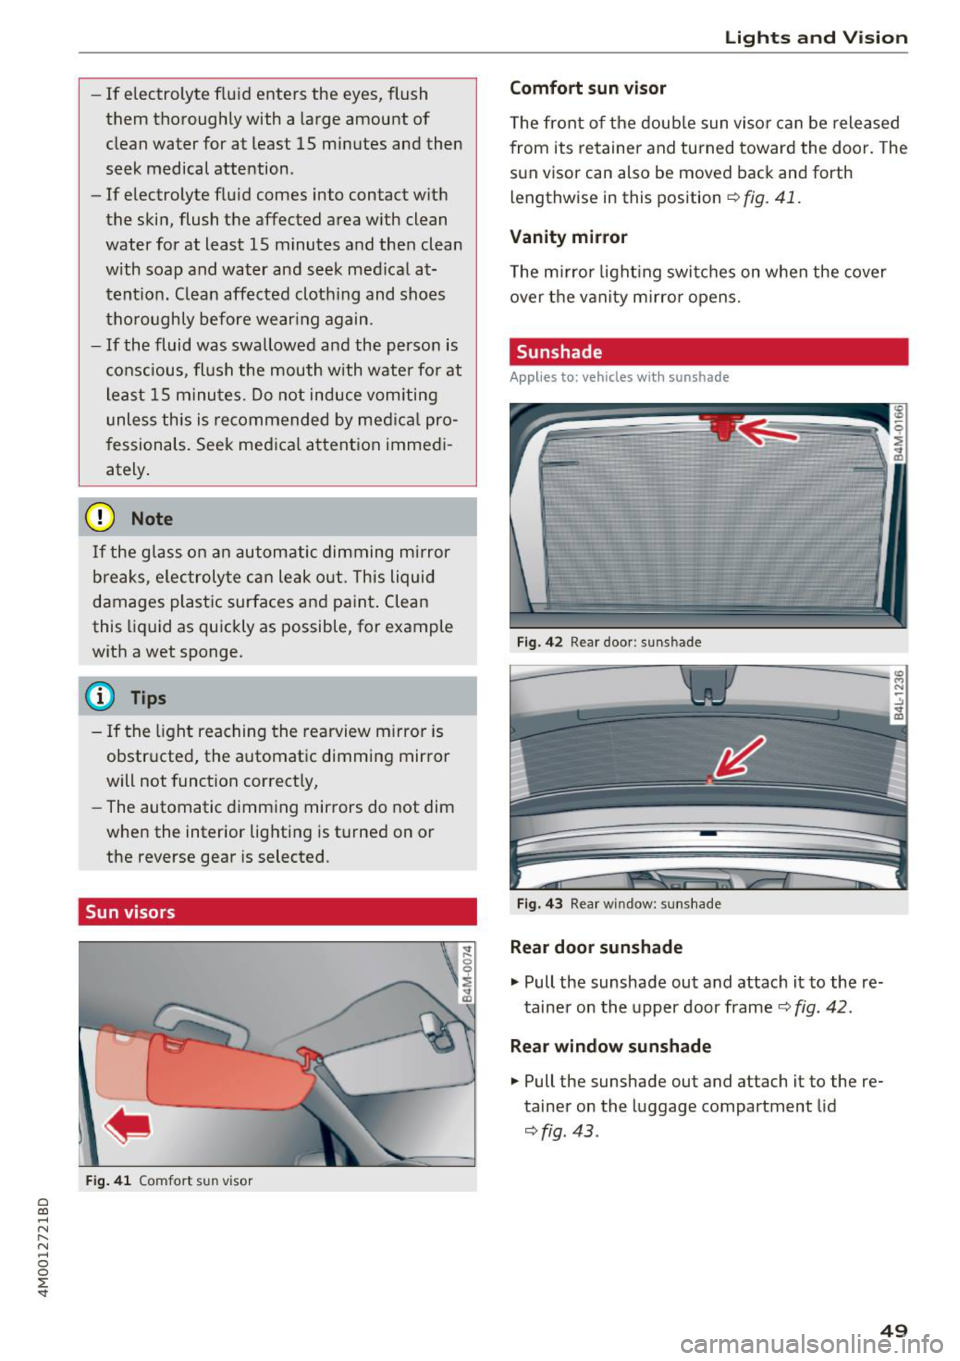
Fig. 41 Comfort s un visor
Lights and Vision
Comfort sun visor
The front of the double sun visor can be released
from its retainer and turned toward the door . The
sun visor can also be moved back and forth
lengthwise in this position
~ fig. 41.
Vanity mirror
The mirror lighting switches on when the cover
over the vanity mirror opens.
Sunshade
Applies to: vehicles with sunshade
Fig. 42 R ear door: sun shade
Fig. 43 Rear w indow : sunshade
Rear door sunshade
.,. Pull the sunshade out and attach it to the re
tainer on the upper door frame
~ fig. 42.
Rear window sunshade
.,. Pull the sunshade out and attach it to the re
tainer on the luggage compartment lid
~fig . 43 .
49
Page 57 of 398
a co ...... N r--. N ...... 0
0
:E '
fig. 51 .
Lumbar support -yo u can adjust the lumbar sup
port up/down and to be stronger/weaker.
Side bol ster s* -you can increase/decrease the
lateral support in the seat using the s ide bo lsters
on the seat surface and the backrest.
Upp er thigh support * -you can increase/de
crease the upper th igh support.
(D Tips
-The massage function switches off auto
matically after approximately 10 minutes.
- The air in the side bolsters* is released as
soon as the driver's door opens. This makes
i s possible to enter and exit the vehicle
more comfortab ly. As soon as you start driv
ing the veh icle, the s ide bo lsters fill.
Center armrest
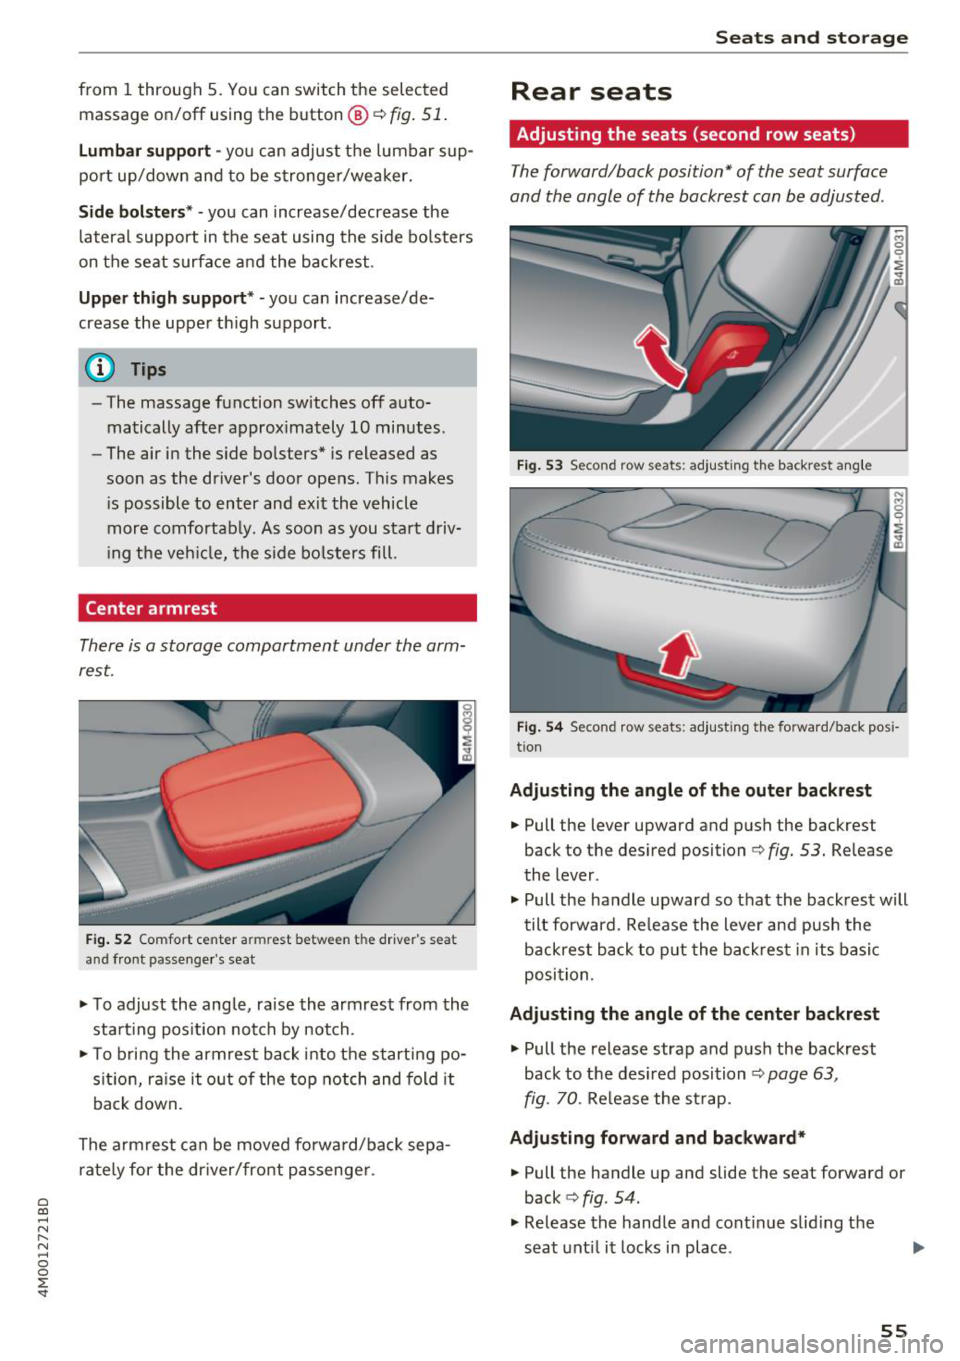
There is a storage compartment under the arm
rest.
F ig . 52 Comfort center armrest between the driver 's sea t
and front passenge r's seat
'" To adjust the angle, raise the armrest from the
sta rt ing pos ition notch by notch.
'"T o bri ng the armrest back into the starting po
s it ion, ra ise it out of the top notch and fold it
back down.
The armrest can be moved forwa rd/back sepa
rately for the dr iver/front passenge r.
S eats and storag e
Rear seats
Adjusting the seats (second row seats)
The forward/back position" of the seat surface
and the angle of the backrest can be adjusted .
Fig . 53 Second row seats: adjusting the backrest ang le
...... _ .. _ __ ---::.._ ..
·-·-----
~ M 0
0
~ ., m
Fig . 54 Second row seats: adjusting the forward/back pos i
tion
Ad ju sting the angle of th e outer back rest
'" Pull the lever upward and push the backrest
back to the desired position ¢
fig. 53. Release
the lever .
'" Pull the handle upward so that the backrest will
tilt forward. Re lease the lever and push the
backrest back to p ut the back rest in its basic
position.
Ad justin g the angle of the cent er bac krest
'" Pull the release strap and push the backrest
back to the des ired position
¢ page 63,
fig. 70.
Release the st rap.
Ad ju sting fo rward and backward*
'" Pull the handle up and slide the seat forward or
back ¢
fig. 54 .
'" Release the handle and cont inue slid ing the
seat unt il it locks in place.
55
Page 59 of 398
Folding the backrest down/up (third row
seats)
Ap plies to vehicles w it h th ird row seats
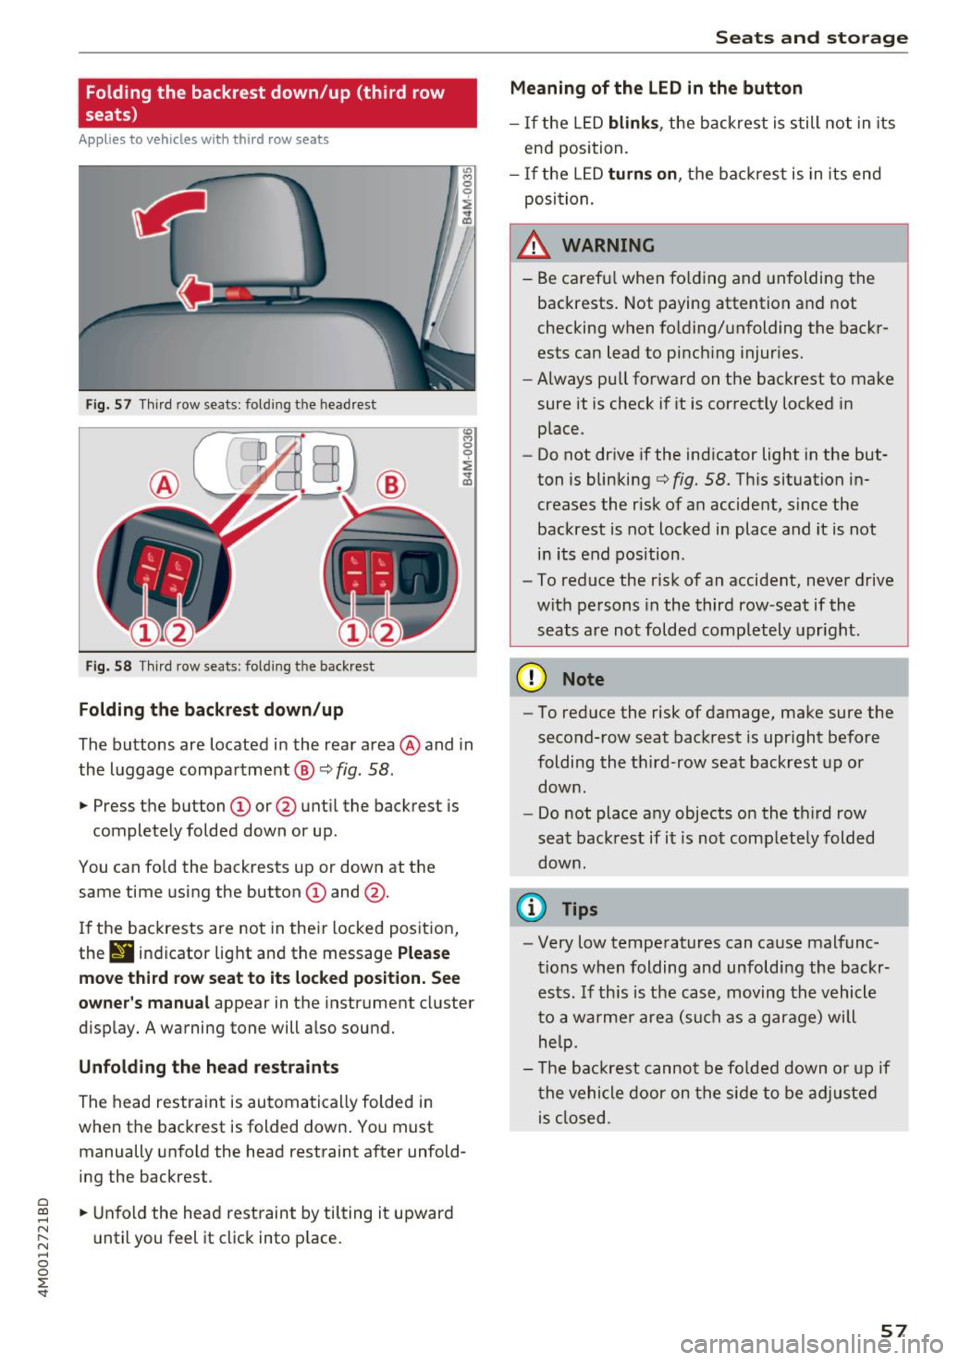
F ig . 57 Thir d row seats : fol ding the headrest
Fig. 58 Th ird row seat s: fol ding t he backrest
Folding the backrest down /up
The buttons are located in the rear area @and in
the luggage compa rtment @
c::> fig. 58.
... Press the button CD or @ unt il the backrest is
completely folded down or up .
You can fo ld the backrests up or down at th e
same time using the button
CD and @.
I f the backrests are not in their locked position,
the
9 indicator light and the message Ple ase
mo ve third ro w s eat to it s locked po siti on . See
owner 's manual
appear in the instrument cluster
d isplay. A warning tone will a lso sound.
Unfold ing the head r estraints
The head restraint is automatically folded in
when the backrest is folded down. You must manually unfold the head restraint after unfold
ing the backrest .
a
~ ... Unfold the head rest raint by tilting it upward
N ~ u ntil you feel it click into p lace.
~ 0
0
:E '
Meaning of the LED in the button
- If the LED blink s, the backrest is still not in its
end position.
- I f the L ED
turn s on , the bac krest is in its end
posi tion.
A WARNING
- Be carefu l when fo lding and unfolding the
backrests. Not paying attention and not
checking when fo lding/unfolding the backr
ests can lead to pinch ing injur ies.
- Always pull forward on the backrest to make
sure it is check if it is correctly locked in place.
- Do not drive if the indicator light in the but
ton is blinking
c::> fig. 58. Th is situation in
creases the risk of an accident, since the
backrest is not locked in place and it is not
in its end position .
- To reduce the r isk of an accident, never drive
with pe rsons in the third row -seat if the
seats are not folded completely upright .
(D Note
-To reduce the risk of damage, make sure the
second-row seat backrest is upr ight before
folding the th ird -row seat backrest up or
down .
- Do not place any objects on the third row
seat backrest if it is not comp letely folded
down .
(D Tips
-Very low temperatures can cause malfunc
tions when folding and unfoldi ng the backr
ests. If th is is the case, moving the vehicle
to a warmer a rea (s uch as a garage) will
help.
- The backrest canno t be fo lded down o r up if
the vehicle door on the side to be adjusted is closed .
57
Page 61 of 398
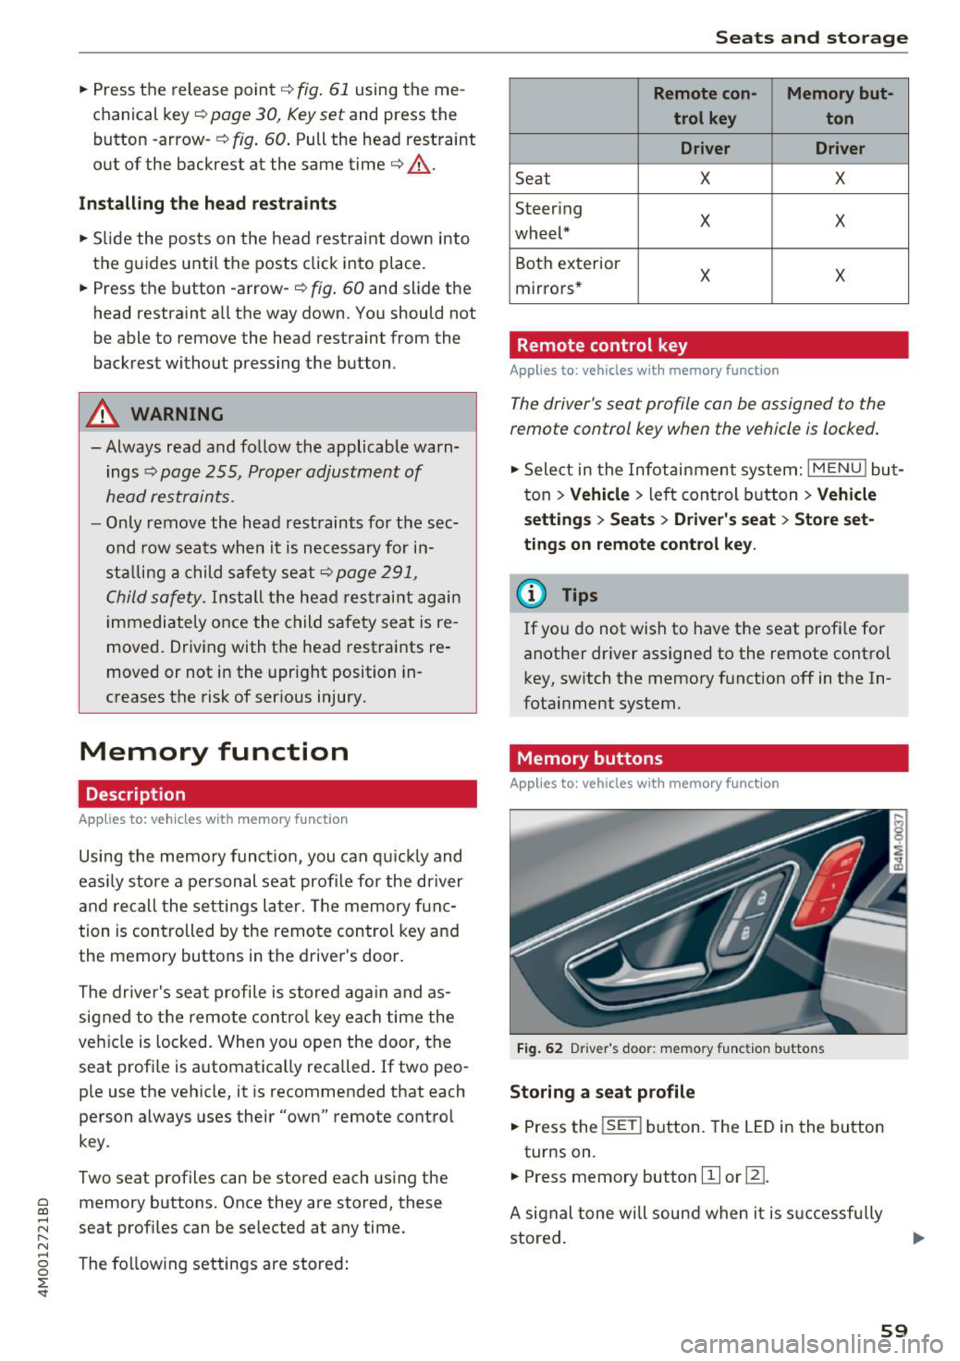
• Press the release point c::> fig . 61 using the me
chanical key
c::> page 30, Key set and press the
button -arrow-
c::> fig . 60 . Pull the head restraint
out of the backrest at the same time
c::> ,&. .
In stall ing th e head rest raints
• Slide the posts on the head restraint dow n into
the guides until the posts click into place.
• Press the b utton -arrow-
c::> fig. 60 and slide the
head restraint all the way down. You should not
be able to remove the head restraint from the
backrest without pressing the button .
A WARNING
-Always read and follow the applicable warn
ings
c::> page 255 , Proper adjustment of
head restraints.
- Only remove the head restraints fo r the sec
ond row seats when it is necessary for in
sta lling a child safety seat
c::> page 291,
Child safety.
Install the head restraint agai n
immediately once the child safety seat is re
moved. Driving with the head restraints re
moved or not in the upr ight position in
creases the risk of serious injury.
Memory function
Description
Applies to: vehicles with memory function
Using the memo ry function, you can qu ick ly and
eas ily store a pe rsonal seat profile for the driver
and recall the settings later. The memory func
tion is controlled by the remote control key and
the memory buttons in the driver's door.
The drive r's seat profile is stored again and as
signed to the remote contro l key each time the
vehicle is locked. When you open the door, the
seat profi le is automat ica lly reca lled . If two peo
p le use the vehicle, it is recommended that each
person always uses their "own" remote control
key.
Two seat profiles can be stored each us ing the
~ memory buttons. Once they are stored, these
...... N seat prof iles can be se lected at any time. r--. N ...... g The fo llowing settings are stored :
:E '
Remote con- Memory but-
trol key ton
Driver Drive r
Seat X X
Steering
X X wheel*
Both exterior
mirrors*
X X
Remote control key
Applies to : vehicles with memory function
The driver's seat profile con be assigned to the
remote control key when the vehicle is locked.
• Select in the Infotainment system: I MENU ! but
ton
> Vehicle > l eft control button > Vehicle
s etting s
> Seats > Driver 's seat > Store set
ting s on r emote cont rol ke y.
(D Tips
If you do not wish to have the seat profi le for
another driver assigned to the remote control key, sw itch the memory f unction off in the In
fotainment system.
Memory buttons
Applies to : vehicles with memory function
F ig . 62 Driver 's door : memo ry f unc tion buttons
Storing a seat p rofil e
• Press the !SET I button. The LED in the button
turns on.
• Press memory button
[II or ill.
A signal tone will sound when it is s uccessfu lly
stored.
59
Page 62 of 398
Seats and stor age
Acc essing a seat profile
• If the driver's door is open and the ignit ion is
switched off, press the memory button.
• If the driver's door is closed or the ignition is
switched on, press and hold the memory but
ton until the seat adjustment is complete.
A WARNING
- For safety reasons, the seat setting can only
be recalled when the vehicle is stationary to
reduce the risk of an accident.
- In an emergency, seat adjustment operation
can be stopped by pressing the
!SETI button
or the buttons @or@
c::> page 54, fig. 50 .
Ashtray
App lies to: ve hicles w ith ashtray
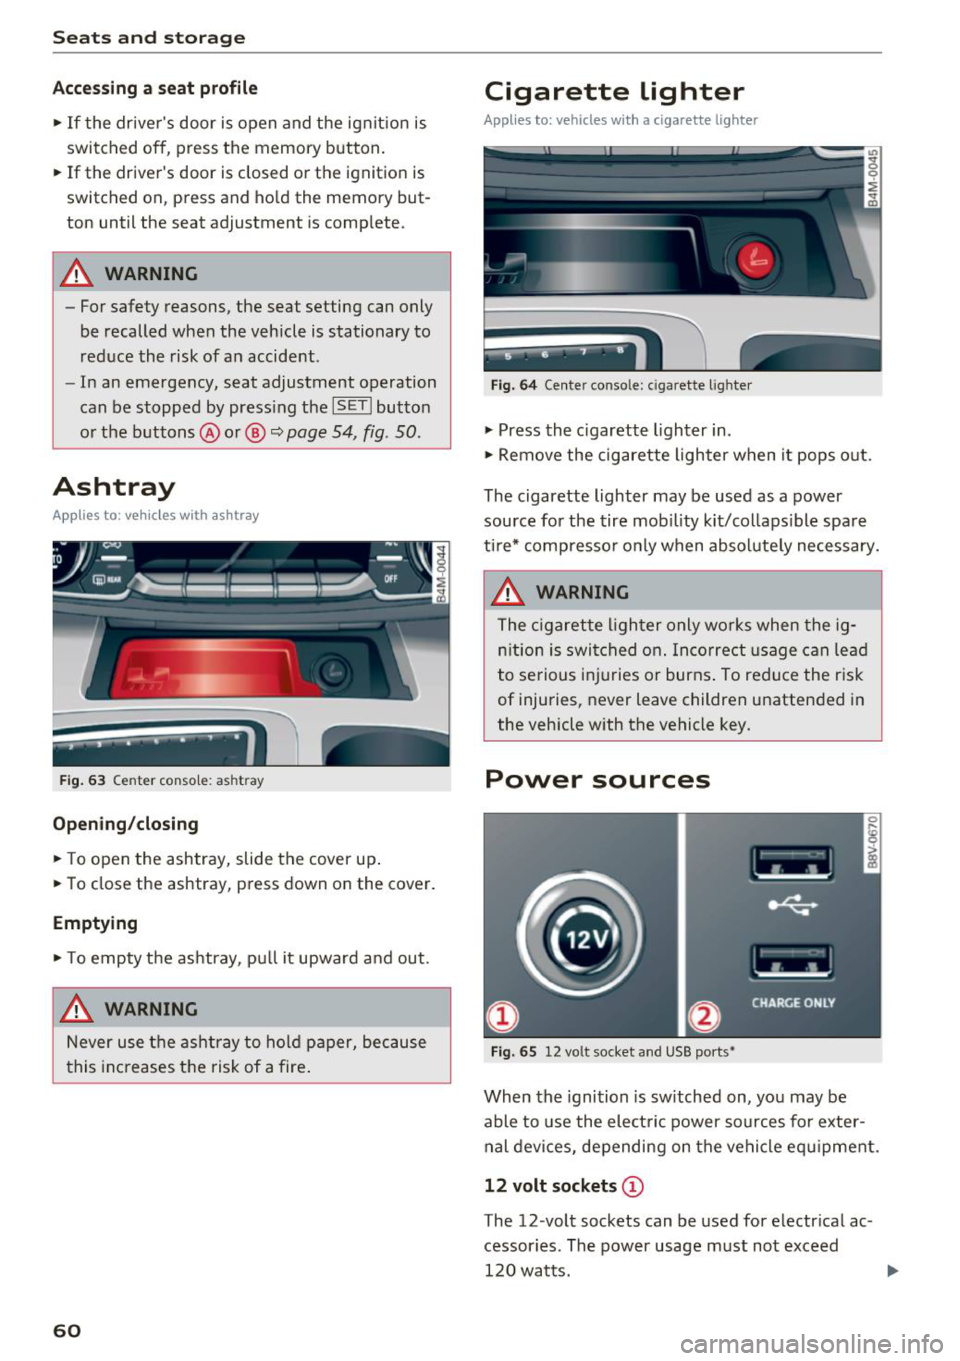
Fig. 63 Center conso le: ashtr ay
Open ing /closing
• To open the ashtray, slide the cover up .
• To close the ashtray, press down on the cover.
Empt ying
• To empty the ashtray, pu ll it upward and out.
A WARNING
Never use the asht ray to hold paper, because
t his increases the risk of a fire .
60
Cigarette lighter
Applies to: vehicles with a cigarette lighter
Fig. 64 Center conso le : cigarette ligh ter
• Press the c igarette lighter in .
• Remove the cigarette lighter when it pops o ut.
The cigarette lighter may be used as a power source for the tire mob ility kit/collaps ible spare
ti re* compresso r o nly when absolute ly necessary.
A WARNING
The c igarette lighter only works when the ig
n ition is switched on. Incorrect usage can lead
to serious i njuries or burns . To reduce the risk
of injuries, never leave children unattended in
the vehicle with the vehicle key.
Power sources
Fig. 65 12 vo lt socket and USB ports•
When the ignition is sw itched on, you may be
able to use the elect ric power sources for exter
nal devices, depending on the vehicle eq uipment.
12 volt sockets (D
The 12-volt sockets can be used for electr ical ac
cessor ies. The power usage m ust not exceed
120 watts.
Page 63 of 398
a co ...... N r--. N ...... 0
0
:E '
sole*, in the rear* and on the luggage compart
ment side tr im panel* .
USB ports @
You can cha rge mobi le devices and/or connect to
the Audi music interface* us ing t he USB ports*.
F or additional information about the USB ports,
see
¢ page 2 31, Multimedia connections.
.8, WARNING
Incorrect usage ca n lead to serio us injuries or
burns . To reduce the risk of injuries, never
leave children unattended in the vehicle with
the vehicle key.
CD Note
- D isconnect the connectors from the power
sources carefully to reduce the risk of dam
aging them .
- To reduce the risk of damage to the vehicle
electrical system, never attempt to charge
the vehicle battery by connecting accesso
ries that prov ide power, such as solar panels
or battery chargers, to the power sources.
- To reduce t he risk of damage to the power
sources, only use plugs and connectors that
fit correctly.
Storage
Cup holde rs
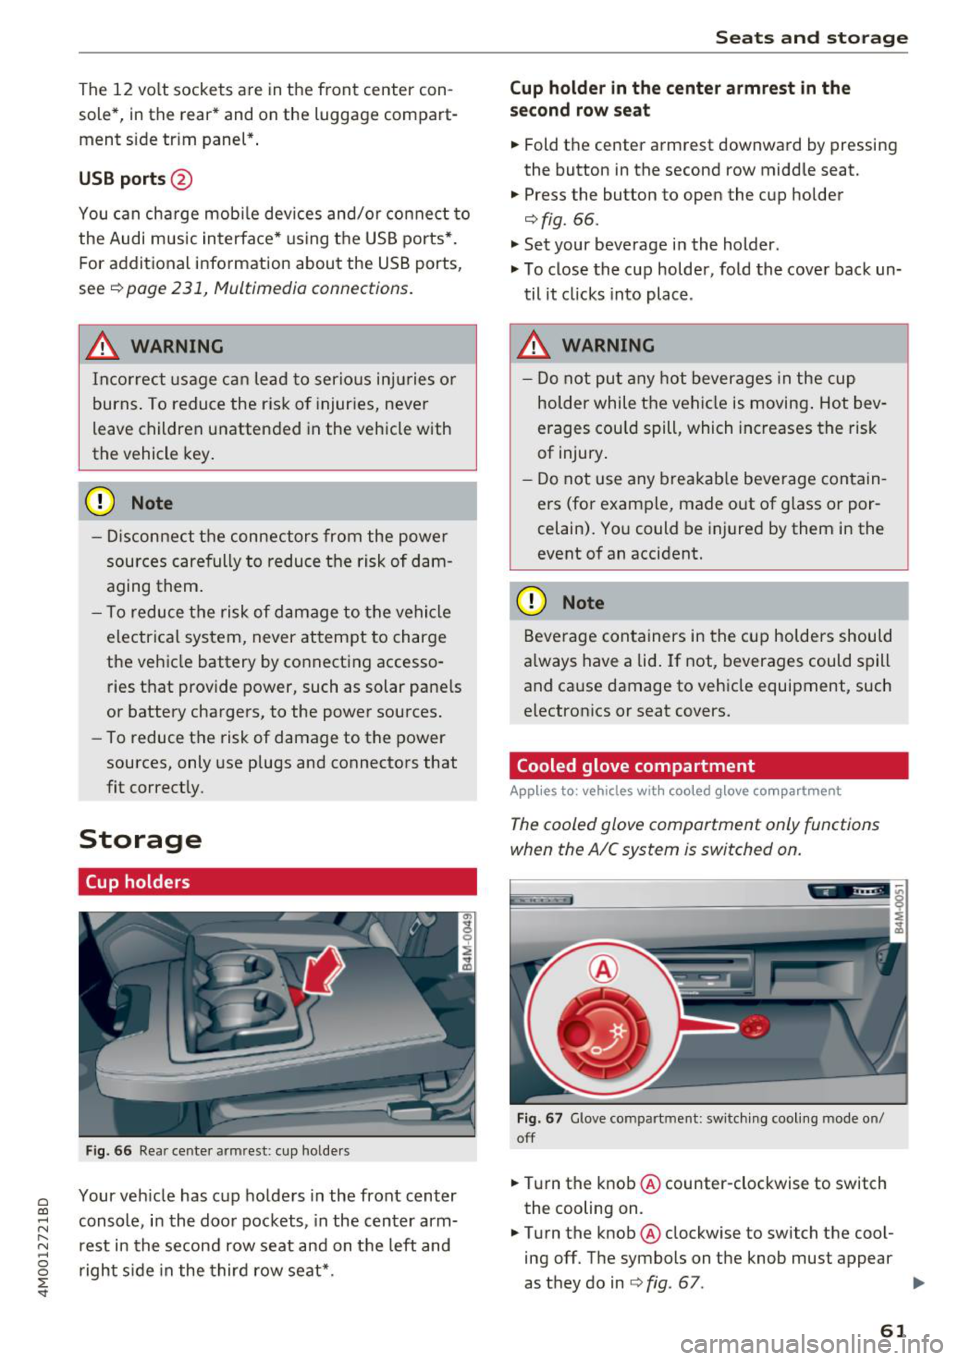
F ig . 66 Rear center armrest: cup holde rs
Your vehicle has c up holders in the front center
console, in the door pockets, in the center arm
rest in the second row seat and on the left and
right s ide in the third row seat*.
S eats and storag e
Cup holde r in the cent er ar mrest in th e
s e co nd row seat
.,. Fold the center armrest downward by pressing
the button in the second row middle seat.
.,. Press the button to open the cup holder
¢ fig. 66.
"'Set your beverage in the holder.
"' To close the cup holder, fold the cover back un
til it clicks into place .
.8, WARNING
-
-Do not put any hot beverages in the cup
holder while the vehicle is moving . Hot bev
erages cou ld spill, which increases the risk
of injury .
- Do not use any breakab le beverage contain
ers (for example, made out of g lass or por
celain). You could be injured by them in the
event of an accident.
CD Note
Beverage containers in the cup holders should
a lways have a lid . If not, beverages could spill
and cause damage to vehicle equipment, such
electron ics or seat covers.
Cooled glove compartment
Applies to : vehicles wi th coo led g love co mpartment
The cooled glove comportment only functions
when the AIC system is switched on.
Fig . 67 G love compartment: sw itch ing cool ing mode on/
off
.,. Turn the knob @counter-clockwise to switch
the cooling on.
.,. Turn the knob@clockwise to switch the cool
ing off. The symbols on the knob must appear
as they do in
¢ fig. 67. ..,.
61
Page 64 of 398
Seats and stor age
If the heat ing is sw itched on, switching the glove
compartment cooling mode off is recommended.
Additional storage compartments
You will find a variety of storage compartments
and holders at various locations in the vehicle.
- Glove compartment: the glove compartment
can be locked using the mechanical key
q page 30, Key set.
-In the door trim pane ls
- Safety vest compartment in the doo r trim pan-
els on the driver 's side and front passenger's
s ide
- Storage compartment* in the center conso le
- Storage compartment unde r the fron t center
armrest
- Ga rment hooks above the rea r doo rs
- Nets on the backrests of the front seats
- Net on the left luggage compartment trim pan-
el
.&, WARNING
-
- Always keep t he g love compartment lid
cl osed while d riving to reduce the risk of in
jury.
- Only use the storage compartments in the
doo r trim pane ls to sto re small objects that
will not st ick o ut of the compartment and
impair the range of the side airbags.
- Make s ure tha t the view to the rear is not
obstructed by hanging garments.
- Hang only lightwe ight cloth ing and be sure
that there a re no heavy or sha rp-edged ob
jects in the pockets.
- Do not use coat h angers to ha ng the cloth
ing because t his could impair the effective
ness of the s ide cu rtain airbags .
Luggage compartment
General information
.&, WARNING
-
Read and follow the important sa fety precau
tions in
q page 257, Storing cargo correctly.
62
Luggage compartment cover
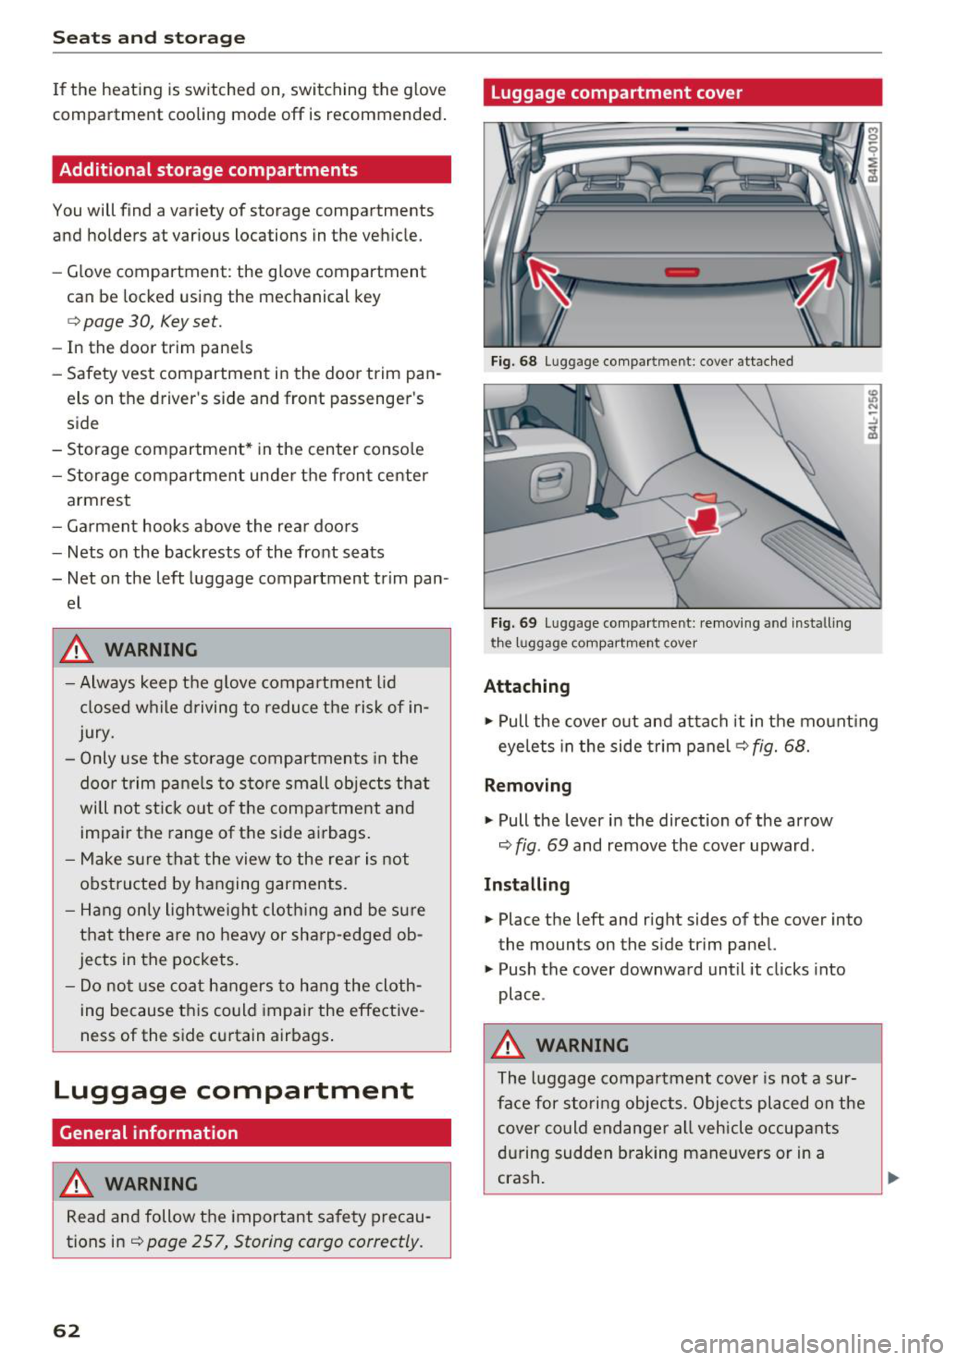
Fig. 68 Luggage compartment: cover attached
Fi g. 69 Luggage compa rtment: removi ng and install ing
the l1,1ggage compart ment cover
Attaching
.,. Pull the cover o ut and attach it in the mount ing
eyelets in the side t rim panel
q fig. 68.
Removing
.,. Pull the lever in the direction of the arrow
q fig. 69 and remove the cover upward.
Installing
.,. Place the left and right sides of the cover into
the mounts on the side trim panel.
.,. Push the cover downward until it clicks into
place .
.&, WARNING
The luggage compartment cove r is no t a sur
face for storing objects. Objects placed on the cover could endange r a ll vehicle occupants
during sudden braking maneuvers or in a
crash .