check engine AUDI Q7 2021 Owner´s Manual
[x] Cancel search | Manufacturer: AUDI, Model Year: 2021, Model line: Q7, Model: AUDI Q7 2021Pages: 332, PDF Size: 117.99 MB
Page 6 of 332
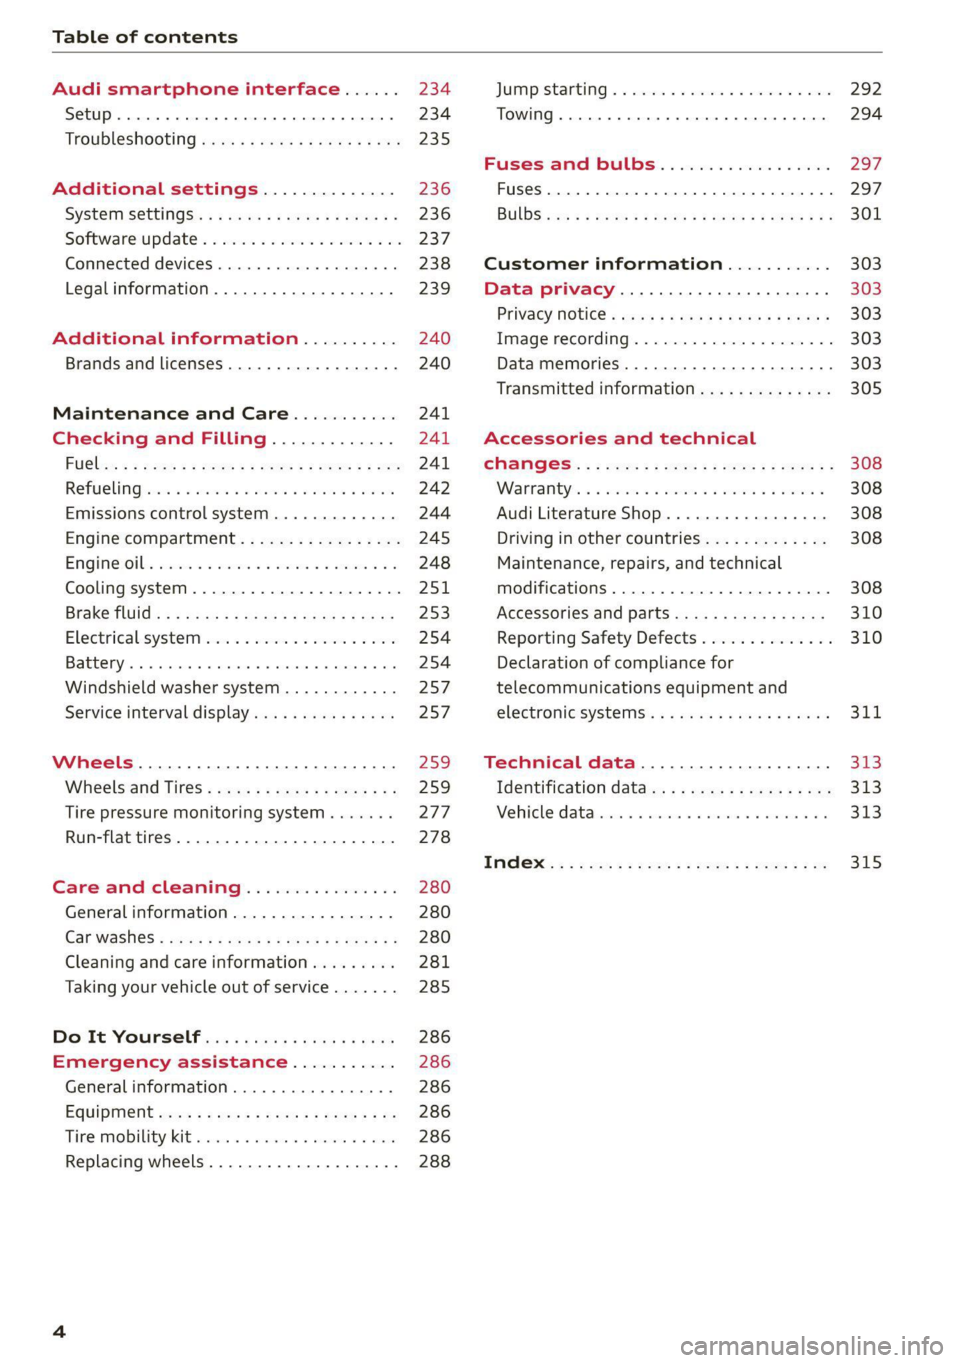
Table of contents
Audi smartphone interface...... 234
Setup... eee eee eee eee 234
Troubleshooting wv s & wees se cows 6 bey 235
Additional settings.............. 236
System Settings: : s eens s i vows ve sews es 236
Software update...............2..-0. 237
Connected devices.............000005 238
Legalinformation................... 239
Additional information.......... 240
Brands and licenses...............--- 240
Maintenance and Care........... 241
Checking and Filling............. 241
Fil@les: « = sume « sowe ye seme oy Ree 6 2 241
RefaelinGuecs « sess oo wea 2 wen 2 wenn 242
Emissions control system............. 244
Engine compartment................. 245
Engine@iOiles esive s+ wacom ov soe 3 v ema ¥ vs 248
Cooling systeM............0 0.002 251
Brake fluids: « s mays ¢ 2 seven 2 waiee ¢ ¢ seven 253)
Electrical:system iiss ee sccwe owe 2 x ere 254
Battery... 0... cece cee eee ee 254
Windshield washer system...........- 257
Service interval display............... 257
Wheels.......... 0... cece eee eee eee 259
Whieelsiand Tires « owes « « amie x x yews 2 od 259
Tire pressure monitoring system....... 277
Run-flat tires... 6.0.0.0... eee eee 278
Care and cleaning................ 280
Generalinformation................. 280
Car washes « swas 5 ¢ sams se pean co eee Gs 280
Cleaning and care information......... 281
Taking your vehicle out of service....... 285
Dovlt YOURSELF wes ¢ nee s pee as nee 286
Emergency assistance........... 286
Generalinformation................. 286
EQUIPMENE wees + « wees = nae go wees 8 2 ee 286
Tire MOBILE KEE secccee x « creases we © anairers 6 @ cece 286
Replacing wheels................2.0. 288
JUIMIPISTANEING se ssces ow erates & a canons vw ae 292
TOWING 0... cece ete eee 294
Fuses and bulbs.................. 297
Fuses... 0... eee ee eee eee 297
BUILDS: sss s = wavs & & ees 5 2 ctetDs sb eG ee 301
Customer information........... 303
Data privacy................000 eee 303
Privacy NOLICE « naw, 2 w aay ¥ Kaew + Meee © 303
Timage reGOrding). « « canew + sect ws caver a os 303
Data memories............00.00e eee 303
Transmitted information.............. 305
Accessories and technical
CINERGSS:. « » sem: : x ews ce ee be ee ee 308
Warranty’ « = eon x 2 manors 6 o ois wv ee 6 308
Audi Literature Shop.............000- 308
Driving in other countries............. 308
Maintenance, repairs, and technical
modifications..................00008 308
Accessories and parts..............-. 310
Reporting Safety Defects.............. 310
Declaration of compliance for
telecommunications equipment and
electroniesystems's « «cows se mean 2 news 314,
Technical data.................... 373
Identification data................... 313
Vehicle datatics ss saves o srewa sv awe 0 ve 313
TAAGK es = see « = wee « = owe Be nee eg oe 315
Page 9 of 332
4M1012721BC
Quick access
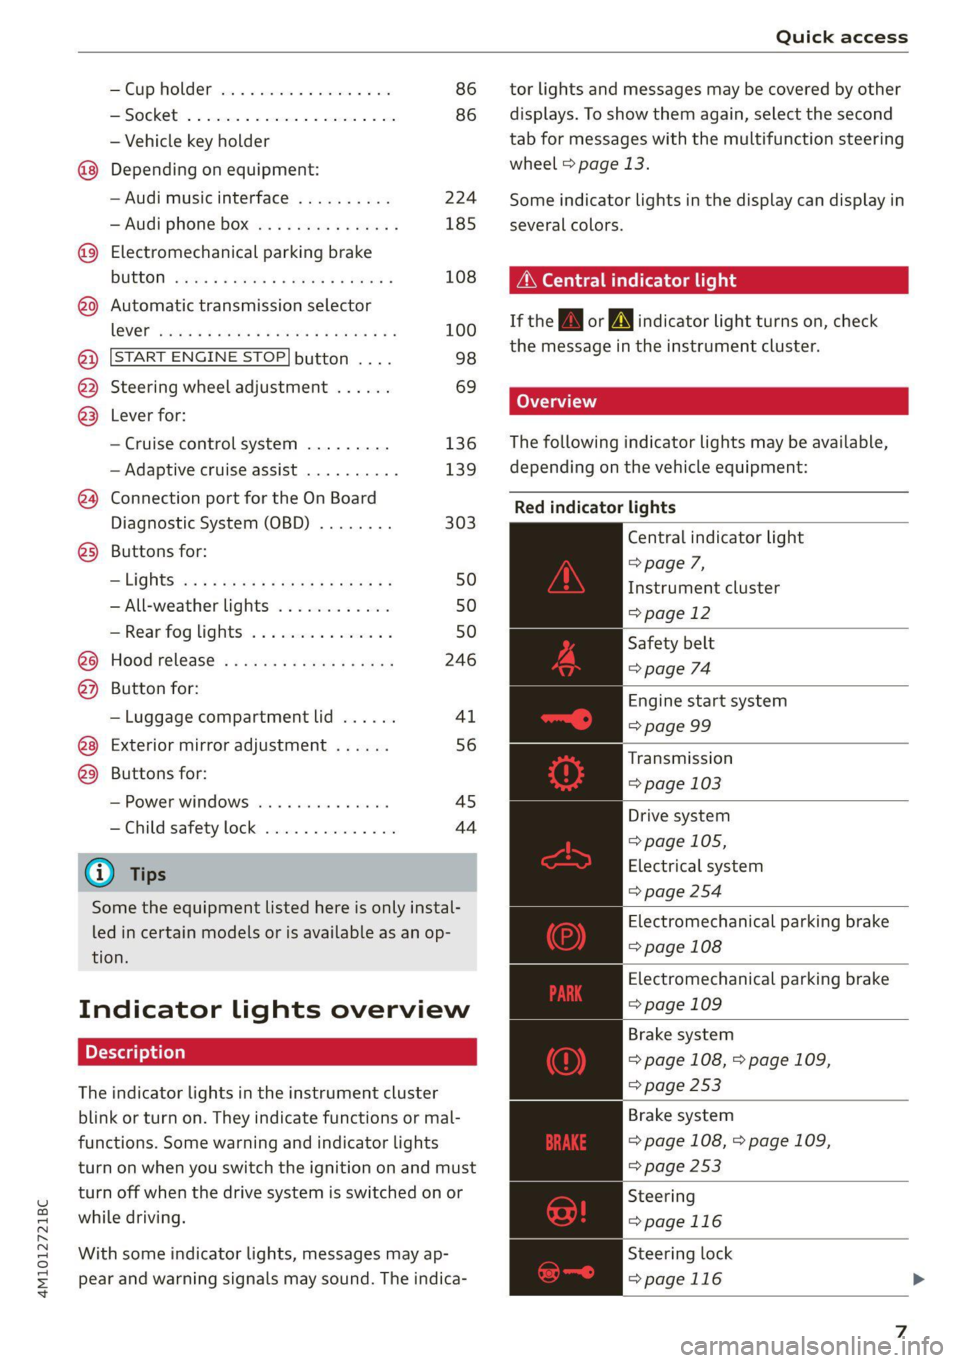
Cup holden asce es cscvene wv omens x v oe 86
ESOGKE « 2 santice wm aconens we < emommiee © osm 86
— Vehicle key holder
Depending on equipment:
— Audi music interface .......... 224
—Audi phone box ............... 185
@® Electromechanical parking brake
BUERON sese ¢ eevee ¢ x mew © 2 pee 4 108
@9 Automatic transmission selector
EVER” scowp: « 2 gave & o eee Go eee Ee 100
@) [START ENGINE STOP] button .... 98
@) Steering wheel adjustment ...... 69
@3) Lever for:
— Cruise control system ......... 136
— Adaptive cruise assist .......... 139
@4 Connection port for the On Board
Diagnostic System (OBD) ........ 303
@5) Buttons for:
LIQHts: as 5 2 sacs 5 2 eqws 3 o ees ss 50
—All-weather lights ............ 50
—Rear fog lights ............... 50
@8 Hood release ..............00-% 246
@) Button for:
— Luggage compartment lid ...... 41
@8 Exterior mirror adjustment ...... 56
@9) Buttons for:
— Power windows ............-. 45
—Child safety lock .............. 44
@ Tips
Some the equipment listed here is only instal-
led in certain models or is available as an op-
tion.
Indicator lights overview
The indicator lights in the instrument cluster
blink or turn on. They indicate functions or mal-
functions. Some warning and indicator lights
turn on when you switch the ignition on and must
turn off when the drive system is switched on or
while driving.
With some indicator lights, messages may ap-
pear and warning signals may sound. The indica-
tor lights and messages may be covered by other
displays. To show them again, select the second
tab for messages with the multifunction steering
wheel © page 13.
Some indicator lights in the display can display in
several colors.
ON ee tle ins
If the A or A indicator light turns on, check
the message in the instrument cluster.
The following indicator lights may be available,
depending on the vehicle equipment:
Red indicator lights
Central indicator light
=> page 7,
Instrument cluster
=> page 12
Safety belt
=> page 74
Engine start system
=> page 99
Transmission
=> page 103
Drive system
=> page 105,
Electrical system
=> page 254
Electromechanical parking brake
=> page 108
Electromechanical parking brake
=> page 109
Brake system
=> page 108, > page 109,
=> page 253
Brake system
=> page 108, > page 109,
=> page 253
Steering
=>page 116
Steering lock
=>page 116
Page 103 of 332
4M1012721BC
Driving
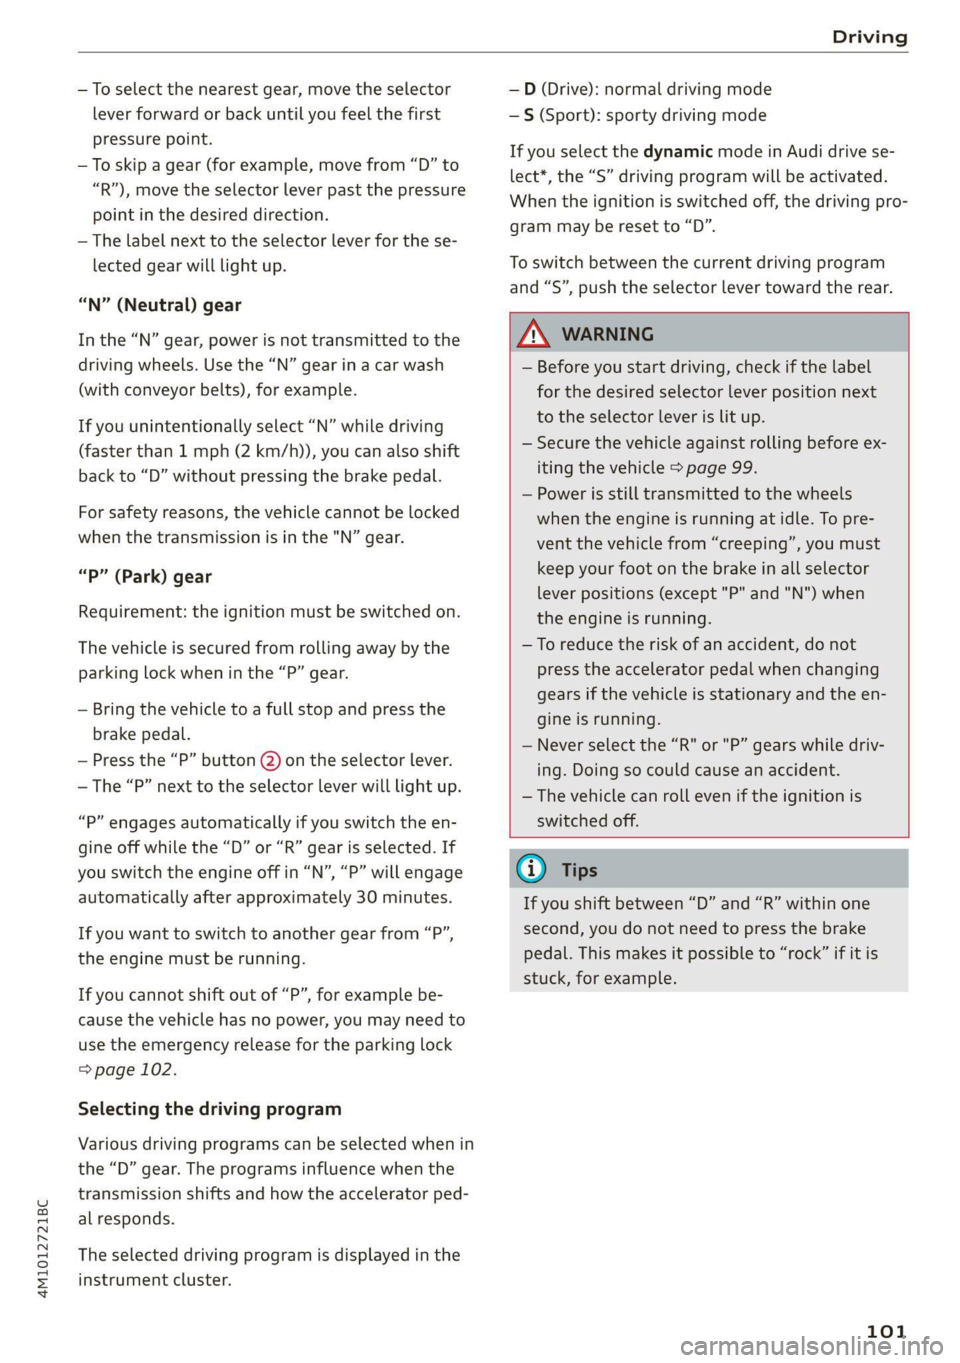
—To select the nearest gear, move the selector
lever forward or back until you feel the first
pressure point.
—To skip a gear (for example, move from “D” to
“R”), move the selector lever past the pressure
point in the desired direction.
— The label next to the selector lever for the se-
lected gear will light up.
“N” (Neutral) gear
In the “N” gear, power is not transmitted to the
driving wheels. Use the “N” gear in a car wash
(with conveyor belts), for example.
If you unintentionally select “N” while driving
(faster than 1 mph (2 km/h)), you can also shift
back to “D” without pressing the brake pedal.
For safety reasons, the vehicle cannot be locked
when the transmission is in the "N” gear.
“p” (Park) gear
Requirement: the ignition must be switched on.
The vehicle is secured from rolling away by the
parking lock when in the “P” gear.
— Bring the vehicle to a full stop and press the
brake pedal.
— Press the “P” button (2) on the selector Lever.
— The “P” next to the selector lever will light up.
“P” engages automatically if you switch the en-
gine off while the “D” or “R” gear is selected. If
you switch the engine off in “N”, “P” will engage
automatically after approximately 30 minutes.
If you want to switch to another gear from “P”,
the engine must be running.
If you cannot shift out of “P”, for example be-
cause the vehicle has no power, you may need to
use the emergency release for the parking lock
=> page 102.
Selecting the driving program
Various driving programs can be selected when in
the “D” gear. The programs influence when the
transmission shifts and how the accelerator ped-
al responds.
The selected driving program is displayed in the
instrument cluster.
—D (Drive): normal driving mode
—S (Sport): sporty driving mode
If you select the dynamic mode in Audi drive se-
lect*, the “S” driving program will be activated.
When the ignition is switched off, the driving pro-
gram may be reset to “D”.
To switch between the current driving program
and “S”, push the selector lever toward the rear.
Z\ WARNING
— Before you start driving, check if the label
for the desired selector lever position next
to the selector lever is lit up.
— Secure the vehicle against rolling before ex-
iting the vehicle > page 99.
— Power is still transmitted to the wheels
when the engine is running at idle. To pre-
vent the vehicle from “creeping”, you must
keep your foot on the brake in all selector
lever positions (except "P" and "N") when
the engine is running.
— To reduce the risk of an accident, do not
press the accelerator pedal when changing
gears if the vehicle is stationary and the en-
gine is running.
— Never select the “R" or "P” gears while driv-
ing. Doing so could cause an accident.
— The vehicle can roll even if the ignition is
switched off.
(i) Tips
If you shift between “D” and “R” within one
second, you do not need to press the brake
pedal. This makes it possible to “rock” if it is
stuck, for example.
101
Page 108 of 332

Driving
@) Note
Always switch the Start/Stop system off when
driving through water > page 105.
@ Tips
— Depending on the driving situation, the en-
gine may already stop when coasting before
the vehicle has come to a complete stop.
— If you select the "D" position after shifting
into reverse, the vehicle must be driven fast-
er than 6 mph (10 km/h) in order for the
Start/Stop system to become active again.
This makes it possible to maneuver without
stopping the engine.
Stopping and starting the engine
Applies to: vehicles with Start/Stop system
> Press and hold the brake pedal until the vehicle
has stopped. The @ indicator light appears in
the instrument cluster once the engine stops
automatically.
> The engine starts again when you remove your
foot from the brake pedal. The indicator light
turns off.
If the parking brake is set, the engine will only
start again when the accelerator pedal is pressed.
@) Tips
— Press the brake pedal during a Stop phase
to keep the vehicle from rolling.
— The ignition will turn off if you press the
START ENGINE STOP] button during a Stop
phase.
— If you leave the vehicle briefly during a Stop
phase and then enter again, the driver's
door must be closed and the safety belt
must be fastened in order for the engine to
be able to restart.
— You can control if the engine will stop or not
by reducing or increasing the amount of
force you use to press the brake pedal. For
example, if you only lightly press on the
brake pedal in stop-and-go traffic or when
turning, the engine will not switch off when
the vehicle is stationary. If you press the
106
brake pedal harder, the engine will switch
off.
Starting and stopping the engine automat-
rely
Applies to: vehicles with Start/Stop system
The system checks if certain conditions are met
before and during the Stop phase, and deter-
mines if the engine stops and how long it re-
mains stopped. For example, if power usage is
high, the engine will not be stopped. Along with
other conditions, the following factors influence
the automatic engine start or stop:
— Environmental conditions (slopes, inclines, ele-
vation, temperature)
— Battery (charge status, temperature, power us-
age)
— Engine temperature
— Assist systems
— Driving behavior
Applies to: vehicles with Start/Stop system
Drive system: please start the vehicle manually
This message appears when specific conditions
are not met during a Stop phase. The Start/Stop
system will not be able to restart the engine. The
engine must be started with the
START ENGINE STOP] button.
Vehicle starting system: malfunction! Please
contact Service
There is a malfunction in the Start/Stop system.
Drive the vehicle to an authorized Audi dealer or
authorized Service Facility as soon as possible to
have the malfunction corrected.
Brakes
General information
You can apply the vehicle's brakes using the brake
pedal.
Page 113 of 332

4M1012721BC
Driving
— Drive slowly and carefully.
—To reduce the risk of underbody damage, pay
attention to the vehicle's ground clearance and
drive across raised areas of the ground with the
wheels on one side of the vehicle, instead of al-
lowing the center of the vehicle to pass over the
raised areas.
— To reduce the risk of becoming stuck, drive
through sandy or swampy areas at a steady
speed and without stopping, if possible.
If necessary, use the following functions:
— Audi drive select* offroad mode > page 113
— Hill hold assist* > page 111
—Inclinometer* > page 110
— Raising the vehicle > page 114
— Limit ESC > page 118
ZA WARNING
Only drive in terrain that is suitable for the ve-
hicle and your driving ability.
@) For the sake of the environment
Avoid actions that are damaging to the envi-
ronment. Show respect for the natural envi-
ronment and remain on marked routes.
G) Tips
Clean your vehicle after driving offroad. Dirt
and stones falling off your vehicle can affect
other road users.
Driving through water
If you must drive through water, follow these in-
structions:
— Check the stability of the ground, the current,
and the water depth. If the ground is unstable,
there is a strong current, or there are waves,
the water must only reach up to the lower edge
of the body at the most.
— Deactivate the Start/Stop system.
— Drive carefully and no faster than at walking
speeds to prevent the front of the vehicle from
creating waves, because they could splash
above the lower edge of the body. Oncoming
vehicles could also create waves.
— Do not stop the vehicle while in the water.
— Drive in reverse.
— Do not turn the engine off.
ZA WARNING
After driving through water, press the brake
pedal carefully to dry the brakes so that the
full braking effect will be restored.
@) Note
Vehicle components such as the engine, drive
system, suspension, or electrical system can
be severely damaged by driving through wa-
ter.
@ Tips
If possible, avoid driving through salt water
because it increases the risk of corrosion. Use
fresh water to clean any vehicle components
that come into contact with salt water.
eee
Applies to: vehicles with hill hold assist
The “@ button is located in the function bar on
the lower display. It lights up when the system is
turned on.
Hill descent assist can assist you when driving
down hills by maintaining a constant vehicle
speed by automatically braking all four wheels.
You can adjust the speed using the accelerator
and brake pedals. The regulation depends on the
hill and the vehicle speed.
> Switching on: press “2.
> Switching off: press “ again.
Active regulation
Regulation begins shortly after you start driving
and is possible at speeds up to approximately 19
mph (30 km/h) and on hills that have an approxi-
mately 6-60% grade. If these conditions are met,
regulation will be activated and the a indicator
light will turn on.
Ready mode
If one of the requirements for active regulation is
not met, the system will be in ready mode. The
111
>
Page 118 of 332

Driving dynamic
speeds, the rear wheels are steered in the oppo-
site direction from the front wheels to reduce the
turning radius. At high speeds, steering the rear
wheels in the same direction as the front wheels
improves the vehicle response and driving stabili-
ty.
Ba Steering: malfunction! Please stop vehicle
The power steering may have failed. Adapt your
driving style immediately to compensate for the
fact that it may be more difficult to turn the
steering wheel, and stop your vehicle in a safe lo-
cation as soon as possible. Do not continue driv-
ing. See an authorized Audi dealer or authorized
Audi Service Facility for assistance.
a Steering: malfunction! Please stop vehicle.
Pay attention to distance at side
The rear axle steering may have failed. More
space on the road may be needed at the side of
the vehicle, and the turning radius may be much
larger. Slow down immediately, and stop your ve-
hicle as soon as possible in a safe location with
enough space at the sides of the vehicle. Do not
continue driving. See an authorized Audi dealer
or authorized Audi Service Facility for assistance.
BS Steering: malfunction! Please stop vehicle
There is a malfunction in the electronic steering
lock. You cannot turn the ignition on. Secure the
vehicle against rolling before exiting the vehicle
= page 99. Do not tow your vehicle because it
cannot be steered. See an authorized Audi dealer
or authorized Audi Service Facility for assistance.
& Steering: malfunction! You can continue
driving
There is a malfunction in the steering system.
Steering may be more difficult or more sensitive.
Adapt your driving style. Have the steering sys-
tem checked immediately by an authorized Audi
dealer or authorized Audi Service Facility. Please
note that the red indicator light may turn on af-
ter restarting the engine. Do not continue driving
if it does.
116
a Steering: malfunction! Adapt driving style.
Larger turning radius
The rear axle steering may have failed. The vehi-
cle will have a larger turning radius, and the sta-
bility when driving around curves will be compa-
rable to a vehicle without rear axle steering. Drive
carefully to an authorized Audi dealer or author-
ized Audi Service Facility to have the malfunction
corrected.
& Steering lock: malfunction! Please contact
Service
There is a malfunction in the electronic steering
lock. Drive immediately to an authorized Audi
dealer or authorized Audi Service Facility to have
the malfunction repaired.
ZA\ WARNING
Do not tow your vehicle if there is a malfunc-
tion in the electronic steering lock because
this increases the risk of an accident.
@ Tips
— If there is a malfunction, the steering wheel
may be crooked when driving straight.
—Ifthe a or el indicator light only stays on
for a short time, you may continue driving.
ALL wheel drive (quattro)
Applies to: vehicles with all wheel drive
The all-wheel drive system distributes the driving
power variably to the front and rear axle to im-
prove the driving characteristics. It works togeth-
er with selective wheel torque control, which can
activate when driving through curves
=> page 117.
The all-wheel drive system is designed for high
engine power. Your vehicle is exceptionally pow-
erful and has excellent driving characteristics
both under normal driving conditions and on
snow and ice. Always read and follow safety pre-
cautions > A\.
Page 122 of 332
Trailer towing
Trailer towing
Driving with a trailer
er else)
Your vehicle is primarily intended for transport-
ing people and luggage. However, if you drive
with a trailer, follow the technical requirements,
the operation and driving tips, and the legal reg-
ulations.
Driving with a trailer affects the vehicle's energy
usage, performance, and wear. It also requires
higher concentration from the driver.
ZA\ WARNING
Do not transport any people in a trailer due to
the risk of fatal injury.
Technical requirements
Trailer hitch
Only use a trailer hitch with a removable ball
hitch mount and ball hitch. The trailer hitch must
be permitted for the vehicle, the trailer and the
permitted total weight of the trailer being
pulled. Above all, it must be securely and safely
attached to the vehicle trailer.
Never mount a trailer hitch on the bumper. The
trailer hitch must be mounted in a way that does
not impair the function of the bumper. Do not
make any changes to the exhaust system and the
brake system.
Check regularly if the trailer hitch is securely
mounted. Always follow the instructions given by
the trailer hitch manufacturer.
Trailer brakes
If the trailer has its own brake system, then fol-
low the manufacturer specifications. However,
the brake system on the trailer must never be
connected to the vehicle brake system.
Engine cooling system
Driving with a trailer means a higher load on the
engine and the cooling system. The cooling sys-
tem must be designed for additional load and
contain enough coolant > @.
120
ZA\ WARNING
— Never mount a "weight-distributing" or
"load-balancing" trailer coupler as the trailer
hitch. The vehicle was not designed for
these types of trailer hitches. The trailer
hitch can malfunction and the trailer can
break off from the vehicle.
— If the trailer is equipped with electronic
brakes, these brakes cannot be activated by
a factory-installed control system, which in-
creases the risk of an accident.
—To reduce the risk of injury, always remove
the ball hitch mount if no trailer is mount-
ed
@) Note
Longer inclines cannot be driven without a
suitable cooling system, especially if the out-
side temperatures are high. Otherwise, this
increases the risk of engine damage.
ey emia aCe
Towing capacity
The permitted towing capacity must not be ex-
ceeded under any circumstances > page 314.
You can drive up larger inclines if you are not us-
ing the maximum towing capacity.
The specified towing weights only apply at eleva-
tions up to 3,200 feet (1,000 m) above sea level.
As the elevation increases, the engine power de-
creases due to the decreasing air pressure. This
reduces the hill climbing ability and towing ca-
pacity. For every additional 3,200 feet (1,000 m),
the maximum permitted towing weight must be
reduced by approximately 10%. The permitted
towing weight is the combined weight of the
(loaded) vehicle and the (loaded) trailer.
Tongue weight
The maximum permitted tongue weight of the
trailer drawbar on the trailer hitch ball head must
not be exceeded.
For driving safety, Audi recommends always us-
ing
the maximum permitted tongue weight, but
do not exceed this weight. Distributing the cargo >
Page 124 of 332
Trailer towing
If you must drive on roads that are in poor condi-
tion, you can raise the vehicle again after hitching
the trailer or after adjusting the tongue weight
=>page 114.
You can also increase ground clearance by select-
ing the Audi drive select* offroad or allroad
modes > page 113.
Vehicle levels below the values set in the comfort
level will no longer be available, even if you are
lowering the vehicle manually.
ZA\ WARNING
Applies to: vehicles with air suspension
— Never turn off trailer mode while driving
when a trailer is hitched, because then the
restrictions for controlling the vehicle level
will be turned off.
— Driving with a trailer on unpaved roads when
the vehicle is raised may change the vehicle
handling. Adapt your speed.
— Note that the vehicle will lower automatical-
ly at certain speeds if you have lifted the ve-
hicle manually.
@) Note
— Applies to: vehicles with air suspension: Se-
lect the Audi drive select* comfort mode.
Otherwise, the tongue load specified for
your vehicle will no longer be applicable.
— Attachments retrofitted on the vehicle may
cause damage, especially on the trailer
hitch ball head. In cases of damage, have
the function checked by an authorized Audi
dealer or authorized Audi Service Facility.
@ Tips
— Block the wheels with chocks when parking
on inclines if the trailer is loaded.
— Audi recommends having the vehicle in-
spected between the inspection intervals if
you tow a trailer frequently.
— Avoid driving with a trailer during the vehi-
cle break-in period.
Driving with a trailer
Driving with a trailer requires extra caution.
122
Speed
Adhere to the legal speed limits. Follow the legal
regulations that are applicable in the country
where you are operating the vehicle.
As the speed increases, the driving stability of
the trailer decreases. Therefore you should not
exceed the maximum legal speed limit when
there are unfavorable road, weather, and/or wind
conditions. This especially applies when driving
downhill.
Hill
When you start driving uphill or downhill, trailers
may tilt or sway sooner than when driving ona
level surface. If small swaying movements have
already occurred, you can stabilize the trailer by
firmly braking immediately. Never attempt to
“straighten out” the trailer by accelerating.
Downshift before driving on hills to utilize the en-
gine braking effect > A\.
Brakes
When using a trailer with overrun brakes, first
brake gently then quickly. This reduces the risk of
jerking while braking if the trailer wheels lock up.
Engine coolant temperature
Pay attention specifically to the coolant tempera-
ture display when there are high outside temper-
atures, and when driving on long inclines
=> page 14. Shift to a higher gear in a timely man-
ner.
ZA\ WARNING
Constant braking causes the brakes to over-
heat and can substantially reduce braking per-
formance, increase braking distance, or cause
complete failure of the brake system.
Page 243 of 332

4M1012721BC
Checking and Filling
Checking and Filling
Fuel
Types of gasoline
The correct gasoline grade is stated on the inside
of the fuel filler door.
The vehicle is equipped with a catalytic converter
and must only be driven with unleaded gasoline.
Audi recommends using TOP TIER Detergent Gas-
oline. For additional information on TOP TIER De-
tergent Gasoline, visit www.toptiergas.com.
The individual gasoline grades are differentiated
by octane ratings. This value is given with (R
+M)/2 equating to AKI or in RON.
The headings below match the sticker in the fuel
filler door (examples):
UNLEADED FUEL ONLY MIN. (R+M)/2 87
Regular / MIN. RON 91 Regular
Use regular gasoline with minimum 87 AKI /
91 RON > ©.
Audi recommends using premium gasoline with
minimum 91 AKI / 95 RON to achieve the rated
horsepower and torque.
UNLEADED FUEL ONLY PREMIUM MIN. (R
+M)/2 91 / SUPER MIN. RON 95
Using premium gasoline with minimum 91 AKI /
95 RON is recommended.
If premium gasoline is not available, you can also
use regular gasoline 87 AKI / 91 RON. However
this does reduce the engine power slightly.
UNLEADED FUEL ONLY PREMIUM MIN. (R
+M)/2 93 / SUPER PLUS MIN. RON 98
Using premium plus gasoline with at least 93
AKI / 98 RON is recommended.
If no premium plus gasoline is available, you can
also use premium gasoline with 91 AKI /95 RON.
However this does reduce the engine power
slightly.
CG) Note
— Filling the tank just one time with leaded
fuel or other metallic additives will cause
permanent deterioration to the catalytic
converter function.
— When gasoline with an octane rating that is
too low is used, high speeds or heavy engine
load can lead to engine damage.
@ Tips
The vehicle may be filled with fuel that has a
higher octane rating than what is required by
the engine.
Gasoline mixture
Gasoline with alcohol or MTBE (Methyl-Tert-
Butyl-Ether)
You can use unleaded gasoline mixed with alco-
hol or MTBE (generally labeled as oxygenated
compounds) as long as the fuel meets the follow-
ing conditions:
Gasoline with methanol content (methyl alco-
hol or methanol)
— Anti-Knock Index is at least 87 AKI
—No more than 3% methanol
— More than 2% solvent
Gasoline with ethanol content (ethyl alcohol or
ethanol)
— Anti-Knock Index is at least 87 AKI
—No more than 15% ethanol
Gasoline with MTBE content
— Anti-Knock Index is at least 87 AKI
—No more than 15% MTBE
Gasoline adapted to the season
Many gasoline fuels are adapted to the seasons.
When the season changes, refueling at high-traf-
fic gas stations is recommended. It is more likely
that the gasoline will be suitable for the season
there.
@) Note
— Gasoline with methanol content that does
not meet the specified conditions may cause >
241
Page 244 of 332
Checking and Filling
corrosion damage and damage to plastic or
rubber components in the fuel system.
— Do not use gasoline that does not meet the
specifications.
— If you are unable to find out if a specific gas-
oline mixture meets the specifications, ask
the gas station operator or their fuel suppli-
er.
— Do not use any gasoline mixture whose
composition cannot be identified.
— Audi does not assume any responsibility for
damage to the fuel system or for perform-
ance problems caused by using gasoline
mixtures different from those specified.
This type of damage also does not fall under
the New Vehicle Limited Warranty or under
the emissions control system warranty.
— If you notice a higher fuel consumption or
poor handling or performance problems due
to such gasoline mixtures, Audi recom-
mends fueling with unblended gasoline.
Gasoline additives
An important issue for many automobile manu-
facturers is combustion residue in the engine
that results from the use of certain fuels.
Although types of gasoline differ depending on
the manufacturer, there are similarities. Certain
substances in the gasoline may cause deposits in
the engine. Additives in the gasoline that should
keep the engine and fuel system clean do not all
function equally.
Audi recommends using TOP TIER Detergent Gas-
oline. For additional information on TOP TIER De-
tergent Gasoline, visit www.toptiergas.com.
If you use incorrect fuels over a long period of
time, the maximum engine performance may be
impaired by combustion residue.
@) Note
— Damage or malfunctions caused by the use
of incorrect types of gasoline are not cov-
ered by the New Vehicle Limited Warranty.
— Only gasoline additives that have been ap-
proved by Audi may be used.
242
Refueling
Messages
A Tank system: malfunction! Please contact
Service
There is a malfunction in the fuel tank system.
Drive to an authorized Audi dealer or authorized
Audi Service Facility immediately to have the
malfunction corrected.
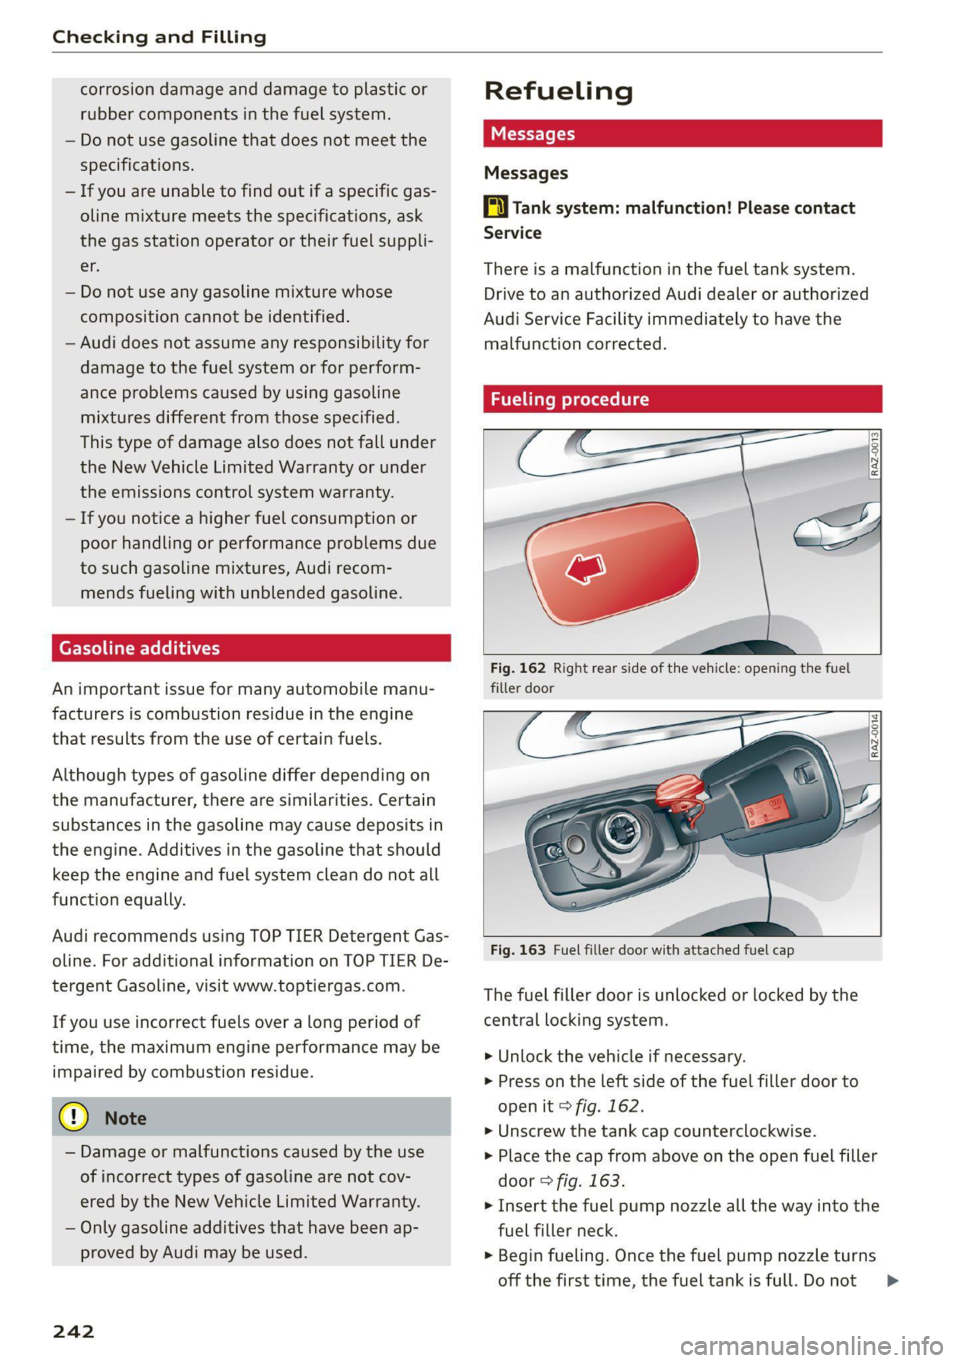
Fueling procedure
Fig. 162 Right rear side of the vehicle: opening the fuel
filler door
Fig. 163 Fuel filler door with attached fuel cap
The fuel filler door is unlocked or locked by the
central locking system.
> Unlock the vehicle if necessary.
> Press on the left side of the fuel filler door to
open it > fig. 162.
> Unscrew the tank cap counterclockwise.
> Place the cap from above on the open fuel filler
door > fig. 163.
> Insert the fuel pump nozzle all the way into the
fuel filler neck.
> Begin fueling. Once the fuel pump nozzle turns
off the first time, the fuel tank is full. Donot =>