reset AUDI Q7 2021 Owner´s Manual
[x] Cancel search | Manufacturer: AUDI, Model Year: 2021, Model line: Q7, Model: AUDI Q7 2021Pages: 332, PDF Size: 117.99 MB
Page 16 of 332
Instrument cluster
Reducing the display
Depending on the vehicle equipment, you can
hide the central area in the instrument cluster.
> Select on the instrument cluster: vehicle func-
tions tab > E] button > Reduced display.
Coolant temperature
display
The coolant temperature display @ > page 12
only functions when the ignition is switched on.
To reduce the risk of engine damage, please ob-
serve the following notes about the temperature
ranges.
Cold range
If only the LEDs at the bottom of the gauge turn
on, the engine has not reached operating tem-
perature yet. Avoid high engine speeds, full accel-
eration, and heavy engine loads.
Normal range
The engine has reached its operating tempera-
ture once the LEDs up to the center of the gauge
turn on. If the | indicator light in the instru-
ment cluster display turns on, the coolant tem-
perature is too high > page 251.
@ Note
— Auxiliary headlights and other accessories in
front of the air intake impair the cooling ef-
fect of the coolant. This increases the risk of
the engine overheating during high outside
temperatures and heavy engine load.
— The front spoiler also helps to distribute
cooling air correctly while driving. If the
spoiler is damaged, the cooling effect will
be impaired and the risk of the engine over-
heating will increase. See an authorized
Audi dealer or authorized Audi Service Fa-
cility for assistance.
Tachometer
The tachometer @) 9 page 12 displays the engine
speed in revolutions per minute (RPM). The be-
ginning of the red zone in the tachometer indi-
cates the maximum permissible engine speed for
14
all gears once the engine has been broken in. Be-
fore reaching the red zone, you should shift into
the next higher gear, select the "D" or "S" selec-
tor lever position, or remove your foot from the
accelerator pedal.
Engine speed limitation
If the Bw indicator light turns on, the engine will
be automatically limited to the RPM displayed in
the instrument cluster. This will protect the en-
gine components, for example during a cold start
or from overheating.
The engine speed limitation is deactivated if you
release the accelerator pedal while the engine is
at normal operating temperature.
If the engine speed limitation was activated by
an engine control malfunction, the By indicator
light also turns on. Make sure the engine speed
does not go above the speed displayed, for exam-
ple when downshifting. Drive to an authorized
Audi dealer or authorized Audi Service Facility im-
mediately to have the malfunction corrected.
C) Note
The needle in the tachometer may only be in
the red area of the gauge for a short period of
time before there is a risk of damaging the
engine. The location where the red zone be-
gins varies depending on the engine.
Odometer
The trip odometer and odometer are displayed in
the status bar ©) > page 12.
The trip odometer shows the distance driven
since it was last reset. It can be used to measure
short distances. The odometer shows the total
distance that the vehicle has been driven.
Resetting the trip odometer
> Select on the instrument cluster: vehicle func-
tions tab > =] button > Reset mi.
G) Tips
Distances are displayed in mi (miles) or km
(kilometers).
Page 17 of 332
4M1012721BC
Instrument cluster
Outside temperature
display
The outside temperature is displayed in the sta-
tus bar @) 9 page 12.
If your vehicle is stationary or if you are driving at
very low speeds, the temperature displayed in
the instrument cluster may be slightly higher
than the actual temperature outside due to heat
radiating from the engine.
At temperatures below 41 °F (+5 °C), a snowflake
symbol appears in front of the temperature dis-
play > A.
ZA WARNING
Do not assume the roads are free of ice based
on the outside temperature display. Be aware
that there may be ice on roads even when the
outside temperature is around 41 °F (+5 °C)
and that ice can increase the risk of accidents.
Engine oil temperature
indicator
Depending on the vehicle equipment, the engine
oil temperature %7 may be indicated by a bar in
the instrument cluster.
> Open the vehicle functions tab and switch to
the enhanced view > page 13.
When engine oil temperatures are low, the dis-
play --- °F (--- °C) appears in the instrument clus-
ter. The engine has reached its operating temper-
ature when the engine oil temperature is be-
tween 176 °F (80 °C) and 248 °F (120 °C) under
normal driving conditions. The engine oil temper-
ature may be higher if there is heavy engine load
and high temperatures outside. This is not a
cause for concern as long as the B or = indica-
tor lights do not turn on.
Boost indicator
Applies to: vehicles with boost indicator
Depending on vehicle equipment, the current en-
gine load (meaning the current boost pressure)
may be indicated by a bar in the instrument clus-
ter.
> Open the vehicle functions tab and switch to
the enhanced view > page 13.
Vehicle functions
Coad (iy
The trip computer is displayed in the first tab of
the driver information system. Additional vehicle
functions can be accessed depending on the vehi-
cle equipment.
> Press the [=] button on the multifunction steer-
ing wheel.
— Trip computer > page 15
— Reduced display > page 14
— Reset trip odometer > page 14
—Lap times > page 131
— Lap statistics > page 132
On-board computer
Resetting values to zero
Requirement: the Consumption, Short-term
memory, or Long-term memory display must be
selected.
> To reset the values in one of the memories to
zero, press and hold the left thumbwheel on
the multifunction steering wheel for one sec-
ond, or
> Select on the instrument cluster: vehicle func-
tions tab > E=] button > Reset mi.
Depending on the vehicle equipment, you can call
up the following displays in the on-board com-
puter one at a time by turning the left thumb-
wheel on the multifunction steering wheel:
— Time and date > page 236
— Average consumption > page 16
— Short-term memory overview
— Long-term memory overview
— Energy consumers > page 16
— Driver assistance
— Traffic sign recognition and traffic light infor-
mation
15
Page 35 of 332
4M1012721BC
Personalization
@) Tips
— Depending on the country, you may be able
to use the myAudi app or my.audi.com.
— You do not need to log into the vehicle with
a myAudi user in order to use Audi connect
vehicle control services, which depend on
the vehicle equipment.
— If you sell your vehicle, reset all settings to
the factory default settings.
— Store the vehicle code in a secure place. It
may be necessary to re-enter the vehicle
code.
— When entering the vehicle code, please note
that the code is case-sensitive.
— If you do not have the 10-digit vehicle code,
contact an authorized Audi dealer or author-
ized Audi Service Facility.
33
Page 49 of 332
4M1012721BC
Opening and closing
Roof emergency closing
If an object is detected when closing, the roof
will open again automatically. In this case, you
can then close it with the power emergency clos-
ing function.
> Within five seconds after the sunroof opens au-
tomatically, pull the applicable button until the
roof is closed.
Z\ WARNING
To reduce the risk of injury, always pay atten-
tion when closing the roof. Always switch the
ignition off and take the key with you when
leaving the vehicle.
@) Note
Always close the roof when you leave the vehi-
cle and when there is precipitation to reduce
the risk of damage to the interior equipment,
particularly the electronic equipment.
G) Tips
— After switching off the ignition, the roof and
sunshades can still be operated for several
minutes as long as neither of the front
doors have been opened.
— It is not possible to open the roof when
temperatures are too low.
Garage door opener
Applies to: vehicles with garage door opener
With the garage door opener, you can activate
systems such as the garage doors, security sys-
tems or house lights from inside your vehicle.
These functions are operated in the MMI. Multi-
ple receivers can be programmed, which can con-
trol the functions of up to eight!) hand-held
transmitters.
)) The possible number of hand-held transmitters depends
on the equipment.
ZA\ WARNING
— When operating or programming the garage
door opener, make sure that no people or
objects are in the area immediately sur-
rounding the equipment. People can be in-
jured or property can be damaged if struck
when closing.
— Do not allow yourself to be distracted from
traffic by the viewing and operating the dis-
plays.
Gi) Tips
— If you sell your vehicle, reset all settings to
the factory default settings > page 237.
— The system complies with United States FCC
regulations and ISED regulations
> page 311.
G) Tips
Before you program your system to the ga-
rage door opener, first check the compatibili-
ty:
— Ask an authorized Audi dealer or authorized
Audi Service Facility or check at www.
homelink.com. You can also find more infor-
mation about HomeLink there.
— You can display information about Home-
Link (compatibility level/status/country
code/HomeLink generation) in the MMI:
— Select on the home screen: VEHICLE > Set-
tings & Service > Garage door opener > @.
Applies to: vehicles with garage door opener
Requirements: the remote control transmitter
must be programmed > page 48, Program-
ming, the vehicle must be within range of the
system, and the ignition must be switched on.
There are multiple options to open or close the
system (such as the garage door).
47
Page 51 of 332
4M1012721BC
Opening and closing
Only a maximum of three systems can be dis-
played in the notification center > page 22. If
you would like to have all systems displayed,
press Au.
Renaming programmed systems
You can rename the programmed systems indi-
vidually (names may have a maximum of 10 char-
acters).
> If you have programmed your system, follow
the instructions in the MMI. Or
If you would like to change the name at another
time:
» Applies to: MMI: Select on the home screen:
VEHICLE > Settings & Service > Garage door
opener.
> Press the Z button.
> Press the 7 button for the system that you
would like to rename.
> Select: Rename. If necessary, delete the preset
name, such as Garage door opener 1.
> Follow the instructions in the MMI.
Deleting programmed systems
The programmed systems can be deleted individ-
ually or all at once.
> Applies to: MMI: Select on the home screen:
VEHICLE > Settings & Service > Garage door
opener.
> Press the Z button.
> To delete an individual system, press the L]
button for the desired system. If the checkmark
JV is set, select: Delete.
> To delete all systems, select: All > Delete.
@ Tips
— Make sure the batteries in the hand trans-
mitter are charged before starting the pro-
gramming process.
— The programming process may take up to
30 seconds. It may be necessary for the
hand transmitter to be pressed again in the
meantime.
— The garage door opener may need to be
synchronized with the system after pro-
gramming. Follow the manufacturer's in-
structions for doing this.
@) Tips
In some cases, the system may need to be
programmed in a different mode (“D mode”).
— Switch the ignition on.
— Applies to: MMI: Select on the home screen:
VEHICLE > Settings & Service > Garage
door opener.
— Press and hold the desired button @).
— Select Yes, in D mode and follow the in-
structions on the MMI.
49
Page 68 of 332
Sitting correctly and safely
Neetu eae tare em a
You can adjust additional settings and switch
functions on or off in the MMI.
> Applies to MMI: Select on the home screen: VE-
HICLE > Seats > Additional seat settings.
Depending on the vehicle equipment, the follow-
ing options may be available.
Reset seat position
You can adjust the position of the front passeng-
er’s seat to match the driver's seat.
Driver seat entry assistance/Front passenger
seat entry assistance
Entry assistance makes it easier to enter or exit
the vehicle.
Adjusting the front passenger's seat from
Aime aha T
Applies to: vehicles with front passenger seat adjustment
You can adjust the front passenger's side with the
driver's seat buttons.
Applies to: MMI:
> Select on the home screen: VEHICLE > Seats.
> To display the various seats, press ) or ¢.
> To switch on the function, press the 2 button.
The lower edge of the button will turn red.
After you have switched on the function, you can
adjust the front passenger's seat using the driv-
er's seat buttons > page 64, fig. 50.
iG) Tips
The function switches off automatically when
you exit the menu.
66
rela) an) e-) arene
Applies to: vehicles with a front center armrest
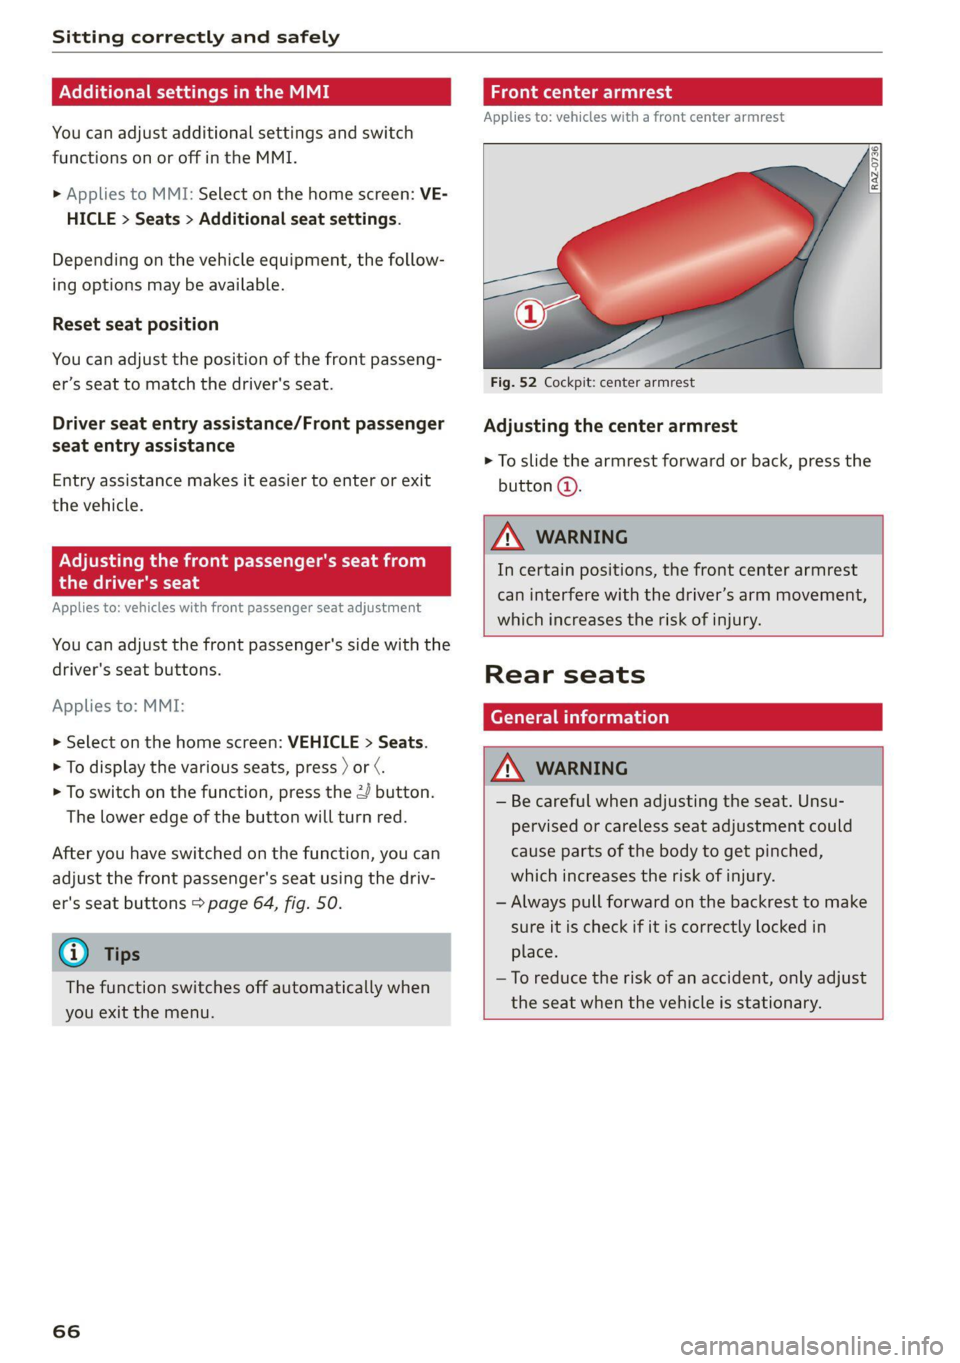
Fig. 52 Cockpit: center armrest
Adjusting the center armrest
> To slide the armrest forward or back, press the
button @).
Z\ WARNING
In certain positions, the front center armrest
can interfere with the driver’s arm movement,
which increases the risk of injury.
Rear seats
General information
AN WARNING
— Be careful when adjusting the seat. Unsu-
pervised or careless seat adjustment could
cause parts of the body to get pinched,
which increases the risk of injury.
— Always pull forward on the backrest to make
sure it is check if it is correctly locked in
place.
—To reduce the risk of an accident, only adjust
the seat when the vehicle is stationary.
Page 103 of 332
4M1012721BC
Driving
—To select the nearest gear, move the selector
lever forward or back until you feel the first
pressure point.
—To skip a gear (for example, move from “D” to
“R”), move the selector lever past the pressure
point in the desired direction.
— The label next to the selector lever for the se-
lected gear will light up.
“N” (Neutral) gear
In the “N” gear, power is not transmitted to the
driving wheels. Use the “N” gear in a car wash
(with conveyor belts), for example.
If you unintentionally select “N” while driving
(faster than 1 mph (2 km/h)), you can also shift
back to “D” without pressing the brake pedal.
For safety reasons, the vehicle cannot be locked
when the transmission is in the "N” gear.
“p” (Park) gear
Requirement: the ignition must be switched on.
The vehicle is secured from rolling away by the
parking lock when in the “P” gear.
— Bring the vehicle to a full stop and press the
brake pedal.
— Press the “P” button (2) on the selector Lever.
— The “P” next to the selector lever will light up.
“P” engages automatically if you switch the en-
gine off while the “D” or “R” gear is selected. If
you switch the engine off in “N”, “P” will engage
automatically after approximately 30 minutes.
If you want to switch to another gear from “P”,
the engine must be running.
If you cannot shift out of “P”, for example be-
cause the vehicle has no power, you may need to
use the emergency release for the parking lock
=> page 102.
Selecting the driving program
Various driving programs can be selected when in
the “D” gear. The programs influence when the
transmission shifts and how the accelerator ped-
al responds.
The selected driving program is displayed in the
instrument cluster.
—D (Drive): normal driving mode
—S (Sport): sporty driving mode
If you select the dynamic mode in Audi drive se-
lect*, the “S” driving program will be activated.
When the ignition is switched off, the driving pro-
gram may be reset to “D”.
To switch between the current driving program
and “S”, push the selector lever toward the rear.
Z\ WARNING
— Before you start driving, check if the label
for the desired selector lever position next
to the selector lever is lit up.
— Secure the vehicle against rolling before ex-
iting the vehicle > page 99.
— Power is still transmitted to the wheels
when the engine is running at idle. To pre-
vent the vehicle from “creeping”, you must
keep your foot on the brake in all selector
lever positions (except "P" and "N") when
the engine is running.
— To reduce the risk of an accident, do not
press the accelerator pedal when changing
gears if the vehicle is stationary and the en-
gine is running.
— Never select the “R" or "P” gears while driv-
ing. Doing so could cause an accident.
— The vehicle can roll even if the ignition is
switched off.
(i) Tips
If you shift between “D” and “R” within one
second, you do not need to press the brake
pedal. This makes it possible to “rock” if it is
stuck, for example.
101
Page 105 of 332
4M1012721BC
Driving
The emergency release is located under the floor
mat on the driver's side. Read and follow the im-
portant instructions about towing > page 294.
Releasing the parking lock using the
emergency release
> Secure the vehicle against rolling > page 99.
> Pry the cover off at one of the openings using
the screwdriver from the vehicle tool kit
=> page 286.
> Insert the socket wrench from the vehicle tool
kit into the opening.
> Turn the socket wrench clockwise (@) until it
stops and press it downward @) until it locks in-
to place.
> Leave the socket wrench inserted.
Resetting the parking lock
> Grasp the socket wrench with both hands and
carefully pull it upward to remove.
> Install the cover.
ZA\ WARNING
— The parking lock must be released using the
emergency release before towing the vehi-
cle.
— Only use the parking lock emergency release
if the vehicle is secured against rolling
= page 99. An unsecured vehicle may roll,
which increases the risk of an accident.
— Only activate the emergency release while
ona level surface or a slight slope.
—To reduce the risk of an accident, you must
not drive when the emergency release is ac-
tivated.
i Transmission: malfunction! Safely stop vehi-
cle
Do not continue driving. Stop the vehicle as soon
as possible in a safe location and secure it so it
does not roll > page 99. See an authorized Audi
dealer or authorized Audi Service Facility for as-
sistance.
& Transmission: too hot. Please stop vehicle
Do not continue driving. Select "P" and contact an
authorized Audi dealer or authorized Audi Service
Facility for assistance.
i Transmission: too hot. Please adapt driving
style
The transmission temperature has increased sig-
nificantly. Drive very cautiously or take a break
from driving until the temperature returns to the
normal range and the indicator light turns off.
fs] Transmission: malfunction! You can contin-
ue driving. See owner's manual
There is a system malfunction in the transmis-
sion. You may continue driving. Drive to an au-
thorized Audi dealer or authorized Audi Service
Facility soon to have the malfunction corrected.
[@] Transmission: malfunction! You can contin-
ue driving with limited function. Please contact
Service
There is a system malfunction in the transmis-
sion. The transmission is switching to emergency
mode. This mode only shifts into certain gears or
may no longer shift at all. The engine may stall.
Drive to an authorized Audi dealer or authorized
Audi Service Facility immediately to have the
malfunction corrected.
fal Transmission: malfunction! You can contin-
ue driving with limited function. No reverse
gear
There is a system malfunction in the transmis-
sion. The transmission is switching to emergency
mode. This mode only shifts into certain gears or
may no longer shift at all. The engine may stall.
You cannot engage the reverse gear. Drive to an
authorized Audi dealer or authorized Audi Service
Facility immediately to have the malfunction cor-
rected.
[&] Transmission: malfunction! You can contin-
ue driving in D until engine is off
There is a system malfunction in the transmis-
sion. The transmission is switching to emergency
mode. If you turn the engine off, you will not be
able to select any other gears after restarting the >
103
Page 111 of 332

4M1012721BC
Driving
> 1f Ba / © appears, the parking brake is hold-
ing the vehicle. You can remove your foot from
the brake pedal.
> Releasing: when the ignition is switched on,
press and hold the brake pedal and press the ©)
button.
If the red indicator light flashes, the braking
force has not built up enough or it has decreased.
You can also secure the vehicle by selecting the
“P” gear or pressing the brake pedal. Make sure
the indicator light is off before you start driving.
Automatically releasing the parking brake
when starting to drive
Requirement: the driver's door must be closed
and the driver’s safety belt must be fastened.
» Press the accelerator pedal to start to drive.
ZA\ WARNING
—To reduce the risk of an accident, always
make sure the vehicle is situated safely
while stationary.
— If the parking brake is set, it can release au-
tomatically when the accelerator pedal is
pressed. To reduce the risk of an accident,
do not inadvertently press the accelerator
pedal and always shift into “P” when the ve-
hicle is stopped.
— If the power supply fails, you cannot set the
parking brake once it is released, or release
it if it is set. Secure the vehicle against roll-
ing before exiting the vehicle > page 99. See
an authorized Audi dealer or authorized
Audi Service Facility for assistance.
G) Tips
— On steep inclines, especially when in trailer
mode, the vehicle may roll backwards unin-
tentionally when starting to drive. To reduce
the risk of this happening, pull and hold the
switch while pressing the accelerator
pedal. If enough drive power has built up at
the wheels and the vehicle does not roll
backwards, then release the switch to start
to drive.
— If you leave the vehicle when “D” or “R” are
engaged, the parking brake will be set auto-
matically.
— Noises when the parking brake is set and re-
leased are normal and are not a cause for
concern.
— The parking brake goes through a self-test
cycle at regular intervals when the vehicle is
stopped. Any noises associated with this are
normal.
Emergency braking function
Emergency braking should only be used in an
emergency, if the standard brake pedal is mal-
functioning or obstructed. When the emergency
braking function is activated, the braking effect is
similar to a heavy braking maneuver.
> Pull and hold the ©) switch while driving.
> An audio warning signal will sound and emer-
gency braking will begin.
> If you press the accelerator pedal, emergency
braking will be canceled.
Z\ WARNING
Heavy braking while driving through curves or
in poor road or weather conditions can cause
the vehicle to slide or the rear of the vehicle to
swerve, which increases the risk of an acci-
dent.
Messages
Gg / ©) Parking brake: malfunction! Safely
stop vehicle. See owner's manual
GRING / Parking brake: malfunction! Please
release parking brake
If one of the two messages appears, there is a
malfunction in the parking brake. If the message
appears while stationary, check if the parking
brake is released and can be reset. If this is the
case, switch the ignition off and back on.
If the message stays on, if the parking brake can-
not be released, or if the message appears while
driving, do not continue driving. Secure the vehi-
cle against rolling before exiting the vehicle
109
>
Page 112 of 332

Driving
= page 99. See an authorized Audi dealer or au-
thorized Audi Service Facility for assistance.
we Parking brake: malfunction! Please contact
Service
There is a malfunction in the parking brake. Drive
to an authorized Audi dealer or authorized Audi
Service Facility immediately to have the malfunc-
tion corrected. Do not park the vehicle on inclines
and shift to “P”.
a / Parking brake: warning! Vehicle parked
too steep
The braking force may not be enough to secure
the vehicle from rolling away. Park the vehicle in
a place with less of an incline.
& / {Q) Parking brake: applied
The parking brake is set. Press and hold the brake
pedal to release the parking brake.
Special driving situations
Driving uphill and downhill
When driving uphill, downhill, or at high alti-
tudes, note the following information:
— Drive slowly and carefully.
— Do not try to turn around if you cannot safely
drive on an incline or hill. Instead, drive in re-
verse.
— When driving down hills, you can activate the
hill descent control if you press the brake pedal
while driving in “D” gear. The automatic trans-
mission will select a gear suitable for driving
down the hill and will attempt to maintain the
speed at which the vehicle was traveling at the
time the brake pedal was pressed. Press the
brake pedal if necessary. The hill descent con-
trol will switch off once the hill levels out or
you press the accelerator pedal.
— Utilize the engine braking effect when driving
downhill by selecting the “S” driving program
=> page 101. This especially applies when tow-
ing a trailer. This reduces the load on the
brakes.
— Apply the brakes in intervals and do not press
the brake pedal continuously.
110
— Use the hill descent assist if necessary
=>page 111
Inclinometer
Applies to: vehicles with a tilt angle display
You can display the vehicle's sideways angle and
lengthwise angle in relation to the horizon.
— Applies to: MMI: Select on the home screen:
VEHICLE > Vehicle data.
— You may need to scroll down to the Inclinome-
ter display.
The sideways angle of your vehicle should not ex-
ceed the yellow range in the gauge. If it reaches
the red range, there is a risk that the vehicle
might tip.
The steering wheel angle, the elevation, the com-
pass direction, and the geo-coordinates of the
current vehicle position are displayed in addition
to the current vehicle angle. You will also receive
information about the maximum sideways and
lengthwise angle that was reached in the current
driving cycle. These values are reset when the ig-
nition is switched off.
Note that the accuracy of the display depends on
the driving situation.
ZA\ WARNING
— Only drive on inclines that your vehicle is de-
signed to handle. Do not exceed the hill
climbing ability of your vehicle. Your vehicle
could tip or slide.
— Do not drive at an angle on steep inclines
and hills. If your vehicle is about to tip, you
must immediately start steering in the di-
rection of the downward slope to reduce the
risk of an accident.
— Always be ready to brake when using the hill
descent control function.
— Applies to: vehicles with an inclinometer: Do
not rely only on the inclinometer when as-
sessing the driving situation.
Offroad driving
Your vehicle is not an offroad vehicle. Note the
following points when driving offroad: