phone AUDI R8 2007 Owners Manual
[x] Cancel search | Manufacturer: AUDI, Model Year: 2007, Model line: R8, Model: AUDI R8 2007Pages: 210, PDF Size: 8.1 MB
Page 11 of 210
Controls and displays9
Controls
Safety
Driving tips
General maintenance
Self-help
Technical data
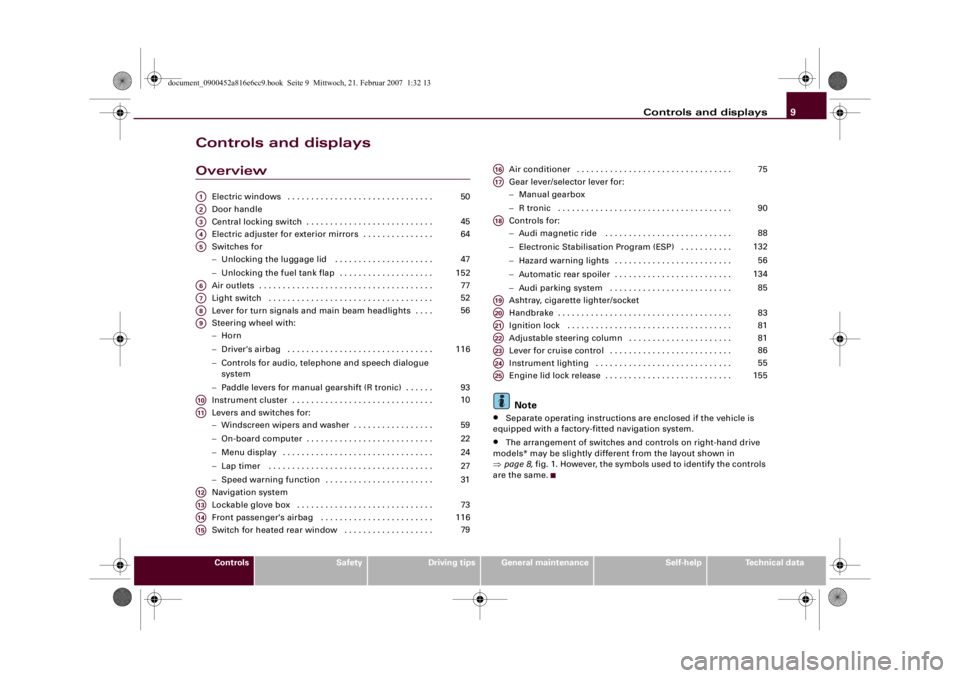
Controls and displaysOverview
Electric windows . . . . . . . . . . . . . . . . . . . . . . . . . . . . . . .
Door handle
Central locking switch . . . . . . . . . . . . . . . . . . . . . . . . . . .
Electric adjuster for exterior mirrors . . . . . . . . . . . . . . .
Switches for
−Unlocking the luggage lid . . . . . . . . . . . . . . . . . . . . .
−Unlocking the fuel tank flap . . . . . . . . . . . . . . . . . . . .
Air outlets . . . . . . . . . . . . . . . . . . . . . . . . . . . . . . . . . . . . .
Light switch . . . . . . . . . . . . . . . . . . . . . . . . . . . . . . . . . . .
Lever for turn signals and main beam headlights . . . .
Steering wheel with:
−Horn
−Driver's airbag . . . . . . . . . . . . . . . . . . . . . . . . . . . . . . .
−Controls for audio, telephone and speech dialogue
system
−Paddle levers for manual gearshift (R tronic) . . . . . .
Instrument cluster . . . . . . . . . . . . . . . . . . . . . . . . . . . . . .
Levers and switches for:
−Windscreen wipers and washer . . . . . . . . . . . . . . . . .
−On-board computer . . . . . . . . . . . . . . . . . . . . . . . . . . .
−Menu display . . . . . . . . . . . . . . . . . . . . . . . . . . . . . . . .
−Lap timer . . . . . . . . . . . . . . . . . . . . . . . . . . . . . . . . . . .
−Speed warning function . . . . . . . . . . . . . . . . . . . . . . .
Navigation system
Lockable glove box . . . . . . . . . . . . . . . . . . . . . . . . . . . . .
Front passenger's airbag . . . . . . . . . . . . . . . . . . . . . . . .
Switch for heated rear window . . . . . . . . . . . . . . . . . . . Air conditioner . . . . . . . . . . . . . . . . . . . . . . . . . . . . . . . . .
Gear lever/selector lever for:
−Manual gearbox
−R tronic . . . . . . . . . . . . . . . . . . . . . . . . . . . . . . . . . . . . .
Controls for:
−Audi magnetic ride . . . . . . . . . . . . . . . . . . . . . . . . . . .
−Electronic Stabilisation Program (ESP) . . . . . . . . . . .
−Hazard warning lights . . . . . . . . . . . . . . . . . . . . . . . . .
−Automatic rear spoiler . . . . . . . . . . . . . . . . . . . . . . . . .
−Audi parking system . . . . . . . . . . . . . . . . . . . . . . . . . .
Ashtray, cigarette lighter/socket
Handbrake . . . . . . . . . . . . . . . . . . . . . . . . . . . . . . . . . . . . .
Ignition lock . . . . . . . . . . . . . . . . . . . . . . . . . . . . . . . . . . .
Adjustable steering column . . . . . . . . . . . . . . . . . . . . . .
Lever for cruise control . . . . . . . . . . . . . . . . . . . . . . . . . .
Instrument lighting . . . . . . . . . . . . . . . . . . . . . . . . . . . . .
Engine lid lock release . . . . . . . . . . . . . . . . . . . . . . . . . . .
Note
•
Separate operating instructions are enclosed if the vehicle is
equipped with a factory-fitted navigation system.
•
The arrangement of switches and controls on right-hand drive
models* may be slightly different from the layout shown in
⇒page 8, fig. 1. However, the symbols used to identify the controls
are the same.
A1
50
A2A3
45
A4
64
A5
47
152
A6
77
A7
52
A8
56
A9
116
93
A10
10
A11
59
22
24
27
31
A12A13
73
A14
116
A15
79
A16
75
A17
90
A18
88
132
56
134
85
A19A20
83
A21
81
A22
81
A23
86
A24
55
A25
155
document_0900452a816e6cc9.book Seite 9 Mittwoch, 21. Februar 2007 1:32 13
Page 43 of 210
Doors and windows41
Controls
Safety
Driving tips
General maintenance
Self-help
Technical data
Remote control key
The remote control will lock and unlock the vehicle
without having to insert the key in the lock.The remote control transmitter and the battery are integrated in the
handle of the key. The receiver is in the interior of the vehicle. The
maximum range of the remote control depends on various factors.
The range is reduced when the battery starts to lose power.
If the receiver has been repaired or replaced, or if a replacement key
is used, the system will need re-programming by a qualified work-
shop. This is necessary so that the receiver can recognise your
remote control key.
The remote control keys (which are radio-operated) conform with all
relevant requirements for Germany and have been approved by the
Federal Approvals Office for Telecommunications of the Federal
Republic of Germany. All components are marked in accordance
with the current legal requirements. This certification forms the
basis for approval for use in other countries.
Personalised remote control key
When you switch off the ignition or lock the vehicle, the settings of
various convenience features are automatically stored and assigned
individually to the remote control key that is currently in use. The
settings stored for the remote control key are then recalled auto-
matically the next time the vehicle is unlocked, the door is opened
or the ignition is switched on.
Note
•
The remote control key is automatically deactivated when the
ignition is switched on.
•
The function of the remote control key may be impaired by inter-
ference from other nearby radio signals (for example from a mobile
telephone or TV transmitter) if these are in the same frequency
range.
Synchronisation
If the remote control fails to unlock the vehicle, it will be
necessary to re-synchronise the system.– Press the unlock button
on the remote control.
– Use the key to manually unlock the driver's door within
30 seconds.
– Press the unlock
or the lock button
.
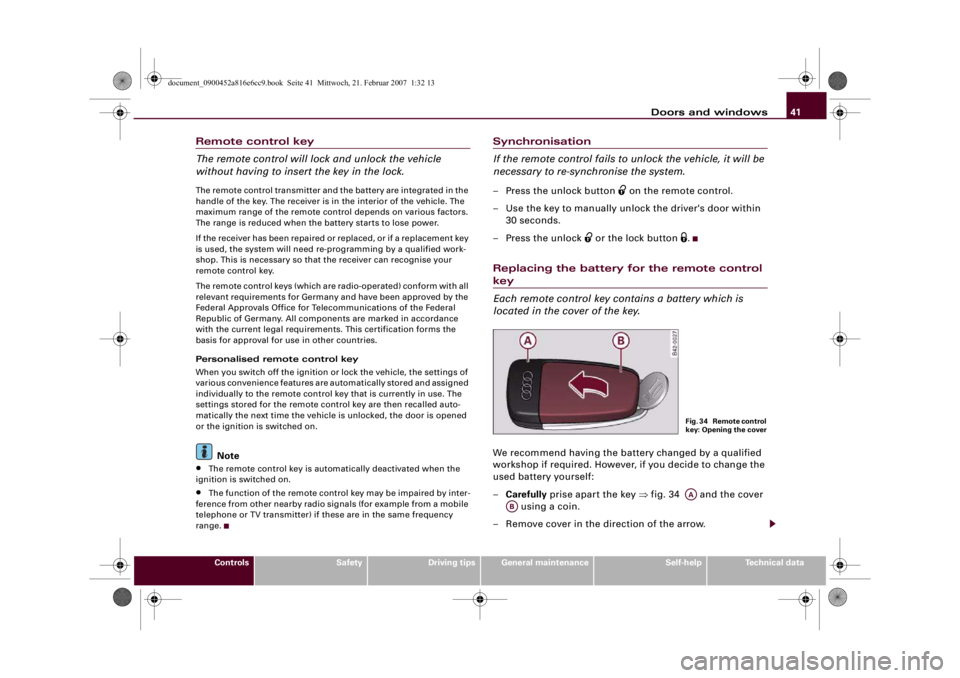
Replacing the battery for the remote control key
Each remote control key contains a battery which is
located in the cover of the key.We recommend having the battery changed by a qualified
workshop if required. However, if you decide to change the
used battery yourself:
–Carefully prise apart the key ⇒fig. 34 and the cover
using a coin.
– Remove cover in the direction of the arrow.
F i g . 3 4 R e m o t e c o n t r o l
key: Opening the coverAA
AB
document_0900452a816e6cc9.book Seite 41 Mittwoch, 21. Februar 2007 1:32 13
Page 105 of 210
Safe driving103
Controls
Safety
Driving tips
General maintenance
Self-help
Technical data
– Check the tyre pressures.
– Make sure that all windows are clean and give good visi-
bility to the outside.
– Secure all luggage and other items carefully.
– Make sure that no objects can interfere with the pedals.
– Adjust the front seat, head restraint and mirrors
correctly.
– Make sure that the head restraints for all passengers are
adjusted to the correct position.
– Make sure that children are protected with suitable
safety seats and properly worn seat belts ⇒page 122.
– Sit in the correct position in your seat and make sure that
your passengers do the same. ⇒page 67.
– Fasten your seat belt correctly. Make sure that your
passengers do the same ⇒page 109.What affects driving safety?
Safety on the road is directly related to how you drive, and
can also be affected by the passengers in the vehicle.The driver is responsible for the safety of the vehicle and all
its occupants. If your ability to drive is impaired in any way,
you endanger yourself and other road users ⇒. There-
fore:
– Do not let yourself be distracted by passengers or by
using a mobile phone, etc.
– Never drive when your driving ability is impaired (by
medication, alcohol, drugs, etc.).– Obey all traffic regulations and speed limits.
– Always adjust your speed to suit the road, traffic and
weather conditions.
– Take frequent breaks on long trips. Do not drive for more
than two hours without a stop.
– If possible, avoid driving when you are tired or stressed.
WARNING
•
Distractions while driving or any kind of impairment to your
driving ability increase the risk of accident and injury.
•
Do not store loose objects on the dashboard. These objects
could fly around the interior when the vehicle is moving (under
acceleration or whilst cornering) and distract the driver – this
could lead to an accident.
document_0900452a816e6cc9.book Seite 103 Mittwoch, 21. Februar 2007 1:32 13
Page 120 of 210
Airbag system 118
WARNING
•
It is important for the driver and front passenger to maintain a
distance of at least 25 cm from the steering wheel or dashboard
⇒page 117, fig. 98. The airbag system will not be able to give the
required protection if you sit too close to the steering wheel or
dashboard. There is also a risk of injury if the airbags are inflated.
The front seats and head restraints must always be positioned
correctly for the height of the occupant.
•
If you do not wear a seat belt, if you lean forward or to the side,
or are not seated correctly while the vehicle is in motion, you are
at greater risk of injury. Should the airbag system be triggered in
an accident there is an even greater risk of injury.
•
Never let a child travel on the front seat without an appropriate
restraint system. If the airbag is triggered in an accident, the child
could sustain serious or fatal injuries ⇒page 122, “Child safety”.
•
Never install a rearward-facing child safety seat on the front
passenger's seat unless the front passenger's airbag has been
deactivated. However, if you have no alternative but to use a rear-
ward-facing child seat on the front passenger's seat, the front
passenger's airbag must be deactivated beforehand by means of
the key-operated switch ⇒page 120, “Deactivating the airbags”.
Failure to observe this precaution could result in serious or poten-
tially fatal injury.
•
Occupants sitting in the front of the car must never carry any
objects or pets in the space between them and the airbags, or
allow children or other passengers to travel in this position.
•
Do not cover or stick anything on the steering wheel hub or the
soft plastic surface of the airbag unit on the passenger's side of
the dashboard, and do not obstruct or modify them in any way.
These parts should only be cleaned with a dry cloth (or with a
cloth moistened with plain water). It is also important not to
attach any objects such as cup holders or telephone mountings to
the surfaces covering the airbag units.
•
Any work on the airbag system or removal and installation of
the airbag components for other repairs (such as repairs to the
steering wheel) should be performed by a qualified workshop.Note
If necessary, you can deactivate the front passenger's airbag by
means of the key-operated switch ⇒page 120, “Deactivating the
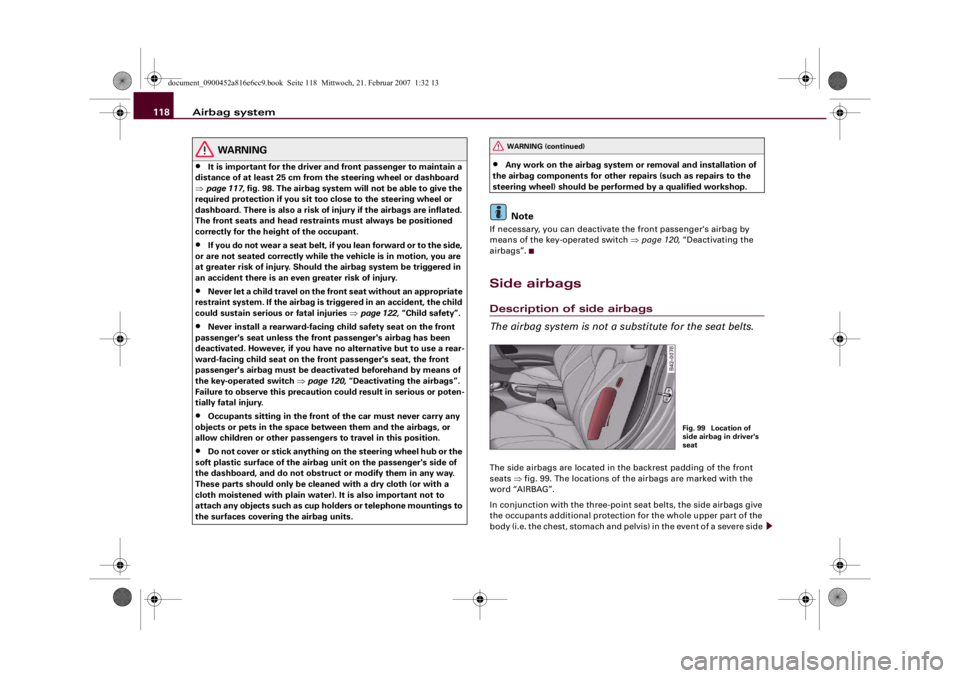
airbags”.Side airbagsDescription of side airbags
The airbag system is not a substitute for the seat belts.The side airbags are located in the backrest padding of the front
seats ⇒fig. 99. The locations of the airbags are marked with the
word “AIRBAG”.
In conjunction with the three-point seat belts, the side airbags give
the occupants additional protection for the whole upper part of the
body (i.e. the chest, stomach and pelvis) in the event of a severe side
WARNING (continued)
Fig. 99 Location of
side airbag in driver's
seat
document_0900452a816e6cc9.book Seite 118 Mittwoch, 21. Februar 2007 1:32 13
Page 175 of 210
Wheels and tyres173
Controls
Safety
Driving tips
General maintenance
Self-help
Technical data
Note
•
Responsibility for ensuring that the tyres are correctly inflated
remains with the driver; the system can only provide assistance.
•
Only adjust the inflation pressure of the tyres when they are at
approximately ambient temperature.
•
The sensors and valves do not have to be detached or changed
round when fitting new tyres. Only the valve core needs to be
replaced, and if necessary the valve and the electronic components
in the wheel.
•
After using the Tyre Mobility System* the tyre pressure moni-
toring system may malfunction. The sensor for the tyre pressure
monitoring system must therefore be renewed by a qualified
workshop.
Applies to vehicles: with tyre pressure monitoring systemMalfunctionsIf the tyre pressure monitoring system is inoperative, the tyre
symbol or “TPMS” will appear on the display. This can have various
causes:•
One of the wheel sensors or other related components may not
be working.
•
Snow chains can interfere with the signals emitted by the
sensors so that the system cannot function properly.
•
The tyre pressure monitoring system may be inoperative due to
radio interference.
•
Radio systems operating on the same frequency, such as radio
headphones or two-way radios inside the vehicle, produce strong
electromagnetic fields which can cause temporary interference.
•
If the fault persists, take the vehicle to a qualified workshop.
document_0900452a816e6cc9.book Seite 173 Mittwoch, 21. Februar 2007 1:32 13
Page 176 of 210

Accessories and modifications to the vehicle 174Accessories and modifications to the vehicleAccessories, replacement parts and repairsIt is best to consult an authorised Audi R8 dealer before
purchasing accessories and replacement parts or having
any repairs carried out.Your car is designed to offer a high standard of active and passive
safety. For this reason, we recommend that you ask an Audi R8
dealer for advice before fitting accessories or replacement parts.
This is also very important if body repairs are required. Audi R8
dealers have full information on the manufacturer-approved repair
methods and can recommend suitable accessories and spare parts.
They can also give advice regarding official requirements for the
vehicle.
We recommend you to use only Audi accessories and Audi Genuine
parts®. Audi has tested these parts and accessories for suitability,
reliability and safety. Audi R8 dealers have the necessary experience
and facilities to ensure that the parts are installed properly.
Although the market is constantly scrutinised, Audi cannot judge or
assume responsibility for the reliability, safety and suitability of
non-genuine products - even though in some instances, these parts
may have been approved by an officially recognised technical
testing authority or accompanied by an official approval certificate.
Any retro-fitted equipment which has a direct effect on the vehicle
and/or the way it is driven (e.g. cruise control system or electroni-
cally-controlled suspension) must be approved for use in your
vehicle and bear the e mark (the European Union's approval
symbol).
If any additional electrical components are fitted which do not serve
to control the vehicle itself (for instance a refrigerator box, laptop or
ventilator fan, etc.), these must bear the CE mark (manufacturer
conformity declaration in the European Union).
WARNING
Never attach accessories (such as cup holders or telephone
brackets) to the surfaces covering the airbag units or the areas
around the airbags: this could cause injury if the airbag is trig-
gered.
Note
•
Since the Audi R8 has an aluminium body, all servicing, repairs
or other work on the car body must be carried out by an Audi R8
workshop or a qualified workshop working to the specifications of
the Audi factory. This ensures that the necessary repairs or servicing
are performed properly and that only Audi Genuine parts® are
installed on your vehicle. Use of non-genuine replacement parts,
equipment or accessories on your Audi R8, or repair of the vehicle
by unqualified persons, may result in serious damage to your car
(possibly including corrosion).
•
The manufacturer cannot be held liable for damage which occurs
as a result of failure to comply with these stipulations, and such
damage is not covered under warranty.
ModificationsModifications must always be carried out according to
our specifications.Unauthorised modifications to the electronic components or soft-
ware in the vehicle may cause malfunctioning. Due to the way the
electronic components are linked together in networks, other
systems may be affected by the faults. This can seriously impair
safety, lead to excessive wear of components, and also invalidate
the type approval for your vehicle.
document_0900452a816e6cc9.book Seite 174 Mittwoch, 21. Februar 2007 1:32 13
Page 177 of 210
Accessories and modifications to the vehicle175
Controls
Safety
Driving tips
General maintenance
Self-help
Technical data You will appreciate that your Audi R8 dealer cannot be held liable
for any damage caused by modifications and/or work performed
incorrectly.
We recommend that all work should be performed by an Audi R8
workshop using Audi Genuine Parts®.
WARNING
Incorrectly performed modifications or other work on your vehicle
can lead to malfunctions and cause accidents.Radio transmitters and business equipmentRadio transmitters (fixed installation)
Retrofit installations of radio transmitters in the vehicle are subject
to official approval. Audi generally authorises in-vehicle installa-
tions of approved types of radio transmitters provided that:•
the aerial is installed correctly,
•
the aerial is not installed in the interior of the vehicle (and
screened cables are used together with non-reflective aerial trim-
ming),
•
the effective transmitting power does not exceed 10 Watts at the
aerial base.
Audi R8 dealers and specialist retailers will be able to inform you
about options for installing and operating radio transmitters with a
higher transmitting power.
Mobile radio transmitters
When using commercial mobile telephones or radio equipment it is
possible that they might interfere with the electronics of your
vehicle and cause malfunctions. The reasons could be:
•
no external aerial
•
external aerial incorrectly installed
•
transmitting power more than 10 W.
Therefore you must not operate portable mobile telephones or radio
equipment inside the vehicle without a correctly installed external
aerial ⇒.
Please note also that the maximum range of the equipment can only
be achieved with an external aerial.
Business equipment
Retrofit installation of business or other equipment in the vehicle is
permitted, provided the equipment cannot interfere with the
driver's immediate control of the vehicle. Any such equipment must
carry the CE mark. Any retrofit equipment that could influence the
driver's control of the vehicle must have a type approval for your
vehicle and must carry the e mark.
WARNING
Mobile telephones or radio equipment which are operated inside
the vehicle without a correctly installed external aerial can create
excessive magnetic fields that could cause a health hazard.
Note
•
Any retrofit installation of electrical or electronic equipment in
the vehicle will affect its type approval. In extreme cases this could
mean that you might lose the type approval for your vehicle.
•
Please refer to the mobile telephone/radio operating
instructions.
document_0900452a816e6cc9.book Seite 175 Mittwoch, 21. Februar 2007 1:32 13
Page 188 of 210
Self-help 186•
Switch off the car telephone if necessary. Details will be given in
the manufacturer's instructions for the car telephone.
Starting the engine
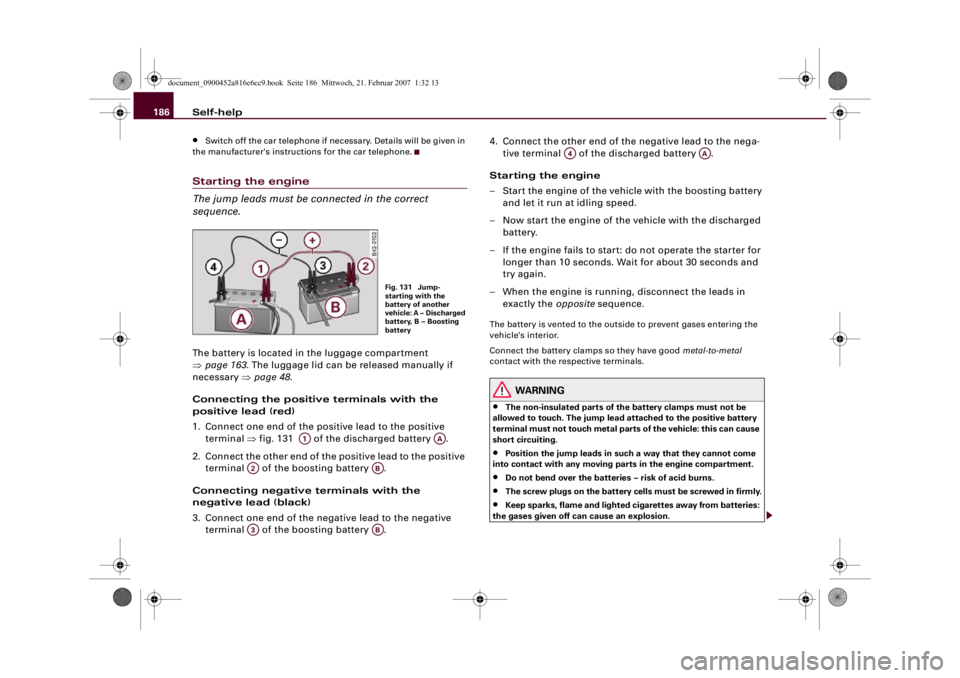
The jump leads must be connected in the correct
sequence.The battery is located in the luggage compartment
⇒page 163. The luggage lid can be released manually if
necessary ⇒page 48.
Connecting the positive terminals with the
positive lead (red)
1. Connect one end of the positive lead to the positive
terminal ⇒fig. 131 of the discharged battery .
2. Connect the other end of the positive lead to the positive
terminal of the boosting battery .
Connecting negative terminals with the
negative lead (black)
3. Connect one end of the negative lead to the negative
terminal of the boosting battery .4. Connect the other end of the negative lead to the nega-
tive terminal of the discharged battery .
Starting the engine
– Start the engine of the vehicle with the boosting battery
and let it run at idling speed.
– Now start the engine of the vehicle with the discharged
battery.
– If the engine fails to start: do not operate the starter for
longer than 10 seconds. Wait for about 30 seconds and
try again.
– When the engine is running, disconnect the leads in
exactly the opposite sequence.
The battery is vented to the outside to prevent gases entering the
vehicle's interior.
Connect the battery clamps so they have good metal-to-metal
contact with the respective terminals.
WARNING
•
The non-insulated parts of the battery clamps must not be
allowed to touch. The jump lead attached to the positive battery
terminal must not touch metal parts of the vehicle: this can cause
short circuiting.
•
Position the jump leads in such a way that they cannot come
into contact with any moving parts in the engine compartment.
•
Do not bend over the batteries – risk of acid burns.
•
The screw plugs on the battery cells must be screwed in firmly.
•
Keep sparks, flame and lighted cigarettes away from batteries:
the gases given off can cause an explosion.
Fig. 131 Jump-
starting with the
battery of another
vehicle: A – Discharged
battery, B – Boosting
battery
A1
AA
A2
AB
A3
AB
A4
AA
document_0900452a816e6cc9.book Seite 186 Mittwoch, 21. Februar 2007 1:32 13
Page 193 of 210
Fuses and bulbs191
Controls
Safety
Driving tips
General maintenance
Self-help
Technical data
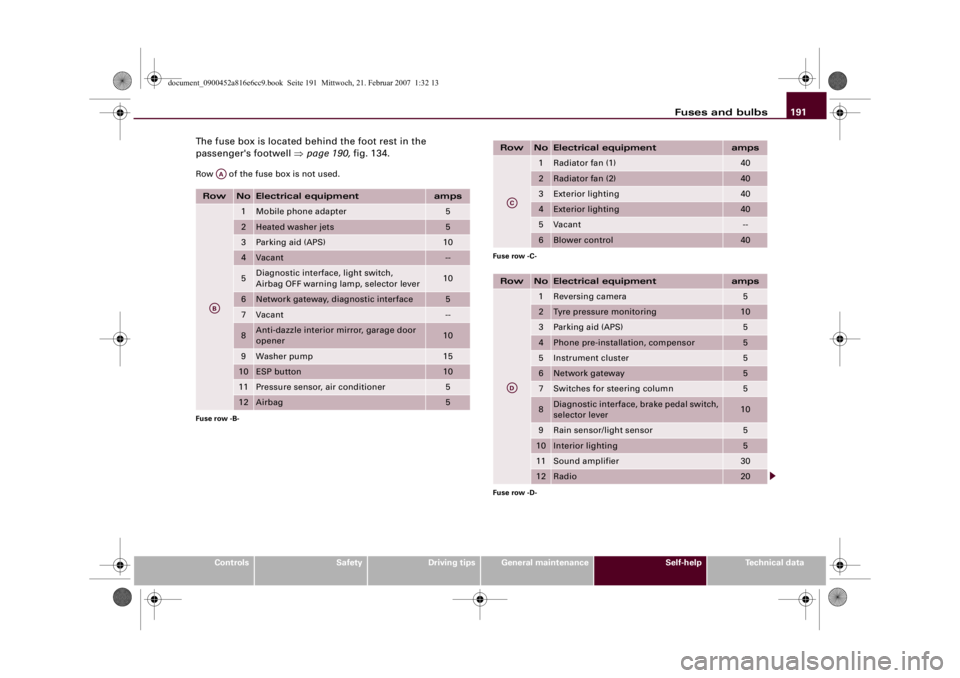
The fuse box is located behind the foot rest in the
passenger's footwell ⇒page 190, fig. 134.Row of the fuse box is not used.Row
No
Electrical equipment
amps
1
Mobile phone adapter
5
2
Heated washer jets
5
3
Parking aid (APS)
10
4
Vacant
--
5
Diagnostic interface, light switch,
Airbag OFF warning lamp, selector lever
10
6
Network gateway, diagnostic interface
5
7
Vacant
--
8
Anti-dazzle interior mirror, garage door
opener
10
9
Washer pump
15
10
ESP button
10
11
Pressure sensor, air conditioner
5
12
Airbag
5
Fuse row -B-
AAAB
Row
No
Electrical equipment
amps
1
Radiator fan (1)
40
2
Radiator fan (2)
40
3
Exterior lighting
40
4
Exterior lighting
40
5
Vacant
--
6
Blower control
40
Fuse row -C-Row
No
Electrical equipment
amps
1
Reversing camera
5
2
Tyre pressure monitoring
10
3
Parking aid (APS)
5
4
Phone pre-installation, compensor
5
5
Instrument cluster
5
6
Network gateway
5
7
Switches for steering column
5
8
Diagnostic interface, brake pedal switch,
selector lever
10
9
Rain sensor/light sensor
5
10
Interior lighting
5
11
Sound amplifier
30
12
Radio
20
Fuse row -D-
ACAD
document_0900452a816e6cc9.book Seite 191 Mittwoch, 21. Februar 2007 1:32 13
Page 208 of 210
Index 206Lights . . . . . . . . . . . . . . . . . . . . . . . . . . . . . . 52
Switching on and off . . . . . . . . . . . . . . 52
Locking . . . . . . . . . . . . . . . . . . . . . . . . . . . . 43
Central locking system . . . . . . . . . . . . . 44
Locking and unlocking the vehicle from in-
side
Central locking system . . . . . . . . . . . . . 45
Locking passenger's door manually . . . . . 46
Long periods of non-use
Battery . . . . . . . . . . . . . . . . . . . . . . . . . 162
LongLife Service . . . . . . . . . . . . . . . . . . . . 157
Luggage compartment . . . . . . . . . . . . . . . 58
Light . . . . . . . . . . . . . . . . . . . . . . . . . . . . 58
Luggage lid
Central locking system . . . . . . . . . . . . . 47
Manual release . . . . . . . . . . . . . . . . . . . 48MMain beam headlights . . . . . . . . . . . . . 52, 56
Make-up mirrors . . . . . . . . . . . . . . . . . . . . . 58
Manual operation
Fuel tank flap . . . . . . . . . . . . . . . . . . . . 154
Luggage lid . . . . . . . . . . . . . . . . . . . . . . 48
Maximum speed
SeePerformance, weights and
dimensions . . . . . . . . . . . . . . . . . . . . 198
Menu button . . . . . . . . . . . . . . . . . . . . . . . . 25
Menu display . . . . . . . . . . . . . . . . . . . . . . . 24
Menu, changing settings . . . . . . . . . . . . . . 26
Mileage recorder . . . . . . . . . . . . . . . . . . . . 13Mirrors
Anti-dazzle setting . . . . . . . . . . . . . . . . 63
Automatic anti-dazzle exterior mirrors 64
Automatic anti-dazzle interior mirror . 63
Exterior mirrors . . . . . . . . . . . . . . . . . . . 64
Interior mirror . . . . . . . . . . . . . . . . . . . . 63
Make-up mirrors . . . . . . . . . . . . . . . . . . 58
Mobile phones . . . . . . . . . . . . . . . . . . . . . 175
Modifications . . . . . . . . . . . . . . . . . . . . . . 174
NNatural leather . . . . . . . . . . . . . . . . . . . . . 148
No R gear . . . . . . . . . . . . . . . . . . . . . . . . . . . 38OOctane rating . . . . . . . . . . . . . . . . . . . . . . 152
Oil
SeeEngine oil . . . . . . . . . . . . . . . . . . . 157
Oil consumption . . . . . . . . . . . . . . . . . . . . 157
Oil dipstick . . . . . . . . . . . . . . . . . . . . . . . . . 157
Oil level . . . . . . . . . . . . . . . . . . . . . . . . . . . . 37
On-board computer . . . . . . . . . . . . . . . . . . 22
Opening
Engine lid . . . . . . . . . . . . . . . . . . . . . . . 155
Outside temperature display . . . . . . . . . . . 20
Overview . . . . . . . . . . . . . . . . . . . . . . . . . . . . 9PPaint damage . . . . . . . . . . . . . . . . . . . . . . 146
Paint No. . . . . . . . . . . . . . . . . . . . . . . . . . . 196Parking
R tronic . . . . . . . . . . . . . . . . . . . . . . . . . . 91
Parking aid . . . . . . . . . . . . . . . . . . . . . . . . . . 85
Parking lights . . . . . . . . . . . . . . . . . . . . . . . 57
Parking the car . . . . . . . . . . . . . . . . . . . . . . 84
Pedals . . . . . . . . . . . . . . . . . . . . . . . . . . . . . 107
Performance figures
SeePerformance, weights and
dimensions . . . . . . . . . . . . . . . . . . . . 198
Performance, weights and dimensions . 198
Personalised remote control key . . . . . . . 41
Petrol . . . . . . . . . . . . . . . . . . . . . . . . . . . . . 152
Polishing . . . . . . . . . . . . . . . . . . . . . . . . . . 144
Pollen filter . . . . . . . . . . . . . . . . . . . . . . . . . 76
Pollution filter . . . . . . . . . . . . . . . . . . . . . . . 76
Power steering . . . . . . . . . . . . . . . . . . . . . 136
Pressure (tyres) . . . . . . . . . . . . . . . . . . . . . 172
QQuartz clock . . . . . . . . . . . . . . . . . . . . . . . . . 12
quattro
SeeFour-wheel drive . . . . . . . . . . . . . . 136RR tronic . . . . . . . . . . . . . . . . . . . . . . . . . . . . . 90
Backup programme . . . . . . . . . . . . . . . . 94
Description . . . . . . . . . . . . . . . . . . . . . . . 90
Kick-down feature . . . . . . . . . . . . . . . . . 92
Launch control programme . . . . . . . . . 93
Manual mode . . . . . . . . . . . . . . . . . . . . . 91
Steering wheel with paddle levers . . . 93
document_0900452a816e6cc9.book Seite 206 Mittwoch, 21. Februar 2007 1:32 13