check engine AUDI R8 SPYDER 2012 User Guide
[x] Cancel search | Manufacturer: AUDI, Model Year: 2012, Model line: R8 SPYDER, Model: AUDI R8 SPYDER 2012Pages: 236, PDF Size: 59.24 MB
Page 21 of 236
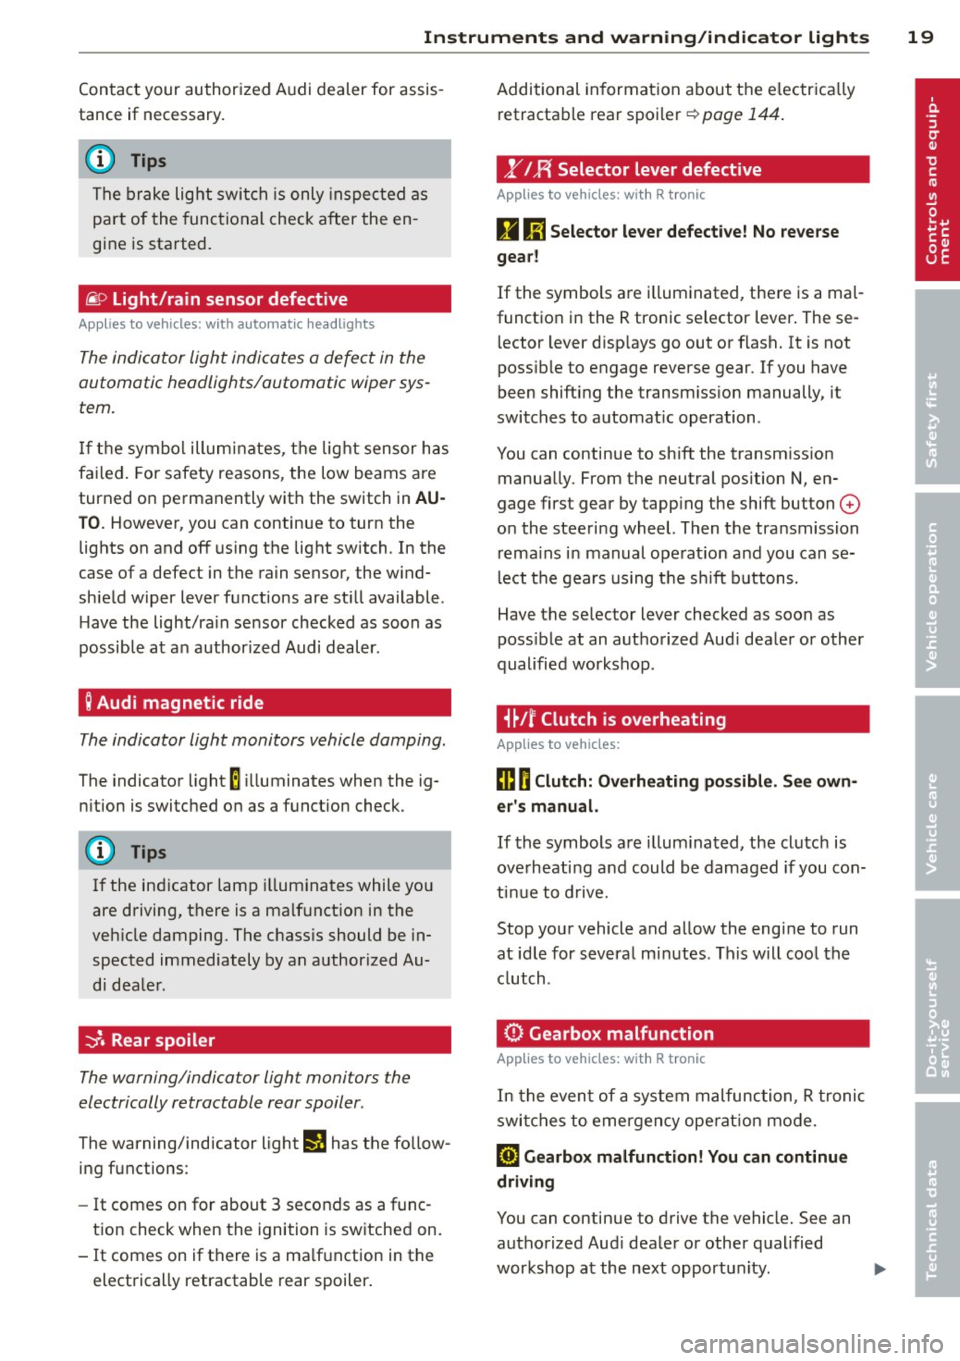
Instruments and warning/indicator lights 19
Contact your authorized Audi dealer for assis
tance if necessary.
@ Tips
The brake light switch is only inspected as
pa rt of the functional check after the en
gine is started.
@ Light/rain sensor defective
Applies to vehicles: with automatic headlights
The indicator light indicates a defect in the
automatic headlights/automatic wiper sys
tem.
If the symbol illum inates, the light sensor has
failed. For safety reasons, the low beams are
turned on permanently with the switch in
AU
TO. However, you can continue to turn the
lights on and off using the light switch. In the
case of a defect in the rain sensor, the wind
shield wiper lever functions are still available .
H ave the light/ra in sensor checked as soon as
possible at an author ized Audi dealer.
; Audi magnetic ride
The indicator light monitors vehicle damping.
The indicator light E ill uminates when the ig
nition is switched on as
a function check.
(D Tips
If the ind icator lamp illuminates while you
are driving, there is a malfunct ion in the
veh icle damping. The chass is should be in
spected immediately by an authorized Au
di dealer.
-:;J. Rear spoiler
The warning/indicator light monitors the
electrically retractable rear spoiler .
The warning/indicator light Ii! has the follow
ing functions:
-It comes on for about 3 seconds as a func
t ion check when the ignition is switched on.
- It comes on if there is a ma lfunction in the
electrically retractable rear spoiler . Additional
information about the electr ica lly
retractable rear spoiler
r:;, page 144.
,.YI F{ Selector lever defective
Applies to vehicles : with R tronic
g Ii] Selector lever defective! No reverse
gear!
If the symbols are i lluminated, there is a mal
function in the R tronic selector lever . These
l ector lever d isp lays go out or flash. It is not
poss ible to engage reverse gear. If you have
been shifting the transm iss ion manually, it
switches to automat ic operation.
You can continue to shift the transmission manually. From the neutral position N, en
gage first gear by tapp ing the shift button
0
o n the steering wheel. Then the transmission
remains in manual operat ion and you can se
lect the gears using the s hift buttons.
Have the selector lever checked as soon as
poss ible at an authorized Aud i dealer or other
qualified workshop .
i~Jf Clutch is overheating
Applies to vehicles:
ffl O Clutch: Overheating possible. See own
er's manual.
If the symbols are i llum inated, the clutch is
ove rheating and could be damaged if you con
tinue to drive.
Stop your vehicle and allow the engine to run
at idle for several m inutes . This w ill cool the
clutch.
0 Gearbox malfunction
App lies to vehicles: wit h R tro nic
In the event of a system malfunction, R tronic
switches to emergency ope rat ion mode.
[O) Gearbox malfunction! You can continue
driving
You can continue to drive the vehicle. See an authorized Aud i dealer or other qualified
workshop at the next opportun ity . ..,.
Page 23 of 236
Driver information
system
Introduction
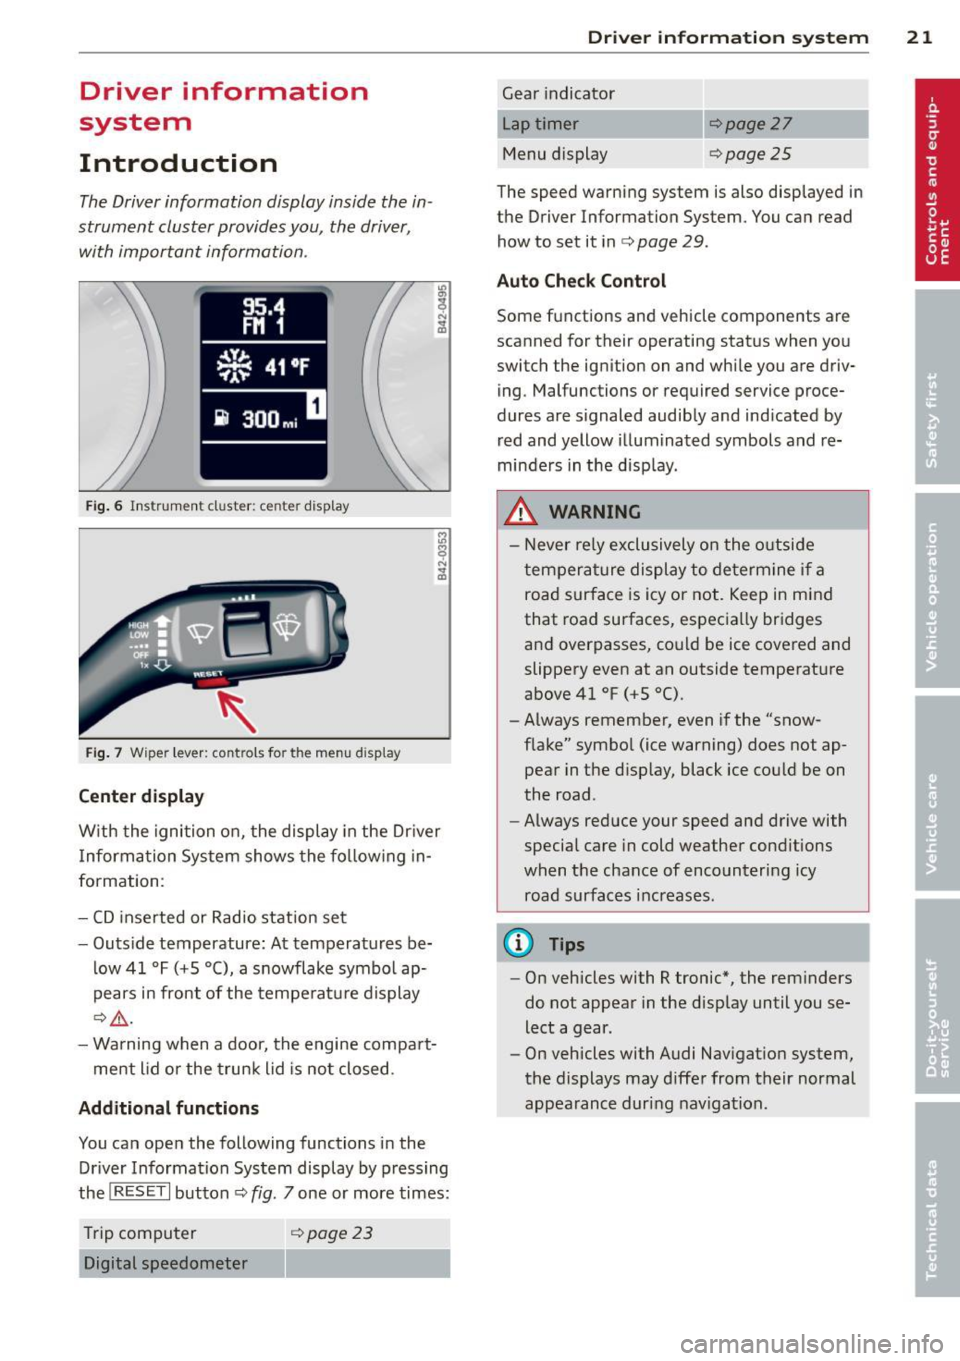
The Driver information display inside the in
strument cluster provides you, the driver,
with important information .
Fig. 6 Instrument cl uster: ce nte r display
Fig. 7 Wiper lever: controls fo r the menu d isplay
Center display
W ith the ignition on, the display in the Dr iver
I nforma tion System shows the fo llow ing in
formation :
- CD inserted or Radio station set
- Outs ide temperature: At temperatures be-
low 41
°F (+S 0 (), a snowflake symbol ap
pears in front of the temperatu re display
c:> &_ .
-Wa rning when a door, the engine compa rt-
me nt lid or the trun k lid is not closed.
Additional functions
You can ope n the following functions i n the
Driver Information System display by p ressing
the
! RESET I button ¢ fig. 7 one or more times:
T rip computer
¢ page 23
Digital speedometer
Dr iver in formation system 21
Gear indicato r
Lap timer
Menu display
c:>page27
<=>page25
The speed warning system is also displayed in
the Driver Information System. You can read how to set it in ¢
page 29 .
Auto Check Control
Some f unctions and vehicle components are
scanned for their operating stat us when yo u
switc h the ign ition on and whi le you are driv
ing. Malfunctions or required service proce
dures are s ignaled audib ly and ind icated by
red and yellow il luminated symbols and re
minde rs in the disp lay.
_&. WARNING
-
- N ever re ly exclusively on the o utside
temperat ure display to determ ine i f a
road surfa ce is icy or not. Keep in mind
that road surfaces, espec ia lly bridges
and overpasses, co uld be ice covered and
slippery even at an outside temperature
above 41
°F (+5 °().
- Always remember, even if the "snow
f lake" symbo l (ice warning) does not ap
pea r in the d isp lay, black ice cou ld be on
the road.
- Always reduce your speed and drive with
special care in cold weathe r cond itions
when the chance of encountering icy
road surfaces inc reases.
@ Tips
- On vehicles with R tronic*, the rem inders
do not appea r in the disp lay until you se
lect a gear.
- On vehicles with Audi Nav igat io n system,
the displays may d iffe r from their normal
appearance duri ng nav iga tion .
Page 34 of 236
32 Opening and clo sing
Opening and closing
Keys
Key set
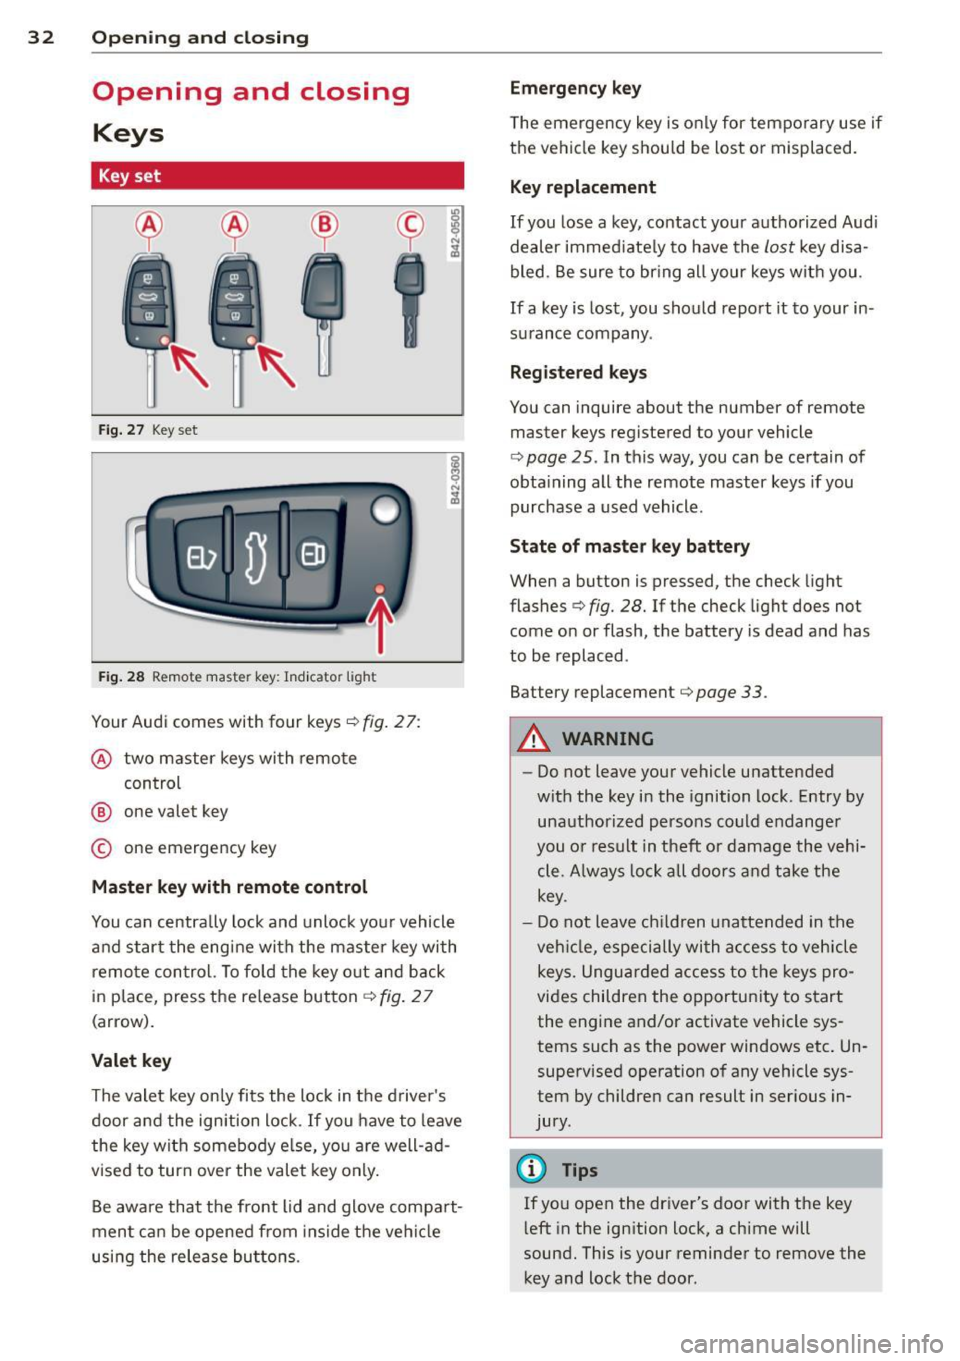
Fig . 27 Key set
Fig. 28 Remote master key : Indicator light
Your Audi comes with four keys c::> fig. 27:
@ two master keys with remote
control
@ one valet key
© one emergency key
M aster key with remot e co ntrol
You can centrally lock and unlock yo ur vehicle
and start the eng ine with the master key with
remote control. To fold the key o ut and back
in place, press the re lease button
c::> fig. 2 7
(arrow).
Valet key
The valet key only fits the lock in the d river's
door and the ignition lock .
If you have to leave
the key with somebody e lse, yo u are well-ad
vised to turn
over the valet key only.
Be aware that the front lid and glove compa rt
ment can be opened from ins ide the ve hicl e
using the release buttons . Emergency key
T he emergency key is only for tempo rary use if
the ve hicle key s hou ld be lost o r misplaced.
Key replacement
If you lose a key, contact your authorized Audi
dealer immed iate ly to have the
lost key disa
bled . Be sure to br ing all your keys with you .
If a key is lost, you should repo rt it to your in
surance company .
Reg istered keys
You can inquire about the number of remote master keys registered to your vehicle
r=> page 25 . In this way, you can be certain of
obta ining all the remote master keys if you
purchase a used vehicle .
St ate of maste r key b attery
When a button is pressed, the check light
flashes
c::> fig. 28. If the check light does not
come on or flash, the battery is dead and has
to be replaced .
Battery replacement
r=> page 33.
A WARNING
--
- Do not leave your vehicle unattended
with the key in the ignition lock. Entry by unauthorized persons co uld endanger
you or result in theft or damage the vehi
cle. A lways lock all doors and take the
key .
- D o not leave ch ildren unattended in the
veh icle, especially with a ccess to ve hicle
keys. Unguarded access to the keys pro
vides children the opportu nity to start
the engine and/or activate vehicle sys
tems such as the power windows etc . Un
supervised operation of any vehicle sys
tem by children can result in serious in
jury .
(D Tips
If you open the driver's door with the key
l eft in the ign ition lock, a ch ime will
sound. This is your reminder to remove the key and lock the door .
Page 40 of 236
38 Opening and closing
• Reach under the closed glove compartment .
There is a red plastic cord under the glove
compartment.
• Pull the red plastic cord towards you .
Anti-theft alarm
system
Description
The anti-theft alarm triggers on alarm if any
one attempts to break into the vehicle .
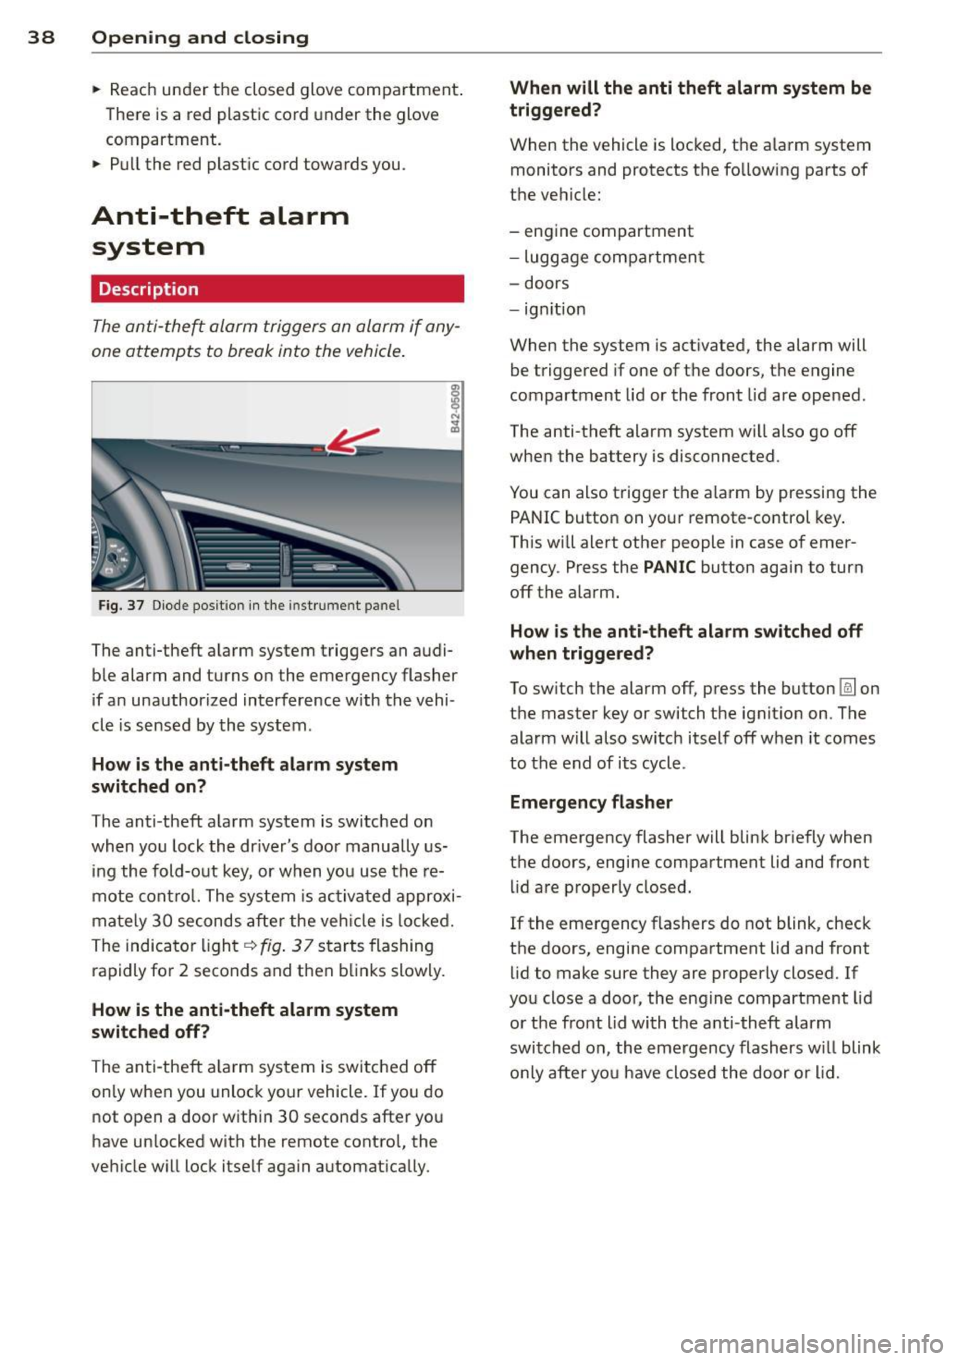
Fig. 37 Diode posit io n in the instr um ent p anel
The anti-theft alarm system triggers an audi
ble alarm and turns on the emergency flasher
if an unauthorized interference w ith the vehi
cle is sensed by the system .
How is the anti-theft alarm system
switched on?
The anti -theft alarm system is switched on
when you lock the driver's door manually us
ing the fold-out key, or when you use the re
mote control. The system is activated approxi
mately 30 seconds after the veh icle is locked.
The indicator light
q fig. 37 starts flashing
rapidly for 2 seconds and then blinks slowly.
How is the anti-theft alarm system
switched off?
The anti-theft a larm system is switched
off
only when you unlock your vehicle. If you do
not open a door within 30 seconds after you
have un locked with the remote contro l, the
vehicle will lock itself again automatically. When will the
anti theft alarm system be
triggered?
When the vehicle is locked, the alarm system
monitors and protects the following parts of
the vehicle:
- engine compartment
- luggage compartment
- doors
- ignition
When the system is ac tivated, the alarm will
be triggered if one of the doors, the engine
compartment lid or the front lid are opened.
The anti-theft alarm system wi ll also go
off
when the battery is disconnected .
You can also trigger the a larm by pressing the
PANIC button on your remote-control key.
This will alert other people in case of emer
gency . Press the
PANIC button again to turn
off the alarm.
How is the anti-theft alarm switched off
when trigge red?
To switch the alarm
off, press the button @Jon
the master key or switch the ignition on. The alarm will also switch itself off when it comes
to the end of its cycle .
Emergency flasher
The emergency flasher will blink briefly when
the doors, engine compartment lid and front lid are properly closed.
If the emergency flashers do not blink, check
the doors, engine compartment lid and front
lid to make sure they are properly closed. If
you close a door, the engine compartment lid
or the front lid with the anti -theft alarm
switched on , the emergency flashers will blink
only after yo u have closed the door or l id.
Page 72 of 236
70 On the road
On the road
Steering
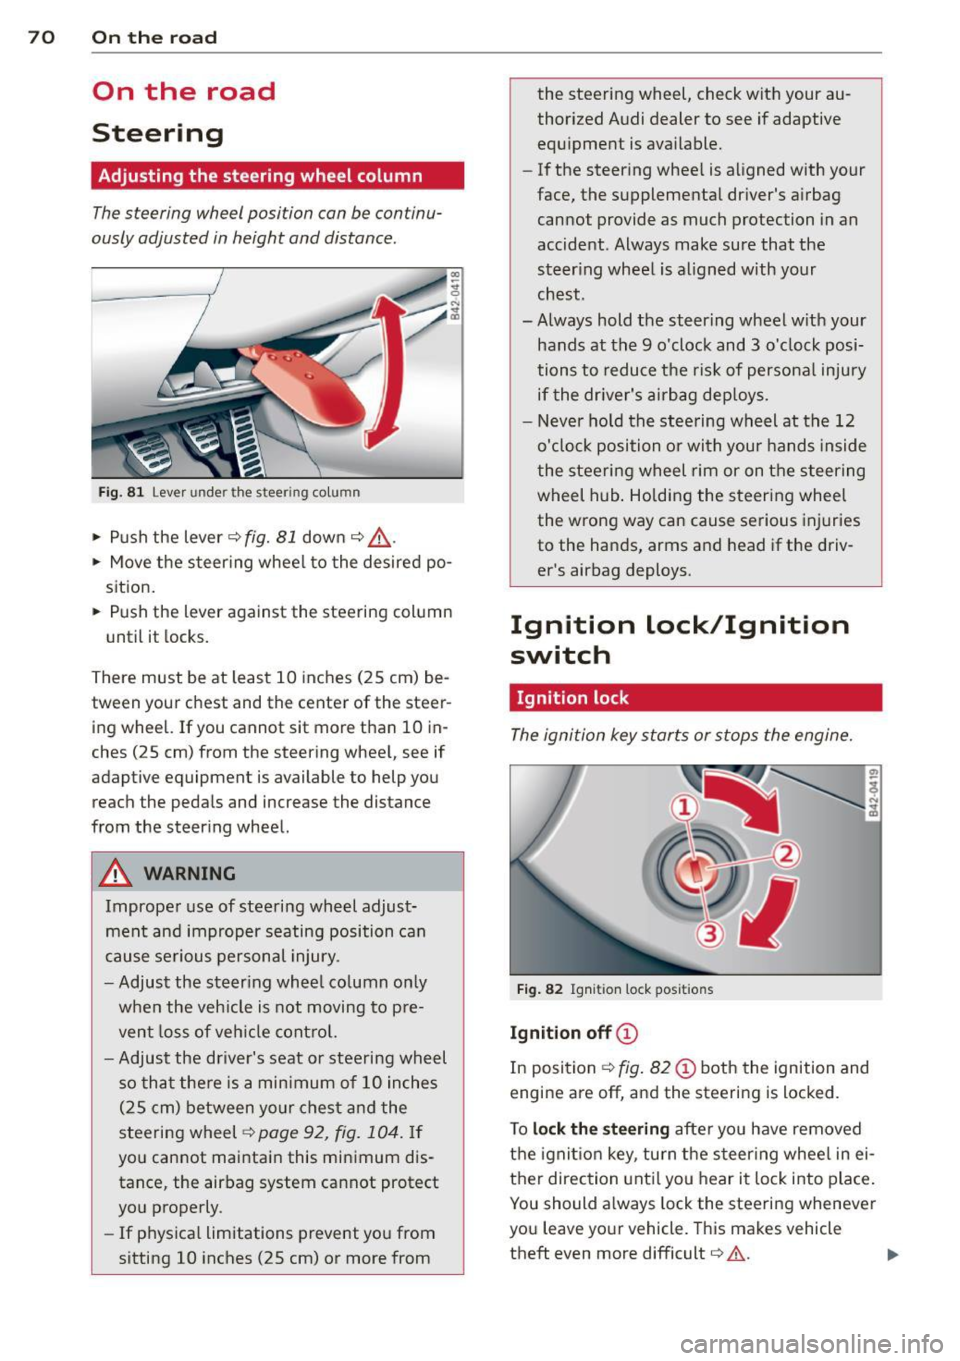
Adjusting the steering wheel column
The steering wheel position can be continu
ously adjusted in height and distance .
Fig. 81 Lever under the steering column
~ Push the lever¢ fig. 81 down ¢ .&_.
~ Move the s teer ing whee l to the desired po
sition.
~ Push the lever against the steering column
until it locks.
There must be at least 10 inches (25 cm) be
tween your chest and the center of the steer
ing wheel. If you cannot sit more than 10 in
ches (25 cm) from the steering wheel, see if
adaptive equipment is available to help you
reach the pedals and increase the distance
from the steer ing wheel.
A WARNING
Improper use of steering wheel adjust
ment and improper seating position can
cause serious personal injury.
- Adjust the steer ing whee l co lumn only
when the vehicle is not moving to pre
vent loss of veh icle control.
-
- Adjust the dr iver's seat or steering wheel
so that there is a minimum of 10 inches
(25 cm) between your chest and the
steering wheel ¢
page 92, fig. 104. If
you cannot maintain this minimum dis
tance, the airbag system cannot protect
you properly .
- If physical limitations prevent you from
sitting 10 inches (25 cm) or more from the steering wheel, check with your au
thorized Audi dealer to see if adaptive
equipment is
available.
- If the steer ing whee l is aligned with your
face, the supplemental dr iver's a irbag
cannot provide as much protection in an
accident . Always make sure that the
steer ing whee l is al igned with your
chest.
- Always hold the steering wheel w ith your
hands at the 9 o'clock and 3 o'clock posi
tions to reduce the risk of personal injury if the dr iver's airbag dep loys.
- Never hold the steering wheel at the 12
o'clock position or with you r hands inside
the steering wheel rim or on the steering
wheel hub . Ho lding the steering wheel
the wrong way can cause serious injuries
to the hands, arms and head if the driv
er's airbag deploys.
Ignition lock/Ignition
switch
Ignition lock
The ignition key starts or stops the engine.
Fig . 82 Ignit ion lock positions
Ig niti on off ©
In position ¢ fig. 82 (D both the ignition and
engine are
off, and the steering is locked .
T o
loc k t he steerin g after you have removed
the ignition key, turn the steering wheel in ei
ther direction unt il you hear it lock into place.
You should a lways lock the steering whenever
you leave your vehicle. This makes vehicle
theft even more difficult¢&. .
Page 147 of 236
Braking
New brake pads
During the first 250 miles (400 km), new
b rake pads do not possess their full braking
effect, they have to be "broken in" first. The
distance can be ten times longer in veh icles
with ceramic brakes*. You can compensate for
this slightly reduced brak ing power by push
ing harder on the brake pedal. Avoid heavy
braking loads during the break-in period.
Operating conditions and driving habits
The brakes on today's automobi les are sti ll
subject to wear, depending largely on operat
ing conditions and dr iv ing habits
c:> & . On ve
hicles that are either driven mostly in stop
and-go city traffic or a re driven hard, the
brake pads should be checked by your author
ized Audi dealer more often than specified in
the
Warranty & Maintenan ce booklet . Failure
to have your b rake pads inspected can result
in reduced brake performance.
On steep slopes, you shou ld use the brak ing
effect of the engine. This way, you prevent un
necessary wear on the brake system . If you
must use your brakes, do not hold the brakes
down continuously. Pump the brakes at inter
va ls.
Moisture or road salt
Under ce rta in conditions, for example, when
d riving through water or very heavy rain, or
even after washing your vehicle, the braking
effect can be reduced due to moisture (or in
freezing conditions ice) on the brake pads. A
few cautious brake applicat ions should dry
off
the brake pads or remove any ice coatings.
When you are driving at higher speeds with
the windshield wipers on, the brake pads will
briefly touch the brake d iscs in regular inter
vals so as to improve reaction t ime when brak
ing on wet surfaces. You, the driver, will not
notice anything.
The effectiveness of the brakes can be reduced
when the vehicle is dr iven on a salt-covered
road and the brakes are not used . Likewise,
Intelligent technology 145
you clean off accumulated salt coating from
brake discs and pads with a few cautious ap
plications of the brake
c:> & .
Corrosion
The re may be a tendency for dirt to build up
on the brake pads and corros ion to form on
the discs if the car is not driven regularly or
on ly for short trips with litt le use of the
brakes.
If the brakes are not used frequently, o r if cor
rosion has formed on the discs, it is advisable
to clean
off the pads and discs by braking
firmly a few times from a moderately high
speed
c:> & .
Faults in the brake system
If you shou ld notice a sudden increase in
brake pedal travel, then one of the two brake
circuits may have fai led . Drive immediately to
the nearest qualified workshop to have the
damage repaired. Drive at reduced speed on
the way there and anticipate longer stopping
distances and higher pedal pressure c:> &,.
Low brake fluid level
Malfunctions can occur in the brake system if
the brake fluid level is too low. The brake flu id
level is monitored electronically.
Brake power assist unit
T he brake power assist unit increases the
pressure that you generate with the brake
pedal. It works only when the engine is run
ning.
Brake lining wear status
Brake lining wear may be checked by visual in
spection of t he condition of the brake pads
thro ugh the openings in the wheel. If neces
sary, the whee l may be removed for this in
spection
c:> page 206 .
A WARNING
--You should perform braking maneuvers
for the purpose of cleaning the brake
system only if road conditions permit.
•
•
Page 148 of 236
146 Intellig ent technolog y
Other road users must not be put at risk -
yo u may cause an acc ident!
- Before descending a steep grade, reduce
speed and shift transmission into a lower
gear or lower driving position . Do not
ride the brakes or ho ld the pedal down
too long or too often . This cou ld cause
the brakes to get hot and d iminish brak
ing efficiency .
- Do not "ride the brakes" by resting your
foot on the pedal when you do not intend
to brake . Thi s may cause the b rakes to
overheat, premature wea r and inc reased
stopp ing distance.
- Under certain climat ic and operating
condit ions such as passing through wa
ter, driving in heavy ra in or after wash ing
the vehicle, the effectiveness of the
brakes can be reduced . In winter, ice can
accumulate on the brake pads, linings,
discs and drums. Cautiously apply brakes
for a test . Brakes will dry and ice coat
ings w ill be cleaned off after a few cau
t ious brake applications .
- Driv ing for an extended period of time on
salt-covered roads w ithout us ing your
brakes can also affect braking efficiency .
Clean off accumulated salt coating from
brake discs and pads w ith a few cautious
brake applicat ions.
- If you damage the front spoiler, or if you
ins tall a different spoiler, be su re the air
flow to the front brakes is not obstruct
ed. Otherwise the brake system co uld
overheat red ucing the effectiveness of
the ent ire brake system.
- Failure of one brake circuit will impair
braking capab ility, resulting in increased
stopp ing distance. Avoid driv ing the vehi
cle and have it towed to the nearest au
thorized Aud i dealer or qualified work
shop .
- Never let the vehicle roll to a stop w ith
the engine shut off .
- If the brake booster is not working, for
example when tow ing your vehicle, or
because the b rake booste r has somehow
been damaged, the brake pedal must be pressed considerably harder to make up
for the lack of booster assistance .
Power steering
When the engine is running, power steering
makes i t easier for the driver to s teer .
Power steering helps the driv er steer the vehi
cle with litt le physica l effort.
If the engine is not running, the power steer
ing system is also not working . In this case ,
you wi ll find it extremely d ifficu lt to turn the
steering wheel.
If you turn the steering fully to the left or
rig ht when the vehicle is stationary, you p lace
a very heavy load on the power steering sys
tem. Turning the steering wheel fully to the left or right will cause noise in the system. It
also reduces engine id le speed.
(D Note
Do not hold the steering t urned fu lly to
the left or r ight for more than 10 seconds
when the engine is running . There is a r isk
of damage to the power steering system .
(D Tips
-In the event of a power steering system
failure, or if the engine is not running
(while being towed), you will still be ab le
to steer the vehicle. However, you will re
quire more effort to do so .
- If the powe r stee ring system has a leak
or is defect ive , you should immediately
contact a qualified wor kshop .
- The power steer ing system req uires a
special hydraulic fl uid. The power steer
ing fluid reservoir is located in t he en
gine comp artment. The co rrect hydrauli c
fluid level is important for proper opera
tion of the power steering system. The
power steering fluid level is checked ac
cording to the Audi maintenance service
schedule.
Page 151 of 236

will be recharged and the notification will go
out.
Driver notification appears and goes out
again
If this driver notification appears after the ig
nition is turned on or while driving and it goes
out again after a wh ile, the battery has been
adequately recharged.
Driver notification appears and does not
go out again
If this driver notification appears after the ig
nition is turned on or while driv ing and does
not go out again, the battery's state of charge
is not in the optimal range. Starting ability is
restricted. Have the battery checked as soon
as poss ible by an author ized Audi dealer or
qualified workshop.
Dry sump lubrication
H igh lateral and long itud inal forces affect the
engine and the vehicle during sporty driving.
Dr y sump l ubr ica tion ensures that your engine
i s supplied w ith oil and properly lub ricated
even under these conditions.
I n a "normal" veh icle the oi l pump sends the
oil from the oil pan to the lubrication points in
the engine. The oil then returns to the oil pan .
I n extreme situations, the oil pump may draw
in air, which results in insufficient oil pressure.
With dry sump lubrication, the oil is not in the
oil pan (it is "d ry"), but in a separate oi l tank.
While one pump supplies the engine with oi l,
a second pump suctions the oi l out of the en
g ine and returns it to the oil tank . Because the
oil tank is ta ll and narrow, o il pressure is con
stant even under extreme conditions.
In addition, the oil pan in vehicles with dry
sump lubrication is noticeably sha llower. Th is
allows the engine to be installed lower in the
vehicle, bringing down the center of gravity .
This improves your vehicle's handling .
Intelligent technology 149
•
•
Page 152 of 236
150 Driving and en vironm ent
Driving and
environment
Break-in period
A new vehicle must be broken in, and the break-in per iod should be 1,500 miles (2,500
km) . Do not use full acceleration for the first
600 miles (1,000 km) and do not exceed the
maximum eng ine speed of 6,000 rpm You
m ust also not use fu ll acce lerat ion between
600 and 1,200 m iles ( 1,000 to 2,000 km).
Fr om 1,200 to 1 ,500 mi les (2,000 to 2,500
km), you can gradua lly increase maxim um en
gine speed to 8,250 rpm for brief periods.
During the first ho urs of operation, there is
g reater friction in the engine and the trans
mission than later when a ll the moving parts
have broken in.
The way yo u drive duri ng the first 1 ,500 miles
(2,500 km) affects engine quality. If you drive
at moderate engine speeds thereafter, partic
u lar ly when the engine is cold, yo u reduce en
gine wear and increase the potential mileage
of the engine.
Do not drive at RPMs that are too low. Shift
down when the engine is no longer running
"smoothly". Extreme ly high RPMs are gov
erned automa tically.
Driving through water
on roads
Note the following to avoid vehicle damage
when dr iving t hrough water, for example on
flooded roads:
- The water must not be any higher than the
bottom of the vehicle body .
- Do not drive faster than wa lking speed .
.&_ WARNING
After driving through water, mud, slush,
etc., the brakes may be slow to take effect
because of wet b rake roto rs and pads. Dry
t he brakes fi rst by bra king carefully to re
sto re the full braking effect .
-
(D Note
Vehicle components such as the eng ine,
transmission, suspension or e lectrical sys
tem can be severe ly damaged by dr iv ing
through water .
@ Tips
-Check the depth of the water before d riv
ing through it.
- Do not stop the vehicle, drive in reverse
or switch the engine off when driving
through water.
- Keep in mind that oncoming vehicles
may create waves that raise the water
level and make it too deep for your vehi
cle to drive through safely .
- Avo id driving through salt water because
it can cause corros ion.
Catalytic converter
You must use lead-free gasoline in your veh i
cle, otherwise you will destroy the ca talyt ic
converter .
Never run the fuel tank completely dry; their
regular fue l supply could cause misfires . This
allows unburned fue l into the exhaus t system,
poss ibly resulting in overheating and damage
to the catalytic converter .
.&_ WARNING ,-
-Do not park or operate the vehicle in
a reas where the hot exha ust system may
come in co nta ct with dry g rass, brush,
fue l spills or o ther material which can
cause a fire.
- Do not app ly addition al under coating or
r u stproofing on or nea r the exhaust
manifold, exhaust pipes, catalytic con
verter or heat shields . Dur ing driving, the
substance used for undercoating could
overheat and cause a fire.
(D Note
To ensure efficient o peration of the Emis
s ion Control System :
Page 153 of 236
-Have you r vehicle maintained properly
and in accordance with the service rec
ommendat ions in your Warranty
& Main
tenance booklet.
- Lack of proper maintenance as well as
improper use of the vehicle will impair
the function of the Emission Control Sys
tem and could lead to damage.
Sporty driving
Warming up and cooling down
By carefully warming up and cooling down
your vehicle, you can he lp ensure that it is not
overstressed unnecessarily during sporty driv
ing.
When warming up, the vehicle is driven at a maximum engine speed of 6000 RPM
(Vl0 engine) or 7000 RPM (V8 engine) in or
der to raise the engine oil temperature to a minimum of 140 °F (60 °(). The tires also on
ly reach their full road holding capability once
they have warmed up.
The cooling fan can continue to run in your ve hicle after the engine is switched
off. H owev
er, driving the vehicle to cool it down is part ic
ularly important. During sporty driving, the
engine and brakes, the exhaust system, and
the t ransm ission all become extreme ly hot.
Before you park the vehicle, you shou ld d rive
it for a few mi les/kilometers at light load in
the low rpm range to allow it to coo l down .
Driving on a track
Before you take your vehicle out on a track,
ensure that it is in perfect condition. For ex
ample, you should check the tire tread and the brake pads . It is best to increase t ire pressure
by about 0 .3 bar .
When driving on a track, oil consumption may be somewhat higher than in "normal" opera
tion
¢ page 17 4 .
You shou ld definitely inspect your vehicle af
ter subjecting it to severe condit ions. Are the
brake pads OK? Is there anything unusual
Dri vin g and en vironm ent 151
about the ti res, including the inner and outer
sidewa lls (e.g . tread, blistering)? Are the air
intakes free of leaves and tire dust? Is the o il
l evel OK?
Your authorized Audi dea ler or qua lified work
shop will be happy to undertake an inspection
before and after use on the race track.
_& WARNING
-
Some race tracks (e.g. steeply banked
turns) may affect the response of the ESC.
(D Tips
- Review the track requirements and con
ditions before you start driving.
- When driven on a race track, all vehicle
parts are severe ly stressed. This can re
sult in increased wear.
Operation and maintenance
Fuel economy, env ironmenta l impact, and
wear on your eng ine, brakes and tires la rgely
depend on three facto rs:
- your personal driving style
- operating conditions
- technical limitations
By havi ng your ve hicle reg ularly se rviced by an
a uthorized Aud i dea le r helps to ens ure that i t
runs properly and economica lly. The condition
of your vehicle not only affects its safety and
ability to ho ld its va lue, it a lso affects
f u el
consumption .
The amount of oi l used is re lated to engine
load and speed .
It is normal for the oil consump tion of a new
engine to reach its lowest value after a certa in
mileage has been driven.
You must drive your veh icle about 3,000 m iles
(5,000 kilometers) before yo u can p rope rly
assess oil consumpt io n.
Th is also app lies to fue l consumption and en-
gine o utp ut.
IJll>
•
•