window AUDI RS7 SPORTBACK 2015 Owners Manual
[x] Cancel search | Manufacturer: AUDI, Model Year: 2015, Model line: RS7 SPORTBACK, Model: AUDI RS7 SPORTBACK 2015Pages: 302, PDF Size: 74.76 MB
Page 4 of 302
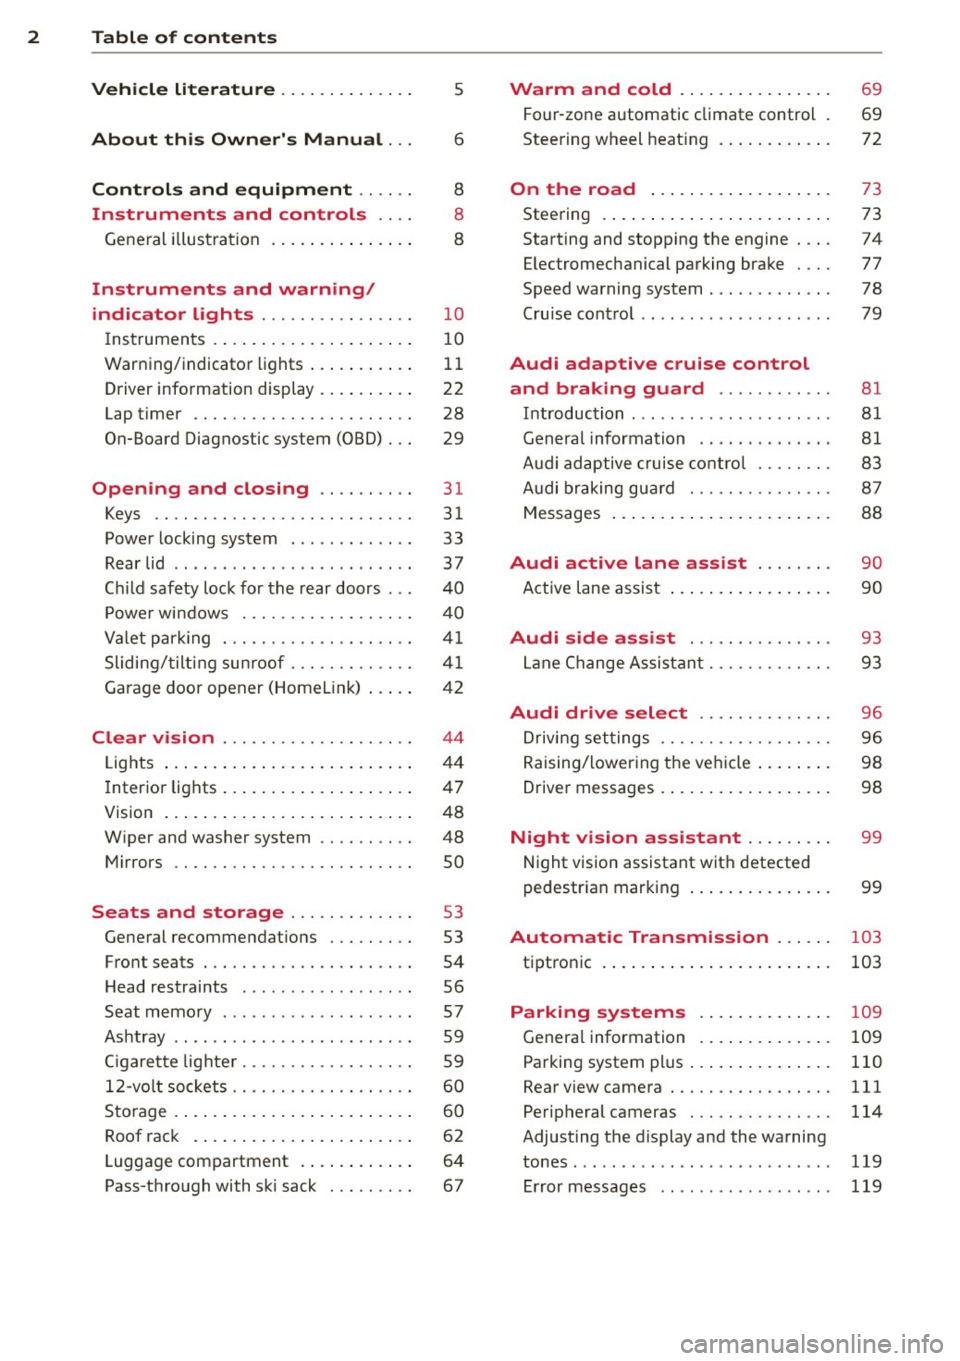
2 Table of contents Vehicle literature ............. .
About this Owner's Manual ...
Controls and equipment .. ... .
Ins truments and controls .. . .
General illustration .............. .
Instruments and warning/
indicator lights ............... .
Instruments ............ ... .. ... .
Warning/indicator lights .......... .
Driver information display ... ... ... .
Lap timer .. ................ ... . .
On-Board Diagnostic system (OBD) .. .
Opening and closing ......... .
Keys .. .. .................. ... . .
Power locking system .......... .. .
Rear lid .... .................. .. .
Child safety lock for the rear doors .. .
Power windows .......... .. .. ... .
Valet parking ................... .
Sliding/tilting sunroof ............ .
5
6
8
8
8
10
10
11
22
28
29
31
31
33
37
40
40
41
41
Garage door opener (HomeLink) . . . . . 42
Clear vision ................... .
Lights .......... ........ .. .. ... .
Interior lights ................... .
V1s1on ..... .............. ... ... .
Wiper and washer system ......... .
Mirrors .. ............... ....... .
44
44
47
48
48
so
Seats and storage . . . . . . . . . . . . . 53
General recommendations ........ .
Front seats ............... ... ... .
Head restraints .... ...... .. .. .. . .
Seat memory ............. ... .. . .
Ashtray ........................ .
Cigarette lighte r ................. .
12-volt sockets ......... ...... .. . .
Storage .... ... .......... ....... .
Roof rack ....... ........ .. .. ... .
Luggage compartment ........ .. . .
Pass -through with ski sack ........ . 53
54
56
57
59
59
60
60
62
64
67
Warm and cold ... .......... .. .
Four-zone automatic climate control
Steering wheel heating ........... .
On the road ... ... .......... .. .
Steering .. .... .. .... ......... .. .
Starting and stopping the engine ... .
Electromechanical parking brake ... .
Speed warning system ............ .
Cruise control . ... ... ......... ... .
Audi adaptive cruise control
and braking guard ........... .
Introduction ..... ............... .
General information .... .... .... . .
Audi adaptive cruise control ....... .
Audi braking guard ............ .. .
Messages ..... .. .. ............ . .
Audi active lane assist ....... .
Active lane assist ... ........... .. .
Audi side assist ......... ..... .
Lane Change Assistant ........ .... .
69
69
72
73
73
74
77
78
79
81
81
81
83
87
88
90
90
93
93
Audi drive select . . . . . . . . . . . . . . 96
Driving settings .. .......... ..... .
Raising/lowering the vehicle ..... .. .
Driver messages .. ... ............ .
Night vision assistant ........ .
Night vision assistant with detected
96
98
98
99
pedestrian marking . . . . . . . . . . . . . . . 99
Automatic Transmission . . . . . . 103
tiptronic . . . . . . . . . . . . . . . . . . . . . . . . 103
Parking systems . . . . . . . . . . . . . . 109
General information . . . . . . . . . . . . . . 109
Parking system plus . . . . . . . . . . . . . . . 110
Rearviewcamera . ............. ... 111
Peripheral cameras . . . . . . . . . . . . . . . 114
Adjusting the display and the warning
tones. ....... ................... 119
Error messages . . . . . . . . . . . . . . . . . . 119
Page 33 of 302
"' N
a:: I.J "". rl I.O
"' rl
"' rl
Opening and closing Keys
Key set
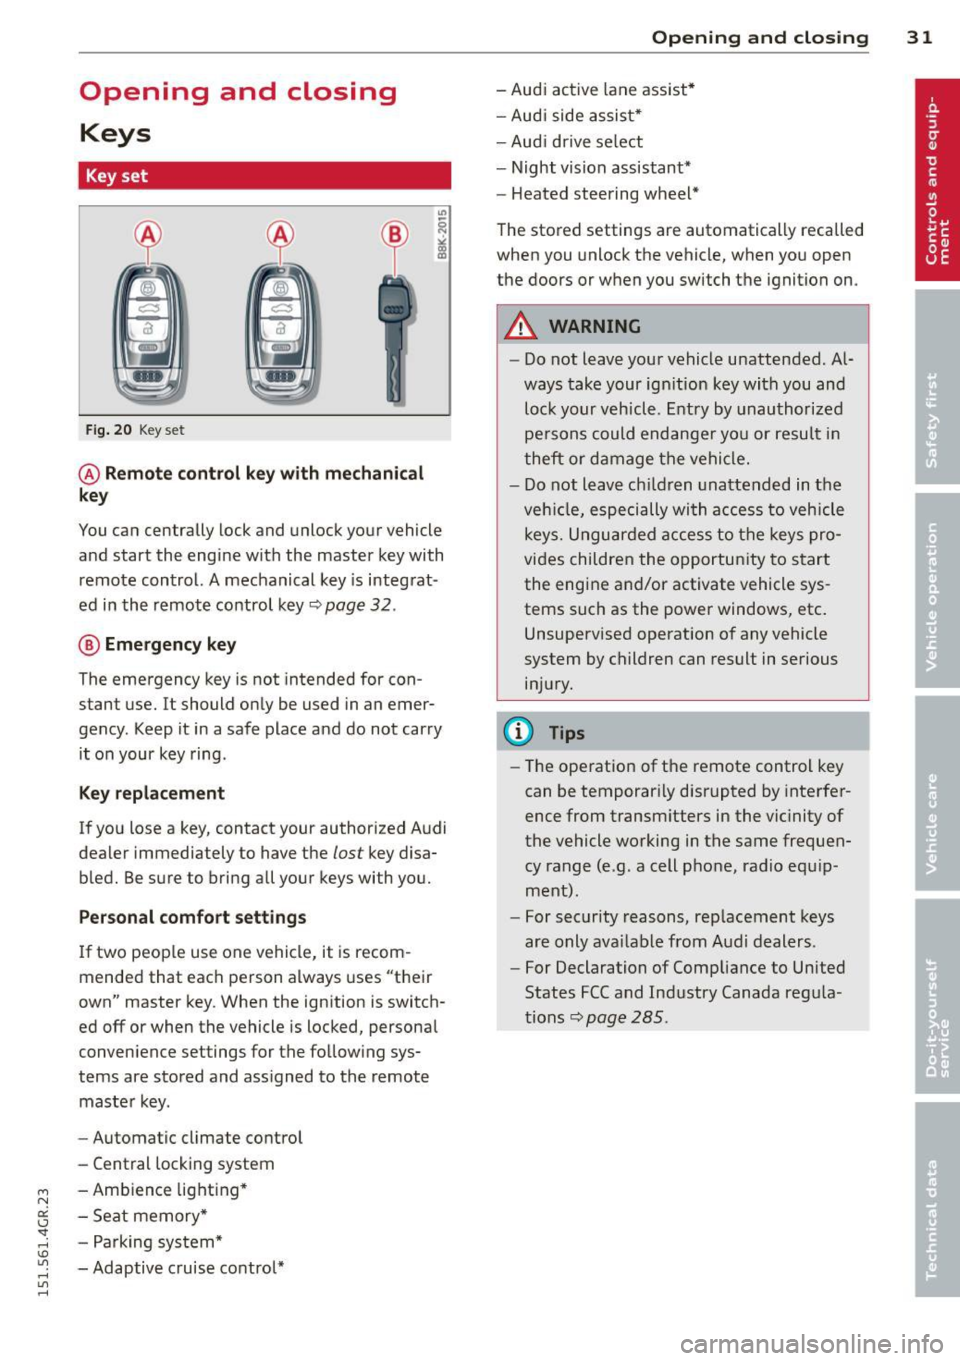
Fig. 20 Key set
@ Remote control key with mechanical
key
You can centrally lock and unlock your vehicle
and start the engine with the master key with
remote control. A mechanical key is integrat
ed in the remote control key~ page
32 .
® Emergency key
The emergency key is not intended for con
stant use.
It should only be used in an emer
gency. Keep it in a safe place and do not carry
it on your key ring .
Key replacement
If you lose a key, contact your authorized Audi
dealer immed iately to have the
lost key disa
bled. Be sure to bring all your keys with you.
Personal comfort settings
If two people use one vehicle, it is recom
mended that each person always uses "their
own" master key. When the ignition is switch
ed off or when the vehicle is locked, personal
convenience settings for the following sys
tems are stored and assigned to the remote
master key.
- Automatic climate control
- Central locking system
- Ambience lighting*
- Seat memory*
- Parking system*
- Adaptive cruise control*
Opening and closing 31
- Audi active lane assist*
- Audi side assist*
-Audi drive select
- Night vision assistant*
- Heated steering wheel*
The stored settings are automatically recalled
when you unlock the vehicle, when you open
the doors or when you switch the ignition on.
A WARNING
-Do not leave your vehicle unattended. Al
ways take your ignition key with you and
lock your vehicle. Entry by unauthorized
persons could endanger you or result in
theft or damage the vehicle.
- Do not leave children unattended in the
vehicle, especially with access to vehicle
keys. Unguarded access to the keys pro
vides children the opportunity to start
the engine and/or activate vehicle sys
tems such as the power windows, etc.
Unsupervised operation of any vehicle
system by children can result in serious
injury.
(D Tips
- The operation of the remote control key
can be temporarily disrupted by interfer
ence from transmitters in the vicinity of
the vehicle working in the same frequen
cy range (e.g. a cell phone, radio equip
ment).
- For security reasons, replacement keys
are only available from Audi dealers.
- For Declaration of Compliance to United
States FCC and Industry Canada regula
tions~ page
285.
Page 34 of 302
32 Opening and clo sing
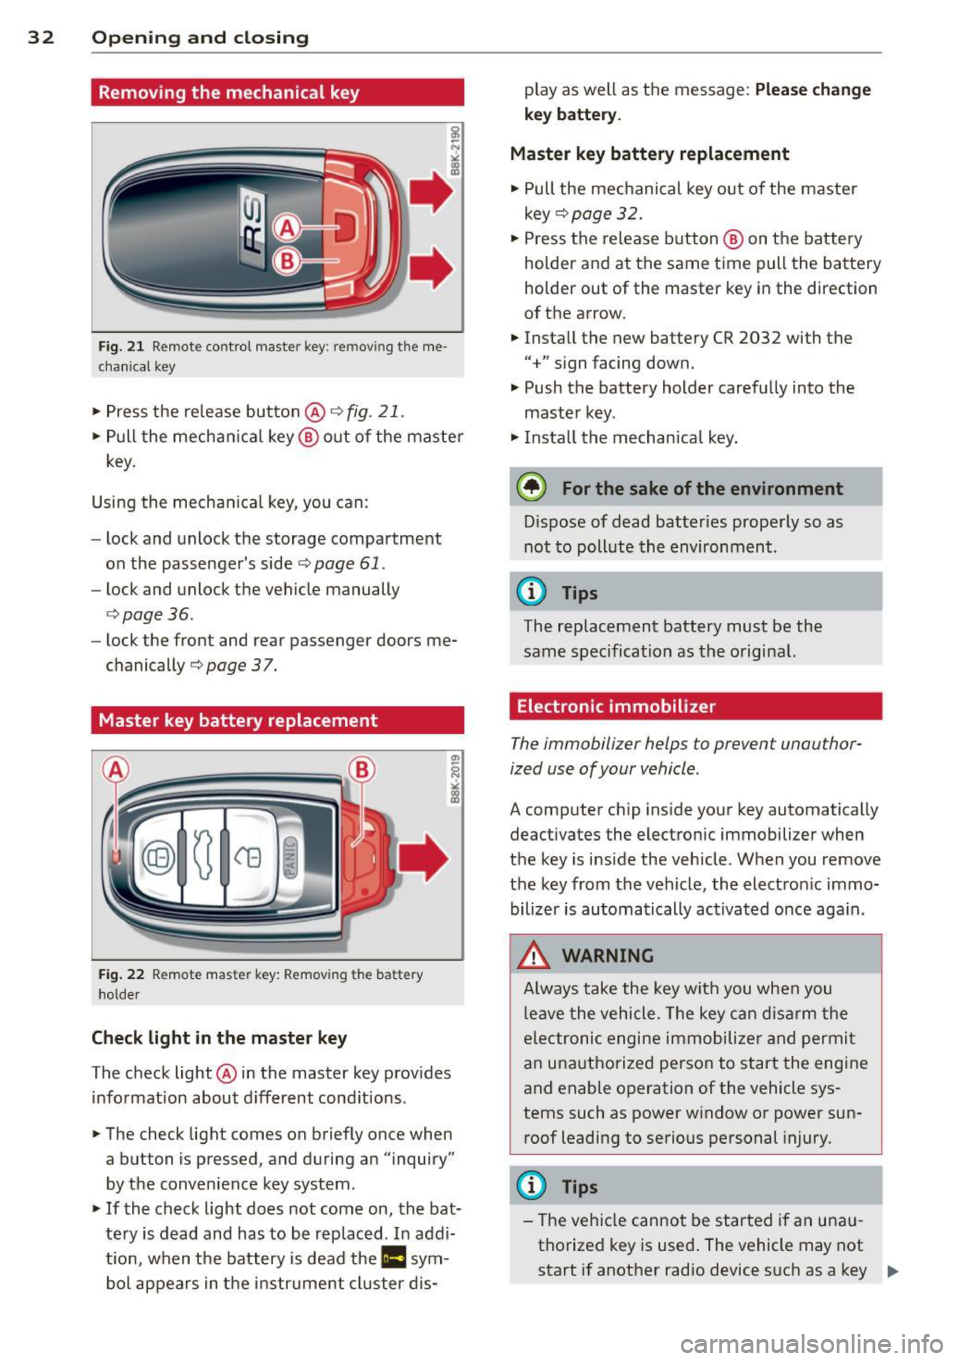
Remov ing the mechanical key
Fig. 21 Remote control master key : removing the me
chanical key
"'Press the release button@r=>.> fig. 21.
.. Pull the mecha nica l key @ out of the master
key.
Using the mechan ica l key, you can:
- lock and unlock the storage compartment
on the passenger's side
c::> page 61.
- lock and unlock the vehicle manually
<=>page 36.
-lock the front and rear passenger doors me
chanically
c::> page 37.
Master key battery replacement
Fig . 22 Remote master key: Removing the battery
holder
Ch eck light in the master ke y
The check light @in the master key provides
information about d ifferent cond itions .
.. The check light comes on briefly once when
a button is pressed, and during an "inquiry"
by the convenience key system .
.. If the check light does not come on, the bat
tery is dead and has to be rep laced. In addi
t ion, when the battery is dead the
II sym
bol appears in the instrument cluster dis- play as well as the message:
Plea
se ch ange
key b attery.
Ma ster key battery replacement
.. Pull the mechanical key out of the master
key
c::> page 32 .
.. Press the release button @ on the battery
holder and at the same time pull the battery
holder out of the master key in the direction
of the arrow .
.. Install the new battery CR 2032 with the
"+" sign facing down.
.. Push the battery holder carefully into the
maste r key .
.. Insta ll the mechan ica l key.
@ For the sake of the environment
D ispose of dead batteries properly so as
not to poll ute the environment.
(D Tips
The replacement battery must be the
same specification as the original.
Electronic immobilizer
The immobilizer helps to prevent unauthor
ized use of your vehicle.
A computer chip ins ide your key automatically
deactivates the electron ic immobilizer when
the key is inside the vehicle . When you remove
the key from the vehicle, the electron ic immo
bilizer is automatically ac tivated once aga in.
_& WARNING
-
A lways take the key with you when you
l eave the vehicle. The key can disarm the
e lectronic engine immobilize r and permi t
an unauthorized person to start the engine
and enable operation of the vehicle sys
tems such as power window or power sun
roof leadi ng to serious personal injury.
(D Tips
- The vehicle cannot be started if an una u
thorized key is used . The vehicle may not
start if another radio device s uch as a key .,..
Page 35 of 302
M N
0:: <.J 'SI: ,...., \!) ..,.,
,...., ..,., ,....,
for another vehicle or a transponder is
l ocated on the key ring.
- For Decla ration of Compliance to United
States FCC and Industry Canada regula
tions
¢ page 285.
Power locking system
General description
The power locking system locks or unlocks all
doors and the rear lid simultaneously.
You can lock and un lock the vehicle centrally.
You have the following choices:
- Remote master key¢
page 34,
-Door handles with convenience key*
¢page 35 ,
-Lock cylinder at the driver's door
¢ page 36, or
- Power locking switch inside¢
page 36.
Selective unlocking
When you lock the vehicle, the power locking
system w ill lock the doors and the rear lid.
When unlocking, you can set in the M MI
whether only the driver 's doo r or the entire
vehicle should be unlocked
¢ page 34.
Automatic locking
The automat ic locking feature locks all the ve
hicle doors and the rear lid when you drive
faster than 9 mph ( 1S km/h).
T he car is unlocked again, when the opening
function in the power lock ing system sw itch
or at one of the door levers is actuated . Th e
Auto Lock function can be turned on and off in
the MMI
¢page 34.
Anti-theft alarm warning system
If the anti-theft alarm warning system de
tects a break- in into the vehicle, acoustic and
visua l warning signals are triggered.
The anti-theft warning system is activated au
tomatically when you lock the vehicle . It is de
activated when u nlocking using the remote
key, with the mechanical key, and when you
switch the ignition o n.
Opening and clo sin g 33
The alarm also turns off when the a larm cycle
has expired.
Turn signals
When you unlock the veh icle, the turn s ignals
flash twice. When you lock the veh icle the
tu rn s ignals flash once. If they do not flash,
one of the doors, the rear lid or the hood is
not locked.
Unintentionally locking yourself out
In the follow ing cases there safeguards to
prevent yo u lock ing your remote master key in
the vehicle:
- The vehicle does not lock w ith the central
locking switch¢
page 36 if the driver's
door is open.
- On veh icles with convenience key*, if the
most recently used maste r key is in the lug
gage compartment, the rear lid is a utomat i
cally un locked again after it is closed.
Do not lock your veh icle w ith the
remote mas
ter key or convenience key*
unti l all doors
and the rear lid are closed . In this way you
avoid locking yoursel f out accidentally .
Power side door closer*
The vehicle doors are equipped w ith a power
s ide door closer . When closing a door, you on
ly have to let it fall light ly into the latch. The
door will then automatically close by itself
¢_&. .
A WARNING
-When you lock your vehicle from outside,
nobody -especia lly children -shou ld re
main inside the vehicle. Remember,
when you lock the vehicle from the out side the windows cannot be opened from
the inside.
- When you leave the veh icle, always take
the ignition key w ith you . Th is w ill pre
vent passengers (children, for example)
from accidentally being locked in the ve
hicle should they accidentally press the
power locking sw itch in the doors. .,.
Page 42 of 302
40 Opening and clo sing
Child safety lock for
the rear doors
The power child safety lock locks the rear win
dows and prevent the rear doors from being
opened from the inside.
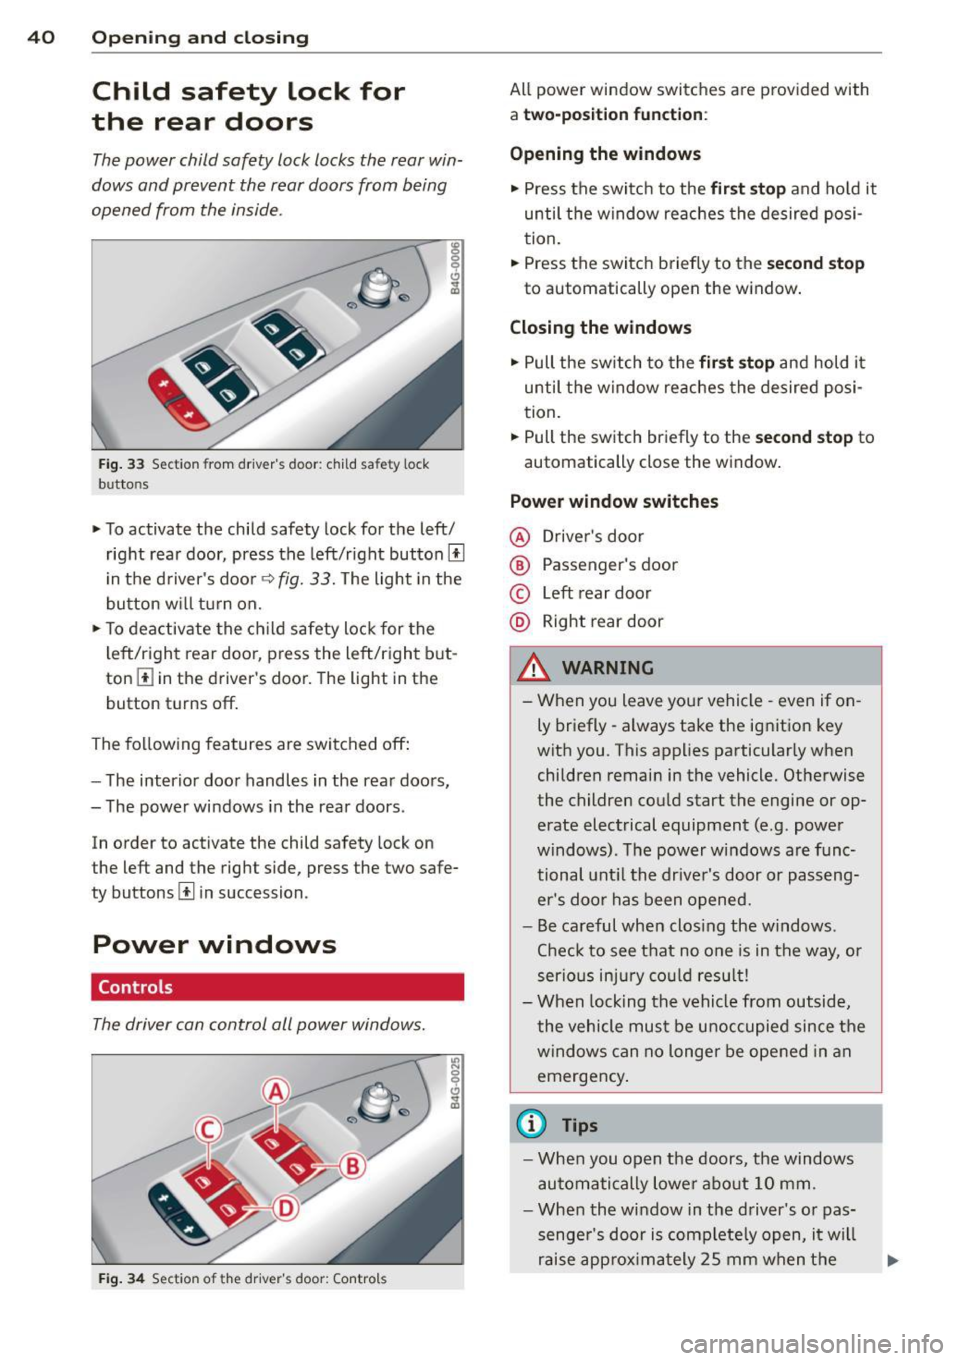
Fig . 33 Sect io n fr om dri ver's door : child sa fe ty lock
b utto ns
• To activate the child safety lock for the left/
right rea r door, press the left/right button[!]
i n the d river 's doo r
q fig. 33. The light in the
button w ill turn on.
• To deactivate the ch ild safety lock for the
l eft/right rear doo r, p ress the left/righ t but
ton
III in the driver's door. The light in the
button turns off.
The following features are switched off:
- The interior door handles in the rear doors,
- The power windows in the rear doors .
In order to activate the child s afety lock on
t he left and the right side, press the two safe
ty buttons[!] in succession .
Power windows
Controls
The driver can control all power windows.
Fig. 34 Sect io n of t he dr ive r's door : Controls
All power window switches are provided with
a tw o-po sition function :
Opening the windows
• Press the switc h to the fir st sto p and hold it
until the window re aches the desired posi
tion.
• Press the switch briefly to the
second stop
to automatically open the window .
Closing the windows
• Pull the sw itch to the fir st stop and hold it
until the window reaches the desired posi
tion .
.. Pull the switch br iefly to the
s e cond stop to
automatically close the window .
Power window switches
@ Driver's door
® Passenger's door
© Left rear door
@ Right rear door
& WARNING
- When you leave you r vehicle -even if on
ly briefly -always take the ignition key
wit h you . This applies particularly when
children remain in the vehicle. Otherwise
the children could start the engine or op
erate electrical equipment (e .g . power
windows). The power windows are func
tional unt il the drive r's door or passeng
er 's doo r ha s been opened.
- Be careful when clos ing the w indows .
Chec k to see that no o ne is in the way, or
serio us inju ry co uld resu lt!
- When lock ing the vehicle from outside,
the vehicle mu st be u noccupied since the
windows can no longer be opened in an
emergency .
{1) Tips
-When you open the doors, the windows
au tomati cally lower abo ut 10 mm .
- When the window in the driver's or pas
senge r's door is complete ly open, it will
raise app rox ima tely 25 mm when t he
Page 43 of 302
"' N
a:: I.J "". rl I.O
"' rl
"' rl
door is opened . The window will Lower
again when you close the door .
- After the ignition has been switched off,
the windows can still be opened or
closed for about 10 minutes . The power
windows are not switched off until the
driver's door or passenger's door has
been opened.
What to do after a malfunction
The one -touch open and close function must
be reactivated if the battery has been discon
nected .
.. Pull and hold the power window switch until
the window is fully closed.
.. Release the switch and then pull it again for
at least one second .
Valet parking
The valet parking feature protects the lug
gage compartment from unauthorized access from the outside.
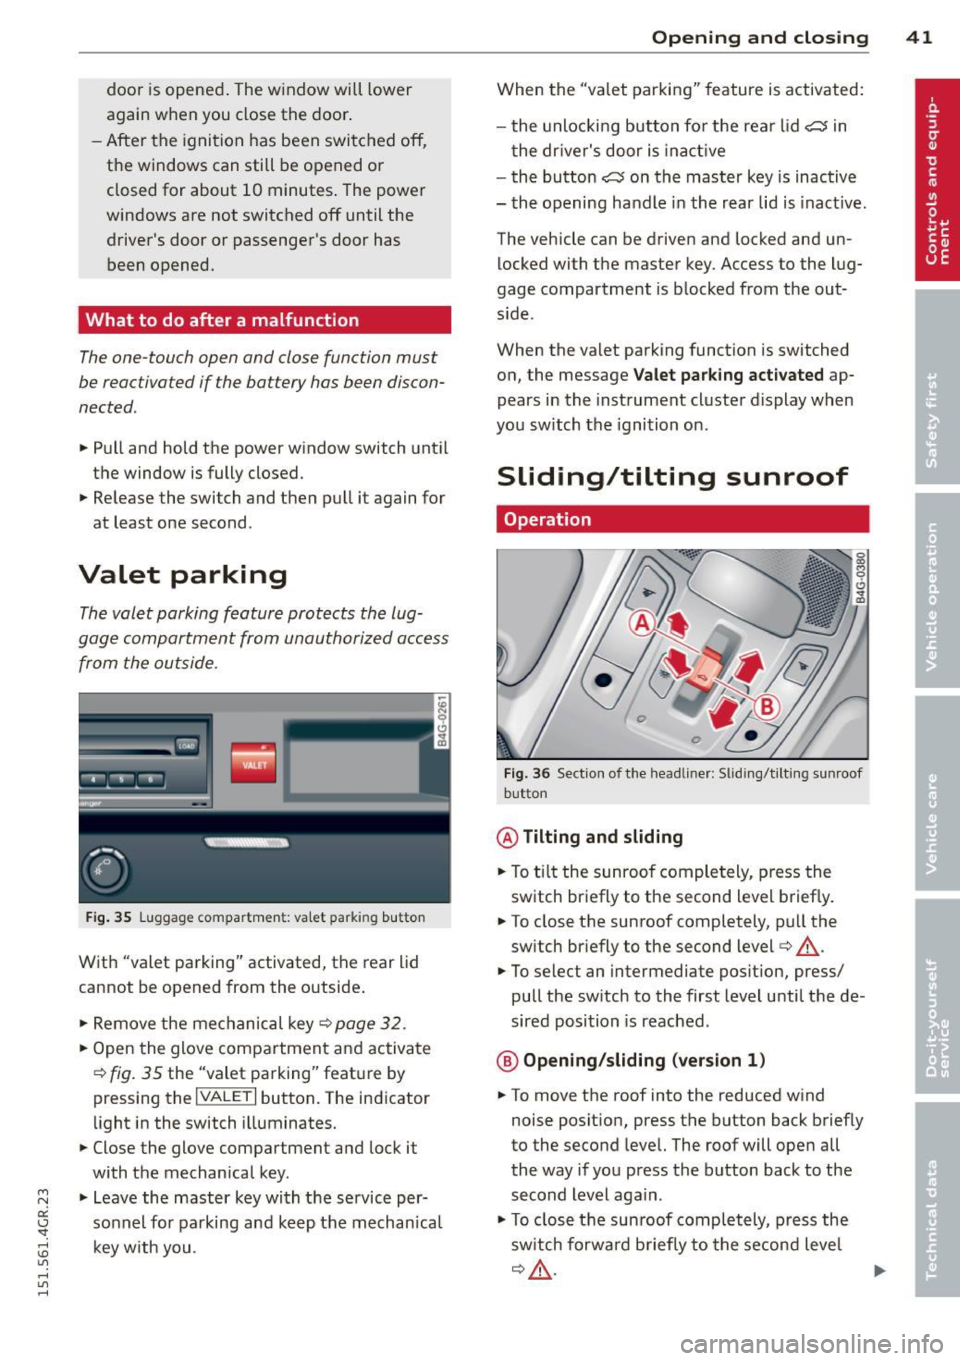
Fig. 35 Luggage compartment: valet parking button
With "valet parking" activated, the rear lid
cannot be opened from the outside .
.. Remove the mechanical key ¢
page 32 .
.. Open the glove compartment and activate
¢
fig. 35 the "valet parking" feature by
pressing the
I VALET I button. The indicator
light in the switch illuminates.
.. Close the glove compartment and lock it
with the mechanical key.
.. Leave the master key with the service per
sonnel for parking and keep the mechanica l
key with you .
Opening and closing 41
When the "valet parking" feature is activated:
- the unlocking button for the rear lid
c:s in
the driver's door is inact ive
- the button
c:s on the master key is inactive
- the opening handle in the rear lid is inact ive.
The vehicle can be driven and locked and un
locked with the master key. Access to the lug
gage compartment is blocked from the out
s ide .
When the valet parking function is switched
on, the message
Valet parking activated ap
pears in the instrument cluster display when
you switch the ignition on .
Sliding/tilting sunroof
Operation
Fig. 36 Sect ion of the headliner: Sliding/t ilting sunroof
button
@ Tilting and sliding
.. To ti lt the sunroof completely, press the
switch briefly to the second level briefly.
.. To close the sunroof completely, pull the
sw itch briefly to the second level¢_&..
.. To select an intermediate position, press/
pull the switch to the first level until the de
sired position is reached .
@ Opening/sliding (version 1)
.. To move the roof into the reduced wind
noise position, press the button back briefly
to the second level. The roof will open all
the way if you press the button back to the
second Level again.
.. To close the sunroof completely, press the
sw itch forwa rd b riefly to the second level
~A -~
Page 51 of 302
M N
0:: <.J 'SI: ,...., \!) 1.1'1 ,...., 1.1'1 ,....,
remove water droplets . You can switch this
function off by moving the lever to position ®
within 10 seconds after the afterw ipe. The af
terw ipe funct ion is react ivated the next time
you switch the ignit ion on .
C lea ning the headlights *. The headlight wash
er system * operates on ly when the headlights
are on. If you move the lever to pos ition ®,
the headlights and the night vision assistant
camera* are washed in intervals .
.&_ WARNING
-The ra in sensor is only des igned to assist
and support the drive r.
It remains entire
ly the dr iver's respons ibility to monitor
o utside wea ther conditions and to man
ually activate the wipers as soon as rain
or drizzle reduces visibility through the
w indshield.
- The w indshie ld m ust not be treated with
water -repe llent materials. They can in
c rease glare under poor visibi lity condi
tions such as wetness, darkness, or when
the sun is low on the horizon. I n addi
tion, they can cause the windshield wip
ers to chatte r.
- Properly functioning windshie ld w iper
blades are required for a clear view and
safe dr iv ing ¢
page 49, Replacing
windshield wiper blades .
(D Note
-In the case of frost, check whether the
windsh ield wiper b lades a re frozen to
t h e windshie ld. Switching on the wind
s h ield wipers can damage the wiper
blades!
- Prior to using a car wash, the win dsh ield
wipe r system must be switched off (lever
i n position @). This helps to prevent un
i ntent ional sw itch ing on and damage to
the windshie ld w iper sys tem .
- Do no t use the wipe rs to cle ar a frosted
window. Using the wipers as a conven
i ent ice sc raper will destroy t he wiper
b lades .
Clear vis ion 49
(D Tips
- The windshie ld wipers are switched off
when the ign it ion is off. Activate the
w indshield wipers after the ignition is
switched back on by moving the w ind
shield wiper lever to any position .
- Worn or d irty windshield wiper blades
result in streaking. This ca n affect the
rai n sensor function. Check your wind
shield wiper blades regularly.
- The washer fluid nozz les of the wind
shield washe r system a re heated at low
tempe ratu res whe n the ignition is on.
- When stopping temporarily, e .g. at a
t raffic light, the set spe ed of the wind
shield wipers is automatically reduced by
one speed.
Cleaning windshield wiper blades
Clean the w indsh ie ld w iper blades when t hey
begin to leave st reaks. Use a soft clo th and
glass cleaner to clean the wi ndshield wipe r
blades.
.,. Place t he windsh ie ld w iper arms in the serv
ice pos ition . Re fer to ¢
page 50 .
.,. Lift the wiper arm away from the front win
dow.
.&_ WARNING
Dirty windsh ield wiper b lades can impair
your view. This can lead to accidents .
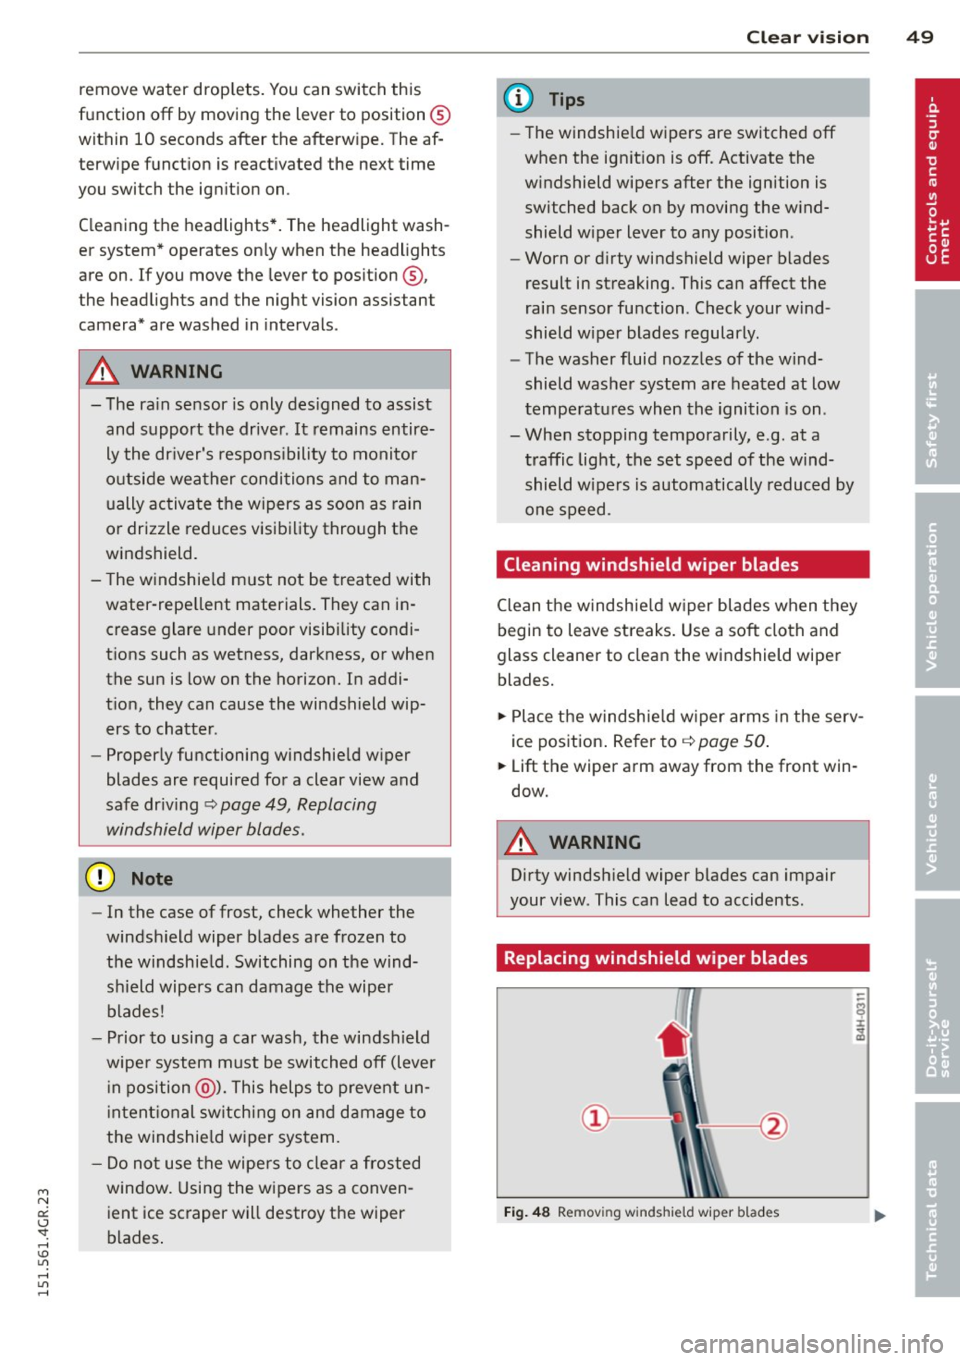
Replacing windshield wiper blades
Fig. 48 Removing windshie ld wiper blades
Page 53 of 302
"' N
a:: I.J "". rl I.O
"' rl
"' rl
8 - The exterior mirrors fold in. In the MMI,
you can select if the mirrors fold in automati
cally when you lock the vehicle ~
page 34.
Tilt function for the passenger's mirror
To help you see the curb when backing into a
parking space, the surface of the mirror tilts
slightly. The knob must be in the P position
for this to happen.
You can adjust the tilted mirror surface by
turning the knob in the desired direction.
When you move out of reverse and into anoth
er gear, the new mirror position is stored and
assigned to the key you are using.
The mirror goes back into its original position
once you drive forward faster than 9 mph (15
km/h) or switch the ignition off.
.&_ WARNING
- Curved (i.e. convex) mirror surfaces in
crease your field of view. Remember that
vehicles or other objects will appear
smaller and farther away than when seen in a flat mirror.
If you use this mirror to
estimate distances of following vehicles
when changing lanes, you could estimate
incorrectly and cause an accident.
(D Note
-If the mirror housing is moved uninten
tionally (for example, while parking your
vehicle), then you must first fold the mi r
ror electrically. Do not readjust the mir
ror housing manually. You could damage
the motor which controls the mirror.
- If you wash the vehicle in an automatic
car wash, you must fold the exterior mir
rors in to reduce the risk of damage to
the mirrors. Never fold power folding ex
terior mirrors* by hand. Only fold them in and out using the power controls.
@ Tips
-The exterior mirror settings are stored
with the memory function*
~ page S 7.
- If there is a malfunction in the electrical
system, you can still adjust the exterior
Clear vision S 1
mirrors by pressing the edge of the mir
ror.
Dimming the mirrors
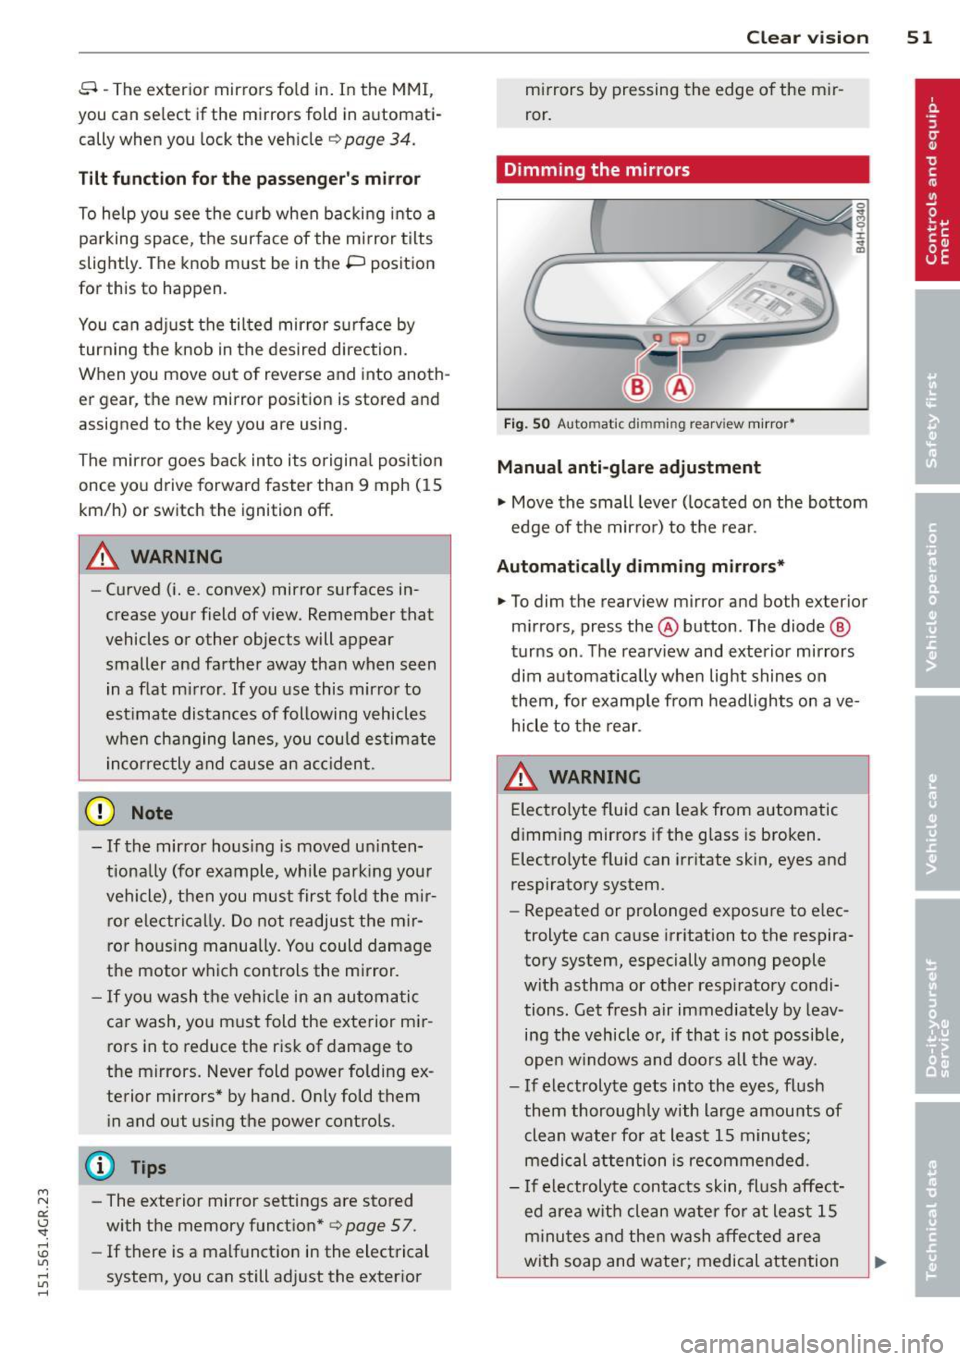
Fig. SO Automatic dimming rea rview mirro r•
Manual anti-glare adjustment
"' Move the small lever (located on the bottom
edge of the mirror) to the rear.
Automatically dimming mirrors*
"'To dim the rearview mirror and both exterior
mirrors, press the@button. The diode @
turns on. The rearview and exterior mirrors
dim automatically when light shines on
them, for example from headlights on ave
hicle to the rear.
&_ WARNING
= Electrolyte fluid can leak from automatic
dimming mirrors if the glass is broken.
Electrolyte fluid can irritate skin, eyes and
respiratory system.
~
- Repeated or prolonged exposure to elec
trolyte can cause irritation to the respira
tory system, especially among people
with asthma or other respiratory condi
tions. Get fresh air immediately by leav
ing the vehicle or, if that is not possible,
open windows and doors all the way.
- If electrolyte gets into the eyes, flush
them thoroughly with large amounts of
clean water for at least 15 minutes·
'
medical attention is recommended.
- If electrolyte contacts skin, flush affect
ed area with clean water for at least 15 minutes and then wash affected area
with soap and water; medical attention
.___ ______ _:_ ____ _:_.::..:.:..__J ....
Page 55 of 302
M N
0:: <.J 'SI: ,...., \!) 1.1'1 ,...., 1.1'1 ,....,
Seats and storage
General recommen
dations
Why is your seat adjustment so important?
The safety belts and the airbag system can
only provide maximum protection if the front
seats are correctly adjusted.
There are various ways of adjusting the front
seats to provide safe and comfortable support
for the driver and the front passenger. Adjust
your seat properly so that :
- you can easily and quick ly reach all the
switches and controls in the instrument
panel
- your body is properly supported thus reduc ing physical stress and fatigue
- the safety belts and airbag system can offe r
maximum protection
¢ page 139.
In the following sections, you will see exactly
how you can best adjust your seats .
There are special regulations and instructions
for installing a child seat on the front pas
senger's seat. Always fo llow the information
regarding chi ld safety provided in
¢ page 165, Child Safety .
A WARNING
Incorrect seating position of the driver and
all other passengers can result in serious
personal injury.
- Always keep your feet on the f loor when
the vehicle is in motion -never put your
feet on top of the instrument panel, out
of the window or on top of the seat cush
ion. Th is applies especially to the passen
gers . If your seating position is incorrect,
you increase the r isk of injury in the case
of sudden braking or an acc ident. If the
airbag inflates and the seating position
is incorrect, this could result in persona l
injury or even death.
- It is important for both the driver and
front passenger to keep a distance of a t
Seat s an d sto rage 53
least 10 inches (25 cm) between them
selves and the steering wheel and/or in
strument panel. If you're s itting any
closer than th is, the airbag system can
not protect you properly. In addition, the
front seats and head restraints must be
adjusted to your body height so that they
can give you maximum protect ion.
- Always try to keep as much distance as
possible between yourself and the s teer
ing wheel o r instrument pane l.
- Do not adjust the driver's or front pas
senger's seat whi le the vehicle is moving.
Your sea t may move unexpected ly, caus
ing sudden loss of vehicle cont rol and
personal injury . If you adjust yo ur seat
while the veh icle is moving, yo u are out
of posit ion.
Driver's seat
The correct seat position is important for safe
and relaxed driving.
We recommend that you adjus t the dr iver's
seat in the fo llowing manner:
.,. Adjust the seat in fore and aft direction so
that you can easily push the peda ls to the
floor wh ile keeping your knees s lightly bent
i:::> A in Why is your seat adjustment so im
portant? on page 53.
.,. Adjust the backrest so that when you sit
w ith your back against the backrest, you can
still grasp the top of the steering wheel.
.,. For adjustable head restra ints: adjust the
head restra int so the upper edge is as even
as poss ible with the top of your head . If that
is not poss ible, try to adjust the head re
straint so that it is as close to this position
as possible ¢
page 56. Move the head re
straint so that it is as close to the back of
the head as possib le .
A WARNING
-Never place any objects in the dr iver's foot-
well. An object could get into the pedal
area and interfere with pedal funct ion . In
~
Page 64 of 302
62 Seats and storage
-Compartments* on the back of the front
seat backrests
- Garment hooks on the sides of the pillars in
the rear of the vehicle and in the rear grab
handles
- Compartment in the rear center armrest
- Storage in the trim panels in the luggage
compartment
~ WARNING
-
- Always remove objects from the instru
ment panel. Any items not stored could
slide around inside the vehicle while driv
ing or when accelerating or when apply
ing the brakes or when driving around a
corner.
- When you are driving make sure that
anything you may have placed in the cen
ter console or other storage locations
cannot fall out into the footwells. In case
of sudden braking you would not be able
to brake or accelerate.
-Always keep the lid of the compartment
for (sun)glasses* closed while driving to
reduce the risk of injury during a sudden
braking maneuver or in the event of an
accident.
- Any articles of clothing that you have
hung up must not interfere with the driv
er's view. The coat hooks are designed
only for lightweight clothing. Never hang
any clothing with hard, pointed or heavy
objects in the pockets on the coat hooks.
During sudden braking or in an accident -
especially
If the airbag is deployed -
these objects could injure any passen
gers inside the vehicle.
- To reduce the risk of personal injury in an
accident or sudden stop, always keep the
glove compartment closed while driving.
- Read and follow all WARNINGS
~ page 160, Important safety instruc
tions on the side airbag system.
-Hang clothes in such a way that they do
not impair the driver's vision.
- The coat hooks must only be used for
lightweight clothing. Do not leave any
heavy or sharp edged objects in the pock- ets which may interfere with the side cur
tain airbag deployment and can cause
personal
injury in a crash.
- Do not use coat hangers for hanging
clothing on the coat hooks as this can in
terfere with proper deployment of the side curtain airbags in an accident.
- Do not hang heavy objects on the coat
hooks, as they could cause personal in
jury in a sudden stop.
(D Note
Objects located on the rear shelf that rub
against the rear window could damage the heating wires for the rear window defog-
ger .
Roof rack
Description and mounting locations
Additional cargo can be carried with a roof
luggage rack.
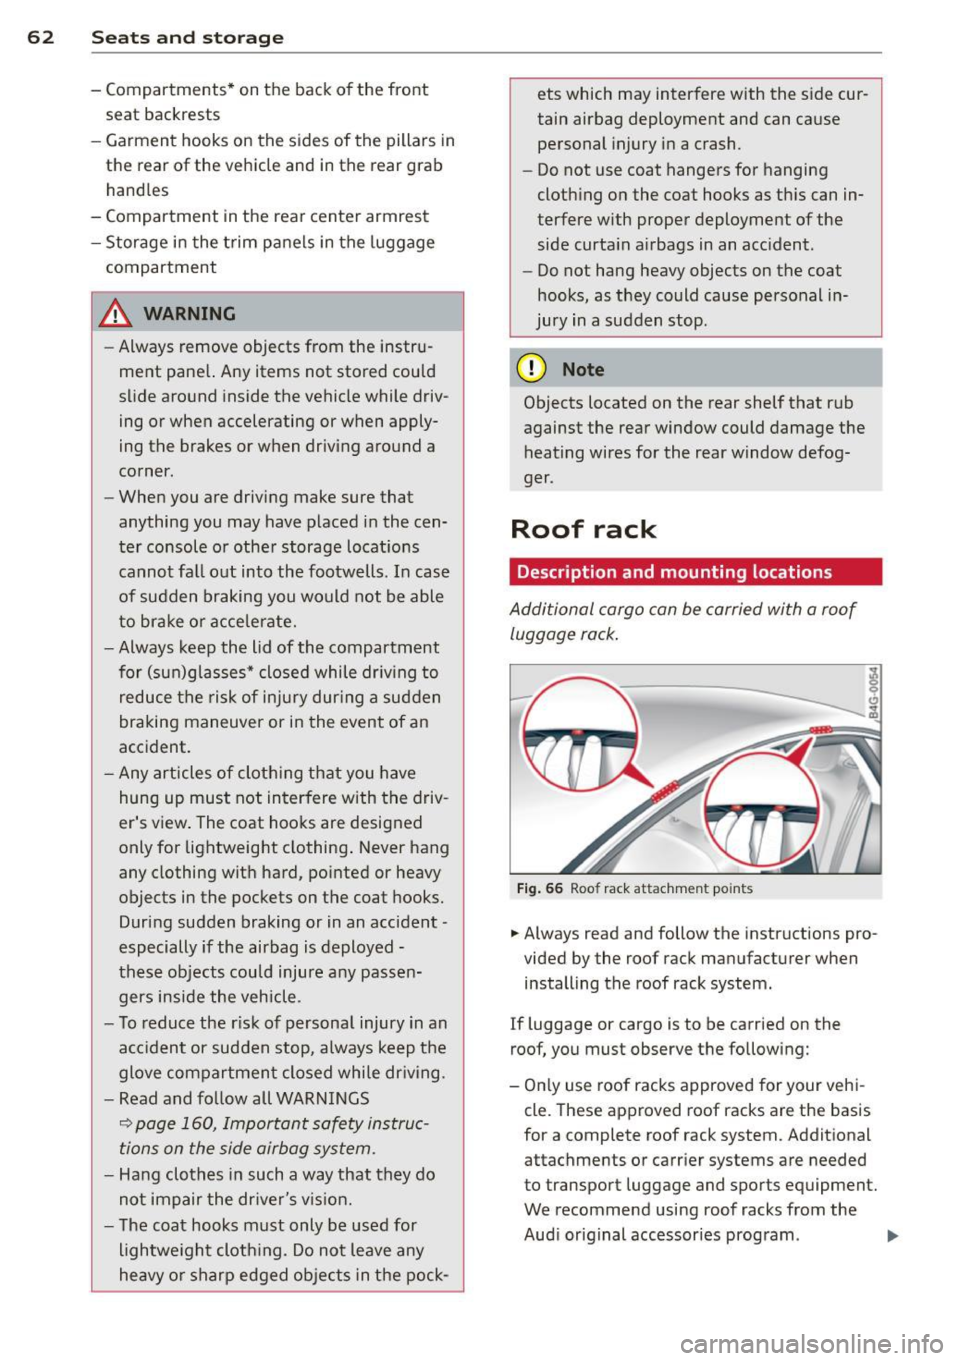
Fig. 66 Roof rack attachment po ints
... Always read and follow the instructions pro
vided by the roof rack manufacturer when installing the roof rack system.
If luggage or cargo is to be carried on the
roof, you must observe the following:
- Only use roof racks approved for your vehi
cle. These approved roof racks are the basis
for a complete roof rack system. Additional
attachments or carrier systems are needed
to transport luggage and sports equipment.
We recommend using roof racks from the
Audi original accessories program . .,..