stop start AUDI S3 2010 Owners Manual
[x] Cancel search | Manufacturer: AUDI, Model Year: 2010, Model line: S3, Model: AUDI S3 2010Pages: 320, PDF Size: 75.34 MB
Page 4 of 320
Table of contents
Table of contents
Vehicle literature ........ .
About this Owner's Manual ..... ... ...... ....... .
Controls and
equipment ................. .
Instrumen ts and con trols ..... .
Genera l ill ustration ............. .
Ins trumen ts and
warning/indicat or lig hts ....... .
Instruments ... ... ............ . .
Warning/indicator lights ........ .
Driver in fo rma tion disp lay ..... .
Introduction ... .......... ... ... .
On-Board Diagnostic system (OBD)
Trip compute r ................. .
Menu di splay ............ ...... .
Speed warn ing system ...... ... .
Warnings and symbo ls ......... .
Opening and c losi ng .......... .
Keys .............. ... ......... .
Power locking system .......... .
Doors, power locks ............ .
Powe r w indows ... ... .. .... ... .
Panoramic s liding sunroof ...... .
Emergency mechanical c losing for
t he panoram ic slid ing sunroof .. .
Clear v ision .................... .
Lights . ..... ... ... .... ... ... .. .
Interior lights .................. .
Vision ........ ...... ......... . .
4
5
6
7
7
8
8
1 1
18
1 8
21
22
23
26
28
36
36
38
41
47
49
50
53
53
58
60
Wiper and washer system .. .... .
Mirrors ....................... .
Digital compass ............... .
Seats and storage ............ .
General recommendat ions ..... .
Adjust ing front seats manua lly ..
Ad just ing the power seat ...... .
Adjusting the lumbar support .. .
Head restraints ............... .
Cen ter armrest ... ... ... ... ... . .
Rear seats .................... .
Luggage compartment . ...... . .
Roof rack* installation ......... .
Cup ho lders .......... ........ .
As htray ................ ...... .
Cigarette lighter/socket . .• .... ..
Storage .................. ... . .
War m and cold ........... ... . .
Climate controls ....... ... .... .
Electrically heated front seats . . .
On the road ............... ... . .
Steering ...................... .
Ignition lock and ignition switch .
Sta rting and stopping the engine
Par king bra ke ................. .
Starting on hills ... ...... •.... ..
Cruise control .......... .. ..... .
Transm ission
Manual transmission
S tronic transmission ... .. .. ... .
62
67
70
72
7 2
7 3
74
76
7 7
80
80
81
86
89
91
91
92
96
96
104
105
105
106
107
108
1 10
1 10
1 13
1 13
1 14
Safety first ...... ...... .... .
Driving Safe ly ...... .... ... .... .
Genera l notes ...... ........... .
Proper occupant seating pos it ions
Peda l a rea .................... .
S tow ing luggage .......... .... .
Reporting Safety Defects ...•....
Safety belts ................... .
General notes ....... •..........
Why safety be lts? .. ... ..... •....
Safety belts ........... ... .. ... .
Safety belt pretensioners ....... .
Airbag system ................. .
Important things to know ...... .
Front
airbags .. .... ... ...... .. .
Monito ring the Advanced Airbag
System ... ..... ... .. ..... ... .. .
Side a irbags .............. •....
Side curtain airbags ....... •....
C hild Safe ty ................... .
Important thi ngs to know ...... .
Child safety seats ............. .
Insta lling a ch ild safety seat .... .
LA TCH Lower anchorages and
tethers for children ............ .
Add itio nal Information ......... .
Vehicle operation ...... . .
Intel ligent technology . ... .. .. . .
No tice abo ut da ta recorded by
1 2 4
12 4
12 4
126
130
131
133
13 5
135
136
139
143
145
145
149
156
161
16 4
167
167
172
177
180
185
188
188
ve hicle control modules . . . . . . . . . 188
E lect ronic Stabili zation Program
(ESP) . . . . . . . . . . . . . . . . . . . . . . . . . . 188
Page 17 of 320

Safety belts i
This warning/indicator light reminds you to put on your
safety belt.
Th e ,{f. warning/indicator light illuminat es when the ignition is
switched on to remind the driver and (on USA models only) any front
passenger to put on the safety belt. Additionally, an acoustic
warning (gong) will also sound.
For more Information:::::, page
135, "Safety belt warning light-*-"·•
Brake system
BRAKE (USA models) / (CD) (Canada models)
This warning/indicator light illuminates when the brake
fluid level is too low or when there is a malfunction in the
ABS, or when the parking brake is set.
The light illuminates when the ignition is turned on. It goes out after
the engine has been started and the parking brake is fully released.
This indicates that the brake warning light is functioning properly.
If the brake warning light does not light up when the engine is
cranking or the parking brake is applied, there may be a malfunction
in the electrical system. In this case, contact your Audi dealer. If the brake system warning/indicator light flashes, there is a brake
system malfunction.
If the ABS fails, the ABS warning /indicator light (USA
models)/
.J (Canada models) flashes together with the brake system
warning/indicator light:::::,& .
(USA models): If the warning light
BRAKE and the warning light
illuminate together, immediately contact your authorized Audi
dealer or qualified workshop to have all brake pads inspected
=:> page 33.
When the light comes on, an audible warning signal is also given.
Controls and equip
ment
Instruments and warning/indicator lights
Parking brake set
The BRAKE or CCi)) (Canada) warning/indicator light illuminates when
the parking brake is set:::::,&.
& WARNING
• USA models : If both the BRAKE warning light and the
warning light come on at the same time, the rear wheels could lock up first under hard braking. Lock-up of the rear wheel brakes
can cause loss of vehicle control and an accident. Have your
vehicle repaired immediately by your authorized Audi dealer or a qualified workshop. Drive slowly and avoid sudden, hard brake
application.
• Canada models: If both the brake warning light CCi)) and the ABS
warning light come on at the same time, the rear wheels could
lock up first under hard braking. Lock-up of the rear wheel brakes
can cause loss of vehicle control and an accident. Have your
vehicle repaired immediately by your authorized Audi dealer or a
qualified workshop. Drive slowly and avoid sudden, hard brake
application
• If the brake warning/ indicator light does not go out after a few
seconds and the parking brake released, or lights up while you are
driving, the fluid level in the brake fluid reservoir is too low. If you
believe that it is safe to do so, proceed immediately at low speed
to the nearest authorized Audi dealer or qualified workshop and have the brake system inspected.
• Always keep in mind that after several brake applications, you
will need greater pressure on the brake pedal to stop your vehicle .
Do not rely on strained brakes to respond with maximum stopping
power in critical situations. You must allow for increased braking
distances. The extra distance used up by fading brakes could lead
to an accident. •
I • •
Page 23 of 320
On-Board Diagnostic system (08D)
On-Board Diagnostics
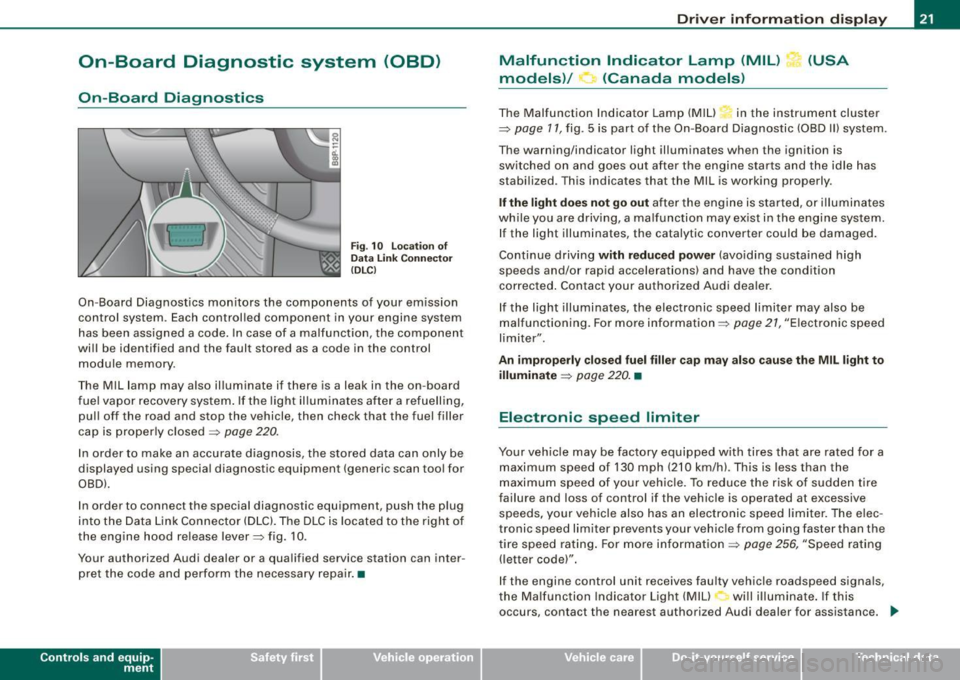
Fig. 10 location of
Data Link Connecto r
( DL C)
On-Board Diagnostics monitors the components of your emission
control system . Each controlled component in your engine system
has been assigned a code. In case of a malfunction , the component
will be identified and the fault stored as a code in the control
module memory .
The Mil lamp may also illuminate if there is a leak in the on-board
fuel vapor recovery system . If the light illuminates after a refuelling,
pull off the road and stop the vehicle, then check that the fuel filler
cap is properly closed
=> page 220 .
In order to make an accurate diagnosis, the stored data can only be
displayed using special diagnostic equipment (generic scan tool for
OBDl.
In order to connect the special diagnostic equipment, push the plug
into the Data Link Connector (DLC). The DLC is located to the right of
the engine hood re lease lever=> fig. 10.
Your authorized Audi dealer or a qualified service station can inter
pret the code and perform the necessary repair. •
Contro ls and eq uip
ment
Driver information display
Malfunction Indicator Lamp (MIL) (USA
models)/ (Canada models)
The Malfunction Indicator Lamp (MIU in the instrument cluster
=> page 11, fig . 5 is part of the On-Board Diagnostic (OBD II) system .
The warning/indicator light illuminates when the ignition is
switched on and goes out after the engine starts and the idle has
stabilized. This indicates that the Mil is working properly .
If the light does not go out after the engine is started, or illuminates
while you are driving, a ma lfunction may exist in the engine system.
If the light illuminates, the catalytic converter could be damaged.
Continue driving
with reduced power (avoiding sustained high
speeds and/or rapid accelerations) and have the condition
corrected . Contact your authorized Audi dealer.
If the light illuminates , the electronic speed limiter may also be
malfunctioning. For more information=>
page 21, "Electronic speed
limiter".
An improperly closed fuel filler cap may also cause the MIL light to
illuminate
=> page 220. •
Electronic speed limiter
Your vehicle may be factory equipped with tires that are rated for a
maximum speed of 130 mph (210 km/h) . This is less than the
maximum speed of your vehicle. To reduce the risk of sudden tire
failure and loss of control if the vehicle is operated at excessive
speeds, yo ur vehicle also has an electronic speed limiter. The elec
tronic speed limiter prevents your vehicle from going faster than the
tire speed rating. For more information
=> page 256, "Speed rating
(letter code)".
If the engine control unit receives faulty vehicle roadspeed signals,
the Malfun cti on Indicator Light (MIU will illuminate . If this
occurs, contact the nearest authori zed Audi dealer for assistance. _.,
Vehicle care I I irechnical data
Page 33 of 320
is too low. In addition to the symbol, the following message
also appears in the display:
Switch off engine and check coolant level
-Pull off the road and stop the vehicle.
- Turn off the engine.
- Check coolant level
=> page 233.
-Add coolant if necessary=> page 234 .
-Continue driving only after the engine coolant
warning/indicator light goes out.
- Contact your authorized Audi dealer for assistance if
necessary.
If the engine coolant level is correct, then the radiator fan may be
the cause of the malfunction.
If the generator warning/indicator light should also illuminate
=> page 14, then the fan belt may be damaged.
_& WARNING
• If your vehicle should break down for mechanical or other
reasons, park at a safe distance from moving traffic, turn off the
engine and turn on the hazard warning lights
=> page 56, "Emer
gency flasher A".
• Never open the hood if you see or hear steam or coolant
escaping from the engine compartment -you risk being scalded.
Wait until you can no longer see or hear steam or coolant escaping.
• The engine compartment of any vehicle is a dangerous area.
Before you perform any work in the engine compartment, turn off
the engine and allow it to cool. Follow the warning stickers
=> page 215, "Engine compartment".
Controls and equip
ment
Driver information display
0 Note
Do not continue driving if the -F-symbol illuminates . There is a
malfunction in the engine cooling system -you could damage your
engine. •
Engine oil pressure malfunction "I=:,:
The red engine oil pressure warning symbol requires
immediate service or repair.
If the 't::r. symbol appears in the display and flashes, the oil
pressure is too low. In addition to the symbol, the following
message also appears in the display:
Switch off engine and check oil level
-Pull off the road and stop the vehicle.
- Shut the engine down.
- Check the engine oil level=>
page 229.
-Contact your authorized Audi dealer for assistance if
necessary.
Engine oil level too low
If the engine oil level is too low, top off oil to the proper level
=> page 230.
Engine oil level OK
If the '1::7: symbol starts flashing again even though the engine oil
level checks OK on th e dipstick,
do not start driving again and do not
let the engine run at idle .
Instead, contact your authorized Audi
dealer for assistance . ..
I • •
Page 49 of 320

Power windows
Controls
Fig. 37 Driver's door :
power window
switches
The switches are located in the driver's door. The front passenger's
door has a own power window switch of its own.
To open/close If the respective switch is pushed or pulled, the
window will , respectively.
Switches for front door windows
@ operates the window in the driver's door.
@ operates the window in the front passenger's door.
Switches for rear windows
© operates the left rear window.
@ operates the right rear window.
Safety switch
© Safety switch for rear window operation.
& WARNING
• Do not leave children unattended in the vehicle, especially with
access to vehicle keys. Unsupervised use of the keys can result in
Con tro ls and eq uip
ment
Opening and closing
& WARNING !continued)
starting of the engine and use of vehicle systems such as power
windows, etc. which could result in serious injury.
• Remember -you can still open or close the power windows for
about ten minutes after the ignition is switched off. Only when
either of the front doors are opened are the power windows
switched off.
• Be careful when closing the windows . Check to see that no one
is in the way, or serious injury could result!
• Always remove the ignition key whenever you leave your
vehicle.
• If you lock your vehicle from the outside, no one, especially chil
dren, should remain in the vehicle.
• Do not stick anything on the windows or the windshield that
may interfere with the driver's field of vision. •
Switches in the driver's door
The driver con operate all windows.
In addition to the switches in the driver 's door, there is a
separate switch in each door for the power w indow in that
door~ fig. 37. If the respective switch is pushed or pulled,
the window will open or close. The power window switches
have a
two -position function:
Opening the windows
Push the switch to the
first stop and hold it there until the
window has lowered to the desired position.
Push the switch briefly to the
second stop : the window
will automatically open all the way.
~
Vehicle care I I irechnical data
Page 109 of 320
___________________________________________________ O_ n_ t_h _e_ r_o _a_ d _ ___._
Starting and stopping the engine
Starting the engine
The engine can only be st arted with your origin al Audi
key.
V ehi cle s with a gas oline engin e:
- Set the parking bra ke.
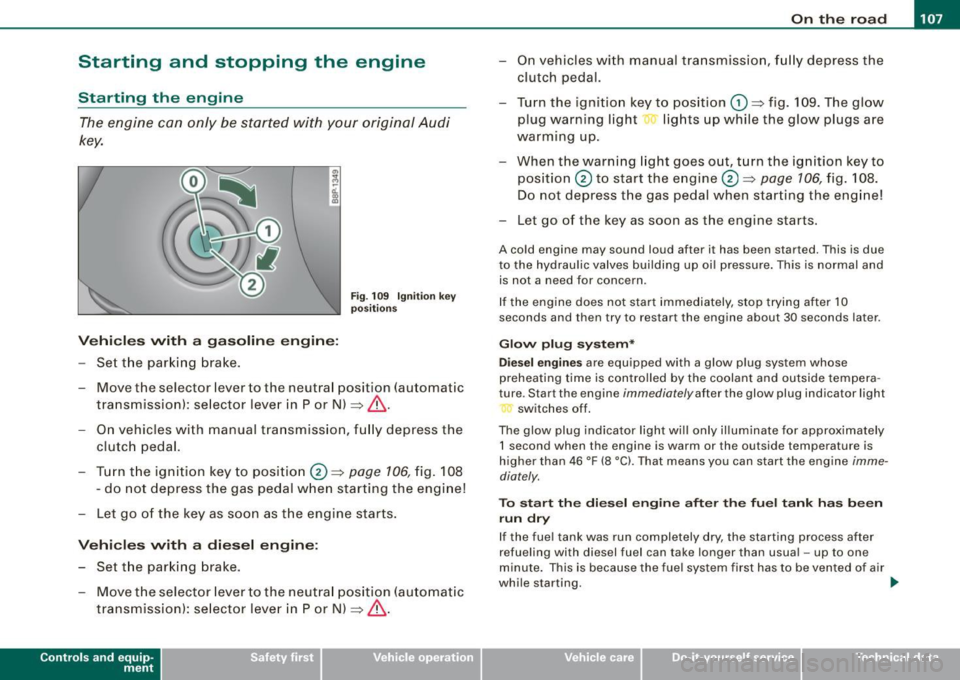
Fi g. 109 I gnit ion ke y
pos it io ns
- Move the selector lever to the neutra l position (automatic
transmission) : se lector lever in P or N) =>
&.
- On vehicles with manual transmission, fu lly depress the
c lutch pedal.
- Turn t he ign ition key to position@ =>
page 106, fig. 108
- do not depress the gas pedal when starting the engine!
- Let go of the key as s oon as the engine s tarts .
Vehicle s with a di esel engine :
- Set the parking brake .
- Move the selector lever to the neutra l position (automatic
transmission): se lector lever in P or N) =>
&.
Con tro ls and eq uip
ment
- On vehicles with manual tra nsm ission, f ully depress the
clutch pedal.
- Turn the ign ition key to position
G) => fig. 109 . The g low
plug warning light lig hts up while the glow plugs are
warming up .
- When the warning light goes out, turn the ignition ke y to
position @ to start the engine@=>
page 106, fig. 108 .
Do not depress the gas pedal when star ting the eng ine!
- Let go of the key as soon as the engine starts.
A co ld engine may sound loud after it has been started. This is due
to the hydrau lic va lves building up oi l pressure . This is normal and
is not a need for concern .
I f the engine does not start i mmediately, stop trying after 10
seconds and then try to res tart the engine about 30 seconds la ter .
Glow plug system *
D ie sel engin es
are equ ipped wi th a glow p lug system whose
preheating time is controlled by the coolant and outside tempera
ture . S tar t the engine
immediately after the glow plug indicator l ight
switches off .
The glow plug indicator light wi ll only il luminate for approximately
1 s econd when the engin e is warm or the outside temp erature is
higher than 46 °F (8 °C). That means you can start the engine
imme
diately .
To st art the di esel engin e after the fuel t ank ha s be en
run dr y
If the fue l tank was run completely dry, the starting process after
refuel ing with diesel fuel can take longer than usual -up to one
minute. This is because the fue l system first has to be vented o f air
while starting. _,.
Vehicle care I I irechnical data
Page 110 of 320

• ..__O_ n_ t_h _e _ r_o _a _ d __________________________________________________ _
& WARNING
Never start or let the engine run in a confined or enc losed area .
Exhaust fumes from the engine contain carbon monoxide , a color
le ss and odorless gas . Carbon monoxide can be fatal if inhaled .
• Never leave the engine idling unattended . An unattended
vehi cle with a runn ing engine poses a danger of personal injury or
theft.
0 Note
• Avoi d high engine speed s, fa st a ccele rati on or heavy eng ine
loads while the engi ne is sti ll cold. This cou ld damage the engine.
• The e ngi ne canno t be sta rt e d by pushing o r to w ing the vehicle.
~ For the sake of the environment
To avoid unnecessary engine wear and to re duce ex hau st emis
sions, do not let your vehicle stand and warm up. Be ready to drive
off immed iate ly afte r start ing y our veh icle. Maintain modera te
sp eed unt il the engine is completely warm. Remembe r, th e engine
performs best a t operati ng tempe ra ture .•
Stopping the engine
- Turn t he ignit ion key to position © ~ page 106 , fig. 108.
& WARNING
• Never turn off the engine until the vehicle has come to a
complete stop.
• The brake booster and servotroni c only work when the engine
is running . With the ignition turned off , you have to apply more
force when steering or braking . Since you cannot steer and stop
normally, this can lead to accidents and serious injuries .
& WARNING (continued )
• The radiator fan can continue to run for up to 10 minutes even
after you have turned off the engine and removed the ignition key .
The radiator fan can also turn on again if the engine coolant heats
up because of inten se sunlight or heat build -up in the engine
compartment .
0 Note
Do not stop the engine immediatel y after hard or extended driving.
Keep the eng ine runn ing f or ap proximate ly t wo minu tes to preven t
excessive heat build -up. •
Parking brake
Parking brake
Whe n the parking brake is s et, i t prev ent s th e v ehicl e f rom
rolli ng away un int entionally.
Setting the parking brake
Fig . 110 Center
console: Par king brake
s et
- Pull the park ing brak e lever all the way up.
Page 111 of 320
_________________________________________________ O _n_ t_h _e _ r_o _a _d __ lfflll
R elea sing th e parking br ake
- Pu ll the parking brake lever up slight ly and press the
release button at the same time~
page 108, fig. 110
-arrow-.
- Keep the release button pressed and lower the parking brake ~& .
If you should drive off with the parking brake sti ll set, a warning tone
will sound and the fo llowing wil l appear in the instrument cluster to
remind you to re lease the parking brake:
Parking brak e set
The parking brake warning comes on only after you have driven for
longer than 3 seconds and faster than 5 mph (5 km/h).
The parking b rake warning light Brake (USA)/ «D>
(CDN) illuminates
when the parking brake is set and you switch on the ignition .
& WARNING
Alway s re leas e the par king br ake completely . A p artiall y engaged
br ake w ill overheat the r ear brake s, reduce their effective ness and
ca use e xcessive w ear. T his co uld le ad to brake failur e and an acc i
dent .
0 Note
Only after the vehicle has come to co mplete stop, should you firm ly
set the parking brake and either move the gearshift lever into 1st .
gear (manual transmission) or move the selector lever into "P"
(Automatic transmission). •
Controls and equip
ment
Parking
To prevent a parked vehicle from rolling away, there are a
few things you should do.
When you park your vehic le, do the fo llowi ng:
- Stop the vehicle using the brake pedal.
- Set the parking bra ke firm ly .
- Move the selector lever into the
P pos ition ( automatic
tran smi ssion)
or m ove the gea rshi ft lever into 1s t. gear
(manual transmission ) ~ &.
- Switch off the engine and remove the ignitio n key from
t h e igniti on loc k.
Wh at else you should d o wh en p arking your vehicle o n
a n i ncline or dec line
Turn the steering wheel so that if the vehicle should start to roll, it
will ro ll into the curb.
I f you are parking on a
declin e (the front of your vehic le facing
downhill!, turn the front wheels to the right so that they point
toward the curb .
If you are parking on an incline (the font of your vehicle fac ing
uphill!, turn the front whee ls to the left so that they point
away from
the curb.
Move the selector lever into the P position ( autom atic tran sm iss ion)
or move the gearshift leve r into 1st. gear (manual tr ansmi ssion ).
& WARNING
Thi s is how you can redu ce the r isk of injury when leaving y our
vehi cle .
• Never p ark the vehi cle where it can come in conta ct with dr y
gra ss, spi lled fuel or any other fl amm able m ater ials . .,_
I • •
Page 112 of 320

• ..__O_ n_ t_h _ e_ r_ o_ a_ d ____________________________________________________ _
& WARNING (continued )
• Never allow anyone -especially small children -to remain in the
vehicle when it is locked. Locked doors make it more difficult for
rescuers to access the passenger compa rtment in the event of an
emergency . Danger to life!
• Never leave children unsupervised in the vehicle. Children
could release the parking brake or move the gearshift lever out of
ge ar. The vehicle could start to roll away and cause an ac cident .
• No matter what the season is , the temperature in a parked
vehicle can reach dangerous levels. •
Applies to vehicles: with hill hold assist
Starting on hills
Hill hold assis t mak es it eas ier to star t on h ills .
T he system is activated when the brake peda l is depressed
for a few
seconds .
After releasing the brake pedal, the brake power is held for a brief
moment to pr event the vehicle fr om r olling back whe n star ting . A t
this time, you can easily begin to move your vehicle.
& WARNING
• If you did not beg in moving immediately after releasing the
brake pedal , under certain circumstances , the vehicle would begin
to roll backward . Depress the brake pedal immediately or engage
the hand brake.
• Should the engine stall , depress the brake pedal immediately
or engage the hand brake .
• In order to prevent the vehicle from rolling back unintentionally
when starting in stop -and-go traffic, keep the brake pedal
depressed for a few seconds before driving off.
[ i ] Tips
You can find out if your ve hicle is equ ipped w it h "Hi ll ho ld ass ist" at
an authorized Audi dealershi p.•
Cruise control
Switching the system on
Th e cruise con trol sys tem mak es it possible to dr ive a t a
c onstant spe ed s tartin g at 20 mp h (30 km /h).
Fig . 111 Control lever
with set button
F ig . 112 Display:
Sele cted speed
P ull the le v er to p ositi o n G) => fig. 11 1 to sw itch the
s y st em o n.
Page 115 of 320

Transmission -_______________ ___.
Transmission
Manual transmission
Applies to vehicles: with manual transmission
Gearshift lever
The clutch pedal must be depressed all the way before
you can start the engine.
The manual transmission in your Audi is equipped with an
interlock-feature.
- Depress the clutch pedal all the way.
- Start the engine with the gearshift lever in Neutral and
the clutch pedal depressed.
0 Note
Always depress the clutch pedal fully when changing gears. Do not
hold the vehicle on a hill with the clutch pedal partially depressed.
This may cause premature clutch wear or damage.
[ i J Tips
• Resting your hand on the gearshift lever knob while driving will
cause premature wear in the transmission.
• The back-up lights go on when you shift into Reverse with the
ignition on. •
Contro ls and eq uip
ment
App lies to vehicles: with 6-speed manual transmission
Gearshift pattern (6-speed manual
transmission )
Fig. 113 Gearshift
pattern: 6-speed
manual transmission
Drive in 6th gear for optimum fuel economy when cruising.
However, if more acceleration is required (when passing, for
example), shift down.
Engaging reverse gear (R)
- Move the shift lever all the way to the left, press it down,
then push it forward.
Especially after driving forward, stop the vehicle completely, shift
into
Neutral and rest the shift lever briefly in Neutral before shifting
into
Reverse. •
Vehicle care I I irechnical data