technical data AUDI S3 2011 Owners Manual
[x] Cancel search | Manufacturer: AUDI, Model Year: 2011, Model line: S3, Model: AUDI S3 2011Pages: 320, PDF Size: 75.79 MB
Page 5 of 320
Vehicle operation ...... 188
Inte lligent tec hno logy ....... . 188
Notice abou t da ta recorded by
vehicle control modules . . . . . . . . 188
Electronic Stab ili z ati on Program
(ESP) ................ ........ 188
Braking ...................... 191
E lec tro-mec hanic al power assist 193
Dr iving with your qua ttro ® ...... 194
Energy management ........ ... 194
D rivi ng a nd env iro nm ent ...... 197
T he firs t 1,000 miles (1,500 km)
and af terwa rds ............... 197
Catalytic converter ...... ... ... 1 98
Diesel part iculate filter ......... 199
Avoid damaging the veh ic le ..... 199
Opera te your veh ic le econom ically
and m inimize pollution . . . . . . . . . 200
Trailer towing ................. 202
Driving with a trailer . . . . . . . . . . . 202
Trailer towing tips . . . . . . . . . . . . . 204
Vehicle care .......... .... 206
Cleaning and protect ion .. ..... 206
G eneral informat ion . . . . . . . . . . . 206
Care of exterior . . . . . . . . . . . . . . . 206
Care of interior ........... ..... 213
F uel sup ply and filling y our fuel
tank ....... .............. ..... 219
Gasoline ..... ......... ....... 219
Diesel fuel . . . . . . . . . . . . . . . . . . . . 220
F u el tank . ... ......... ........ 221
Checking and filling ........... 225
Engine hood . . . . . . . . . . . . . . . . . . 225
E ngine compartment .......... 227
E ngi ne oil . . . . . . . . . . . . . . . . . . . . 228
Controls and equip
ment Safety first
Engine
cooling sys tem . . . . . . . . . 234
Brake fl uid ................... 237
Battery . . . . . . . . . . . . . . . . . . . . . . 238
Windshield washer container . . . 243
T ires and whee ls .............. 245
T ires . . . . . . . . . . . . . . . . . . . . . . . . 245
Tire pressure monitoring system 264
Do-it-yourself service . 270
What do I do now? . . . . . . . . . . . 270
Jack, tools and spa re whee l . . . . . 270
Compac t spare wheel .......... 271
Wheel change ................ 272
Fuses a nd bul bs . . . . . . . . . . . . . . 281
E lec trica l fuses ............... 281
Bulbs ........................ 285
E merg ency si tuati ons . . . . . . . . . 286
G eneral . . . . . . . . . . . . . . . . . . . . . . 286
Starting by pushing or towing
Starting with jumper cables ....
General info rma tion of starting
assistance .................. .
Us e of j umper cab les ......... .
Emergency tow ing w ith
comme rcial tow truck ........ .
Lif ting the vehic le ............ .
Technical data
General in formatn on
Explanation of technical data .. .
Vehicle identification ......... .
Weights .................... .
Dimensions 286
286
287
288
289
292
294
294
294
294
295
295
Table of contents
Data .
. . . . . . . . . . . . . . . . . . . . . . . . . 296
200 hp , 2.0 liter 4-cyl. turbo
gasoline engine . . . . . . . . . . . . . . . 296
140 hp, 2.0 TOI l iter 4-cyl. turbo
clean diesel engine . . . . . . . . . . . . 298
C o nsumer Inform ati on . . . . . . . 299
Warranty coverages . . . . . . . . . . . 299
Operating your vehicle outside the
U.S.A. or Canada . . . . . . . . . . . . . . 299
Aud i Service Repair Manuals and
Li tera ture . . . . . . . . . . . . . . . . . . . . 299
Maintenance . . . . . . . . . . . . . . . . . 299
Add itional accessories,
modif ications and parts
replacemen t . . . . . . . . . . . . . . . . . 301
Alphabetical index . . . . 304
Vehicle operation Vehicle care Do-it-yourself service Technical data
Page 7 of 320
About this Owner's Manual
This owner's manual contains important information, tips, sugges
tions, and warnings for the use of your vehicle.
Make sure that this owner's manual is always located in the vehicle .
This is especially important if you allow other people to drive the
vehicle , or if you sell it.
This owner's manual describes the
equipment range specified for
this model at the editorial deadline date. Some of the equipment
described here will only be available at a later date, or only in specific
markets .
Some sections in this owner's manual do not apply to all vehicles. In
that case, the
range of applicability is given at the beginning of the
section, e.g. "Applies to vehicles: with parking system". In addition,
optional equipment is indicated by an asterisk"*".
The details in the
illustrations may be different from those in your
vehicle, and are intended to be viewed as a basic guide.
You will find a
table of contents at the beginning of this book, which
displays all topics described in this manua l in order of appearance.
You will find an alphabetical
index at the end of this book.
All
directions , such as "left", "right", "front", "back", are relative to
the direction of travel.
* optional equipment
.,. This section continues on the next page.
• Indicates the
end of a section .
® Registered trademarks are identified with a®. If this symbol is
missing, it is no guarantee that the terms can be used freely.
=> & Cross-reference to a "WARNING!" within a section. For indica
tion with a page number, the corresponding "WARNING!" can be
found outside of the section .
Controls and equip
ment Safety first Vehicle operation
About this Owner's Manual
& WARNING
Text with this symbol
contains important information on safety
and how to reduce the risk of personal injury or death .
0 Note
Text with this symbol draws your attention to potential sources of
damage to you r vehicle.
ci' For the sake of the environment
Text with th is symbol contains information about the environment
and how you can help protect it.
[I) Tips
Text with this symbol contains spec ia l tips and other information
about getting the most out of your vehicle and its feat ures .•
Vehicle care Do-it-yourself service Technical data
Page 9 of 320
Instruments and controls
General illustration
CD
@
®
©
Power window switches
Door handle
Power lo cking sw itch ... .. .. ......... .... .. .. .. . .
Switches for:
- Adjuster for outside m irro rs ... .. .. .. .. .. ... . .. .
- Switching on heated exterior m ir rors
© Light switch ........... .. .... .. .... .. ...... ... .
© Air outle ts ... .. ... .. .. .. .... .. .. .. .. .. ...... . .
0 T ur n s ignal and high be am .. ................... . .
@ Rad io cont rol buttons
® Steering wheel with:
- Integra ted control bu ttons
(multi-fun ction s teering
wheel only) for Audi Sound System
- Horn
- Drive r's airbag ............. .. .. .. .. .. .... ... .
@ Instrument cluster .................. .... ... ... .
@ Rad io and telephone control bu ttons
@ Switches for
- Windshield wiper/washer ... ...... .. ..... .... . .
- Trip computer ....... ...... .. .... .. ...... ... .
@ Depending on options : Radio or Navigat ion system
(n avigat ion, r adio, CD changer)
@ Sw itches fo r Electro nic Stabilization P rogram ( ESP)
@ Emergency flasher .. . .......................... .
@ Storage tray or switch for ............ ...... .. .. . . 4
9
44
6 5
56
101 59
1 4 9
8
65
21
188 92
92
- Audi magnetic ride . . . . . . . . . . . . . . . . . . . . . . . . . . . 12
@ Glove compa rtment (lockab le) . . . . . . . . . . . . . . . . . . . . 92
@ Fron t passenge r's airb ag . . . . . . . . . . . . . . . . . . . . . . . . . 149
Controls and equip
ment Safety first
Instruments and controls
@ loudspeaker (treble)
@ Climate controls .
.. ... ... .. ..... ........... ... .
@ Rear window defogger sw itch .. .. .. .. .. .. .. ..... .
@ Sw itch for seat heat ing ... .. ................. .. .
@ Gear shift lever or se lector lever
- Manu al tra nsm iss io n ..... ................. .. .
- Automatic transm ission ................. .... . .
@ Cup holder ... ... .. .. .. .. .. .. .. .. ... ... .... ... .
@) Electrica l socket . ....... .. . .. ... .. ... .. .. ... .. .
@ El ectri cal socket ................. .... .. .. ..... .
@ AUX- in connection
@ Parking brake lever .................. .... ...... .
@ Ignit ion lock ...... .. .... .. ................... .
@ Adjustable steering co lumn . ....... ... ... . .... .. .
@ Cruise control .... .. .. ... . ..... .. .. .. .. .. .. ... .
@ In strume nt lighting .......... ... .. . .. .. .. .. .. . .
@ Data Link Connecto r for On Boa rd Diagnostic (OBD II)
@ Release lever for the engine hood ......... . ... ... .
@ Switches for :
- Fuel flap release .... ... . ... .. .. .. .. .. .. .. ... .
- Rear hatch re lease
(I] Tips
9 7
102
103
1 14
115 89
90
90
108
106
105
1 10
5 8
20
2 25
222 4 5
A separate Owner's Manua l is in vehicles that have a factory-installed
radio, CD c hanger, navigatio n system, AUX -in connection or multi
fu nction stee ring w heel. •
Vehicle care Technical data
Page 11 of 320
If the engine RPMs drop below 1 500, you should downshift to the
next lower gear. The red area at the end of the scale indicates
maximum permissible engine RPMs after the break-in period. Before
reach ing this area, you should either shift into the next higher gear or
ease your foot off the accelerator pedal.
0 Note
The tachometer needle=> page 8, fig. 2 © should not move into the
red range. If it does, then only for a very short period of time. You
could damage your engine by driv ing at high RPM!
<£> For the sake of the environment
Upshifting early saves fuels and reduces engine noise. •
Digital clock with date display
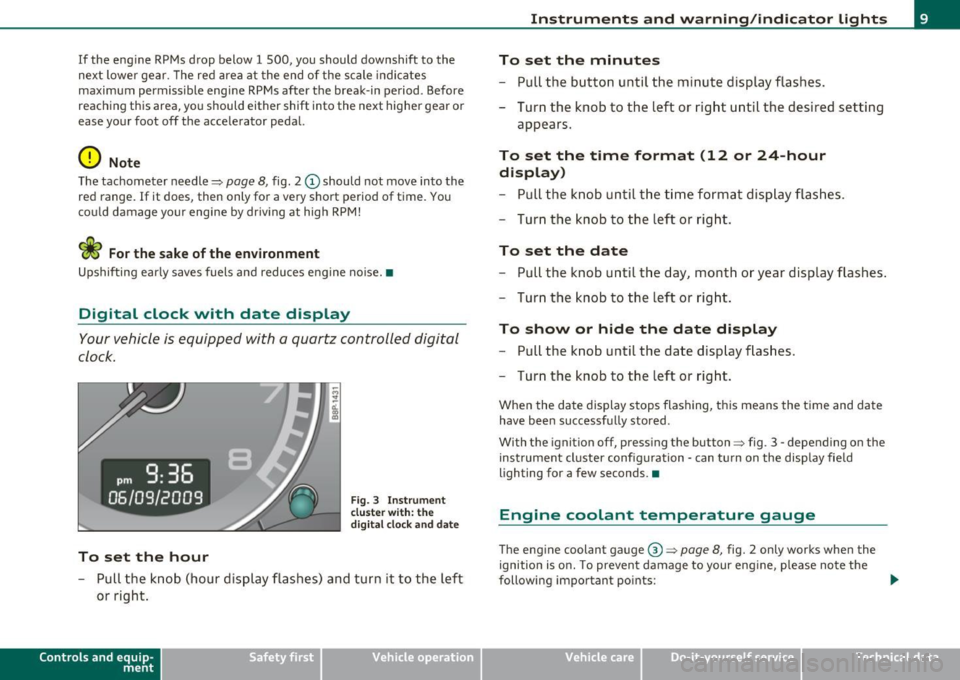
Your vehicle is equipped with a quartz controlled digital
clock.
To set the hour
Fig. 3 Instrume nt
cl uste r with: the
digital clock and date
- Pull the knob (hour display flashes) and turn it to the left
or right.
Con tro ls a nd e quip
m en t Vehicle
OP-eration
Instruments and warning /indicator lights
To set the minutes
- Pull the button until the minute display flashes.
- Turn the knob to the left or right until the desired setting
appears.
To set the time format (12 or 24-hour
display)
- Pull the knob until the time format display flashes.
- Turn the knob to the left or right.
To set the date
- Pull the knob until the day, month or year display flashes .
- Turn the knob to the left or right .
To show or hide the date display
-Pull the knob until the date display flashes.
- Turn the knob to the left or right.
When the date display stops flashing, this means the time and date
have been successfu lly stored .
With the ignition off, pressing the button=> fig . 3 - depending on the
instrument cl uster configuration - can turn on the display fie ld
lighting for a few seconds. •
Engine coolant temperature gauge
The engine coolant gauge@=> page 8, fig. 2 only works when the
ignition is on. To prevent damage to your eng ine , please note the
following important points: .,_
Vehicle care Do-it-yourselt service iTechnical data
Page 13 of 320
Lower odometer
The lowe r odometer shows the total number of mi les (k ilometers)
driven .
Upper odometer (trip odometer)
The upper odometer shows the total number of m iles (kilometers)
driven since you last reset the odometer back to zero . Yo u can use th is
odometer when you want to keep track of how many m iles (k ilome
ters) you have dr iven for a sing le trip or er rand. The last dig it indicates
1 /10 of a mi le ( 100 metres) . You can set the trip odome ter back to
zero by pressing the reset button=>
page 10, fig. 4.
Malfunction message
If there is a ma lfunction somewhe re in the instr ument cl uster, dEF
will appear in the trip odometer and will stay on. Contact you r autho
r ized A udi dea ler to have the problem corrected .
Immobilizer
When the ignition is switched on, the da ta on the igni tion key are
scanned automatically.
If an una uthorized key was used,
SAFE is disp layed continuous ly in
t he o dome ter di sp la y field. The vehicle ca nnot be operated
=> page 40.
[ i J Tips
• The d ig ita l clock and the odometer are turned on for about 30
seconds when the driver's do or is ope ned.
• When the ignition is turned off, t he odomete r reading and the
dig it al cl ock wi th date di sp la y can be sw itche d on for abou t
30 seconds by press ing the knob::::;,
page 8, fig. 2 @ . •
Con tro ls a nd e quip
m en t Vehicle
OP-eration
Instruments and warning /indicator lights
Warning/indicator lights
Overview
The w arni ng/in dicator lights ind icate differ ent fun ctions
o r a po ssible m alfunc tio n.
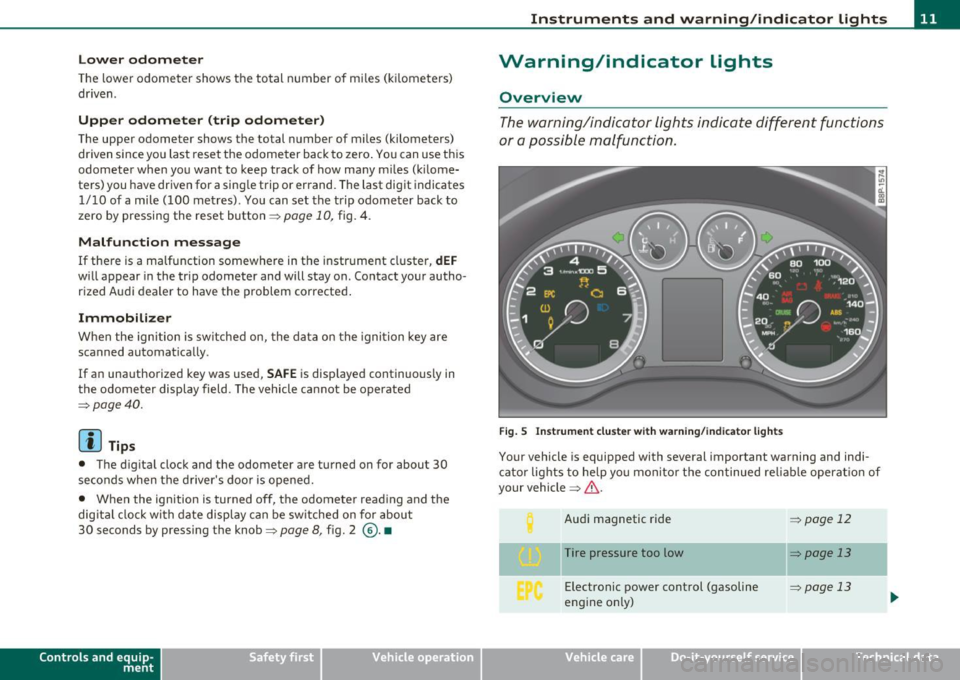
Fig. 5 In strument clu ster w ith warn ing /ind ica tor light s
Your vehicle is equipped with several important warning and indi
c ato r lights to help yo u m onito r th e con tinued re liable operat io n o f
your vehicle ::::;,& .
Aud i ma gnetic ride
Tire pressure too low Electronic power control (gasoline
engine o nly)
=> page 12
=:> page 13
=> page 13
Vehicle care Do-it-yourselt service iTechnical data
Page 15 of 320

[I) Tips
If the ind icator lamp i lluminates wh ile you a re dr iv ing , there is a
ma lfunction in the vehicle damping. Th e chassis shou ld b e insp ected
immediately by an author ized Audi dealer. •
Applies to veh icles : with t ir e p re ssure m onito rin g s yste m
Tire pressure monitoring system - telltale
indicator Lamp ...
The warning/indicator light appears in the event of a
significant loss of air pressure .
The ..Jwarning/indicator light illuminates for a few seconds after the
ignition is turned on as function check and then goes out .
If the symbol appears, pressure is too low in at least one tire.
When the system detects a ma lfunction, the warning/ind icator light
will flash for approximately one minute and then remain continu ously i lluminated. This sequence will continue upon subsequent
vehicle starts up as long as the malfunction exists . Contact your
authorized Audi dea ler and have the ma lfunction corrected .
For more informat ion=>
page 264. •
Electronic power control Dr.
This warning/indicator light monitors the electronic
power control.
The warn ing/ indicator light ( Electronic Power Control) illumi-
nates when you switch on the ignition as a function check.
[ i J Tip s
If this warning/indicator light illuminates while you are driving, then
there is a ma lfunct ion in the engine e lectronics . Have the ma lfunct ion
Controls and equip
ment Safety first
In
strum ents and warning /indicator lights
corrected as soon as possible by your authorized Audi dealer or qual
ified wo rkshop. •
Applies to ve hicles : w it h d ie se l e ng in e
Glow plug system/ Engine malfunction C
The indicator lamp lights up to show that the glow plugs
are preheating. It flashes if there is an engine malfunc tion .
Warn ing light stays lit up
If the -indicator light illuminates, the glow plug system is act ive.
You should start the engine immediately afte r the indicator light
switches off. The ind icator light only illumina tes for approximately 1
second if the engine is warm o r if the outside tempe rature is above 46
QF (8 QC).
There is a fault in the glow plug system if the warning light does
not light up when the engine is
cold . Contact an authori zed Audi
dealer or a qualified workshop .
Warning light fl ashe s
If a malfunct ion develops in the engine management system while
you are driving, the glow plug light will flash
ilf . The engine should
be checked by an autho rized Aud i dealer or a qualified workshop as
soon as possible.
& WARNING
If yo u do not pa y attenti on t o the w arning light s tha t h ave com e
on, thi s co uld lead t o pe rso nal injury o r dama ge to y our veh icle .•
Vehicle care Technical data
Page 17 of 320
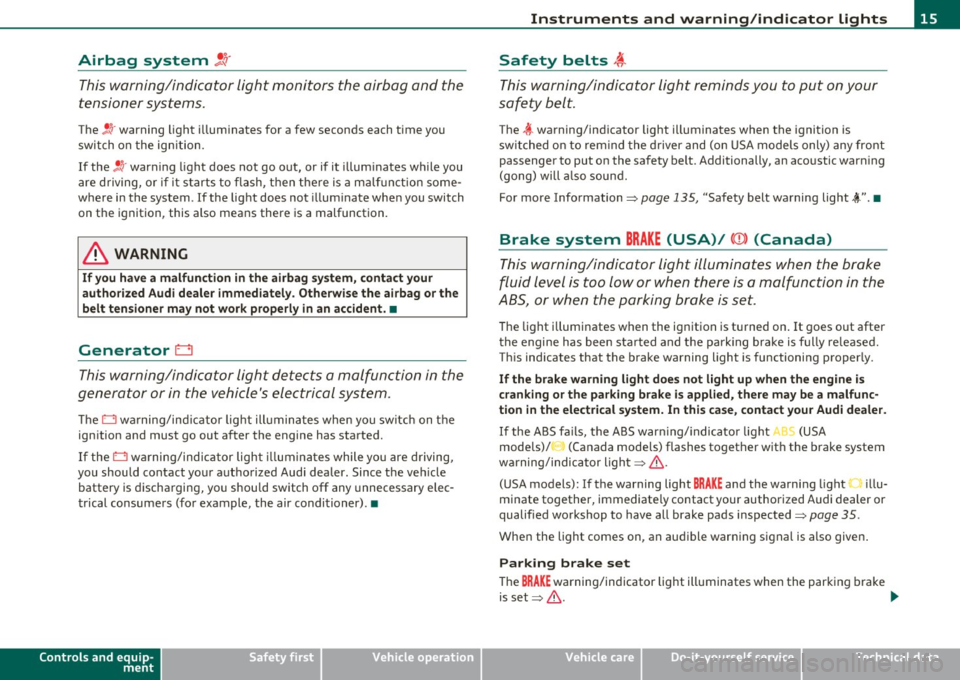
Airbag system !.!r
This warning/indicator light monitors the airbag and the
tensioner systems.
The !! r warning light i llum inates for a few seconds each time you
switch on the ign ition.
If the
! !r warning light does not go out, or if it illum inates while you
are d riving, or i f it s tarts to flash, t hen there is a m alfu nct io n some
where in the system . If the light does not illum inate when you switch
on t he ignition, this also means there is a malfunction.
& WARNING
If you have a malfunction in the airbag sy stem, contact your
authorized Audi dealer immediately. Otherwise the airbag or the
belt tensioner ma y not work properly in an accident. •
Generator 0
This warning/indicator light detects a malfunction in the
generator or in the vehicle 's electrical syst em .
Th e D war ning/in dica tor lig ht ill uminates when you swit ch on t he
ign ition and must go out a fter the engine has started.
If the D war ning/ind ic at or ligh t illumina tes whi le you are d riving,
you shou ld contact you r auth o rized Audi dealer . Since the ve hicle
battery is discharging, you shou ld switch off any unnecessary elec
t rical consume rs (fo r example , the air condi tioner) .•
Controls and equip
ment Safety first
Instruments and warning
/indicator lights
Safety belts ,ft-
This warn ing/indic ato r light remind s you t o put on yo ur
safety belt.
The 4'-wa rning/ind icator light illuminates when the ignition is
s w itched on to re mi nd the driver and (o n USA models only) any fro nt
passenger to put on the sa fety belt. Additionally, an acoustic warn ing
(gong) will a lso s oun d.
For more Information=>
page 135, "Safety belt wa rning light .t" . •
Brake system
BRAKE (USA)/ (CD) (Canada)
T his warn in g/in dic ato r ligh t ill umin ates whe n t he br ake
flui d level is t oo lo w o r w he n t here is a ma lfunction in the
AB S, or whe n the pa rking b rake is s et.
T he light illuminates w hen the ign it io n is tu rned on . It goes out after
t he engine has bee n sta rted and th e p arki ng bra ke is f ully re le ase d.
T hi s indicates that t he bra ke warning light is functioning properly.
If the brake warning light does not light up when the engine is
cranking or the parking brake is appl ied , there may be a malfunc
tion in the electrical system. In this case , contact your Audi dealer .
If the ABS f ails, the A BS war ning/ indicato r light 5 (USA
models)/ (Canada mode ls) flashes toget her w it h the brake system
w ar ning/indica tor ligh t=> & .
(USA models): If the warning light
BRAKE and the warni ng lig ht illu
m inate together, immediate ly contact your authorized Audi dealer or
qualified workshop to have all brake pads inspected=>
page 35.
Whe n the light comes on, an aud ible warn ing si gna l is also given .
Parking brake set
The BRAKE warning/indicator light i lluminates when the par king brake
is set=> &. _,.
Vehicle care Technical data
Page 19 of 320
& WARNING (continued)
• USA model s: If both , the BRAKE warning light and the C
warning light come on at the sam e time, the rear wheels could
lock up first under hard brak ing. Lo ck-up of the rear wheel brakes
can cause los s of vehicle control and an accident. Have your vehicle
repaired immediately by your authorized Audi dealer or a qualified
workshop. Drive slowly and avoid sudden, hard brake appli cation .
• Canada models : If both, the brake warning light
ABS warning light
J come on at the same time, the rear wheels
could lock up first under hard b raking. Loc k-up of the rear wheel
brake s can cause loss of vehicle control and an accident . Have your
veh icle repaired immediately by your authorized Audi dealer or a
qualified workshop. Drive slowly and avoid sudden, hard brake
application •
Electro-mechanical power assist /@
If the ind icator light illuminates while you are d riving, there is a
m alfu nction in the ele ctro-mech anical steering . If the ind ic a tor ligh t
is showing , there may be a reduction in power steer ing ass ist . If
t he indi cato r light is sh owing @, there may be a tot al loss o f power
steeri ng assist . The stee ring must be inspected immediately by a
qualif ie d workshop =>
&-With the engi ne not running (e.g. when the
car is be ing towed), t he re is also no power ass ist available.
& WARNING
If there is a malfunction , the indicator light for the electro
mechanical power a ssist illuminate s. Seek professional
assistance. •
Controls and equip
ment Safety first
Instruments and warning
/indicator lights
Vehicle care Technical data
Page 21 of 320

& WARNING
• Nev er rely exclu sive ly on the out side temperature display to
determine if a r oad surface i s icy or not. Keep in mind that road
s urfaces, esp ecially bridg es and overpas ses, could be ice covered
and slippery even at an outside temperature above 41 °F (+5 °C) .
• Always remember, even if the "snowflake " symbol (ice
warning ) does not appear in the di splay , bla ck ice could be on the
road.
• Alway s redu ce your speed and drive with special care in cold
w eather conditions when the chance of encountering icy road
s urfaces increa se s.
[I] Tips
• If the vehicle is stat ionary, o r if you are driving at a very low speed,
the temperature shown in the display might be s light ly higher than
the act ual o utside temperat ure. Th is is caused by the heat being radi
ated fro m the eng ine.
• On vehicles with S t ronic, the reminde rs do not appear in the
display unt il you se lect a gea r.
• O n veh icles wi th Au di Navigat io n system *, the disp lays may d if f e r
from t heir normal appearance dur ing navigation .•
Controls and equip
ment Safety first
Driver information display
Applies
to vehicles : w ith gea rs hi ft indicator and man ual transm issio n
Gearshift recommendation
Th is indicator can help conserve fuel.
Fig . 8 Gear shift
recommendation
I n orde r to become familiar with the gears hift indicator, begin d riving
as usua l. If the c urrent gea r is not the best o ne fo r conserv ing fuel,
the indicato r will d isp lay the recommended gear. The disp lay shows
the cu rre nt g ear a nd the recommended gear:::::, fig . 8 .
• Upshifting: The d isp lay is to the r ight of the current gear if a
higher gear i s recomme nded.
• Downshifting : The display is to the left of the current gear if a
lower gear is recommende d.
Sometimes the indicator will recommend sk ipping a gear (3
IJIJ> 5).
0 Note
Thi s ind icator should help you co nse rve fuel. It is not des ig ned to
recommend the correct gear in a ll dr iving situations. Only the dr iver
can dec ide which gear is cor rect i n certain dr iv ing s ituatio ns s uc h as
when accelerating or driving on hills.
[I] Tips
• The disp lay switches off when the clutch pedal is pressed.
Vehicle care Technical data
Page 23 of 320

If the engine control unit receives faulty vehicle roadspeed signals,
t he Mal func tion In dica tor Ligh t (M IL)
t::: will illuminate. If th is
occu rs, contact the nearest authorized Audi dea ler fo r ass istance .
& WARNING
Always observe the posted speed limits and adjust your speed to
suit prevailing road, traffic and weather conditions. Never drive
your vehicl e faster than the m aximum speed rating of the tires
in stalled .•
Trip computer
Introduction
The trip com puter gives you informati on on current a nd
average fuel mileage, a verage speed , fu el range and
driving time.
F ig . 1 0 T rip c ompute r
1
You can switch between the t rip computer 1 an d 2 by p ressing the
[ Reset ] bu tton @ ~ page
22, fig . 11.
You can tell wh ich memory level is currently active by the number in
t he display~ fig. 10. The da ta from t he single -trip memo ry (memory
level 1) is being d isp layed if a
1 appears in the display . If a 2 is shown,
Controls and equip
ment Safety first
Driver information display
t
hen the data from the total-trip memory is be ing d isplayed (memory
level 2).
Single-trip memory (Trip computer 1)
Th e sing le- tri p memory sto res t he trip in forma tion from the t ime the
ignition is turned on until it is turned off. If the trip is continued
within 2 hours from the t ime t he ign ition was turned off, the new
data will be included in the ca lculat ion of the c urren t tr ip i nforma
t ion. If th e t rip is interrupted for
more than 2 hours the memo ry is
reset automa tically .
Total-trip memory (Trip compu ter 2 )
Unlike the single-t rip memory, the total-trip memory is not reset
au tom atically . This permi ts you to ev aluate your d riving data for the
en tire pe riod be twee n manual resets.
Fuel range
The est imated cru is ing range in mi les (km) appears in the display. The
display changes in inc rements of 6 mi les (1 0 km).
Average fuel mileage
The ave rage fuel e co nomy in MP G (l/100 km) s in ce you last clea red
the memory appears in this d isp lay.
Current fuel mileage
Th e instantaneous f uel cons umption in miles pe r ga llon ( l/100 km) is
show n in this d is pl ay. W hen the veh icle is st ationary, the most recent
fue l cons umption is displayed.
Average speed
The average speed in mph (km/h) since the last t ime the display was
reset appea rs in the display .
Elapsed time
T he lengt h of t ime that you have been drivi ng s ince you last reset the
memo ry appears in this dis pl ay . The maxim um time period that can
be recor ded is 999 ho urs and 59 minu tes . .,
Vehicle care Technical data