airbag AUDI S3 SEDAN 2017 Owners Manual
[x] Cancel search | Manufacturer: AUDI, Model Year: 2017, Model line: S3 SEDAN, Model: AUDI S3 SEDAN 2017Pages: 400, PDF Size: 67.32 MB
Page 6 of 400
Table of content s
Online media and Internet radio . . . . . . . . 227
Mu ltim edia connections . . . . . . . . . . . . . . 228
Playing media . . . . . . . . . . . . . . . . . . . . . . . 230
Addit ional se ttings . . . . . . . . . . . . . . . . . . 233
Supported media and file formats . . . . . . 235
Troubleshoot ing ................. ... . 237
Audi smartphone interface . . . . . . 239
Setup . . . . . . . . . . . . . . . . . . . . . . . . . . . . . 239
Operating . . . . . . . . . . . . . . . . . . . . . . . . . . 240
Troubleshoot ing . . . . . . . . . . . . . . . . . . . . . 240
System settings . . . . . . . . . . . . . . . . . . 241
Sett ing the date and time . . . . . . . . . . . . . 24 1
MMI se ttings . . . . . . . . . . . . . . . . . . . . . . . 241
Con nection ma nager . . . . . . . . . . . . . . . . . 242
System update . . . . . . . . . . . . . . . . . . . . . . 244
Sound settings . .... .. ..... ... .. .. .. .
Volume settings .... .. ..... ... .. .. .. .
Restarting the
MMI . .. ..... ... .. .. .. .
Software license information 2
4 5
245
246
246
Safety first . . . . . . . . . . . . . . . . . . . . . . . 247
Driving safety . . . . . . . . . . . . . . . . . . . . 247
Basics . . . . . . . . . . . . . . . . . . . . . . . . . . . . . 247
Correct passenger seating positions . . . . . 248
Driver 's and front passenger's footwell . . 252
Pedal area . . . . . . . . . . . . . . . . . . . . . . . . . . 252
Sto ring cargo co rrectly . . . . . . . . . . . . . . . 253
R epo rting Safety Defects . . . . . . . . . . . . . . 255
Ac tive rollove r prote ct io n system 256
Safety belts . . . . . . . . . . . . . . . . . . . . . . 258
Gene ral notes . . . . . . . . . . . . . . . . . . . . . . . 258
W hy use safety belts? . . . . . . . . . . . . . . . . 259
Safety belts . . . . . . . . . . . . . . . . . . . . . . . . 262
Belt tensione rs . . . . . . . . . . . . . . . . . . . . . . 265
Airbag system . . . . . . . . . . . . . . . . . . . . 26 7
Important information . . . . . . . . . . . . . . . 267
Front airbags ... ... ... .... ... .. .. .. . 271
Mon itor ing the Advanced Airbag System . 279
K nee airbags . . . . . . . . . . . . . . . . . . . . . . . . 283
4
S ide a irbags . . . . . . . . . . . . . . . . . . . . . . . . 285
Side curtain airbags . . . . . . . . . . . . . . . . . . 288
Child safety . . . . . . . . . . . . . . . . . . . . . . 292
Important information . . . . . . . . . . . . . . . 292
Child safety seats . . . . . . . . . . . . . . . . . . . . 298
Securing child safety seats . . . . . . . . . . . . 303
LATCH system (lower anchorages and
tethers for c hildren) . . . . . . . . . . . . . . . . . 306
Additional informat ion ........ ..... .. 311
Maintenance and Care ........... 312
Checking and Filling . . . . . . . . . . . . . 312
Fuel ......... .... ... ............... 312
Refueling . . . . . . . . . . . . . . . . . . . . . . . . . . 313
Ca talytic conve rter .. .. .. ........... .. 316
Engine compar tment .. ... .......... .. 316
Engine o il . . . . . . . . . . . . . . . . . . . . . . . . . . 3 19
Cooling system . . . . . . . . . . . . . . . . . . . . . . 323
Brake fluid . . . . . . . . . . . . . . . . . . . . . . . . . 325
Battery . . . . . . . . . . . . . . . . . . . . . . . . . . . . 325
Windshie ld washer system . . . . . . . . . . . . 327
Service interva l display 327
Wheels .... .. . ... .. .. ........... .. 328
Wheels and Tires . . . . . . . . . . . . . . . . . . . . 328
Tire pressure monitoring system 344
Care and cleaning . . . . . . . . . . . . . . . . 347
Genera l information . . . . . . . . . . . . . . . . . 347
Car washes . . . . . . . . . . . . . . . . . . . . . . . . . 347
Cleaning and care informat ion . . . . . . . . . 348
Plac ing your vehi cle ou t of serv ice 352
Do It Yourself . . . . . . . . . . . . . . . . . . . . 353
Emergency assistance . . . . . . . . . . . 353
T ru nk escape la tch . . . . . . . . . . . . . . . . . . . 353
Genera l info rmation . . . . . . . . . . . . . . . . . 353
Eq uipment . . . . . . . . . . . . . . . . . . . . . . . . . 353
T ire mobility kit . . . . . . . . . . . . . . . . . . . . . 354
Replacing wheels . . . . . . . . . . . . . . . . . . . . 356
Spare t ire . . . . . . . . . . . . . . . . . . . . . . . . . . 362
Page 11 of 400
CXl CXl .... N ,.__
N .... 0 N > 00
CD
@
®
©
®
®
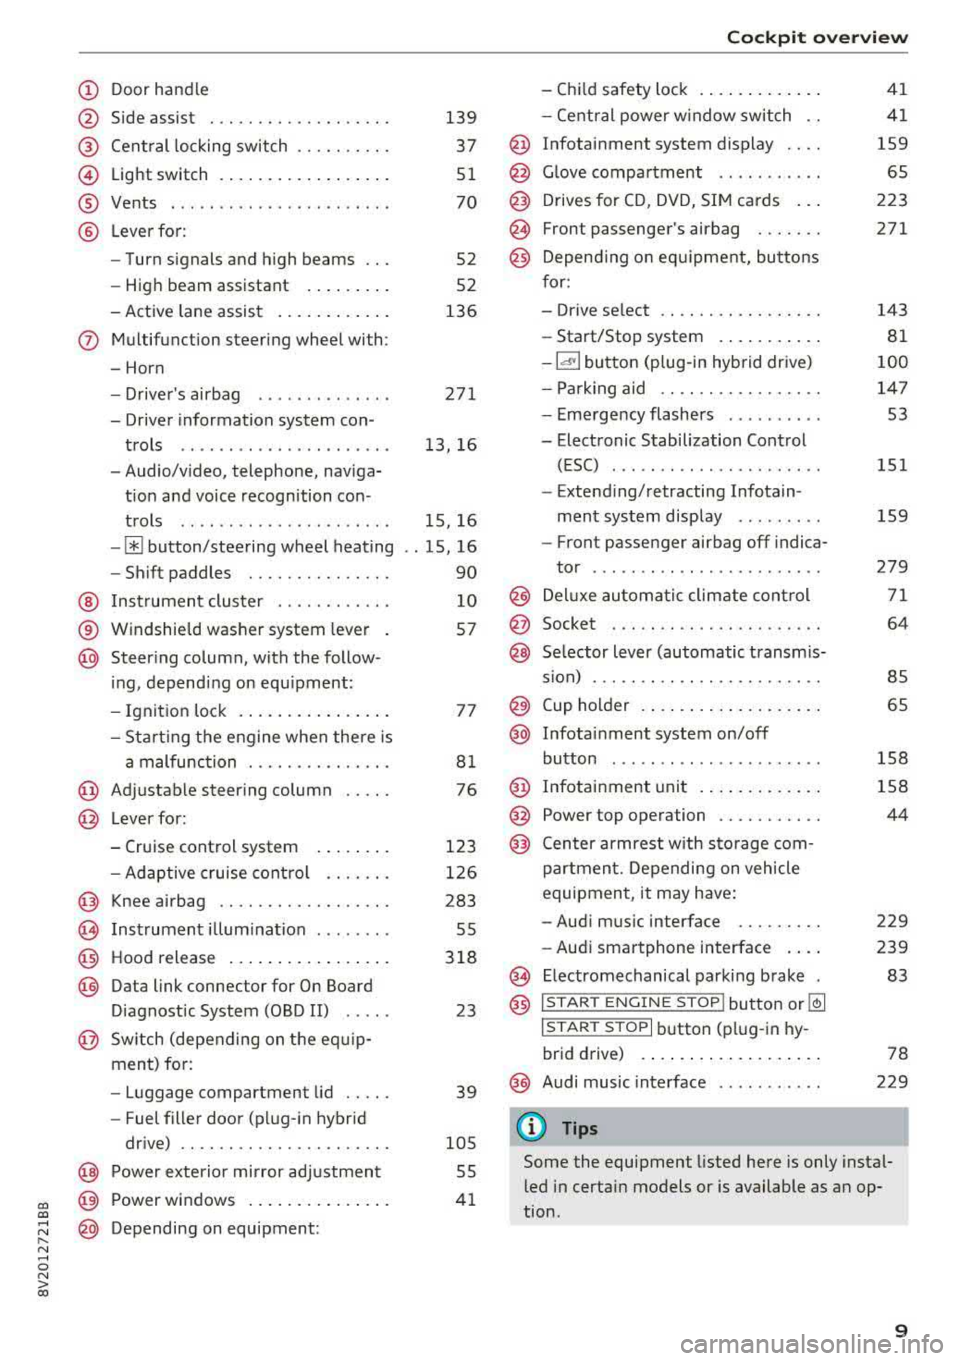
Door handle
Side assist
Central locking switch ....... .. .
Light switch ................ . .
Vents ... .. ........ ..... ... . .
Lever for:
- Turn signals and high beams .. .
- High beam assistant ....... . .
- Active lane assist .......... . .
(J) Multifunction steering wheel with:
- Horn
D. ' . b -rivers air ag .... ..... ... . .
- Driver information system con-
trols ......... ....... ..... .
- Audio/video, telephone, naviga
t ion and voice recognition con -
trols .. .. ........ ..... ... . .
-[ii button/steering wheel heating
- Shift paddles ............ .. .
@ Instrument cluster ......... .. .
® Windshield washer system lever
@ Steering column, with the follow -
ing, depending on equipment :
- Ignition lock .............. . .
- Starting the engine when there is
a malfunction ............ .. .
@ Adjustable steering column .. .. .
@ Lever for:
- Cruise control system ....... .
- Adaptive cruise control ...... .
@ Knee airbag ............. .. .. .
@) Instrument illumination ....... .
@ Hood release ................ .
@ Data link connector for On Board
Diagnostic System (OBD II) .....
@ Switch (depending on the equ ip
ment) for:
- Luggage compartment lid .... .
- Fuel filler door (plug-in hybrid
drive) .. .. ............... .. .
@ Power exterior mirror adjustment
~ p . d ~ ower win ows .............. .
@ Depending on equipment:
139
37
51
70
52
52
136
271
13, 16
15, 16
. . 15, 16
90
10
57
77
81
76
123
126
283
55
318
23
39
105
55
41
Cockpit overview
- Child safety lock ............ .
- Central power window switch ..
@ Infotainment system display ... .
@ Glove compartment .... ...... .
@ Drives for CD, DVD, SIM cards .. .
@ Front passenger's airbag ...... .
@ Depending on equ ipment, buttons
for:
- Drive select .. .............. .
- Start/Stop system .......... .
-la •I button (plug-in hybrid drive)
- Parking aid .. .............. .
- Emergency flashers ......... .
- Electronic Stabilization Control (ESC) ....... .. ............ .
- Extending/retracting Infotain -
ment system display ........ .
- Front passenger airbag off indica-
tor .... ... .. .. ............ .
@ Deluxe automatic climate control
@ Socket . .... .. .. ............ .
@ Selector lever (automatic transmis-
s ion) ... .... .. .............. .
@ Cup holder .... .. ............ .
@ Infotainment system on/off
button ..... .. .. ... ....... .. .
@ Infotainment unit ............ .
@ Power top operation .......... .
@ Center armrest w ith storage com-
partment. Depending on vehicle
equipment , it may have:
- Audi music interface ........ .
- Audi smartphone interface ... .
~ Electromechanical parking brake
@ ISTAR T ENGINE ST OP lbutton or ~
I STAR T STOPI button (plug-in hy-
brid drive) .... .. ............ .
@) Audi music interface
(D Tips
41
41
159
65
223
271
143
81
100
147 53
151
159
279
71
64
85
65
158
158
44
229
239
83
78
229
Some the equipment listed here is only instal
led in certain models or is available as an op
tion .
9
Page 39 of 400
a, a, ..... N
" N .... 0 N > 00
"'Pull on the door handle to open the door.
Locking the vehicle
"'Place the selector lever in the P position (auto
matic transmissions), or e lse the vehicle will
not be able to lock.
"'To lock the vehicle, close the door and touch
the sensor on the door handle
once ¢ fig. 23,
¢_& .Do not hold the door hand le while doing
this.
Unlocking and locking the vehicle can only be
done at the front doors . The remote contro l key
cannot be more than approx imately 5 ft ( 1.5 m)
away from the door handle. It makes no differ
ence whether the remote control key is in you r
jacket pocket, purse or br iefcase .
If you hold the door handle while locking, this
can impair the locking function .
The door cannot be opened for a br ief period di
rect ly after locking it. This allows you the oppor
tunity to check that the driver's door is locked .
The settings in the Infotainment system deter
mine if the enti re vehicle or only one of the doors
is unlocked when unlocking the vehicle
¢page 38.
A WARNING
Read and following all warnings ¢ A in De
scription on page 34.
(!j) Tips
If your vehicle is left stand ing for a long peri
od of time, note the following:
-The proximity sensor switches off after a
few days to save energy. You then have to pull once on the door handle to unlock the
vehicle and a second time to open it.
-The energy management system gradually turns off unnecessary convenience functions
to prevent the vehicle battery from draining
and to maintain the vehicle's ab ility to start
for as long as possib le . You may not be able
to unlock your vehicle using the convenience
key.
-
Open ing and closing
Central locking switch
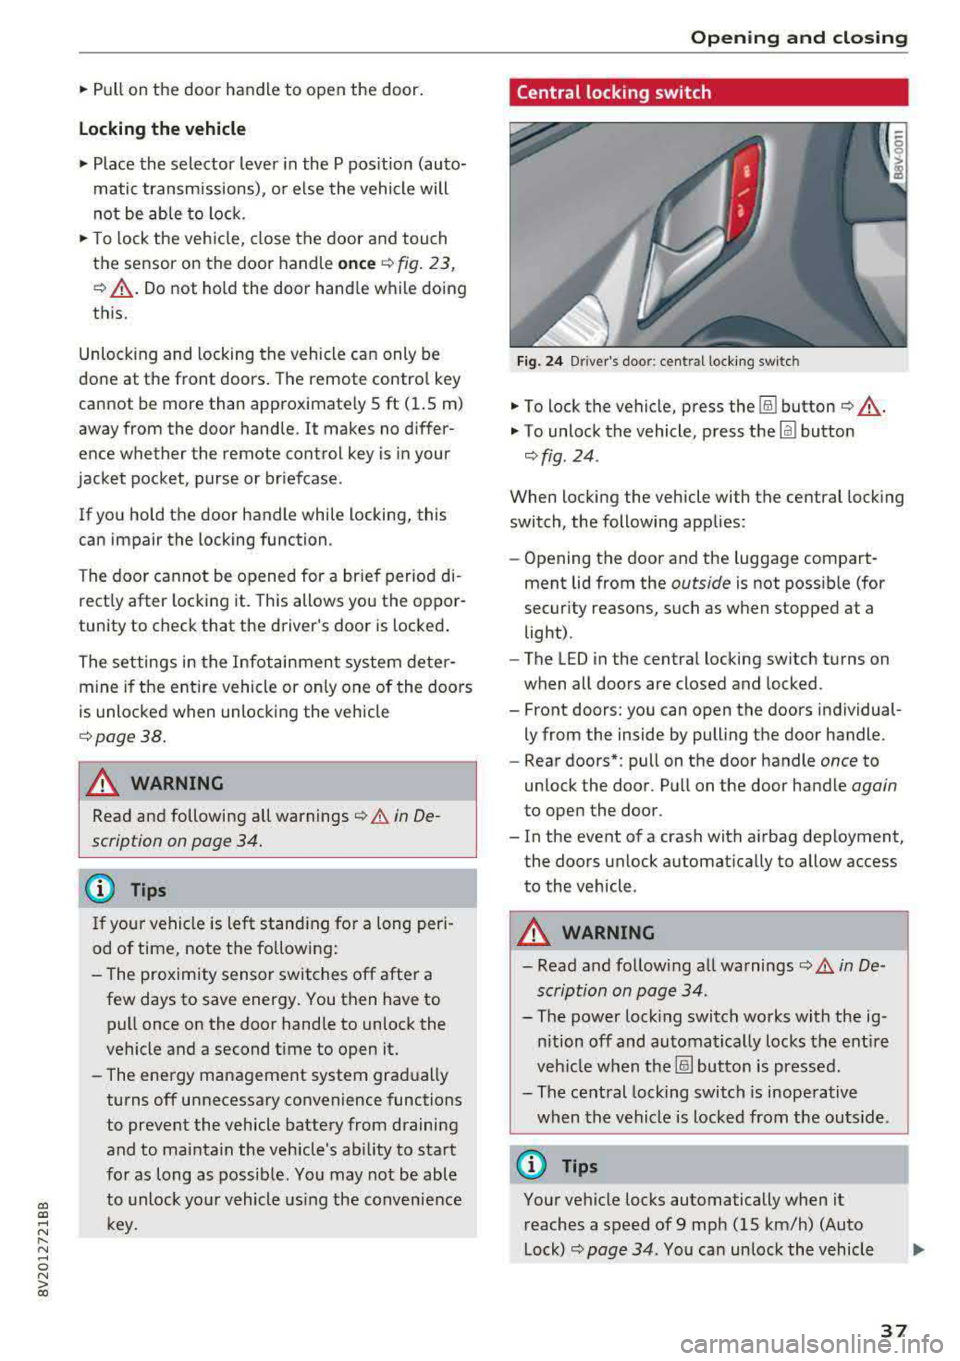
Fig. 24 Drive r's doo r: centra l lock ing switc h
"'To lock the vehicle, press the !ill button ¢_& .
"'To unlock the vehicle, press the Im button
¢ fig . 24.
When locking the vehicle with the central locking
switch, the following applies:
-Opening the door and the luggage compart
ment lid from the
outside is not possible (for
security reasons, such as when stopped at a
light) .
- The L ED in the central locking sw itch turns on
when all doors are closed and locked.
- Front doors: you can open the doors individual ly from the inside by pulling the door handle.
- Rear doors*: pull on the door handle
once to
unlock the door . Pull on the door handle
again
to open the door .
- In the event of a crash with airbag deployment, the doors unlock automatically to allow access
to the vehicle.
A WARNING
-- Read and following all warnings¢ A in De-
scription on page 34 .
- The power locking switch works with the ig
nition off and automatical ly locks the entire
veh icle when the[§] button is pressed.
- The central locking switch is inoperative
when the vehicle is locked from the outs ide.
@ Tips
Your vehicle locks automatically when it
reaches a speed of 9 mph (15 km/h) (Auto
Lock) ¢
page 34. You can unlock the vehicle
37
Page 63 of 400
a, a, ..... N
" N ..... 0 N > 00
Seats and storage
General information
A WARNING
Refer to the chapter Driving Safely
~ page 247, Driving safety for important in
formation, tips, suggestions and warnings
that you should read and follow for your own
safety and the safety of your passengers.
Front seats
Manual seat adjustment
Applies to vehicles with manual adjustable seats
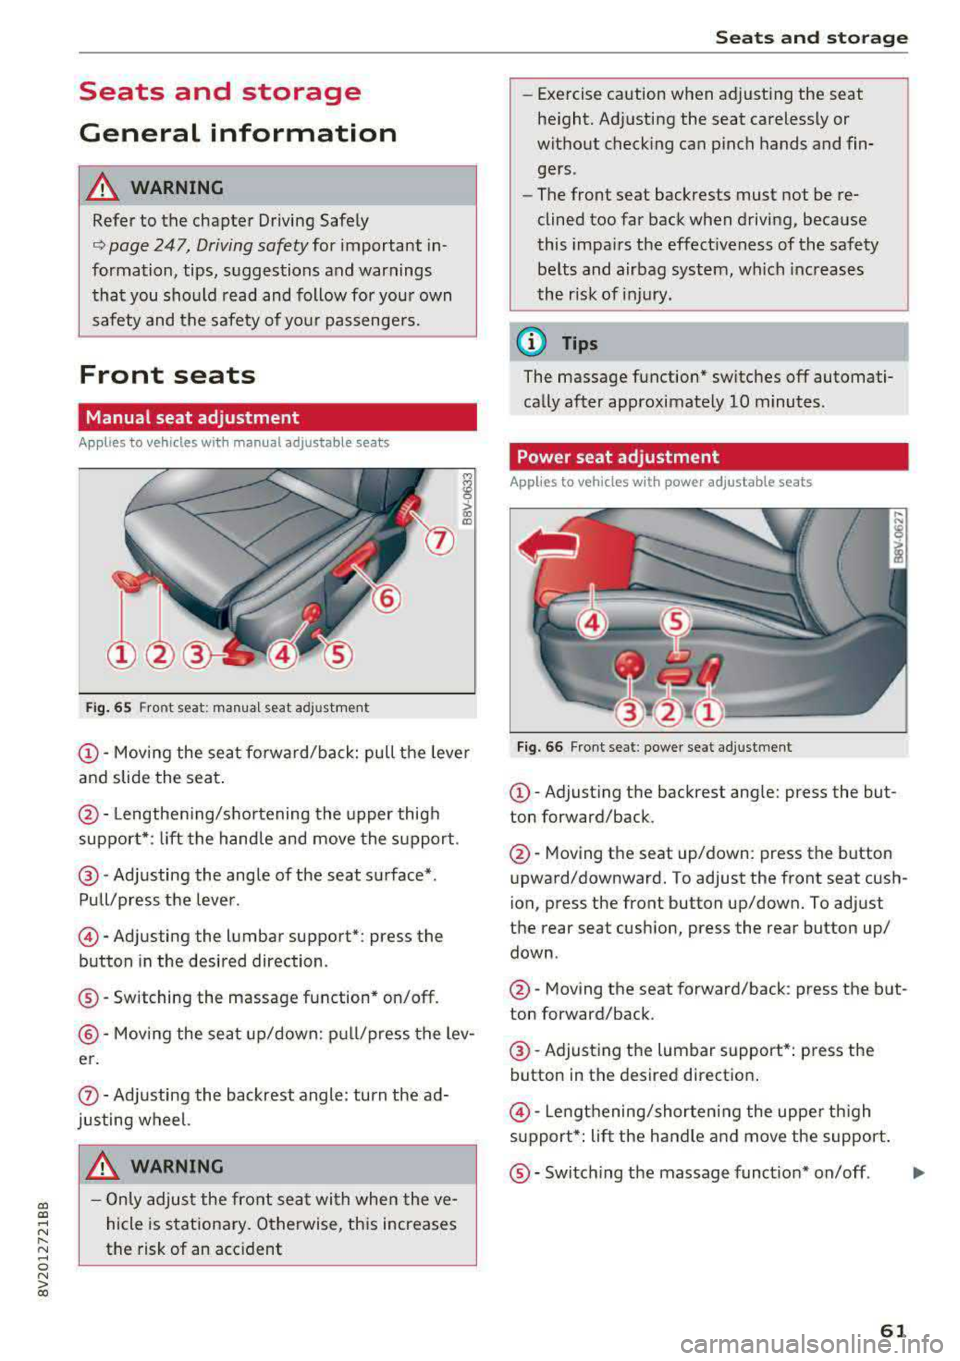
Fig. 65 Fro nt seat: manual seat adj ustment
@ -Moving the seat forward/back: pu ll the lever
and slide the seat .
@-Lengthening/shortening the upper thigh
support* : lift the handle and move the support.
@-Adjusting the angle of the seat surface*.
Pull/press the lever .
@-Adjusting the lumbar support* : press the
button in the desired direction .
®-Switching the massage function* on/off.
@ -Moving the seat up/down: pull/press the lev
er.
0 -Adjusting the backrest angle : turn the ad
justing wheel.
A WARNING
- Only adjust the front seat with when the ve
hicle is stationary. Otherwise, this increases
the risk of an accident
Seats and storage
-Exercise caution when adjusting the seat
height. Adjusting the seat carelessly or
without checking can pinch hands and fin
gers .
- The front seat backrests must not be re
clined too far back when driving, because
this impairs the effectiveness of the safety
belts and airbag system, which increases
the risk of injury.
(D Tips
The massage function* switches off automati
cally after approximately 10 minutes.
Power seat adjustment
Applies to vehicles w ith power adjustab le seats
Fig. 66 Front seat : power seat adj ustment
@ -Adjusting the backrest angle: press the but
ton forward/back .
@-Moving the seat up/down: press the button
upward/downward. To adjust the front seat cush
ion, press the front button up/down. To adjust
the rear seat cushion, press the rear button up/
down .
@-Moving the seat forward/back : press the but
ton forward/back .
@-Adjusting the lumbar support*: press the
button in the desired direction .
@-Lengthening/shortening the upper thigh
support*: lift the handle and move the support.
®-Switching the massage function* on/off .
61
...
Page 64 of 400
Sea ts and stor age
_& WARNING
- Only adjust the front seat with when the ve
hicle is stat ionary . Otherwise, this increases
the risk of an acc ident
- The power adjustment for the front seats al
so works with the ignition switched off or
with the ignition key removed . For this rea
so n, children should never be left unattend
ed in the veh icle
-they co uld be inj ured!
- Exercise caution when adjusting the seat
height. Uns upervised or careless seat ad
justment can p inch fingers or hands causing
injur ies .
- T he front seat backrests m ust not be re
cl ined too far back when driving, because
this impairs the effectiveness of the safety
belts and airbag system, which increases
the risk of injury .
(Di Tips
The massage function* switches off a utomat i
cally after approximately 10 mi nutes.
Entry assistance
Applies to: vehicles with entry ass istance
E asy seat entry makes it easier to get into the
back seats .
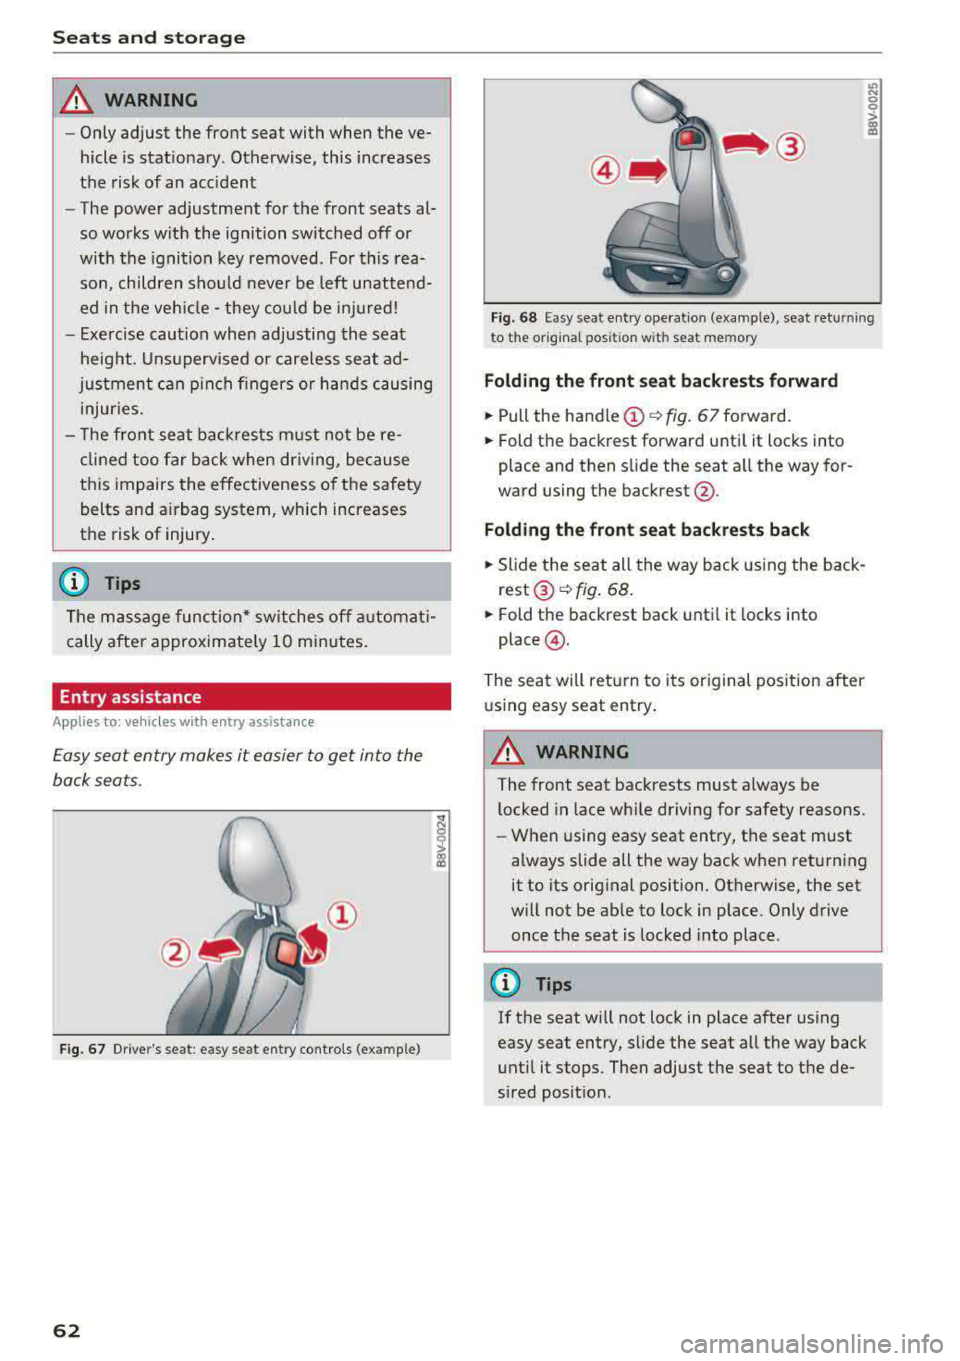
Fig. 67 Dr ive r's seat : easy se at ent ry controls (ex ample )
62
'° ::: 0 ::l-a) 113
F ig. 6 8 Easy sea t en try ope rat io n (examp le) , seat ret urnin g
t o t he origina l pos ition w it h se at mem ory
Fold ing th e front seat backrests forward
.,. Pull the handle (!)¢ fig. 67 forward.
.,. Fold the backrest forward unti l it locks into
place and then slide the seat a ll the way for
ward using the backrest @.
Fold ing the front seat back rests back
.,. Slide the seat all the way back using the back
rest ®~ fig. 68 .
.,. Fold the backrest back until it locks into
place @.
The seat will ret urn to its original posit ion after
u sing easy seat entry.
A WARNING
-The front seat backrests must a lways be
l ocked in lace wh ile driving for safety reasons.
- When using easy seat entry, t he seat must
always slide all the way back when returning
it to its orig inal position . Otherwise, the set
w ill not be ab le to lock in place. Only drive
once the seat is locked into place .
(D Tips
If the seat w ill not lock in place after using
easy seat entry, slide the seat all the way back
unt il it stops. Then adjust the seat to the de
sired posit ion.
Page 68 of 400
Sea ts and stor age
-Hang only lightweight cloth ing and be s ure
that there are no heavy or sharp-edged ob
jects in the pockets.
-Do not use coat hangers to hang garments,
because th is could reduce the effectiveness
of the side curtain airbags.
Luggage compartment
General information
A WARNING
Read and follow the important safety p recau
tions in
¢ page 253, Storing cargo correctly.
Luggage compartment cover
A pp lies to: ve hicles with luggage compart men t cover
The luggage comportment cover blocks the view
into the luggage comportment.
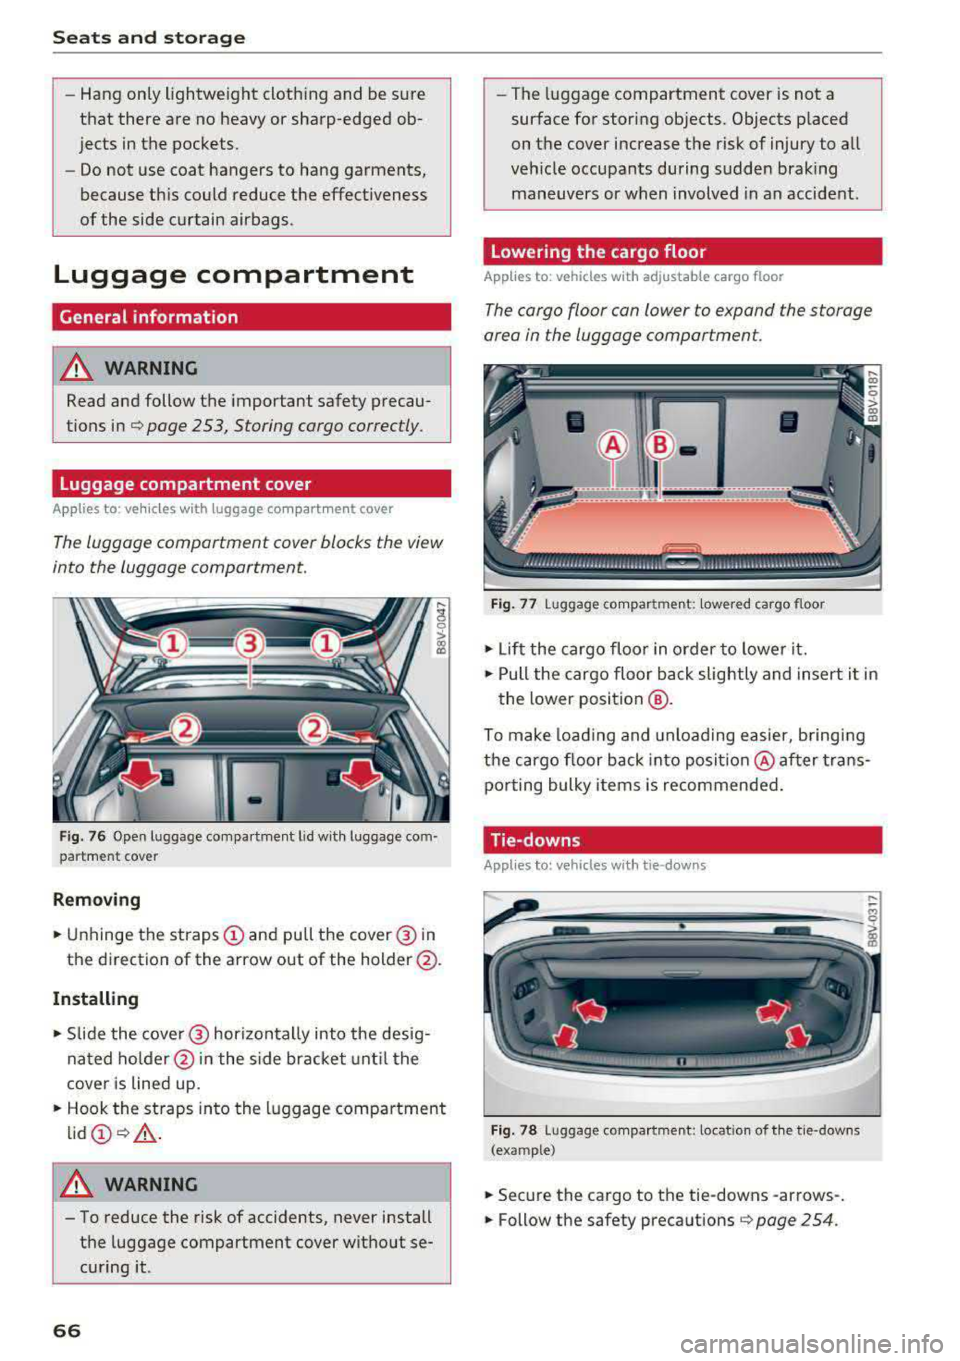
F ig . 76 Open luggage com pa rtment l id w ith luggage com
partment cover
Remov ing
... U nhinge the straps (D and pull the cover @ in
the d irection of the arrow out of the holder @.
Installing
... Slide the cove r@ horizontally into the desig
nated ho lder @in the s ide bracket until t he
cove r is lined up .
... Hook the st raps into the luggage compartment
lid @ ¢,& .
A WARNING
-To reduce the risk of accidents, never install
t h e luggage compartment c over wit hout se
cu ring it.
66
-The luggage compartment cover is not a
surface for storing objects. Objects p laced
on the cover increase the risk of injury to all
veh icle occupants during sudden braking
maneuvers or when involved in an accident.
Lowering the cargo floor
App lies to: vehicles with adjustable cargo floor
The cargo floor con lower to expand the storage
area in the luggage comportment.
Fi g. 7 7 Luggage co mpa rt ment: lowe re d cargo floor
... Lif t the cargo floo r in o rder to lowe r it .
... Pull the cargo floor ba ck slightly and insert i t in
the lower position
@ .
To make load ing and unloading easier, b ringi ng
the cargo floor back into posit io n @ aft er trans
po rting bulky item s is recommended.
Tie-downs
Appl ies to: vehicles with tie-downs
- ------- --
Fig. 7 8 Luggage compa rtment: locat io n of t he t ie-downs
(example)
... Secure the cargo to the tie-downs -arrows-.
... Follow the safety preca utions ¢ page 254.
Page 78 of 400
Driving
other damage to the vehicle or other property .
-Have your vehicle maintained properly and
in accordance with the service recommenda
tions in your Warranty
& Maintenance book
let . Lack of proper maintenance as well as
improper use of the vehicle will impair the
function of the emission control system and
could lead to damage.
- Do not alter or remove any component of
the Emission Control System unless ap
proved by the manufacturer .
- Do not alter or remove any device, such as
heat shields, switches, ignition wires,
valves, which are designed to protect your
vehicle's Emission Control System and other
important vehicle components.
(I) Tips
The consumption estimates as published by
ENVIRONMENTAL PROTECTION AGENCY
(EPA) and Transport Canada may not corre
spond to your actual consumption on the
road, which will vary depending upon vehicle
load and speed, road and weather conditions,
trip length, etc .
Steering
Adjusting the steering wheel position
The steering wheel position is fully adjustable up
and down and forward and back .
Fig. 88 Steering column: steering col umn adjustment lever
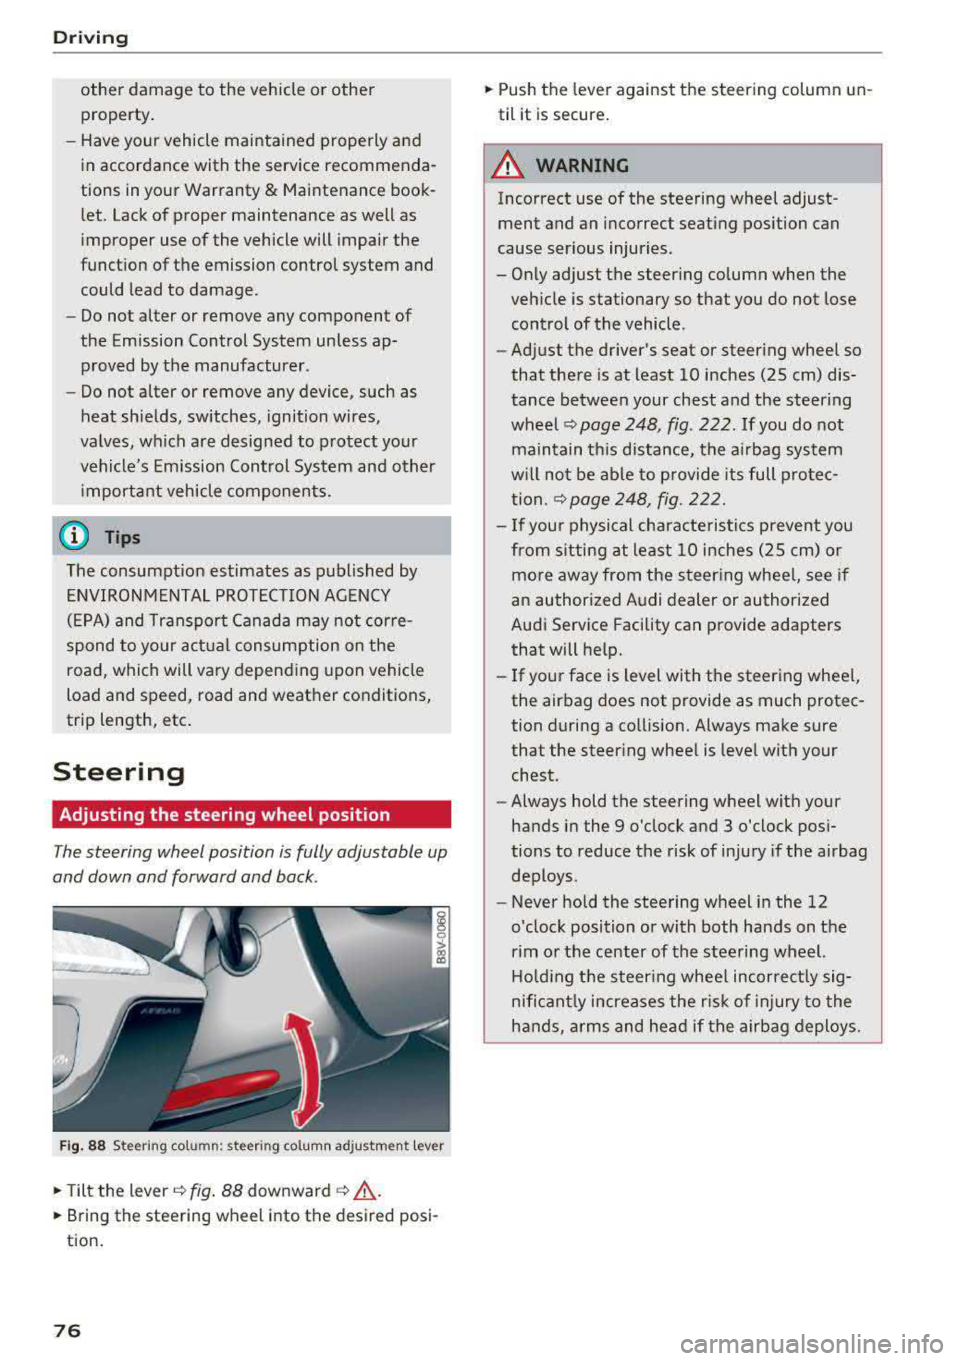
.,. Tilt the lever c:::;, fig. 88 downward c:::;, ,& .
.,. Bring the steering wheel into the desired posi
tion.
76
.,. Push the lever against the steering column un
til it is secure.
A WARNING
Incorrect use of the steering wheel adjust ment and an incorrect seating position can
cause serious injuries.
- Only adjust the steering column when the
vehicle is stationary so that you do not lose control of the vehicle .
-
-Adjust the driver's seat or steering wheel so
that there is at least 10 inches (25 cm) dis
tance between your chest and the steering
wheel
c:::;, page 248, fig. 222 . If you do not
maintain this distance, the airbag system
will not be able to provide its full protec
tion .
c:::;,page248, fig. 222.
- If your physical characte ristics prevent you
from s itting at least 10 inches (25 cm) or
more away from the steering whee l, see if
an authorized Audi dealer or authorized
Audi Service Facility can provide adapters
that will help.
- If your face is level with the steering whee l,
the airbag does not provide as much protec
tion during a collision. Always make sure
that the steer ing wheel is level with your
chest.
- Always hold the steering wheel with your
hands in the 9 o'clock and 3 o'clock posi
tions to reduce the risk of injury if the airbag
deploys.
- Never hold the steering wheel in the 12
o'clock position or with both hands on the
rim or the center of the steering wheel.
Holding the steer ing wheel incorrect ly sig
nificant ly increases the r isk of injury to the
hands, arms and head if the airbag deploys.
Page 136 of 400
Assistance systems
-Due to the interlinking of various vehicle sys
tems, critica l driving situations can be detected
by
pre sense basic and measures for preventa
tive occupant protection are can be initiated.
-The pre sense front uses the data from the ra
dar sensors and calcu lates the probability of an
accident
c> page 127. An impending collision
with vehicles can be detected within the limits
of the system . In this case, the system warns
the driver visually, acoustically and with a jerk
on the brakes if necessary. If needed, it can i ni
tiate a partia l or full dece le rat ion to reduce the
collision speed o r to avoid the coll ision unde r
ce rtain c ircumstances. In conjunction with pre
sense basic, the front safety belts are also re
versib ly tensioned when needed . The pre sense
front is also active when adaptive cruise con
trol* is sw itched off.
.,&. WARNING
Also follow the general instructions found in
c> .&. in General information on page 127.
(i) Tips
-Certain pre sense functions switch off when
driving in reverse.
-The pre sense functions may not be availa ble if there is a malfunction in the ESC sys
tem or the airbag contro l module.
-Note that the reversible belt tensioner on
the front passenger's side deactivates when
the front passenger's a irbag is deactivated .
-Switch the pre sense off when you are not
us ing public streets or when loading the ve
hicle onto a vehicle carr ier, train, ship or
other type of transportation. This can pre
vent an undes ired intervention from the pre
sense system.
Audi pre sense basic
Description
Applies to: veh icles with Audi pre sense basic
The pre sense basic funct ions are activated at a
speed of approximately 20 mph (30 km/h) or h igher.
134 The following
functions can be triggered under
certain conditions within the limits of the sys
tem:
-Tensioning of the safety bel ts (for examp le,
during heavy braking): the front safety belts
have reversib le be lt tensioners. If a collision
does not occur, the safety belts loosen slightly
and are ready to trigger aga in.
-Initiating the closing of the windows and the
panorama glass roof* (for examp le when un
der- or oversteering).
Audi drive select* : the trigger times are adjusted
depending on the mode selected.
Audi pre sense front
· Description
Applies to: vehicles with Audi pre sense front
Within the limits of the system and depending
on the situation and speed, pre sense front can
warn you about impending collisions with sta
tionary, stopped, and moving vehicles and ini
tiate appropriate braking measures.
If detection is not possib le, then pre sense front
does not react.
The following func tions trigger in conjunction
with pre sense basic at corresponding vehicle
speeds :
-Reversible tens ion ing of the front safety belts.
-Closing the windows and panorama glass roof*.
Warnings and braking
Applies to: vehicles with Audi pre sense front
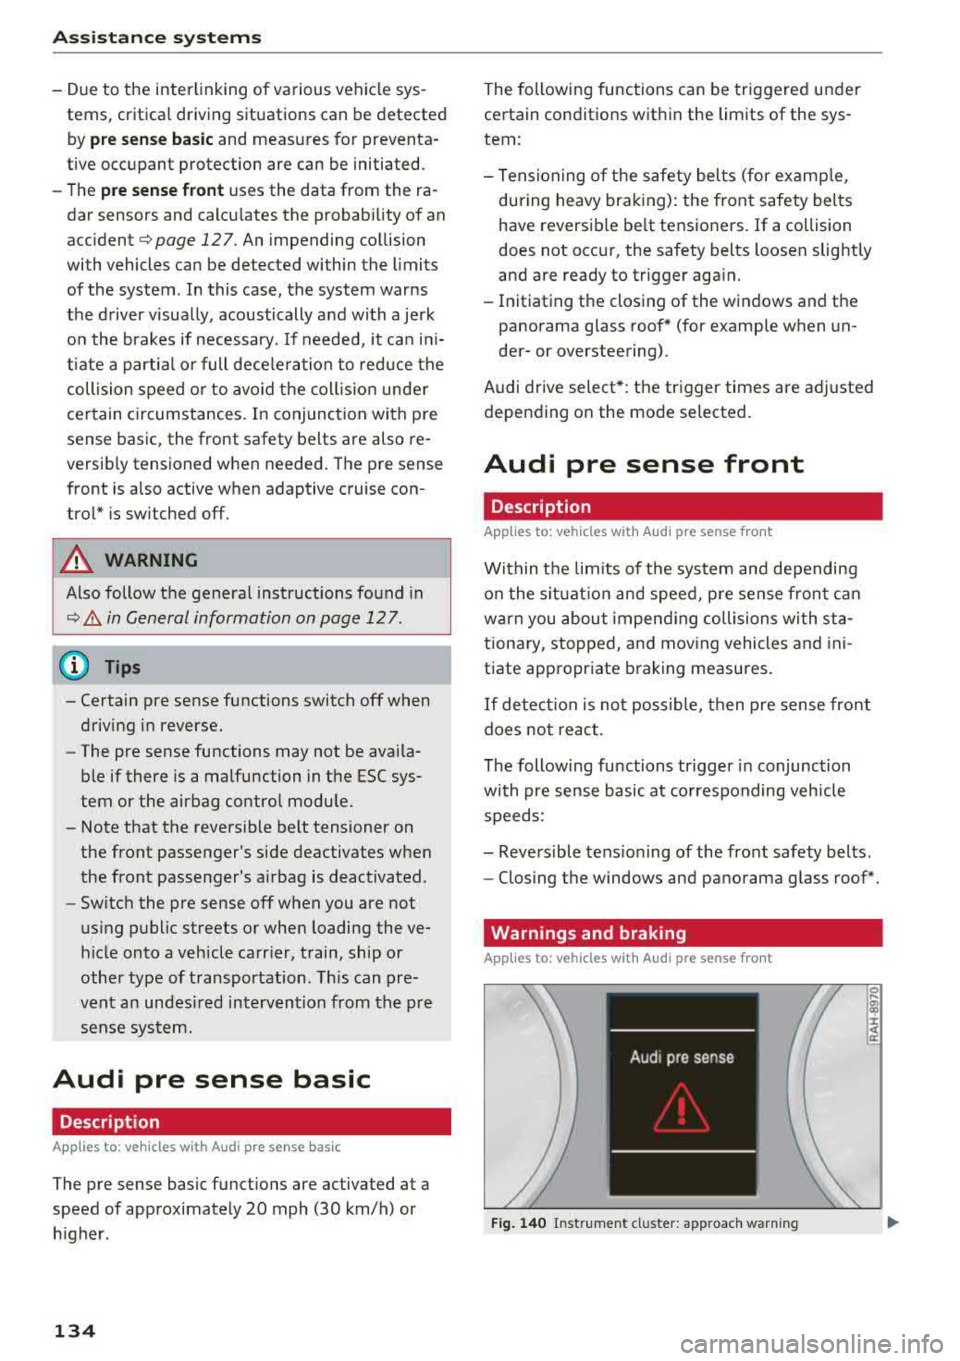
Fig. 140 Instrument cluster: approach warning
0
;
::c
Page 158 of 400
Intelligent Technology
and at cold times of the year. A lot of energy is
used but little is generated. It is also critical
when the engine is not running but electrical
equipment is switched on. In this case, energy is
used but none is generated.
In situations like this, energy management will
actively regulate the distribution of energy.
Long periods without use
If you do not drive your vehicle for several days or
weeks, electrical equipment is gradually scaled
back or switched off. This reduces energy use and
ensures the vehicle will be able to start after long
periods of time. Some convenience functions
such as opening with the remote control key may not be available. These convenience functions
will be available again once you switch the igni tion on and start the engine.
With the engine switched off
The vehicle battery will drain if you use Infotain
ment functions such as listening to the radio
while the engine is switched off.
If the vehicle's ability to start may be impaired by
the energy use, a message will appear in the In
fotainment system display. The message indi
cates that the system will switch off automatical ly soon . If you would like to continue using the
functions, you must start the engine.
With the engine running
Although electrical energy is generated while
driving, the vehicle battery can drain . This can
happen if little energy is generated but much is
used, and the charge level of the vehicle battery
is not optimal.
To restore the balance of energy, components that require large amounts of energy are temporar ily scaled back or switched off. Heating sys
tems in part icular require a great deal of energy .
If you notice, for example, that the seat heating*
or rear window defogger is not working, then it
has been temporarily reduced or switched off.
These systems are available again as soon as the
energy supply has been restored .
In addition , you may notice that the idle speed
has slightly increased. That is normal and no
156
cause for concern . By increasing the idling speed,
the additional required energy will be generated
and the vehicle battery will be charged.
Notice about data
recorded by the Event
Data Recorder and
vehicle control modules
Event Data Recorder
This vehicle is equipped with an Event Data Re
corder (EDR). The main purpose of an EDR is to
record, in certain crash or near crash-like situa
tions, such as an airbag deployment or hitting a road obstacle, data that will assist in understand
ing how a vehicle's systems performed . The EDR
is designed to record data related to vehicle dy
namics and safety systems for a short period of
time, typically 30 seconds or less. The EDR in this
vehicle is designed to record such data as:
- How various systems in your vehicle were oper
ating;
- Whether or not the driver and passenger safety
belts were buckled/fastened;
- How far (if at all) the driver was depressing the
accelerator and/or brake pedal; and,
- How fast the vehicle was traveling.
These data can help provide a better understand
ing of the circumstances in which crashes and in
juries occur. NOTE: EDR data are recorded by your
vehicle only if a non-trivial crash situation occurs;
no data are recorded by the EDR under normal
driving conditions and no personal data (e.g .,
name, gender, age, and crash location) are re
corded . However, other parties, such as law en
forcement, could combine the EDR data with the
type of personally identifying data routinely ac
quired during a crash investigation .
To read data recorded by an EDR, special equip
ment is required, and access to the vehicle or the
EDR is needed . In addition to the vehicle manu
facturer, other parties, such as law enforcement,
that have the special equipment, can read the in
formation if they have access to the vehicle or the EDR.
~
Page 159 of 400
CXl CXl .... N r--N .... 0 N > 00
Some state laws restrict the retrieval or down
l oading of data stored by EDRs insta lled in a vehi
cle for the express purpose of retrieving data af
ter an accident or crash event without the own
er's consent.
Audi will not access the EDR and/or similar data
or give it to others -
- u nless the vehicle owner (or lessee if the vehi
cle has been leased) agrees; or
- u pon the off icia l request by the po lice; or
- upon the order of a court of law or a govern-
ment agency; o r
- for the defense of a laws uit through the judicial
dis cove ry process.
- Audi may also use the data for research about
vehicle ope ration and safety performance or
provide the data to a thi rd party for research
purposes without iden tifying the specific vehi
cl e or information about the identity of its own
er or lessee and on ly after the recorded vehicle
data has been accessed .
Vehicle control modules
Your vehicle is also equipped wi th a number of
e lec tronic contro l mod ules for vario us veh icle
systems, such as eng ine management, emission
control, airbags, and safety belts .
These electroni c con trol modules re co rd da ta
d ur ing normal vehi cle ope ra tion that may be
needed by trained technicians for diagnostic and
repair pu rposes. The recording capability of these
modules is limited to data (no sound is record
ed). On ly a small amount of data is actually re
corded over a very limited per iod of t ime, or stor
ed when a system fau lt is detected by a control
module . Some of the data stored may relate to
ve hicle speed, d irect ion, or brak ing, as well as re
stra int system use and perfo rma nce in the even t
of a c rash . Stored data can also only be read and
downloaded with special e quipment that is di
rect ly connected to the veh icle.
(D Tips
Your veh icle may be equ ipped with Audi con
nect. Your use of ce rtain Audi conne ct fea
tures req uires w ireless services that are pro
vided by a third pa rty wire less telecommuni-
Intellig ent Technology
cations provider. Fo r details regarding how in
fo rmation obtained through Audi connect is
collected, p rocessed, transmitted, used, and
shared, please see you r contract with the
wireless telecommun ications provider and the
"About Audi connect" tab in your vehicle's In
fota inment system:
I MENU I butto n> Audi
connect
> right contro l button > About Audi
connect .
157