flat tire AUDI S4 2015 Owner's Manual
[x] Cancel search | Manufacturer: AUDI, Model Year: 2015, Model line: S4, Model: AUDI S4 2015Pages: 304, PDF Size: 74.86 MB
Page 255 of 304
and sudden deflation and loss of control.
-Temperature grades apply to tires that are properly in
flated and not over or un
derinflated.
-For technical reasons it is not always possible to use
wheels from other vehicles_ 1n some cases not even
wheels from the same vehi
cle model.
-If you install wheel trim discs on the vehicle wheels
I
make sure that the air flow
to the brakes is not blocked.
Reduced airflow to the
brakes can them to over
heat, increasing stopping
distances and causing a col lision.
-Run flat tires may only be used on vehicles that were
equipped with them at the
factory. The vehicle must have a chassis designed for
run flat tires and a factory
installed tire pressure moni
toring system* that indi cates a loss of tire pressure.
Incorrect use of run flat
tires can lead to vehicle damage or accidents. Check
Tires and wheels 253
with an authorized Audi dealer or tire specialist to
see if your vehicle can be
equipped with run flat tires.
If run flat tires are used
I
they must be installed on all
four wheels. Mixing tire types is not permitted.
(D Note
-For technical reasons, it is not generally possible to
use the wheel rims from
other vehicles. This can hold
true for wheels of the same
vehicle type.
-If the spare tire is different from the tires that you have mounted on your vehicle
(for example winter tires or
wide profile tires), then use
the spare tire for a short pe riod of time only and drive
with extra care. Replace the
flat tire with the tire match ing the others on your vehi
cle as soon as possible.
-Never drive without the valve stem cap. The valves could get damaged.
I),
•
•
'
Page 256 of 304
254 Tires and wheels
@ For the sake of the environment
Dispo se of old tires in accord
ance with the local require
ments.
Uniform tire quality grading
- Tread wear
- T raction AA A B C
- T empera ture ABC
Quality grades can be found where applicable
on the tire side wa ll between tread shou lder
and max imum sect ion width
¢ page 248,
fig. 193.
For example: Tread wear 200, Tract ion AA ,
Temperature A.
All passenger car tires must conform to Feder
al Safety Requirements in addition to these
grades.
Tread wear
The tread wear grade is a comparative rating
based on the wear rate of the tire when tested
under controlled conditions on a spec ified
government test course .
For example, a t ire graded 150 would wear
one and one half (1 1/2) t imes as well on the
government course as a tire graded 100.
The relat ive performance of t ires depends
upon the actua l conditions of their use, how
ever, and may depart significantly from the norm due to var iations in dr iving habits, serv
ice practices and differences in road character
istics and climate .
Traction
The traction grades, from highest to lowest,
are AA, A, Band
C. Those grades represent the
tire's abil ity to stop on wet pavement as
measured under controlled cond it ions on
specified government test surfaces of asphalt
and concrete . A tire marked C may have poor
trac tion performance ¢&,. .
Temperature
The temperature grades are A (the highest),
B, and C, representing the tire's resistance to
the generation of heat and its ability to dissi
pate heat when tested under controlled condi
tions on a specified indoor laboratory test
wheel.
Sustained high temperature can cause the
material of the tire to degenerate and red uce
tire life, and excessive temperature can lead
to sudden tire failure
¢ &,..
The grade C corresponds to a level of perform
ance which all passenger car tires must meet
under the Federal Motor Vehicle Safety Stand
ard No. 109. Grades Band A represent higher
levels of performance on the laboratory test
wheel than the minimum required by law .
A WARNING
The traction grade assigned to this tire is
based on straight-ahead braking traction
tests, and does not include acceleration,
cornering, hydroplaning or peak traction
characteristics.
A WARNING
The temperature grade for this tire is es
tablished for a tire that is properly inflated
and not overloaded. Excessive speed, un
derinflation, or excessive load ing, either
separately or in combination, can cause
heat buildup and possible tire failure.
Winter tires -
Winter tires can improve vehicle handling on
snow and ice . At temperatures below 45 °F
(7 °C) we recommend changing to winter
tires .
In some heavy snow areas, local governments
may require true winter or "snow" tir es, those
with very deeply cut tread . These tires should
only be used in pairs and be installed on all
four wheels. Make sure you purchase snow
tires that are the same size and construction
type as the other tires on your vehicle. .,.
Page 257 of 304
"" N
0 ::.,: co ...... \!) 1.1'1
...... 1.1'1 ......
Your vehicle is equipped with all whee l drive,
this will improve traction during winter driv ing, even with the standard tires. However, we
strongly recommend that you a lways equ ip a ll
four wheels on your veh icle w ith correctly fit
ted wi nte r tires or all -season tires, when w in
ter road conditions are expected. This also im
p roves the vehicle 's braking performance and
reduces stopping distances.
Summer tires provide less grip on ice and
snow .
W inter tire s (snow t ires) must always be fitted
on all four wheels.
Ask your authorized Audi dea ler o r qualified
workshop for permitted
w inter t ire sizes. Use
only radia l winter tires .
Winte r ti res lose thei r effectiveness when the
tread is worn down to a depth of
0 .15 7 inch
(4 mm) .
On ly drive with winter tires under winter con
d itions. Summer tires hand le better when
there is no snow or ice on the roads and the
temperature is above 45
°F (7 °().
If yo u have a flat tire, see notes on spare
wheel ¢ page 248 .
Pl ease always remembe r th at w inte r ti res may
have a lower speed rating tha n the t ires origi
n all y ins talled on your veh icle at the t ime i t
was manufactured . Please see ¢ page 250,
Speed roting (letter code) for a Listing of the
speed rat ing letter codes and the maximum
speed at wh ich the t ires can be driven .
The speed rating letter code( ¢ page 232) is
on the side wall of the tire ¢ page 248.
A WARNING
Winter tires have maximum speed limits
that may be lower than your vehicle's max
imum speed. Always know the maximum
speed befo re driving off . Never drive faster
than the speed permitted for your specific
w inte r tir es . This will cause damage to the
ti res leading to an ac cident and se rious
pe rsonal i njury to you and yo ur p assen
gers .
Tire s an d wheel s 255
A WARNING
Driving faster than the maximum speed
for which the winter tires on your ve hicle
were designed can cause t ire fail ure in
cluding a blowout and sudden deflation,
l oss of cont ro l, crashes and ser ious per
sona l injuries. Have wo rn or damaged ti res
replaced immedia tely.
- Wi nte r tires h ave maxim um speed ra ting
that may be lower than yo ur vehicle 's
maxim um speed.
- Never d rive fas ter than the speed for
whi ch the w inter or othe r ti res installed
on yo ur vehicle are rated.
A WARNING
=
A lways ad just yo ur driving to t he roa d and
traffic conditions. Never let the good ac
celeration of the winter tires and a ll wheel
drive tempt you into taking extra risks. Al
ways remember:
- When braking, an all wheel drive vehicle handles in the same way as a front drive
veh icle.
- Drive carefully and reduce your speed on
icy and slippery roads, even w inter t ires
cannot help under black ice conditions.
@ For the sake of the environment
Use summer tires when weather condi
tions permit. They are qu ieter, do not wear
as quickly and reduce fuel consumpt ion.
Snow chains
-
Snow cha ins may be fitted only to the fro nt
whee ls, and on ly to certain tire sizes . Ask your
autho rized Aud i dea le r o n whi ch tire sizes
snow chains can be used.
The snow chains must have low-p rofile links
and must not be th icker than
0 .53 inch
(13 . 5 mm) , in cl ud ing t he lo ck.
Remove wheel center covers and trim discs
before putt ing snow cha ins on your veh icle
¢ 0 . For safety reasons cover caps must then ..,.
•
•
Page 259 of 304
'"" N
0 ::.,: co ,...., \!) 1.1'1 ,...., 1.1'1 ,....,
and handling under a variety of driving condi
tions . Ask your authorized Audi dealer for
more details.
The low aspect ratio of these tires is indicated
by a numeral of
55 or less in the tire's size
designation. The numeral represents the ratio
of the tire's sidewa ll height in relation to its
tread width expressed in percentage . Conven
tional tires have a height/width ratio of 60 or
more .
The performance of low-aspect-ratio tires is
particularly sensitive to improper inflation
pressure. It is therefore important that low
aspect ratio tires are inflated to the specified
pressure and that the inflation pressure is
regularly checked and maintained. Tire pres
sures should be checked at least once a
month and always before a long trip
¢ page 239, Checking tire pressure.
What you can do to avoid tire and rim
damage
Low aspect ratio tires can be damaged more
easily by impact with potho les, curbs, gullies
or ridges on the road, particularly if the tire is
underinflated .
In order to minimize the occurrence of impa ct
damage to the tires of your vehicle, we recom
mend that you observe the following precau
tions:
- Always maintain recommended inflation
pressures. Check your tire pressure every
2,000 miles (3,000 km) and add air if neces
sary .
- Drive carefully on roads with potholes, deep
gullies or ridges. The impact from driving
t hr ough or over such obstacles can damage
your tires. Impact with a curb may also cause damage to your tires.
- After any impact, immediately inspect your
t ir es or have them inspected by the nearest
authorized Aud i dealer. Replace a damaged
t ir e as soo n as possible .
- Inspect your t ires every 2,000 miles (3,000
km) for damage and wear . Damage is not al
ways easy to see . Damage can lead to loss of
air and underinflation, wh ich could eventu-
Tires and wheels 257
ally cause tire failure. If you believe that a
tire may have been damaged, rep lace the
tire as soon as possib le.
- These tires may wear more quickly than oth
ers.
- Please also remembe r that, while these tires
deliver responsive handling, they may ride
less comfortably and make more noise than
other choices.
Reduced performance in winter/cold
season conditions
All tires are designed for certain purposes.
The low aspect ratio, ultra high performance
tires or iginally installed on your vehicle are in
tended for maximum dry and wet road per
formance and handling. They are not suitable
for cold, snowy o r icy weather conditions. If
you drive under those circumstances, you
should equip your vehi cle w ith all-season or
winter tires, which offer better traction under
those conditions. We suggest you use the rec
ommended snow or a ll-season tires specified
for your vehicle, or their equivalent .
Refer to¢
page 254 for more detailed infor
mation regarding winter tires.
Ti re pressure
monitoring system
ill General notes
Applies to vehicles: with tire pressure monitoring system
Each tire, including the spare (if provided),
sho uld be checked monthly when cold and in
flated to the inflation pressure recommended by the veh icle manufacturer on the veh icle
placard or tire inflation pressure label. (If your
vehicle has tires of a d ifferent size than the
s ize indicated on the vehicle placard or tire in
flat io n pressure label, you should determine
the proper t ire inflation pressu re for those
tires).
As an added safety feature , your veh icle has
been equipped with a tire pressure mon itoring
system (TPMS) that illum inates a low ti re
pressure te llt ale when one or more of your
tires is significantly under-inflated. .,.
•
•
Page 260 of 304
258 Tires and wheels
Accordingly, when the low tire pressure tell
tale illuminates, you should stop and check
your tires as soon as possible, and inf late
them to the proper pressure. Driving on a sig nificantly under-inflated tire causes the tire to
overheat and can lead to tire failure. Under-in
flation also reduces fuel efficiency and tire
tread life, and may affect the vehicle's han
dling and stopp ing ability.
Please note that the TPMS is not a subst itute
for proper tire maintenance, and it is the driv
er's responsib ility to ma inta in correct tire
pressu re, even if under- inflation has not
reached the level to trigger illumination of the
TPMS low tire pressure telltale.
Your veh icle has also been equ ipped with a
TPMS malfunction indicator to indicate when
the system is not operating properly. The
TPMS malfunction indicator is combined with
the low tire pressure telltale . When the sys
tem detects a malfunction, the te lltale will
f lash for approximately one minute and then
remain cont inuous ly illuminated. This se
quence will continue upon subsequent vehicle
start-ups as long as the ma lfunction ex ists .
When the malfunct ion indicator is illuminat
ed, the system may not be able to detect or
signal low t ire pressure as intended. TPMS
malfunctions may occur for a variety of rea
sons, includ ing the installat ion of replace
ment or a lternate tires or whee ls on the veh i
cle that prevent the TPMS from functioning
p rop erly. Always check the TPM S malf unct ion
tellta le after replacing one o r more t ires or
wheels on your vehicle to ensure that the re p lacement or a lternate tires and wheels allow
the TPMS to continue to function properly. Tire pressure indicator appears
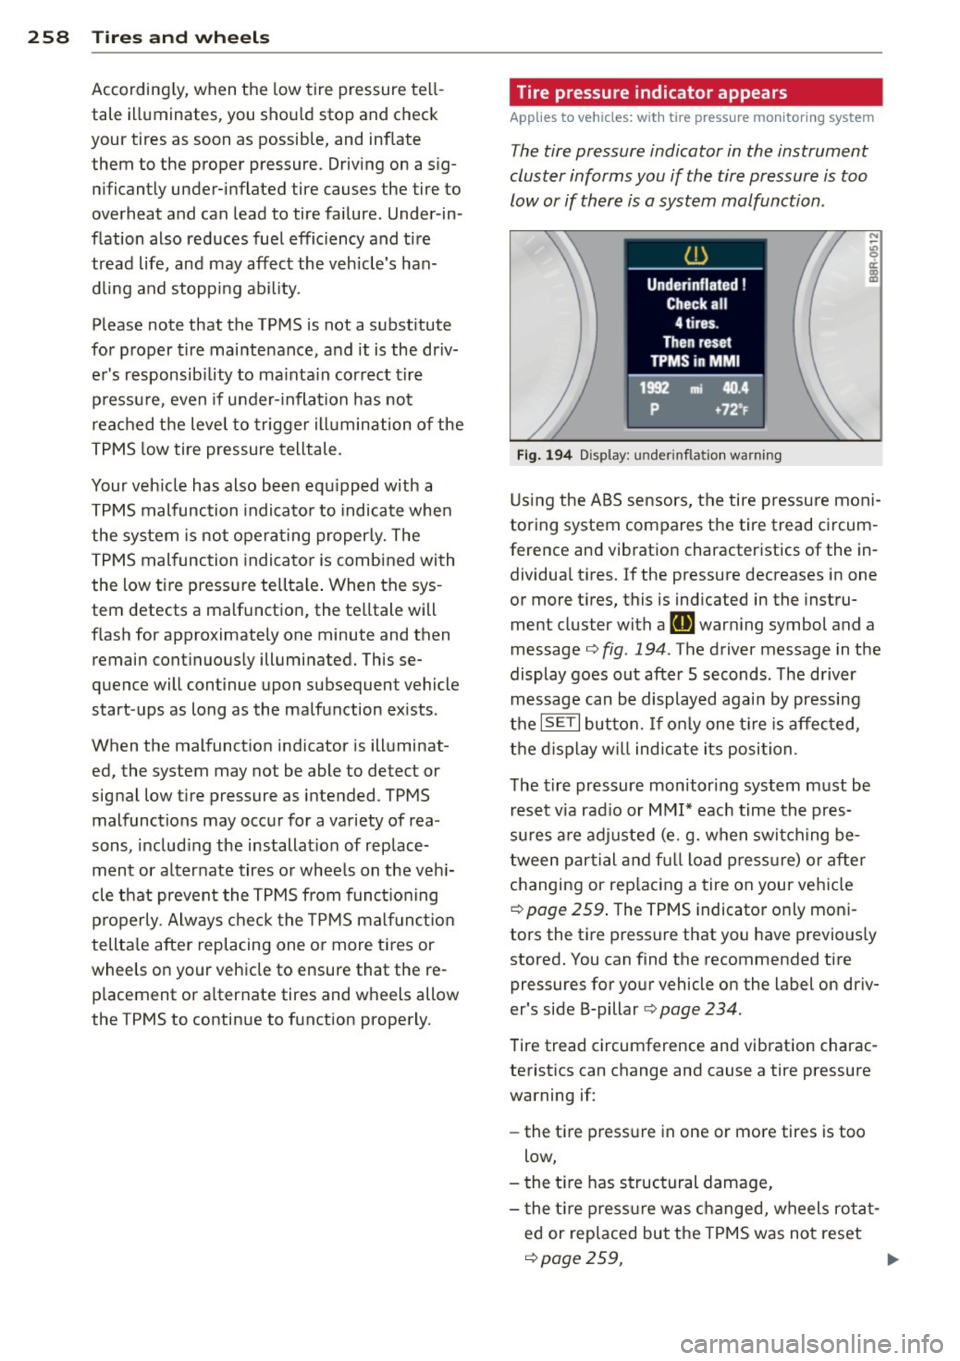
App lies to vehicles : wi th tire p ress ure mo nito rin g system
The tire pressure indicator in the instrument
cluster informs you if the tire pressure is too
low or if there is a system malfunction .
Fig. 194 Display: u nde rinfla tion warning
Using the ABS sensors, the tire pressure moni
toring system compares the tire tread circum
ference and vibration characteristics of the in
dividua l tires.
If the pressure decreases in one
or more t ires, this is indicated in the instru
ment cluster with a
RI] war ning symbol and a
message¢
fig . 194 . The driver message in the
display goes out afte r 5 seconds . The driver
message can be displayed again by pressing
the
ISETI button. If o nly one tire is affec ted,
the display will ind icate its position.
The tire pressure monitoring system must be
reset via rad io or MMI* each time the pres
sures are adjusted (e.g. when switching be
tween partial and full load pressure) or after
changing or replacing a tire on your ve hicle
¢
page 259. The TPMS indicator only moni
tors the tire pressure that you have previous ly
stored. You can find the recommended tire
pressures for your vehicle on the label on driv
er's side 8-pillar ¢
page 234.
Tire tread circumference and vibration charac
teristics can change and cause a tire pressure
warning if:
- the tire pressure in one or more tires is too
low,
- the tir e has structural damage,
- the tir e pressure was changed, wheels rotat-
ed or rep laced but the TPMS was not reset
¢page 259, ..,_
Page 261 of 304
'"" N
0 ::.,: co ,...., \!) ..,.,
,...., ..,., ,....,
-the spa re tire* /inflatable spare tire* is
mounted.
Warning symbols
[IJ Loss of pressure in at least one tire¢,&. .
Check the tire or tires and replace or repair if necessa ry. The indicator light
[IJ in the instru
ment cluster also illuminates
¢page 13.
Check/correct the pressures of all four tires
and resetTPMS via radio or MMI*.
mm (T ire Pressure Monitoring System) Ti re
pre ssure: S ystem m alfuncti on!.
1tE appea rs after sw itching the ign it ion on
or while d rivi ng and the ind icator light
[IJ in
the instrument cluster blinks for approxi mately one minute and then stays on, there is
a system malfunction. Attempt to store the
correct t ire pressure ¢
page 259. If the indi
cator light does not turn off or if it turns on
shortly thereafter, immediately drive your ve
h icle to an authorized Audi dealer or author
ized repair facility to have the malfunction
corrected.
.&, WARNING
- If the t ire pressure indicator appears in
the instrument cl uster d isplay, one or
more o f your tires is significantly under
inflated. Reduce your speed immediately
and avoid any hard steering or braking
maneuvers. Stop as soon as possible and
check the t ires and the ir pressures. In
flate the tire pressure to the proper pres
sure as indicated on the vehicle 's t ire
pressure label~
page 234 . Driving on a
significantly under-inflated tire ca uses
the tire to overhea t and can lead to tire
failure. Under-inflation also is likely to impair the vehicle 's handling and stop
ping ability.
- The driver is responsible for mainta ining
the correct tire pressures. You must check the tire pressures regularly .
- Under certain cond itions (such as a spor
ty driving style, winter conditions or un paved roads), the pressure monitor indi
cator may be de layed .
Tire s an d wheel s 259
-Ask your a uthorized Audi dea ler if run
flat tires may be used on your vehicle.
(D Tips
- The tire pressure mon itoring system may
stop working when there is an ESC ma l
function.
- Using snow chains may res ult in a system
ma lfunction.
- The tire pressure mon itor ing system on
your Audi was deve loped using tires with
the "AO" or "RO" identification on the
tire s idewall
~ page 248. We recom
mend us ing these tires.
Reset tire pressure monitoring system
App lies to vehicles: with tire pressure mon itor ing system
If the tire pressure is adjusted, wheels ore ro
tated or changed, the TPMS must be reset via
radio or MMI*.
... Before storing the new tire pressures, check
that the current pressures on all four tires
correspond to the specified va lues and
adapt the pressures to the current load
¢ page 234.
.,. Switch on the ignition.
.,. Select: the
I CARI funct io n button > Tir e pre s
s ure mon itoring
> Store now . Or
.,. Select: the
I CARI fu nct ion button > Car sy s
tem s*
contro l button > S erv icing & che cks >
Tire pres sure mon itor in g > Store tire pre s
s ures
> Yes, sto re now .
(D Tips
Do not store the tire pressure if there are
snow chains on the tire . Otherwise, a sys
tem mal function may occur.
•
•
Page 263 of 304
M N
~ co
rl I.O
"' rl
"' rl
.. Turn the large screw q fig . 197 counter
clockwise.
.. Take out the spare tire.
.. Always store the vehicle tool kit, the jack *,
and the replaced tire in the luggage com
partment
c:> page 132.
.. Unhook the cargo floor before clos ing the
rear lid .
Using the spa re tire (compact spare tir e)
The compact spare tire is only intended for
emergenc ies until you can reach a repair shop.
Replace it as quickly as possible with a stand
ard wheel and t ire .
There are some restrictions on the use of the
compact spare t ire . The compact spare t ire
has been des igned specifically for your type of
veh icle.
It must not be swapped with a com
pact spare tire from another type of veh icle.
Snow chains
For technical reasons, the use of snow chains
on the compact spare tire is
not p erm itted .
If you do have to drive with snow chains and a
front tire fails, mount the spare whee l w ith
tire instead of a rear tire. Install the snow
chains on the rear t ire and use it to replace
the defective front tire.
.,&. WARNING
- Never use the spare tire if it is damaged
or if it is worn down to the tread wear in
dica to rs.
- If the spare tire is mo re tha n 6 years o ld,
use it only in an emerge ncy and w it h ex
tr eme cau tion a nd careful d riving .
- T he spare tire is intended only fo r tem
porary and sho rt-term use.
It should be
rep laced as soon as possib le w ith the
normal wheel and t ire.
- After mount ing the compac t spare ti re,
the tire pressu re must be che cked as
soon as possible . The tire pressure of the
compact spa re tire m ust be 4 .2 bar; oth
erwise, you risk hav ing an accident.
- Do not drive faster than 50 mph (80 km/
h) . You risk having an accident.
What do I d o now ? 261
-Avoid full-thrott le acceleration, heavy
brak ing, and fast cornering. You risk hav
ing an accident .
- Never drive using more than one spare
wheel and tire. You r isk having an acci
dent .
- Normal summer or winter t ires must not
be mounted on the compact spare w heel
rim .
- For technical reasons, the use of tire
chains on the spa re tire is not permitted .
If it is necessary to drive with t ire chains,
the spare wheel must be mounted on the
fro nt axle in the event of a flat in a rear
tire. The newly available fron t wheel
m ust then be inst alled in place of the
rea r whee l w ith the flat tire. Installing
the tire chain before mounting the whee l
a nd tire is recommended.
- Loose items in the passenger compart
ment can cause serious personal injury
during hard brak ing or in an accident.
Never store the spare tire or jack and
too ls in the passenger compartment.
Inflatable spare tire
App lies to vehicles: wi th inflatable spa re tire
The inflatable spare tire expands to its full di
ameter when it is inflated .
Fig. 19 8 I nflatable spare tir e w it h compressor
Removing inflatable spare tire
.. Lift up the cargo floo r us ing the handle .
.. Tur n the large screw ¢
fig. 198 counte r-
clockw ise.
.. Take out the in fla table spare tire.
Page 264 of 304
262 What do I do now ?
• Always store the vehicle tool kit, the jack *
and the replaced tire in the luggage com
partment ¢
page 132.
Stowing the infl atable spare tir e
• Release the air by unscrew ing the va lve
stem.
• Screw the valve stem back in afterwards.
• Wait a few hours before p lacing the wheel in
the spare wheel well¢.&_ .
• Secure the wheel with the large screw.
• Fold the cargo floor back down.
Aft er usi ng th e inflat able sp are wh eel
The inflatable spare tire can be re-used as
long as it is not damaged and is not worn
down to the tread wear indicators¢&. .
When you let the air out of the inflatable
spare tire, it does not assume its folded shape
again for several hours . Until then, it cannot
be p laced back in the spare wheel well and
stowed securely .
A WARNING
-Never use the spare tire if it is damaged
or if it is worn down to the tread wear in
dicators.
- If the inflatable spare tire is more than 6
years old, use it only in an emergency and w ith extreme caut ion and caref ul
dr iv ing .
- The inflatable spare tire is intended only
for temporary and short-term use.
It
should be replaced as soon as possible
with the norma l wheel and tire.
- T he tire pressure value for the inflatable
spare t ire is located on the drive r's side
8 -pilla r
¢page 234, fig. 190.
-Maximum perm iss ible speed is SO mph
(80 km/h).
- Avoid full-throttle acce le rat ion, heavy
braking, and fast corner ing.
- When the air is let out of the inflatable
spare wheel, it does not ass ume its fold
ed shape for severa l hours. Until t hen, it
cannot be p laced back in the spare wheel
we ll and stowed secu rely . -
Never drive with more than one inflata
ble spare tire.
- For technical reasons, the use of tire
chains on the inflatable spare tire is not
perm itted. If it is necessary to drive with
tire chains, the inflatab le spare wheel
must be mounted on the rear axle in the
event of a f lat in a front tire . The newly
availab le rear whee l must then be instal
led in place of the front whee l with the
f lat t ire. Instal ling the tire chain before
mount ing the wheel and tire is recom
mended .
- L oose items in the passenger compart
ment can cause serious personal injury
during hard braking or in an accident.
Never store the inflatable spare tire or
jack* and too ls in the passenger com
partment.
(D Note
- The inflatable spa re tire has been deve l
oped specifically for this vehicle mode l.
It must not be exchanged or used for
other vehicle models. Sim ilarly, inflata
ble t ires from other vehicle models must
not be used.
- Normal summer or w inter tires must not
be installed on the inflatable t ire rim.
Inflating inflatable
spare tire
Applies to veh icles: w ith inflatable spare t ire
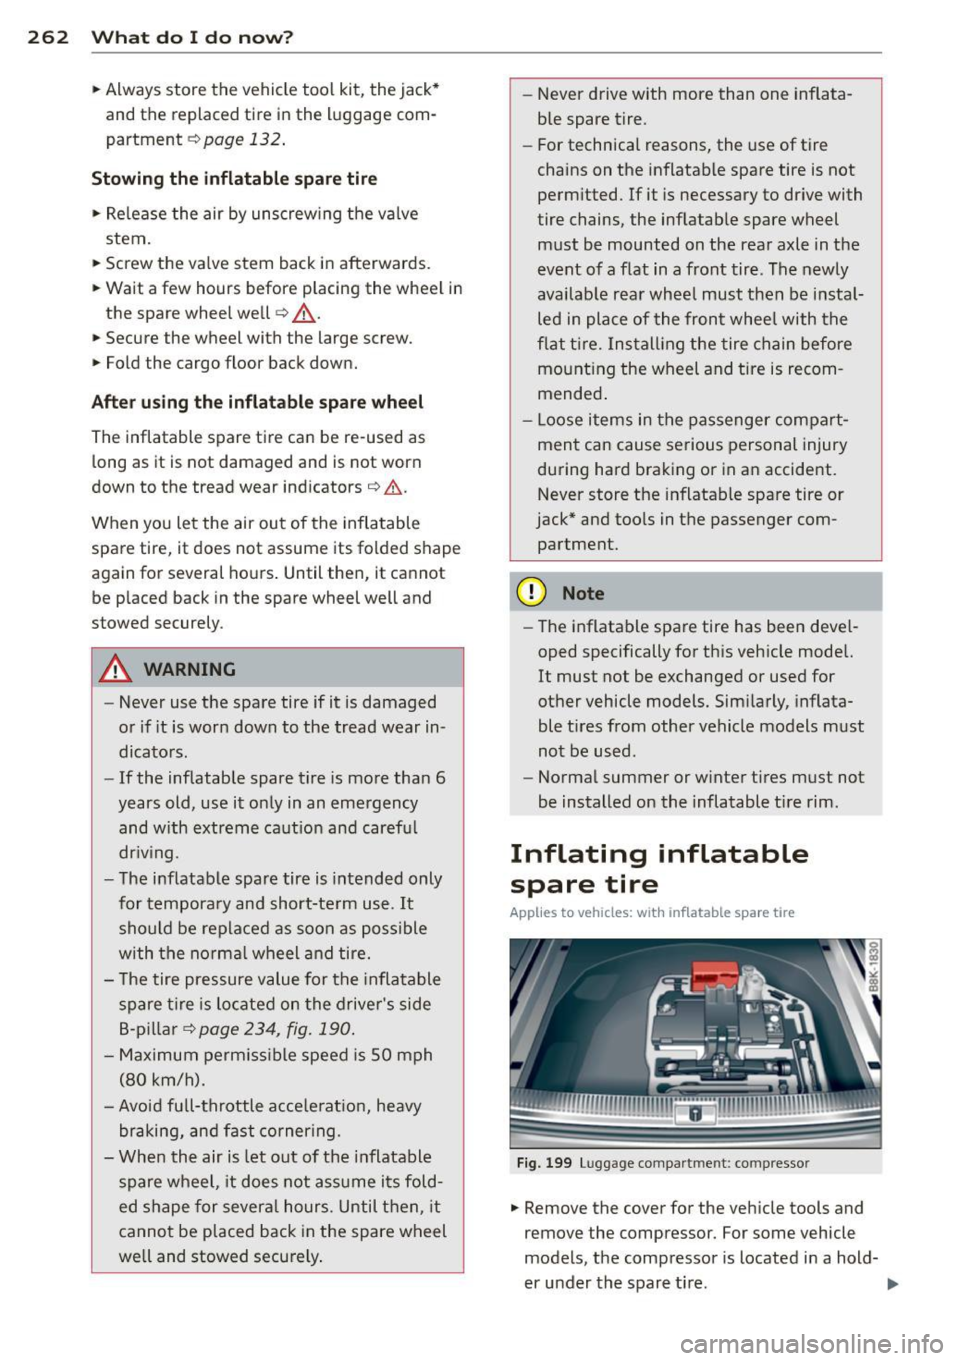
F ig. 199 Lu gg age compart ment: co mpressor
• Remove the cover for the veh icle tools and
remove the compressor. For some vehicle
models, the compressor is located i n a hold-
er under the spare tire . .,.
Page 265 of 304
"" N
0 ::.,: co ,...., \!) 1.1'1 ,...., 1.1'1 ,....,
~ Unscrew the va lve stem from the s pare tire .
~ Screw the tire filler hose from the compres
sor firm ly onto the valv e of the spare tire.
~ In se rt the p lug from the compress or into a
socket of the vehicle¢
page 66.
~ Switc h the compressor on .
~ Let the compressor run until the valu e speci
fied on the tire pressure label is reached ¢
page 234, fig . 190. Sw itch the compres
so r off afte r runn ing for 12 minutes at the
most -danger of overhea ting!
A WARNING
The compressor and the tire filler hose can
become extremely hot while they are run
ning -danger of burns!
(D Note
Switch the compressor off after running
for 12 minutes at the most -danger of
overheating! Allow the compressor to cool
down for a few minutes before you use it
again.
Changing a wheel
Before changing a wheel
Observe the following precautions for your
own and your passenger' s safety when chang
ing a wheel .
~ After you experience a tire fa ilure, pu ll the
ca r well away from moving traffic and try to
r e ach
level gro und before yo u stop ¢ LI)..
~ All p assengers sho uld leave the car and
move to a safe loca tion (for instance, beh ind
the guardrai l) ¢
A .
~ Engage the parking brake to prevent your
vehicle from ro lling un intentionally ¢
A.
~ Shift into 1st gear on vehicles with manua l
transmission, o r move the
selector lever to
the P po sition
on veh icles with au toma tic
t ransmission .
~ If you are tow ing a tra ile r: u nhi tch the trail
er from your veh icle.
~ T ake the jack ¢ page 260 and the spare tire
¢ page 261 out of the luggage compart
ment.
What do I do now? 263
A WARNING
You or your passengers could be injured
while c hanging a wheel if you do not fo l
low these safety precaut ions:
- If you have a flat tire, move a safe d is
tance off the road . T urn off the engine,
tur n the eme rg ency flashers on and use
other wa rn in g devices to a le rt othe r mo
torists.
- Ma ke sur e that passengers wait in a safe
p lace away from the vehicle and well
away from the ro ad and traffic.
- T o help prevent the vehicle from moving
suddenly and possib ly sli pping off the
j a ck, alw ay s fu lly se t the par king br ake
an d block the wheel d iagonally opposi te
the whee l be ing changed w ith the fol d
ing chocks or other objects. When one
front wheel is lifted off the ground, plac ing the Automatic Transmission in "P"
(Park) will
not prevent the vehicle from
moving .
- Before you change a wheel, be sure the
grou nd is level and firm. I f necessary,
use a sturdy board unde r the jack .
- Always sto re the vehicle tool kit, the
jack* and the replaced tire in the luggage compa rtment
¢page 132.
(D Note
If you are changing the whee l on a steep
i ncline, use a rock or s imilar object to
block the opposite whee l to prevent the
vehicle from moving.
(D Tips
Obey all laws.
Changing a wheel
When you change a wheel , follow these
quence described below step-by-step and in
exactly that order .
l. Remove the decorative wheel cover* or
-
the wheel bolt caps* . For more details see..,.
•
•
Page 266 of 304
264 What do I do now?
also ¢ page 264, Decorative wheel cov
ers
or ¢ page 264, Wheels with wheel
bolt caps.
2 . Loosen the wheel bolts ¢ page 265.
3. Locate the proper mounting point for the
jack and align the jack below that point
¢ page 265.
4. Lift the car with the jack¢ page 265 .
5. Remove the wheel with the flat tire and
then install the
spare tire¢ page 266 .
6 . Tighten all wheel bolts lightly.
7 .
Lower the ve hicle with the jack .
8 . Use the wheel bolt wrench and
firmly
tighten all whee l bolts in a crisscross pat
tern
¢ page 265.
9. Replace the decorative wheel cover* or
the
wheel bolt caps* .
A WARNING
Always read and follow all WARNINGS and
information
¢ .&. in Raising the vehicle on
page
266 and ¢ page 267.
After changing a wheel
A wheel change is not complete without the
doing the following .
.,. Always store the vehicle tool kit, the jack*,
and the replaced tire in the l uggage com
partment ¢
page 132 .
.,. Check the tire pressure of the spare tire as
soon as possible .
.,. As soon as possible, have the
tightening
torques
on all wheel bo lts checked with a
torq ue wrench . The correct tightening tor
que is 90
ft lbs. (120 Nm).
.,. Have the flat tire
replaced as soon as possi
ble .
(j) Tips
-If you notice that the whee l bolts are
corroded and difficult to turn while
changing a t ire, they should be replaced
before you check the tighten ing torque.
- Drive at reduced speed until you have the
tightening torques checked .
Decorative wheel covers
Applies to vehicles: with decorative whee l covers
The decorative wheel covers must be removed
first to access the wheel bolts .
Fig. 200 C ha ng in g a w hee l: removing th e w heel cover
Removing
.,. Insert the hook provided with the vehicle
tool kit in the hole in the hub.
.,. Pull off the
decorative wheel cover
qfig. 200.
Wheels with wheel bolt caps
Applies to vehicles: with wheel bolts with caps
The caps must be removed first from the
wheel bolts before the bolts can be un
screwed .
Fig. 201 Changing a wheel: removing t he wheel bolt
caps
Removing
.,. Push the plastic clip provided with the vehi
cle tool kit over the wheel bolt cap until it
engages.
.,. Pull on the
plastic clip to remove the cap
qfig. 201.