flat tire AUDI S4 2015 Owner's Guide
[x] Cancel search | Manufacturer: AUDI, Model Year: 2015, Model line: S4, Model: AUDI S4 2015Pages: 304, PDF Size: 74.86 MB
Page 268 of 304
266 What do I do n ow ?
c:> fig. 203 . Behind the marking, there is a
lifting p oint on the sill for the veh icle jack.
• Turn the
veh icle j ack located under the lift
ing point on the si ll to raise the jack until
the jaw
c:> fig. 204 ® covers the notch on
the vehicle
c:> &_ c:>(D .
• Align t he vehicle jack so the jaw ® covers
the notch and the base plate @ is flat on
the floor. The base plate @ must be
vertical
under the lifti ng point @.
• Install the rod on the vehicle jack: Insert the
rod into the opening on the handwheel. Turn
the rod left or right to secure it .
• Contin ue raising the jack with the rod until
the wheel lifts off the ground slightly.
Position the vehicle jack
onl y under the desig
nated lifting points on the sill
c:> fig. 203 .
There is exactly one location for each wheel.
The jack must not be positioned at any other location
c:> ,&. c:>(D .
Soft ground under the jack can cause the ve
hicle to slip off the jack. Always place the jack
on firm ground. Use a flat, stable support if necessary . Use a non-slip surface such as a
rubber mat on a
slipp ery surfac e such as tile .
A WARNING
-You or your passengers could be injured
wh ile chang ing a wheel if you do not fol
low these safety precautions :
- Position the vehicle jack only at the
des ignated lifting points and align the
jack. Otherwise, the vehicle jack could slip and cause an injury if it does not
have sufficient hold on the veh icle .
- A soft or unstable surface under the
jack may cause the veh icle to slip off
the jack . A lways provide a firm base for
the jack on the ground.
If necessary,
use a sturdy board under the jac k.
- On hard, slippery surface (such as tiles)
use a rubber mat or similar to preven t
the jack from s lipping.
- T o help p revent injury to yourself and
yo ur passengers: -
Do not raise the vehicle until you are
sure the jack is securely engaged.
- Passengers must not remain in the ve
hicle when it is jacked up.
- Make sure that passengers wait in a
safe place away from the veh icle and
well away from the road and traffic .
- Make sure jack pos ition is correct, ad
j ust as necessary and then cont inue to
raise the jack.
(D Note
Do not lift the vehicle by the sill. Position
the veh icle jack only at the designated lift
i ng points on the sill. Otherwise, your vehi
cle will be damaged.
Taking the wheel off/installing the spare
tire
Follow these instructions step-by-step for
changing the wheel .
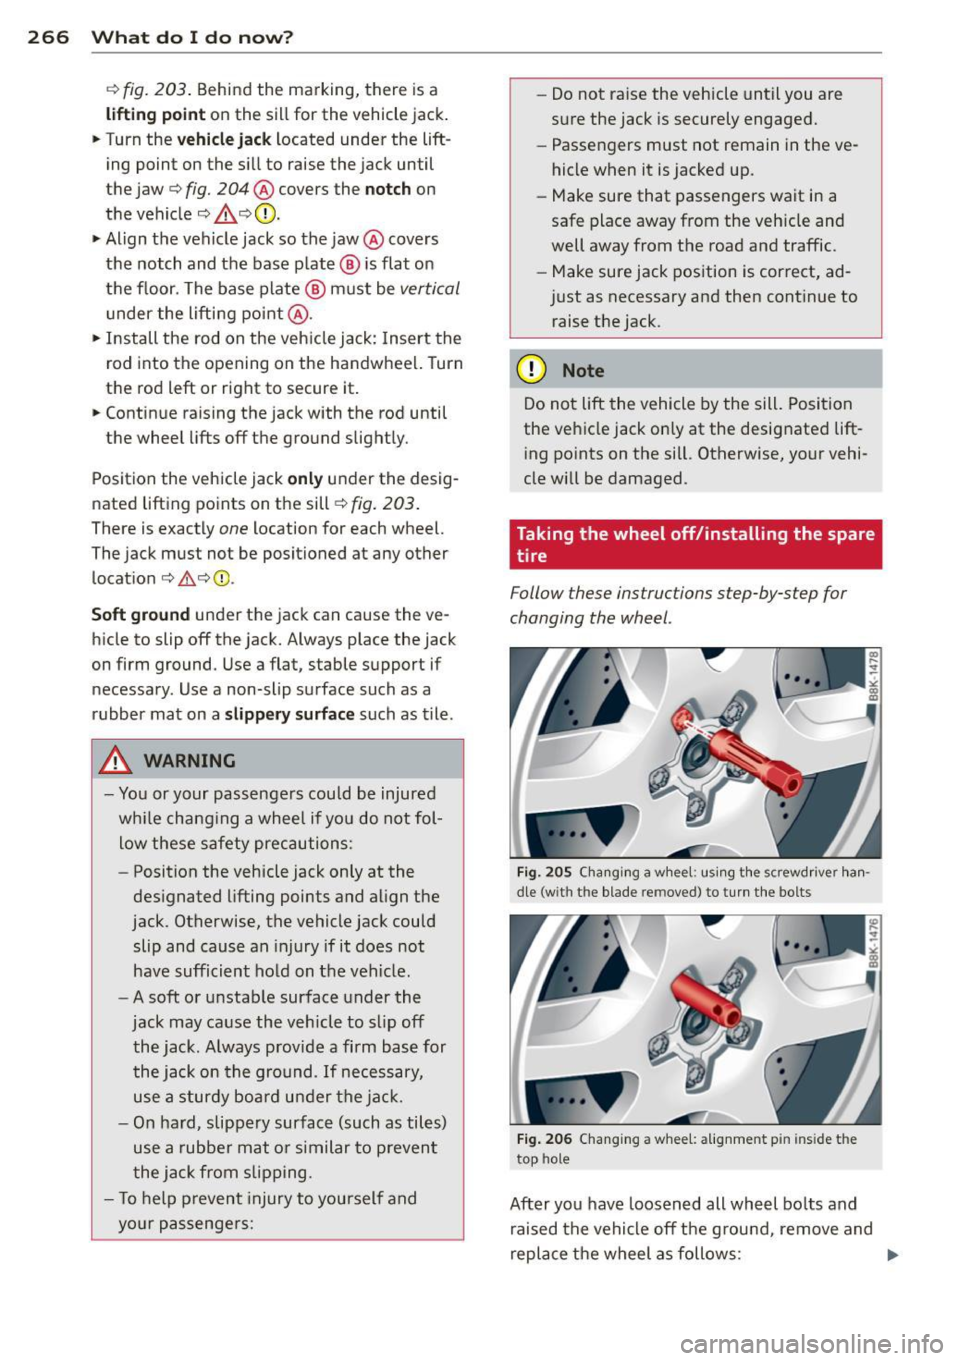
Fig. 205 C ha nging a w hee l: us ing t he screwd rive r han
dle (w it h th e blade re m oved) to turn the bolts
Fig . 206 Ch ang ing a w hee l: alignment p in in side t he
top hole
After you have loosened all wheel bo lts and
raised the vehicle off the g round, remove and
replace the wheel as follows: .,..
Page 269 of 304
'"" N
0 ::.,: co ,...., \!) 1.1'1 ,...., 1.1'1 ,....,
Removing the wheel
"' Remove the topmos t wheel bolt completely
with the
he xagonal socket in t he screwdriv
er hand le (vehicle tool kit)
c::> fig. 205 and
set it aside on a
clean surface.
"' Screw the threaded end of the
alignment
pin
from the tool k it hand-tight into the
empty bolt hole
c::> fig. 206.
"'T hen remove the other wheel bo lts as de
scribed above .
"'T ake off the wheel leav ing the alig nment pin
i n t he bolt hole
c::> CJ).
Putting on the spare tire
"' allroad : Inflate the inflatable spare tire
c::> page 262
"' Push the spare tire over the a lignment pin.
"' Screw o n the w heel bolts and tighten them
slightly using the hexagonal socket.
"' Remove the alignment pin and insert and
t ighten the remaining whee l bo lt s light ly
Li ke the rest.
"' Turn the jack handle counter-clockw ise to
lower the vehicle unt il the jack is f ully re
l eased .
"' Use the wheel bolt w rench to t ighten all
whee l bolts firmly
c::> page 265. Tig hten
them
in a crisscross pattern, from one bo lt
to the (approx imately) opposi te o ne, to keep
t h e whee l cen te red.
"'P erfo rm the steps req uired after changing
t h e whee l
c::> page 26 4, After changing a
wheel .
The hex agonal so cket m akes it easier to re
move the w heel bo lts from the r im . Care
should be taken when removing the reversible
b lade .
@ Note
When removing or ins tal ling the wheel,
the rim could hit the brake rotor and dam
age the rotor . Wor k carefully and have a
second person to he lp you.
@ Tips
- When mounting tires with unidirectional
tread design
ma ke s ure the tread pat-
What do I do now? 267
'
tern is po inted the righ t way
c::> page 267.
- T he w heel bolts shou ld be clean an d easy
to t urn . Check fo r dirt an d corrosion on
the mating surfaces of both the w heel
and the hub. Remove all d irt from these
surfaces before remounting the whee l.
- Do not use the hexagonal socket in the
sc rewd river handle to loosen or t ighten
the whee l bolts.
Tires with unidirectional tread design
Tires with unidirectional tread design must be
mounted with their tread pattern pointed in
the right direction.
U si ng a spa re tire with a tread pattern
intended for use in a specific di rection
When using a spare t ire with a tread patter n
intended for use in a spec ific d irection, please
note the following :
- The d irect ion of rotation is marked by an
ar
row on the side of the t ire .
-If the spare tire has to be insta lled in the in
correct d irect ion, use the spare tire only
temporarily s ince the tire will not be able to
achieve its optimum performance cha racte r
istics w it h regard to aquap la ni ng, no ise and
wear .
- We recommend that you pay part icu lar at
t en tion to th is fact during wet weather and
that you adjust your speed to match road
condi tions.
- Replace the flat t ire wi th a new one a nd
have it insta lled o n you r vehicle as soo n as
pos sible to res to re the hand ling advant ages
o f a u nidirec tional tire.
Notes on wheel changing
Please read t he info rmation c::> page 248, New
tires and replacing tires and wheels
if yo u a re
going to use a spare tire wh ich is different
from the tires on your vehicle.
After yo u change a tire:
IJI,-
•
•
Page 270 of 304
268 What do I do now?
-Check the tire pressure on the spare imme
diately after installation.
- Have the wheel bolt tightening torque
checked with a torque wrench as soon as possible by your authorized Audi dealer or
qualified workshop.
- With steel and alloy wheel rims, the wheel
bolts are correctly tightened at a torque of
90 ft lbs. (120 Nm).
- If you notice that the wheel bolts are cor
roded and difficult to turn while changing
a tire, they should be replaced before you
check the tightening torque.
- Replace the flat tire with a new one and
have it installed on your vehicle as soon as
possible. Remount the wheel cover.
Until then, drive with extra care and at re
duced speeds.
A WARNING
- If you are going to equip your vehicle
with tires or rims which differ from those
which were factory installed, then be
sure to read the information ~
page 248,
New tires and replacing tires and
wheels.
- Always make sure the damaged wheel or
even a flat tire and the jack and tool kit
are properly secured in the luggage com
partment and are not loose in the pas
senger compartment.
- In an accident or sudden maneuver they
could fly forward, injuring anyone in the
vehicle.
- Always store damaged wheel, jack and
tools securely in the luggage compart
ment. Otherwise, in an accident or sud
den maneuver they could fly forward,
causing injury to passengers in the vehi
cle.
@ Note
Do not use commercially available tire
sealants. Otherwise, the electrical compo
nents of the tire pressure monitoring sys
tem* will no longer work properly and the
sensor for the tire pressure monitoring system* will
have to be replaced by quali
fied workshop.
Page 291 of 304
"' N
0 ::.,: co ,...., \!) 1.1'1 ,...., 1.1'1 ,....,
Automatic climate control Air vents ... ..... ..... ... .. .. .. .... 80
Operation . . . . . . . . . . . . . . . . . . . . . . . . . 79
Setup ... .. ................. .. .... 81
Automatic S hift Lock (ASL) .. .. .. .. .. .. 95
Automatic transmission . . . . . . . . . . . . . . . 93
Automatic S hift Lock (ASL) . . . . . . . . . . . 95
D riving .. .. ............. .... .. .. .. 95
E mergency mode . . . . . . . . . . . . . . . . . . . 99
E me rgency release ........ .. .. .. .. . 100
Kick -down . . . . . . . . . . . . . . . . . . . . . . . . . 98
M anual shift program .. ... .. .. .. .. .. 98
Remova l lock (ignition key) ... .. .. .. .. 82
Selector lever . . . . . . . . . . . . . . . . . . . . . . 94
Automatic wipe rs . . . . . . . . . . . . . . . . . . . . 55
Auto Safety Hotline . . . . . . . . . . . . . . . . . 134
Average speed . . . . . . . . . . . . . . . . . . . . . . . 24
Avoid damag ing the vehicle .. .. .. .. .. . 193
B
Bag hooks . . . . . . . . . . . . . . . . . . . . . . . . . . 7 4
Battery . . . . . . . . . . . . . . . . . . . . . . . 16, 222
Battery location inside the luggage com -
partment .. .. ........... .. .. .. ... 222
Charging . ................ ... ... .. 224
Important warn ings when working on
the battery . ................ ... ... 222
J ump starti ng ............ .... .. .. . 274
L ow . .. .. .. .. .. ........... .. .. ... 19 1
Replacing the ba ttery .. ... .. .. .. .. . 225
State of charge . . . . . . . . . . . . . . . . . . . . 191
Winter operation . ..... ... .. .. .. .. . 222
Working on the battery .... .. .. .. .. . 222
B efore driving ............. .... .. .. . 126
Bio-ethanol (Fuel) ..... ..... .. .. .. .. . 208
Blended gasoline ... .... ... .. .. .. .. . 207
B lower (automatic climate cont rol) . . . . . . 80
Booster seats ............. .... .. .. . 173
B rake fl uid
Changing the brake fl uid ... .. .. .. .. . 22 1
Checking the brake fluid level ... .. .. . 221
Reservoir .. ............. .... .. ... 221
What is the correct brake flu id leve l? . . 221
What should I do if the brake fluid warn-
i ng light comes o n? .. ..... .. .. .. .. . 221
Inde x 289
Brake system . ..... ... .. .. ..... ... .. 221
Anti- lock b raking system ..... ... .. .. . 19
•
B rake assist system .. .. ..... ... .. .. 185 •
Brake fluid .. .. .. ................. 221
Brake fluid specifications for refill and re-
placement ...... .. ............... 221
B rake light defective ... .. .. ... ... .. . 21
B ra ke powe r ass ist unit ............ . 188
Br akes .. .. .. .. .. .. . .............. 188
Ceram ic bra kes . .. .... ........... .. 188
El ec tromechanica l parking brake ... .. . 87
Warning/indicator lights ..... ... .. .. . 15
Wor n brake pads symbo l . . . . . . . . . . . . . 20
B ra kin g
E mergency bra king f unct ion ..... .. .. . 89
braking guard . .. .... ... ....... ..... 101
Messages . . . . . . . . . . . . . . . . . . . . . . . . 109
Settings ........ .. ............... 108
Break -in per iod .. .. .... ............. 193
Tires ... .. .. .. .. .. ............... 193
Bul bs . ... .. .. .... .. . .. .. ..... ... .. 2 72
C
Califor nia Proposition 65 Warn ing . .. .. 213
B attery spec ifi c .. ............. .. .. 223
Capacities ........ .. ............... 281
Carbon pa rts
Cleaning . . . . . . . . . . . . . . . . . . . . 204, 205
Care ..... .. .. .. .... ... .......... .. 202
Cargo area
refer to L uggage compartment . . . 70, 132
Catalytic converter ... .. ...... ... .. .. 194
Cen te r armrest . . . . . . . . . . . . . . . . . . . . . . 62
Central lock ing .. .. ................. . 31
Cen tral lock ing switch ............. .. 35
Co nvenience key .. .. . .. .. .. ... ... .. . 35
Remote cont ro l key . . . . . . . . . . . . . . . . . 34
Ceram ic brake rotors
New brake pads .. ............. .... 188
Ce rtification . ... .... . ... ...... ... .. 286
Chang ing a flat t ire . .. ... ....... .... . 263
Chang ing a wheel .. ............. .... 263
Chang ing engine oil ............. .... 217
Checking Engine coolant level .... ....... .... . 218
Checking t ire pressure ............... 239
Page 294 of 304
292 Index
Starting with jumper cab les . ....... . 274
Stopping . . . . . . . . . . . . . . . . . . . . . . 84, 86
E ng ine compartment
Safety instructions ...... .. .. .. .. .. . 212
Working the engine compartment 212
Eng ine coolant
Indicator light . . . . . . . . . . . . . . . . . . . . . 17
E ngine coolant system ...... .. .. .... . 218
Adding coolant ........... .. .. .. .. . 219
Checking coolant level ..... .. .. .. .. . 218
Check ing the eng ine coolant level .. .. . 218
Radiator fan .............. ... .. .. . 220
E ngine coolant temperature
Temperature gauge ....... .. .. .... .. 10
Engine hood
C losing ......... ......... ... .... . 212
How to release the hood ............ 212
E ng ine oil . .... ........... ........ . 214
Adding .. .. ............. .. .. .. .. . 216
Addit ives ... ................ ..... . 216
Changing . ................. ..... . 217
Check oil level ............ ... .... . 216
Consumption ............ .. .. .. .. . 216
Indicator light . . . . . . . . . . . . . . . . . 17, 21
Oil consumption ............ .. .... . 215
Oil grades .. ................ ... .. . 214
Pressure malfunction ...... .. .. .. .. . . 17
Sensor defective . . . . . . . . . . . . . . . . . . . . 21
Specification and viscos ity .. .. .. .... . 214
Engine speed limitation ......... .... .. 20
Environment Break- in period ............ ... .... . 193
Cata lytic converter ............ .. .. . 194
Disposing of your vehicle battery ..... 225
Driving at high speeds ..... .. .. .. .. . 195
Driving to minimize pollution and noise 195
Fuel ..... .. ..... ........... ... .. . 210
Fuel economy ............. ... .. .. . 195
L eaks under your veh icle . .. .. .. .. .. . 212
L ett ing the vehicle stand and wa rm up . 196
Proper disposal of drained brake fluid . 221
Proper disposal of drained engine coo l-
ant ..... .. ................ ..... . 219
Proper disposal of dra ined engine
oil .. .. .. ................. .. 216,217
Recycling used engine oil ... .. .. .. .. . 216
Roof rack . . . . . . . . . . . . . . . . . . . . . . . . . 70 Unleaded fuel
.... ................ . 207
What shou ld I do with an o ld battery? . 22S
EPC
refer to E lectronic power control . . . . . . 20
Ethyl alcohol (Fuel) . .. .. ...... ... .. .. 208
Event Data Recorder (EDR) ............ 184
Exhaust tail pipes
Cleaning .. .... .. ............. .... 203
Expansion tank .... ............. .... 218
Exterior lighting ... ................ .. 49
Exterior m irrors
Adjust ing . .. .. .. .. ........... .. .. . 52
Dimming .. .... .. ............. ..... 53
Heating . .. .. .. . .............. .. .. . 52
F
Fan
Radiator 220
Fastening Booster seats . . . . . . . . . . . . . . . . . . . . . 173
Convertib le child safety seats .. ... ... 172
Infant seats ... .. ... .......... .... 171
Fa stening eye s
refer to Tie-downs .. .... .... ... .. .. . 74
Flat tire Changing ..... .. ................ . 263
flexib le fue l ....... ............. .... 208
Floor .. .... .... .. ................. . 76
Floor mats . ..... .. ................ . 131
Fog lights/rear fog light(s) ......... ... . 49
Folding the rear seats ............ .... . 71
Foot pedals . .... .. ............. .... 131
For the sake of the environment Gasoline fumes and the env ironment .. 210
Letting the engine warm up . . . . . . 82, 85
Refueling . .. .. .. ... .......... .... 210
Sav ing fuel by early upshifting . .. .. .. . 11
Front airbags Description . . . . . . . . . . . . . . . . . . . . . . . 148
How they work . .. .......... ...... . 153
Frontal collisions and the laws of physics 137
Front passenger's door emergency lock ing 37
Front seats Adjusting ... .. .. ....... ...... .. .. 128
Child restraints in the front seat .. .. .. 145
Page 301 of 304
'"" N
0 ::.,: co ,...., \!) er, ,...., er, ,....,
Tire pressure .... ....... ... .. .. .. ... 239
Tire pressure monitoring system .. . ... . 257
T ires .. .. .. .. ................. .. .. . 227
Low aspect ratio t ires ...... .. .. .. .. . 256
Service life . . . . . . . . . . . . . . . . . . . . . . . 245
Speed rating letter code . ...... ... .. 250
Tire manufacturing date . ....... .... 250
Tire spec ifications ........ .. .. .. .. . 249
Tread depth .. ........... .. .. .. ... 245
Uniform tire quality gra ding .. .. .. .. . 254
Winter tires ............. .. .. .. ... 254
Tires and vehicle load limits ... ... ... .. 242
T ires and whee ls
Checking tire pressure ..... .. .. .. .. . 239
Cold tire inflation pressure . .. .. .. .. . 234
Dimensions . ................ ... ... 248
Gene ral notes ......... .... ... ... .. 227
Glossary of tir e and loadin g termino lo-
gy .. .... .. .. ............. .. .. ... 229
N ew tires and wheels ...... .. .. .. .. . 248
Replacing . . . . . . . . . . . . . . . . . . . . . . . . 249
Snow chains .. ........... .. .. ..... 255
Tires and vehicle load limits . ... .. .. . 242
Wheel bolts ............. .... .. ... 256
Winter tir es .. ........... .. .. .. ... 254
Tire service life ............ .. .. ..... 245
Tool kit ... .. .. ........ ... .. ... ... . 260
T orn or frayed safety belts
139
Towing Front eyelet ............. .. .. .. .. . 277
Rear eyelet .............. .. .. .. ... 277
Tow truck procedures ............ .. . 276
TPMS Tire pressure monitoring system .. .. . 257
Trailer towing ... ... .... ... .. .. .. .. . 199
Operating instructions .......... .... 199
Tec hnical requir ements . . . . . . . . 199, 200
Tips ... .. .. .. .. ........... .. .. ... 201
Transm ission .............. .... .. .... 93
6-speed manual transmission ... .. .. .. 93
Transmission malfunction (indicator light) 99
Transport Canada ............. .... .. 134
Travel mode . . . . . . . . . . . . . . . . . . . . . . . . 51
Tread Wear Indicator (TWI) .. .. .. .. .. . 245
Trip computer Fuel consumption . . . . . . . . . . . . . . . . . . 24
Mil eage .. .. ............. .... .. .. .. 24
Index 299
Single-trip memory .. .......... .. .. . 24
Total-trip memory . .. .......... .. .. . 24
T rip odometer . .. .. ................. . 12
Trunk
refer to Luggage compartment. . . 70, 132
T runk escape handle . .. .......... .. .. . 41
Trunk lid
refer to Rear lid . . . . . . . . . . . . . . . . 38, 39
Turn signals . .. .. .. .... ............. . SO
Warning/indicator lights ........... .. 22
u
Un fastening safety belts 141
Uni directional tires .... .......... .. .. 228
Uniform tire quality g rading ......... . 254
Unlocking Rear lid ... .. .. .. .... ............. . 38
Unlo cking/locking
at the lock cylinder ... .......... .. .. . 37
by remote control . . . . . . . . . . . . . . . . . . 34
with t he ce ntra l locking sw itch ..... .. . 35
with the conven ience key ............ . 35
Use of jumper cables ............ .. .. 275
V
Valet parking .... .... ... .......... .. . 45
Vanity mirrors . . . . . . . . . . . . . . . . . . . . . . . 54
Vehicle care/clean ing ...... . .. .......... .. 202
Vehicle control modules ............. . 184
Vehicle electrica l system ............. . 16
Vehicle identifica tion label ........ .. .. 280
Vehicle Identificat ion Number (VIN) .... 280
Vehicle jack ... .... .. . .. .......... .. 265
Vehicle key . . . . . . . . . . . . . . . . . . . . . . . . . 32
Vehicle literature ...... ............. .. S
Vehicle shut-down ... . .. .......... .. 195
Vehicle tool kit .. .. .. . .. .. ...... .. .. 260
Ventilation . . . . . . . . . . . . . . . . . . . . . . . . . 78
Vinyl Cleaning .. .. .... .. . .. .......... .. 205
•
•
Page 302 of 304
300 Index
w
Warning/indicator lights . . . . . . . . . . 10, 13
Airbag system ........ ... ... ..... .. 20
Anti-lock braking system (ABS) . ... ... . 19
Brake system .................... .. 15
Electromechanical parking brake .... .. 16
Electronic power control . . . . . . . . . . . . . 20
Electronic Stabilization Control (ESC) ... 18
Generator .. .. .. ...... .... ... .. .. .. 16
Malfunction Indicator Lamp (M IL) . . . . . 20
Safety belt .............. .. .. .... .. 16
Safety systems . . . . . . . . . . . . . . . . . . . . . 20
Turn signa ls .............. ... .... .. 22
Warranty coverages .. ...... .. .. .. .. . 283
Washer reservoir .......... .. .. .. .. . 225
Wear ind icator . ........... .... .... . 245
Weights ... .. ... .... ...... .. .. .. .. . 280
What happens if you wear your safety belt
too loose? ... ................ ..... . 140
What happens to unbelted occupants? .. 137
What impairs driving safety? ..... .. .. . 127
What should I do after changing a
wheel? . ..... ................ ..... . 241
What should I do after replacing wheels? 241
Wheel bolts Torque ... .. ... .... ...... .. .. .. .. . 256
Wheels .................... .. .... . 227
Checking tire pressure .............. 239
Cleaning . ................. .. .... . 203
Cold tire inflation pressure . .. .. ..... 234
General notes ... ...... .... ... .. .. . 227
Glossary of t ire and loading terminolo -
gy . ... .. .. ... .... ...... .. .. .. .. . 229
New tires and wheels ...... .. .. .. .. . 248
Tires and vehicle load lim its .... .. .. . 242
When must a safety belt be replaced? . . 139
When must the airbag system be inspect-
ed? ............................... 154
When shou ld I adjust the tire pressures? 241
When should I check the tire pressures? . 241
Where can I find the tire pressures for my
car? . .. ... .................. ..... . 239
Why safety belts? . . . . . . . . . . . . . . 136, 137
Window regulators Power locks . . . . . . . . . . . . . . . . . . . . . . . 42 Windows
Cleaning/removing ice .............. 204
defrosting ... .. .. ................ .. 80
Windsh ield
Cleaning . . . . . . . . . . . . . . . . . . . . . . . . . . 55
defrosting . . . . . . . . . . . . . . . . . . . . . . . . . 80
Windshield washer fluid Low level . . . . . . . . . . . . . . . . . . . . . . . . . . 21
Windshield washer system ..... .. .. .. . 55
Windshield wipers Cleaning . . . . . . . . . . . . . . . . . . . . . . . . . . 56
Folding up .... .. ................ .. 57
Indicator light .................. .. . 21
Replacing windshield wiper blades . 57, 58
Switching on/off . . . . . . . . . . . . . . . . . . . 55
Washer reservoir 225
Winter operation Battery . . . . . . . . . . . . . . . . . . . . . . . . . . 222
Car washes ...... ............. .... 202
Coolant system ............... .... 218
Defrosting windows ................. 80
Removing ice from windows ... .. .. .. 204
Seat heating . . . . . . . . . . . . . . . . . . . . . . . 80
T ires ............................ 190
Winter tires . ....................... 254
All wheel drive . .. ... ....... ...... . 254
X
Xenon headlights .. ... ....... 49, 51,272