instrument cluster AUDI S4 2016 Owners Manual
[x] Cancel search | Manufacturer: AUDI, Model Year: 2016, Model line: S4, Model: AUDI S4 2016Pages: 278, PDF Size: 70.26 MB
Page 11 of 278
..... N
0 ::..:: co .....
@
®
©
®
®
(j)
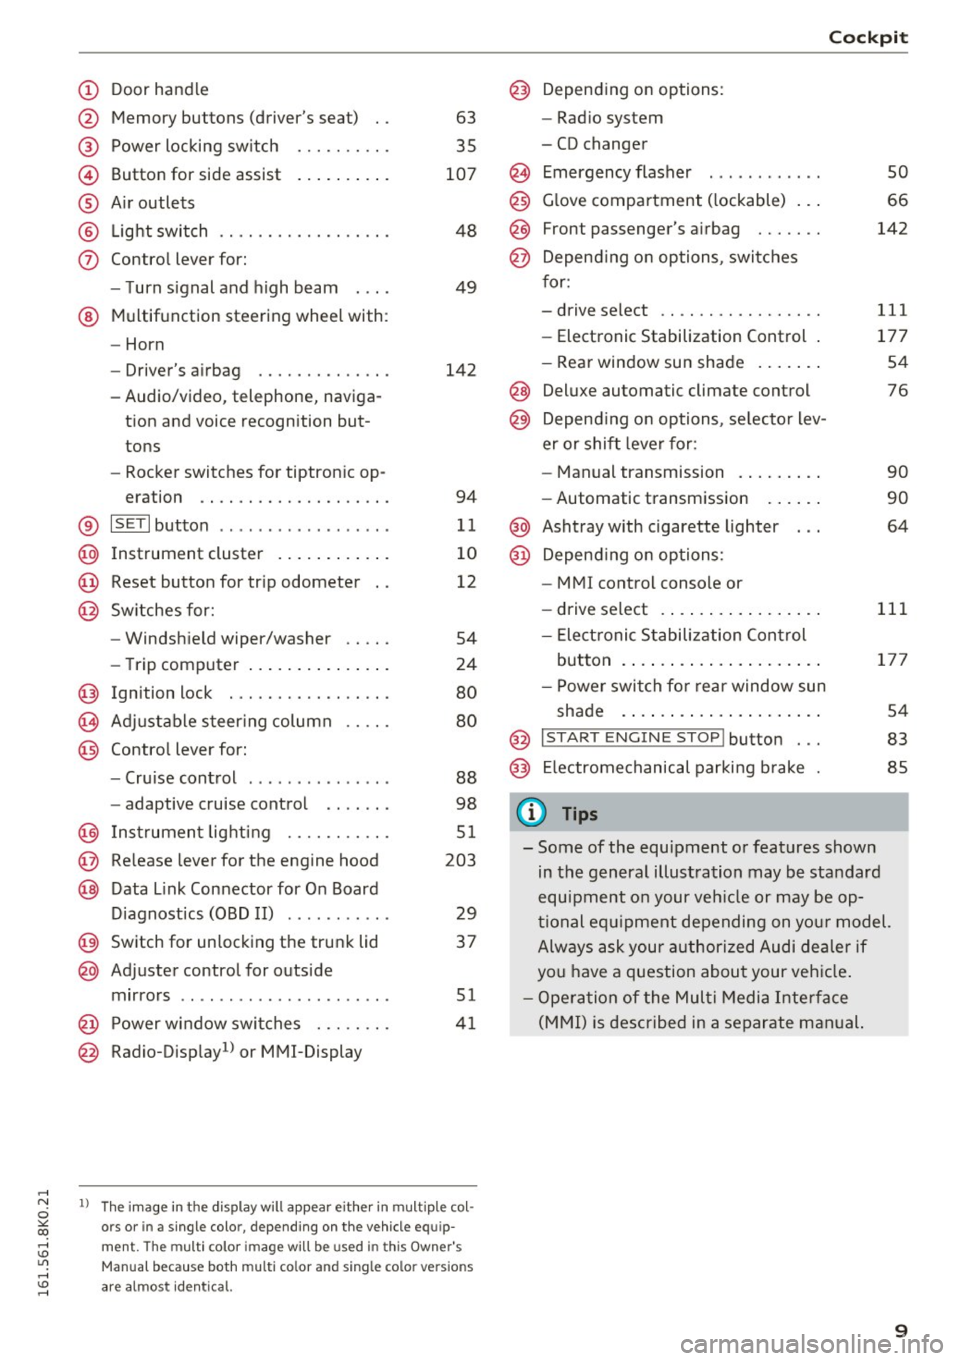
Door handle
Memo ry buttons (driver's seat)
Power locking sw itch
Button for side assist
A ir outlets
L ight switch
Control lever for:
- T urn signal and high beam
® Multifunction steering wheel with:
- Horn
- Driver's airbag ............. .
- Audio/video, telephone, naviga-
tion and voice recognition but
tons
- Rocker switches for tiptron ic op-
eration ................... .
® ISETI button ................. .
@ Instrument cluster .......... . .
@ Reset button for tr ip odometer
@ Switches for:
@
@
-Windshield wiper/washer
- Trip computer .............. .
Ignition lock . ............. .. .
Adjustable steer ing column
Contro l lever for:
- Cruise control .............. .
- adaptive cruise control
I nstrument lighting .......... .
Release lever for the engine hood
Data Link Connector for On Board
Diagnostics (OBD II) .......... .
Switch for unlocking the trunk lid
Adjuster control for outside
mirrors ................ ..... .
Power window switches ..... .. .
Radio-Display
1> or MMI-Display
63
35
107
48
49
142
94
11
10
12
54
24
80
80
88
98
51
203
29
37
51
41
ll The image in t he d isplay will appear either in mu ltiple col
ors or in a single colo r, depending on the vehicle equip
m ent. The mult i colo r im age will be used in th is Owner's
Manual because both multi co lor and single color versions
are almos t id entical.
Cockpit
Depending on options:
- Radio system
- CD changer
Emergency flasher
Glove compartment ( lockable) .. .
Front passenger's airbag ...... .
Depend ing on options, switches
for :
- drive select ................ .
- Electronic Stabilization Control .
- Rear window sun shade ...... .
@ Deluxe automatic climate control
@ Depending on options, se lector lev
er or shift lever for :
@
@
- Manual transmission ........ .
- Automatic transmission
Ashtray with cigarette lighter Depend ing on options:
- MMI control console or
- drive select . ... ............ .
- Elect ronic Stabilization Control
so
66
142
111
177
54
76
90
90
64
111
button . . . . . . . . . . . . . . . . . . . . . 177
- Power switch for rear window sun
shade . . . . . . . . . . . . . . . . . . . . . 54
@ I START ENGINE STOP! button . . . 83
@) Electromechanical parking brake 85
(D Tips
- Some of the equipment or features shown
in the general illustration may be standard
equipment on your veh icle or may be op
tional equipment depending on your model.
Always ask your authorized Audi dealer if
you have a question about your vehicle.
- Operation of the Multi Media Interface
(MMI) is described in a separate manual.
9
Page 12 of 278
Instruments and indicator lights
Instruments and indicator Lights
Instruments
Instrument cluster and controls
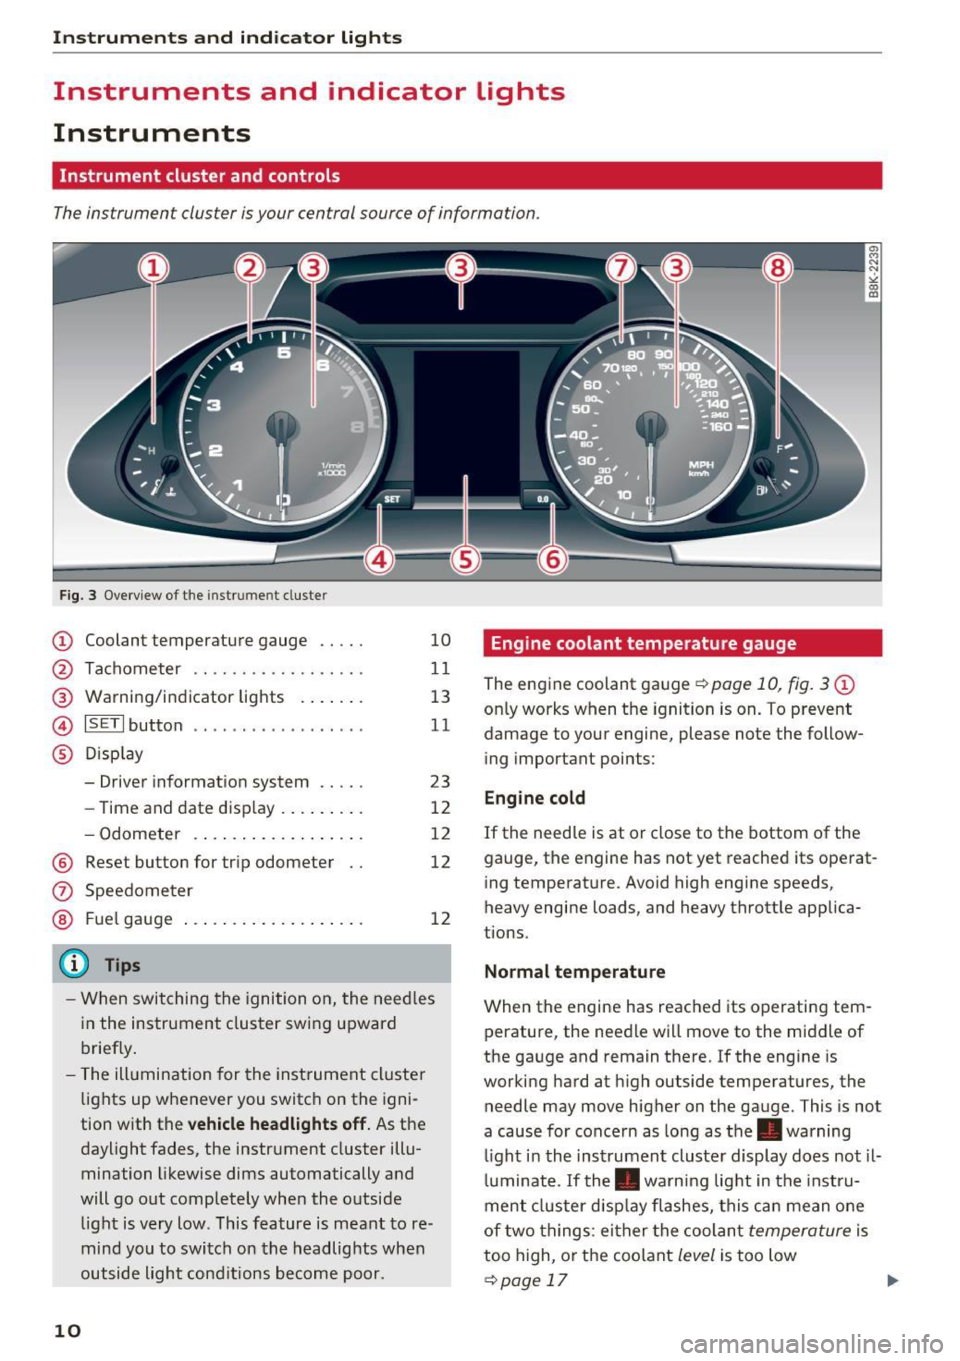
The instrument cluster is your central source of information.
Fig. 3 Overview of the instr ume nt cluste r
(D Coolant temperature gauge .. .. .
@ Tachometer .... .. .. ..... .... .
@ Warning/indicator lights ...... .
@ ISETI button ....... ...... .... ·
® Display
- Driver information system .... .
- Time and date display ........ .
- Odometer .... ............ . .
® Reset button for trip odometer
10
11
13
11
23
12
12
12
12
-When switching the ignition on, the needles
in the instrument cluster swing upward
briefly.
- The illumination for the instrument cluster
lights up whenever you switch on the igni
tion with the
vehicle headlights off. As the
daylight fades, the instrument cluster illu
mination likewise dims automatically and
will go out completely when the outside
light is very low . This feature is meant to re
mind you to switch on the headlights when
outside light conditions become poor.
10
Engine coolant temperature gauge
The engine coolant gauge¢ page 10, fig. 3@
only works when the ignition is on. To prevent
damage to your engine, please note the follow ing important points:
Engine cold
If the needle is at or close to the bottom of the
gauge, the engine has not yet reached its operat
ing temperature. Avoid high engine speeds,
heavy engine loads, and heavy throttle applica
tions .
Normal temperature
When the engine has reached its operating tem
perature, the needle will move to the middle of
the gauge and remain there. If the engine is
working hard at high outside temperatures, the
needle may move higher on the gauge . This is not
a cause for concern as long as the . warning
li ght i n the inst rument cluster display does not il
luminate . If the . warning light in the instru
ment cluster display flashes, this can mean one
of two things : either the coolant
temperature is
too high, or the coolant
level is too low
¢page 17 ..,.
Page 13 of 278
,....,
N
0
""' CX) ,....,
I.Cl U"I ,....,
I.Cl ,....,
A WARNING
-Always observe the warning in ¢ page 203,
before opening t he hood and checking the
engine coolant level.
- Never open the engine hood if you see or
hear steam, or if you see engine coolant
dr ipping from the engine compartment. You
cou ld burn yourself. Let the engine cool off
firstsothatyoucannothearo rseeany
steam or engine coo lant.
0 Note
- Mounting additional lights or accessories in
front of the air inlets reduces the cooling ef
fect of the radiator. At h igh outside temper
atu res or high engine load, the engine could
overheat.
- The front spoiler has been designed to prop
erly distribute the cooling air when the vehi
cle is moving. If the spoiler is damaged, this
could reduce the cooling effect and the en
gine could then overheat. Ask your author
ized Audi dealer for assistance.
Tachometer (engine rev counter )
The tachometer indicates the engine RPM (revo
lutions per minutes).
If engine RPM drops below 1,500, you should
downshift to the next lower gear. The red area at
the end of the scale indicates maximum permis
sible eng ine RPM after the break-in period. Be
fore reaching this area, move the selector lever
to position D/5 or ease your foot off the accelera
tor pedal.
(D Note
The tachometer needle@¢ page 10, fig. 3
should only briefly be in the red zone: you
could damage your eng ine! The beginning of
the red zone varies depending on the engine.
@ For the sake of the environment
Upshifting early saves fuel and reduces en
gine noise.
Instruments and indicator lights
~button
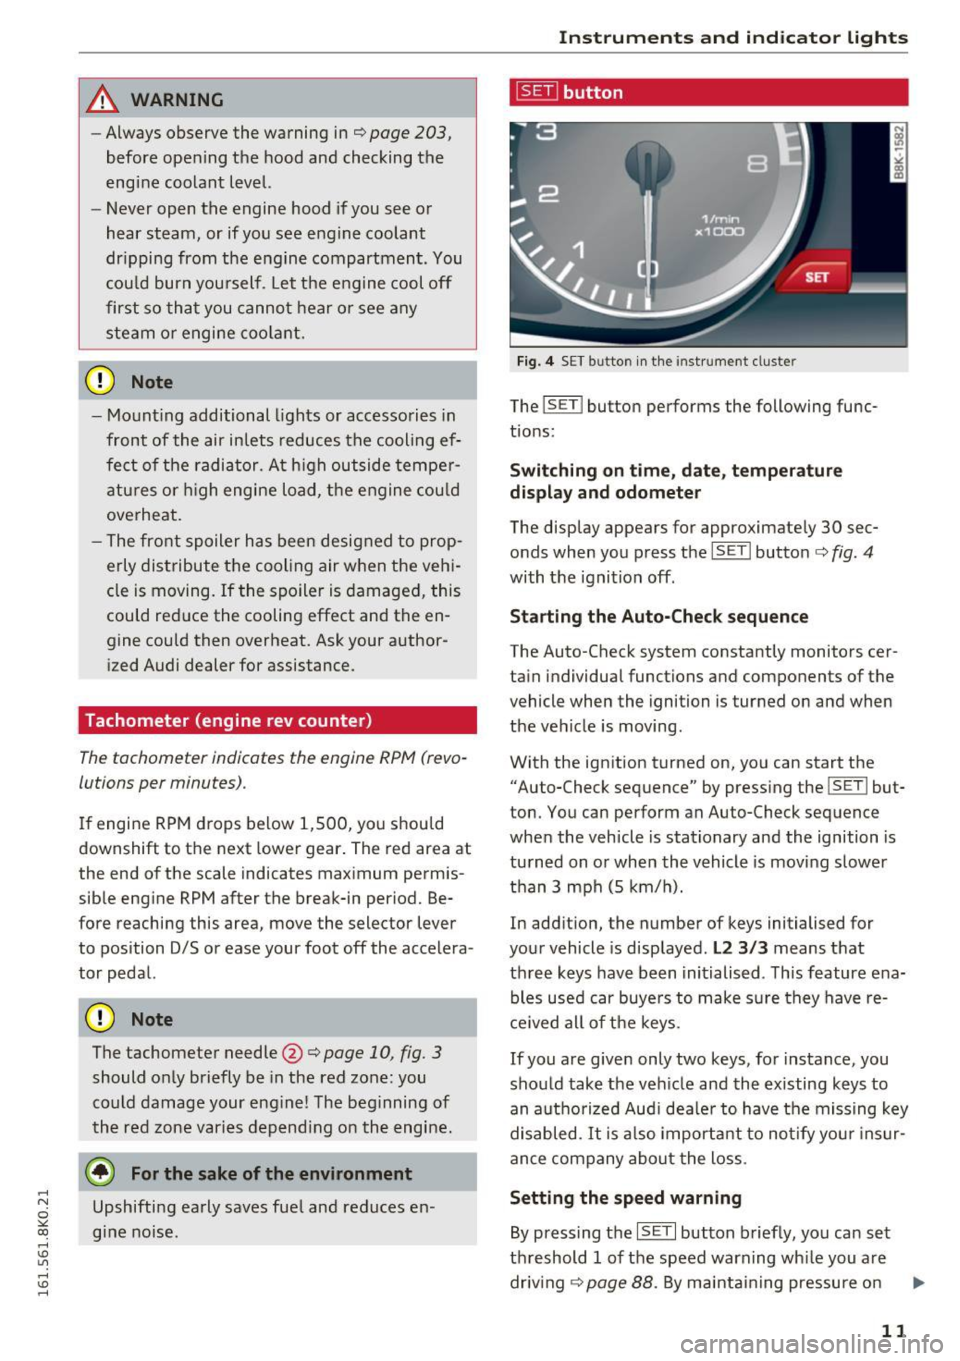
Fig. 4 SET button in the instrument cluster
The !SET I button performs the following func
tions:
Switching on time, date, temperature
display and odometer
The display appears for approximately 30 sec
onds when you press the
ISETI button¢ fig . 4
with the ignition off.
Starting the Auto-Check sequence
The Auto-Check system constantly monitors cer
tain indiv idual functions and components of the
vehicle when the ignition is turned on and when
the vehicle is moving.
With the ignition turned on, you can start the
"Auto-Check sequence" by pressing the
! SETI but
ton. You can perform an Auto-Check sequence
when the vehicle is stat ionary and the ignition is
turned on or when the vehicle is moving slower
than 3 mph (5 km/h).
In addition, the number of keys initialised for
your vehicle is displayed.
L2 3/3 means that
th ree keys have been initialised. This feature e na
bles used car buye rs to make su re they have re
ceived all of the keys.
If you are given only two keys, for instance, you
should take the veh icle and the existing keys to
an authorized Audi dealer to have the missing key
disabled. It is also important to notify your insur
ance company about the loss.
Setting the speed warning
By pressing the ISETI button briefly, you can set
threshold 1 of the speed warning wh ile you are
driv ing
¢page 88. By ma intaining pressure on
11
Page 14 of 278
Instrumen ts and ind icator ligh ts
the I SET! button, you de lete the warning thresh
old.
Digital clock with date display and
Odometer
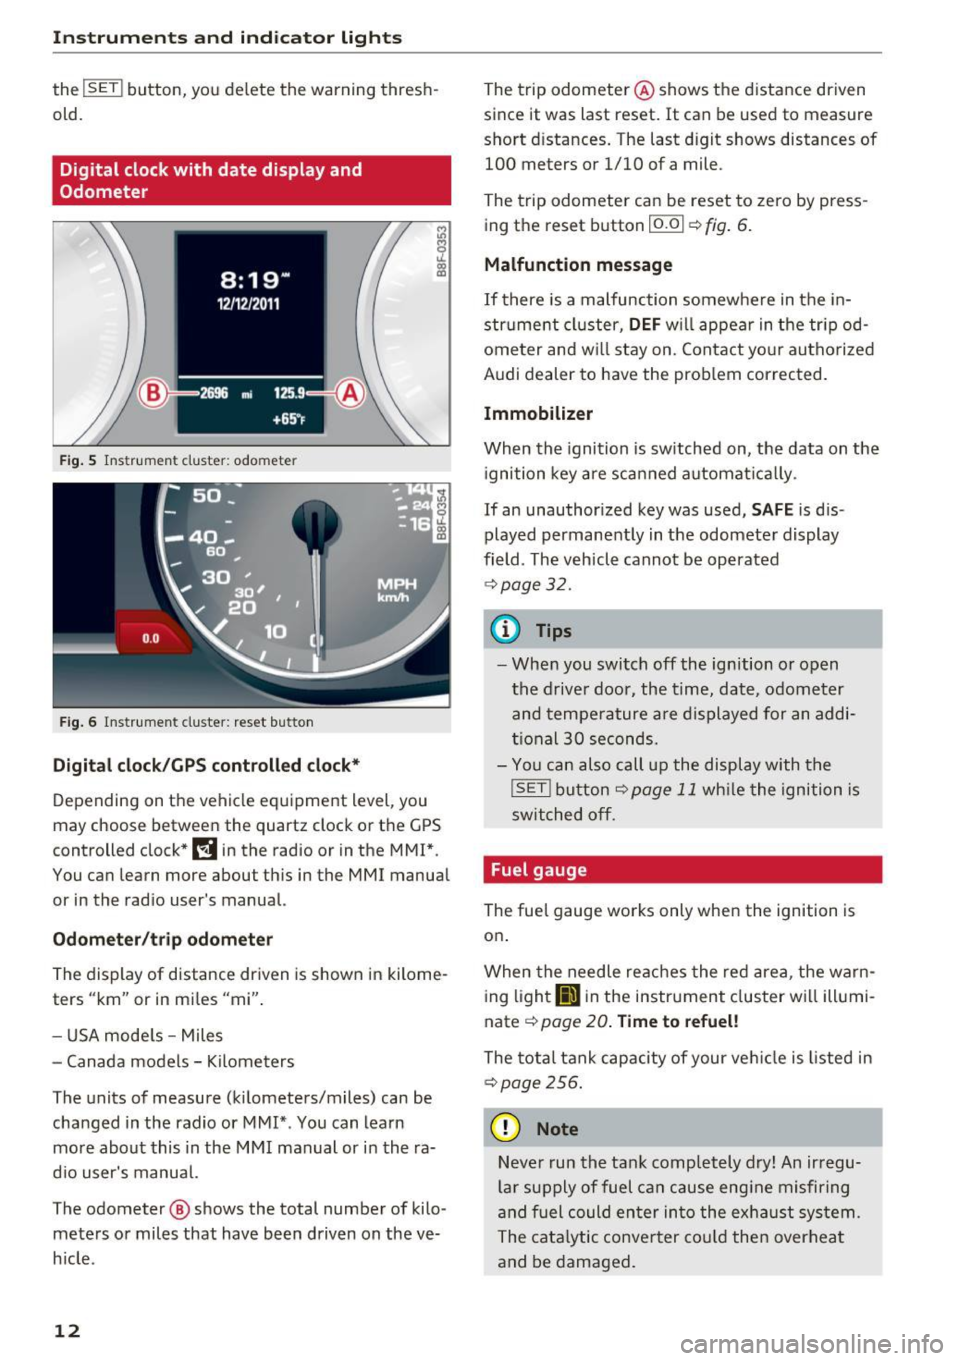
F ig . 5 Ins trum en t cluster: odo meter
Fig . 6 Instrument cluster: reset bu tton
Digi tal clock/GP S controll ed cl ock*
Depending on the vehicle equipment level, you
may choose between the quartz clock or the
GPS
controlled clock* l!j in the radio or in the MMI *.
You can learn more about this in the MMI manual
or in the rad io user 's manual.
Odometer /t ri p odomete r
The display of distance driven is shown in kilome
ters "km" or in miles "mi".
- USA mode ls - Miles
- Canada models - Kilometers
The units of measure (kilometers/miles) can be changed in the radio or MMI* . You can learn
mo re about this in the MMI manual or in the ra
d io user's manual.
The odometer @ shows the total number of kilo
meters or miles that have been driven on the ve
h icle .
12
The trip odometer @ shows the distance driven
since it was last reset.
It can be used to measure
short distances. The last digit shows distances of
100 meters or 1/10 of a mile .
The trip odometer can be reset to zero by press
ing the reset button
!O.O I ¢ fig. 6.
Malfunction message
If there is a malfunction somewhe re in the in
strume nt cluster,
DEF w ill appear in the tr ipod
ometer and w ill stay on. Contact yo ur authorized
Aud i dealer to have the prob lem corrected.
Immobilizer
When the ignition is switched on, the data on the
i gnition key are scan ned automat ica lly .
If an unauthor ized key was used,
SAFE is d is·
played permanently in the odomete r display
field . The vehicle cannot be operated
¢ page 32 .
{i) Tips
-When you switch off the ignition or open
the driver door, the time, date, odometer
and tempe rature are displayed for an addi
tional
30 seconds.
- You can also call up the display with the
!SE T! button¢ page 11 while the ignition is
switched off .
Fuel gauge
The fuel gauge works only when the ignition is
on.
When the needle re aches the red area, the warn
i ng l ight
li'J in the instrument cluster wi ll illumi
nate ¢
page 20. Time to refuel!
The tota l tank capacity of your ve hicle is listed in
¢ page 256.
(D Note
Neve r run the tan k comp letely dry! An ir regu
l a r supply of fuel can cause eng ine misfiring
and fuel could enter in to the exhaust system .
The cata lytic conver ter cou ld the n overheat
and be damaged.
Page 25 of 278
,....,
N
0
""' CX) ,....,
I.Cl U"I ,....,
I.Cl ,....,
Driver information
system
Introduction
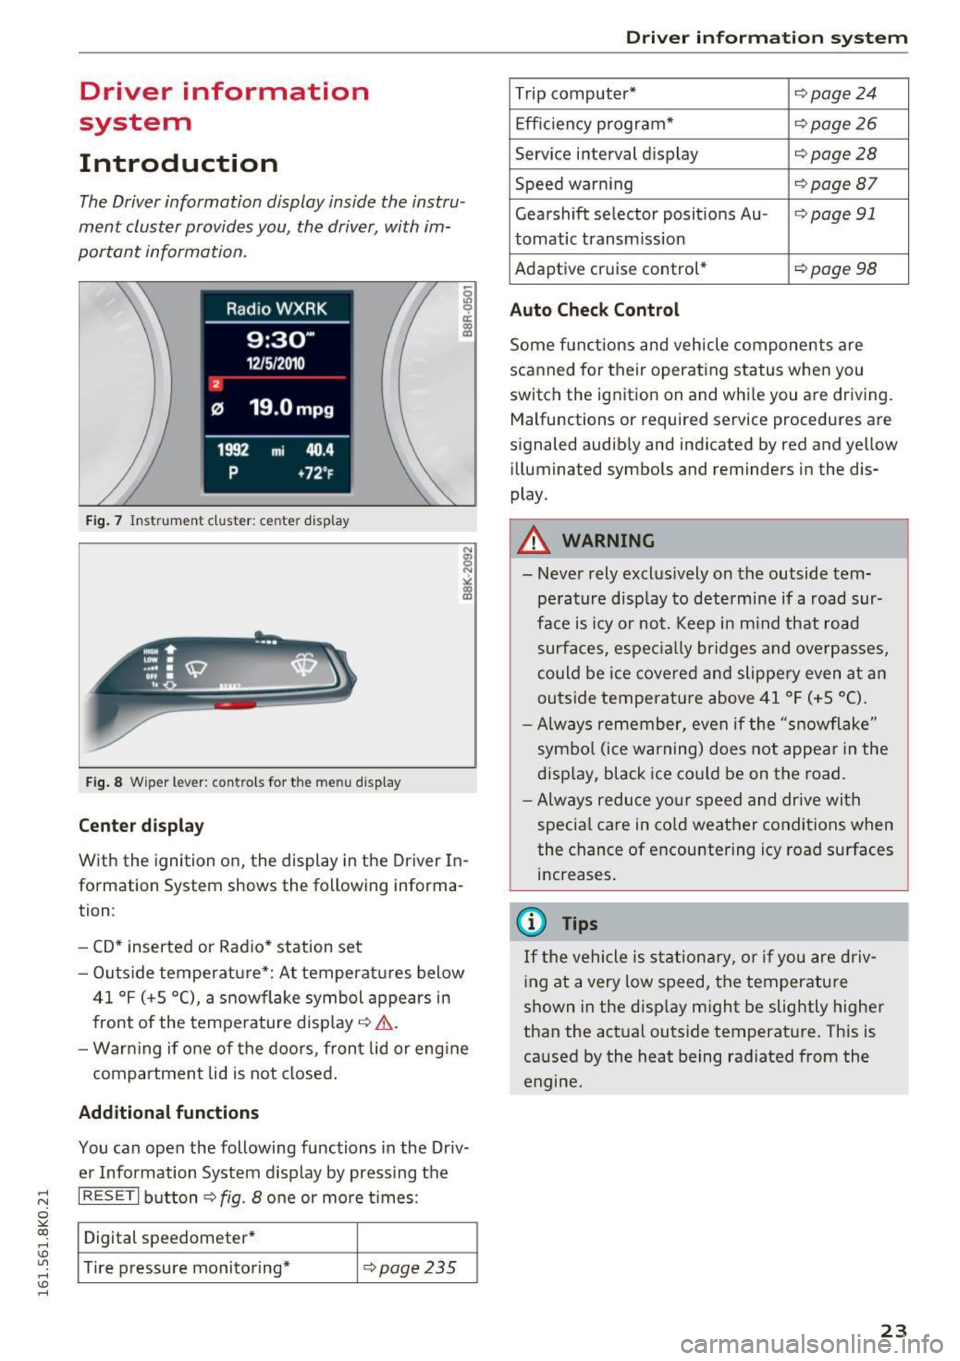
The Driver information display inside the instru
ment cluster provides you, the driver, with im
portant information.
Fig. 7 Instrument cluster: ce nter display
Fig. 8 Wipe r lever: contro ls for the menu display
Center display
With the ignition on, the display in th e Driver In
formation System shows the following informa
tion :
- CD* inserted or Radio* station set
- Outs ide temperature*: At temperatures below
41 °f (+S
0
(), a snowflake symbol appears in
front of the temperature display¢ ,1,. .
- Warning if one of the doors, front lid or engine
compartment lid is not closed.
Additional functions
You can open the following functions in the Driv
er Information System display by pressing the
I RESETI button¢ fig. 8 one or more t imes :
Digital speedometer*
Tire pressure monitoring*
¢pag e235
Driver in forma tion system
Trip computer* ¢page24
Efficiency program* ¢page26
Service interval display ¢page28
Speed warning ¢page Bl
Gearshift selector posit ions Au -i=>page 91
tomatic transm ission
Adaptive cruise control*
¢ page 98
Auto Check Control
Some functions and vehicle components are
scanned for their operating status when you
switch the ignition on and while you are driving. Malfunctions or required service procedures are
signaled audibly and indicated by red and yellow
illum inated symbols and reminders in the dis
play.
A WARNING
--
- Never rely exclus ively on the outside tem
pe rature display to determine if a road sur
face is icy or not. Keep in m ind that road
surfaces, especially bridges and overpasses,
could be ice covered and slippery even at an
outside temperat ure above 41 °f (+S °C).
- Always remember, even if the "snowflake"
symbol (ice warning) does not appear in the
display, black ice could be on the road.
- Always reduce your speed and dr ive with
specia l care in cold weather conditions when
the chance of encountering icy road surfaces
increases.
(j) Tips
If the vehicle is stationary, or if you are driv
ing at a very low speed, the temperature
shown in the disp lay might be slightly higher
than the actual outside temperature. This is
caused by the heat being radiated from the
engine.
23
Page 27 of 278
..... N
0 ::..:: co .....
data from the tota l-trip memory is being dis
p layed (memory level 2). The fuel pump nozzle
ii indicates the efficiency program*
¢page 26.
Single-trip memory (Trip computer 1)
The single-trip memory stores the trip informa
tion from the time the ignition is turned on until
it is turned off.
If the trip is continued within 2
hours
from the time the ignition was turned off,
the new data w ill be included in the calculat ion of
the current tr ip inf ormat ion . If the trip is inter
rupted fo r
more than 2 hours the memory is re
set automat ica lly.
Total-trip memory (Trip computer 2)
Unlike the single-trip memory, the total-trip
memory is not reset automatically. This permits
you to evaluate your driving data for the entire period between manual resets.
Efficiency program*
The efficiency program can help you to use less
fuel¢
page 26.
Operation
App lies to vehicles: with trip computer
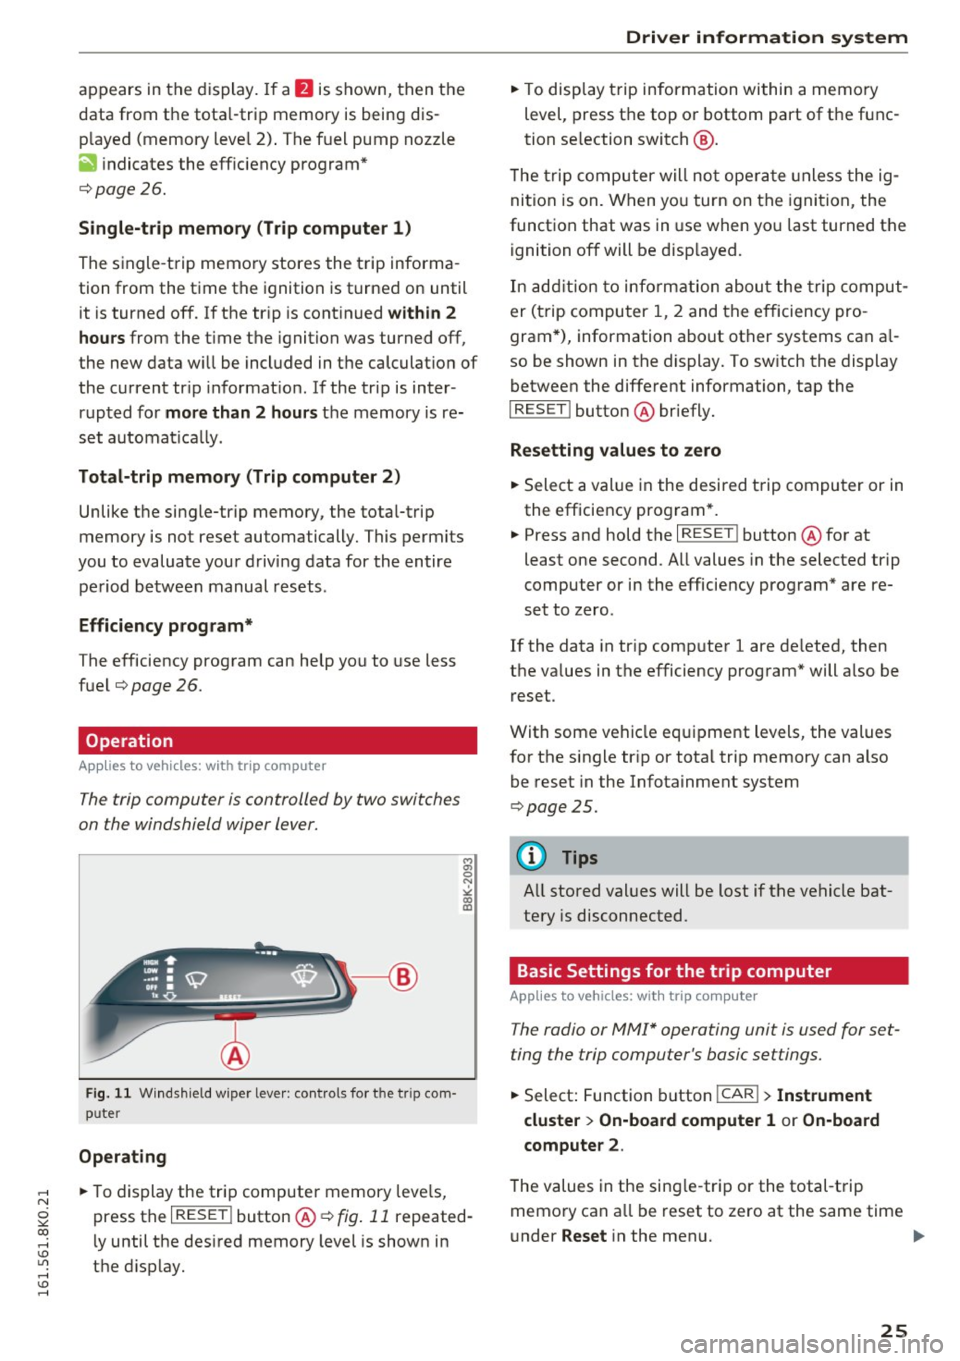
The trip computer is controlled by two switches
on the windshield wiper lever.
F ig. 11 W indsh ield w iper lever: controls for t he tr ip com·
puter
Operating
• To display the trip computer memory levels,
press the
I RESET ! button@¢ fig. 11 repeated
ly until the desired memory level is shown in
the display.
Driver information system
• To display trip information within a memory
level, press the top or bottom part of the func
tion se lection switch @.
T he trip computer will not ope rate un less the ig
nition is on. When you turn on the ignition, the
function that was in use when you last turned the
ignition off will be disp layed.
In addition to information about the trip comput
er (trip computer 1, 2 and the efficiency pro
gram*), information about other systems can a l
so be shown in the display. To sw itch the display
between the different information, tap the
I RESET I button @ briefly.
Resetting values to zero
• Select a value in the desired trip computer or in
the efficiency program *.
• Press and hold the
I RESET ! button @for at
least one second . All values in the selected trip
computer or in the efficiency program* are re
set to zero.
If the data in trip computer 1 are de leted, then
the va lues in the efficiency program* will a lso be
reset.
With some vehicle equipment levels, the values
for the single trip or total trip memory can also
be reset in the Infotainment system
¢ page 25.
(0 Tips
All stored values will be lost if the vehicle bat
tery is disconnected.
Basic Settings for the trip computer
Applies to vehicles: with trip computer
The radio or MMI* operating unit is used for set
ting the trip computer 's basic settings.
• Select: Function button !CAR !> Instrument
cluster
> On-board computer 1 or On-board
computer 2.
The values in the sing le-trip or the total-trip
memory can a ll be reset to zero at the same time
under
Reset in the menu. .,..
25
Page 28 of 278
Driver information system
In addition, you can determine what information
from the trip computer should be shown in the instrument cluster disp lay . If one of the pieces of
driver information is turned
Off , that driver infor
mation will not be shown in the display. The in
formation will continue to be calculated by the
tr ip computer and can be turned back
On at any
time .
(D Tips
-This function is not available on all veh icles.
- The driving information in the efficiency
program is also reset to zero with the sin
gle-trip memory .
Gearshift Indicator
Appl ies to ve hicles: w ith manu al transmiss ion an d ge arshi ft
i n di cato r
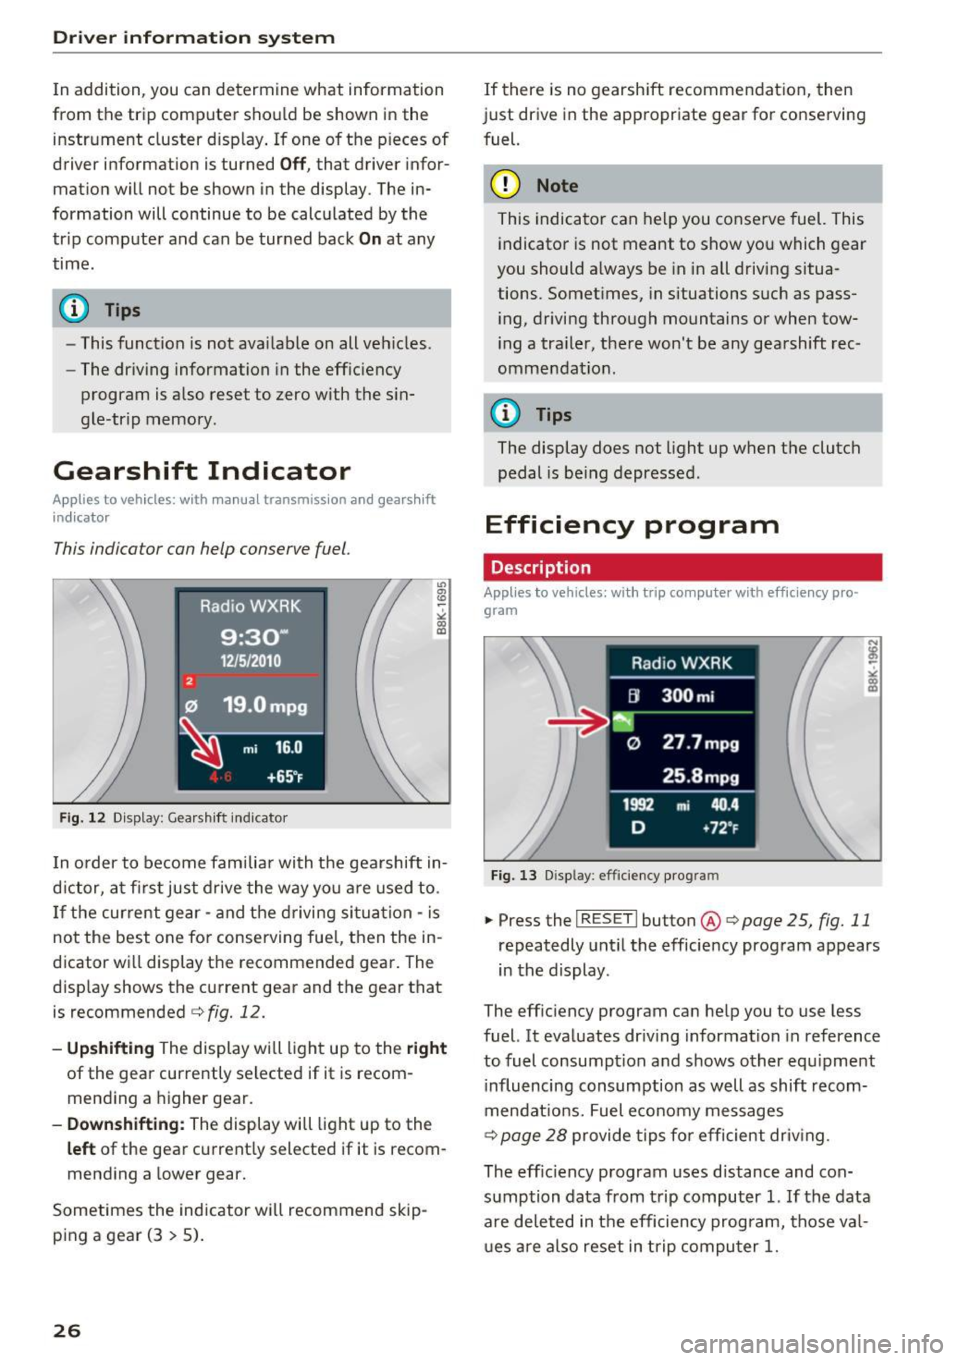
This indicator can help conserve fuel.
Fig. 12 Display: Gearshift indicator
In order to become familiar with the gearshift in
d ictor, at firs t just drive the way you are used to.
If the current gear - and the driving situation -is
not the best one for conserving fuel, then the in
d icator will display the recommended gear. The
display shows the current gear and the gear that
is recommended
c>fig. 12.
-Upshifting The display will light up to the right
of the gear currently selected if it is recom
mending a higher gear.
-Downshifting: The display will light up to the
left of the gear current ly selected if it is recom
mending a lower gear.
Sometimes the indicator will recommend skip
ping a gear (3
> 5).
26
If there is no gearshift recommendation, then
just drive in the appropriate gear for conserving
fuel.
(D Note
This indicator can help you conserve fuel. This
indicator is not meant to show you which gear
you should a lways be in in all driving situa
tions. Somet imes, in situations such as pass
i ng, driving through mountains or when tow
i ng a tra iler, there won't be any gearshift rec
ommendat ion.
@ Tips
The display does not light up when the clutch
pedal is be ing depressed .
Efficiency program
Description
Applies to vehicles : wi th trip co mpute r with eff ic ie n cy pro
gram
Fig. 13 Disp lay: efficiency program
.. PressthelRESETlbutton @c>poge25, fig.11
repeatedly until the efficiency program appears
in the display .
The efficiency program can help you to use less
fuel. It evaluates driving information in reference
to fuel consumpt ion and shows other equipment
i nfluencing consumption as well as shift recom
mendat ions. Fuel economy messages
c>
page 28 provide tips for efficient driv ing.
The eff ic iency program uses distance and con
sumption data from trip computer
1. If the data
are deleted in the efficiency program, those val
ues are also reset in trip computer
1.
Page 31 of 278
,....,
N
0
""' CX) ,....,
I.Cl U"I ,....,
I.Cl ,....,
vehicle, particularly the engine, and main
taining its value. Even if the mileage driven
is low, the maximum period of one year
from one service to the next must not be ex
ceeded.
@ Tips
The informat ion in the Service Rem inder re
mains stored even when the vehicle battery is
disconnected.
On Board Diagnostic
System (OBD)
Malfunction Indicator Lamp (MIL)
The Malfunction Indicator Lamp (MIL) ¢..ift in the
instrument cluster is part of the On-Board Diag
nostic (OBD II) system .
The warning/indicator light illuminates when the
ignition is switched on and goes out after the en
gine starts and the idle has stabilized. This indi
cates that the MIL is working properly .
If the light does not go out after the engine is
started, or illuminates while you are driving, a malfunction may exist in the engine system.
If
the light illuminates, the catalytic converter
could be damaged.
Continue driving
with reduced power (avoiding
sustained high speeds and/or rapid accelera
tions) and have the condition corrected. Contact
your authorized Audi dealer.
If the light illuminates, the electronic speed limiter may also be malfunctioning. For more infor
mation
¢ page 29, Electronic speed limiter.
An improperly closed fuel filler cap may also
cause the MIL light to illuminate ¢
page 200.
Driver in forma tion system
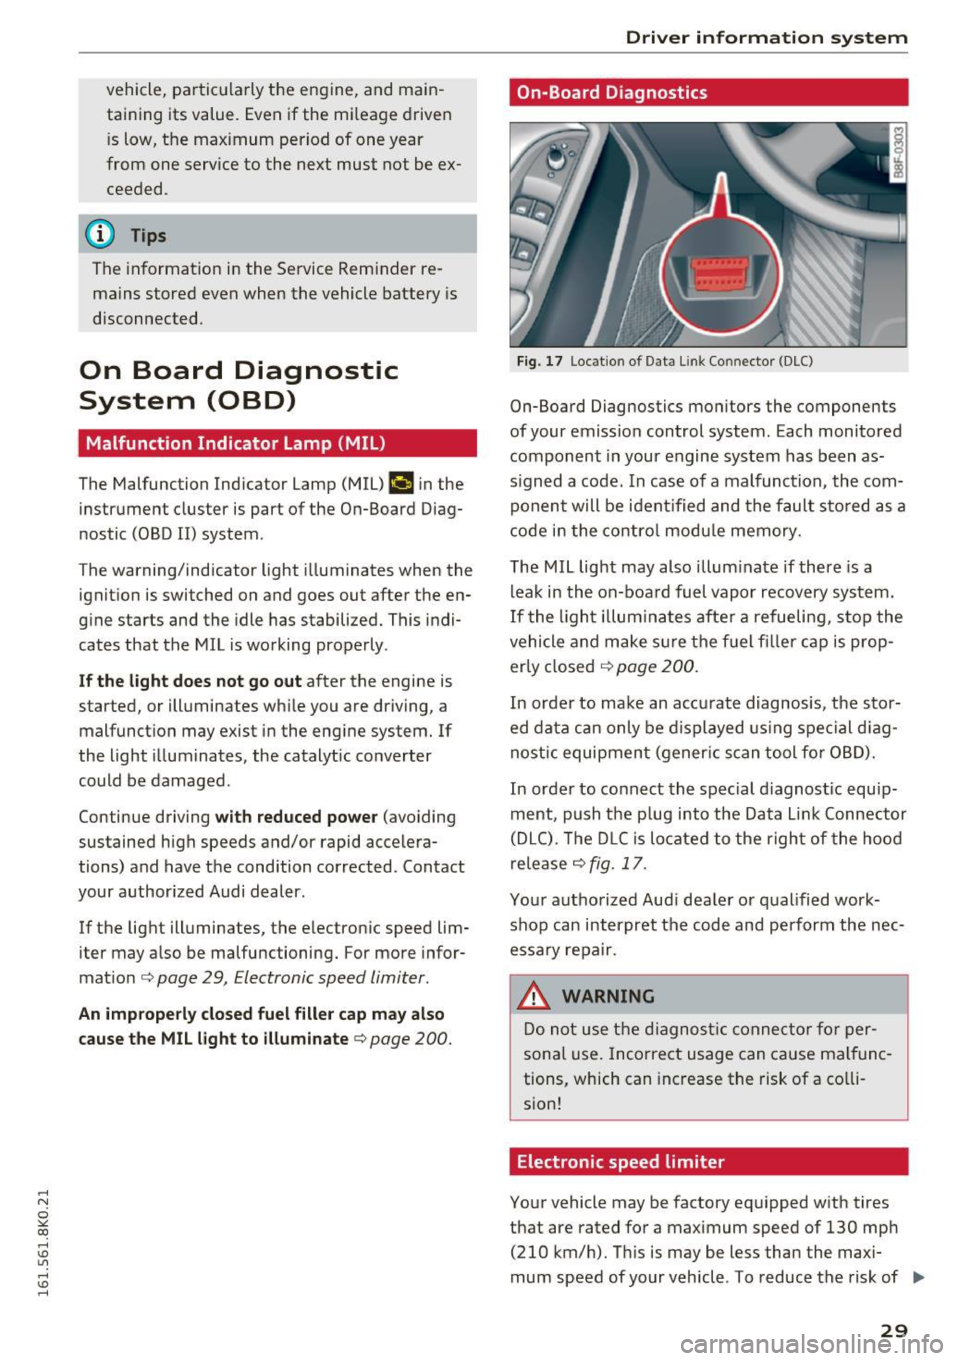
On-Board Diagnostics
Fig. 17 Loca tion of Data Link Connector (DLC)
On-Board Diagnostics monitors the components
of your emission control system. Each monitored
component in your engine system has been as
s igned a code. In case of a malfunction, the com
ponent will be identified and the fault stored as a
code in the control module memory.
The MIL light may also illuminate if there is a
leak in the on-board fuel vapor recovery system.
If the light illuminates after a refueling, stop the
vehicle and make sure the fuel f iller cap is prop
erly closed
¢ page 200.
In order to make an accurate diagnosis, the stor
ed data can only be displayed using special diag
nostic equipment (gener ic scan tool for OBD).
In order to connect the special d iagnost ic equip
ment, push the p lug into the Data L ink Connector
(DLC). The DLC is located to the right of the hood
release
¢ fig. 17.
Your authorized Audi dealer or qualified work
shop can interpret the code and perform the nec
essary repair.
.&, WARNING
Do not use the diagnostic connector for per
sonal use. Incorrect usage can cause malfunc
tions, which can increase the risk of a co lli
sion!
Electronic speed limiter
Your vehicle may be factory equipped with tires
that are rated for a maximum speed of 130 mph (210 km/h). This is may be less than the maxi
mum speed of your vehicle . To reduce the risk of .,.
29
Page 46 of 278
Opening and clo sin g
Valet parking
Applies to vehicles: with folding and lockable rear seatbacks
The valet parking feature protects the luggage
comportment from unauthorized access .
-
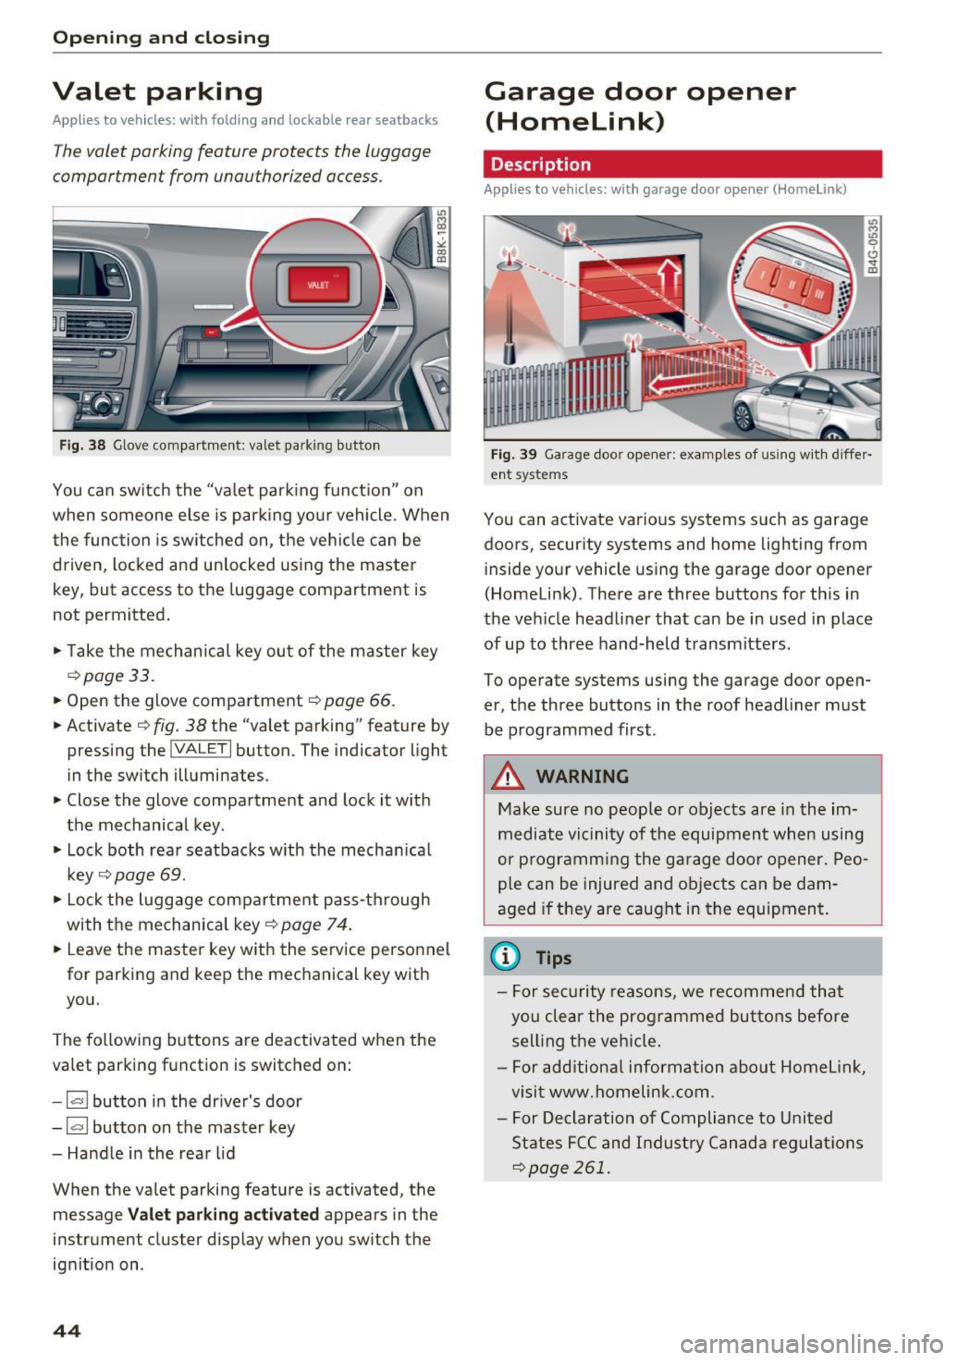
Fig. 38 Glove compartment: valet park ing button
You can sw itch the "va let park ing funct ion" on
when someone else is pa rk ing you r vehicle. When
the function is sw itched on, the vehicle can be
driven, locked and un locked using the master
key, but access to the luggage compartment is
not permitted .
• Take the mechanical key ou t of the master key
<=> page 33.
• Open the glove compartment r::!> page 66 .
• Activate
¢ fig. 38 the "valet parking" feature by
pressing the
! VALET I button. The indicator light
in the switch illuminates.
• Close the glove compartment and lock it with
the mechanical key.
• Lock both rea r seatbacks w ith the mechan ica l
key
¢ page 69.
• Lock the luggage compar tment pass-through
with the mechanical key<=>
page 74 .
• Leave the master key with the service personnel
for parking and keep the mechanical key with
you.
The fo llowing buttons are deactivated when the
valet parking function is switched on:
- 1""' 1 bu tton in the dr iver's door
- I a I button on the master key
- Handle in the rear lid
When the valet parking feature is activated, the message
V alet park ing activ ated appears in the
instrument cluster display when you switch the ignit ion on .
44
Garage door opener
(Homelink)
Description
Applies to vehicles: with garage door opener (Horne Link)
Fig. 3 9 Garage doo r opene r: exa mples of using w it h d iffer·
ent syste ms
You can act ivate vario us systems suc h as garage
doors, secur ity systems and home lighting from
inside your vehicle using the garage door opener
(Homelink) . There are three buttons for th is in
the veh icle headliner that can be in used in place
of up to three hand-held transmitters.
To operate systems using the garage door open
er, the three buttons in the roof headliner must be programmed first .
A WARNING
Make sure no people or objects are in the im
mediate vi cinity of the equipment when using
or p rogramm ing the ga rage door opener. Peo
pl e can be injured and ob jects can be dam
aged i f they are caught in the equipment.
(D Tips
- For sec urity reasons, we recommend that
yo u clear the prog rammed but tons before
sell ing t he ve hicl e.
- For add itiona l information about HomeL ink,
visit www.homelink .com .
- For Declaration of Compliance to United
States FCC and Indust ry Canada regulat ions
<=>page 261.
Page 51 of 278

.... N
0
""' CX)
.... I.Cl U"I
.... I.Cl ....
the windshield in this area in order to
prevent malfunctions or failures.
- Some exterior lighting functions can be ad
justed
c:, page 49.
- When you remove your key from the igni
tion while the vehicle's lights are turned on,
a buzzer sounds as long as the driver's door
is open.
- In cool or damp weather, the inside of the
headlights, turn signals and tail lights can
fog over due to the temperature difference
between the inside and outside. They will
clear shortly after switching them on. This does not affect the service life of the light
ing .
- In the event of a light sensor malfunction,
the driver is notified in the instrument clus
ter display
c:, page 21.
Turn signals and high beam lever
The lever operates the turn signals, the high
beams and the headlight flasher.
Fig. 43 Turn signal and high beam lever
Turn signals¢¢
g N
0
~ CD
The turn signals activate when you move the lev
er into a turn signal position when the ignition is
switched on.
@ -right turn signal
@-left turn signal
The turn signal blinks three times if you just tap
the lever.
High beams and headlight flasher ~D
Move the lever to the corresponding position:
@-high beams on
Light and Vision
@-high beams off or headlight flasher
The indicator light
II in the instrument cluster
turns on.
Notes on these features
- The turn signals only work with the ignition
turned on. The indicator lights. or
II in the
instrument cluster also blink.
- After you have turned a corner, the turn signal
switches off automatically.
- The
high beam works only when the headlights
are on. The indicator light
II in the instrument
cluster illuminates when the high beams are
on.
- The
headlight flasher works only as long as you
hold the lever -even if there are no lights
switched on . The indicator light
II in the in
strument cluster illuminates when you use the
headlight flasher.
WARNING
Do not use the high beam or headlight flasher
if you know that these could blind oncoming
traffic.
Adjusting exterior lighting
The functions are selected in the radio or MMI* .
.,. Select: !CAR I function button> Exterior light
ing .
Or
.,. Select: 1-C~A ~ R-.l function button > Car systems*
control button > Vehicle settings > Exterior
lighting.
Coming home (light when leaving car)*,
Leaving home (light when unlocking car)*
The coming home function illuminates the area
around the vehicle when the ignition is switched
off and the driver's door is opened. Depending on
vehicle equipment, the function can be switched on and off or the length of time the lights remain
on* can be adjusted .
The
leaving home function illuminates the area
around the vehicle when unlocking it. This func-
tion can be switched on and off.
ll>
49