AUDI S4 CABRIOLET 2009 Repair Manual
Manufacturer: AUDI, Model Year: 2009, Model line: S4 CABRIOLET, Model: AUDI S4 CABRIOLET 2009Pages: 340, PDF Size: 77.32 MB
Page 61 of 340
Power windows
Controls
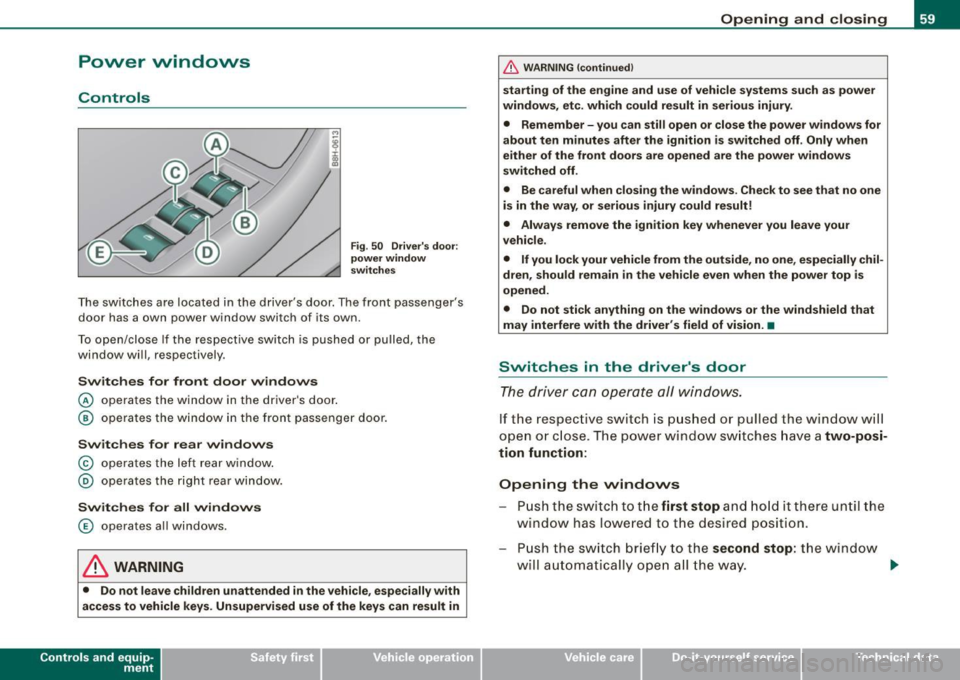
Fig. 50 Driver's door:
power window
switches
The switches are located in the driver's door. The front passenger's
door has a own power window switch of its own.
To open/close If the respective switch is pushed or pulled, the
window will, respectively .
Switches for front door windows
© operates the window in the driver's door.
@ operates the window in the front passenger door.
Switches for rear windows
© operates the left rear window.
@ operates the right rear window.
Switches for all windows
© operates all windows .
& WARNING
• Do not leave children unattended in the vehicle, especially with
access to vehicle keys. Unsupervised use of the keys can result in
Contro ls and eq uip
ment
Opening and closing
& WARNING (continued)
starting of the engine and use of vehicle systems such as power
windows, etc. which could result in serious injury.
• Remember -you can still open or close the power windows for
about ten minutes after the ignition is switched off. Only when
either of the front doors are opened are the power windows
switched off.
• Be careful when closing the windows . Check to see that no one
is in the way, or serious injury could result!
• Always remove the ignition key whenever you leave your
vehicle.
• If you lock your vehicle from the outside, no one, especially
chil
dren, should remain in the vehicle even when the power top is
opened.
• Do not stick anything on the windows or the windshield that
may interfere with the driver's field of vision. •
Switches in the driver's door
The driver can operate all windows.
If the respect ive switch is pushed or pulled the windo w will
open or close . The power w indow switches have a
two-posi
tion function:
Opening the windows
Push the switch to the first stop and hold it there until the
window has lowered to the desired position.
Push the switch briefly to the
second stop: the window
will automatically open all the way. ..
~ehicle care Technical data
Page 62 of 340
Opening and closing
Closing the windows
- Pull the switch up to the first stop and hold it there until
the window has risen to the desired position.
- Pull the switch quickly to the
second position : the
window will automatically close all the way=>
& in
"Contro ls".
Operating switch © =>page 59, fig. 50 you can open/close all
windows centrally=> & in "Controls".
[ i] Tips
The windows can still be opened and closed for about ten minutes
after the ignition has been turned off. The power windows are not
shut off until one of the front doors is opened. •
Switch in the front passenger 's door
...
~ i ., m
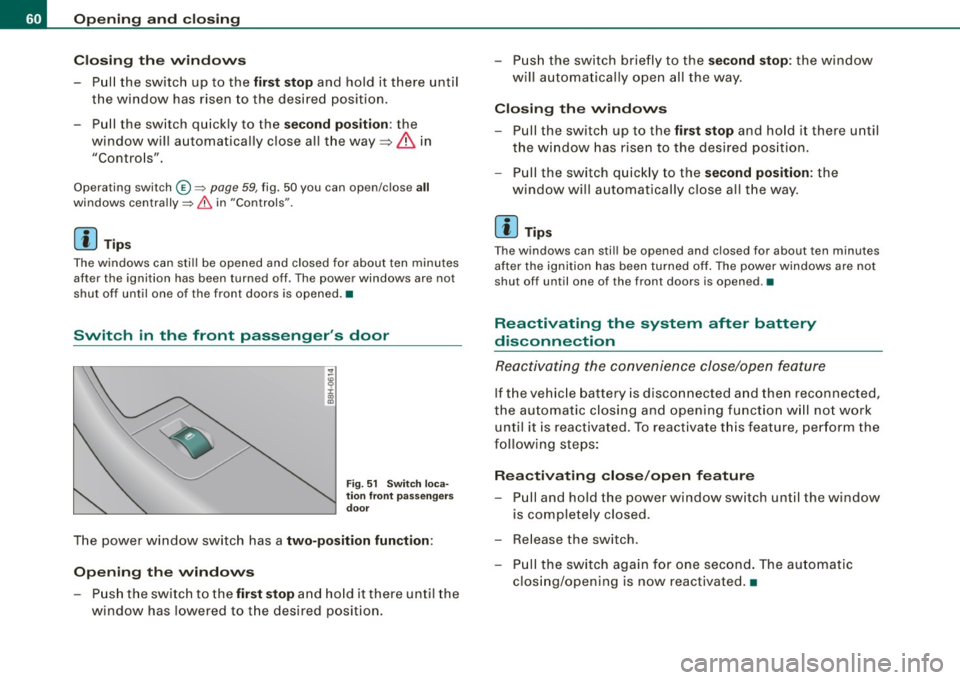
Fig. 51 Switch loca
tion front passengers
door
The power window switch has a two-position function :
Opening the windows
-Push the switch to the first stop and hold it there until the
window has lowered to the desired position. - Push the switch briefly
to the
second stop: the window
will automatically open all the way.
Closing the windows
Pull the switch up to the first stop and hold it there until
the window has risen to the desired position.
- Pull the switch quickly to the
second position: the
window will automatically close all the way.
[ i] Tips
The windows can still be opened and closed for about ten minutes
after the ignition has been turned off. The power windows are not
shut off until one of the front doors is opened .•
Reactivating the system after battery
disconnection
Reactivating the convenience close/open feature
If the vehicle battery is disconnected and then reconnected,
the automatic closing and opening function will not work
until it is reactivated. To reactivate this feature, perform the
following steps:
Reactivating close/open feature
-Pull and hold the power window switch until the window
is completely closed.
- Release the switch.
- Pull the switch again for one second. The automatic
closing/opening is now reactivated. •
Page 63 of 340
Power top
Normal operation
General information
The power top is designed for quick and easy operation. The power
top opens and closes automatically by itself . When the top is folded
dow n, it is stored in a special compartment and hidden under a
cover.
The power top is both wind -and waterproof under normal oper
ating conditions . Only under extreme weather conditions, for
examp le, a violent burst of rain or torrentia l rainfall, can a few drops
of water possibly form inside the roof. This is normal and no cause
for concern.
To maintain the appearance of the power roof and to keep it water
proof , read the information on roof care in=> page
233, "Power top
care". In addition to this, please note the following:
• Always open or close the power roof on ly when it is clean . Other
wise particles of dirt can scratch the rear window when the power
top fo lds down . The particles can chafe a nd damage the fabric over
a period of time. It is a lso important to remove ice and snow before
opening the power roof.
• Do not use a sharp object or any other tools, which cou ld scratch
t he fabr ic when removing ice or snow. A normal ice scraper can be
used to remove ice from the rear window.
• The power roof should be opened only when it is completely dry .
I f you open and store the power roof when it is wet, unsight ly marks
or mildew can form if left for long per iods of time .
• Never leave the roof open for severa l weeks at a time. You should
close it occasiona lly to prevent discoloration in the folds of the
fabric and to allow the creases to smooth out. This is especially
impor tan t if t he top has once been s tored away when it was not
completely dry .
Controls and equip
ment
P ow er top
• Do not open the power when it is colder than 32 °F (0 °C). At
these temperatures, the fabric is less flexible.
L1}. WARNING
• For safety reasons never open or close the power top when the
v ehi cle is moving .
• Never drive the vehicle without the power top securely locked
in the closed po sition . If it i s not firml y en gaged , the top can be
blown open by the airstream and cau se in jur ies and damage to the
vehi cle . - Risk of cr ash!
• When opening and closing the power top m ake sure to keep
yo urself and other s clear of all moving pa rt s. Risk of injury!
• During opera tion of the power top the head clearance in the
re ar of the vehi cle is r edu ced . Alw ay s m ake sure that rea r seat
p assen gers keep clear of the power top a s it is being opened or
cl osed . Ri sk of injury!
[ i ] Tip s
• The power top can only be operated w ith the ignition switched
on.
• To avoid unnecessary strain on the battery, you should not open
and c lose the top several times in a row when the e ngine is n ot
running.
• The display in the ins trument cluster will indicate if a pr otective
feature of the power top has been activated or if a malfunction
occurs ~ page
64.
• In case of a ma lfunction the power top can be operated manu
a lly. This is intended for a limited time only~ page
68, "Opera te the
power top manually" . T he cause of the malfunction should be
tracked down and repaired by an au tho rized Aud i deale r as soon as
possible . _.,
Page 64 of 340
Power top
• If you park the vehicle with the power top open, be aware that
you leave the interior exposed to the effects of unexpected weather
changes as well as to criminal access. To protect your property,
close the top before leaving the car and lock away any valuables in
the luggage compartment. •
Open the power top
The power top opens automatically.
Switch on the ignition.
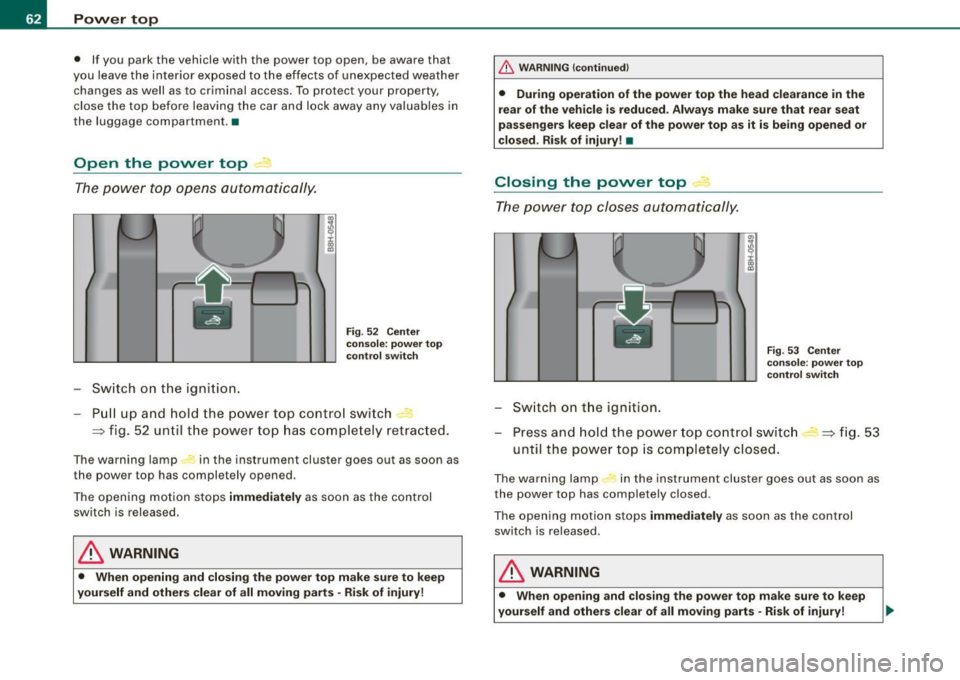
Fig. 52 Center
console: power top
control switch
Pull up and hold the power top control switch -
=:> fig. 52 until the power top has completely retracted.
The warning lamp in the instrument cluster goes out as soon as
the power top has completely opened.
The opening motion stops immediately as soon as the control
switch is released.
& WARNING
• When opening and closing the power top make sure to keep
yourself and others clear of all moving parts · Risk of injury!
_& WARNING (continued)
• During operation of the power top the head clearance in the
rear of the vehicle is reduced . Always make sure that rear seat
passengers keep clear of the power top as it is being opened or
closed . Risk of injury! •
Closing the power top 4
The power top closes automatically.
Switch on the ignition.
"'
I
Fig. 53 Center
console: power top
control switch
Press and hold the power top control switch
until the power top is completely closed. =:> fig. 53
The warning lamp #, in the instrument cluster goes out as soon as
the power top has completely closed .
The opening motion stops immediately as soon as the control
switch is released.
& WARNING
• When opening and closing the power top make sure to keep
yourself and others clear of all moving parts -Risk of injury!
Page 65 of 340
& WARNING (continued)
• During operation of the power top the head clearance in the
rear of the vehicle is reduced . Always make sure that rear seat
passengers keep clear of the power top as it is being opened or
closed. Risk of injury! •
Convenience opening and closing of power
top
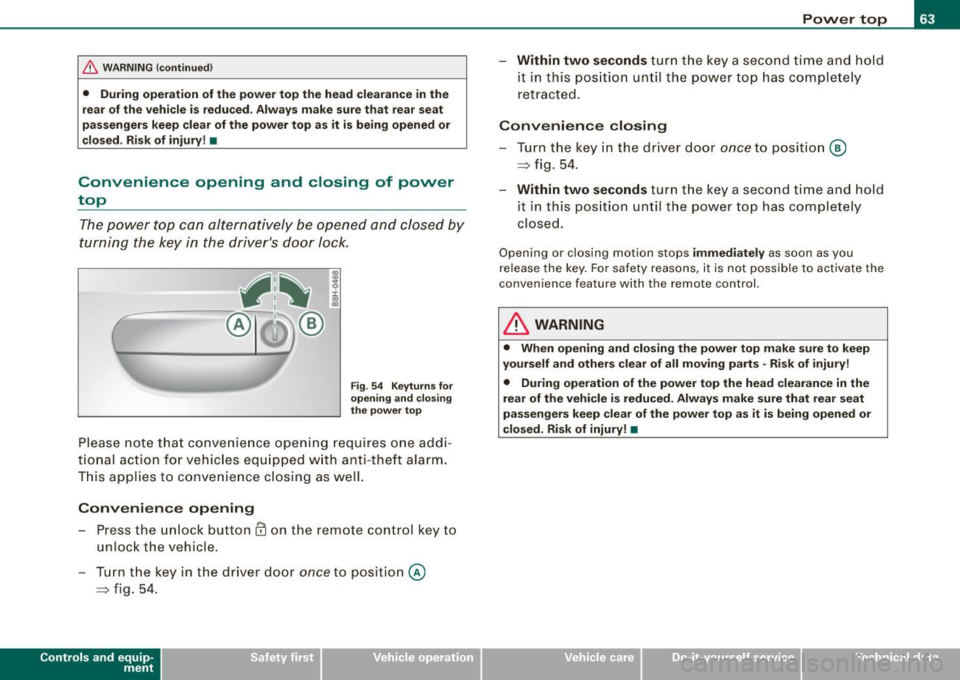
The power top can alternatively be opened and closed by
turning the key in the driver's door lock.
Fig . 54 Keyturns for
opening and closing
the power top
Please note that convenience opening requi res one addi
tional action for vehicles e quipped with anti-theft alarm.
This applies to convenience closing as well.
Convenience opening
- Press the unlock button @ on the remote control key to
unlock the vehicle.
- Turn the key in the driver door
once to position @
~ fig. 54.
Controls and eq uip
ment
Power top
- Within two seconds turn the key a second time and hold
it in this position until the power top has completely
retracted.
Convenience closing
-Turn the key in the driver door once to position @
~ fig. 54.
- Within two seconds turn the key a second time and hold
i t in this position until the power top has completely
closed.
Opening o r closing motion stops immediately as soon as you
release the key. For safety reasons , it is not possible to activate the
c onven ience feature wi th th e re mote control.
& WARNING
• When opening and closing the power top make sure to keep
yourself and others clear of all moving parts -Risk of injury!
• During operation of the power top the head clearance in the
rear of the vehicle is reduced. Always make sure that rear seat
passengers keep clear of the power top as it is being opened or
closed. Risk of injury! •
~ehicle care irechnical data
Page 66 of 340
Pow er t op
Variable power top storage bay
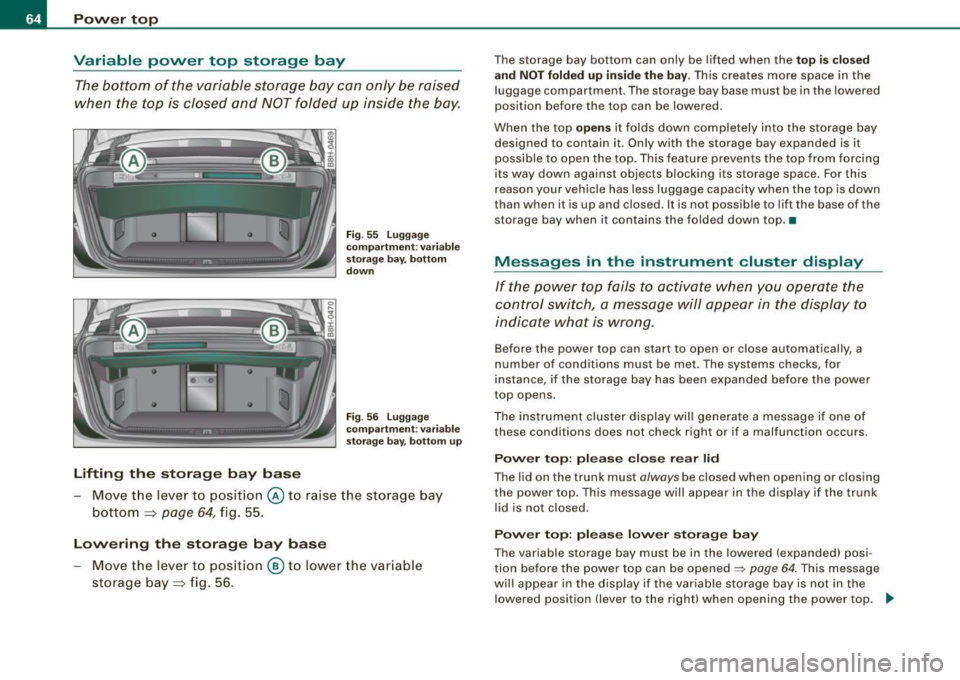
The bottom of the variable storage bay can only be raised
when the top is closed and NOT folded up inside the bay.
Lifting th e stor ag e bay bas e
Fig. 55 Lug gage
co mp artm ent: va riab le
st orage bay, bottom
d ow n
F ig . 5 6 Lu ggage
co mp artm en t: varia ble
s tora ge b ay, bo ttom u p
Move the lever to position @ to raise the storage bay
bottom =>
page 64, fig. 55.
Lowering the storag e bay bas e
-Move the lever to pos ition @ to lower the var iab le
storage bay=> fig. 56 .
The storage bay bottom can only be lifted when the top i s clos ed
and NOT folded up in side the ba y.
This creates more space in the
luggage compartment . The storage bay base must be in the lowered
position before the top can be lowered.
When the top
o pe ns it folds down completely into the storage bay
des igned to contain it. Only with the storage bay expanded is it
poss ible to open the top . This feature prevents the top from forcing
i t s way down agains t objects blocking its storage space . For this
reason your vehicle has less luggage capacity when the top is down
than when it is up and closed . It is not possible to lift the base of the
storage bay when it contains the folded down top .•
Messages in the instrument cluster display
If the power top fails to activa te when you operate the
control switch, a message will appear in the display to
indicate what is wrong.
Before the power top can start to open or close automatically, a
number of conditions must be met . The systems checks, for
instance, if the storage bay has been expanded before the power
top opens.
The instrument c luster disp lay will generate a message if one of
these condi tions does not check right or if a malfunction occurs .
Power top: ple ase clo se rear lid
The lid on the trunk must always be closed when opening or closing
t he power top . This message will appear in the display if the trunk
lid is not closed .
Power top: pl ease low er stor age ba y
The variable storage bay must be in the lowered (expanded) posi
tion before the power top can be opened=> page 64 . This message
will appear in the display if the variable storage bay is not in the lowered position (lever to the right) when opening the power top. ..,
Page 67 of 340
Power top: ca nnot b e use d
Power top not operating
This message wi ll appear in the display if the power top has been
deactivated for safety reasons or if there is a malfunction. Possible
causes are:
• vehicle speed t oo high: the power top operation is deactivated
for safety reasons if the vehic le is mov ing at a speed above 3 mph
(5 km/hi.
• battery voltage too low: the power top wil l not operate if the
battery voltage is too low . This is a precautionary feature to make
s u re that the re is always enough battery power avai lable to start the
engine. The power top can be activated again once the engine has
been started and is running.
• ove rload cut -off: if the power top is operated repeatedly the
hydraulic actuator components will be severely stressed . In this
case the over load cut -off will safeguard the system against damage.
This safeguard deactiva tes the system fo r abou t 15 to 30 minutes.
After this time the power top can be operated again as usual=> & .
• Malfunction: One possible cause of a malfunction is the fai lure
of a system component. In this case the power top can a lso be
manual ly operated =>
page 68. Turning off the ignition during the
opening or closing process may cause a malfunction. You can
correct this yourself=>
page 65.
Pow er top no t sec ure
Power top not locked in place
If the top has not opened or closed completely and the vehicle
moves then at a speed above 3 mph (5 km/h), this
warning will
appear in the instrument cluster display. Stop the vehicle. Open or
close the power top completely. The warning should disappear .
& WARNING
Never drive the car with a power top that is not securely lock ed in
place . If it i s not fir mly engaged , the top can b e blown ope n by the
Contro ls and eq uip
ment
P o w er top
& W ARN ING (conti nued )
airstre am and ca u se injur ies and damage to the vehicle . - Risk of
crash !•
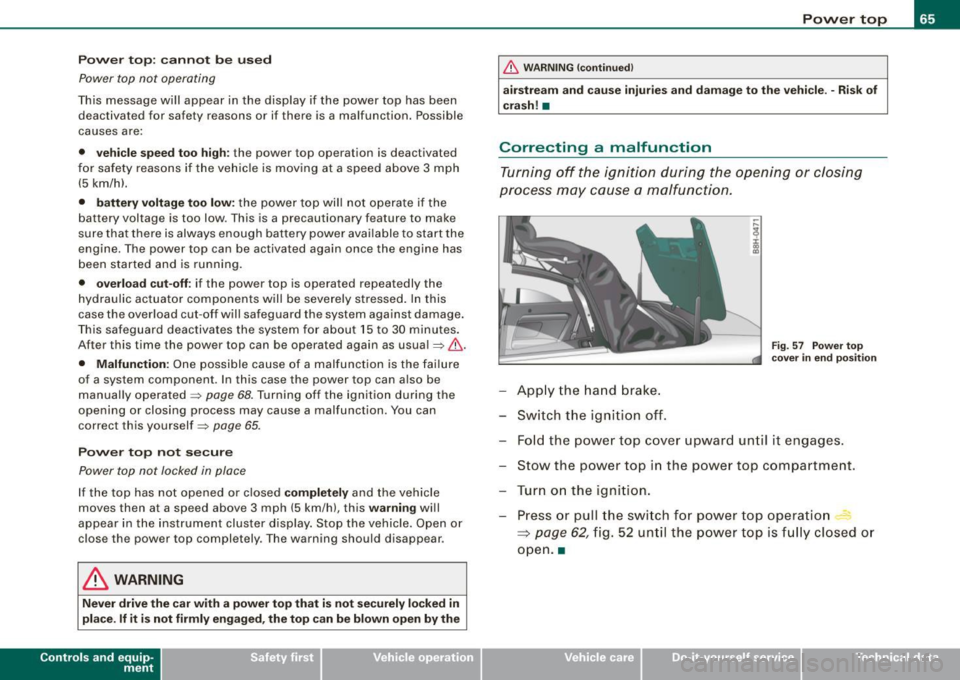
Correcting a malfunction
Turning off the ignition durin g the opening or closing
process may cause a malfunction.
F ig. 57 Power top
cov er in end p osition
App ly the hand b rake.
Sw it c h t he igniti on off .
Fold the powe r top cove r upward un til it engages.
Stow the power top in the powe r top compa rtment.
T ur n on the igni tion.
Press or pull the swi tch f or p ow er top operatio n
~ page 62, fig . 52 un til the powe r top is f ully clos ed o r
open .a
~ehicle care Technical data
Page 68 of 340
Power top
Wind deflector
Applies to veh icles: with wind def lector
General notes
The wind deflector reduces turbulent airflow inside the
vehicle for greater comfort when driving with the power top open.
The optional wind deflector is stored in a bag in the luggage
compartment. To prevent damage it should always be kept in this
bag when not installed. Do not place heavy objects (e.g. crates or
heavy shopping bags) on top of the wind deflector.
& WARNING
• The two rear seats must not be occupied when the wind
deflector is installed.
• Do not place any objects on the horizontal surface of the wind
deflector. The deflector is not designed to support loads. Be also
aware that objects left there could be blown off by the airstream
when the vehicle is moving. -Risk of injury!
0 Note
When you adjust the front seats when the wind deflector is
installed, be careful not to push the backrests into the wind
deflector when reclining the seats or when moving them back. This
can damage the deflector, especially the locking mechanism. •
Applies to vehic les : w ith wind deflector
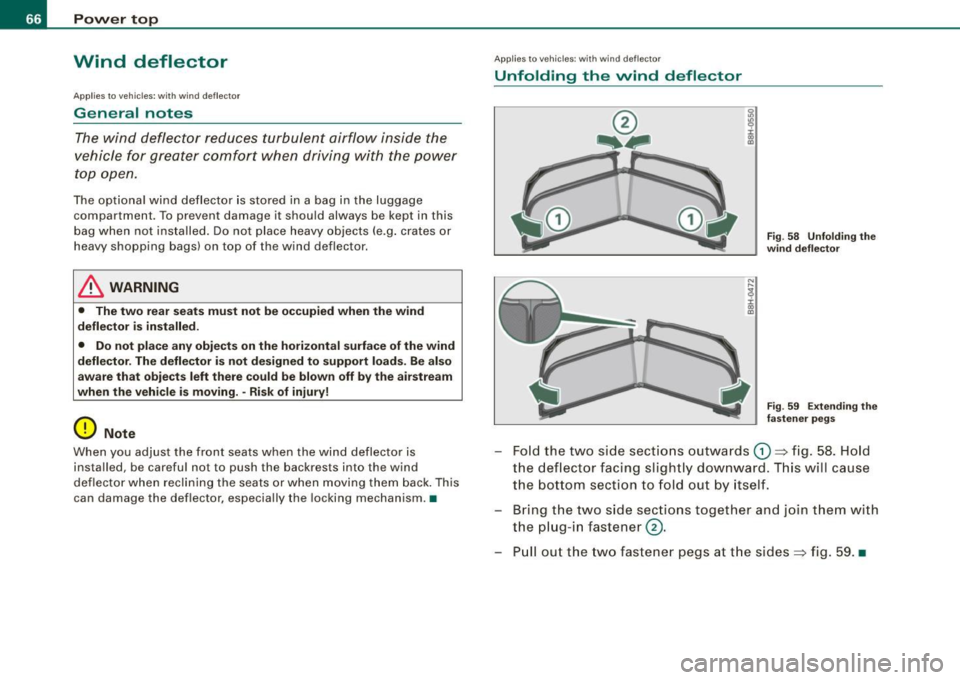
Unfolding the wind deflector
C
Fig . 58 Unfolding the
wind deflector
Fig . 59 Extending the
fastener pegs
- Fold the two side sections outwards G) ~ fig. 58. Hold
the deflector facing slightly downward. This will cause
the bottom section to fold out by itself .
- Bring the two side sections together and join them with
the plug-in fastener@.
- Pull out the two fastener pegs at the sides~ fig. 59. •
Page 69 of 340
Applies to vehi cles: with win d de flec tor
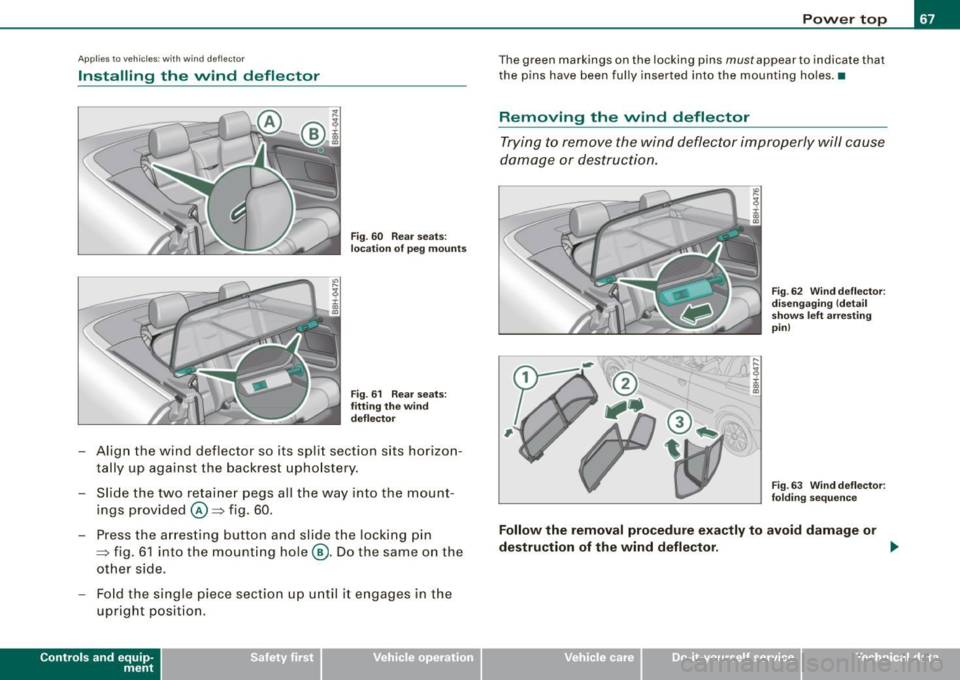
Installing the wind deflector
Fig . 60 Rear seats:
location of peg mounts
Fig . 61 Rear seats:
fitting the wind
deflector
- Align the wind deflector so its split section sits horizon
tally up against the backrest upholstery.
- Slide the two retainer pegs all the way into the mount
ings provided
@ => fig. 60.
- Press the arresting button and slide the locking pin
=> fig. 61 into the mounting hole@. Do the same on the
other side .
- Fold the single piece section up until it engages in the
upright position.
Contro ls and eq uip
ment
Power top
The green markings on the locking pins must appear to indicate that
the pins have been fully inserted into the mounting holes .•
Removing the wind deflector
Trying to remove the wind deflector improperly will cause
damage or destruction .
) ~
i
"' al
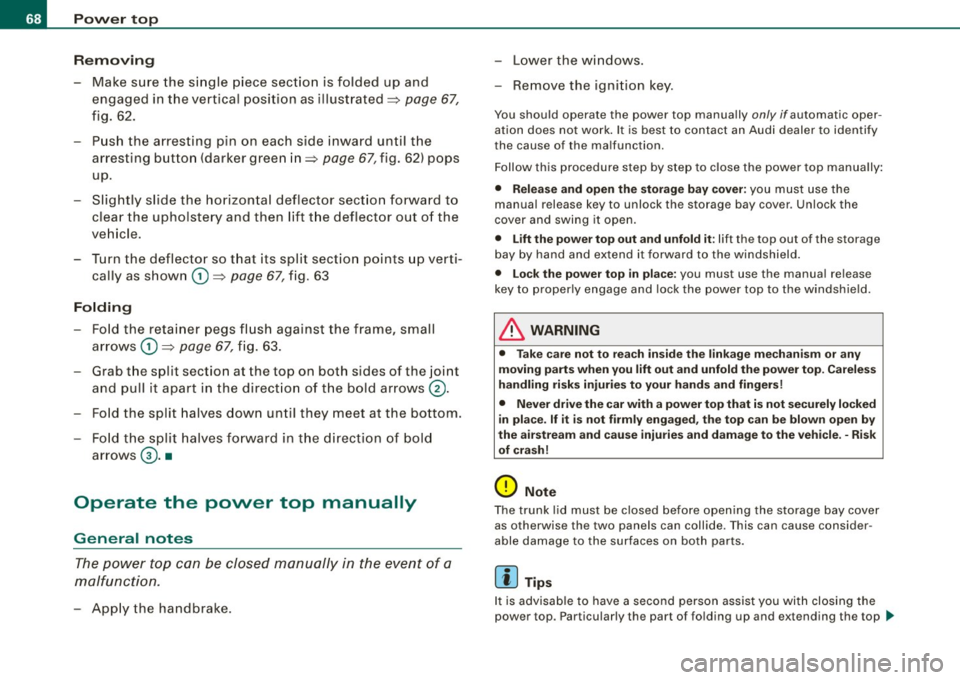
Fig. 62 Wind deflector:
disengaging (detail
shows left arresting
pin)
Fig . 63 Wind deflector :
folding sequence
Follow the removal procedure exactly to avoid damage or
destruction of the wind deflector. ..,
~ehicle care irechnical data
Page 70 of 340
Pow er to p
R emovin g
- Make sure the single piece section is folded up and
engaged in the vertical position as illustrated=> page
67,
fig. 62.
- Push the arresting pin on each side inward until the arresting button (darker green in => page
67, fig. 62) pops
up.
- Slightly slide the horizontal deflector sect ion forwa rd to
clea r the upholstery and then lift t he deflector out of the
veh icle.
- Turn the deflector so t hat its split sect ion points up verti
cally as shown
G) => page 67, fig. 63
Folding
- Fo ld the reta iner pegs fl ush ag ainst the frame, small
arrows
(D => page 67, fig . 63 .
- Grab the split section at the top on both sides of the joint
and pull it apart in the direct io n of the bold arrows @.
- Fo ld the split halves down until they meet at the bottom.
- Fold the split halv es fo rward in the directi on of bol d
arrows @.•
Operate the power top manually
General notes
The po wer top can be closed manually in the event of a
malfunction.
- App ly the handbrake. - Lower the wi
ndows.
Remove the igni tion key.
You should operate the power top manually only if automatic oper
ation does not wo rk. It is best to contact an Aud i dealer to identify
the cause of the ma lfunction .
Follow this procedure step by step to close the power top manua lly:
• Relea se a nd open the storage bay cover: you must use the
manual release key to unlock the storage bay cover . Unlock the
cover and swing i t ope n.
• Lift th e power top out and unfold it : lift the top out of the storage
bay by hand and extend it forward to the windshield.
• Lock the power top in pla ce: you must use the manual release
key to proper ly engage and lock the power top to the windshie ld.
& WARNING
• Ta ke care not to r ea ch in side the link age me ch an is m or a ny
moving p arts when you lift out and unfold the power top . Carel ess
h andling ri sk s injurie s to your hand s and finger s!
• Nev er driv e the car w it h a power top that is not securely locked
i n pl ace.
If it is not firmly engaged , th e top c an be blo wn ope n by
the air stream and c ause injurie s and damag e to the veh icle . - R isk
of cr ash!
0 Not e
The trunk lid must be closed be fore opening the storage bay cover
as otherwise the two panels can collide . T his can cause consider
able damage to the surfaces on both parts.
[ i ] Tips
It is advisable to have a second person assist you wi th closing the
power top. Particularly the part of folding up and extending the top
~