AUDI S6 2008 Owners Manual
Manufacturer: AUDI, Model Year: 2008, Model line: S6, Model: AUDI S6 2008Pages: 390, PDF Size: 88.42 MB
Page 181 of 390
_____________________________________________ A_u_ d_ i _P _a_ r_ k_ i_n -=g a..- S-=y'--- s_ t_ e_ m __ ....JJIIII
Ap plies to vehicles: with Audi Par king System (r ear) and rea r-vie w came ra
Adjusting the chimes -option 2
The menu for adjusting signal sounds can also be called
up via the control button with the "settings" function.
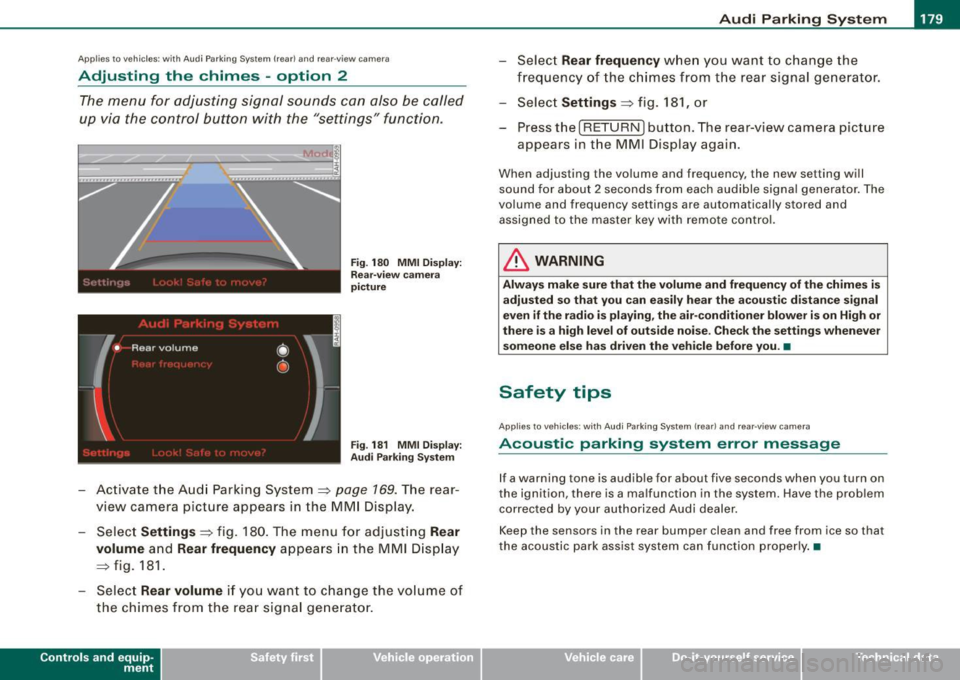
Fig. 180 MMI Display:
Rear-view camera
picture
Fig . 181 MMI Display:
Audi Parking System
- Activate the Audi Parking System=> page 169. The rear
view camera picture appears in the
MMI Display.
- Select
Settings => fig. 180. The menu for adjusting Rear
volume
and Rear frequency appears in the MMI Display
=> fig.
181.
Select Rear volume if you want to change the volume of
the chimes from the rear signal generator.
Contro ls and eq uip
ment
Select Rear frequency when you want to change the
frequency of the chimes from the rear signal generator.
Select
Settings => fig. 181, or
Press the [RETURN] button . T he rear-v iew camera picture
appears in the
MMI D isplay again.
When adjusting the volume and frequency , the new setting will
sound for about 2 seconds from each audible signal generator. The
volume and frequency settings are automatically stored and
assigned to the master key with remote control.
& WARNING
Always make sure that the volume and frequency of the chimes is
adjusted so that you can easily hear the acoustic distance signal
even if the radio is playing, the air-conditioner blower is on High or
there is a high level of outside noise. Check the settings whenever
someone else has driven the vehicle before you. •
Safety tips
Applies to vehic les: with Audi Par king System {rear) and rea r-v iew came ra
Acoustic parking system error message
If a warning tone is audible for about five seconds when you turn on
the ignition, there is a malfunction in the system. Have the problem
corrected by your authorized Audi dealer.
Keep the sensors in the rear bumper clean and free from ice so that
the acoustic park assist system can function properly.•
Vehicle care I I irechnical data
Page 182 of 390
• .___A_ u_d_ i _P _a_ r_ k_ i_ n ..:g=-- S_ y=-- s_t _ e _m _____________________________________________ _
Applies to vehic les: with Audi Park ing System (rearl and rear-view camera
Rear-view camera tips
We recommend that you practice parking with t he rear -view camera
in a traff ic -free location, or parking lot, to become fami liar with the
system, the orientati on line s, a nd th eir functi on. When doi ng this,
there should be good light and weather conditions.
In the MMI Display, objects or vehicles ap pea r closer or further away
i f:
• you are driving in reverse gear from a level surface onto an
inc lin e, o r a downwa rd sl ope,
• you are driving in reverse gear toward protruding objects,
• the ve hicle is carrying too much load in the rear.
The accuracy of the orientation lines and blue surfaces diminishes if :
• the Adaptive Air Suspension* is defective, or th e dynamic, off
road, o r lift mode is swi tched on,
• the rear -view camera does not provide a reliable image, for
exam ple, in po or vi sibi lit y c ondi tio ns or if the lens is dirt y,
• the image on the screen is not visible due to sun g lare and reflec
t ion .
Caring for the rear-view camera lens:
• Dampen the lens with a household a lcoho l- based g lass c leaner,
and c lean th e lens wit h a dry cl oth.
• Remove snow with a hand brush.
• Remove ice, preferably with de -icing spray~
0.
& WARNING
• The rear-v iew camera does not replace the view to the rear and
the rear view mirrors .
• The rear-view camer a - because of technical limitat ions -does
not show the entire area behind the vehicle~
page 17 3, fig. 171.
& WARNING (continued )
Be especially careful to che ck for small children and animals
before backing up . Small children and animals will not alway s be
shown in the rear-view display .
• The Audi Parking System is not a sub stitute for being careful
and alert when back ing up . Be especially careful during parking
and similar maneuver s. Always watch where you are driving and
make su re that nothing is in the way .
• Do not allow yourself to be distracted from traffic by the rear
view camera pi ctures .
• When maneuvering or parking , do not only u se the MMI Display
for orientat ion . Certain obje cts - depending on the screen resolu
tion -may not, or not entirely, be displayed ; for example tr ailer
hitches , cha ins , narrow posts , or fences .
• Only use the rear -view camera for aid if it shows a good , clear
picture . The image may be obscured , for example , by the sun
shining into the lens, dirt on the lens, or as the result of a defect -
danger of accident!
• If the image i s hazy when the MMI Display is switched on or the
area behind the vehicle is not visible (for e xample , as the result of
a dirty or defective lens ), the rear -view camera must not be used
for aid in maneuver ing - danger of accident!
• The rear -view camera generates two -dimensional images . For
this reason , please note that recesses in the ground and
protruding parts on another vehicle , or protruding objects fixed to
the ground , will be more difficult or impossible to recognize on the
MMI Di splay, due to the missing spacial depth .
• If the position and the installation angle of the camera has
changed, for example , after a rear end collision , do not continue to
use the system for safety reasons . Have it checked by an autho
rized Audi dealer or qualified work shop .
• Only use the rear-v iew camera when the rear lid is fully closed .
Make sure that objects mounted on the rear are not obscuring the
camera v iew .
Page 183 of 390
______________________________________________ A_ u_ d_ i _P _a_ r_ k_ i_ n """g=-- S_ y-=- s_t _e _m __ ffllll
& W ARNING (continu ed )
• Remove ice , preferably with de-icing spray.
0 Note
• N ever use warm or hot water to remove snow or ice from the
rear -view camera le ns -danger of crack formation on the lens!
• When clea nin g t he le ns, never use care pr oducts wi th an abra
sive effect.
[ i J Tips
T he positions of the orientation lines/ surfaces are disp laced up or
down if the parking process is carried out with the rear-view came ra
i n Adaptive Air Suspension*~
page 21 d yna mic, off -road, or lif t
mode. Therefore, the acc uracy is reduced. •
Controls and equip
ment I • •
Page 184 of 390
• .___A_ d_ a --=- p_t_ i_v _e _ A_ ir_ S_u_ s_,_ p_e_ n_ s_io _ n _____________________________________________ _
Adaptive Air Suspension
Adaptive Air Suspension and
Damping
A pplies to veh icles: with Adaptive Air Suspens ion
Description
Adaptive Air Suspension and damping can be regulated
and they adapt automatically to a request from the driver
and the driving situation at the time.
Adaptive Air Suspension is an electronically controlled springing
and damping system . Th is chassis system makes it easier on the
driver by adapting to the particular situation through imperceptible
control processes.
The
Adaptive Air Suspension component regulates ground clear
ance depending on vehicle speed, load condition and driver input.
When the system is in automatic mode, accelerating to a speed above a predetermined limit will make the vehicle lower itself. On
the other hand, driving more slowly results in the vehicle raising
again at specific speeds.
The
damping component provides individual control of the
damping forces. For example, with damping characteristics set to
provide greater comfort, damping is set somewhat harder for a brief
period only as required, for example, when going around a curve or
over rough road surfaces as well as when braking.
Settings
Adaptive Air Suspension provides the driver with the opportunity to
set the chassis characteristics also to their individual preference.
With the driving modes
standard, automatic and dynamic the driver
has three chassis settings available, ranging from comfort to sporty .
In addition,
lift provides a fourth mode which can be selecting for
driving over poor stretches of road :::::,
page 183, "Chassis controls". The modes are set in
MMI:::::,
page 183.
& WARNING
The height of the parked vehicle can change due to temperature
fluctuations or changes in load.
0 Note
• Whenever you park your vehicle, always make sure there is
adequate clearance above and below the vehicle. The height of the parked vehicle can change as the result of temperature fluctuations,
changes in load condition and changes in the driving mode (ground
clearance!.
• If the vehicle is being transported (e.g. by tow truck, train, ship,
etc.), mount the tie -down chains/cables over the running surface
(circumference) of the tires . Never secure the vehicle by the axle, the
suspension struts or the front or rear towline eye. For technical
reasons, the pressure in the suspension struts may change during
the transport, which could result in the vehicle no longer being
secured properly.
• To prevent damage to the vehicle underbody, remember that
your vehicle is not an off-road vehicle, even in the "lift" mode. The
ground clearance is insufficient for this type of operation.
• If you are going to tow a trailer, you must activate the trailer oper
ation mode :::::,
page 184.
[ i] Tips
Before you raising your vehicle using the vehicle jack (for example,
when changing a flat tire) you must activate the jacking mode
=> page 184. •
Page 185 of 390
____________________________________________ A_ d_a--' p=-- t_iv _e_ A_ ir_ S_u_ s-=- p_e _ n_ s _ io_ n __ lllll
Ap plies to vehicl es: wi th Adap tive Ai r Su sp ension
Chassis controls
Four different driving modes can be set by the driver.
The automatic contro l processes are speed -and time -dependent.
For example, it is not possib le to raise the suspension to the lift
mode above certain speeds.
L ev el a djustment
automatic
dynamic
aut om ati c Ground clearan
ce
about 4.7 - 4 .1 inches
(120 -105 mm)
about 4.7 inches (120 mm)
about 4.1 inches (105 mm)
a bo ut 5.3 inches ( 135 mm)
Se lect the automatic mode i f you p refer suspension and damping
settings emphasizing comfort .
• Low ering : When a speed of about 75 mph (120 km/h) is exceeded
for more than 30 seconds, the vehicle is automatically lowered by about 0.6 inch (15 mm) to the dynamic level which is more suitable
for highway speeds. Road holding is optimized as a result of the lower center of gravity and fuel consumption is reduced as a result
of reduced wind res istance.
• Rais ing : The vehicle is automatically raised again if the speed
falls below about 44 mph (70 km/h) for a period of 2 minutes . The
vehic le is raised immediate ly when speed falls below about 22 mph
(35 km/h).
s ta nd ard
Select the standard mode if you desire a suspension setting with a
special emphasis on comfort. In the standard mode there is
no
lowering of the suspension. Even a t high speeds, the vehicle stays
at the same level. Damping characteristics with a decided emphasis
on comfort are selected in this mode.
Controls and equip
ment d
y n ami c
Select the dynamic mode if you prefer a sporty suspension setting .
In this mode, the vehicle is lowered whi le it is still stationary and
spo rty damping characteristics are selected . The warn ing light
c.::i
in the instrument cluster will come on for a few seconds just to
remind you of the reduced ground clearance .
If y ou switch off the engine wh ile the ve hicle is in the dynamic mode
and then switch on the ignition once again, the
c.::i warning light
wi ll also come on again f or a few seconds as a reminder .
lift
Select the lift mode when you have to travel over poor sect ions of
road (e .g. trails). In the lift mode, the vehic le is raised by 0.6 inch (15
m m) compared to norma l leve l while it is stil l stationary and
damping characteristics are adjusted to emphasize comfort .
The lift mode can be activated only at speeds below 50 mp h (80
km/h) . When a speed of about 62 mph (100 km/h) is exceeded, the
system automatical ly leaves lift mode and the mode set previously
(standard, automat ic, dynam ic) is activated aga in. •
App lies to v ehic les : with Ada ptive Air Suspens io n
Setting the driving modes
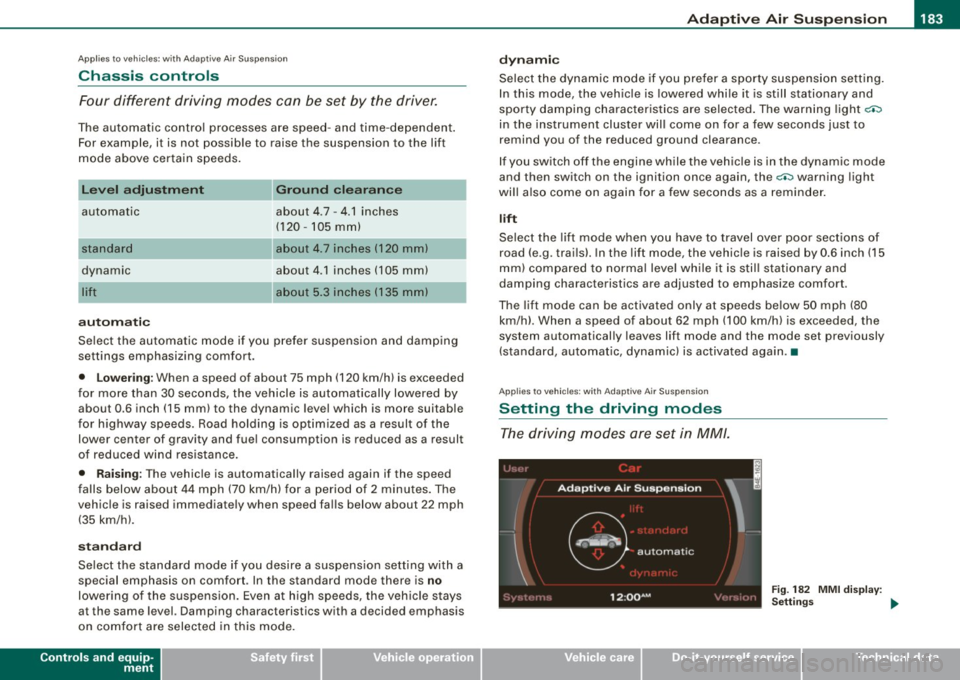
The driving modes are set in MM/.
Fig . 18 2 MMI di splay:
Settin gs _,.
I • •
Page 186 of 390
• ..__A_ d_ a--=- p_t _iv _ e_ A_ i_ r _ S_ u_ s....; p=--- e_n_ s_ io_ n _____________________________________________ _
The ignition must be switched on to set the driving modes.
- Press the !CARI function button. The main menu
Adaptive Air Suspension appears=>
page 183, fig. 182.
- Select the desired mode with the control knob.
Please note that not every driving mode can be selected in every
driving situation. For example, it is not possible to switch to "lift"
mode at speeds above 50 mph (80 km/h). This mode is then shown
greyed out in the MMI display.
For additional information on the driving modes=>
page 183,
"Chassis controls". •
Applies to vehicles: with Adaptive Air Suspension
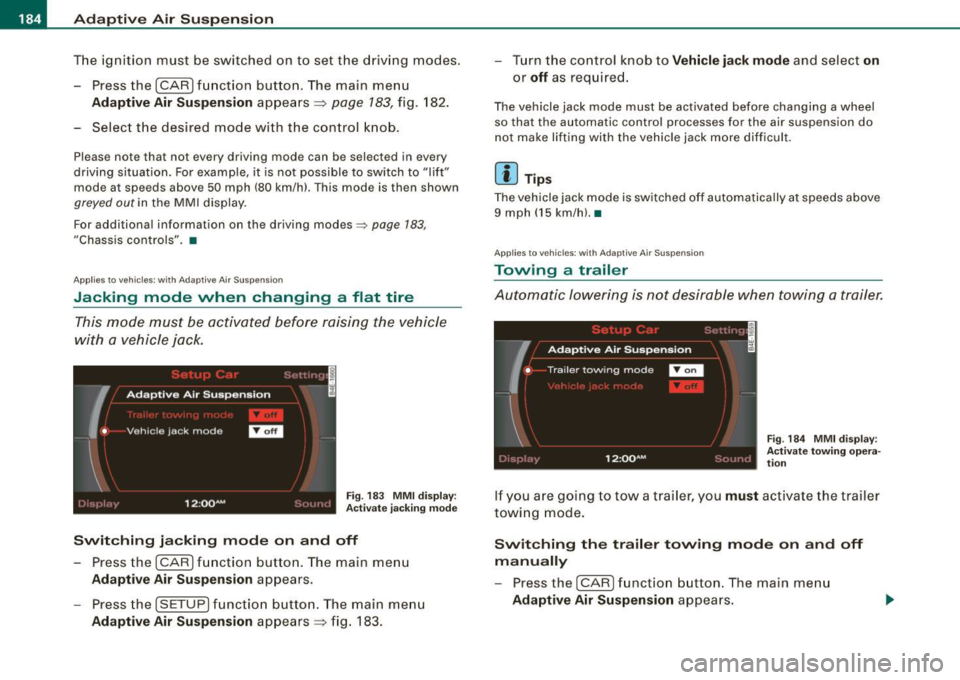
Jacking mode when changing a flat tire
This mode must be activated before raising the vehicle
with a vehicle jack.
Fig. 183 MMI display :
Activate jacking mode
Switching jacking mode on and off
-Press the (CAR] function button. The main menu
Adaptive Air Suspension appears.
- Press the !SETUP) function button. The main menu
Adaptive Air Suspension appears=> fig. 183. - Turn the control knob to
Vehicle jack mode and select on
or
off as required.
The vehicle jack mode must be activated before changing a wheel
so that the automatic control processes for the air suspension do
not make lifting with the vehicle jack more difficult.
[ i ] Tips
The vehicle jack mode is switched off automatically at speeds above
9 mph (15 km/h).•
Applies to vehicles: with Adaptive Air Suspension
Towing a trailer
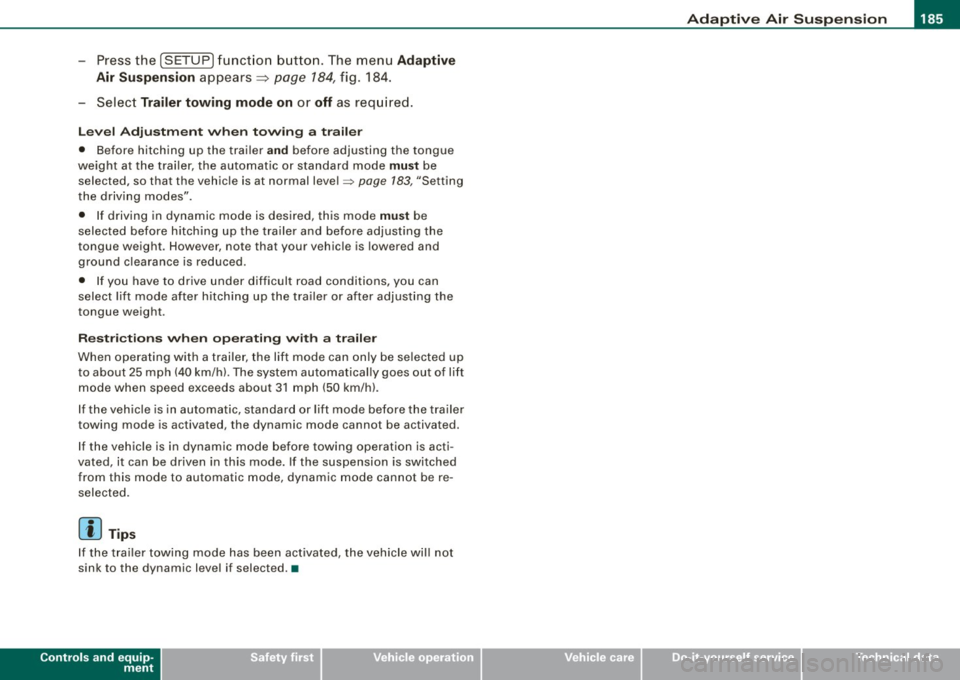
Automatic lowering is not desirable when towing a trailer.
Fig. 184 MMI display:
Activate towing opera
tion
If you are going to tow a trailer, you must activate the trailer
towing mode.
Switching the trailer towing mode on and off
manually
- Pressthe!CARJfunction button. The main menu
Adaptive Air Suspension appears.
Page 187 of 390
____________________________________________ A_ d_a--' p=-- t_iv _e_ A_ ir_ S_u_ s-=- p_e _ n_ s _ io_ n __ llll
- Press the I SETUP I functio n button . The menu Ad aptiv e
Air
Su spen sion appears~ page 784, fig. 184.
- Select
Trailer towing mode on or off as requ ired .
Leve l Adjus tment w he n t ow ing a tra il e r
• Before hitching up the trailer and before adjusting the tongue
weight at the trailer, the automatic or standard mode
mu st be
selected, so that the vehicle is at normal level=>
page 183, "Setting
the driving modes".
• If driving in dynamic mode is desired, this mode
mu st be
selected before hitching up the tra iler and before adjust ing the
tongue weight . However, note that your vehicle is lowered and
ground c learance is reduced .
• If you have to drive under difficult road conditions, you can
select lift mode after hitching up the trailer or after adjusting the
tongue weight .
Restri ctions when op erating wit h a trailer
When operating wi th a trailer, the lift mode can only be selected up
to about 25 mph (40 km/h) . The system automatically goes out of li ft
mode when speed exceeds about 31 mph (50 km/hl.
If the veh icle is in automatic, standard or lift mode before the tra iler
towing mode is activated, the dynamic mode cannot be activated.
If the vehic le is in dynamic mode before towing operation is acti
vated, it can be driven in this mode. If the suspension is switched
from this mode to automatic mode, dynamic mode cannot be re
selected.
[ i ) Tips
If the trai ler towing mode has been activated, the vehicle will not
sink to the dynamic level if selected. •
Controls and equip
ment I • •
Page 188 of 390
• ..__H_ o_ m_ e_ L_in _ k_® ____________________________________________________ _
Homelink®
Universal remote control
Applies to vehicles: w ith Home Link® universal remote control
General information
The Homelink® feature can learn the up to three radio
frequency codes for most current transmitters used for
operating garage doors, estate gates, home or outdoor
lighting systems, and other devices.
You must first program the Homelink® transmitter before you can
use the system=>
page 186, "Programming the Homelink® trans
mitter".
In order to program the Homelink® transmitter for devices utilizing
rolling code, a second person on a ladder who can safely reach the
garage door opener motor is recommended. It is also necessary to
locate the "learn" button on your garage door opener motor. Refer
to the operating instructions for the opener, as the location and
color of this button may vary by manufacturer.
You can still use the original remote control for the device at any
time .
& WARNING
• Never use the Homelink"" transmitter with any garage door
opener that does have not the safety stop and reverse feature as
required by federal safety standards. This includes any garage
door opener model manufactured before April 1, 1982.
• A garage door opener which cannot detect an object, signaling
the door to stop and reverse does not meet current federal safety
standards . Using a garage door opener without these features
increases risk of serious injury or death .
& WARNING (continued)
• For safety reasons never release the parking brake or start the
engine while anyone is standing in front of the vehicle.
• A garage door or an estate gate may sometimes be set in
motion when the Homelink ® remote control is being
programmed . If the device is repeatedly activated, this can over
strain motor and damage its electrical components -an over
heated motor is a fire hazard!
• To avoid possible injuries or property damage, please always
make absolutely certain that no persons or objects are located in
the range of motion of any equipment being operated. •
Applies to vehicles: wit h Home link® universal remote contro l
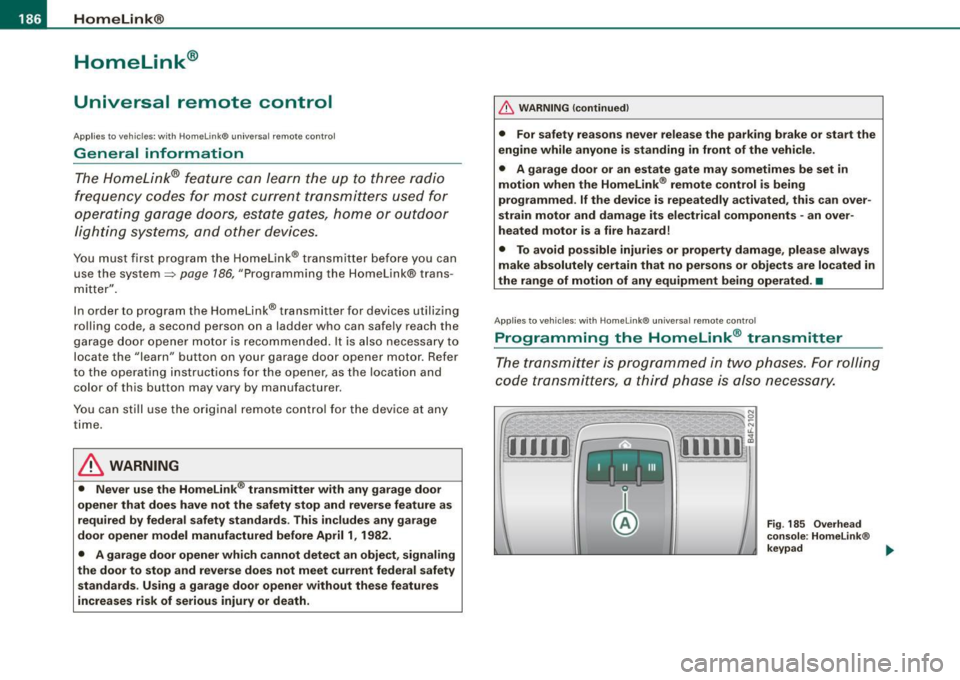
Programming the Homelink ® transmitter
The transmitter is programmed in two phases. For rolling
code transmitters, a third phase is also necessary.
Fig . 185 Overhead
console: Homelink ®
keypad ...
Page 189 of 390
HomeLink®
------------------------------------
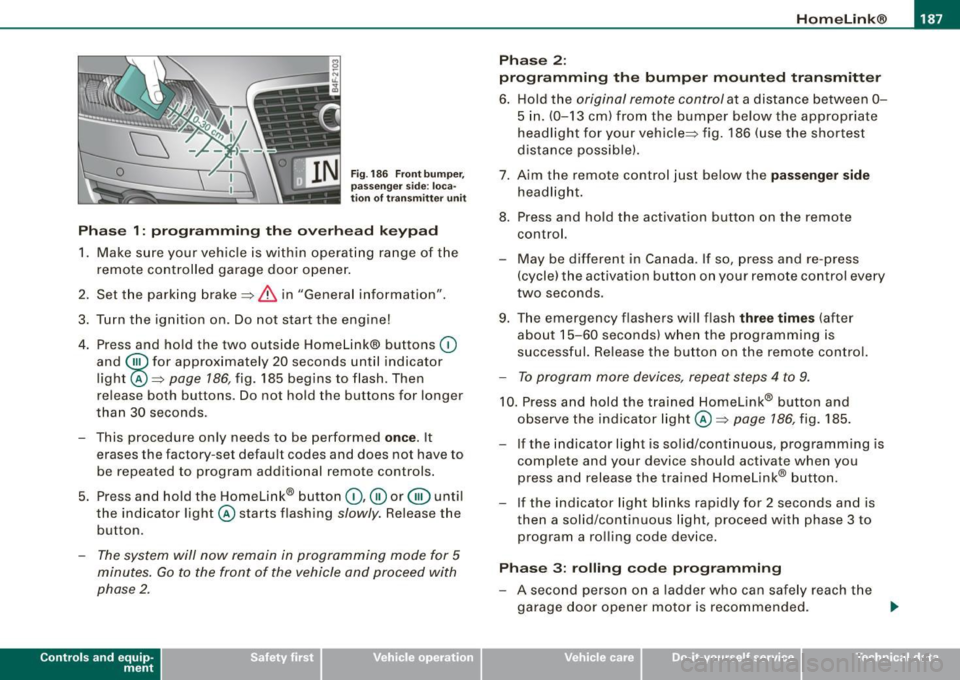
Fig. 186 Front bumper ,
passenger side: loca
tion of transmitter unit
Phase 1: programming the overhead keypad
1. Make sure your vehicle is within operating range of the
remote controlled garage door opener.
2. Set the parking brake::::>
& in "Genera l information".
3. Turn the ignition on. Do not start the engine!
4. Press and hold the two outside Homelink® buttons
(D
and @for approxim~tely 20 sec_onds until indicator
light ©::::>
page 186, fig. 185 begins to flash. Then
r elease both buttons. Do not hold the buttons for longer
than
30 seconds.
- This procedure only needs to be performed
once . It
erases the factory-set default codes and does not have to
be repeated to program additional remote controls.
5. Press and hold the Homelink® button
(D, ® or@ until
the indicator light © starts flashing
slowly. Release the
button .
-The system will now remain in programming mode for 5
minutes. Go to the front of the vehicle and proceed with
phase 2.
Contro ls and eq uip
ment
Phase 2:
programming the bumper mounted transmitter
6. Hold the original remote control at a distance between 0-
5 in. (0-13 cm) from the bumper below the appropriate
headlight for your vehicle::::> fig.
186 (use the shortest
distance possible).
7. Aim the remote control just below the
passenger side
headlight.
8. Press and hold the activation button on the remote control.
- May be different in Canada. If so, press and re-press
(cycle) the activation button on your remote control every
two seconds .
9. The emergency flashers will flash
three times (after
about
15-60 seconds) when the programming is
successful. Release the button on the remote control.
-To program more devices, repeat steps 4 to 9.
10. Press and hold the trained Homelink® b utton and
observe the indicator light© ::::>
page 186, fig. 185.
If the indicator ligh t is solid/continuous, programming is
complete and your device should activate when you press and release the trained Homelink® button.
- If the indicator light blinks rapidly for 2 seconds and is
th en a solid/continuous light, proceed with phase 3 to
program a rolling code device.
Phase 3: rolling code programming
-A second person on a ladder who can safely reach the
garage door opener motor is recommended. .,_
Vehicle care I I irechnical data
Page 190 of 390
111..__H_ o_ m_ e_ L_in _ k_® ____________________________________________________ _
11. Locate the "learn" button on the garage door opener
motor (refer to the operating instructio ns for the opener,
as the location of this button may vary by manufacturer).
12. Press and release the learn button on the garage door opener motor .
-Note : once the button is pressed, there are 30 se cond s in
which to in itiate the next step.
13. On the Homeli nk® keypad inside the veh icle, f irmly
press and hold the Homelink ® button previously
programmed in phases 1 and 2 for two seconds and
release . Repeat th is sequence
twi ce.
- Some vehicles may req uire the press/hold/re lease
seque nce up to three t imes to complete the training
process.
Homelink® should now activate your rolling code
equipped device .
If the 5 minute time limit is exce eded, the e mer gency flas her s will
flas h one time to indicate that the process has been terminated . In
this cas e, r epeat steps 4 through 9.
If the emergency flashers do not flash
three times (after about 15-
60 seconds) , programmi ng was not successful. In this case , repea t
steps 4 through 9.
Remote con trol units for garage door opene rs in Canada a re set to
stop transm itting radio frequency s ignals after two seconds. Th is
t ime may not be sufficient for the Homelink ® system to learn the
radio frequency signal. Perform all o ther st eps as d escribed
above .•
A pp lies 10 veh ic les: wit h Home Link® unive rsa l remote control
Operating the Homelink ® transmitter
The Homelink® transmitter works in the same manner as
the original handheld remote c ontrol that came with the
system.
[11111 ~
, _1 11 _ I Ill
N 0
~
~,,.-,-1 .,.-,--I I ,....,...,I W 1~
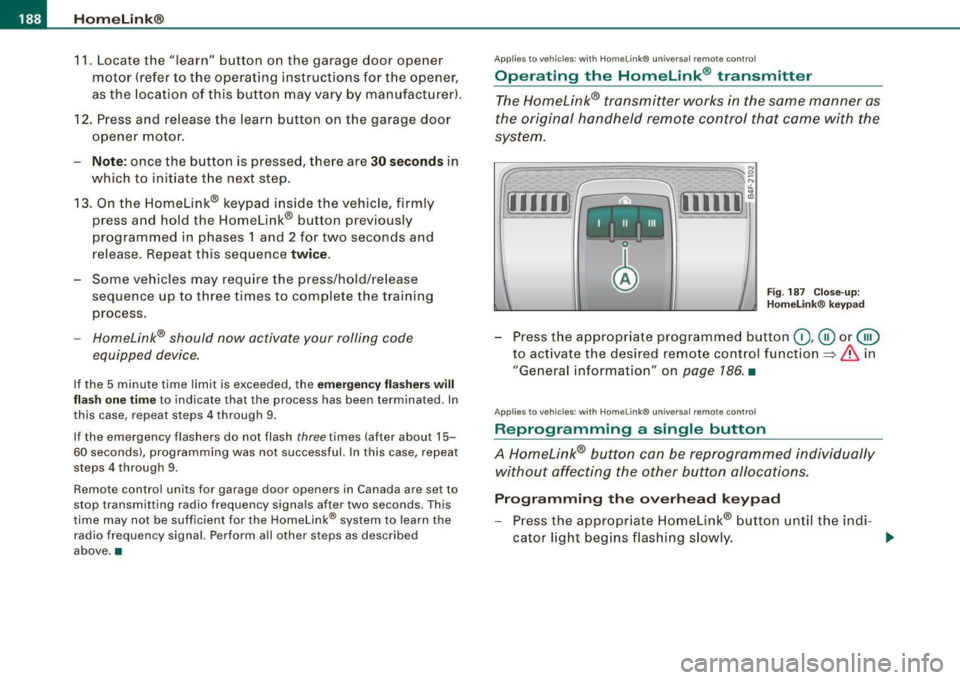
Fig . 187 C lose- up:
H omelink® keypad
- Press t he appropr iate programmed button (D , @ or@
to activate the desired remote control function=>&. in
"General information" on
page 186 . •
App lies 10 vehicles: wit h Home link® unive rsa l remote contro l
Reprogramming a single button
A Homelink® button can be reprogrammed individually
without affecting the other button a/locations.
Progr amming th e ove rhead keypad
- Press the appr opriate Homelink® button until the indi-
cator l ight beg ins flashing slowly. _..