ESP AUDI S6 2009 Owners Manual
[x] Cancel search | Manufacturer: AUDI, Model Year: 2009, Model line: S6, Model: AUDI S6 2009Pages: 398, PDF Size: 43 MB
Page 5 of 398
Safety first ........ ... ... .. .
Driving Safely ................. .
General notes . .... ........... . .
Proper occ upant sea ting positions
Peda l area ... ..... ....... .... . .
Sto\Ning luggage . .... .... .... . .
Reporting Sa fety Defects ....... .
Safety belts .......... ....... .. .
Genera l notes ...... ........... .
W hy safe ty belts? .... ... ... ... .
Safety belts ..... ........ ... .. .
Safety belt pretensioners ... ... .
Airbag sy stem ..... ...... ... .. .
Important t hings to kno\N ...... .
Front airbags . ... ... .......... .
Monitoring the Advanced Airbag
System ... .. ... .... ..... ..... .
Side airbags ......... .... .. ... .
Side curtain a irbags ...... ..... .
Child Safety ................... . 193
194
194
196
200
201
203
205
205
206
209
2 13
215
2 15
2 19
226
231
234
238
Impo rtant things to kno\N . . . . . . . 238
Child safety seats . . . . . . . . . . . . . . 243
Insta lling a ch ild safe ty seat . . . . . 248
Add it ional Information . . . . . . . . . . 251
Lo\Ner anchorages and tether for
ch ildren (LA TC H) . . . . . . . . . . . . . . . .
253
Vehicle operation .... ... .
Inte lligent technology ......... .
Not ice about d ata reco rded by
ve hicle contro l modules ........ .
Elect ronic S tabilizat ion Program
!ESP) ...... .... ..... ..... ..... .
B raking ....... ................ .
Servotronic® -advanced po\Ner
s teer ing syst em ............... .
Driv ing \Nit h your quatt ro® ..... .
Energy management .... ....... .
Driving a nd enviro nment ...... .
The first 1,000 miles (1 ,500 km) and
after\Na rds .............. ... ... .
Cata lytic converter ............ .
Avo id damaging the vehicle .. .. .
Operate your vehicle economically
and minimize pollution ......... .
Trailer towi ng ................. .
Driving \Nit h a trailer ..... ... ... .
Trai ler to\Ning tips ....... ..• ....
261
262
262
262
265
267
2 6 8
269
2 7 1
2 7 1
27 2
273
273
276
2 7 6
278
Table of contents
Vehicle care ....... ... ... ... 281
C leaning and protection ........ 282
Gener al in fo rm atio n . . . . . . . . . . . . . 282
Care of exterior . . . . . . . . . . . . . . . . . 282
Care of inte rior . . . . . . . . . . . . . . . . . 28 9
F u el su pp ly and fillin g your fuel
ta nk . . . . . . . . . . . . . . . . . . . . . . . . . . . . 295
Gasoline . . . . . . . . • . . . . • . . . . . . . . . 295
Fuel tank . . . . . . . . . . . . . . . . . . . . . . . 296
C heck in g and filling . . . . . . . . . . . . 300
Engine hood . . . . . . . . . . . . . . . . . . . 300
Engine oil . . . . . . . . . . . . . . . . . . . . . . 303
Engi ne cooling sys te1 T1 . . . . . . . . . . 307
Brake fluid . . . . . . . . . . . . . . . . . . . . . 3 10
Battery . . . . . . . . . . . . . . . . . . . . . . . . 3 11
W indshield/headlight \Nasher
containe r .... .... .. ... .. .... ...
3 16
T iresa ndw hee ls ............ ... 317
T ires ........................ ... 3 17
Tire pressure monitoring system . . 336
Vehicle care I I irechnical data
Page 8 of 398
About this Own er's M anu al
About this Owner's Manual
This owner's manual contains important information, tips, sugges
tions, and warnings for the use of your vehicle.
Make sure that this owner's manual is always located in the vehicle .
This is especial ly important if you allow other people to drive the
veh ic le, or if you sell it.
This owner's manua l describes the
equ ip m ent r an ge specified for
this model at the editorial deadline date. Some of the equipment
descr ibed here will only be availab le at a later date, or only in
specific markets.
Some sections in this owner's manual do not apply to all veh icles.
In that case, the
range of appl icability is giv en at the beginning of
the section, e.g . "Appl ies to veh icles : with Audi Parking System". In
addition, optional equipment is indicated by an asterisk" *".
The deta ils in the
illu strations may be different from those in your
veh ic le, and are intended to be viewed as a bas ic guide .
You wil l find a
table of content s at the beginning of this book, which
displays all topics descr ibed in this manua l in order of appearance .
You wil l find an alphabetical
inde x at the end of this book.
All
dir ection s, such as "left", "right", "front", "back", are re lative to
the direction of trave l.
* optiona l equipment
.,. This section continues on the next page .
a Indicates the end of a section .
® Registered tradema rks are identified with a®. If this symbol is
m issing, it is no guarantee that the terms can be used freely.
=> &. Cross -reference to a "WARN ING! " within a section . For indi
cation with a page number, the corresponding "WARN ING!" can be
found outside of the section .
& WARNING
Text w ith thi s symbol cont ains impo rtant inform ation on saf ety
and how to reduce the ri sk of personal injury or death .
0 Note
Text with this symbol draws your attention to potent ial sources of
damage to your veh ic le.
W For th e sake of the environment
Text with this symbol contains in fo rmation about the environment
and how you can he lp protect it.
[ i ] Tips
Text with this symbol contains specia l tips and other information
about getting the most out of your vehicle and i ts features .•
Page 13 of 398
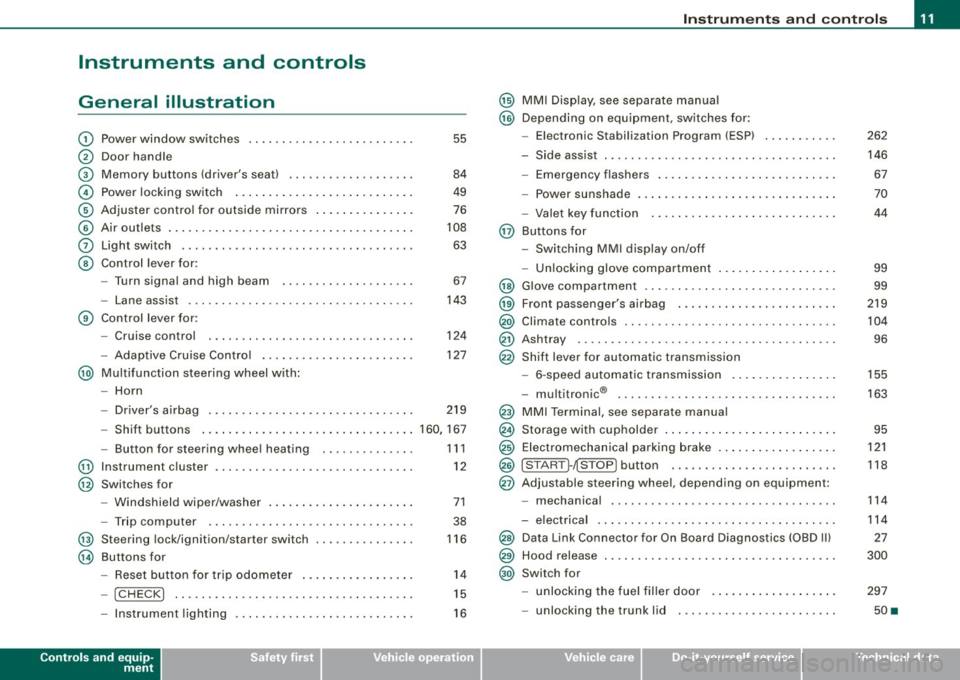
Instruments and controls
General illustration
G)
0
©
©
©
©
0
©
Power window switches ...... .... ..... .. ....... .
Door handle
Memory buttons (driver's seat)
Power locking switch .......................... .
Adjuster control for outside mirrors .. .... .... .... .
Air outlets ........ ... ...... .... ...... .... ... .. .
Light switch .... .... ........... .... .... .... ... .
Control lever for :
- Turn signal and high beam
- Lane assist .... .... ... .... .... .... .......... .
Control lever for:
- Cruise control
- Adaptive Cruise Contro l .......... ...... .... .. .
@ Multifunction steering wheel with:
- Horn
55
84
49
76
108
63
67
143
124
127
- Driver's airbag . . . . . . . . . . . . . . . . . . . . . . . . . . . . . . . 219
- Shift buttons ................................ 160, 167
@
@
@
@
-Button for steering wheel heating
Instrument cluster ... .... ... .... ...... ......... .
Switches for
- Windshield wiper/washer ..... ...... ..... .. ... .
- Trip computer ..... .. ..... ... .... ...... ... .. .
Steering lock/ignition/starter switch
Buttons for
- Reset button for trip odometer ... .. .... .... ... .
!CHECK] .. .... ....... .... .... ....... .... ... .
Instrument lighting .... ... .... .... ... ..... ... .
Controls and equip
ment
1 1 1
12
71
38
116
14
15
16
Instruments and controls
@ MMI Display, see separate manual
@ Depending on equipment, switches for:
- Electronic Stabilization Program (ESP)
- Side assist .. ... ..... .. .. .. .... .... .... ... ... .
- Emergency flashers .......................... .
- Power sunshade .... .... .... .... ... .... ..... . .
- Valet key function .... ....... ...... .... ...... .
@ Buttons for
- Switching MMI display on/off
- Unlocking glove compartment
@ Glove compartment ........... .... .... ......... .
@ Front passenger's airbag .. .... .... ... .. ...... .. .
@) Climate controls ......... .. .. .... .... .... .. . .. . .
@ Ashtray ..... .... .... ....... .... .... .... ... ... .
@ Shift lever for automatic transmission
- 6-speed automatic transmission .. .. .... .... ... .
I . .
® -
mu t1tron1c ... .... .... .... .... .... ... ...... .
@ MMI Terminal, see separate manual
@ Storage with cupholder . ........ ... .. .... .... ... .
@ Electromechanical parking brake ... .... .... .... .. .
@ ISTART ]-~STOP ] button .. ... ..... ... .... .... ... .
@ Adjustable steering wheel, depending on equipment:
- mechanica l .. .. .... .... ..... .. .... ..... ... .. .
- electrica l ... ...... .... ... .. .... .... ...... ... .
@) Data Link Connector for On Board Diagnostics (OBD II)
@ Hood release . .... .... ...... ... .. .... .... ... ... .
@) Switch for
unlocking the fuel filler door ..... ...... .... ... .
- unlocking the trunk lid . .... .... .... .... ... ... .
I • •
262
146 67
70
44
99
99
219
104
96
155
163
95
121
118
114
114
27
300
297
50 •
Page 20 of 398
![AUDI S6 2009 Owners Manual Inst rum ents and w arnin g/indi cat or li ghts
[ i ] Tip s
Many functions are mon itored by the Auto -Check system
=> page 28. Malfunctions or faults wil l be identified either wit AUDI S6 2009 Owners Manual Inst rum ents and w arnin g/indi cat or li ghts
[ i ] Tip s
Many functions are mon itored by the Auto -Check system
=> page 28. Malfunctions or faults wil l be identified either wit](/img/6/57595/w960_57595-19.png)
Inst rum ents and w arnin g/indi cat or li ghts
[ i ] Tip s
Many functions are mon itored by the Auto -Check system
=> page 28. Malfunctions or faults wil l be identified either with a red
symbol (priority 1 - Danger!) o r w ith a yel low sy mbol (priority 2 -
Warning). •
Electronic power control I'
This warning/indicator light monitors the electronic
power control.
The warning/indicator light (Electronic Power Control) i llumi -
nates when you turn on the ignition as a function check.
[ i ] Tip s
If this warning/indicator light illuminates whi le you are driv ing, then
there is a malfunction in the engine electronics . Have the malfunc
tion corrected as soon as possible by your authorized Audi dea ler or
qualified repair facility. •
Electronic stabilization program (ESP) at.
This warning/indicator light monitors the electronic stabi
lization program .
The warning/indicator light has the following functions:
• It blinks while you are dr iving when the ESP is working.
• It illuminates when you sw itch on the ignition for approximately
2 seconds as a function check.
• It illuminates when there is a malfunction in the ESP .
• It illuminates when ESP or ASR (Anti -Slip Regu lation) is deacti
vated. • I
t illuminates if there is a malfunction in the ABS, since the ESP
is part of the ABS sys tem.
If the battery terminals were disconnected and re-connected , the
vehic le was jump started or the battery is very weak, the ESP sensor
system goes through a learning process for the first few yards. The
warning/indicator light illuminates. The warning/indicator light
goes out as soon as the learning process is complete .
I f the ESP warning/indicator light illuminates and stays on after you
have started the engine, this may mean that the control system has
temporarily switched off the ESP . If this is case, you can reactivate
the ESP by turning the ignition off and then on again . The
warning/indicator light should go out to show that the system is
fully functional again.
For more information about the ESP=>
page 262. •
Airbag system
~ (USA models) / !lr (Canada models)
This warning/indicator light monitors the airbag and the
pretensioner systems.
The ~ (USA models) IJ.!r (Canada mode ls) warning light illuminates
for a few seconds each time you switch on the ignition .
If the ~ (USA mode ls)
tJ.! r (Canada models) warning light does not
go out, or if it i lluminates whi le you are driving, or if it starts to b link,
t hen there is a malfunction somewhere in the system. If the light
does not il luminate when you switch on the ignition, this a lso
means there is a malfunction .
& WARNING
If you have a m alfuncti on in the airb ag sy ste m, cont act your autho
ri zed A udi dealer imm ed ia te ly. Othe rwise the airb ag or the belt
preten sioner may not work p roperly in an accident. •
Page 23 of 398
Anti-lock brake system (ABS)
/ .J (USA models) / ~ (Canada models)
This warning/indicator light monitors the ABS and the
electronic differenti al l ock (EDLJ.
T he warning/indicato r ligh t will come on fo r a few seconds whe n the
ignition is switched on . The light will go out after an automatic
check sequence is completed .
There is a malfunction in the ABS when:
• The war ning/indi cat or l igh t does no t illu minate w he n yo u swi tch
on the ignition.
• The war ning/i ndicat or light does not go out aft er a few seconds .
• T he warning/indicator light il luminates while driving.
The brake system will still respond even without the assistan ce of
the ABS system. See you r authorized Audi dealer as soon as
possible to restore full braking performance.
For mo re in form ati on
re garding the ABS~
page 266 .
The ABS warning light and the brake warning light come on
together. The ABS will not work and you will notice a change in braking response and performance.
Malfun ction in the brake system
If the brake warning light~ page 22and the ABS warning illuminate
together there may be a malfunction in the ABS, a nd there may also
be a ma lfunction in the bra ke system itself~& .
I n the even t of a
malfunction in the brake system th e wa rn in g/in di
cator light
BRAKE (USA mode ls)/ (©) (Canada models) in the instrument
c lus ter flas hes . B y pres sing the [ C HE CK ] bu tton, you ca n bring u p a
driver message wh ich explains the malfunction in more deta il.
P lease note
~ page 30.
Controls and equip
ment
Instruments and warning /indi cator lights
Malfun ction in the electroni c differential lock (EDL )
The ED L wo rks toge ther wit h the ABS. T he ABS wa rn ing light w ill
come on if there is a ma lfunction in the EDL system~
page 263 . See
yo ur aut ho rized Aud i dea ler as soon as poss ib le.
& WARNING
• If the AU (USA models )/u (Canada models ) warning light
does not go out , or if it comes on while driving , the ABS system is
not working properly. The vehicle can then be stopped only with
the standard brakes (without ABS ). You will not have the protec
tion ABS provides. Contact your Audi dealer as soon as possible .
• USA models :
If the BRAKE warning light and the -warning
light come on together , the rear wheels could lock up first under
hard b raking . Rear wheel lock -up can cause loss of vehicle control
and an accident. Have your vehicle repaired immediately by your
autho riz ed Audi dealer or a qualified workshop. Drive slowly and
avoid sudden, hard brake applications .
• Canada models : If the brake warning light (CD) and the ABS
warning light ~ come on together , the rear wheels could lock up
first unde r hard braking . Rear wheel lock -up can cause loss of
vehicle control and an a ccident . Have your veh icle rep aired imme
diately by your authorized Audi dealer or a qualified workshop .
Drive slowly and avoid sudden, hard brake applications . •
Electromechanical parking brake
~E (USA models) / (®) (Canada models)
The warning/indicator li ght m onit ors the e lec tromech an
i c al park ing brake.
W ith the parking brake a pplied and th e ignition tur ned on, the
warning/ indicator light i lluminates. After t he ignition has been
tu rn ed off , th e warni ng/ indicato r ligh t co ntin ues to i llu mina te fo r
about 30 seconds . If t he parking brake is applied with t he ignition _,,
I • •
Page 24 of 398
Instruments and warning/indicator lights
turned off, the warning/indicator light illuminates for about 30
s e co nds.
The warnin g/indicator li ght wi ll go out when the par kin g brak e is
r e lea sed .
I f the wa rn in g/ind ica tor l ig ht flas hes co ntinu ously
after applying th e
par king brake, brakin g force is not sufficient to prevent the veh ic le
fr om r olling u nint enti onally. Ple as e n ote the foll owin g:
• If the s lope of the ground is too steep to park the vehicle, the
additio nal drive message appea rs
Caution: Vehicle parked too
steep .
• In the even t of a parking brake malf unc tion, the yel low I sym bol
appears in the instrument c luster display and the driver m essage
Parking brake malfunction! is displayed. Have the ma lfunct ion
repa ired as soo n as possible b y a qua lified Aud i deale rship. •
Brake system BRAKE (USA models) /(©) (Canada
models)
Th e warn ing/indicator light f lashes if brake fluid level i s
low, if there is an ABS sy stem malfunct ion or a par kin g
b ra ke malfun cti on.
The light illuminate s when the ignition i s turned on . It goes out afte r
the engine has been start ed. Thi s ind icates t hat th e bra ke w arni ng
light is functioning properly .
If the brake warning light does not light up when the engine is
cranking , there may be a malfun ction in the electrical system . In this
case , contact your Audi dealer .
If the b rake system warni ng/ind icator l ight flas he s, t here is a b rake
system malfunction . By pressing the [
CH ECK ] button, you can bring
up a dr ive r m essage w hic h exp la in s the mal funct io n i n mor e deta il
=>
page 30 .
If the ABS fai ls, the A BS warning/indicator lig ht _. (USA
mod els)/ (Ca nada mode ls) flas hes toget he r w ith th e brake sys te m
warn ing/ indicator lig ht=>
& -
(U SA mode ls): If the warni ng light BRAKE and the warning light
illumin ate t oget her, im medi ate ly contact yo ur a uth orized Aud i
dea ler or qua lified workshop to have all brake pads ins pected
=>
p age 35.
When the l ig ht comes on, an aud ible warning signal is also giv en .
& WARNING
• USA models : If the BRAKE warning light and the Af'l~ warning
light come on together , the rear wheels could lock up first under
hard braking . Rear wheel lock-up can cause loss of vehicle control
and an accident . Have your vehicle repaired immediately by your
authorized Audi dealer or a qualified workshop . Drive slowly and
avoid sudden, hard brake applications.
• Canada model s: If the brake warning light (Q)) and the ABS
warning light come on together , the rear wheels could lock up
first under hard braking . Rear wheel lock -up can cause loss of
vehicle control and an accident . Have your vehicle repaired imme
diately by your authorized Audi dealer or a qualified workshop .
Drive slowly and avoid sudden , hard brake applications.
• If the brake warning /indicator light does not go out after a few
seconds and the parking brake released, or lights up while you are
driving , the fluid level in the brake fluid reservoir is too low . If you
believe that it is safe to do so , proceed immediately at low speed
to the nearest authorized Audi dealer or qualified repair facility and have the brake system inspected .
• Always keep
in mind that after several brake applications , you
will need greater pressure on the brake pedal to stop your vehicle. Do not rely on strained brakes to respond with maximum stopping
power in critical situations . You must allow for increased braking
distances . The extra di stance used up by fading brakes could lead
to an a ccident. •
Page 26 of 398
Driver information display
Sound system display
Fig. 9 Displ ay : s ound
system
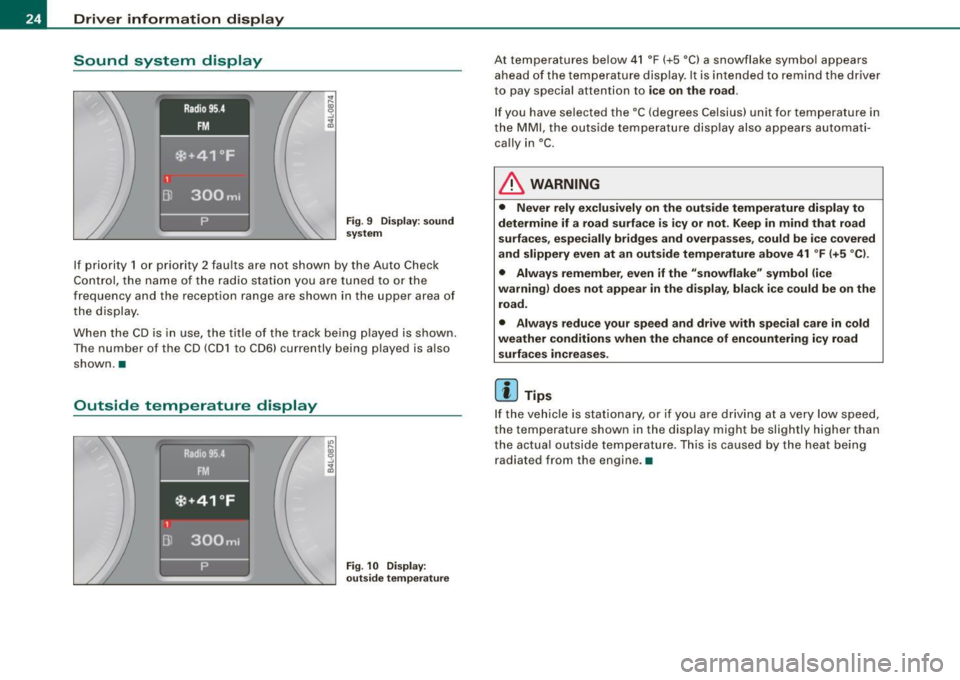
If priority 1 or priority 2 faults are not shown by the Auto Check
Cont rol, the name of t he radi o sta tio n you a re tune d to or the
frequency and the recept ion range are shown in the upper area of
the display .
When t he C D is in use, the title of t he trac k bein g pla y ed is shown.
The number of the CD (CD 1 to CD 6) currently being p layed is also
shown. •
Outside temperature display
Fig. 1 O Display:
out side temperatu re
At temperatu res be low 41 °F (+5 °C) a snowfla ke symbol appears
ahead of the te mper atu re disp lay. It is intended to remind the dr iver
to pay special attention to
ice on the road.
If you have selected the °C (degrees Celsius) unit for temperature in
th e
MM I, the outsid e temp erat ure d isp lay also appears automati
cally in °C.
& WARNING
• Never rely exclusively on the outside temperature display to
determine if a road surface is icy or not. Keep in mind that road
surfaces , especially bridges and overpasses , could be ice covered
and slippery even at an outside temperature above 41 °F (+5 °C ).
• Always remember , even if the "snowflake " symbol (ice
warning) does not appear in the display , black ice could be on the
road.
• Always reduce your speed and drive with special care in cold
weather conditions when the chance of encountering icy road
surfaces increases .
[ i ] Tips
If t he ve hic le is stat ionary, or if you are dr iving at a very low speed,
the temperature shown in the di splay mig ht be slightly higher than
t h e actua l outs ide temper atu re. This is caused by the heat bei ng
radiated from the engine. •
Page 34 of 398
Driver information display
Engine oil pressure malfunction "t=;f':
The red engine oil pressure warning symbol requires
immediate service or repair. Driving with a low-oil-pres
sure indication is likely to inflict severe damage to the
engine.
If the ~ symbol appears in the display and blinks, the oil
pressure is too low. An additional driver message can also
be displayed by pressing the
!CHECK] button:
Switch off engine and check oil level
Immediate actions
- Pull off the road.
- Stop the vehicle.
- Turn off the engine.
-Check the engine oil level with the dipstick=:> page 305.
Dipstick readings checks too low
-Top off oil to the proper level ::::, page 306.
Make sure that the oil pressure warning symbol~
appears no longer in the display before you start driving
again.
Dipstick reading checks OK
- If the oil pressure warning symbol~ starts flashing
again even though the engine oil level checks OK on the
dipstick,
do not continue driving and do not let the
engine run in idle.
Instead, contact your authorized Audi
dealer for assistance.
[ i] Tips
• The engine oil pressure symbol ~ is not an indicator for a low
engine oil level. Do not rely on it. Instead, check the oil level in your
engine at regular intervals, preferably each time you refuel, and
always before going on a long trip.
• The yellow oil level warning indication ,.. requires oil refill or
workshop service without delay. Do not wait until the red oil pres
sure warning
~ starts to flash before you respond to the low oil
level warning ...... By then, your engine may already have suffered
serious damage. •
Steering malfunction i
If there is a malfunction in the electronic steering column
lock, the steering cannot be unlocked.
If the i symbol in the display blinks, there is a malfunction
in the electronic steering column lock. An additional driver
message can also be displayed by pressing the
I CHECK]
button:
Do not drive vehicle: Steering defective
-Contact your nearest authorized repair facility.
- Do
not tow your vehicle.
& WARNING
Your vehicle must not be towed in the event of a malfunction in the
electronic steering column lock because it cannot be steered due
to the locked steering. If it is towed with the steering locked, there
is the risk of an accident. •
Page 43 of 398
Opening and closing
Keys
Key set
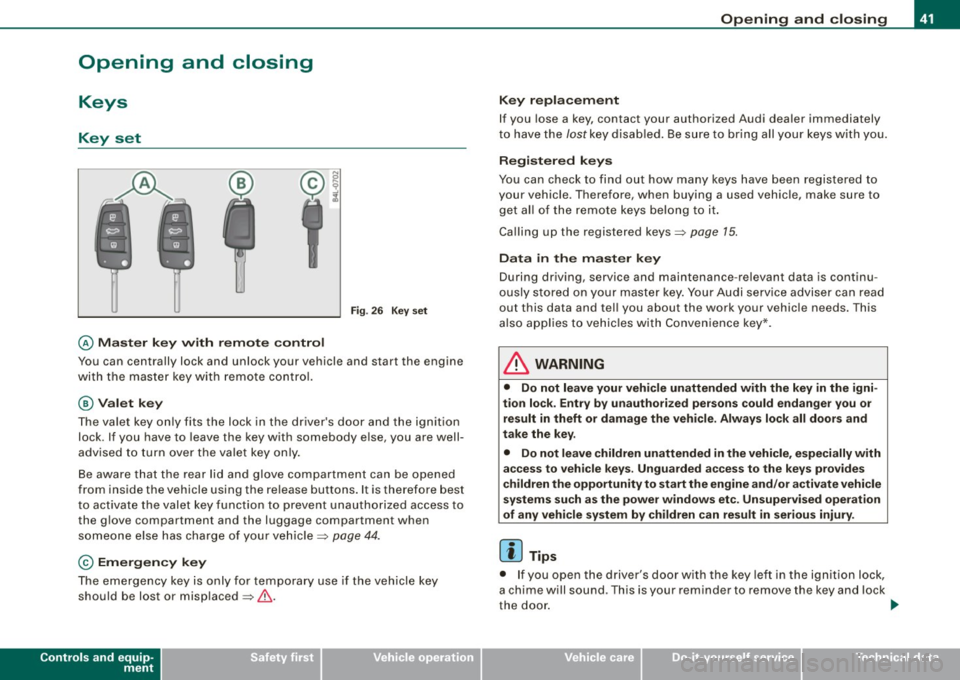
© Master key w ith remo te con trol
Fig . 26 Key s et
You can centrally lock and unlock your vehicle and start the engine
with the mas ter key with remote control.
@ Valet k ey
The va let key o nly fits the lock in the driver 's door and the ignition
lock . If you have to leave the key with somebody else, you are well
advised to turn over the va le t key only .
Be aware t hat the rear lid and glove co mpartment can be opened
from inside the vehicle using the re lease buttons . It is therefore best
to activate the valet key function to prevent unauthorized access to
the g love compartment and the luggage compartment when
someone e lse has charge of your vehic le=>
page 44.
© Emergency key
The emergency key is only for temporary use if the vehicle key
should be lost or misplaced=>& .
Controls and equip
ment
Opening and clo sing
Ke y repla cemen t
If you lose a key, contact your authorized Audi dealer immediately
t o have the
lost key disab led . Be sure to bring all your keys with you.
R egister ed keys
You can check to find out how many keys have been registered to
your vehicle. Therefore, when buying a used vehicle, make sure to
get al l of the remote keys belong to it .
Ca lling up the registered keys=>
page 15.
Data in the master key
During driving, service and maintenance -relevant data is continu
ously stored on your master key . Your Audi service adviser can read
out this data and tel l you about the work your vehicle needs. This
a lso applies to vehic les wi th C onvenience key*.
& WARNING
• Do not leave your vehi cle unattended with the key in the igni
tion lock . Entry b y un authorized persons could endanger you or
result in theft or damage the vehi cle . Alway s lock all doo rs and
t ak e the key .
• Do not le ave children unattended
in th e vehicl e, especially with
a ccess to vehicle key s. Ungu arded a ccess to the ke ys pr ovides
c hildren the opportunity to st art the eng ine and /or a ctivate vehicle
systems su ch as the po wer wi ndo ws etc . Unsupervi sed operat ion
of any vehi cle system b y ch ildren c an re sult in serious injury .
[ i ] Tips
• I f you open the driver's door with the key left i n the ign ition lock,
a chime will sound . T his is your reminder to remove the key and lock
the door .
I,,,
I • •
Page 48 of 398
Opening and closing
Unlo cking and lo cking w ith Convenie nce key *
On vehic les which a re equ ipped with the
C onveni enc e key* authori
zation system, the doors are un locked
without a key by means of a
proximity sensor in the doo r handle. The doors are simi larly locked
without a key using the locking button. Each door has a proximity
senso r and a locking button.
Powe r side do or clo ser*
The vehicle is equipped with a power side door closer. When closing a door, you simp ly need to gent ly push on the door. The door will
then automatica lly close by itse lf =>
page 48 .
Autom atic locking
The automatic locking feature locks a ll the vehic le doors an d the
rear lid when you drive faster than 9 mph (15 km/hl. This function
can be turned on and off in the MMI
Central locking Menu
=>
page 48.
You can unlock the vehicle from the inside by :
• removing the key from the ignition swi tch (the veh icle will auto
matically un lock itself) or
• pressing the unlock par t of the power lock switch
(l::!l or
pu lling the door handle (twice to open the rear doors).
& WARNING
• When you lock you r vehi cle from out side , nobody -espe cially
c hildren -should remain in side the veh icle . Remember , when you
lock the vehi cle from the outside the window s cannot be opened
from the inside .
• When you leave the vehi cle , alwa ys remove the ignition k ey and
t a ke it with you . Thi s will prevent pa ssenger s {children , for
e x ample ) from a ccidentally bei ng locked in the vehi cle should they
accidentally pre ss the p ower locking switch in the front doo rs.
& WARNING (continu ed )
• Do not leave children in side the vehicle un supervised . In an
emerg ency it would be impos sible to open th e door s from the
outside witho ut the key.
[ i ] Tips
• I n the event of a crash with airbag deployment all locked doors
wi ll be automat ically un locked to give access to the vehic le occu
pants from the outside.
• If the power locking system shou ld ma lfunction, you can lock
each door individually using the vehicle key=>
page 50.
• If the power locking system shou ld fail, you can still open the
fuel tank flap in an emergency=>
page 299.
• You are well advised not to keep valuables inside an unattended
vehic le, visib le or not . Even a p roperly locked vehi cle cannot p rovide
the secur ity of a safe. •
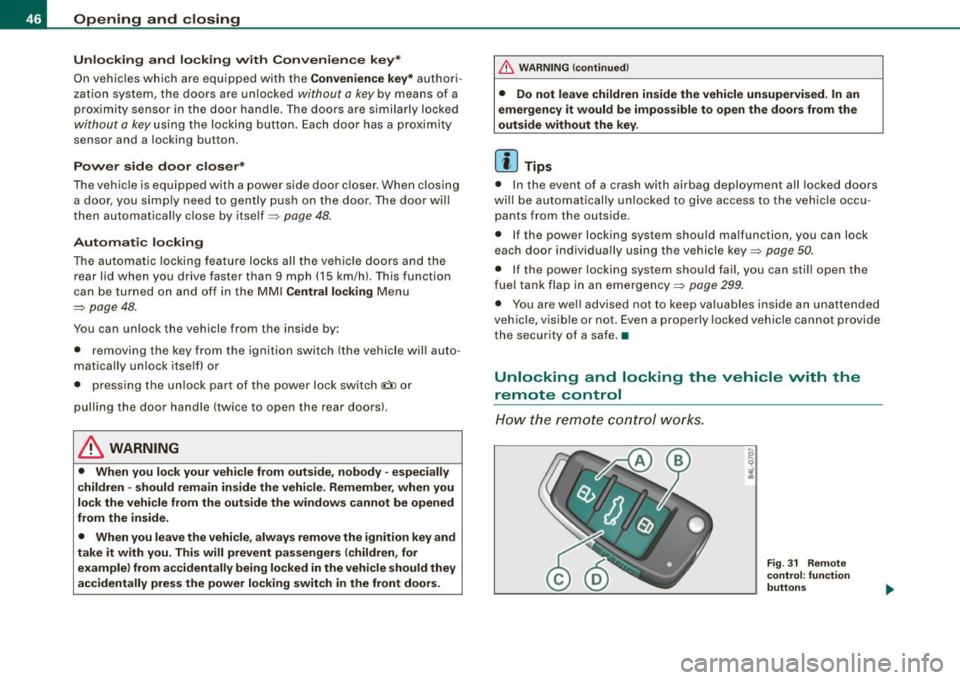
Unlocking and locking the vehicle with the
remote control
How the remo te control works.
Fig . 31 Rem ote
control : fun ctio n
butt on s