fuel AUDI S6 2009 Owners Manual
[x] Cancel search | Manufacturer: AUDI, Model Year: 2009, Model line: S6, Model: AUDI S6 2009Pages: 398, PDF Size: 43 MB
Page 5 of 398
Safety first ........ ... ... .. .
Driving Safely ................. .
General notes . .... ........... . .
Proper occ upant sea ting positions
Peda l area ... ..... ....... .... . .
Sto\Ning luggage . .... .... .... . .
Reporting Sa fety Defects ....... .
Safety belts .......... ....... .. .
Genera l notes ...... ........... .
W hy safe ty belts? .... ... ... ... .
Safety belts ..... ........ ... .. .
Safety belt pretensioners ... ... .
Airbag sy stem ..... ...... ... .. .
Important t hings to kno\N ...... .
Front airbags . ... ... .......... .
Monitoring the Advanced Airbag
System ... .. ... .... ..... ..... .
Side airbags ......... .... .. ... .
Side curtain a irbags ...... ..... .
Child Safety ................... . 193
194
194
196
200
201
203
205
205
206
209
2 13
215
2 15
2 19
226
231
234
238
Impo rtant things to kno\N . . . . . . . 238
Child safety seats . . . . . . . . . . . . . . 243
Insta lling a ch ild safe ty seat . . . . . 248
Add it ional Information . . . . . . . . . . 251
Lo\Ner anchorages and tether for
ch ildren (LA TC H) . . . . . . . . . . . . . . . .
253
Vehicle operation .... ... .
Inte lligent technology ......... .
Not ice about d ata reco rded by
ve hicle contro l modules ........ .
Elect ronic S tabilizat ion Program
!ESP) ...... .... ..... ..... ..... .
B raking ....... ................ .
Servotronic® -advanced po\Ner
s teer ing syst em ............... .
Driv ing \Nit h your quatt ro® ..... .
Energy management .... ....... .
Driving a nd enviro nment ...... .
The first 1,000 miles (1 ,500 km) and
after\Na rds .............. ... ... .
Cata lytic converter ............ .
Avo id damaging the vehicle .. .. .
Operate your vehicle economically
and minimize pollution ......... .
Trailer towi ng ................. .
Driving \Nit h a trailer ..... ... ... .
Trai ler to\Ning tips ....... ..• ....
261
262
262
262
265
267
2 6 8
269
2 7 1
2 7 1
27 2
273
273
276
2 7 6
278
Table of contents
Vehicle care ....... ... ... ... 281
C leaning and protection ........ 282
Gener al in fo rm atio n . . . . . . . . . . . . . 282
Care of exterior . . . . . . . . . . . . . . . . . 282
Care of inte rior . . . . . . . . . . . . . . . . . 28 9
F u el su pp ly and fillin g your fuel
ta nk . . . . . . . . . . . . . . . . . . . . . . . . . . . . 295
Gasoline . . . . . . . . • . . . . • . . . . . . . . . 295
Fuel tank . . . . . . . . . . . . . . . . . . . . . . . 296
C heck in g and filling . . . . . . . . . . . . 300
Engine hood . . . . . . . . . . . . . . . . . . . 300
Engine oil . . . . . . . . . . . . . . . . . . . . . . 303
Engi ne cooling sys te1 T1 . . . . . . . . . . 307
Brake fluid . . . . . . . . . . . . . . . . . . . . . 3 10
Battery . . . . . . . . . . . . . . . . . . . . . . . . 3 11
W indshield/headlight \Nasher
containe r .... .... .. ... .. .... ...
3 16
T iresa ndw hee ls ............ ... 317
T ires ........................ ... 3 17
Tire pressure monitoring system . . 336
Vehicle care I I irechnical data
Page 13 of 398
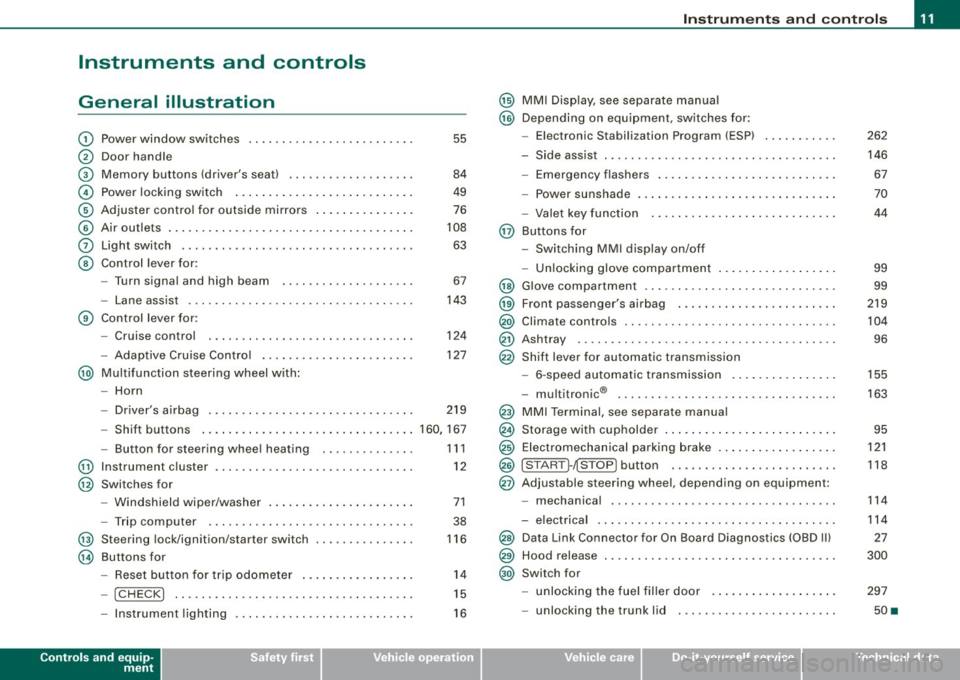
Instruments and controls
General illustration
G)
0
©
©
©
©
0
©
Power window switches ...... .... ..... .. ....... .
Door handle
Memory buttons (driver's seat)
Power locking switch .......................... .
Adjuster control for outside mirrors .. .... .... .... .
Air outlets ........ ... ...... .... ...... .... ... .. .
Light switch .... .... ........... .... .... .... ... .
Control lever for :
- Turn signal and high beam
- Lane assist .... .... ... .... .... .... .......... .
Control lever for:
- Cruise control
- Adaptive Cruise Contro l .......... ...... .... .. .
@ Multifunction steering wheel with:
- Horn
55
84
49
76
108
63
67
143
124
127
- Driver's airbag . . . . . . . . . . . . . . . . . . . . . . . . . . . . . . . 219
- Shift buttons ................................ 160, 167
@
@
@
@
-Button for steering wheel heating
Instrument cluster ... .... ... .... ...... ......... .
Switches for
- Windshield wiper/washer ..... ...... ..... .. ... .
- Trip computer ..... .. ..... ... .... ...... ... .. .
Steering lock/ignition/starter switch
Buttons for
- Reset button for trip odometer ... .. .... .... ... .
!CHECK] .. .... ....... .... .... ....... .... ... .
Instrument lighting .... ... .... .... ... ..... ... .
Controls and equip
ment
1 1 1
12
71
38
116
14
15
16
Instruments and controls
@ MMI Display, see separate manual
@ Depending on equipment, switches for:
- Electronic Stabilization Program (ESP)
- Side assist .. ... ..... .. .. .. .... .... .... ... ... .
- Emergency flashers .......................... .
- Power sunshade .... .... .... .... ... .... ..... . .
- Valet key function .... ....... ...... .... ...... .
@ Buttons for
- Switching MMI display on/off
- Unlocking glove compartment
@ Glove compartment ........... .... .... ......... .
@ Front passenger's airbag .. .... .... ... .. ...... .. .
@) Climate controls ......... .. .. .... .... .... .. . .. . .
@ Ashtray ..... .... .... ....... .... .... .... ... ... .
@ Shift lever for automatic transmission
- 6-speed automatic transmission .. .. .... .... ... .
I . .
® -
mu t1tron1c ... .... .... .... .... .... ... ...... .
@ MMI Terminal, see separate manual
@ Storage with cupholder . ........ ... .. .... .... ... .
@ Electromechanical parking brake ... .... .... .... .. .
@ ISTART ]-~STOP ] button .. ... ..... ... .... .... ... .
@ Adjustable steering wheel, depending on equipment:
- mechanica l .. .. .... .... ..... .. .... ..... ... .. .
- electrica l ... ...... .... ... .. .... .... ...... ... .
@) Data Link Connector for On Board Diagnostics (OBD II)
@ Hood release . .... .... ...... ... .. .... .... ... ... .
@) Switch for
unlocking the fuel filler door ..... ...... .... ... .
- unlocking the trunk lid . .... .... .... .... ... ... .
I • •
262
146 67
70
44
99
99
219
104
96
155
163
95
121
118
114
114
27
300
297
50 •
Page 14 of 398
Instruments and warning /indicator lights
Instruments and warning/indicator lights
Instruments
Instrument cluster and controls
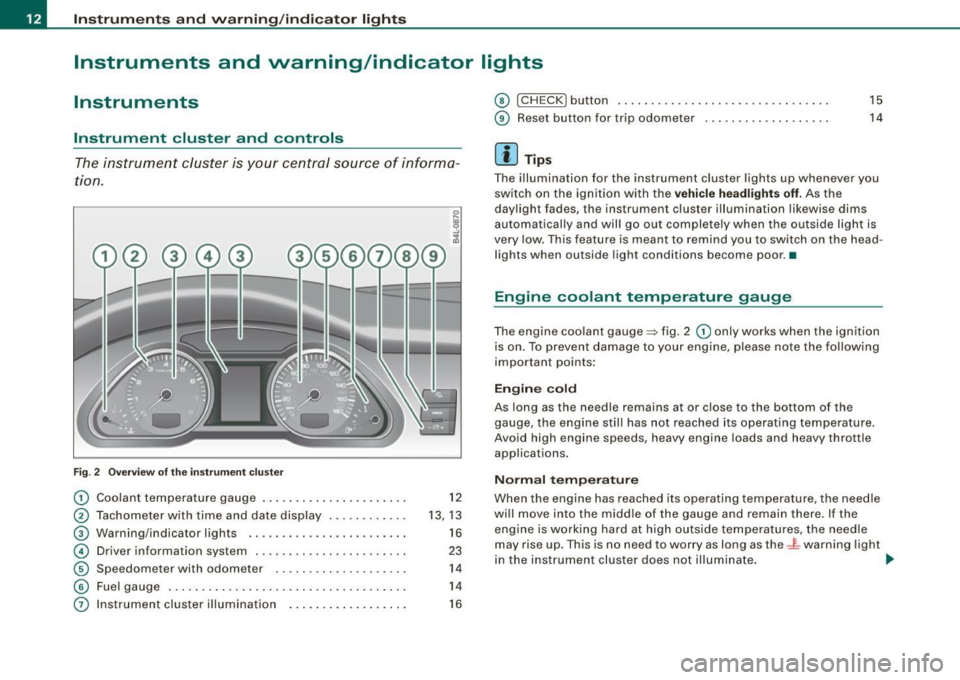
The instrument cluster is your central source of informa
tion.
Fig. 2 Overview of the instrument cluster
G) Coolant temperature gauge ....... ........ ...... .
@ Tachometer with time and date display .. .... .... . .
G) Warning/indicator lights .. ............. ...... .. .
© Driver information system ...................... .
© Speedometer with odometer . .... ........ .... .. .
© Fuel gauge .... .... ... ...... .... ...... .... ... . .
0 Instrument cluster illumination ................ . .
12
13, 13
16
23
14
14 16
© I CH ECK] button ............. ..... .... ... ..... •.
® Reset button for trip odometer .................. .
[ i ] Tips
15
14
The illumination for the instrument cluster lights up whenever you
switch on the ignition with the
vehicle headlights off. As the
daylight fades, the instrument cluster illumination likewise dims
automatically and wil l go out complete ly when the outside light is
very low . This feature is meant to remind you to switch on the head
lights when outside light conditions become poor. •
Engine coolant temperature gauge
The engine coolant gauge~ fig. 2 G) only works when the ignition
is on. To prevent damage to your engine, please note the fo llowing
important points:
Engine cold
As long as the needle remains at or close to the bottom of the
gauge, the engine still has not reached its operating temperature .
Avoid high engine speeds, heavy engine loads and heavy throttle
applications .
Normal temperature
When the engine has reached its operating temperature, the needle
will move into the middle of the gauge and remain there. If the
engine is working hard at high outside temperatures, the needle
may rise up. This is no need to worry as long as the -~-warning light
in the instrument cluster does not illumina te. ..,.
Page 15 of 398
Warning light in the instrument cluster -L
When the _L warning light in the instrument cluster starts to flash,
this can mean one of two things: either the coolant
temperature is
too high, or the coolant
level is too low=> page 31.
If the needle is well in the upper area of the gauge, the coolant
temperature is too high. Stop the vehicle, switch the engine off and
allow the engine to cool. If the warning light comes on again after
driving a short distance, contact an authorized dealer.
& WARNING
• Always observe the warning in => page 293, "Engine compart
ment", before opening the hood and checking the engine coolant
level.
• Never open the engine hood if you see or hear steam, or if you
see engine coolant dripping from the engine compartment . You
could burn yourself. Let the engine cool off first so that you cannot
hear or see any steam or engine coolant.
0 Note
• Mount ing additional lights or accessories in front of the air inlets
reduces the cooling effect of the radiator. At high outside tempera
tures or high engine load, the engine could overheat .
• The front spoiler has been designed to properly distribute the
cooling air when the vehicle is moving. If the spoiler is damaged,
this could reduce the cooling effect and the engine could then over
heat. Ask your authorized Audi dealer for assistance. •
Tachometer (engine rev counter)
The tachometer indicates the engine RPM (revolutions per
minutes).
Th e tachometer 0 => page 12, fig. 2 is the left of the two large clock
type displays.
Controls and equip
ment
Instruments and warning/indicator lights
The engine turns at a speed 1,000 times the single digit in the
display, e.g. if the needle is pointing at the "2" the engine is turning
at
2,000 RPM.
If engine RPM drops below
1,500, you should downshift to the next
lower gear. The red area at the end of the scale indicates maximum
permissible engine RPM after the break -in period. Before reaching
this area, move the selector lever to position "D (Drivel" or ease your
foot off the accelerator pedal.
0 Note
The tachometer needle should not move into the red range. If it
does, then only for a very short period of time. You could damage
your engine by driving at high RPM.
'£> For the sake of the environment
Upshifting early saves fuel and reduces engine noise .•
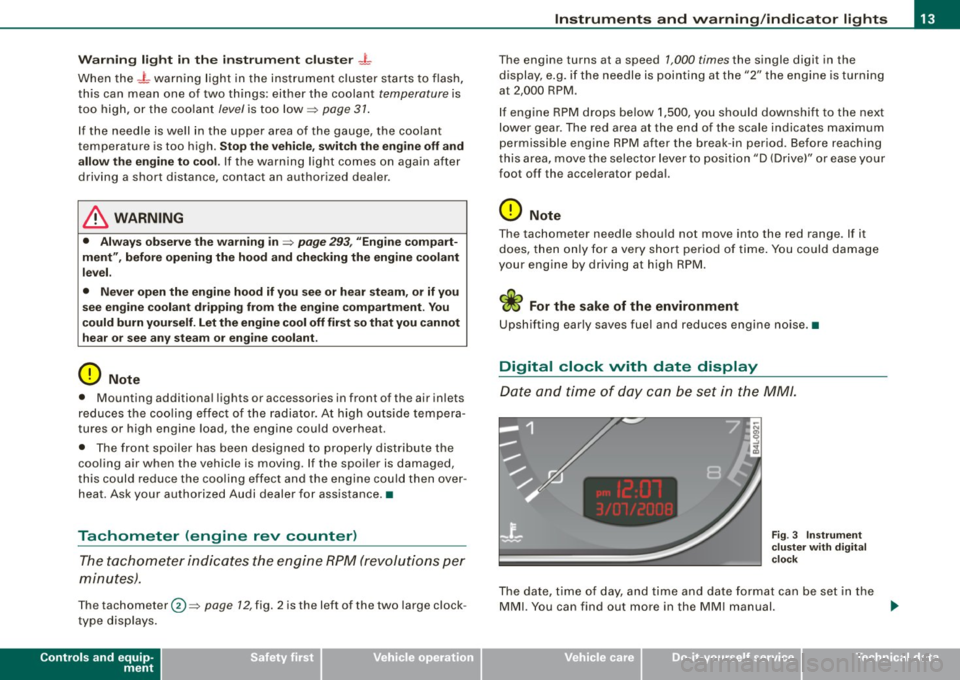
Digital clock with date display
Dote and time of day con be set in the MM/.
Fig . 3 Instrument
cluster with digital
clock
The date, time of day, and time and date format can be set in the
MMI. You can find out more in the MMI manual. .,_
I • •
Page 16 of 398
Instruments and warning /indicator lights
[ i J Tips
• The digital clock and the odometer are turned on for about 30
seconds when the driver's door is opened.
• When the ignition is turned off, the odometer reading and the
digital clock with date display can be switched on for about
30 seconds by pressing the
I CHECK) button => page 15, fig. 5. •
Speedometer with odometer
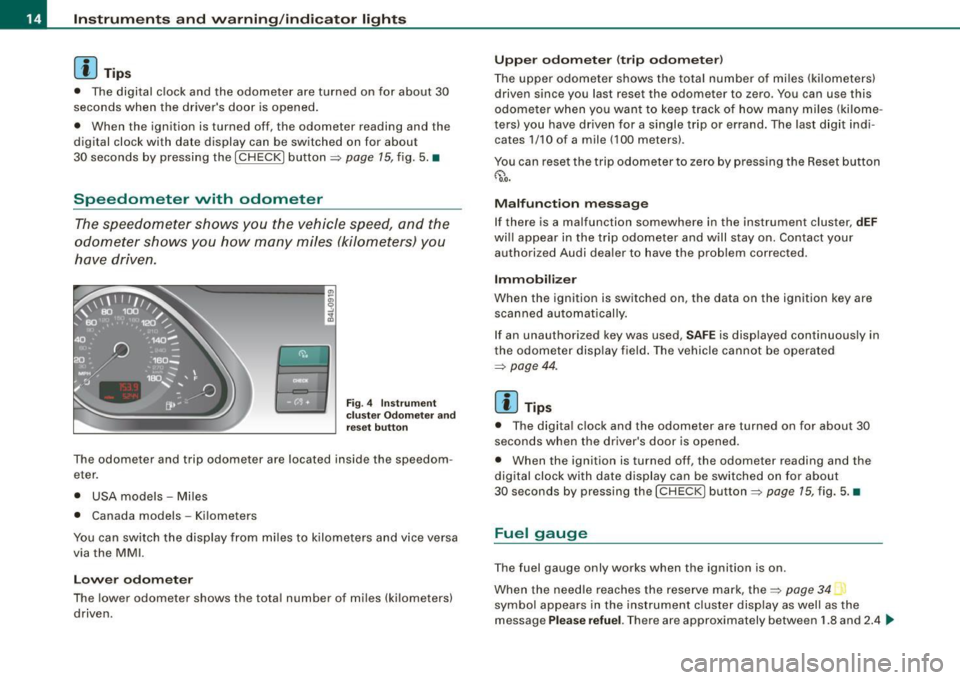
The speedometer shows you the vehicle speed, and the
odometer shows you how many miles (kilometers) you
have driven.
Fig . 4 Instrument
c luster Odometer and
reset button
The odometer and trip odometer are located inside the speedom
eter.
• USA models -Miles
• Canada models -Kilometers
You can switch the display from miles to kilometers and vice versa
via the MMI.
Lower odometer
The lower odometer shows the total number of miles (kilometers)
driven. Upper
odometer (trip odometer )
The upper odometer shows the total number of mil·es (kilometers)
driven since you last reset the odometer to zero. You can use this
odometer when you wan t to keep track of how many miles (kilome
ters) you have driven for a single trip or errand. The last d igit indi
cates 1/10 of a mile (100 meters) .
You can reset the trip odometer to zero by pressing the Reset button
~0-
Malfunction message
If there is a malfunction somewhere in the instrument cluster,
dEF
wi ll appear in the trip odometer and will stay on. Contact your
authori zed Audi dealer to have the prob lem corrected .
Immobilizer
When the ignition is switched on, the data on the ignition key are scanned automatically.
If an unauthorized key was used,
SAFE is disp layed continuously in
the odometer display field . The vehicle cannot be operated
=>
page 44 .
[ i J Tips
• The digita l clock and the odometer are turned on for about 30
seconds when the driver's door is opened.
• When the ignition is turned off, the odometer reading and the
digital clock with date display can be switched on for about
30 seconds by pressing the
I CHECK) button=> page 15, fig. 5. •
Fuel gauge
The fuel gauge only works when the ignition is on.
When the needle reaches the reserve mark, the~
page 34 _,,,
symbo l appears in the instrument cluster display as well as the
message
Please refuel. There are approximately between 1.8 and 2.4 .,_
Page 17 of 398
gallons (7-9 liters) of fuel left. Th is message is meant to remind you
to
refuel.
The tota l tank capacity of your vehicle is listed in => page 369.
0 Note
Never run the tank completely dry . An irregular supp ly of fuel can
cause engine misfiring and fuel could enter the exhaust system . The
cata lytic converter could then overheat and be damaged. •
[ CHECK] button
You con perform different functions with this button.
Fig. 5 C HECK button in
the instrument cluster
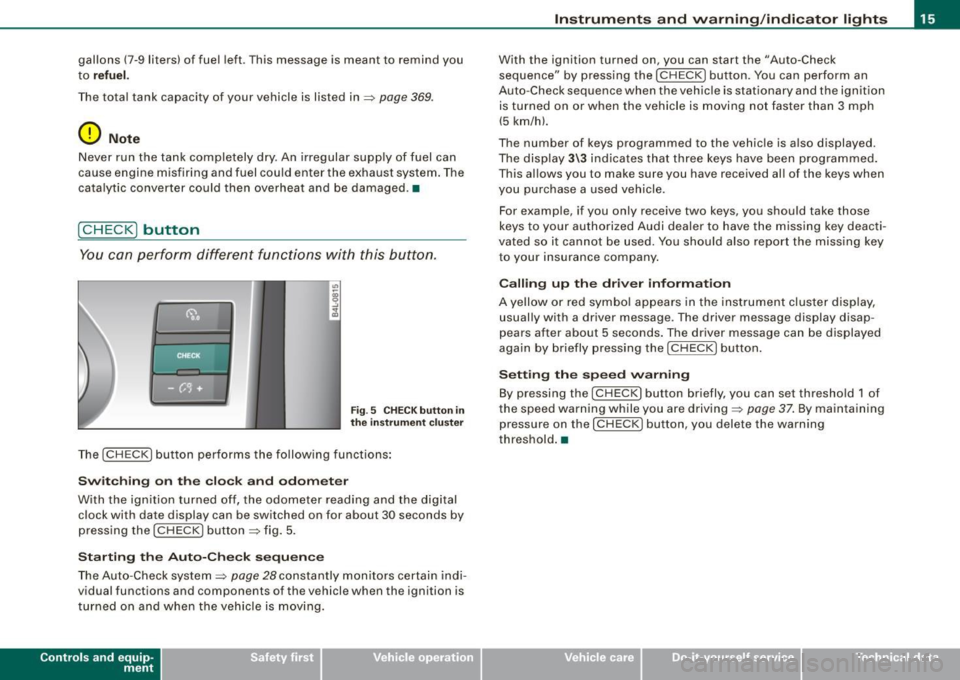
The [ CHECK I button performs the following functions:
Switching on the clock and odometer
With the ignition turned o ff, the odometer reading and the digital
clock with date display can be switched on for about 30 seconds by
pressing the
(CHECK I button ~ fig. 5.
Starting the Auto-Check sequence
The Auto -Check system=> page 28 constantly monitors certain indi
vidual functions and components of the vehicle when the ignition is
turned on and when the vehicle is moving.
Contro ls and eq uip
ment
Instruments and warning /indicator lights
With the ignition turned on, you can start the "Auto-Check
sequence" by pressing the
[CHECK ] button. You can perform an
Auto-Check sequence when the vehicle is stationary and the ignition
is turned on or when the vehicle is moving not faster than 3 mph
(5 km/h).
The number of keys programmed to the vehicle is also displayed.
The display
3\3 indicates that three keys have been programmed.
This allows you to make sure you have received al l of the keys when
you purchase a used vehicle.
For example, if you only receive two keys, you should take those
keys to your authorized Audi dealer to have the missing key deacti
vated so it cannot be used. You should also report the missing key
to your insurance company .
Calling up the driver information
A yellow or red symbol appears in the instrument cluster display,
usually with a driver message . The driver message display disap
pears after about 5 seconds . The driver message can be displayed
again by briefly pressing the
I CHECK I button.
Setting the speed warning
By pressing the [ CHECK] button briefly, you can set threshold 1 of
the speed warning while you are driving=>
page 37. By maintaining
pressure on the [
CHECK] button, you delete the warning
threshold .•
Vehicle care I I irechnical data
Page 27 of 398
Digital speedometer
Fig. 11 Display: Digital
speedometer
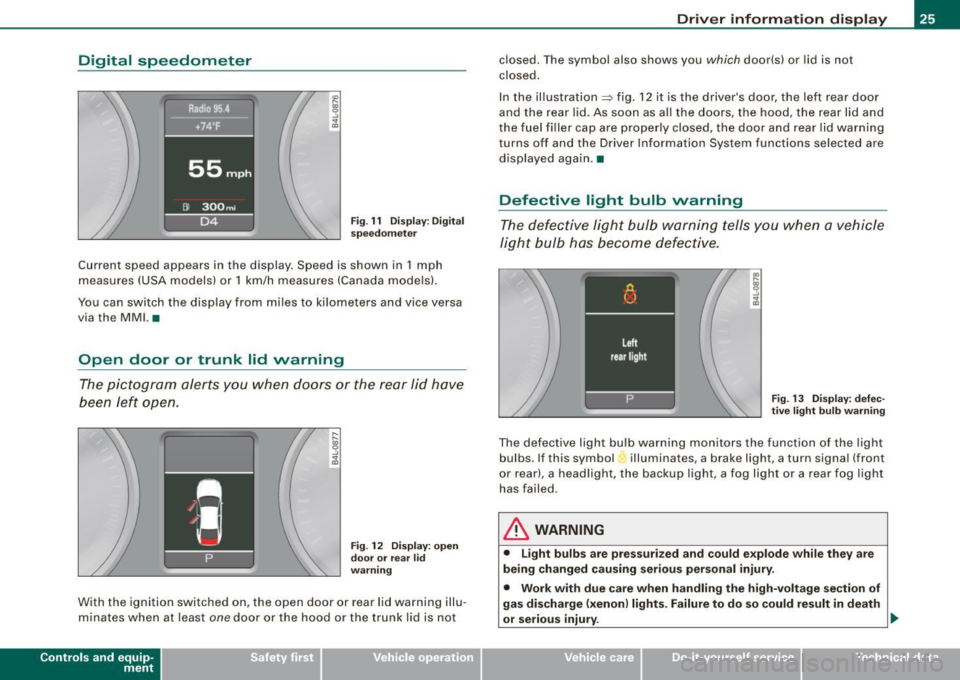
Current speed appears in the display . Speed is shown in 1 mph
measures (USA models) or 1 km/h measures (Canada models).
You can switch the display from miles to kilometers and vice versa
via the MMI. •
Open door or trunk lid warning
The pictogram alerts you when doors or the rear lid have
been left open.
Fig . 12 Display: open
door or rear
lid
warning
With the ignition switched on, the open door or rear lid warning illu
minates when at least
one door or the hood or the trunk lid is not
Con tro ls and eq uip
ment
Driver information display
closed. The symbol also shows you which door(s) or lid is not
closed.
In the illustration=> fig. 12 it is the driver's door, the left rear door
and the rear lid. As soon as all the doors, the hood, the rear lid and
the fuel filler cap are properly closed, the door and rear lid warning
turns off and the Driver Information System functions selected are
displayed again .•
Defective light bulb warning
The defective light bulb warning tells you when a vehicle
light bulb has become defective.
Fig. 13 Display: defec
tive light bulb warning
The defective light bulb warning monitors the function of the light
bulbs . If this symbol illuminates, a brake light, a turn signal (front
or rear), a headlight, the backup light, a fog light or a rear fog light
has failed.
& WARNING
• Light bulbs are pressurized and could explode while they are
being changed causing serious personal injury.
• Work with due care when handling the high-voltage section of
gas discharge (xenon) lights. Failure to do so could result in death
or serious injury . ..,
Vehicle care I I Technical data
Page 29 of 398
On-Board Diagnostic system (08D)
Malfunction Indicator Lamp (MIL)
The Malfunction Indicator Lamp (MIU ~ in the instrument cluster
~ page 16, fig. 7 is part of the On-Board Diagnostic (OBD ID system.
The warning/indicator light illuminates when the ignition is
switched on and goes out after the engine starts and the idle has
stabi lized . This indicates that the MIL is working properly.
If the light does not go out after the engine is started, or illuminates
while you are driving, a malfunction may exist in the engine system.
If the light starts flashing, the catalytic converter could be damaged.
Continue driving
with reduced power (avoiding sustained high
speeds and/or rapid accelerations) and have the condition
corrected. Contact your authorized Audi dealer.
If the light illuminates, the electronic speed limiter may also be
malfunctioning . For more information~
page 27, "Electronic speed
limiter".
An improperly closed fuel filler cap may also cause the MIL light to
illuminate
~ page 297. •
On-Board Diagnostics
Con tro ls and eq uip
ment
Fig . 16 Location of
Data Link Connector
(D LC )
Driver information display
On-Board Diagnostics monitors the components of your emission
control system. Each monitored component in your engine sys tem
has been assigned a code. In case of a malfunction, the component
wil l be identified and the fault stored as a code in the control
module memory .
The M IL light may also illuminate if there is a leak in the on -board
fuel vapor recovery system. If the light illuminates after a refuelling,
stop the vehicle and make sure the fuel filler cap is properly closed
~ page 297.
In order to make an accurate diagnosis, the stored data can only be
d isplayed using special diagnostic equipment (generic scan tool for
OBDl.
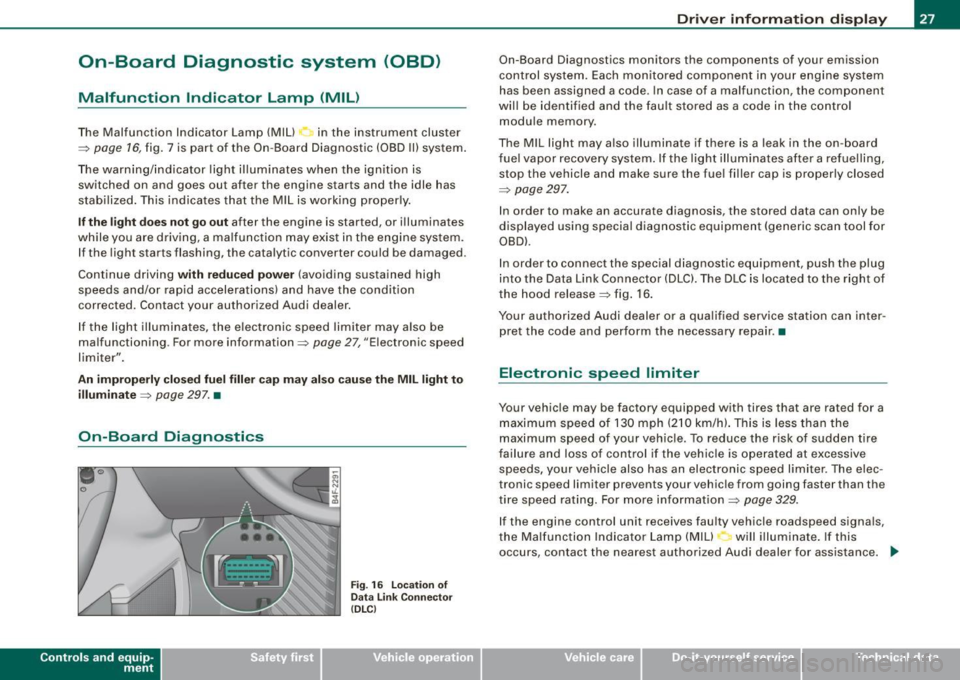
In order to connect the special diagnostic equipment, push the plug
into the Data Link Connector (DLC). The DLC is located to the right of
the hood release~ fig. 16.
Your authorized Audi dealer or a qua lified service station can inter
pret the code and perform the necessary repair. •
Electronic speed limiter
Your vehicle may be factory equipped with tires that are rated for a
maximum speed of 130 mph (210 km/h). This is less than the
maximum speed of your vehicle. To reduce the risk of sudden tire
failure and loss of control if the vehicle is operated at excessive
speeds, your vehicle also has an electronic speed limiter. The elec
tronic speed limiter prevents your vehicle from going faster than the
tire speed rating. For more information~
page 329.
If the engine control unit receives faulty vehicle roadspeed signa ls,
the Malfunction Indicator Lamp (MIU will i lluminate . If this
occurs, contact the nearest authorized Audi dealer for assistance. .,.
Vehicle care I I Technical data
Page 34 of 398
Driver information display
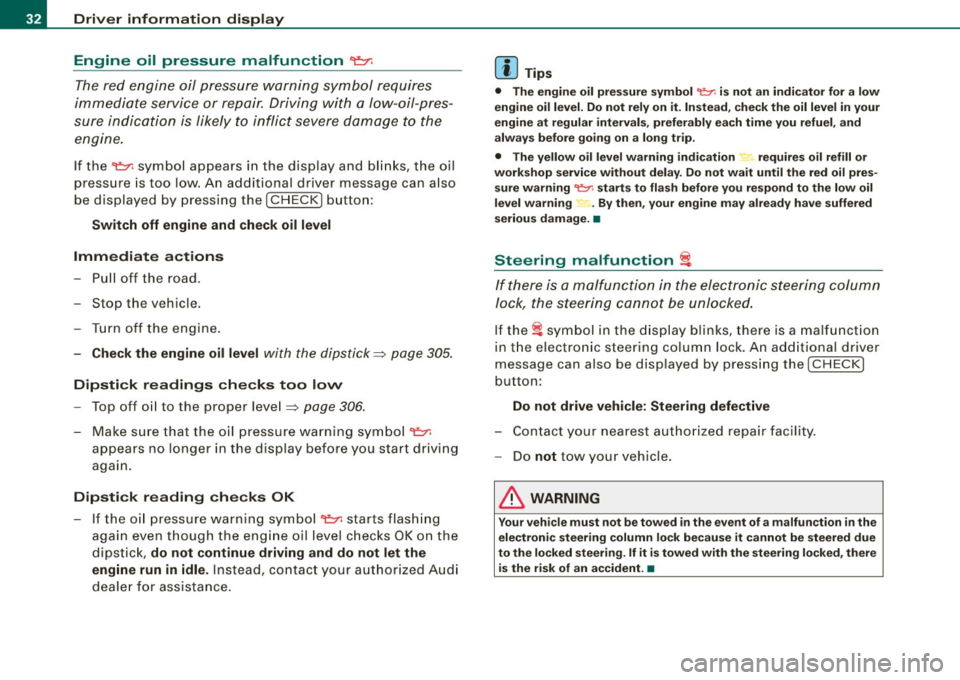
Engine oil pressure malfunction "t=;f':
The red engine oil pressure warning symbol requires
immediate service or repair. Driving with a low-oil-pres
sure indication is likely to inflict severe damage to the
engine.
If the ~ symbol appears in the display and blinks, the oil
pressure is too low. An additional driver message can also
be displayed by pressing the
!CHECK] button:
Switch off engine and check oil level
Immediate actions
- Pull off the road.
- Stop the vehicle.
- Turn off the engine.
-Check the engine oil level with the dipstick=:> page 305.
Dipstick readings checks too low
-Top off oil to the proper level ::::, page 306.
Make sure that the oil pressure warning symbol~
appears no longer in the display before you start driving
again.
Dipstick reading checks OK
- If the oil pressure warning symbol~ starts flashing
again even though the engine oil level checks OK on the
dipstick,
do not continue driving and do not let the
engine run in idle.
Instead, contact your authorized Audi
dealer for assistance.
[ i] Tips
• The engine oil pressure symbol ~ is not an indicator for a low
engine oil level. Do not rely on it. Instead, check the oil level in your
engine at regular intervals, preferably each time you refuel, and
always before going on a long trip.
• The yellow oil level warning indication ,.. requires oil refill or
workshop service without delay. Do not wait until the red oil pres
sure warning
~ starts to flash before you respond to the low oil
level warning ...... By then, your engine may already have suffered
serious damage. •
Steering malfunction i
If there is a malfunction in the electronic steering column
lock, the steering cannot be unlocked.
If the i symbol in the display blinks, there is a malfunction
in the electronic steering column lock. An additional driver
message can also be displayed by pressing the
I CHECK]
button:
Do not drive vehicle: Steering defective
-Contact your nearest authorized repair facility.
- Do
not tow your vehicle.
& WARNING
Your vehicle must not be towed in the event of a malfunction in the
electronic steering column lock because it cannot be steered due
to the locked steering. If it is towed with the steering locked, there
is the risk of an accident. •
Page 35 of 398
Ignition lock malfunction ~
A malfunction in the ignition Jock must be repaired immediately.
If the ~ symbol in the display blinks, there is a malfunction
in the electronic ignition lock. An additional driver message
can also be displayed by press ing the [CHECK] button:
Ign iti on lock defe ctive . C ont ac t wo rkshop !
- Do not turn the engine off.
- Drive immediately to an auth orized A udi dealer to have
the malfunction corrected .
If there is a malfunction in the electronic ignition lock, the ignition
cannot be turned off . Drive immediately to an authorized Audi
dea ler to have the cause of the malfunction corrected .
On vehicles with Convenience key*, the engine should not be
switched off using the [
STOP] button because the engine cannot be
started again after the ignition is switched off. •
Yellow symbols
A yellow symbol means WARNING.
Contro ls and eq uip
ment
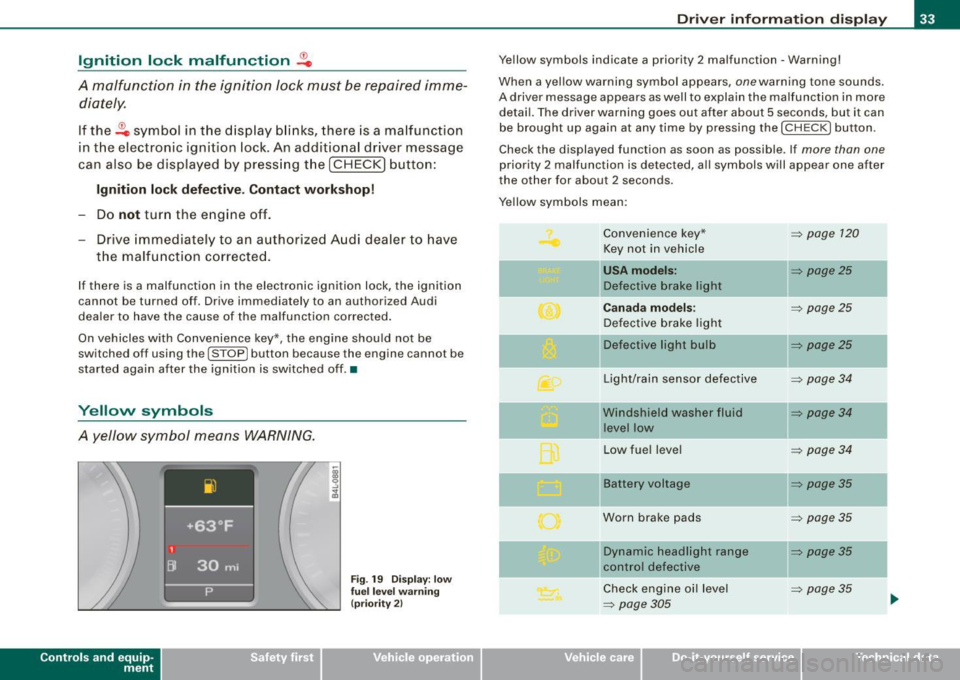
Fig . 19 Dis pl ay: low
fu el le ve l wa rning
(pr io rity 2)
Dri ver inf orm atio n di spl ay
Ye llow symbols indicate a priority 2 malfunction -Warning!
When a yellow warning symbol appears,
one warning tone sounds.
A driver message appears as well to explain the malfunction in more detail. The driver warning goes out after about 5 seconds, but it can
be brought up again at any time by pressing the [ CHECK
I button .
Check the displayed function as soon as possible . If
more than one
priority 2 malfunction is detected , a ll symbols will appear one after
the other for about 2 seconds.
Yellow symbols mean:
Convenience key*
~ page 120
Key not in vehicle
USA models: ~ page25
Defective brake light
Canad a mod els: ~ page25
Defective brake light
11 Defective light bulb
~ page25
-
Light/rain sensor defective ~ page34
Windshield washer fluid ~ page34
level low
Low fuel leve l
~ page34
Battery voltage ~ page35
Worn brake pads ~ page35
IIDynamic headlight range ~ page35
control defective
-
Check engine oi l level ~ page35
~ page305 ...
Vehicle care I I irechnical data