brake pads AUDI S6 2009 Owners Manual
[x] Cancel search | Manufacturer: AUDI, Model Year: 2009, Model line: S6, Model: AUDI S6 2009Pages: 398, PDF Size: 43 MB
Page 24 of 398
Instruments and warning/indicator lights
turned off, the warning/indicator light illuminates for about 30
s e co nds.
The warnin g/indicator li ght wi ll go out when the par kin g brak e is
r e lea sed .
I f the wa rn in g/ind ica tor l ig ht flas hes co ntinu ously
after applying th e
par king brake, brakin g force is not sufficient to prevent the veh ic le
fr om r olling u nint enti onally. Ple as e n ote the foll owin g:
• If the s lope of the ground is too steep to park the vehicle, the
additio nal drive message appea rs
Caution: Vehicle parked too
steep .
• In the even t of a parking brake malf unc tion, the yel low I sym bol
appears in the instrument c luster display and the driver m essage
Parking brake malfunction! is displayed. Have the ma lfunct ion
repa ired as soo n as possible b y a qua lified Aud i deale rship. •
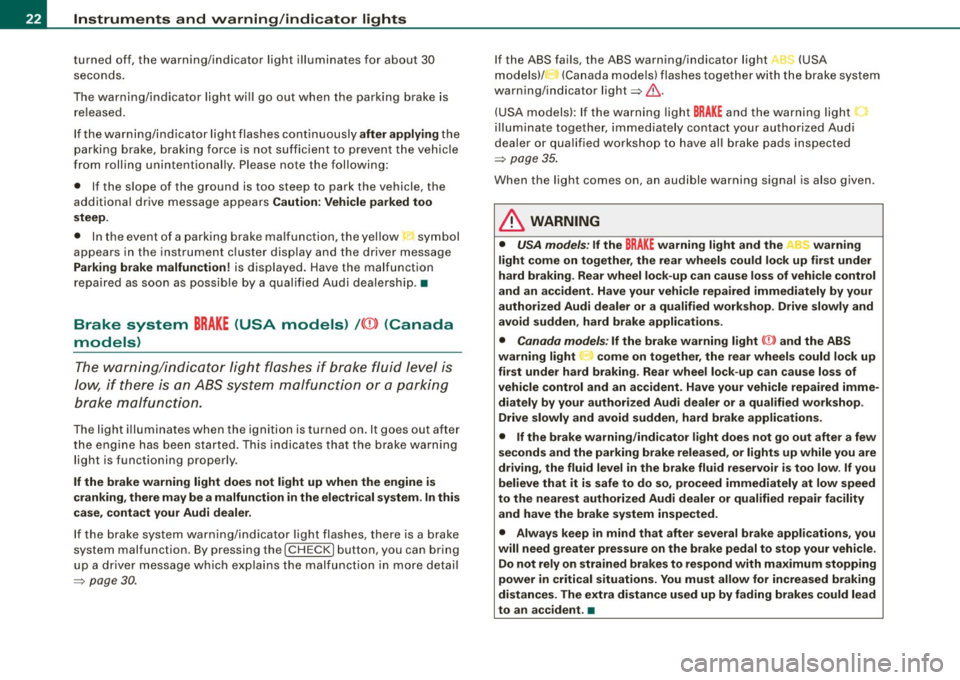
Brake system BRAKE (USA models) /(©) (Canada
models)
Th e warn ing/indicator light f lashes if brake fluid level i s
low, if there is an ABS sy stem malfunct ion or a par kin g
b ra ke malfun cti on.
The light illuminate s when the ignition i s turned on . It goes out afte r
the engine has been start ed. Thi s ind icates t hat th e bra ke w arni ng
light is functioning properly .
If the brake warning light does not light up when the engine is
cranking , there may be a malfun ction in the electrical system . In this
case , contact your Audi dealer .
If the b rake system warni ng/ind icator l ight flas he s, t here is a b rake
system malfunction . By pressing the [
CH ECK ] button, you can bring
up a dr ive r m essage w hic h exp la in s the mal funct io n i n mor e deta il
=>
page 30 .
If the ABS fai ls, the A BS warning/indicator lig ht _. (USA
mod els)/ (Ca nada mode ls) flas hes toget he r w ith th e brake sys te m
warn ing/ indicator lig ht=>
& -
(U SA mode ls): If the warni ng light BRAKE and the warning light
illumin ate t oget her, im medi ate ly contact yo ur a uth orized Aud i
dea ler or qua lified workshop to have all brake pads ins pected
=>
p age 35.
When the l ig ht comes on, an aud ible warning signal is also giv en .
& WARNING
• USA models : If the BRAKE warning light and the Af'l~ warning
light come on together , the rear wheels could lock up first under
hard braking . Rear wheel lock-up can cause loss of vehicle control
and an accident . Have your vehicle repaired immediately by your
authorized Audi dealer or a qualified workshop . Drive slowly and
avoid sudden, hard brake applications.
• Canada model s: If the brake warning light (Q)) and the ABS
warning light come on together , the rear wheels could lock up
first under hard braking . Rear wheel lock -up can cause loss of
vehicle control and an accident . Have your vehicle repaired imme
diately by your authorized Audi dealer or a qualified workshop .
Drive slowly and avoid sudden , hard brake applications.
• If the brake warning /indicator light does not go out after a few
seconds and the parking brake released, or lights up while you are
driving , the fluid level in the brake fluid reservoir is too low . If you
believe that it is safe to do so , proceed immediately at low speed
to the nearest authorized Audi dealer or qualified repair facility and have the brake system inspected .
• Always keep
in mind that after several brake applications , you
will need greater pressure on the brake pedal to stop your vehicle. Do not rely on strained brakes to respond with maximum stopping
power in critical situations . You must allow for increased braking
distances . The extra di stance used up by fading brakes could lead
to an a ccident. •
Page 35 of 398
Ignition lock malfunction ~
A malfunction in the ignition Jock must be repaired immediately.
If the ~ symbol in the display blinks, there is a malfunction
in the electronic ignition lock. An additional driver message
can also be displayed by press ing the [CHECK] button:
Ign iti on lock defe ctive . C ont ac t wo rkshop !
- Do not turn the engine off.
- Drive immediately to an auth orized A udi dealer to have
the malfunction corrected .
If there is a malfunction in the electronic ignition lock, the ignition
cannot be turned off . Drive immediately to an authorized Audi
dea ler to have the cause of the malfunction corrected .
On vehicles with Convenience key*, the engine should not be
switched off using the [
STOP] button because the engine cannot be
started again after the ignition is switched off. •
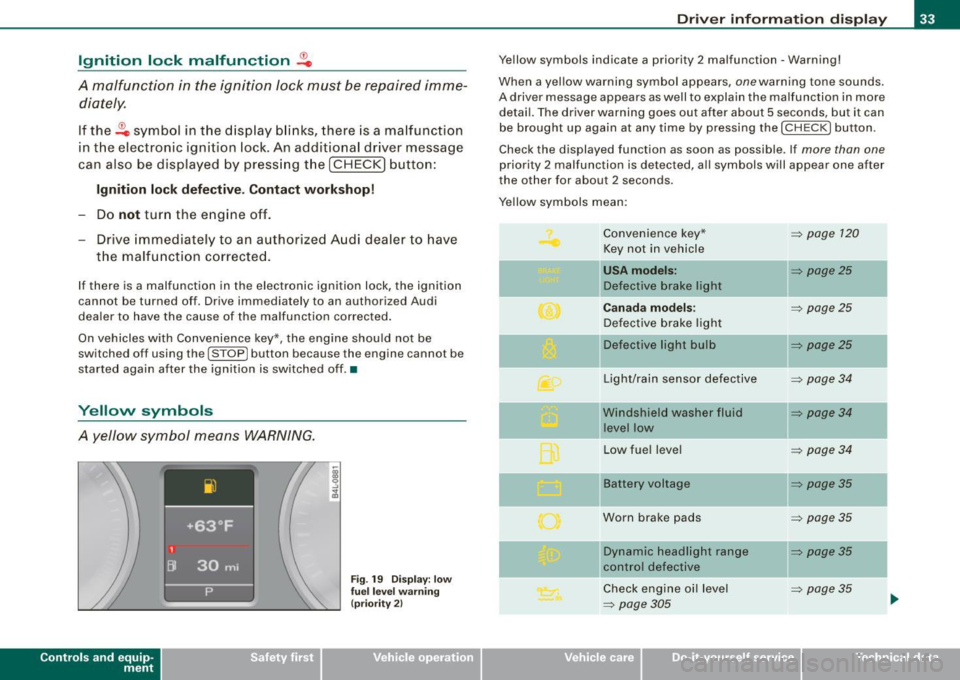
Yellow symbols
A yellow symbol means WARNING.
Contro ls and eq uip
ment
Fig . 19 Dis pl ay: low
fu el le ve l wa rning
(pr io rity 2)
Dri ver inf orm atio n di spl ay
Ye llow symbols indicate a priority 2 malfunction -Warning!
When a yellow warning symbol appears,
one warning tone sounds.
A driver message appears as well to explain the malfunction in more detail. The driver warning goes out after about 5 seconds, but it can
be brought up again at any time by pressing the [ CHECK
I button .
Check the displayed function as soon as possible . If
more than one
priority 2 malfunction is detected , a ll symbols will appear one after
the other for about 2 seconds.
Yellow symbols mean:
Convenience key*
~ page 120
Key not in vehicle
USA models: ~ page25
Defective brake light
Canad a mod els: ~ page25
Defective brake light
11 Defective light bulb
~ page25
-
Light/rain sensor defective ~ page34
Windshield washer fluid ~ page34
level low
Low fuel leve l
~ page34
Battery voltage ~ page35
Worn brake pads ~ page35
IIDynamic headlight range ~ page35
control defective
-
Check engine oi l level ~ page35
~ page305 ...
Vehicle care I I irechnical data
Page 37 of 398
Battery voltage ~
If the battery's state of charge is not in the optimal range, the
symbo l is shown in the display and the driver message
Low battery
c harge : battery will be charged wh ile dr iving
appears .
Whi le th is d river notification is displayed, you have to be p repa red
for limited starting capabi lity.
Driver message appears and goes out again
If this driver message appears after the ignition is turned on or
w hile driving and it g oes out agai n after a w hile , th e ba tte ry has
been adequately recharged.
Driver message appears and does not go out again
I f this dr iver notification appears after the ignition is turned on or
while driv ing and does n ot go out aga in, the bat tery's state of
charge is not in the optimal range. Starting capability is restricted.
H ave the ba ttery checke d by an au tho rize d Audi deale r as soon a s
poss ible .•
Worn brake pads
Brake pads!
If the wa rning light i lluminates, immediate ly contact your autho
rized Aud i d eal er or qualified wor kshop to have a ll brake pads
inspected. On USA models the warning light comes on together
wit h the warning light
BRAKE . Both sets of brak e pads o n an a xle must
a lways be replaced at the same time.
& WARNING
Driving with bad brakes can cause a collision and serious personal
injury.
• If the warning light • and the warning light
BRAKE11 with the
message Brake pads ! comes on in the instrument cluster display ,
Controls and equip
ment
Driv er information display
& W ARNING (continued )
immediately contact your author ized Audi dealer or qualified
workshop to have all brake pads checked or replaced if necessary .•
Headlight range control defective ">
l ) Headlight range control defective
If th e sy mbol ill uminates , the dyna mic headlig ht ra nge c ont rol is n o
longer working properly . Have the system checked and repa ired at
yo ur Au di d eale r.•
Engine oil level "'·
Please check oil level
When the symbol il luminates, check the engine o il leve l as soon as
possible =>
page 305. Top off the oi l at your earliest opportu nity
=>
page 306. •
Engine oil sensor defective ~,m,
Oil level! sensor defective
If the symbo l il luminates, contact your authorized Audi dealer and
h ave th e oil sensor insp ecte d. Unt il y ou hav e thi s do ne, c heck the oil
leve l each time you refue l just to be on the safe side=>
page 305. •
11 BRAKE : USA models only
I • •
Page 131 of 398
Adaptiv e Crui se Contro l IIJ!IIIII ---------------------------------..:....:.:=:...:.;_;....::.....::...._ \
_______ _
not be detected. The sensor measures the distance to reflective
surfaces that must have a certain size. The system responds only
after the distance measurement has been made . If a measurement
is not possible, the system cannot respond and wil l not react to a
vehicle or something else up ahead.
O pen ro ad
When the road is clear, the Adaptive Cruise Control works like cruise
control. It main tains a constant target speed specified by the driver.
D riv in g in tr affic
If a slower vehic le driving ahead is detected, the Adaptive Cruise
Control dece lerates (within the limits of the system)::::;,
page 138,
"Driver intervention prompt" and::::;, page 140, "System limitations"
to its speed and after adjusting, tries to maintain the set distance
from the vehicle ahead . The vehicle may temporarily drive s lower
than the set speed while adjusting::::;,
& in "Description" on
page 127.
If the vehicle in front accelerates, Adaptive Cruise Control a lso acce l
erates up to the speed that you have set.
Sit uation s re qui ring d rive r int erve ntion
In some situations you will have to use the footbrake to s low the
vehicle down in order to keep a safe distance from vehic le in front
of you or to avoid a rear -end collision. In this situation, a symbol
appears and a warning tone sounds::::;,
page 138.
P assing anoth er veh icle
If you move into the pass ing lane and no vehicle is detected ahead,
the Adaptive Cruise Control accelerates to the speed you have set
and ma intains it.
O ve rridin g ACC
You can increase your speed at any time by stepping on the acceler
ator pedal. After you re lease the acce lerator pedal, the system
adjusts back down to the speed you previously set.
Controls and equip
ment R
edu cin g s topping di sta nce
If the radar sensor detects that the distance to the vehicle ahead is
less than defined minimum distance, the brakes are automatical ly
prepared for emergency braking by the driver . The brake pads are
moved very c lose to the brake discs without actual ly braking the
vehic le. This brake assistant feature reacts more quick ly to the
driver's braking, and also works when Adaptive Cruise Control is off.
The stopping distance is reduced as a result of this advance brake
preparation. This function does not perform any emergency brak ing
maneuvers by itself; the driver must always app ly the brakes.
& WARNING
• Never r ely on the d istan ce control feature of ACC alone t o
p re vent re ar- end colli sio ns. Alwa ys be prep ared t o br ake and take
eva sive ac tion to a void colli sio ns and ot her acc ident sit uation s.
• Never allo w the clo sing sp ee d b etwe en you and other vehi cle s
to be so hi gh th at th e Ada ptive Crui se Control may not b e able to
s low your vehicl e safely . If clo sing spe ed i s too h igh , you must
a pp ly the brake s yours elf to reduce the risk of a rea r-end cras h.
[ i ] Tip s
Please note that the amount of acceleration the Adaptive Cruise
Contro l uses depends on the Distance setting selected . DISTA NCE 1
gives you acceleration that is dynamic and sporty . D ISTANCE 4, on
t he o ther hand, gives more moderate acce leration. For more infor
mation about the time intervals::::;,
page 133, "How is the distance
(time interval) set?" .
• Please note that if the Adaptive Cruise Control has begun braking
t he vehicle and the driver chooses to brake the vehicle additional ly,
the brakes may feel "hard". This is simply due to the pressure build
up of the initial braking .
• Adaptive Cruise Control is switched off after pressing the foot
brake . The speed saved up this point can be resumed. To resume the
saved speed, release the brake pedal and pu ll the control lever _.,
I • •
Page 267 of 398
When the abnormal situation is over, you should activate the ASR
again.
& WARNING
The increased safety afforded by ASR does not mean that you can
take safety risks. Always adapt your driving style to the road
conditions and traffic situation.
[ i] Tips
To ensure that the ASR works properly, all four wheels must be fitted
with identical tires. Any differences in rolling radius of the tires can
cause the system to reduce engine power when this is not desired.
See also~
page 329, "New tires and replacing tires and wheels". •
Braking
General information
What affects braking efficiency?
Operating conditions and driving habits
The brakes on today's automobiles are still subject to wear,
depending largely on operating conditions and driving habits~& .
On vehicles that are either driven mostly in stop-and-go city traffic
or are driven hard, the brake pads should be checked by your autho
rized Audi dealer more often than specified in the
Warranty & Main
tenance booklet.
Failure to have your brake pads inspected can
result in reduced brake performance.
On steep slopes, you should use the braking effect of the engine .
This way, you prevent unnecessary wear on the brake system. If you
must use your brakes, do not hold the brakes down continuously.
Pump the brakes at intervals.
Controls and equip
ment Safety first Vehicle operation
Intelligent technology
Moisture or road salt
If
you are driving faster than 50 mph (80 km/h) and the windshield
wipers are on, the brake pads will briefly touch the brake discs in regular intervals so as to improve reaction time when braking on
wet surfaces. You, the driver, will not notice anything.
Under certain conditions, for example, when driving through water
or very heavy rain, or even after washing your vehicle, the braking
effect can be reduced due to moisture (or in freezing conditions ice)
on the brake pads. A few careful brake applications should dry off
the brake pads or remove any ice coatings .
The effectiveness of the brakes can be reduced when the vehicle is driven on a salt-covered road and the brakes are not used. Here too,
you should clean off accumulated salt coating from brake discs and
pads with a few careful applications of the brake ~& .
Corrosion
There may be a tendency for dirt to build up on the brake pads and
corrosion to form on the discs if the car is not driven regularly or
only for short trips with little use of the brakes.
If the brakes are not used frequently, or if corrosion has formed on
the discs, it is advisable to clean off the pads and discs by braking
firmly a few times from a moderately high speed~&.
Faults in the brake system
If you should notice a sudden increase in brake pedal travel, then
one of the two brake circuits may have failed~& .
Low brake fluid level
Malfunctions can occur in the brake system if the brake fluid level is
too low . The brake fluid level is monitored electronically .
Brake lining wear status
Brake lining wear may be checked by visual inspection of the condi
tion of the brake pads through the openings in the wheel. If neces
sary, the wheel may be removed for this inspection
~ page 344,
"Changing a wheel". ._.
Vehicle care Do-it-yourself service Technical data
Page 268 of 398
___ ln_ t _e_ ll-'"ig ...,_ e_ n_t _t_ e_ c_ h _ n_o _ l_o _,.g= y,_ __________________________________________ _
& WARNING
• You should perform braking maneu vers for the purpose of
cleaning the brake system only if road conditions permit . Other
road u sers mu st not be put at r isk -you may cause an a ccident!
• Before des cending a steep grade, reduce speed and shift trans
mission into a lower gear or lower dr iving range . Do not ride the
brakes or hold the pedal down too long or too often. This could
cause the brake s to get hot and diminish braking effi ciency .
• Do not "ride the brakes " by resting your foot on the pedal when
you do not intend to b rake. This may cause the br ake s to ove rheat ,
premature wear and increased stopping distance.
• Under ce rtain climat ic and operating condit ions such as
passing through water , driving in heavy rain or after washing the
vehi cle , the effectiveness of the brakes can be reduced . In winter ,
ice can a ccumulate on the brake pads , linings , discs and drums .
Carefully apply bra kes fo r a test . Brakes will dry and ice coatings
will be cleaned off after a few careful brake appli cations .
• Driving for an extended period of time on salt -co vered roads
without using your brakes can also affect braking effic iency. Clean
off accumulated salt coating from brake dis cs and pads with a few
c areful brake applications .
• If you damage the front spoile r, or if you install a different
spoiler, be sure the air flow to the front brakes is not ob structed.
Otherw ise the brake sy stem could overheat reducing the effective
ness of the entire brake system .
• Failure of one bra ke cir cuit will impair the braking capability
resulting in an increased stopping distance. Avoid driving the
veh icle and have it to wed to the nearest Audi dealer or qualified
workshop . -..
Brake booster
T he b rake boost er ad ds extra b ra king powe r.
The brake booster works with vacuum pressure which is created
o nly w he n t he e ngine is ru nnin g=> & .
& WARNING
• Never let the vehicle roll to a stop with the engine shut off.
• If the brake booster is not working, for example when towing
your vehicle, or because the brake boo ster has somehow been
damaged , the brake pedal must be pressed considerably harder to
make up for the lack of booster assistance . •
Functioning of A!"lt"-Lock Brake System (ABS)
ABS p revents the wheels from locking up unde r brakin g.
Th e ABS co ntribu tes effect ively to vehicle cont ro l since it preve nts
the whee ls from
locking when the brakes are app lied. This means
t h at the ve hicle rema ins steerable and is less l ikely to s kid.
With ABS you do not need to pump the brake . Just hold the brake
pedal down .
However, do not expec t the A BS to s hor ten bra king d istance u nder
all circumstances. When driving o n grave l or on newly fallen snow
o n t op o f icy sur faces, brak ing d istance may be ev en lon ger, the re
fore, under these c ircumstances, it is especially important that you
driv e slow ly an d with gre at ca re.
How the ABS system works
An automat ic c heck is made w hen a speed o f abou t 4 mph (6 km/hl
is reached. When this happens, a pumping noise can be heard.
I f a n in div id ual wheel begins to rotate too slowly in rela tion t o
vehic le speed and tends to lock, the ABS automatically reduces
b rake p ress ure to preven t tha t w hee l from lo cking.
Page 274 of 398
-Driving
and environment --=---------------
New brake pads
--
Remember that new brake pads do not have a full braking
effect during the first 250 miles (400 kilometers) after they
are installed .
New brake pads have to be "burnished in" before they have optimal
grab =>& .
During the break -in period, you should avoid putting severe loads
on the brakes . Severe loads include, for examp le, sudden hard
braking, in particular at very high speeds or, for example, on moun
tain passes.
& WARNING
New brake pads don't have the best stopping power and must be
"broken-in" during the initial 100 to 150 miles (150 to 200 kilome
ters) of normal city driving. You can compensate for this by
pressing the brake pedal more firmly . This also applies later when
new pads are installed.
:J
Catalytic converter
It is very important that your emission control system
(catalytic converter) is functioning properly to ensure that
your vehicle is running in an environmentally sound
manner.
- Always use lead-free gasoline:=> page 295, "Fuel supply".
- Never run the tank down all the way to empty.
- Never put too much motor oil in your engine ==>
page 306,
"Adding engine oil 't=:;r\11
•
Never try to push- or tow-start your vehicle.
The catalytic converter is an efficient "clean-up" device built into the
exhaust system of the vehicle. The catalytic converter burns many
of the po llutants in the exhaust gas before they are released into the
atmosphere.
The exclusive use of unleaded fuel is critically important for the life
of the catalytic converter and proper functioning of the engine.
& WARNING
• Do not park or operate the vehicle in areas where the hot
exhaust system may come in contact with dry grass, brush, fuel
spill or other material which can cause a fire .
• Do not apply additional undercoating or rustproofing on or
near the exhaust manifold, exhaust pipes, catalytic converter or
heat shields. During driving, the substance used for undercoating
could overheat and cause a fire .
0 Note
• Be aware that just one tank filling with leaded fuel will alr eady
seriously degrade the performance of the catalytic converter.
• Do not exceed the correct engine oil level=>
page 306.
• Do not drive until the fuel tank becomes completely empty. The
engine could misfire. Unburned fuel could also get into the exhaust
system and this could cause the catalytic converter to overheat.
• Do not turn off the ignition while the vehicle is moving.
• Do not continue to operate your vehicle under these conditions,
as otherwise fuel can reach the catalytic converter. This could result
in overheating of the converter, requiring its replacement .
• To assure efficient operation of the Emission Control System:
- Have your vehicle maintained properly and in accordance with
the service recommendations in your Warranty
& Maintenance
booklet. •
Page 313 of 398
Checkin g and fillin g Ill
--------------~-
•
-Read the brake fluid level from the brake fluid reservoir
~ fig. 243. The brake fluid level must be between the
"MIN" and "MAX" markings.
The brake fluid reservoir is located at the rear partition of the engine
compartment on the left side=> page 302.
The fluid level may drop slightly after some time due to the auto
matic adjustment of the brake pads . This is not cause for alarm.
If the brake fluid level falls considerably below the "MIN" mark, the
brake warning/indicator l ight (U.S. models:
BRAKE , Canadian models:
CCD> l will come on=> page 22 and=> page 30. Do not continue to
operate the vehicle . The complete brake syste m shou ld be thor
oughly checked by an authorized Audi dealer or other qualified
facility and the cause corrected. If the brake fluid level is too low, the
brake warning/indicator light will illuminate . Contact an authorized
Audi dea ler
immedi ately. •
Changing brake fluid
Have the brake fluid changed by an experienced techni
cian.
Brake fluid absorbs moisture from the air. If the water content in the
brake fluid is too high, corrosion in the brake system may result
after a period of time . The boiling po int of the brake fluid will also
decrease considerably and decrease braking performance.
T herefore, the brake fluid must be changed
ever y two yea rs. Always
use new brake fluid which conforms to Federa l Motor Veh ic le Stan
dard "FMVSS 116 DO T 4".
The brake fluid reservoir can be difficult to reach, therefore, we recommend that you have the brake fluid changed by your autho
rized
Audi deal er. Your dealer has the co rrect tools, the right brake
fluid and the know-how to do this for you.
& WARNING
• Bra ke fluid i s poi sonou s. It m ust be stor ed only in the closed
or iginal container out of the reach of children!
• Brake f ailur e can result fr om old or in approp riat e bra ke fluid .
Ob serve the se pre cauti ons:
- Use o nly br ake fluid that me ets SAE specifi cation
J 1703 and
c onfo rm s t o Fed eral Mo to r V ehicle Standard 116 . Alway s check
w ith your auth oriz ed A udi de aler t o m ake sure you are usin g
the correct b rake flu id . The corre ct ty p e of brake flu id i s al so
indi cate d on the br ake fl uid r eservo ir .
- The brake f luid mu st be new . Heav y use of the brake s can
ca us e a va por lo ck if the brake fluid is left in the sy stem too
long. Thi s ca n seriou sly affect th e effic iency of the brake s as
well as your safe ty. T his co uld r esult i n an a ccide nt.
0 No te
Brake fluid wil l damage the paint of your vehicle .
'£> For the sake of the environm ent
Because of the problem of proper disposal of brake fluid as well as
the special too ls required and the necessary expertise, we recom
mend that you have the brake fluid changed by your authorized Audi
dea ler. •
Battery
General information
Under norm al operating conditions, the battery in your Audi does
not need any maintenance . With high outside temperatures or long
daily drives we recommend that you have the electrolyte level ._
Vehicle care I t •
Page 383 of 398
Alphab eti ca l ind ex 111111
-------------------------------------=--------
Ashtray
Fron t . ..... ... .. .... .... ..... .. .. 96
Rear . ...... .. ..... ... ... .... ... .. 97
ASR How th e Anti -Slip Regulation Syst em
works ... .. ... .... .... ... .... .. 264
Ast erisk
What does it mean when something is marked with an asterisk? ... .. ...... 6
Audi Parking System Acoustic parking system tips .. .... . 181
Adjusting the chimes -option 1 ..... 180
Adjusting the chimes -option 2 . ... . 181
General Information . ..... .. .... .. 169
Notes on distance information ..... 179
Parking next to obstacles .... . ... .. 178
rear ..... .. .... .... .... .... .... . 169
rear , with rear -vi ew camera ... .... . 171
Rear -vi ew camera -parking mode 1 175
Rear-view camera -parking mode 2 . 177
Rear-view camera (Rear View) ...... 173
Rear-view camera coverage area .... 175
Rear-view camera tips .......... ... 182
Specia l parking situations . ... .... . 178
Audi Parking Syst em (rear)
Adjusting the chimes .... .... .... . 170
Audi Service Repair Manuals and Literature 372
AUTO mode AC climate controls ... .... ... .... . 105
Auto Safety Hotline ... .. .... .... .... . 203
Auto -Ch eck Control . ...... .. .... .... .. 28
Automatic belt retractor .... .... .... .. 209
Controls and equip ment Safety first Automatic car wash
See Washing ..
... .... ...... ...... 283
Automatic Shift Lock (ASU ...... .. 157, 164
Automatic transmission 6-speed automatic transmission .... 155
Automatic Shift Lock (ASU .. .. . 157, 164
Driving ....... .. ... .. ... .... .... . 155
Dynamic shift program ...... ...... 158
Emergency release for selector lever 161
Emergency release for selector lever (multitronic®) .. .... .... .... .... 168
Fail-safe mode ... .... .... .... 160,167
Ignition key safety lock .. .... ..... . 117
Kick -down .... ....... .... ... . .... 158
Manual shift program ... .... .... .. 159
multitronic® .... .... ...... .. ... .. 161
Selector lever .. .. .. . ... ... .. . 156, 163
Sh ift buttons . ... ..... ... .... 160 , 167
Steering wh eel with t iptronic® . 160, 167
Average speed .. ....... .... .... .... .. 38
Avoid damaging the vehicle ... ..... ... 273
B
Battery . .... .... ..... .. ... ... .. ... . 311
Battery location inside the luggage compartment .. . .. .. .... .... .... 312
Charging . ...... ........ ..... .... 314
Important warnings when working on the battery ..... ...... .. ...... .... . 312
Jump star ting ... ... ... ..... .. .... 357
Low ... .. .... .. . .. .. .... .. .... .. 269
Replacing the battery ...... .. ... .. 315
State of charge . .... .. ...... .. .... 269 Voltage
.... ... .. .. .. .... .... .. . .. 35
Winter opera tion . .... .... .... .... 311
Working on the battery .... ... ... .. 312
Before driving ... .... .... .. . ... .... . 195
Blended gasoline . ...... ...... .... ... 295
Body cavity sealing ... .. ... ..... ... .. 288
Booster seats ... .. .. .... .... ...... .. 246
How do I properly install a booster seat in my veh icle? . .... .... ... ... ... .. 246
Safety instructions .... .... .... ... . 246
Brake assistant .. .. ... ... .... ...... . 267
Brake booster .. .. ... ... .... . ... ..... 266
Brake fluid Changing the brake fluid ... .... .... 311
Checking the brake fluid level .. ... . 310
Reservoir .. .... .... ... .... .... ... 310
What is the correct brake fluid level? 310
What should I do if the brake fluid warning
light comes on? . .... .... .... ... . 310
Brake light Defective ... .. .... .... .... ... .. .. . 25
Brake system .... ... ..... ... .... .... 310
Anti-lock brake system . .. . .. .. ... .. 21
Brake fluid . ... .. .. .... .. . ... ... .. 310
Brake f luid specifications for refill and
replacement . .... .... ...... .... . 311
Brake pads ..... .. .... ...... ..... 272
Electromechanical parking brake .... 121
General information .. .... .... ... . 265
How does moisture or road salt affect the brak es? . ........ ........ ...... . 265
Malfunction . .... .... .... .... ..... 30
Vehicle operation Vehicle care Do-it-yourself service Technical data
Page 384 of 398
ll'IJ Alphabetical index
---=------------------------------------------------
Warning/indicator lights . .... . ... .. 22
Worn brake pads symbol . . . . . . . . . . . 35
B reak -in period . . . . . . . . . . . . . . . . . . . . . 271
Brake pads .. ...... .... ... ...... . 272
Tires .. .... ... .... .... ... .... ... 271
Bu lbs ..... ..... .... .... .... ....... 355
Bumper
cover
Caution when parking near a parking bar- rier or curb ...... ... .... .... ... 122
C
Ca lifornia Proposition 65 Warning ... .. 302
Battery specific . . . . . . . . . . . . . . . . . . 314
Capacities ....... ... .... .... ....... 369
Car care ....... ...... .... ... .... ... 282
Interior ......................... 289
Plastic and vinyl ...... ...... . .. .. 286
Weathers trips ...... ... .. ...... .. 287
Care of exterior .... ...... ... .... .... 282
Cargo area
See Loading the luggage compartment ..
201
Cargo net ..... ... .... .... ..... ...... 90
Catalytic converter . . . . . . . . . . . . . . . . . . 272
CD changer . . . . . . . . . . . . . . . . . . . . . . . . . 99
Centra l locking
Emergency locking .. ...... .. . .... . 50
Certification . . . . . . . . . . . . . . . . . . . . . . . 375
Changing a flat tire ...... .... .... ... 344
Changing a wheel . ... .... .... ....... 344
Changing engine oi l .. .... .... ...... . 306 Chassis
Undercoa ting . .... .... ...... ..... 288
See also Adaptive A ir Suspension .. . 184
CHECK button . . . . . . . . . . . . . . . . . . . . . . . 15
Check ing
Engine coolant level . ...... ....... 308
Checking tire pressure ....... ........ 323
Child restraints
Danger of using child restraints in the
front seat .... .... .... .... .... .. 217
What types of chi ld restraint anchors are
available? .... .... .... .... .... .. 251
Where can I get add itional informat ion
about chi ld restraints? ... .. .. .... 252
Child safety ...... ..... .. .... .. . 238, 243
Additional information . ........... 257
Booster seats . ... ... ....... ...... 246
Convertible chi ld safety seats .... .. 244
Convertible locking retractor . ...... 248
Guidance fixtures for lower anchorages
254
Important safety instructions for using chi ld safety seats .. . ......... ... 241
Important things to know when driving
with children ....... .... ... .. ... 238
Infant seats ... ... .... .... .... ... 243
Installing a child restraint using the
LATCH system . . . . . . . . . . . . . . . . . . 256
Lower anchorages ........ ... .... . 253
Mounting and releasing the anchorage hook .. ...... ........ .......... 257
Older children and safety belts ... .. 247
Saf ety bel ts and ol dler children ... .. 247
Teth er anchors .... .... ....... ... 257 Tether
strap ... .... .... ....... .. . 258
Which restraint sys tem should my older
chi ld wear? .......... .. .. .... .. 247
Child safety lock
rear doors (power) . .... .... .... ... . 51
Child safety seats .... .... .... .... ... 243
Conver tible locking re tractor .... ... 248
Danger of using child restraints in the
front seat ..................... . 217
How do I properly install a child safety
sea t in my vehicle? ...... ....... . 241
Installing .. .. .. .... ... .. .. .... ... 248
LATCH system . .... .... ... .... ... 256
Safety instructions .... .... .... ... 241
Cigarette lighter ........... .... ...... 97
Cleaning Alcantara (synthetic suede) .... ... . 292
Engine compartm ent ... ... .... ... 293
Fabrics and fabric cov erings ... .... 289
Ins trumen t panel .... ... ..... ... .. 290
Inte rio r ...... ....... ....... .. .. . 289
Leather ............. ....... .. ... 291
MMI display .. .. .. .... .... ...... . 289
MM I terminal . .... .... ... ... .. ... 289
Plastic and viny l ... .... .... .... ... 286
P lastic parts .... .. .... .... ....... 290
Safety belts . . . . . . . . . . . . . . . . . . . . . 293
Trim strips .. ...... .... ....... .. . 285
trim strips ...... ....... ...... .... 286
Cleaning and protection .......... ... 282
Climate control .. ... ...... ...... .... 102
Synchroni zing . .... ... ... ........ 104
Warm and cold ... .... ...... ... .. 102