homelink AUDI S6 2009 Owners Manual
[x] Cancel search | Manufacturer: AUDI, Model Year: 2009, Model line: S6, Model: AUDI S6 2009Pages: 398, PDF Size: 43 MB
Page 4 of 398
Table of contents
Table of contents
Vehicle literature ........ .
About this Owner's Manual .............. ...... . .
Controls and
equipment ............ ..... .
Instruments and controls ..... .
General il lustration ............. .
Instruments and
warning/indicator lights ....... .
Instruments .............. ..... .
Warning/indicator lights ........ .
Driver information display ..... .
Introduction ................... .
On-Board Diagnostic system (OBD)
Auto Check Control ............ .
Speed warning system ..... .. .. .
Trip computer ..... ... .. .. ... .. .
Opening and closing .......... .
Keys ... ..... .......... ... ..... .
Power locking system ..... ... .. .
Rear lid ....................... .
Child safety lock .... ......... .. . 5
6
9
11
1
1
12
12
16
23
23
27
28
36
38
41
41
45
50
51
Convenience key . . . . . . . . . . . . . . . . 52 Anti-theft
alarm system ........ .
Power windows ... ... .... .... .
S liding/ti lting power sunroof . .. .
Clear vision . .... .. .. .......... .
Lights ... ................ ... .. .
In ter ior l ights ...... ... .. .. .. .. .
Vision ... ... ......... ...... ... .
Wiper and washer system ...... .
Mirrors .................... ... .
Digital compass ............... .
Seats and storage ..... .... ... .
General recommendations ..... .
Power seat . ... ... ......... ... .
Seat m emory ...• ........ .... ..
Rear seats .......... ....... ... .
Head restraints ........ ..... .. .
Arm rest ....... ... ... ... ... •..
Luggage compartment ..... ... .
Roof rack ..... .......... ... .• ..
Cupholder .. ...... ... .. ... ..• ..
Ashtray ................... ... .
Cigarette lighter /socket ........ .
Storage ............ ....... ... .
Warm and cold ............... .
Climate control ........ .. ... .. .
Basic settings ......... •. ... ....
On the road . ... ..... .. ..... ... .
Steering .................... .. .
Ignition lock and ignition switch .
Starting and stopping the engine
Starting and stopping the engine
with Convenience key ....... .. .
Electromechanical parking brake .
Cruise control ......... ........ .
54
55
58
63
63
68
69
71
75
78
80
80
81
84
85
86
88
88
93
95
96
97
99
102
102
1 1 1
114
114
116
117
118
121 124
Adaptive Cruise Control ....... .
Speed and distance control system
Driver informa tion ....... ...... .
System limitations ............. .
Audi lane assist ............... .
Lane assist ......... ........ .. .
Audi side assist ............... .
Lane Change Assistant .. ..... .. .
Notes ....................... •.
Automatic transmission ....... .
tiptronic® (6-speed automatic
transmission) ... .... ... ... .... .
multitronic® ..........•........
Audi Parking System ......... . .
Park Assist Systems .... ... .... .
Audi Park ing System (rear) ...... .
Audi Parking System (rear, with rear-
view camera) .... .. ...... ..... .
Specia l parking situations ..... •.
Settings in the MMI ....... ..... .
Saf ety tips . ............ .... ... .
Adaptive Air Suspension ...... .
Adaptive Air Suspension and
Damping ............. ........ .
Homelink® . ................ ... .
Universal remote control ....... . 127
127
135
140
143
143
146
146
153
155
155
161
169
169
169
171
178
180
181
184
184
188
188
Page 190 of 398
• .___H_ o_ m _ e _L_i _ n _k _® ____________________________________________________ _
Homelink®
Universal remote control
Applies to vehic les: w ith Home link ® universal remote cont ro l
General information
The HomeLink® fe ature c an learn th e up to th re e r adio
fre que nc y c odes for m ost cu rrent t ransmi tters us ed for
operating gar age do ors, es tate gates , home o r out doo r
lighti ng sy stems, an d other de vice s.
Yo u must first pro gram t he Hom elink ® trans mitter b efor e you c an
use the system=>
page 189, "Pro gramm ing th e Home link® tra ns
mit ter".
In o rd er to pro gram t he Homelink® tra nsmitter fo r dev ices utiliz ing
ro lling code, a second person on a ladder who can safe ly reach the
ga rag e door o pener motor is reco m me nd ed. It is also necessa ry to
l ocate the "learn" button on yo ur garage do or opener moto r. R efer
to t he op era tin g instr uctions for the open er, as the loc ation and
co lor of th is button may vary by manufacturer .
Y o u c an still u se the o rigi na l r emo te c ontrol for th e dev ice at a ny
tim e.
& WARNING
• Never use the Homelinkl1JI transmitter with any garage door
opener that does have not the safety stop and reverse feature as
required by federal safety standards . This includes any garage
door opener model manufactured before April 1, 1982.
• A garage door opener which cannot detect an object , signaling
the door to stop and reverse does not meet current federal safety standards . Using a garage door opener without these features
increases risk of serious injury or death .
& WARNING (continued)
• For safety reasons never release the parking brake or start the
engine while anyone is standing in front of the vehicle.
• A garage door or an estate gate may sometimes be set in
motion when the Homelink ® remote control is being
programmed . If the device is repeatedly activated , this can over
strain motor and damage its electrical components -an over
heated motor is a fire hazard!
• To avoid possible injuries or property damage , please always
make absolutely certain that no persons or objects are located in
the range of motion of any equipment being operated.
[ i ] Tips
• If y ou wou ld l ik e mor e inf ormation o n Hom elink®, wh ere to
purchase the Homelink ® compatib le products, or wou ld li ke to
pu rchase th e Home link® Ho m e Lightin g Pack age, please call toll
fre e: 1 -8 0 0 -355 -3515.
• For Declara tion of Comp lia nc e to Un ited St ates FCC and Indust ry
C anada regulations=>
page 3 75. •
Page 191 of 398
___________________________________________________ H_ o_m _ e_ L_ i_ n _k_ @_R _ __.11111
Ap plies to vehic les: wit h Hom elin k® un iversal remo te contro l
Programming the Homelink ® transmitter
The transmitter is programmed in two phases. For rolling
code transmitters, a third phase is also necessary.
[i Ii It~
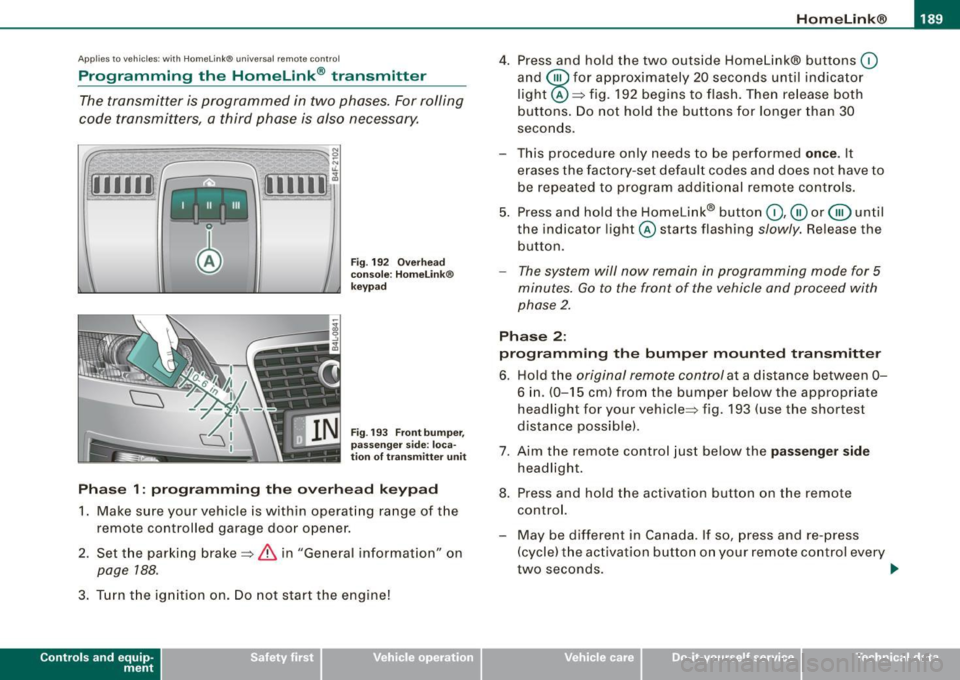
Fig . 192 Overhead
console: HomeLink®
keypad
Fig . 193 Front bumper,
passenger side : loca
tion of transmitter unit
Phase 1: programming the overhead keypad
1. Make sure your vehicle is with in operating range of the
remote controlled garage door opener.
2. Set the parking brake=>
& in "General information " on
page 188 .
3. Turn the ignition on . Do not start the engine!
Con tro ls and eq uip
ment
4. Press and hold the two outside Homelink® buttons (0
and @for approximately 20 seconds until indicator
light @=> fig. 192 begins to flash. Then release both
buttons. Do not hold the buttons for longer than 30
seconds.
This procedure only needs to be performed
once. It
erases the factory-set default codes and does not have to be repeated to program additional remote controls.
5. Press and hold the Homelink® button
(0 ,@ or @ until
the indicator l ight @starts flashing
slowly. Release the
button.
- The system will now remain in programming mode for 5
minutes.
Go to the front of the vehicle and proceed with
phase 2.
Phase 2:
programming the bumper mounted transmitter
6. Hold the original remote control at a distance between 0-
6 in. (0-15 cm ) from the bumper below the appropriate
headlight for your vehicle=> fig . 193 (use the shortest
distance possible) .
7. Aim the remote control just below the
passenger side
headlight.
8. Press and hold the activation button on the remote control.
- May be different in Canada. If so, press and re-press (cycle) the activation button on your remote control every
two seconds. .,_
Vehicle care I I irechnical data
Page 192 of 398
• ..__H_ o_m_ e_ L_ i_ n _k_ @_R __________________________________________________ _
9. The emergency flashers will flash three times (after
about 15-60 seconds) when the programming is
successful. Release the button on the remote control.
- To program more devices, repeat steps 4 to 9.
10. Press and hold the trained Homelink® button and
observe the indicator light@=> page 189, fig. 192.
- If the indicator light is solid/continuous, programming is
complete and your device should activate when you press and release the trained Homelink® button.
- If the indicator light blinks rapidly for 2 seconds and is
then a solid/continuous light, proceed with phase 3 to program a rolling code device.
Phase 3: rolling code programming
- A second person on a ladder who can safely reach the
garage door opener motor is recommended.
11. Locate the "learn" button on the garage door opener
motor (refer to the operating instructions for the opener,
as the location of this button may vary by manufacturer).
12. Press and release the learn button on the garage door
opener motor.
- Note: once the button is pressed, there are 30 seconds in
which to initiate the next step.
13. On the Homelink® keypad inside the vehicle, firmly
press and hold the Homelink ® button previously
programmed in phases 1 and 2 for two seconds and
release. Repeat this sequence
twice .
- Some vehicles may require the press/hold/release
sequence up to three times to complete the training
process.
- Homelink® should now activate your rolling code
equipped device.
If the 5 minute time limit is exceeded, the emergency flashers will
flash one time
to indicate that the process has been terminated. In
this case, repeat steps 4 through 9.
If the emergency flashers do not flash
three times (after about 15-
60 seconds), programming was not successful. In this case, repeat
steps 4 through 9 .
Remote control units for garage door openers in Canada are set to
stop transmitting radio frequency signals after two seconds. This
time may not b e sufficient for the Homelink® system to learn the
radio frequency signal. Perform all other steps as described
above. •
Applies to vehicles: with Horne link ® uni versa l remote contro l
Operating the HomeLink ® transmitter
The Homelink® transmitter works in the same manner as
the original handheld remote control that came with the
system.
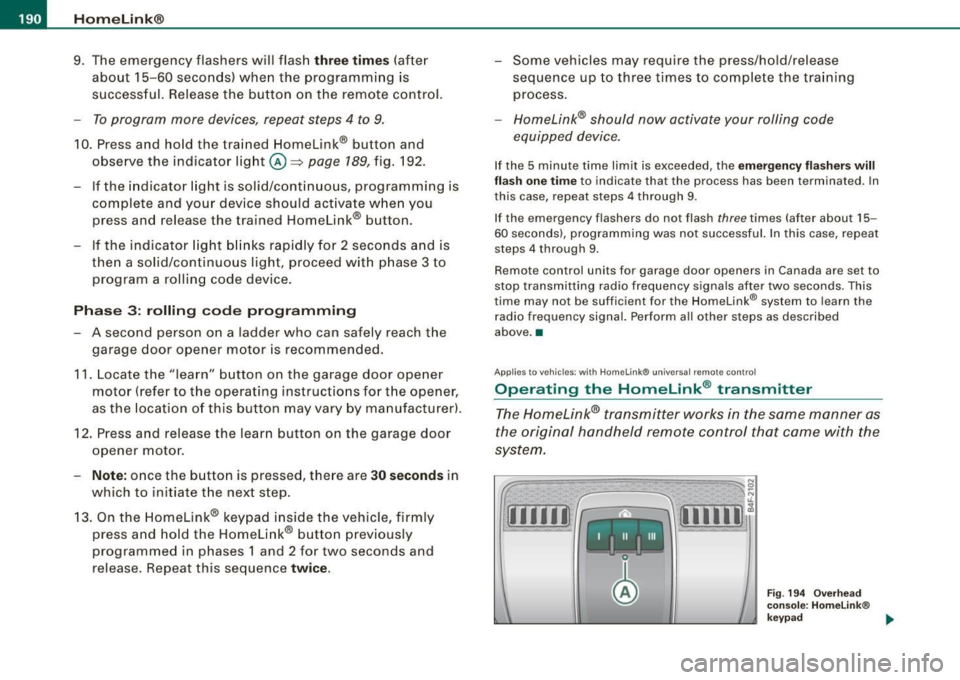
[iiiil~
I -I II I Ill
Fig. 194 Overhead
console: Homelink®
keypad ...
Page 193 of 398
______________________________________________________ H_o_ m.....: e..:L:.; i __ n ;..k __ ® .:.R __ _
-Press the appropriate programmed button G),@ or @
to activate the desired remote control function~
& in
"General information" on
page 188. •
Applies t o ve hicl es: wit h Hom elin k® universal re mote co nt ro l
Reprogramming a single button
A Homelink ® button can be reprogrammed individually
without affecting the other button a/locations.
Programming the overhead keypad
- Press the appropriate Homelink® button unt il the indi
cator light begins flashing slowly.
Programming the bumper mounted transmitter
1. Hold the original remote control at a distance between 0-
5 in. (0-13 cm) from the bumper below the appropriate
headlight for your vehicle (use the sho rtest distance
possible) .
2. Aim the remote control just below the
passenger side
headlight.
3. Press and hold the activation button on the remote control.
4. The emergency flashers will flash
three times (after
about
15-60 seconds) when the programm ing is
successful. Now release the button on the remote
control.
- If the device ut ilizes a rolling code, please follow phase 3
of ~
page 189, "Programming the Homelink® trans
mitter" for rolling code programming.
Controls and equip
ment This procedure
will cause
the existing programming on the
Homelink ® button to be erased! •
App lies t o ve hicles : with Homeli nk® universa l re m ote contro l
Erasing the programming of the Homelink ®
transmitter
When you erase the programming , the programming on
all three of the transmitter channels with be lost!
- Perform steps 1 to 4 as descr ibed on~ page 189, "Phase
1: programm ing the overhead keypad ".
When completed , the Homelin k® system will be in the program
ming mode and is then ready to learn the cod es for remote
controlled devices.
(I) Tips
• Programmed buttons cannot be erased individually.
• For security reasons you ar e advis ed to erase the programming
of the Homelink ® system befo re you sell your vehicle. •
I • •
Page 354 of 398
-Fuses and bulbs Pffl..._ _____________________ _
[ i J Tip s
You are wel l advised to keep a supply of spare fuses in your vehicle .
Fuses with the proper ampere ratings are availab le at your Audi
dea ler. •
Fuse Location , Instrument Panel left
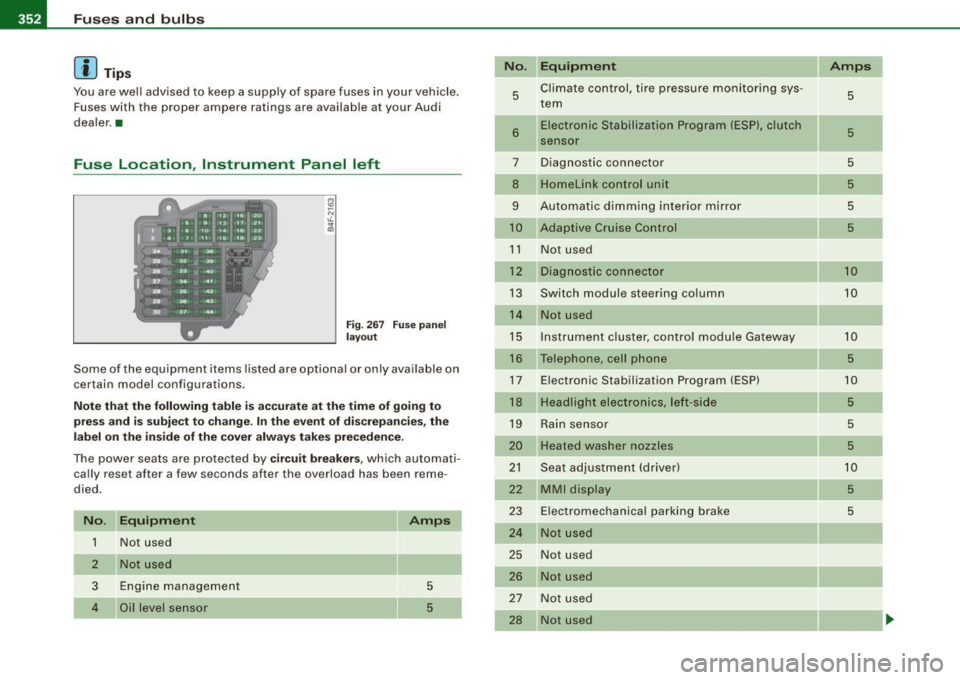
Fig . 267 Fuse pa nel
l ayo ut
Some of the equipment items listed are optional or only ava ilable on
certain model configurations .
Note th at t he fo llo wi ng t able i s acc urat e at th e time of goin g to
pr ess and is subject t o ch ang e. In th e eve nt of d iscrep ancie s, th e
labe l on th e in side of th e cover always ta kes prece de nce .
The power seats are protected by cir cuit br eaker s, which automati
cally reset after a few seconds after the overload has been reme
died.
N o. Equipm ent
1 Not used
2
3
4
Not used
Engine management
Oil level sensor Amps
5
5
No
.
5
6
..
7
8
9
10
1 1
12
13
14
15
16
17
18
19
20
21
22
23
24
25
26
27
28
Equipm ent
Climate cont rol , tire pressure monitoring sys
tem
Electronic Stabilization Program (ESP), clutch
sensor
Diagnostic connector
Homelink control unit
Automa tic dimming interior mirror
Adaptive Cruise Control
Not used
Diagnostic connector
Switch modu le steering column
Not used
I nstrument c luster, control module Ga teway
Telephone, cell phone E lectronic Stabilization Program (ESP)
Headlight electronics, left -side
Rain sensor
Heated washer nozzles
Seat adjustment (driver)
MMI display
E lectromechanica l parking brake
Not used
Not used
Not used
N ot used
Not used Amps
5
5
5
5
5
5
10
10
10
5
10
5
5
5
10
5
5
-
Page 377 of 398
Consumer Information -
----------------
& WARNIN G (continu ed )
ment zone s. Do ing so will in creas e the risk of injur y if airb ags are
trig ger ed in an accident!
• Before you che ck anyth ing in the engine comp artme nt, a lwa ys
re ad and heed all WARN IN GS
=> page 293.
0 Note
• If items other than ge nuine Audi spare parts, add -on equ ipment
and accessory items are used or if repair work is not performed
according to specified methods, this can resu lt in severe damage to
your vehicle's engine and body (such as corrosion) and adverse ly
affect your vehicle's war ranty.
• If emergency repairs must be performed elsewhere, have the
vehic le examined by an authorized Audi dea lership as soon as
possible.
• The manufacturer cannot be held liable for damage which occurs
due to failure to comply with these stipu lations. •
Technical Modifications
Our guidelines must be complied with when technical
modifications ore made.
A lways consult an authorized Audi dealer before starting work on
any modifications.
T his will he lp ensure that vehicle function, performance and safety
are not impaired =>& .
Attempting to work on electronic components and the software used with them can cause malfunctions . Because of the way elec
tronic components are interconnected with each other, such malfunctions can also have an adverse affect on other systems that
are not direct ly involved. This means that you risk both a substantial
reduction in the operational safety of your vehicle and an increased
wear of vehicle parts=>& .
Controls and equip
ment Safety first Vehicle operation
Authorized Audi dealers wi
ll perform this work in a professional and
competent manner or, in special cases, refer you to a pro fessio nal
company that specializes in such modifications .
& WARNING
Improper repair s and modifi cations c an change the way vehicle
s y stem s wo rk and cau se seriou s per sonal injury.
0 Note
If emergency repairs must be performed e lsewhere, have the
vehic le examined by an authorized Audi dea lership as soon as
possible. •
Declaration of Compliance,
Telecommunications and Electronic
Systems
Radio Frequency Devices and Radiocommunication
Equipment User Manual No tic e.
The manufacturer is not responsible for any rad io or TV in terference
caused by unauthorized modifications to this equipment.
De vice s
The following devices each comp ly with FCC Part 15. 19, FCC Pa rt
15.21 and RSS -Gen Issue 1 :
• Adaptive Cruise Contro l
• Convenience key
• Audi side assist
• Cell phone package
• Electronic immobi li z er
• Homelink® universal remote contro l
Vehicle care Do-it-yourself service Tec hn ica l da ta
Page 385 of 398
______________________________________________ A_ l_,_ p _h_ a_ b_e _t_i c_ a _ l _in _ d_e _ x __ lllll
Climate controls
Air distribution ... .... .... ........ 107
Air outlets ..... .. .... .... .... .... 108
Air outlets (rear) .... ...... ... ..... 109
Air recirculation .. .... .... ... .... . 107
AU TO (standard setting) ........ .. . 105
Basic se ttings ... .. ... .... .. .. .... 111
Center ai r vent .... .... ... ... ..... 112
Contro ls ..... .... ... .. .... .. .... 104
Defrosting/defogging ..... ... .... . 107
Descr iption ... ... .... .... ...... .. 102
ECON operation .. ..... .. .... .... . 112
Fan . .... ...... .. .... ..... .. ... .. 106
Heated seats , front ..... .. ...... .. 110
Key coded set ting ................ 102
Recircu lation mode (automatic) ..... 112
Recommended settings ... ... .... . 102
Residual heat .... .... .... ...... .. 105
Setting the temperature ..... . .... . 106
SETUP . ......... .... .... ... .... . 112
Solar operat ion ...... .... .. . .... . 113
Switching on and off ...... .. . .... . 105
Synchronization ...... .... ... .... . 112
Using climate contro l economically . 109
Clock ... .... .... .... .... ... .... .... . 13
Closing Pow er sunroof .... ... ... ... .. ..... 59
Coat hooks . . . . . . . . . . . . . . . . . . . . . . . . . 101
Co ld tire inflation pressure .... ...... . 321
Compass m irror . .... .... ... .... .... . 78
Comp liance ... .. ........ ... .. ...... 375
Consumer Information .. ........ . 203, 372
Contacting NHTSA ....... ... .. .. .... 203
Controls and equip
ment Safety first
Continuously Variable
Transmission (CVTJ D
See multitronic® . ........... ..... 16 1
Conven ience key ... .. .... .... ... .... . 52 Damping
Driver messages ...... .... .... ... 1 20
See Adaptive Air Suspension ...... . 184
Locking vehicle ... .... .... .... .... . 53 Data .. ... .... .... .... ... .... .... ... 369
STAR T button . ..... ........ ...... 118
Data reco rder . ... .... .... .. . .... .. .. 262
Star ting engine .. ... .... ... .. .... 118
Date display ....... .... ........ ... ... 13
STO P button ... .. .... ..... .. ..... 1 19
Switching engine off . ....... .... .. 119
Switching on ignition . ...... .. .... 118
Un lock ing vehic le ........ .... .... . 53 Dayti
me runn ing lights ... .... .... .. 63, 64
Dec laration of compliance
Adaptive Cruise Control .... ....... 375
Audi side ass ist ... .... ...... ... .. 375
Convertible chi ld s eats
Cell phone package ... .... .... .. . . 375
How do I prop erly install a convertible
chi ld sea t in my vehicle? .. ...... . 244 Conve
nience key ...... ... .... .. .. 375
E lec tronic immobil izer . ... .... .. .. 375
Safety instruct ions ... .. ....... .... 244
Homelink® universal remote control 375
Conver tible locking re trac tor
Activating .... ...... .... ..... .... 250 Remote control key ..
.... . .... .. .. 375
de f
Deactivati ng . .... ... .... .... .... . 251
Using to secure a chi ld sa fety seat . 248,
250
Co olan t system ..... .. .. .... .... .... 307
Coo ling System
E xpans ion tank .... ..... .. .... .... 308
Cru ise control What does this mean when it appea
rs in
t he trip odomet er disp lay? .. ... .... 14
De fect ive light bu lb warning ...... ... .. 25
D efrosting/defogging the windows ... . 107
Defrosting /defogging windows ....... . 108
Dete rmin ing cor rec t load li mit .. ...... . 3 26
Changing sp eed .. .... ...... ... ... 125
P resetting your speed ....... .... .. 125 Digita
l clock ...... ..... .... .... ...... 13
Digi ta l compass ... .. .... .... .... .. .. . 78
Switching off .................... 125 D
igita l speedometer . ...... .. .... ..... 25
Switching on .... ... .... ... .. .... 124 D
imensions .. .... .... ... .... .... ... 368
Warning/indicato r lights .. .... .... .. 20 Dipstick
See also Adaptive Cruise Control ..
.. 127 Readi
ng th e dipstick p roper ly ..... . 305
Cruising range ... .... .... .... .... ... . 38 Distance control sys
tem
Cupholder ...... ..... .. .... .... .. 95, 96
See Adaptive C ru ise Contro l ..... ... 127
Vehicle operation Vehicle care Do-it-yourself service Technical data
Page 387 of 398
______________________________________________ A_ l.:.. p _h_ a_ b_e _t_i c_ a _ l _in _ d_e _ x __ _
Environment
Break -in period ... ... . .. .. ..... ... 271
Catalytic converter .... ...... ...... 272
Dispos ing of your vehic le battery ... 315
Driving at high speeds .... .... ... . 273
Dr iving to minimi ze pollution and noise .
273
Fuel ............................ 297
Fuel economy .... .... .... ....... . 273
Leaks under your vehicle ... .. ... .. 301
Letting the vehicle stand and warm up .
274
Proper disposal of drained brake fluid 311
Proper disposal of drained engine coolant ........................ 309
Proper disposa l of drained engine oil 306
Recycling used engine oi l .. .. .. .... 306
Un leaded fuel .................... 295
What should I do with an old battery?
315
EPC
See E lectronic power control ........ 18
ESP
See E lectronic stabi lizat ion p rogram
(ESP) ... ..... ...... .... ..... .... 18
Event Data Recorder (EDR) . ...... .... . 262
Expansion tank ... ... .... ..... .. .... 308
Exterior lighting in the mirror housing ... 66
E yeglasses compartment .... .... .... . 100
Controls and equip
ment Safety first
F
Fan
Radiator .... .... .... .... ...... .. 310
Fastening eyelets .................... 90
Flat tire
Changing .... .... .... .... .... ... 344
Floor mats ......................... 200
Fog lights ...... .... .... ...... ... .. .. 65
Fo lding master key with remote contro l . 41
Foot pedals ........................ 200
For the sake of the e nvi ro nmen t
Gaso line fu mes and the environment 297
Letting your eng ine warm up ...... . 1 17
Reducing engine noise by ear ly
upshif ting ....................... 12
Re fuel ing ..... ... .... .... .... .... 297
Savi ng fuel by early upshifti ng .. .... 12
Using the rear window de fogger ... . 108
Front airbags Description .... ..... .. .... .... ... 219
How they work .... .... .... ....... 224
Front arm rest adjusting . .... ..... .. .... .... .... . 88
Storage compartment .............. 88
Front ashtray .... .... .... .... .... ... . 96
Front fog lights . .... .... .... .... ..... 65
F ront seats .. ............ .... ....... . 80
Adjusting ....................... 197
Child restraints in the front seat .... 217
F ronta l coll isions and the laws of physics
206 Fuel
Additives .. .... .... ... .... .... ... 295
Blended gasoline ...... .... .... ... 295
Consumption ........... .... ...... 38
Fi ller neck .... .... .... ... .... .... 296
Fuel gauge . ...... .... ... .... .... . 14
Gas oline ...... .... ... .... .... ... 295
Gaso li n e additives ..... ... .... .... 296
Low fuel level ..... .... ... .... .. 14, 3 4
Octane rating .. ...... .... .... .... 295
Recommendation .. .... ... .... .... 295
Refuelling .... .... .... ... .... .... 297
Reserve ... .... ... .... ... ... ...... 14
Tank capacity ..... ... .... ...... .. 369
Un locking the fue l filler flap by hand 299
Fuse ar rangement . ....... ... .... .... 35 1
G
Ga rage door opener (Homelink®) ..... . 188
Gas discharge lamps ... ... .... ... ... . 355
Gauges Engine coolant temperature .... ..... 12
Fuel gauge ... ... ....... . .... ..... 14
Speedometer . .... .... ... .... ..... 14
Tachometer ....................... 13
Tr ip odometer .. ....... .... .... .... 14
General illustration Instruments and controls . .... .... .. 11
G lossary of tire a nd loading termi nology . . .
318
G love compartment ... .. .... .... ..... 99
cd change r ... .... .... .... .... .... 99
Valet key function .... .... .... ... .. 44
Vehicle operation Vehicle care Do-it-yourself service Technical data
Page 388 of 398
llffl __ A_l.:,. p _h_ a_ b_e _t _ic _ a_l _in _ d_e _x ____________________________________________ _
Glove compartment -emergency unlocking .
100
Gross Vehic le Weight Rating (GVWRl ... 367
H
Head restraints . . . . . . . . . . . . . . . . . . . . . 199
Adjusting . .... .... ....... ...... . 199
Front seats . . . . . . . . . . . . . . . . . . . . . . . 86
Insta llation and remova l .... ....... 87
Rear seats . . . . . . . . . . . . . . . . . . . . . . . 87
Headlight washer reservoir ........... 316
Headlights . . . . . . . . . . . . . . . . . . . . . . . . . . 63
Adaptive Light .... .... .... ...... .. 66
Defective . . . . . . . . . . . . . . . . . . . . . . . . 25
Front fog lights . . . . . . . . . . . . . . . . . . . 65
Headlight range control defective .. . 35
Switching off ..................... 63
Switching on . .................. .. 63
Washer system . . . . . . . . . . . . . . . . . . . 73
Xenon headlights . ...... ... .. .... . 63
Heat ed outside mirrors . . . . . . . . . . . . . . . 76
Heated seats
Front ............. .... ........ .. 110
Rear ..................... ...... 110
Heated steering wheel . . . . . . . . . . . . . . . 111
Heat ed washer jets
Wiper and washer system . . . . . . . . . . 71
Heavy clothing and safety belts .. .... . 208
High beam . . . . . . . . . . . . . . . . . . . . . . . 63, 67
Warning/indicator lights ........... 20
High voltage warning label . ........ .. 366
Homelink® universal remote control .. 188 Hood
Opening 300 Interior
lights ..... ... . .... .. . .. .. .... 68
Rear .. ..... ....... .... ... .... . 68, 69
Release lever .. ...... .... ..... ... 300 Intermittent wiping
Horn .. ...... ............ ....... .... 11
How many a irbags does my vehicle have? ..
222
How often should I check my tire pressures?
324
How safety belt pretensioners work .... 213
Hydroplaning .... .... .... .... ...... 328
I
Ignition key ........................ 116
Ignition lock .. .... .... .... .... .... .. 116
Malfunction .. .... ...... .... ... 33, 36
Ignition lock posit ions .......... ..... 116
Immobilizer ......................... 14
Important things to do before driving .. 195
Improperly worn safety be lts ......... 213
Indicator lights ...... ....... ....... .. 16
Airbag system ............... 226, 227
PASSENGER AIR BAG OFF ......... 227
Infant seats .......... .... ....... ... 243
How do I properly install an infant seat in my veh icle? ........ .... ... .. ... 243
Safety instructions ............... 243
Inside rear view mirror . ............. .. 75
Installing child safety seats
Safety belts . . . . . . . . . . . . . . . . . . . . . 248
Instrument cluster illumination . ... .... 16
Instruments and controls . . . . . . . . . . . . . 12
General illustration ................ 11 Rain sensor
... .... .... ...... .... . 71
J
Jack 342
Jumper cables ...................... 358
Jump-starting 357
K
Key ................................ 41
Battery replacement ............... 43
Coded settings ................... 102
Convenience opening and closing of windows .. ........ ......... .... 57
Emergency key ............ .... .... 41
Key replacement . . . . . . . . . . . . . . . . . . 41
Mast er key ................. ...... 41
Valet key .. ............ ...... ... .. 41
Key coded settings
Climate controls . . . . . . . . . . . . . . . . . 102
Key less entry remote control ... ........ 42
Kick -down
multitronic® ... .... .... ... .... ... 165
tiptronic® ............ ........ ... 158
L
Lane assist
Activating and deactivating 143
Description . . . . . . . . . . . . . . . . . . . . . . 143