key AUDI S6 2010 Owners Manual
[x] Cancel search | Manufacturer: AUDI, Model Year: 2010, Model line: S6, Model: AUDI S6 2010Pages: 368, PDF Size: 86.82 MB
Page 4 of 368
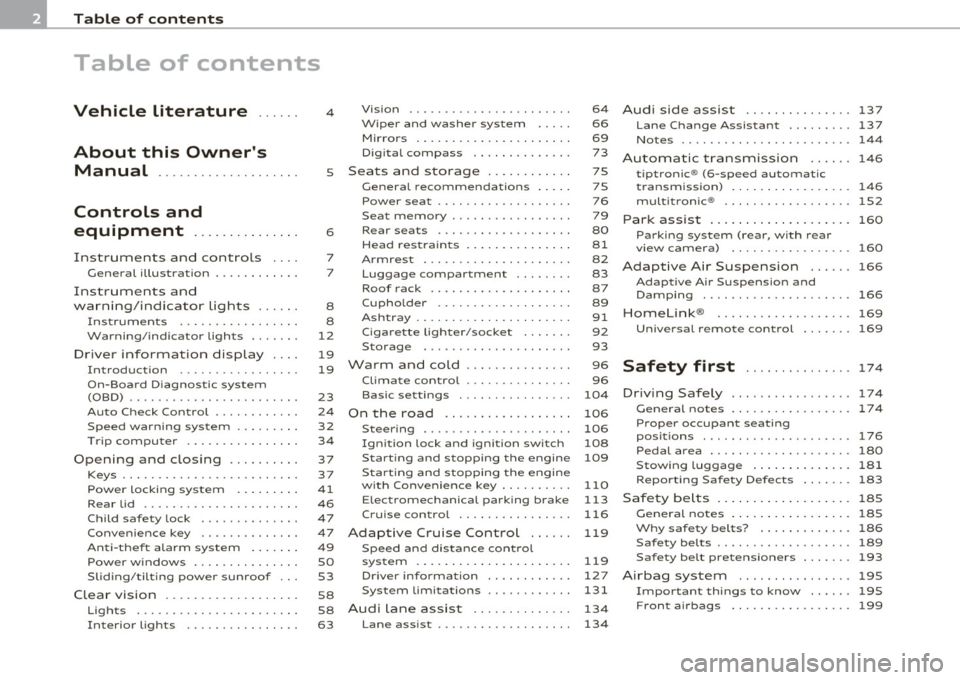
Table of contents
Table of contents
Vehicle literature ..... .
About this Owner's Manual .......... ....... .. .
Controls and
equipment .............. .
Instruments and controls ... .
General illustration ........... .
Instruments and
warning/indicator Lights ..... . Instruments ... ... .......... .
Warning/indicator ligh ts ..... . .
Driver information display ... .
Introduction ...... ......... . .
On-Board Diagno stic sy ste m
(OBD) . ..... ....... .......... .
Auto Ch eck Control ........... .
Speed warning system ........ .
Tr ip computer ............ ... .
Opening and closing ......... . Keys ............ ............ .
Power locking system ........ .
Rear lid .... ..... ............ .
Child safety Lock ............. .
Convenience key ............. .
Anti-theft alarm sys tem ...... .
Power windows .............. .
Sliding/tilting power sunroof .. .
Clear vision .. .... ............ .
L ights ... .. ........ ......... .
Interior ligh ts ... ... .. ....... .
4
5
6
7
7
8
8
12
19
19
23
24
32
34
37
3 7
41
46
47
47
49
so
53
58
58
63 Vi
sion .................... .. .
Wiper and washer system Mirrors ... ............... ... .
Digital compass ............. .
Seats and storage ........ ... .
General recommendations .... .
Power seat . ................. .
S eat m emory ............... . .
Rear sea ts ... ... .. .......... .
Head res train ts ........... ... .
Armrest .. .. ................ .
Luggage compar tm en t ..... .. .
Roof ra ck . .... .... .......... .
Cupholder .................. .
Ashtray .. ................... .
Cigarette Lighter/socket ...... .
S torag e ................ .. .. .
Warm and cold .... .......... .
Cl imate control ....... ... .... .
Ba sic se tt ings ............... .
On the road ... .... .......... .
S tee ring .................... .
Igni tion lock and ignition swi tch
Start ing and stopp ing the engine
Start ing and stopping the engine
with Convenience key ......... .
E lectromechanical parking brake
Cru ise control ............... .
Adaptive Cruise Control ..... . Speed and distance con trol
sys tem .............. ....... .
Dr iver information ........... .
Syst em Limitations ........... .
Audi Lane assist ........... .. .
Lane ass ist .... .. ............ . 64
66
69
73
75
75
76
79
80
81
82
83
87
89
91
92
93
96
96
104
106
106
108
109
110
113
116
119
119
12 7
131
134
134 Audi side assist ...............
137
Lane Change Assistant ......... 137
No tes ....... .... ............. 144
Automatic transmission 146
tiptronic ® (6-sp eed au toma tic
tr ansmission) . . . . . . . . . . . . . . . . . 146
multitronic ® ............ ...... 152
Park assist . . . . . . . . . . . . . . . . . . . . 160
Park ing system (rear, with rear
view camera) . . . . . . . . . . . . . . . . . 160
Adaptive Air Suspension .. ... . 166
Adaptive Air Su spens ion and
Damping . . . . . . . . . . . . . . . . . . . . . 166
Homelink ® ............. ... ... 169
Univ ersal r emot e control 169
Safety first ............ ... 174
Driving Safely .. ............... 174
G eneral n otes ......... ........ 174
Proper occupant seating
po sition s . . . . . . . . . . . . . . . . . . . . . 176
Pedal area . . . . . . . . . . . . . . . . . . . . 180
S towing Luggage .............. 181
Report ing Safety Defects . . . . . . . 183
Safety belts . . . . . . . . . . . . . . . . . . . 185
General no tes . . . . . . . . . . . . . . . . . 185
Why safety belts? ............ . 186
Safe ty b elts . . . . . . . . . . . . . . . . . . . 189
Safety bel t pre ten sioner s . . . . . . . 193
Airbag system ................ 195
Im portan t thing s to kn ow ...... 195
F ront airbags .............. ... 199
Page 9 of 368
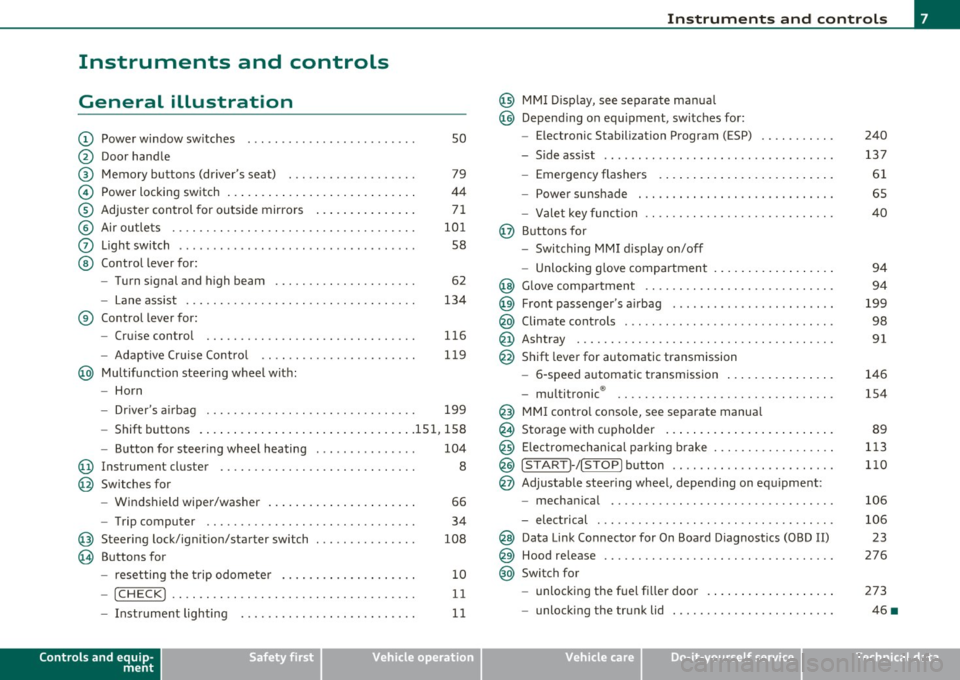
Instruments and controls
General illustration
(D Power window switches . . . . . . . . . . . . . . . . . . . . . . . . . 50
@ Door handle
@ Memory buttons (driver's seat) . . . . . . . . . . . . . . . . . . . 79
© Power locking switch . . . . . . . . . . . . . . . . . . . . . . . . . . . . 44
® Adjuster control for outside mirrors . . . . . . . . . . . . . . . 71
© Air outlets . . . . . . . . . . . . . . . . . . . . . . . . . . . . . . . . . . . . 101
0 Light switch . . . . . . . . . . . . . . . . . . . . . . . . . . . . . . . . . . . 58
@ Control lever for:
- Turn signal and high beam . . . . . . . . . . . . . . . . . . . . . 62
- Lane assist . . . . . . . . . . . . . . . . . . . . . . . . . . . . . . . . . . 134
® Control lever for:
- Cruise control . . . . . . . . . . . . . . . . . . . . . . . . . . . . . . . 116
- Adaptive Cruise Control . . . . . . . . . . . . . . . . . . . . . . . 119
@ Multifunction steering wheel with:
- Horn
- Driver 's airbag . . . . . . . . . . . . . . . . . . . . . . . . . . . . . . . 199
- Shift buttons ...... .. .. .... ........ .......... 151, 158
- Button for steering wheel heating . . . . . . . . . . . . . . . 104
@ Instrument cluster . . . . . . . . . . . . . . . . . . . . . . . . . . . . . 8
@ Switches for
- Windshield wiper/washer . . . . . . . . . . . . . . . . . . . . . . 66
- Trip computer ............... .. .. .. .. ....... .
@ Steering lock/ignition/starter switch ... .. ......... .
@ Buttons for
- resetting the trip odometer .......... .. .. .. ... .
- !CHECK] .... .... .. .... .. .... ............... .
-Instrument lighting . ....... .... .. .. .... .. .. . .
Controls and equip
ment Safety first
34
108
10
11
11
Instruments and controls
@ MMI Display, see separate manua l
@ Depending on equipment, switches for:
- Electronic Stabili zation Program (ESP)
- Side assist .. ... . .... .. .. .. .. .. .... .. .. .. ... .
- Emergency flashers .. .... .. .. .. ............. .
- Power sunshade . ... ... .. .. .. .. .... .. .. ... .. .
- Valet key function .. .. .. .. .... ....... ...... .. .
@ Buttons for
- Switching MMI display on/off
- Unlocking glove compartment
@ Glove compartment ...... .. .. .. .... .. ......... .
@ Front passenger 's airbag ............... ... .. .. . .
@ Climate controls ... .. .. .. .. .. .... .......... ... .
@ Ashtray .............. .. .... .. .. .. .. .... ..... .
@ Shift lever for automatic transmission
- 6-speed automatic transmission ....... .. ... ... .
- multitronic ® ....................... .. .... .. .
@ MMI contro l console, see separate manua l
@ Storage with cupholder ... .. ... .............. .. .
@) Electromechanical parking brake .............. .. . .
@ ISTAR T]-/ISTOP] button ........ .. ... .......... .
@ Adjustable steering wheel, depending on equipment :
- mechanical ............. .. .. .. ............. .
- electrical . ... ... .. .. .. .. .. .. .. .. .. ....... .. .
@ Data Link Connector for On Board Diagnostics (OBD II)
@ Hood release .......... .. .... .. .. .. .. ......... .
@ Switch for
unlocking the fuel fi ller door .............. .... .
- unlocking the trunk lid . .. ........ .. ... .. .. .. . .
Vehicle care
240
137
61
65
40
94
94
199
98
91
146
154
89
113
110
106
106 23
276
273
46 •
Technical data
Page 13 of 368

0 Note
Never run the tan k comp letely d ry . An irregular s upply of f ue l can
cause engine misfiring and fue l cou ld enter the ex ha ust system . T he
c ata lytic co nve rter co ul d the n overhea t and be damaged .•
[ C HECK ) button
You can per form differen t functions wi th this button.
Fig . 5 CHE CK button
i n the in strume nt
clu ste r
Th e [ C H ECK] bu tton perfo rms the fo llowing func tions :
Switching on the clock and odometer
With the ignition tu rned off, the odome ter read ing and the dig ita l
clock with date d isplay can be switched on for abo ut 30 seconds by
pressin g the [
CHECK ] button ~ fig . 5.
Starting the Auto-Check sequence
The Auto-Check system~ page 2 4 constantly monitors ce rtain indi
vidual functions and components of the vehicle when the ignit ion is
tur ned on and w hen the vehicle is movi ng.
With the ignition turned on, yo u can sta rt the "A uto-Check sequence"
by pressing the
!CHECK ] button. You can perform an Auto -Check
sequence whe n the veh icle is st ationa ry a nd the ignition is turned on
or when the vehicle is moving not faster than 3 mph (5 km/h) .
Control s and equ ip
m ent Vehicle OP-eration
Instruments and warning /indicator lights
The nu mber of keys programmed to the vehicle is a lso displayed . The
di splay
3\3 indic ates th at three keys have been programmed . T his
allows you to make sure you have received all of the keys w hen you
purc hase a used ve hicle.
For example, if you o nly receive two keys, yo u sho uld ta ke tho se keys
to your a uthorized Audi dealer to have the missing key deactivated so
i t ca nn ot be used. You sh ould also re port the mis sing key to you r
insurance compa ny.
Calling up the driver information
A ye llow or red symbol appears in the instrument cluster display,
us ua lly w it h a dr ive r mes sage . T he driver message display di sappe ars
after about 5 seco nds. The driver message can be displayed again by
br iefly p ressing t he
[CHECK ] but to n.
Setting the speed warning
By press ing t he I CH ECK] button br iefly, you can set t hreshold 1 of
the speed warning while yo u are driving ~
page 33. By maintaining
pressure on the
I CHECK ] button, you de lete the warning th reshol d.•
Instrument cluster illumination
The basic brig htness of the illumination for the inst ru
ments, the center console and the display can be
a dju sted.
Fig. 6 Instrument
clu ste r illum inat ion .,,_
Vehicle care Do-it-yourselt service iTechnical data
Page 26 of 368
Driver information display
in. WARNING
Always observe the posted speed limits and adjust your speed to
s uit prevailing road, traffic and weather condition s. Never drive
your vehicle fa ster than the maximum speed rating of the tires
installed. •
Auto Check Control
Introduction
The Auto-Check control monitors the function o f ce rtain vehicle
featu res and components.
It simp ly makes su re t hese featu res and
components are work ing properly. The Auto-Check control works as
long as the ignition is on, as we ll as whe neve r th e veh icle is d riven.
If a component is malfu nctioning or if the need for an urgent repair
has been de tected, this wi ll appear in t he instrument clus ter display .
Yo u will also hea r an a udible warning to ne. The disp lays are colo r
coded in e ither red or yellow depend ing on their level of prior ity.
A red symbo l me ans
Danger , a yellow sym bol indic ates Warning . In
certain situations, information message for the driver appear in addi
t ion to the red and yellow sym bols.
Function test: automatic transmission
T he Auto-Check Contro l w ill a uto matic ally perform a test each t ime
you switch on the ignit ion. W ith the selector lever in
P or N , the
f ollowin g messa ge a ppears in the displ ay :
When stationary apply foot brake while selecting gear .
When you a se lect a d ifferent gear (for example : R, D , etc .), the
message w ill disappea r and the Au to-C hec k function is d isp layed.
If there is a ma lfunction, then the malfunct ion message will appear
a bou t 15 seco nds after t he you st art the vehicle . At t he same time
you will hea r a wa rn ing tone .•
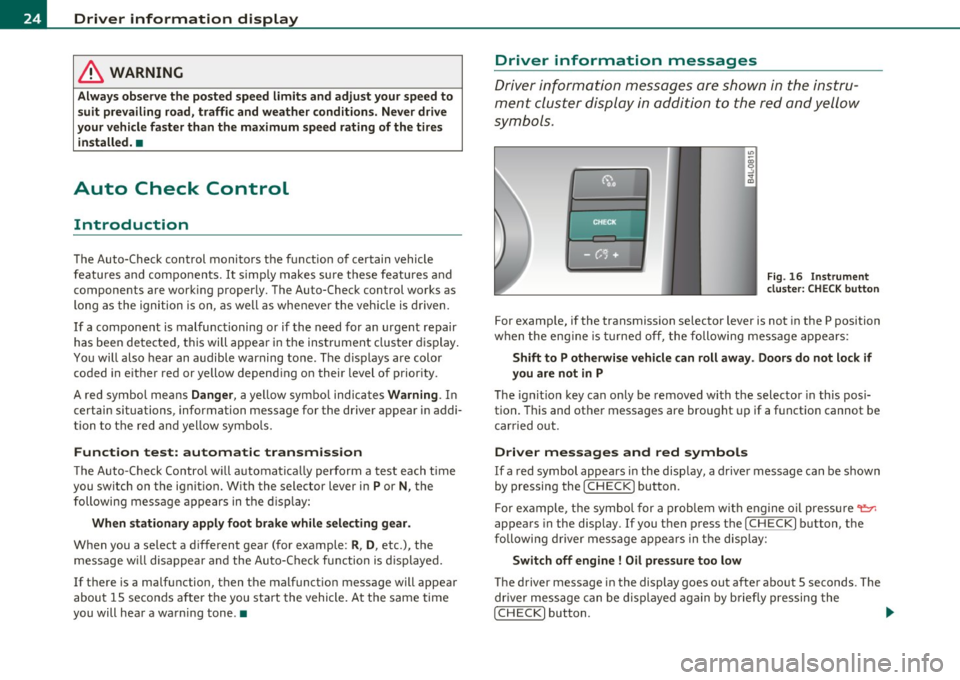
Driver information messages
Dr ive r inf orm ation messa ges a re show n in the instru
men t clust er dis play i n addition to the red a nd yell ow
sym bols .
Fig . 16 In st rument
cluste r: CHE CK button
For examp le, if the transmiss ion se lector lever is not in the P position
w hen the eng ine is tu rne d off, the following mess age app ears :
Shift to P otherwise vehicle can roll away. Doors do not lock if
you are not in P
Th e ig nit io n key can on ly be removed w ith t he selecto r in this posi
tion. This and other messages are brought up if a funct io n cannot be
c arr ied out.
Driver messages and red symbols
If a red symbol appears in the disp lay, a dr ive r message can be s hown
by pressing the [ CHECK] button .
F or e xample, t he symbol for a prob lem w ith e ngine oil press ure
'l:::r.
appea rs in the display. If you t hen p ress the I CHECK ] b utton, the
f ollowi ng dr iver me ss a ge ap pea rs in t he disp lay:
Switch off engine ! Oil pressure too low
The driver message in the display goes out afte r abo ut 5 seconds . The
dr ive r mes sage can be di spla yed a gain by b riefly p ressing the
[CHECK ] button. .,,.
Page 31 of 368
Ignition Lock malfunction ~
A malfunction in the ignition lock must be repaired immediately .
If the .Pe symbol in the display blinks, there is a malfunction
in the electronic ignition lock. An additional driver message
can also be displayed by pressing the
[CHECK ] button:
Ignition lock defecti ve . Contact wor kshop!
- Do not turn the engine off.
- Drive immediately to an authorized Audi dealer to have
the malfunct ion correc ted.
If the re is a malfunction in the e lectronic ignition lock, the ignit ion
cannot be turned
off . Drive immediately to an authori zed Audi dealer
to have the cause of the mal function corrected.
On vehicles with Convenience key* , the eng ine should not be switched
off using the [STOP] button because the engine cannot be started
again afte r the ign ition is switched off .•
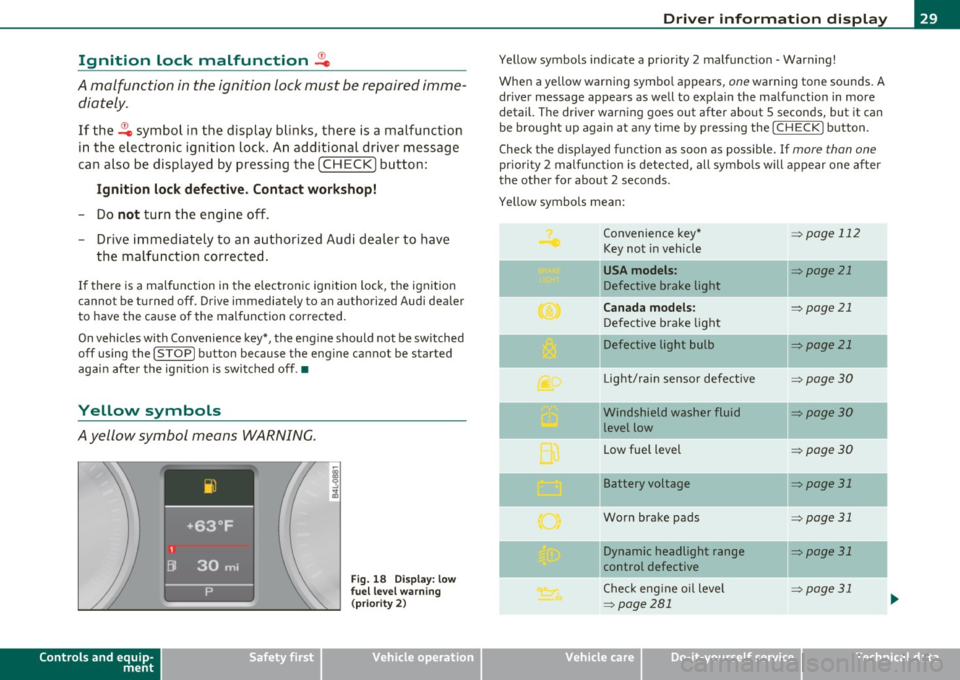
Yellow symbols
Ayellow symbol means WARNING.
Controls and equip
ment Safety first
Fig.
18 Disp la y : lo w
f u el l evel warning
(p rio ri ty 2)
Dri ver information display
Yellow symbols ind icate a prior ity 2 malfunct ion - Warning!
When a yellow warning symbo l appears,
one warning tone sounds. A
dr iver message appears as well to expla in the malfunction in more
detail. The driver warning goes out after about 5 seconds, but it can
be brought up again a t any time by pressing the
I CHECK] button .
Check the displayed function as soon as possible . If
more than one
pr iori ty 2 malfunction is detected, all symbo ls will appear one after
the other for about 2 seconds.
Yellow symbols mean:
Convenience key*
=> page 112
Key not in vehicle
-
USA models : => page 21
Defective brake light
Canada models : => page 21
Defective brake light
Defective light bulb
=> page 21
L ig ht/rai n sensor defective :::>page 30
Windshield washer fluid =:>page 30
level low
Low fue l level
=:> page30
II Battery voltage => page 31
-
Worn brake pads => page 31
II Dynamic headlight range => page 31
control defective
-
Check engine oil leve l => page 31
=> page 281
..,
Vehicle care Technical data
Page 32 of 368
Driver information display
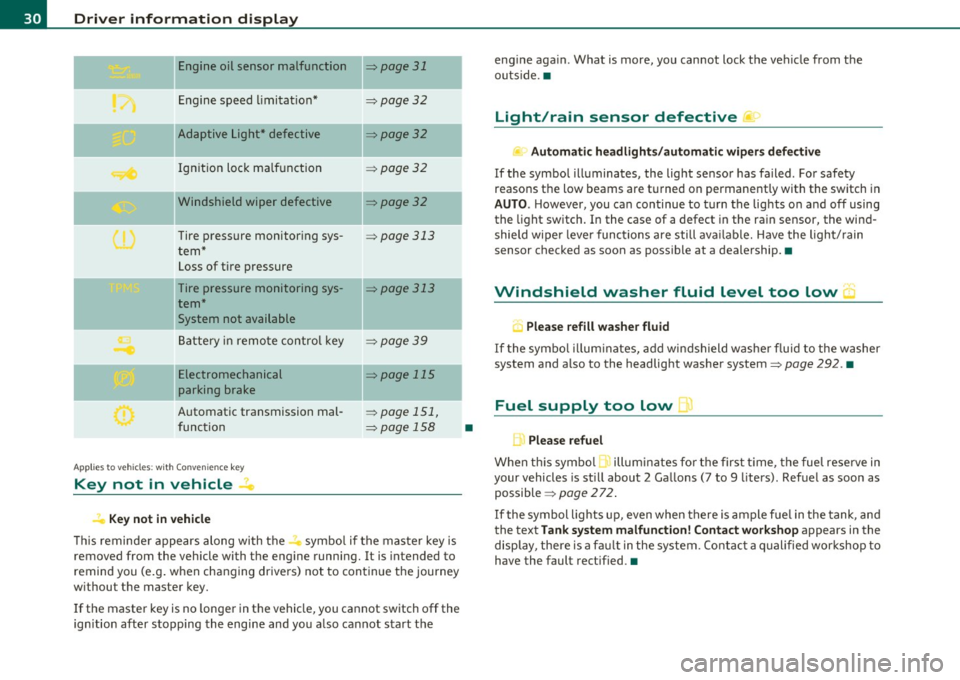
Engine oil sensor malfunction :::::, page 31
._ --
Engine speed limitation* :::::, page 32
-- -Adaptive Light* defective :::::, page 32
Ignition lock malfunction :::::, page 32
--Windshield wiper defective :::::, page 32
Tire pressure monitoring sys
tem*
Loss of tire pressure
Tire pressure monitoring sys
tem*
System not available
Battery in remote control key
--
=> page 313
:::::, page 313
:::::, page 3 9
Electromechanical :::::, page 115
parking brake
Automatic transmission mal
function
Ap plies to vehicles: w ith Conven ience key
Key not in vehicle
Key not in vehicle
:::::, page 151,
=> page 158
-
-
This reminder appears along with the...., symbol if the master key is
removed from the vehicle with the engine running. It is intended to
remind you (e.g. when changing drivers) not to continue the journey
without the master key.
If the master key is no longer in the vehicle, you cannot switch off the
ignition after stopping the engine and you also cannot start the
•
engine again . What is more, you cannot lock the vehicle from the
outside. •
Light/rain sensor defective )
Automatic headlights/automatic wipers defective
If the symbol illuminates, the light sensor has failed . For safety
reaso ns the low beams are turned on permanently with the switch in
AUTO. However, you can continue to turn the lights on and off using
the light switch. In the case of a defect in the rain sensor, the wind
shield wiper lever functions are still available. Have the light/rain
sensor checked as soon as possible at a dealership. •
Windshield washer fluid level too low 5
, Please refill washer fluid
If the symbol illuminates, add windshield washer fluid to the washer
system and also to the headlight washer system:::::,
page 292. •
Fuel supply too low )
L Please refuel
When this symbol 1. illuminates for the first time, the fuel reserve in
your vehicles is still about 2 Gallons (7 to 9 liters). Refuel as soon as
possible :::::,
page 272.
If the symbol lights up, even when there is ample fuel in the tank, and
the text
Tank system malfunction! Contact workshop appears in the
display, there is a fault in the system . Contact a qualified workshop to
have the fault rectified.•
Page 39 of 368

Opening and closing
Keys
Key set
Fig. 23 Key set
© Ma ster key with remote control
You can centrally lock a nd u nlock your ve hicle and start the eng ine
with the master key with remote contro l.
@Valet key
The va let key only fi ts the lock in the d river's door and the ig nition
lock . If you have to leave the key with somebody e lse, you are well
advised to turn over the vale t key only .
Be aware tha t the rear lid a nd g love compartment can be opened
from inside the vehicle using the re lease buttons. It is therefore best
t o activa te the vale t key function to preven t una uth o rized access to
the glove compartment and the luggage compartment when
someone else h as charge of your vehicle::::>
page 40.
© Emergency key
The emergency key is only for tempo rary use if the vehicle key should
be lost or misplaced =>
&.
Controls and equip
ment Safety first
Opening and closing
Key replacement
If you lose a key, contact your a
uthorized A udi dea ler immediately to
have t he
lost key d isab led. Be sure to bring all you r keys wi th yo u.
Registered keys
You can chec k to f ind out how many keys have been reg iste red to yo ur
vehicle . Therefore, w hen b uy ing a used vehicle, make sure to get all
of the remote keys be long to it .
Calling up the registered keys=>
page 11.
Da ta in the master key
During driving, serv ice and ma intenance- relevant data is continu
o u sly sto red on yo ur maste r key. Your Aud i serv ice adviser c an re ad
out this data and tell you about the work your vehicle needs. This a lso
applies to vehicles wi th Co nvenience key *.
& WARNING
• Do not leave your vehicle unattended with the key in the igni
tion lock. Entry by unauthorized persons could endange r you or
re sult in theft or dam age the vehicle. Alway s lock all doors and
take the key.
• Do not leave children unattended in the vehicle, especially with
access to vehicle keys. Unguarded access to the keys p rovides chil
dr en the opportunity to start the engine and /or activate vehicle
systems such as the power windows etc . Unsupervised operation
of any vehicle system by children can result
in serious injury.
[ i ] Tips
• If you open t he dr iver 's door wi th the key left in the ignit ion lo ck,
a ch ime will sound . This is your reminde r to remove the key and lock
the doo r.
IJ),,,
Vehicle care Technical data
Page 40 of 368
Opening and closing
• For security reasons, replacement keys are only available from
Audi dealers. •
Master key with remote control
The remote control allows you to lock or unlock the
vehicle electronically.
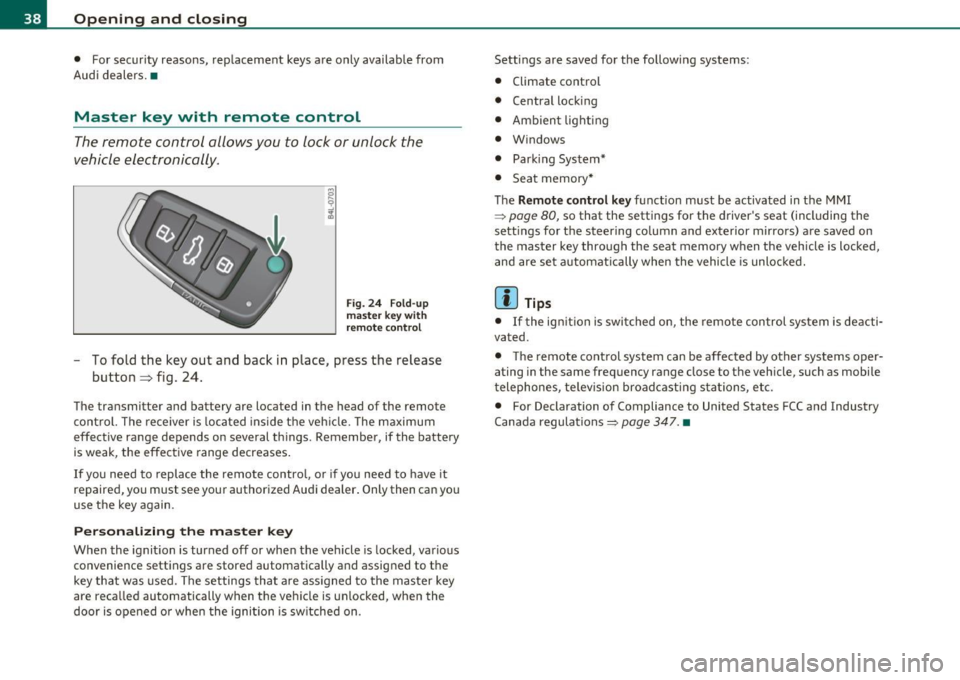
Fig. 24 Fold-up
master key with
remote control
-To fold the key out and back in place, press the release
button~ fig. 24.
The transmitter and battery are located in the head of the remote
control. The receiver is located inside the vehicle. The maximum
effective range depends on several things . Remember, if the battery
is weak, the effective range decreases.
If you need to replace the remote contro l, or if you need to have it
repaired, you must see your authorized Audi dealer. Only then can you
use the key again.
Personalizing the master key
When the ignition is turned off or when the veh icle is locked, various
convenience settings are stored automatically and assigned to the
key that was used. The settings that are ass igned to the master key
are recalled automatically when the vehicle is un locked, when the
door is opened o r when the ignition is sw itched on. Settings are saved for the following systems:
•
Climate control
• Central locking
• Ambient lighting
• Windows
• Park ing System*
• Seat memory*
The
Remote control key function must be activated in the MMI
=> page 80, so that the settings for the driver's seat (including the
sett ings for the steering column and exterior mirrors) a re saved on
the master key through the seat memory when the vehicle is locked,
and are set automat ically when the vehicle is unlocked.
[ i ] Tips
• If the ignit ion is switched on, the remote control system is deacti
vated.
• The remote control system can be affected by other systems oper
ating in the same frequency range close to the vehicle, such as mobile
telephones, telev isio n broadcasting s tations, etc.
• For Declaration of Compliance to United States FCC and Industry
Canada regulations:=>
page 347. •
Page 41 of 368

Check Light in the master key
The check light in the master key provides information
about different conditions.
Check light functions in the master key :
Vehicle within range of the key
Fig . 25 C heck lig ht in
the m aster k ey
If the vehicle is w ith in range of the key, the check light comes on
briefly once w hen a button is pressed.
Vehicle outside the range of the key
If the veh icle is outside t he range of the key, the c hec k light comes on
briefly once and then shows the status of the vehicle door locks:
• If the light is fl as hi ng q uickly, the veh icle is not locked.
• If the light is f lashing slow ly, the vehicle is locked .
State of master key battery
If the check light does not come on, the battery is dea d and has to be
replaced . I n addition, when the battery is dead the symbol appea rs
i n the instrument cluste r display as well as the message :
Please replace ma ster ke y battery
Battery replacement~ page 39.
Con tro ls a nd e quip
m en t Vehicle
OP-eration
Opening and closing
(I) Tips
Please note that the c urrent state of the vehicle doo r locks can only
be recalled wit h the master key t hat was last used to lock the vehicle.
It is poss ib le tha t a d ifferen t state is shown fo r the door lo cks on the
other master key which is not the same as that of the vehicle .•
Master key battery replacement
Each mas ter key contains a battery hous ed under th e
cover.
Fi g. 26 Master key:
o pe ning the c ove r
We reco mmend having the ba ttery chang ed by an au thori zed
dealer ship . However , if you wi sh to replace th e dead b atte ry
yourse lf, proc eed as follows :
- Pry apart the base~ fig. 26 @and the
cover @carefully
with a c oin.
- Remove the cover (arrow).
- Remove the dead battery from the cover .
- Install th e new ba ttery . Please make c ertain that the"+"
sign on t he ba ttery faces down . Correct po lar ity is shown
o n the cover. .,,.
Vehicle care Do-it-yourselt service iTechnical data
Page 42 of 368
Open ing and closing
- Place the cover w ith the new battery on the key base and
press both parts together.
c£> For the s ake of the environment
Dispose of dead batteries proper ly so as not to po llute the envi ron
me nt.
00 Tips
The replacement battery must be the same specification as the
orig inal. •
Electronic immobilizer
The immobilizer helps to prevent unauthorized use of
your vehicle.
A compu ter chip inside you r key au tomatically deactivates the e lec
tron ic immob ilizer when you insert the key in the ignition lock, or on
vehicles with Convenience key*, when the key is inside the vehicle.
When you remove the key from the ign ition lock, or on veh icles with
Conven ience key, when you remove the key from the vehicle, the elec
tron ic immobil izer is a utomat ica lly activated once again.
& WARNING
A lw ays ta ke the k ey with you when you l ea ve the vehicle . Th e key
c an di sa rm the e lect roni c engine immobilizer and pe rmit an u nau
tho riz ed p erso n t o start the eng ine a nd enable operati on of the
ve hicle sys tems su ch as p owe r w indo w or powe r su nroof* l eading
to serious perso nal injur y.
00 Tips
• The immobilizer prevents una uthorized use of the vehicle . The
vehicle cannot be started if an unauthorized key is used . The vehicle may not start if another rad
io device such as a key for another vehicle
or a transponde r is located on the key r ing.
• For Declaration of Compliance to United States FCC and Industry
Canada regulations =>
page 347. •
Valet key function
The valet key function prevents unauthorized persons
from opening the glove compartment or rear lid.
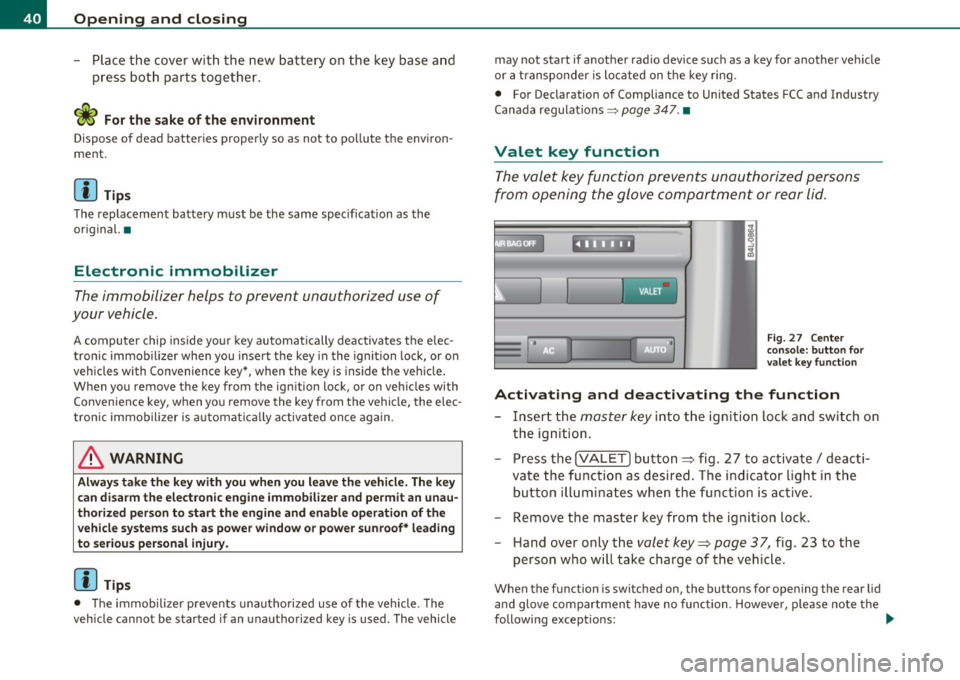
Fi g. 27 Ce nter
co n sole: but ton for
valet key functio n
Activating and deactivating th e function
- Insert the master key into the ignition lock and switch on
the ignition.
- Press the
!VALET] bu tton ~ fig . 27 to activate/ deacti
va te the func tion as desired . The indicator light in the
butto n illuminates when the function is active.
- Remove the master key from the ignition lock.
- Hand over only the
valet key~ page 37, fig . 23 to the
person who will take charge of the vehicle .
When the function is switched on, the buttons for opening the rear lid
and glove compartment have no function. However, p lease no te the
following except ions: ._