sensor AUDI S6 2010 Owners Manual
[x] Cancel search | Manufacturer: AUDI, Model Year: 2010, Model line: S6, Model: AUDI S6 2010Pages: 368, PDF Size: 86.82 MB
Page 14 of 368
Instruments and warning /indicator lights
- Press the"+" button to increase the brightness during the
hours of darkness.
- Press the"-" button to decrease the brightness during the
hours of dark ness.
A light sensor in the instrument cluster contro ls the illumination for
the instrument cluster, the center console and the displays. In a
br ight env ironment, using the buttons to change the br ightness has
no effect .
[ i ] Tips
The illumination for the instrument cluster lights up whenever you
switch on the ig nition with the vehicle head lights off. As the daylight
fades, the instrument cluster illum inat ion likewise d ims automati
cally and w ill go out completely when the outside light is very low.
Th is feature is meant to remind you to sw itch on the headlights when
outside light conditions become poor. •
Warning/indicator lights
Overview
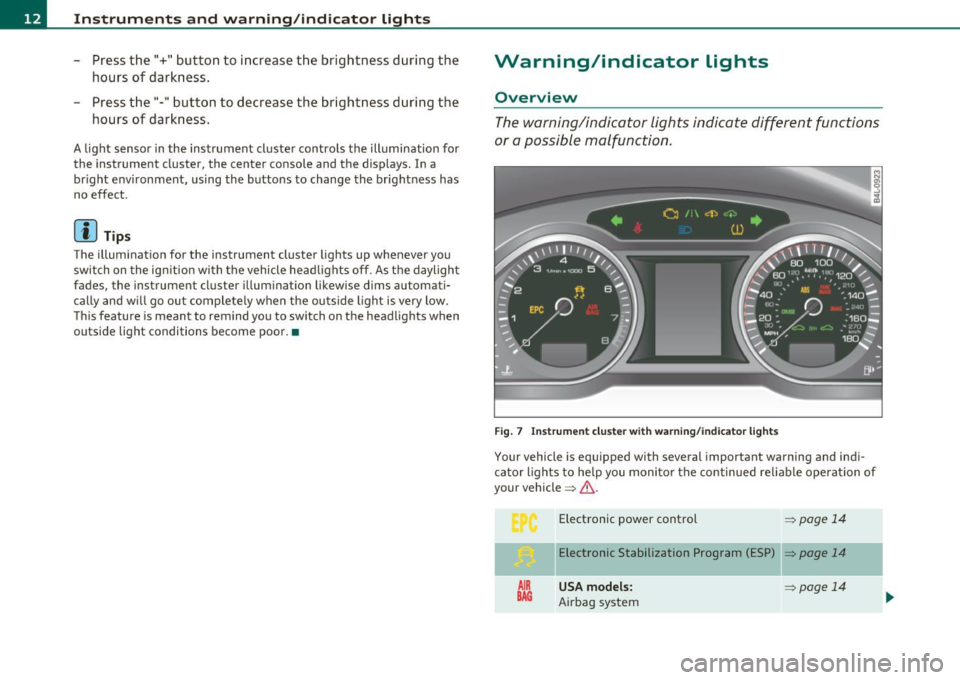
The warning/indicator lights indicate different functions
or a possible malfunction .
Fig . 7 Instr um ent cluste r w ith warn in g/ indicato r lig hts
Your vehicle is equipped with several important warning and ind i
ca tor lights to he lp you moni to r the continued re liable operat ion of
your vehicle =>& .
AIR
BAG
Electronic power control => page 14
Elect ronic Stabilization Program (ESP) => page 14
USA models: ~page 14
Airbag system
Page 31 of 368
Ignition Lock malfunction ~
A malfunction in the ignition lock must be repaired immediately .
If the .Pe symbol in the display blinks, there is a malfunction
in the electronic ignition lock. An additional driver message
can also be displayed by pressing the
[CHECK ] button:
Ignition lock defecti ve . Contact wor kshop!
- Do not turn the engine off.
- Drive immediately to an authorized Audi dealer to have
the malfunct ion correc ted.
If the re is a malfunction in the e lectronic ignition lock, the ignit ion
cannot be turned
off . Drive immediately to an authori zed Audi dealer
to have the cause of the mal function corrected.
On vehicles with Convenience key* , the eng ine should not be switched
off using the [STOP] button because the engine cannot be started
again afte r the ign ition is switched off .•
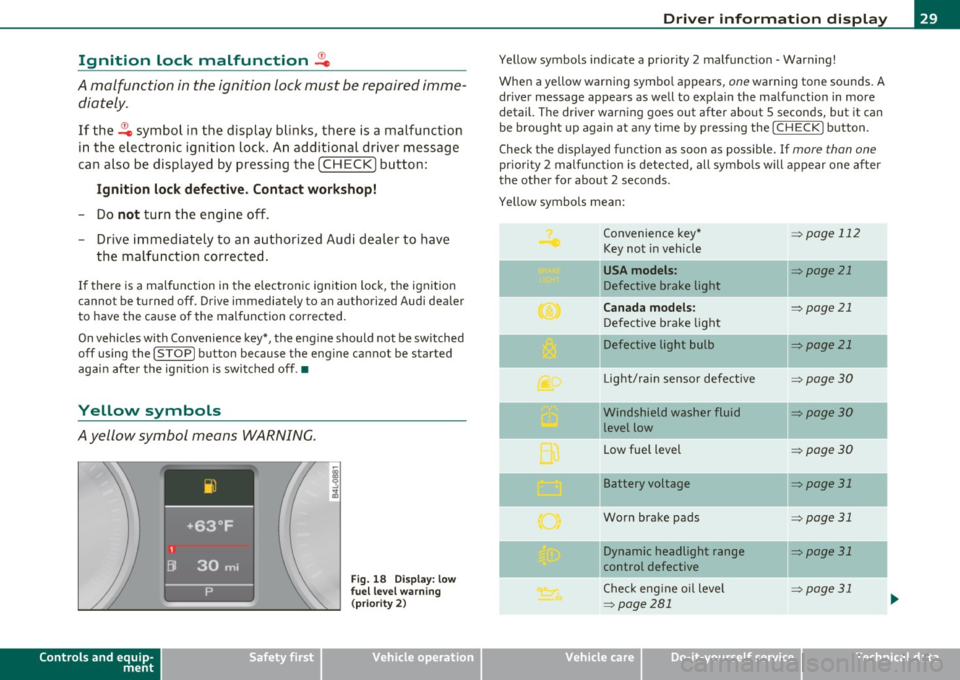
Yellow symbols
Ayellow symbol means WARNING.
Controls and equip
ment Safety first
Fig.
18 Disp la y : lo w
f u el l evel warning
(p rio ri ty 2)
Dri ver information display
Yellow symbols ind icate a prior ity 2 malfunct ion - Warning!
When a yellow warning symbo l appears,
one warning tone sounds. A
dr iver message appears as well to expla in the malfunction in more
detail. The driver warning goes out after about 5 seconds, but it can
be brought up again a t any time by pressing the
I CHECK] button .
Check the displayed function as soon as possible . If
more than one
pr iori ty 2 malfunction is detected, all symbo ls will appear one after
the other for about 2 seconds.
Yellow symbols mean:
Convenience key*
=> page 112
Key not in vehicle
-
USA models : => page 21
Defective brake light
Canada models : => page 21
Defective brake light
Defective light bulb
=> page 21
L ig ht/rai n sensor defective :::>page 30
Windshield washer fluid =:>page 30
level low
Low fue l level
=:> page30
II Battery voltage => page 31
-
Worn brake pads => page 31
II Dynamic headlight range => page 31
control defective
-
Check engine oil leve l => page 31
=> page 281
..,
Vehicle care Technical data
Page 32 of 368
Driver information display
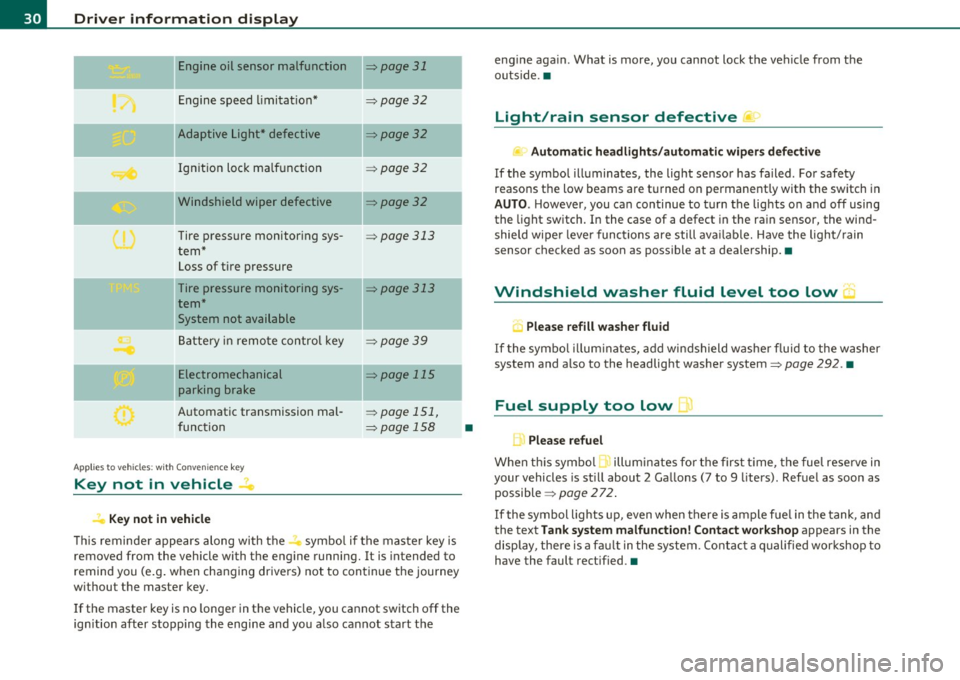
Engine oil sensor malfunction :::::, page 31
._ --
Engine speed limitation* :::::, page 32
-- -Adaptive Light* defective :::::, page 32
Ignition lock malfunction :::::, page 32
--Windshield wiper defective :::::, page 32
Tire pressure monitoring sys
tem*
Loss of tire pressure
Tire pressure monitoring sys
tem*
System not available
Battery in remote control key
--
=> page 313
:::::, page 313
:::::, page 3 9
Electromechanical :::::, page 115
parking brake
Automatic transmission mal
function
Ap plies to vehicles: w ith Conven ience key
Key not in vehicle
Key not in vehicle
:::::, page 151,
=> page 158
-
-
This reminder appears along with the...., symbol if the master key is
removed from the vehicle with the engine running. It is intended to
remind you (e.g. when changing drivers) not to continue the journey
without the master key.
If the master key is no longer in the vehicle, you cannot switch off the
ignition after stopping the engine and you also cannot start the
•
engine again . What is more, you cannot lock the vehicle from the
outside. •
Light/rain sensor defective )
Automatic headlights/automatic wipers defective
If the symbol illuminates, the light sensor has failed . For safety
reaso ns the low beams are turned on permanently with the switch in
AUTO. However, you can continue to turn the lights on and off using
the light switch. In the case of a defect in the rain sensor, the wind
shield wiper lever functions are still available. Have the light/rain
sensor checked as soon as possible at a dealership. •
Windshield washer fluid level too low 5
, Please refill washer fluid
If the symbol illuminates, add windshield washer fluid to the washer
system and also to the headlight washer system:::::,
page 292. •
Fuel supply too low )
L Please refuel
When this symbol 1. illuminates for the first time, the fuel reserve in
your vehicles is still about 2 Gallons (7 to 9 liters). Refuel as soon as
possible :::::,
page 272.
If the symbol lights up, even when there is ample fuel in the tank, and
the text
Tank system malfunction! Contact workshop appears in the
display, there is a fault in the system . Contact a qualified workshop to
have the fault rectified.•
Page 33 of 368
Battery voltage 1• i
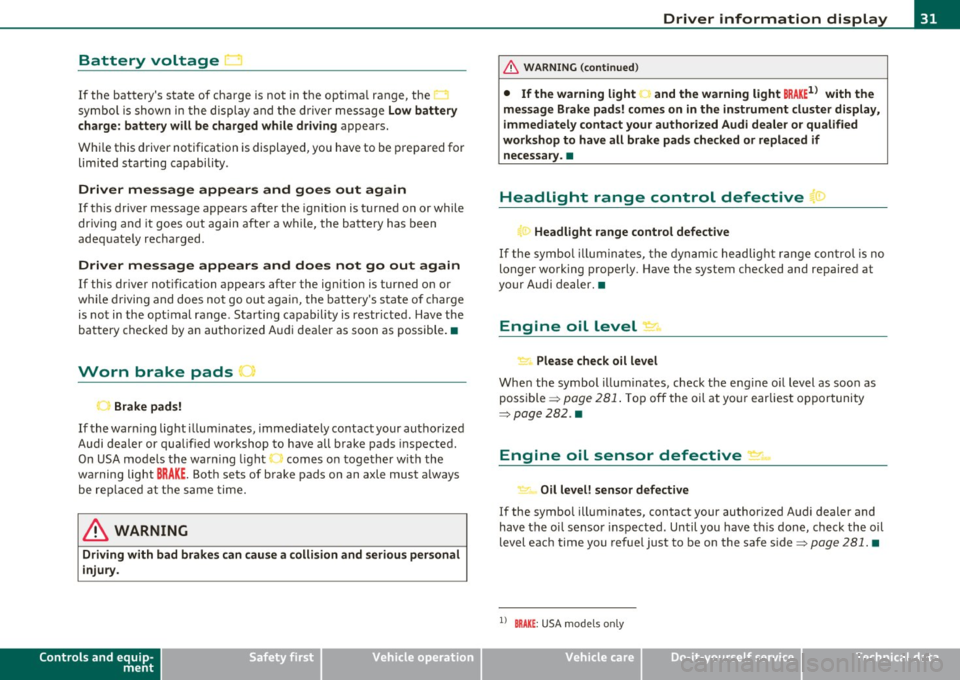
If the battery's state of charge is not in the optima l range, the
symbo l is show n in the di splay and the d river me ssage
Low battery
charge: battery will be charged while dri ving
appears.
Whi le this d river notification is displayed, you have to be prepared for
limited starting capability .
Driver message appears and goes out again
If this driver message appears after the ignition is turned on or while
driving and it goes o ut again afte r a while, the ba ttery has been
adequate ly recharged.
Driver me ssage appears and does not go out again
If th is dr iver notification appears after the ignition is turned on or
wh ile driving and does not go ou t aga in, the battery 's state o f charge
is not in the opt imal range . Starting capability is restricted. Have the
bat tery checked by an au thor ized A udi dea le r as soon as possible. •
Worn brake pads U
._ Brake pads!
If the war ning lig ht ill um inates, immediately co ntact your au tho rized
Audi dea ler or qualified wor kshop to have all brake pads inspected.
On USA mode ls the warn ing light comes on together w it h the
warning light
BRAKE . Both sets of brake pads on an axle must a lways
be re placed at th e same time.
& WARNING
Driving with bad brakes can cause a collision and serious personal
injury .
Controls and equip
ment Safety first
Driver information display
& WARNING
(co ntinued )
• If the warning light... and the warning light BRAKE1l with the
mes sage Brake pads! comes on in the instrument cluster di splay,
immediately contact your authorized Audi dealer or qualified
workshop to have all brake pads checked or replaced if necessary. •
Headlight range control defective ((
~ ~ Headlight range control defective
If the symbo l illumina tes, the dynam ic he adlig ht r an ge con tro l is no
longer working properly. Have the system checked and repaired at
your Audi de aler. •
Engine oil Level~
Please che ck oil level
Whe n the symbol i llumina tes, check t he engine o il level as soo n as
poss ible => page 281 . Top off the oil at yo ur earlies t oppor tunity
=>page282 .•
Engine oil sensor defective _t..
Oi l level! sensor defective
If the symbo l illuminates, contact your author ized A udi dealer and
have the oi l senso r inspected. Un til you have t his don e, check the oil
level each time you refue l just to be on the safe side => page 281. •
ll BRAKE : USA mode ls only
Vehicle care Technical data
Page 44 of 368
Opening and closing
without a key using the locking button. Each door has a prox imity
sensor and a locking button.
Automatic locking
The automatic locking feature locks all the vehicle doors and the rear
lid when you drive faster than 9 mph (15 km/h). This function can be
turned on and off in the MMI
Central locking Menu=> page 44.
You can unlock the vehicle from the inside by:
• removing the key from the ignition switch (the vehicle will auto
matically unlock itself) or
• pressing the unlock part of the power lock switch
€.J:l or
pulling the door handle (twice to open the rear doors).
& WARNING
• When you lock your vehicle from outside, nobody -especially
children -should remain inside the vehicle. Remember, when you
lock the vehicle from the outside the windows cannot be opened
from the inside.
• When you leave the vehicle, always remove the ignition key
and take it with you . This will prevent passengers (children, for
example) from accidentally being locked in the vehicle should
they accidentally press the power locking switch in the front
doors.
• Do not leave children inside the vehicle unsupervised . In an
emergency it would be impossible to open the doors from the
outside without the key.
[ i ] Tips
• In the event of a crash with airbag deployment all locked doors
wi ll be automatically unlocked to give access to the vehicle occupants
from the outside .
• If the power locking system should malfunction , you can lock each
door individually using the vehicle key=>
page 45.
• If the power locking system should fail, you can still open the fuel
tank flap in an emergency =>
page 275.
• You are well advised not to keep valuables inside an unattended
vehicle, v isib le or not. Even a properly locked vehicle cannot provide
the security of a safe .•
Unlocking and Locking the vehicle with the
remote cont rol
How the remote control works.
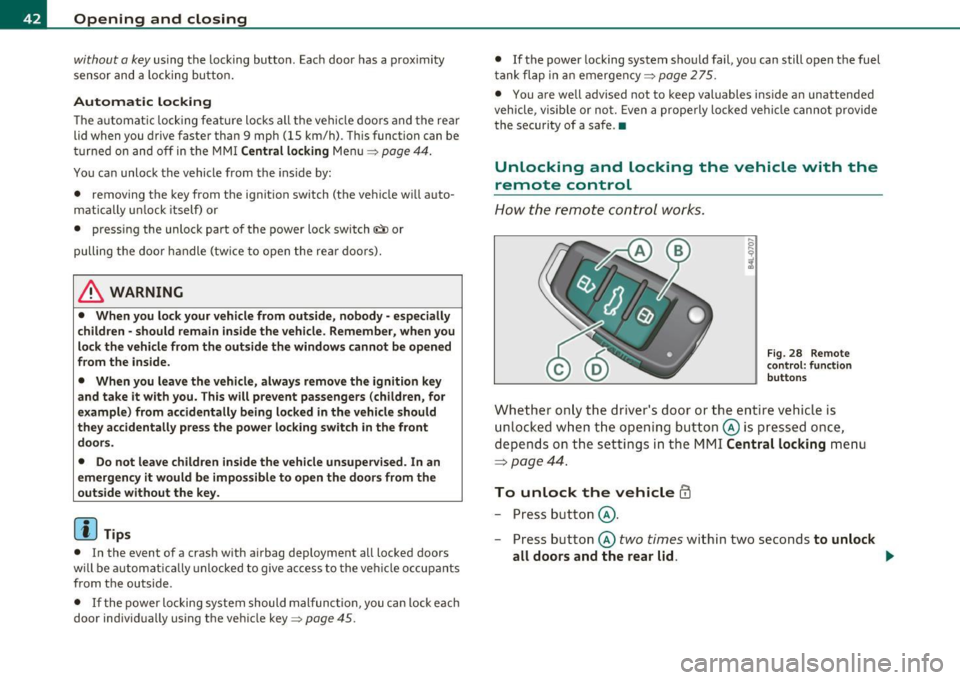
Fig. 28 Remote
control: function
buttons
Whether only the driver's door or the entire vehicle is
unlocked when the opening button @is pressed once,
depends on the settings in the MMI
Central locking menu
=:> page 44.
To unlock the vehicle ffi
-Press button @.
- Press button @
two times within two seconds to unlock
all doors and the rear lid. ..,,
Page 51 of 368
• The proximity sensors are deactivated after a few days to save
power . You then have to pull on the door handle once to unlock the
vehicle and a second time to open the vehicle.
• To prevent the battery from being discharged and to preserve your
vehicle's ability to start for as long as possible, the energy manage
ment system gradually switches off unnecessary convenience func
tions . It is possible that you will not be able to unlock your vehicle
using these convenience functions. •
Appli es to ve hicle s: wit h Co nven ience key
Locking the vehicle
The vehicle can be locked without operating the mastery
key.
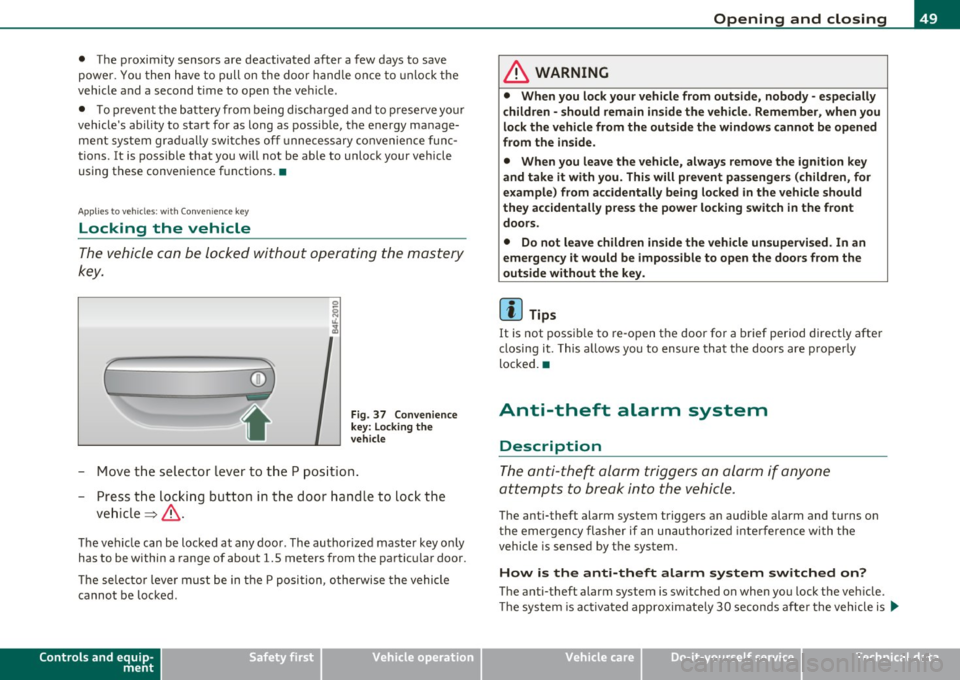
(
i
Fig . 37 Convenience
key: Locking the
vehicle
- Move the selector lever to the P position.
- Press the locking button in the door handle to lock the
vehicle ~& .
The vehicle can be locked at any door . The authorized master key only
has to be within a range of about 1.5 meters from the particular door.
Th e se lecto r lever must be in the P position , otherwise the vehicle
cannot be locked .
Controls and equip
ment Safety first
Opening and closing
& WARNING
•
When you lock your vehicle from outside, nobody -especially
children -should remain inside the vehicle. Remember, when you
lock the vehicle from the outside the windows cannot be opened
from the inside.
• When you leave the vehicle, always remove the ignition key
and take it with you. This will prevent passengers (children, for
example ) from accidentally being locked in the vehicle should
they accidentally press the power locking switch in the front
doors .
• Do not leave children inside the vehicle unsupervised. In an
emergency it would be impossible to open the doors from the
outside without the key.
[ i ] Tips
It is not possible to re-open the door for a brief period directly after
closing it. This allows you to ensure that the doors are properly
locked. •
Anti-theft alarm system
Description
The anti-theft alarm triggers an alarm if anyone
attempts to break into the vehicle.
The anti-theft alarm system triggers an audible alarm and turns on
the emergency flasher if an unauthorized interf erence with the
vehicle is sensed by the system.
How is the anti-theft alarm system switched on?
The anti-theft alarm system is switched on when you lock the veh icle.
Th e system is activated approximate ly 30 seconds after the vehicle is .,,_
Vehicle care Technical data
Page 60 of 368
Clear vision
Clear vision
Lights
Switching the headlights on and off ·"ti-·
In the "AUTO" position, a light sensor automatically
switches the head- and taillights on and off in response to light condi tions.
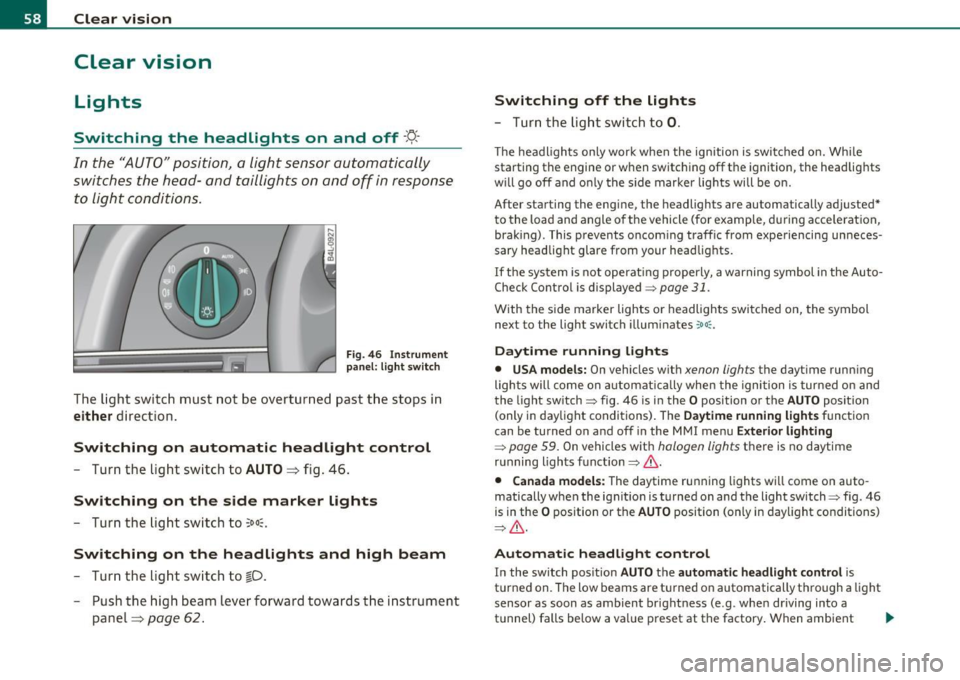
Fi g. 46 In strument
p an el: li gh t swit ch
The ligh t switc h must not be overtur ned past t he stops in
either d irection.
Switching on automatic headlight control
- Turn the lig ht sw itch to AUTO => fig. 46 .
Switching on the side marker lights
-Turn the lig ht swi tch to ~oo~.
Switching on the headlights and high beam
- Tur n the lig ht sw itch to ~D.
- Push the high beam leve r forward tow ards the in strument
panel=>
page 62 .
Switching off the lights
- Tu rn th e lig ht swi tch to 0.
T he headlights on ly work when the ignitio n is switc hed on. Whi le
starting the engine or w hen switching off t he ignition, the headlig hts
w ill go off and o nly the s ide marke r lights will be o n.
After starting the eng ine, the headlights are automatically adjusted*
to the load and angle o f th e vehicle (for example, during acce lerat ion,
brak ing) . This prevents oncom ing traff ic from experiencing unneces
sary headlight glare from your head lig hts.
If the system is not operat ing p roperly, a warning symbol in the Auto
Check Control is displayed=>
page 31.
With the side marker lights o r headlights switc hed on, the symbol
next to the light switch illum inates
':o oc .
Daytime running lights
• USA models: On vehicles w ith xenon lights the dayt ime runn ing
lights will come on automat ica lly when the ignition is turned o n and
the light switch=> fig. 46 is i n the
O position or the AUTO position
(only i n day light conditions) . The
D aytime running light s function
can be turned on and off in the MMI menu
Exterior lighting
=> page 59. On vehicles wit h halogen lights there is no daytime
r u nning lights fu nctio n=>
& -
• Canada models: The daytime ru nning lights wi ll come o n auto
matically w hen the ignit io n is t urned on and t he light switch=> fig. 46
is in the
O p osition or the AUTO position (on ly in day light co nditions)
=> & -
Automatic headlight control
In the switch pos ition AUTO the automatic headlight control is
t u rned on. The low beams are t urned on automatically t hrough a light
sensor as soon as ambient br ight ness (e .g . when dr iving into a
t u nnel) falls below a val ue p reset at the factory . When ambient .,.
Page 61 of 368
brightness increases again, the low beams are turned off again auto
matically =>& .
In the
AUTO position the low beams are switched off automatically
when the ignition is turned off.
Light Sensor Malfunction
In the event of a light sensor ma lfunct ion, the driver is notified in the
instrument cluster display:
Automatic headlights/automatic wipers defective
For safety reasons the low beams are turned on permanently with t he
switch in
AUTO. However, you can continue to turn the lights on and
off using the light switch. Have the light sensor checked as soon as
possible at a dealership.
& WARNING
• Never use daytime running lights to see where you are going.
They are not bright enough and will not let you see far enough
ahead for safety, especially at dusk or when it is dark. Always
switch on the low beams at dusk or when it is dark.
• Automatic headlights are only intended to assist the driver .
They do not relieve the driver of his responsibility to check the
headlights and to turn them on manually according to the current
light and visibility conditions. For example, fog and rain cannot be
detected by the light sensors. So always switch on the headlights
under these weather conditions and when driving in the dark
io.
• Crashes can happen when you cannot see the road ahead and
when you cannot be seen by other motorists.
- Always turn on the headlights so that you can see ahead and
so that others can see your car from the back.
[ i ) Tips
• With the switch in AUTO front fog lights and rea r fog ligh ts cannot
be turned on in addition .
Controls and equip
ment Safety first
Clear vision
•
The light sensor for headlight control is located in the rear view
mirror mount. Do not apply any stickers to the winds hield in this area
to prevent malfunctions or failures .
• If you remove the ignition from the ignitio n lock w hile the head
lights are still on, a buzzer will sound as long as the dr iver's door is
open to remind you to turn off the lights.
• Always observe the specific loca l regulations for your area as to
when to use your lights .•
Adjusting exterior lighting
The functions are set in the MMI.
-Select: Function button [CAR]> Systems* > Exterior
lighting .
Coming home
The Coming home function ensures tha t after turning off the igni
tion and opening the driver's door
the vehicle per iphery is illum i
nated in the dark. In addition, the front fog lights, the tail lights and
the license plate light are turned on. On-time can be set for a per iod
from O (off) to 60 seconds .
Leaving home
The Leaving home function ensu res that when unlocking the vehicle
per iphery is illuminated in the dark. In addition, the front fog lights,
the tail lights and the license plate light are turned on. This function
can be turned on and off .
Daytime running lights
USA models: On vehicles with xenon lights the daytime running
lights can be turned on or off using this function . On vehicles with
halogen lights there is no daytime running lights function .
Canada models: The function cannot be turned off. It is activated
automatically each time the ignition is tur ned on. This menu item is
shown "greyed out". •
Vehicle care Technical data
Page 68 of 368
Clear vision
Wiper and washer system
r..-.
Windshield wiper~
The windshield wiper lever controls both the windshield
wipers and the washer system.
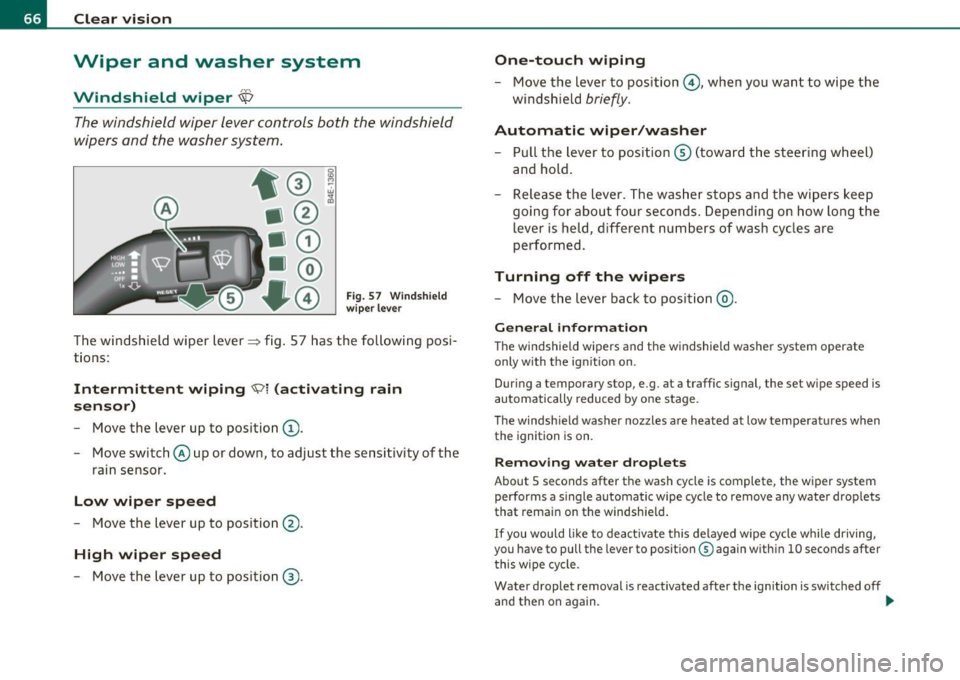
F ig. 57 Wind sh ield
wi per l ever
The windsh ield wiper lever~ fig. 57 has the following pos i
t ions:
Intermittent wiping \\J l (activating rain
sensor)
- Move the lever up to position (D .
- Move switch @ up or down, to adjust the sensitivity of the
rain sensor.
Low wiper speed
- Move the lever up to position @.
High wiper speed
- Move the lever up to position ®·
One-touch wiping
- Move the lever to position@, when you want to wipe the
windshield
briefly.
Automatic wiper /washer
- Pull t he lever to position © (toward the steering wheel)
and hold .
Re lea se t he le ver. The washe r stops and the wipers keep
going for about four seconds . Depend ing on how long the
lever is held, d ifferent numbers of wash cyc les are
performed.
Turning off the wipers
- Move the lever back to pos ition @) .
Gen eral information
The windshie ld wipers and the windshield washer system operate
only with the ign it ion on .
During a temporary stop, e.g. at a traff ic signal, the set w ipe speed is
automatically reduced by one stage.
The windsh ie ld washer nozzles are heated at low temperatures when
the ignition is on.
Removing w ate r dr oplet s
About S seconds after the wash cycle is complete, the wiper system
performs a single automatic wipe cycle to remove any water droplets
that remain on the windsh ield .
If you would l ike to deact ivate this delayed wipe cycle whi le driving,
you have to pull the lever to position ® again within 10 seconds after
t his wipe cycle .
Water droplet removal is reactivated after the ignition is switched off
and then on again.
~
Page 69 of 368
Rain sensor
The rain sensor operates on ly in the interval wiper position . When it
starts to rain, the interval wiper mode is activated automat ically .
I f the windshield wiper lever is in the interval wipe position with the
ign ition switched off, the rain sensor is not activated until vehicle
speed is above 4 mph (6 km/h) .
To reduce the sensitivity of the rain sensor, the switch @ must be
moved down . To increase the sensit ivity of the rain sensor, the switch
must be moved up.
The higher the sensitiv ity sett ing, the sooner the windsh ield wipers
react to mo isture on the windshie ld. Increased sensitivity is signa led
by the windshield w ipers making a single pass over the windshie ld.
T he rain sensor wiper intervals depend on the sensitivity setting as
we ll as vehicle speed. During brief stops, wiper motion will adjust in
relation to the amount of rain on the windshield .
& WARNING
• Wiper blades are crucial for safe driving! Only when they are in
good condition are they able to clear the windows properly to
provide uncompromised visibility. Worn or damaged wiper blades
are a safety hazard =>
page 68, "Installing new wiper blades"!
• The rain sensor is only designed to assist and suppo rt the
driver. It remains entirely the driver's responsibility to monitor
outside weather conditions and to manually activate the wipers as
soon as rain or drizzle reduces visibility through the windshield.
• The windshield must not be treated with water-repellent
material s. They can increase glare under poor visibility conditions
such as wetness, darkness, or when the sun is low on the horizon .
In addition, they can cause the windshield wipers to chatter.
0 Note
In freezing or near freezing conditions:
Controls and equip
ment Safety first
Clear vision
•
Always check that the wiper blades are not frozen to the glass
before you turn the wipers on. Loosen a wiper blade which is frozen in
place before operat ing the w ipers to prevent damage to the wiper
blade or the wiper motor.
• Do not use the wipers to clear a frosted window . Us ing the wipers
as a convenient ice scraper will destroy the wiper blades.
• Before you take your vehicle to an automatic car wash, make sure
you have the windshield wipe r system switched off (lever in position
0), otherw ise the windshield wiper system could get damaged in the
car wash if it shou ld suddenly come on.
(I) Tips
• Worn or dirty windshield wiper blades cause smearing which can
affect the operation of the rain sensor . Check the condit ion of your
windshield wiper b lades regularly.
• The rain sensor is part of the interval wiping system . Turn ing off
the ignition will a lso deactivate the rain sensor. To reactivate the
sensor, switch off the interval wip ing function, then switch it back on
again.
• The w indshield wipers are switched off when the ignition is turned
off . Activate the windsh ie ld wipers after the ignition is switched back
on by mov ing the w indshield wiper lever to any pos it ion.
• Make sure the washer fl uid reservoir in the engine compar tment is
topped off before going on a long trip . Look up::::>
page 292 for
checking and filling the washer conta iner. •
App lies to ve hicle s: with headli ght was h er syste m
Headlight washer system
The headlight washer system cleans the headlights.
- Operate the windshield wiper/washer system~ page 66,
fig. 57 ®with the headlights turned on by holding the
lever for longer than one second. _,,,,
Vehicle care Technical data