sensor AUDI S8 2008 Owner's Guide
[x] Cancel search | Manufacturer: AUDI, Model Year: 2008, Model line: S8, Model: AUDI S8 2008Pages: 404, PDF Size: 52.7 MB
Page 173 of 404

Advan ce d Parkin g Sy ste m Ill
-------------~--
-Press the sw it c h P111! in t he cen ter console =:> page 170,
fig. 192 to activate the Aud i pa rking system manually.
Activation of the acoustic park ing system is confirmed by
a brief acknowledgement sound. The indicator light in
the switc h lights up.
De activation
-If yo u drive forwa rds faster t han approx. 6 mph (1 0 km/h},
or
-if you switc h the ignition off, the entire acoustic parking
assist is automatically deactivated, or
-you can press the switch P111A. in the center console
=:> page 170, fig. 192 to deact ivate the Audi parking
system. The indicator light in the switch goes out.
You have to turn on the acoustic parking assist manuall y if you wish
to park the vehicle forwards or if you wish to approach an obstacle
forwards and want a distance warning .
The range at whic h the sensors start to measure is about:
Front
Rear
W arn in g tone s side
cen ter
side
cen ter 3
ft
(0 .90 ml
4f t
(1 .20 ml
2 ft (0.60 ml
Dis tance wa rn ing is given by chimes which are generated by a
signal generator . The volume and the pitch of the chimes can be
adjusted in the MM I
=> page 180.
Mute
I n t he case of vehic les with automatic transmission, an acoustic
distance warning is discontinued when the transmission selector
Controls and equip ment lever is moved to the P position
. However, the system remains
active . As soon as the selector lever is moved fro m the
P pos it ion
and the vehicle approaches an obstacle, the acoustic distance
warning resumes.
Dr iving fo rw ard /b ac kw ard
Dista nce warn ing w hen driving fo rward/ backward is based on
detection of an obstac le in the range of the parking assist. As the
distance decreases, t he time interval betwee n the aud ible t ones
becomes shorter.
When the distance is less than approx .
1 ft (0.30 m), the tone
becomes cont inuous. At th is po int you shou ld stop backing up or
driving forward .
I f the distance to an obstacle re m ains the same, the vo lume of the
distance warning is gradua lly reduced after about
4 seconds (does
not app ly to the zone for the continuous tone). If you start to
approach the detected obstacle again, the distance warning will
sound at the norma l volume again.
P arking
When you se lect another gear when park ing (e .g . reverse/forwa rd),
the warning tones are temporarily suppressed, but the visua l
display remains on the MMI display . If you start approaching a
detected obstac le again, the distance warning wi ll sound at the
normal volume again .
Vi su a l displa y
The segments on t he MMI d isp lay indicate a change in the distance
between the vehicle and an obstacle . The number of segments
displayed depends on the obstac les in front of or behind the
vehic le. The c loser the vehic le comes to the obstacle, the closer t he
segments approach the
vehic le => page 170, fig. 193. When the
seg ment before last is d isplaye d, the ve hicle has reac hed the coll i
sion zone. At this point you should stop backing up or driving
f orward
=> & . ~
Page 174 of 404

-
Advanced Parking System
--~-------------
The image in the visual display can be switched off on the MMI
display=> page 182. The acoustic distance warning remains active.
If you press a function button on the MMI terminal, the visual
display disappears. Manually switching the parking assist on again
via the
P, Yi switch shows the visual image on the MMI display again .
Further informat ion regard ing the MMI terminal is included in the
MMI user 's manual.
Rear-view camera (rear view)
The rear-view camera picture=> page 175, fig. 198 appears on the
MMI display as a mirror image. The rear -view camera picture has
orientation lines and marked surfaces projected into it as an aid to
the parking
process => page 173. The red line in the picture
=> page 173, fig. 194 or=> page 173, fig. 195 indicates the collision
area . You should stop backing up, preferably before you reach this
point =>& .
If your vehicle is close to an obstacle, the visual distance display
also appears in the picture from the rear -view camera. This superim
posed display is intended to help display the relevant critical vehicle
area.
If the visual display is shown on the MMI display and you press the
control button with the
Rear view function=> page 170, fig. 193, the
picture from the rear -view camera is displayed.
If the picture from the rear-view camera is shown and you press the
control button with the
Graphic function => page 175, fig. 198, the
visual display is shown.
The picture from the rear-view camera can be switched off on the MMI
display => page 182. The acoustic distance warning remains
active.
If you press a function button on the MMI terminal, the rear -view
camera picture disappears. The rear-view camera picture reappears
the next time you park. But the picture from the rear -view camera
can also be shown again on the MMI display by manually switching
off and on with the
P' Yi switch . Further information regarding th e
MMI terminal is included in the MMI user 's manual.
& WARNING
• Sensors have dead spaces in which objects cannot be
detected. Be especially careful to check for small children and
animals before backing up . Small children and animals will not
always be detected by the sensors.
• The Audi parking system is not a substitute for being careful
and alert when backing up. Be especially careful during parking
and similar maneuvers . Always watch where you are driving and
make sure that nothing is in the way.
• Remember that low obstacles which have already been
signaled may pass below the system's sensing zone when the
vehicle is backing up. The fact that the signal stops does not mean
that you have cleared the obstacle. When the signal stops, impact
is imminent. Objects such as trailer hitches, chains, narrow posts
or fences covered by a thin layer of paint may not always be
detected by the system. They can still damage your vehicle
without warning.
• Always make sure that the volume and frequency of the chimes
is adjusted so that you can easily hear the acoustic distance signal
even if the radio is playing, the air-conditioner blower is on High or
there is a high level of outside noise.
- Check the settings whenever someone else has driven the
vehicle before you.
• Improper reliance on the Audi parking system can cause colli
sions and serious personal injury.
- Never rely only on parking assist when backing up.
- Always check rear view mirrors to make sure it is safe to back
up.
[ i] Tips
• The rear-view camera picture is available as soon as the MMI
Display or the MMI is switched on, or the start -up phase is
completed .
Page 175 of 404
Advanced Parking Sy ste m -
----------------=---=------'
• Keep the sensors in the rear bumper and the rear -view camera
lens clean and free of snow and ice, so that the Audi parking system
can work properly . P lease follow the additional notes on
~ page 183 . •
Applies to ve hicle s: with Ad vanced Par king Sys tem wit h rea r vi ew c am era
Rear-view camera (Rear View)
The rear-vie w camera picture, appearing in the MM!
Dis pla y, shows the are a behind the vehicle.
-'
Ll --
.
-
. -
Fig . 194 T op view :
Park ing mode 1
Fi g. 19 5 Top v iew:
P ark ing mode 2
Parki ng mode
Two different parking modes are available for parking with the rear
view camera . The two different park ing modes are denotes as
" parking mode 1 " ~ page 175 and "parking mode Z' ~ page 176.
Controls a nd eq uip
ment
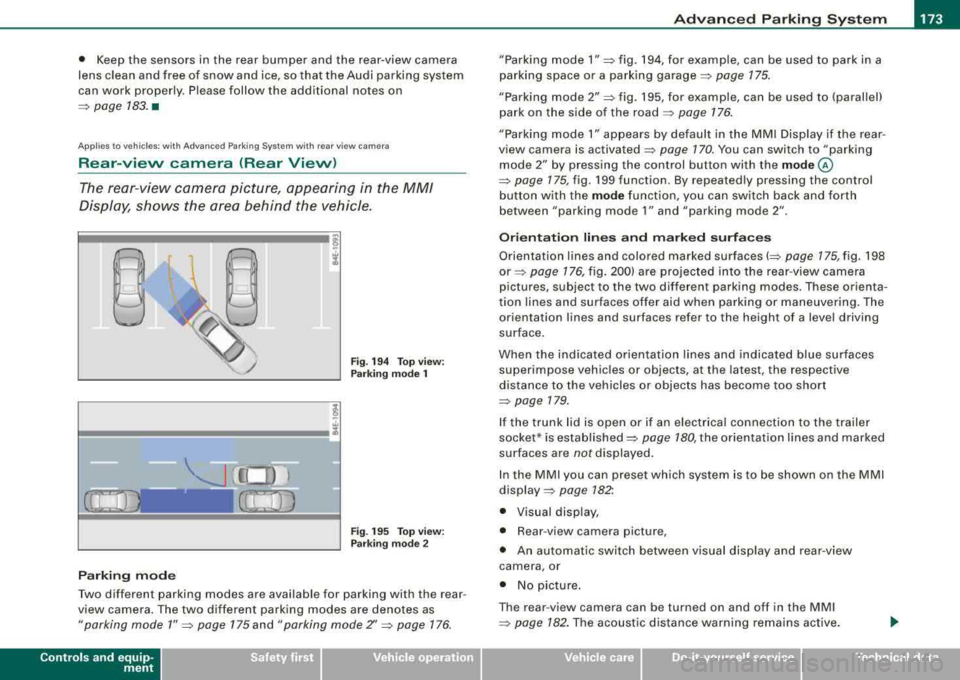
" Parking mode 1" => fig. 194, for examp le, can be used to park in a
parking space or a par king garage ::::>
page 175.
"Parking mode 2" => fig. 195, for examp le , can be used to (parallel)
park on the side of the road
~ page 176.
"Parking mode 1" a ppears by defau lt in the MMI Display if the rear
view camera is activated
=> page 170 . You can switch to "parking
mode
2" b y pressing the control button with the mode @
=> page 175, fig. 199 function . By repeated ly pressing the control
button w ith the
mode function, you can sw itch bac k and forth
between "par king mode
1" and "parking mode 2" .
Orientation lines and marked surfaces
Orientation lines and colored marked surfaces(::::> page 175, fig . 198
or => page 176, fig . 200) are projec ted into the rear -v iew came ra
pictures , subject to the two different parking modes . These orienta
t ion lines and surfaces offer aid when parking o r maneuvering. The
orientation lines and surfaces refer to the height of a leve l driving
surface .
When the indicated orientation lin es and indicated blue surfaces
superimpose vehicles or objects, at the latest , the respective
distance to the vehicles or objects has become too short
=>
page 179.
I f the trunk lid is open or if an e lectrica l connection to the trailer
socket* is established::::>
page 180, the orientation li nes and marked
surfaces are
not displayed.
I n the MMI y ou ca n preset which system is to be shown on the MMI
display => page 182".
• Visual di sp lay,
• Rear -view camera picture,
• An au tomatic switch between v isual disp lay an d rear -view
c amera , or
• No picture .
The rear -view camera can be turned on and off in the MMI
=>
pag e 182 . The acoust ic d istance wa rni ng remains active.
Vehicle care I I irechnical data
Page 176 of 404

___ A_ d_v _a_ n_ c_e _ d_ P_ a
_ r_k _in -= g'-- S...,_y _s_ t_ e_ m ___________________________________________ _
& WARNING
• The rear-view camera has blind spots , in whi ch objects cannot
be detected. Be especially careful to check for small children and
an imals before ba ck ing up . Small children and animals will not
always be detected by the sensors.
• The Audi parking system is not a substitute for being careful
and alert when backing up. Be especially careful during parking
and similar maneu vers . Always watch where you are driving and
make sure that nothing is in the way .
• Remember that low obsta cles which have already been
signaled may pass below the system's sensing zone when the
vehicle is ba cking up . The fact that the signal stops does not mean
that you have cleared the obstacle . When the signal stops , impact
is imminent . Objects such as trailer hit ches , chains , narrow posts
or fences covered by a thin layer of paint may not always be
detected by the system. They can still damage your vehicle
without warning .
• Always make sure that the volume and frequency of the chimes
is adjusted so that you can easily hear the acoustic distance signal
even if the radio is playing, the air -conditioner blower is on High or
there is a high level of outside noise .
- Check the settings whenever someone else has driven the
vehicle before you.
• Improper reliance on the Audi parking system can cause colli
sions and serious personal injury .
- Never rely only on parking assist when chang ing backing up .
- Always check rear view mirrors to make sure it is safe to back
up .
[ i J Tips
• Before parking with the rear -view camera, the Adaptive Air
S us pe nsi on sta ndard or automatic mo de mus t be switch ed on
=> page 27.
• T he rear -view camera pictur e is avai lable as soon as the MMI
Display or the M MI is sw itche d on, o r the start -up pha se is
completed.
• In order fo r th e re ar-v iew camera to func tion prop erly, the
camera
lens=> page 170, fig. 191 must be kept clean, and free of
sn ow a nd i ce. Please follo w the ad ditio nal no tes
on => page 783 .
• T he camera coverage angle changes when the trunk lid is open.
Theref ore, the r ear-view camera picture is d isplaye d w ithout ori en
tation lines and without blue surfaces.
• Observe an d follow t he no tes on towing mo de
on => pag e 180. •
App lies to veh icles : w ith Advanced Parking System with rear view came ra
Rear-view camera coverage area
0
.. - --
®
F ig . 196 Top vi ew :
Re ar- vie w ca mera
coverage a rea
F ig . 197 Side vi ew:
Covered ar ea
G) and
uncover ed area
0 of
the rear-v iew camera
~
Page 182 of 404
___ A_ d_v _ a_ n_c _e _ d_ P_ a_r _k _in ~ g_ S_y _ s_ t_ e_ m ___________________________________________ _
&, WARNING (continued)
• Maintain plenty of distance from an obstacle, so that your
outside mirror or a corner of your vehicle does not collide with any
obstacles -danger of accident!
• The Audi parking system is not a substitute for being careful
and alert when backing up. Be especially careful during parking
and similar maneuvers. Always watch where you are driving and
make sure that nothing is in the way.
• When maneuvering or parking, do not only use the MMI Display
for orientation. Certain objects -depending on the screen resolu
tion -may not, or not entirely, be displayed; for example trailer
hitches, chains, narrow posts, or fences .
•
Applies to vehicles: with Advanced Parking System with rear view camera and a trailer hitch
i nstalled according to factory spec ifications
Towing hitch
For vehicles with a trailer hitch installed according to factory speci
fications, the rear acoustic parking sensors are not activated when
the vehicle is put in reverse gear while an electrical connection to
the trailer socket* is established . No distance alert occurs in the rear
=> page 170. The rear -view camera picture => page 173 is displayed
without orientation lines and without blue surfaces. •
Settings in the MMI
Applies to vehicles : w ith Advanced Par king Sys tem with rear vie w camera
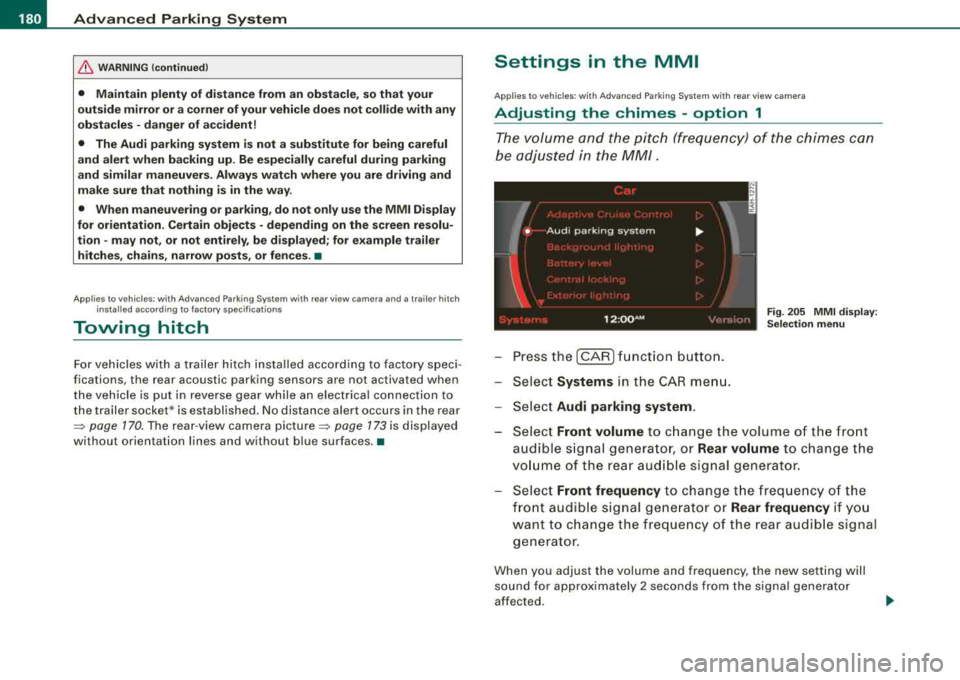
Adjusting the chimes -option 1
The volume and the pitch (frequency) of the chimes can
be adjusted in the MM/.
Fig. 205 MMI display:
Selection menu
- Press the [CAR] function button.
- Select
Systems in the CAR menu.
- Select
Audi parking system .
-Select Front volume to change the volume of the front
audible signal generator, or
Rear volume to change the
volume of the rear audible signal generator.
- Select
Front frequency to change the frequency of the
front audible signal generator or
Rear frequency if you
want to change the frequency of the rear audible signal
generator.
When you adjust the volume and frequency, the new setting will
sound for approximately 2 seconds from the signal generator
affected.
Page 218 of 404
___ s_a _f _e _t -=-y _ b_ e_lt _s ______________________________________________ _
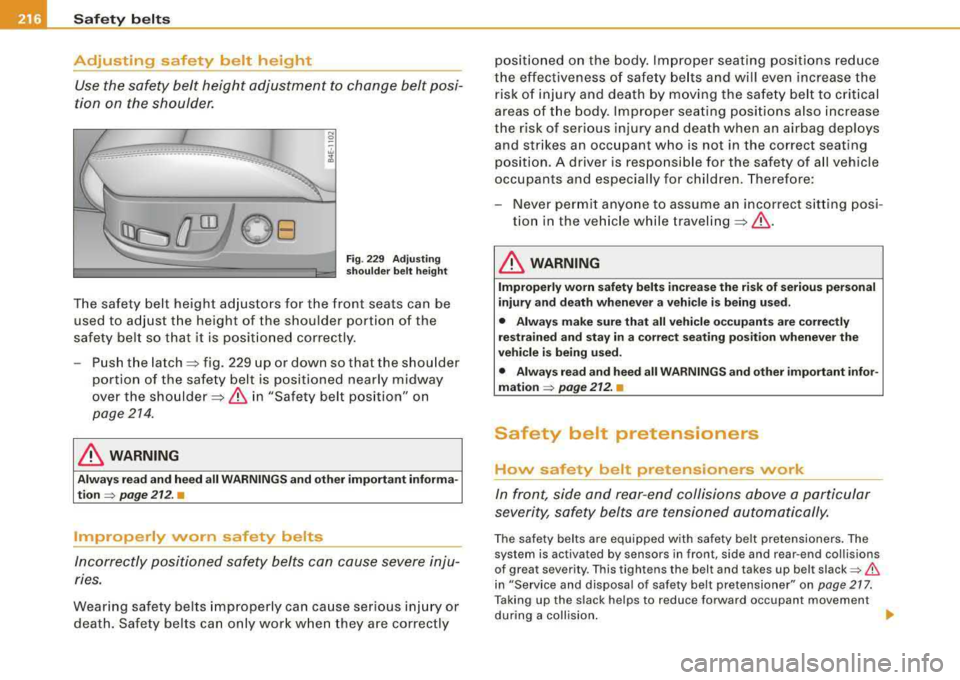
Adjusting safety belt height Use the safety belt height adjustment to change belt posi
tion on the shoulder.
Fig . 229 Adjusting
shoulder belt height
The safety belt height adjustors for the front seats can be
used to adjust the height of the shoulder portion of the
safety belt so that it is positioned correctly.
- Push the
latch ~ fig. 229 up or down so that the shoulder
portion of the safety belt is positioned nearly midway
over the
shoulder ~ & in "Safety belt position" on
page 214.
& WARNING
Always read and heed all WARNINGS and other important informa
tion
~ page 212. •
Improperly worn safety belts
Incorrectly positioned safety belts can cause severe inju
ries.
Wearing safety belts improperly can cause serious injury or
death. Safety belts can only work when they are correctly positioned on the body. Improper seating
positions reduce
the effectiveness of safety belts and will even increase the
risk of injury and death by moving the safety belt to critical
areas of the body. Improper seating positions also increase
the risk of serious injury and death when an airbag deploys
and strikes an occupant who is not in the correct seating position. A driver is responsible for the safety of all vehicle
occupants and especially for children. Therefore:
- Never permit anyone to assume an incorrect sitting posi
tion in the vehicle while
traveling ~& .
& WARNING
Improperly worn safety belts increase the risk of serious personal
injury and death whenever a vehicle is being used.
• Always make sure that all vehicle occupants are correctly
restrained and stay in a correct seating position whenever the
vehicle is being used.
• Always read and heed all WARNINGS and other important infor
mation
~ page 212. •
Safety belt pretensioners
How safety belt pretensioners work
In front, side and rear-end collisions above a particular
severity, safety belts are tensioned automatically.
The safety belts are equipped with safety belt pretensioners . The
system is activated by sensors in front, side and rea r-end collisions
of great severity . This tightens the belt and takes up belt
slack ~ &
in "Service and disposal of safety belt pretensioner" on page 217.
Taking up the slack helps to reduce forward occupan t movement
during a collision.
•
Page 227 of 404
Airbag system -
--------------=---=--
& WARNING (continued)
• If you must install a rearward facing child seat on the front
passenger seat because of exceptional circumstances and the
PASSENGER AIR BAG OFF light does not come on and stay on,
immediately install the rear-facing child seat in a rear seating posi
tion and have the airbag system inspected by your Audi dealer.
& WARNING
If, in exceptional circumstances, you must install a forward-facing
child restraint on the front passenger's seat:
• Always make sure the forward-facing seat has been designed
and certified by its manufacturer for use on a front seat with a
passenger front and side airbag.
• Never put the forward-facing child restraint up against or very
near the instrument panel.
• Always move the passenger seat into its rearmost position in
the seat's fore and aft adjustment range, as far away from the
airbag as possible, before installing the forward-facing child
restraint. The backrest must be adjusted to an upright position.
• Make sure that the PASSENGER AIR BAG OFF light comes on
and stays on all the time whenever the ignition is switched on. •
Advanced Airbag System components
The front passenger seat in your vehicle has a lot of very important
parts of the Advanced Airbag System in it. These parts include the
weight -sensing mat, sensors, wiring, brackets, and more. The func
tion of the system in the front passenger seat is checked by the elec
tronic control unit when the ignition is on. The control unit monitors
the Advanced Airbag System and turns the airbag indicator light on
when a malfunction in the system components is detected. The
function of the airbag indicator light is described in greater detail below . Because the front passenger seat contains important parts
Controls and equip
ment Safety first Vehicle operation
of the Advanced Airbag System, you must
take care to prevent it
from being damaged. Damage to the seat may prevent the
Advanced Airbag for the front passenger seat from doing its job in
a crash.
The front Advanced Airbag System consists of the
following:
• Crash sensors in the front of the vehicle that measure vehicle
acceleration/deceleration to provide information to the Advanced
Airbag System about the severity of the crash.
• An electronic control unit, with integrated crash sensors for front
and side impacts. The control unit "decides" whether to fire the
front airbags based on the information received from the crash
sensors. The control unit also "decides" whether the safety belt
pretensioners should be activated.
• An Advanced Airbag with gas generator for the driver inside the
steering wheel hub.
• An Advanced Airbag with gas generator inside the instrument
panel for the front passenger.
• A weight -sensing mat under the upholstery padding of the front
passenger seat cushion that measures the total weight on the seat.
The information registered is sent continuously to the electronic
control unit to regulate deployment of the front Advanced Airbag on
the passenger side .
• An airbag monitoring system and indicator light in the instru
ment
cluster => page 229.
• The PASSENGER AIR BAG OFF light comes on and stays on in the
center of the instrument
panel => page 230, fig. 233 and tells you
when the front Advanced Airbag on the passenger side has been
turned off .
• A sensor below the safety belt latch for the front seat passenger
to measure the tension on the safety belt . The tension on the safety
belt and the weight registered by the weight-sensing mat help the
control unit
"decide" whether the front airbag for the front
passenger seat should be turned off or
not=> page 220, "Child
restraints on the front seat
-some important things to know". .,_
Vehicle care Do-it-yourself service Technical data
Page 232 of 404
__ .....;.A..;.;.;. ir.;;b ;..; a;;;;. g=... s;;;.!. y.;;s ..;;t ..;;e ;.;.m.;..;... ________________________________________________ _
PASSENGER AIR BAG OFF light
I~
I
( f8 : !'°""BA
I ~ )
Fig. 233 Sec tio n f rom
th e in strum ent p an el:
PAS SEN GER A IR BAG
O FF lig ht
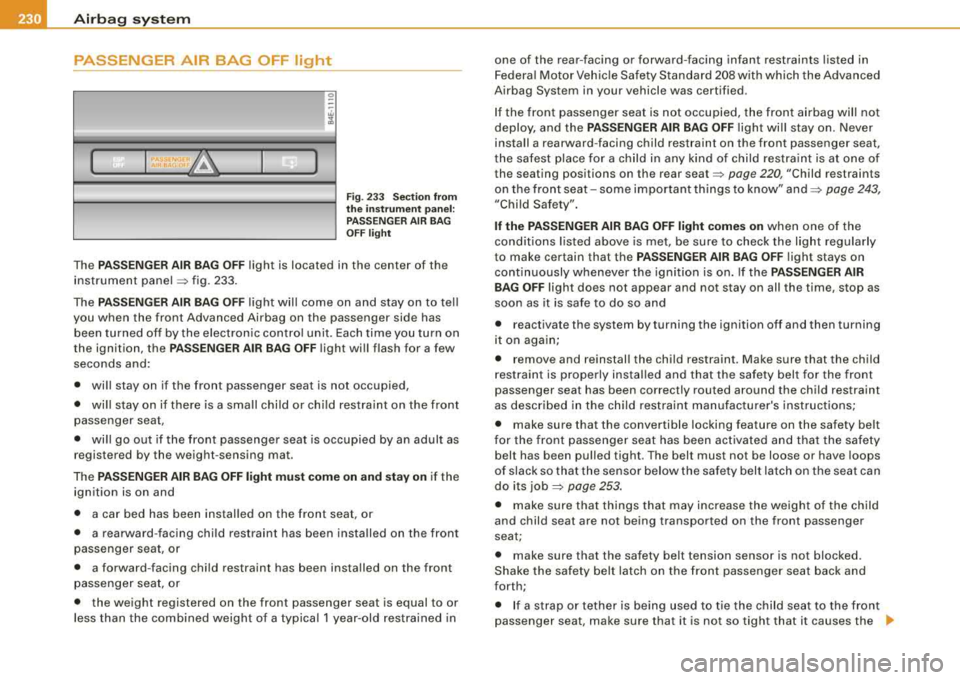
Th e PA SSEN GER AIR BAG OFF light is locat ed in the center of th e
instrument pane l
=> fig. 233 .
The PASSE NGER AIR BA G OFF light will come on and stay on to tel l
you wh en the front Advanced Airbag on the passenger side has
bee n turned of f by the electron ic contro l unit . Each time you turn o n
the ign ition, th e
PASS ENGER AIR BAG OFF light wi ll flash for a few
seconds and :
• will stay on if the front passenger seat is not occupied,
• will stay on if there is a sma ll chi ld or chi ld restra int on the front
pass enger s eat ,
• will go out if the front passenger seat is occupied by an adult as
reg ist ered by the weight -s e nsing mat .
The
PASSENGER AIR BAG OFF li ght must come on and sta y on if the
ignition is on and
• a car bed has been instal led on the front seat, or
• a rearward -facing child restraint has been installed on the front
passenger seat, or
• a forward -facing child res traint has been installed on the front
passenger seat, or
• the weight registered on the front passenger seat is equal to or
less than the combined weight of a typica l 1 year-old res trained in one of the rear
-facing or forward-facing infant restraints lis ted in
Federa l Motor Vehic le Safety S tandard 208 with which the Advanced
Airbag System in your vehicle was certified .
I f the front passenger seat is not occup ied, the front a irbag wil l not
deploy, and the
PA SS ENGER AIR BA G OFF light wi ll stay on. Never
install a rearward -facing ch ild restraint on the front passenger s eat,
the safest p lace for a c hild in any kind of c hild restra int is at one o f
the seating posi tions on the rear
sea t=> page 220, "Child restraints
on t he front seat -so me important th ings to know"
and => page 243,
"Chi ld Safety".
If the PASSENGER AIR BAG OFF light come s on when one of the
cond it ions l isted above is m et, be sure to check the lig ht regularly
to make certain that the
PASSENGER AIR BAG OFF l ight stays on
cont inuously whenever the ignition is on. If the
PASSENGER AIR
BAG OFF
light do es not appear and not stay on all the time , stop as
soon as it is safe to do so and
• reactivate the system by turning the ignition off and then turning
it on aga in;
• remove and reinstal l the child restraint. Make sure that the child
r estra in t is prope rly instal led and that the safety belt for the front
passenger seat has been correctly routed around the child restraint
as described in the ch ild res traint manufactu rer's inst ructions;
• make sure that the convertible locking feature on the safety belt
f or the front passenger seat has been activated and t hat the safety
belt has been pulled tight . The bel t must not be loose or have loops
of slack so that the sensor below the safe ty belt latch on the sea t can
do its job
=> page 253.
• make sure that things that may inc rease the we ight of the child
and child seat are no t being transported on the front passenger
seat;
• make sure that the safety belt tension sensor is not blocked .
Shake the safety belt latch on the front passenger seat back and
forth;
• I f a s trap or tether is be ing used to tie the child seat to the front
passenger seat , make sure that it is not so tight that it causes the
.,,_
Page 235 of 404
Airbag system -
--------------=---=--
& WARNING (continued )
-Never install seat covers or replacement upholstery over the
front seatbacks that have not been specifically approved by
Audi .
- Never use additional seat cushions that cover the areas
where the side airbags inflate.
- Damage to the original seat covers or to the seam in the area
of the side airbag module must always be repaired immedi
ately by an authorized Audi dealer .
• The airbag system can be activated only once. After an airbag
has inflated , it must be replaced by an authorized Audi dealer or
qualified technician who has the technical information , training
and special equipment necessary .
• The airbag system can be deployed only once . After an airbag
has been deployed , it must be replaced with new replacement
parts designed and approved especially for your Audi model
version . Replacement of complete airbag systems or airbag
components must be performed by qualified workshops only .
Make sure that any airbag service action is entered in your Audi
Warranty
& Maintenance booklet under AIRBAG REPLACEMENT
RECORD .
• For safety reasons in severe accidents , the alternator and
starter are separated from the vehicle battery with a pyrotechnic
circuit interrupter .
- Work on the pyrotechnic circuit interrupter must only be
performed by a qualified dealer
-risk of an accident!
- If the vehi cle or the circuit interrupter is scrapped, all appli
cable safety precautions must be followed .
For the sake of the environment
Undeployed ai rbag mod ule s and pr etensione rs mi ght b e cla ssi fied
as Perchlorate Material -sp ecial handling may ap ply, s ee
www .dtsc.ca.gov/hazardouswaste/perchlorate. When the vehicle or
Controls and equip
ment Safety first Vehicle operation
parts of th
e restraint syst em incl uding airbag modules saf ety be lts
w ith preten sio ne rs a re sc rapped, a ll a pp lic ab le laws a nd re g ul a
tions must be observ ed. Your authorized Audi deale r is fam iliar with
t hese req uir e m ents a nd we rec ommend tha t yo u have yo ur dea ler
perfor m this service for you .•
Other things that can affect Advanced Airbag
performance
C han ging the vehic le 's suspens ion system can change the way that
t h e Ad va n ce d Ai rbag Sys tem perfo rm s in a crash. F or e xam ple,
using ti re -r im comb inations not app rov ed by Audi, lower ing the
ve hic le , ch angi ng th e st iff ne ss of the su sp en sion , in cludin g the
springs, suspension struts, shock absorbers etc . can cha nge the
forc es that are measu re d b y th e a irbag sens ors a nd sen t to the e lec
t ronic con trol un it. Some suspens ion chan ges can, for exa mple,
i nc rea se the force le v e ls mea sured by the sen so rs and make the
a irb ag sys tem de plo y i n cras hes in whi ch it wo uld not de plo y if the
changes had not been made . Other kinds of changes may reduce
t h e force leve ls m easured by t he se nso rs a nd p reve nt t he a irba g
from deploy ing when it should .
T he se nsor s in th e safe ty bel t buc kle for th e dr ive r a nd fr ont
passen ger seat te ll th e electron ic control module if t he safety belt is
l a tc h e d or n ot. If t he safety belt is b ein g use d, th e fr ont ai rbag will
dep loy at a s lig htly h igher rate of veh ic le dece lerat ion t han if t he
safety belt is not being use d. Therefore, in a partic ular collision, it is
poss ible t hat an airba g w ill not deplo y at a s eat ing pos itio n where
the safety be lt is being used but wi ll inflate at the position where t he
sa fe ty be lt is no t bein g used. It i s im por ta nt th at n othi ng i nterfe re
with t he safety belt buc kles so that the sensors can send the correct
info rm ati on abou t sa fet y bel t use to th e ele ctr on ic co ntrol unit.
~
Vehicle care Do-it-yourself service Technical data
Page 236 of 404
___ A_ ir_b _a_ g;::;_ s-=-- y_s _t _e _m _________________________________________________ _
& WARNING
Changing the vehicle's su spension includ ing use of un approved
tire -rim combinations can change Advanced Airbag performance
and increase the ris k of serious pe rsonal injury in a crash .
• Never install suspen sion components that do not have the
same performance chara cteristi cs as the components or iginally
installed on your vehicle.
• Never use tire-r im combinations that have not been approved
by Audi.
& WARNING
Items stored between the safety belt buckle and the center
c onsole can cause the sensors in the buc kle to send the wrong
information to the electroni c control module and prevent the
Advanced Airbag System from working properly .
• Always make sure that nothing can interfere with the safety
belt buckles and that they are not obstructed .
W For the sake of the environment
Undeployed airbag modules and pretensioners might be c lassified
as Pe rchlora te Mat erial -s pecia l handling may a pply, see
www.dtsc.ca.gov/hazardouswaste/perchlorate. When the vehicle or
par ts o f the res train t syst em inclu ding airbag mod ules sa fety be lts
with pretensioners are scrapped, all applicable laws and regu la
tions must be o bse rved. You r au thor ize d A udi d ealer is fami liar wi th
these requirements and we recommend that you have you r dea ler
perfo rm this service for you. •
Knee airbags
Description of knee airbags
Th e a irba g sys tem ca n prov id e suppl emen tal prot ect ion
t o pro perly res tra ined front s eat occ upa nts.
0
Fig . 2 34 Dri ver' s
airba g
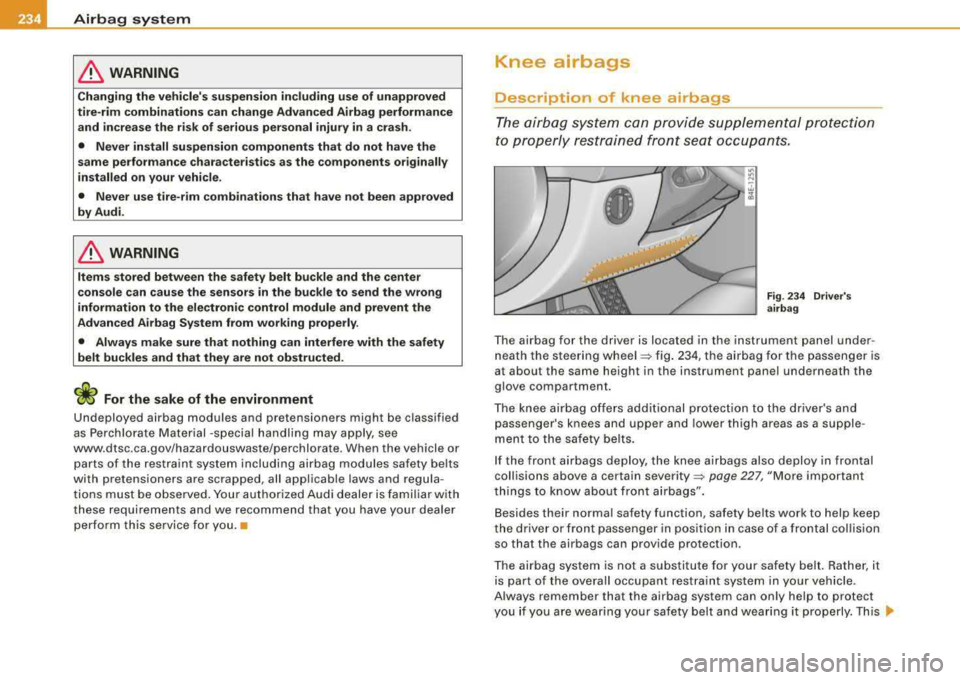
The airbag for the driver is located in the instrument panel under
neath the steering
whee l=> fig . 234 , the airbag for the passenger is
at about the same height in th e instrument panel und erneath the
glove compartment.
T he k nee air bag offer s addi tio nal pr otec tion to the driver 's a nd
passenger 's knees and upper and lower thi gh areas as a supple
me nt to t he safet y belts.
I f the front airbags deploy , the knee airbags also deploy in frontal
collisions above a certain
se verity => page 227, "M ore important
thi ngs to know about fron t a irba gs" .
B esides their normal safety function, safety be lts wor k to help keep
th e drive r o r fr on t pas seng er in pos itio n in case of a fro ntal co llis io n
so that the airbags can provide protection .
T he airbag system is not a su bstitute for your safety belt . Rathe r, it
i s part o f the overa ll occupa nt res traint system i n yo ur veh icl e.
A lwa ys re member that the airbag system can on ly help to protect
you if you a re weari ng your safe ty belt and wea ring it p roperly . T hi s
liJ,,