sensor AUDI S8 2016 Owners Manual
[x] Cancel search | Manufacturer: AUDI, Model Year: 2016, Model line: S8, Model: AUDI S8 2016Pages: 302, PDF Size: 75.68 MB
Page 15 of 302
TPMS
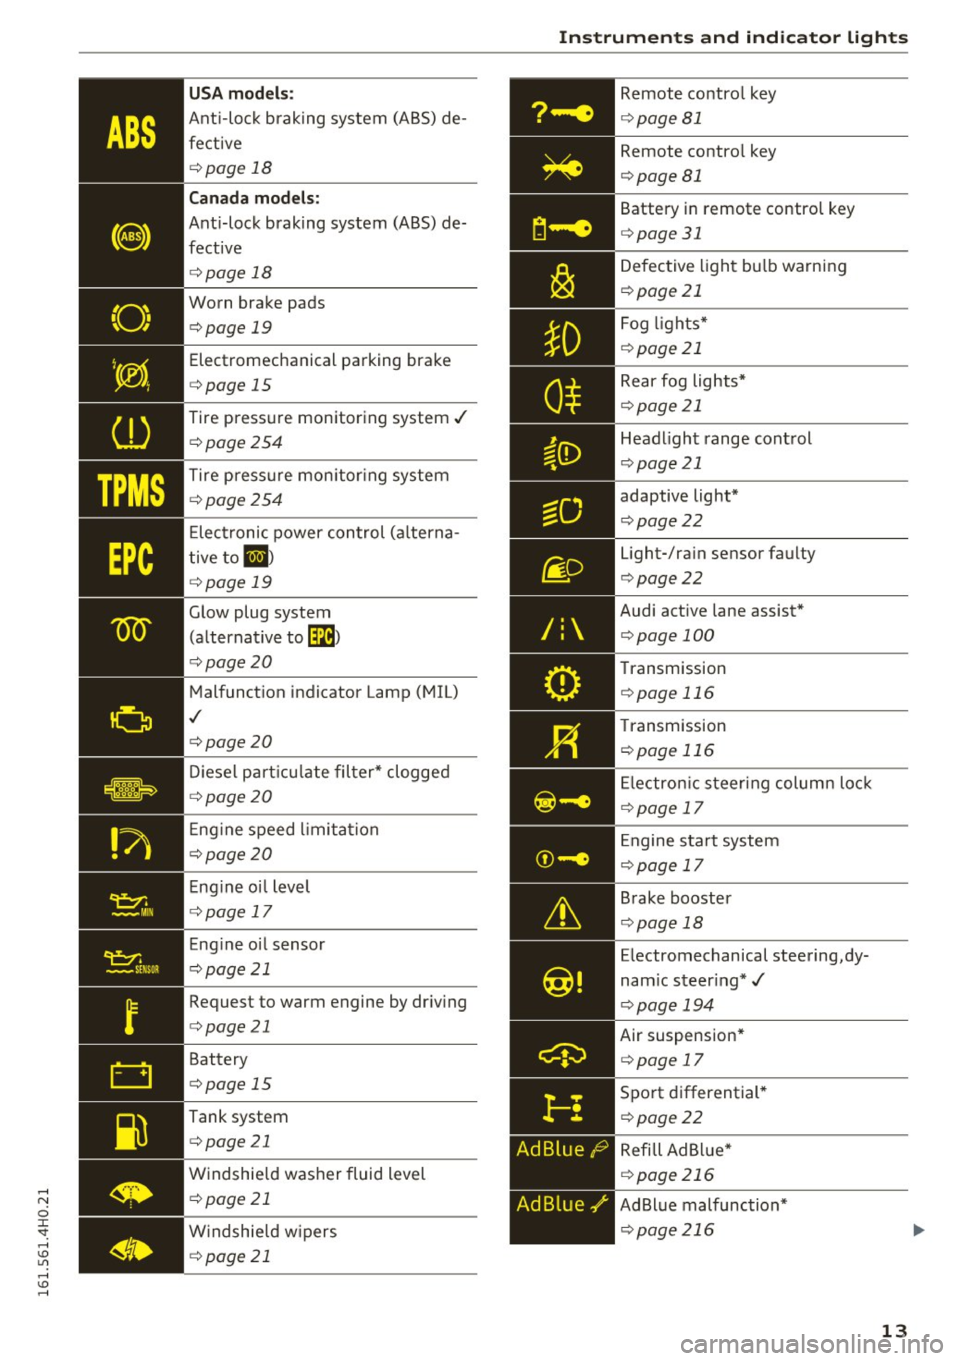
USA models:
Anti-lo ck brak ing system (AB S) de
fect ive
r=> page 18
Canada models:
Ant i-lock brak ing system (ABS) de
fect ive
r::!> page 18
Worn bra ke pads
r=> page 19
Electromechanical pa rking brake
r=> page 15
Tire press ure mon itoring system ../
r=>page 254
Tire p ress ure mon itor ing system
r=> page 254
Elect ronic power control (a lterna
t ive
to ll )
r=> page 19
Glow plug system
(a lterna tive to
lla )
r::!> pag e 20
Malfunct ion indicator Lamp ( MIL)
,I
r=> page 20
Di ese l pa rt ic ulat e filter* clogged
r=> page 20
Eng ine speed limi ta ti on
r::!> page 20
Eng ine o il level
r::!> page 1 7
Engine oi l sensor
r::!> page 21
Request to warm engine by dr iv ing
r=> page 21
Battery
r=> page 15
Tank system
r=> page 21
W indshie ld washer fluid level
r::!> page 21
W indshie ld w ipers
r=> page 21
Instruments and ind icator lights
Ad Blue /9
Ad Blue,/'
Remote contro l key
r::!> page 81
Remote contro l key
r=> page 81
Battery i n remote control key
r=> page 31
Defec tive ligh t bu lb warning
r=> page 21
F og ligh ts*
r=>page 21
Rear fog lights*
r::!> page 21
Head ligh t range cont rol
r=> page 21
adaptive light*
r=> page 2 2
light-/ra in sensor fa ulty
r=> page 2 2
Audi act ive lane assist *
r=>page 100
Transmission
r=> page 116
Transmission
r=> page 11 6
Electro nic s teer ing colum n lo ck
r=>p age 17
Engine sta rt syste m
r=>page 17
Brake booster
r=> pag e 18
Electromechanical steering ,dy
nam ic steer ing* ../
r=>page 194
Air suspension*
r=>page 17
Sport d ifferential *
r=>page22
Refi ll Ad Blue*
r::!> page 21 6
AdBlue malfunc tion*
r=> page 216
13
Page 23 of 302
.... N
0 J:
'SI: ....
malfunction corrected.
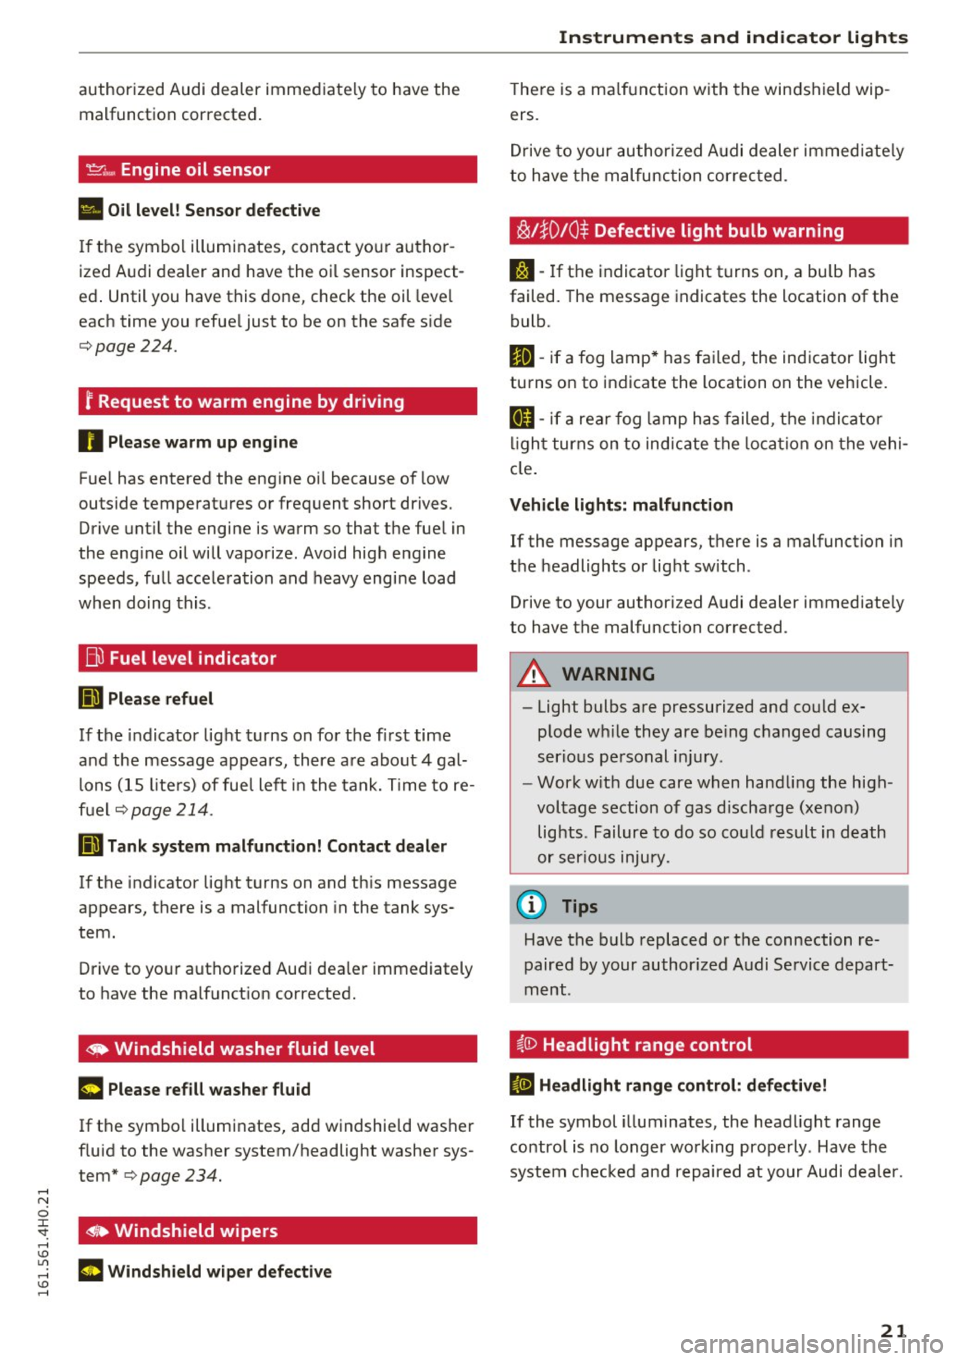
~ .... Engine oil sensor
• Oil level! Sensor defective
If the symbol illuminates, contact your author
ized Audi dealer and have the oil sensor inspect
ed . Until you have this done, check the oil level
each time you refuel just to be on the safe s ide
¢page 224.
f Request to warm engine by driving
0 Please warm up engine
Fuel has entered the engine oil because of low
outside temperatures or frequent short drives. Drive until the engine is warm so that the fuel in
the engine oil will vaporize. Avoid high engine
speeds, full acceleration and heavy engine load
when doing this.
.Bil Fuel level indicator
ID] Please refuel
If the indicator light turns on for the first time
and the message appears, there are about 4 gal
l ons (15 liters) of fuel left in the tank. Time to re
fuel
¢ page 214 .
ID] Tank system malfunction! Contact dealer
If the indicator light turns on and this message
appears, there is a malfunction in the tank sys
tem .
Drive to your authorized Audi dea ler immediately
to have the malfunction corrected.
~ Windsh ield washer fluid level
~ Please refill washer fluid
If the symbol illuminates, add windshield washer
f luid to the washer system/headlight washer sys
tem*
¢ page 234 .
<$• Windshield wipers
m Windshield wiper defective
Instruments and indicator lights
T he re is a malfunct ion with the windshield wip
ers .
Drive to your authorized Audi dealer immed iate ly
to have the malfunction corrected .
i§il}0/0$ Defective light bulb warning
1:1-If the indicator light turns on, a bu lb has
failed. The message indicates the location of the
bulb.
fm-if a fog lamp* has failed, the indicator light
turns on to indicate the location on the vehicle.
II-if a rea r fog lamp has failed, the indicator
light turns on to indicate the location on the vehi
cle.
Vehicle lights: malfunction
If the message appears, there is a malfunction in
the headlights or light switch .
Drive to your authorized Audi dealer immediate ly
to have the malfunction corrected .
A WARNING
-Light bulbs are pressurized and could ex
plode wh ile they are be ing changed causing
serious personal injury.
- Work w ith due care when handling the high
voltage section of gas d ischarge (xenon)
lights . Failure to do so could result in death
. . . or serious inJury.
(D Tips
Have the bulb replaced or the connection re
paired by your author ized Audi Service depart
ment.
~{D Headlight range control
II Headlight range control: defective!
If the symbol illuminates, the headlight range
control is no longer working properly . Have the
system checked and repaired at your Audi dealer.
21
Page 24 of 302
Instruments and indicator lights
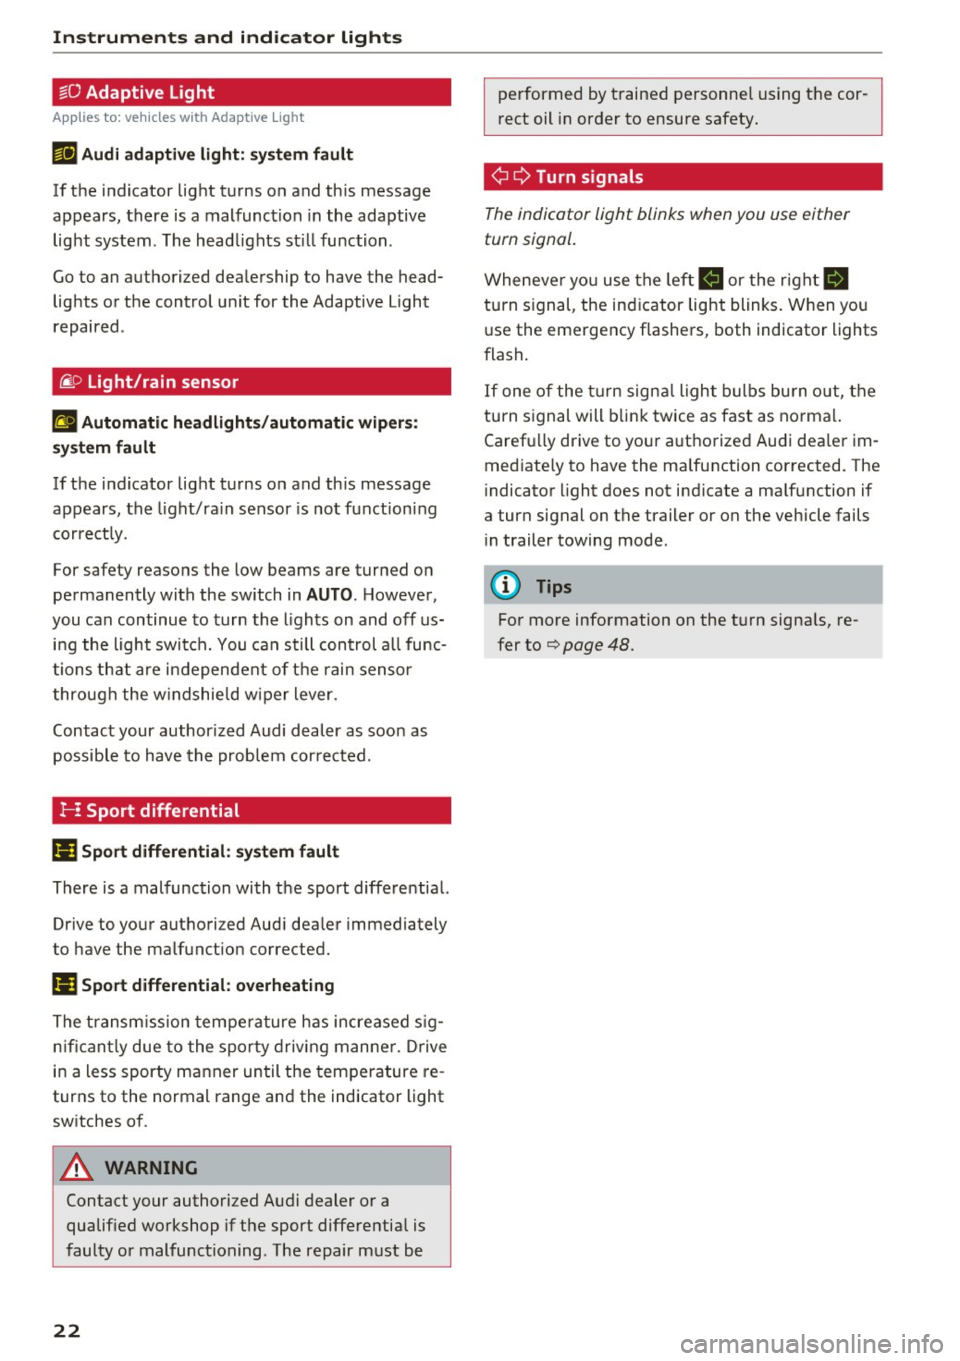
§0 Adaptive Light
Applies to: vehicles with Adaptive Light
m;J Audi adaptive light : system fault
If the indicator light turns on and th is message
appears, there is a malfunction in the adaptive
light system . The head lights st ill function .
Go to an authorized dea lership to have the head
lights or the control unit for the Adaptive Light
repaired .
~D Light /rain sensor
!;I Automatic headlights /automatic wipers:
s y stem fault
If the ind icator lig ht t urns on and th is message
appears, the light/ra in sensor is no t funct ioning
correct ly.
For safety reasons the low beams are turned on
permanently with the switch in
AUTO . However,
you can continue to turn the lights on and off us
i n g the light swi tch. You can still con trol a ll func
tions th at are in dependen t of t he rain senso r
through t he w indshie ld w iper lever.
Contact your author ized Audi dealer as soo n as
possible to have the prob le m corrected.
I-: Sport differential
1,11 Sport differential : sy stem fault
There is a malfunc tion wi th t he sport differential.
Drive to yo ur authori zed Aud i dea le r i mmediately
to have the malfunct ion corrected.
1,11 Sport differential: overheating
T he t ransm iss ion tempe rature h as increased s ig
n ificant ly due to the spor ty driv in g manne r. Dr ive
in a less sporty ma nner un til the tem perature re
turns to the normal range and the indicator light
sw itches o f.
A WARNING
Contact your authorized Audi dealer or a
qualified workshop if the sport differentia l is
faulty or malfunctioning . The repair m ust be
22
performed by t rained personnel using the cor
rect oil in order to ensure safety .
¢ Q Turn signals
The indicator light blinks when you use either
turn signal.
Wheneve r yo u use the left II or the r ight B
turn s ignal, the indicator light blinks . When you
u se the emergency flashers, both indicator lights
flash.
I f one of the turn sign al light bulb s bu rn o ut, the
turn s ignal will b link twice as fast as no rma l.
Caref ully drive to yo ur authorized Aud i dea le r im
med iate ly to have the malfunction corrected. The
i ndicato r light does not indicate a ma lfunction if
a turn signal on the trailer or on the vehicle fails i n trailer towing mode.
(D Tips
Fo r more informati on on the t urn signa ls, re
fer to
¢ page 48.
Page 35 of 302

they accidentally press the power locking
switch in the doors.
- Do not leave children inside the vehicle un
supervised. In an emergency it wou ld be im
possible to open the doors from the outside
without the key.
- Applies to vehicles with power side door closer*:
- When closing a door, make sure nothing
can interfere w ith the door. This could
cause serious persona l injury .
- You can stop the door from closing at any
time by pulling on the inside or outside
door handle .
@ Tips
-In the event of a crash with airbag deploy
ment all locked doors w ill be a utomatically
unlocked to give access to the vehicle occu
pants from the outside.
-If the power lockin g system should ma l
function, you can lock the driver's door us
i ng the mechanical key¢
page 36 .
-If the power locking system should fail, you
can still open the fuel tank flap in an emer
gency
¢ page 216.
-You are well advised not to keep valuables
ins ide an unattended vehicle, vis ible or not.
Even a properly locked vehicle cannot pro
vide the secur ity of a safe .
- If the LED in the upper edge of the driver 's
door panel comes on for about 30 seconds
after the vehicle is locked, there is a mal
funct ion in the power locking or the anti
theft warning system. Have the malfunction
corrected by an authorized Audi dealership
or qualified repair facility.
Setting power locking
The driver can determine the functions for power
locking in the
fvlfv/J .
• Select : I CARI function button > Car systems
contro l button > Vehicle settings > (Central
locking ).
Open ing and closing
Lock when driving -If you select On, the vehicle
locks automatically when driving . All of the doors
and luggage compartment lid lock .
Central locking
Unlock door s -
You ca n decide if All doors or on ly
the
Driver should unlock. The luggage compa rt
ment lid a lso unlocks when
All is se lected. If you
select
Driver in a vehicle with a convenience key *,
only the door whose hand le you pull will unlock .
If you se lect
Driver , all the doors and luggage
compartment lid will unlock if you p ress the
CD
button on the remote control master key twice.
Lock exterior trunk handle -If you select On , the
luggage compartment lid handle is locked. In
this case the luggage compartment lid can be
opened with the button
CJ on the master key or
with the
c:5 button* in the driver's door. In
vehicles with a convenience key*, you can still
open the luggage compartment lid using the
handle if an authorized master key is near the
prox imity sensor .
Fold mirrors* -If you select On, the exterior rear
view m irrors fold in automatically when you press
the
CD button on the remote control master key
or touch the sensor* in the handle.
Tone when locking -When you select On, a con
firmation tone sounds when you lock the vehicle.
Locking and unlocking the vehicle with the
remote control
Fig. 21 Remote control: functio n butto ns
E ither the driver's door only or the entire vehicle
will unlock when the unlock button
CD is pressed
once, depending on the settings in the MMI
¢page 33. .,.
33
Page 36 of 302

Opening and clo sin g
• Press button@ to unlock the vehicle¢ fig. 21.
• Press button ffl to lock the vehicle ¢ A in Gen
eral description on page 32 .
• Press button C:$ briefly to unlock the luggage
compartment lid.
• Push the red
I PANIC I button to activate the
panic funct ion . The horn sounds and the turn
s ignals flash. Push the red
! PANIC I button again
to deactivate the pan ic function .
If the vehicle is unlocked and no door, the lug
gage compartment lid or the hood is opened
with in 60 seconds, the vehicle locks itself agai n
automatically. This feature prevents the vehicle
from being accidentally left unlocked over a long
period of time.
It depends o n the settings in the MMI whethe r
the entire veh icle is unlocked or only certa in
doors¢
page 33 .
& WARNING
Read and follow all WARN INGS ¢ & in Gener
al description on page 32 .
@ Tips
-In orde r to make s ure the locking function is
working, you s hou ld always keep your eye
on the vehicle to make sure it is properly
l ocked.
- Do not use the remote contro l if you are in
side the car, otherwise you may uninten
tiona lly lock the vehicle, and then yo u wou ld
set off the anti-theft alarm when you try to
start the engine or open a door. In case this happens anyhow, push the unlock button@.
- The vehicle can only be locked when these lector lever is in the P position.
- Use the panic funct ion only if you are in an
emergency s ituation.
34 Locking and unlocking with convenience
key
Applies to:
vehicles with convenience key
The doors and the luggage compartment lid can
be unlocked and locked without operating the
master key.
Fig. 22 Co nve nience key : locking t he ve hicle
Unlocking vehicle
• Take hold of the door hand le . The door is un-
locked automatically.
• Pull the handle to open the door .
Locking vehicle
• Sele ct the P selector lever positio n. Otherwise
the vehicle cannot be locked .
• To lock the vehicle, close the door and touch
the sensor in the door handle
once ¢ fig. 22. Do
not reach inside the door handle .
The vehicle can be locked and unlocked at any
door. The master key must be within a range of
about 1.5 m from the appropriate door or the
l uggage compartment lid. It makes no difference
whether the maste r key is in your jacket pocket or
i n your brief case .
It is not possib le to re-open the door for a brief
per iod direct ly after closing it . Th is allows you to
ensure that the doors are properly locked .
It depends on the settings in the MMI whether
the entire vehicle is unlocked or one of the doors
¢ page 33 .
& WARNING
Read and follow all WARNINGS ¢ & in Gener
al description on page 32 .
Page 37 of 302
@ Tips
If your vehicle has been standing for an ex
tended period, please note the follow ing:
- The proximity sensors are deactivated after
a few days to save power . You then have to
pull on the door handle once to unlock the
vehicle and a second time to open the vehi
cle.
- To prevent the battery from draining and to
preserve your vehicle's ability to start for as
long as poss ible, the energy management
system gradually switches off unnecessary
convenience funct ions. It is possible that
you wi ll not be able to unlock your veh icle
us ing these convenience functions .
- Fo r De claration of Comp liance to Un ited
States FCC and Industry Canada regulations
c>page284.
Operating locks with the key
In the event of a failure of the power locking sys tem , the driver's door can be locked and un
locked at the lock cylinder.
F ig. 23 Key turns for opening and closing.
• Remove the mechan ical key c> page 31.
• Turn the key to the left to unlock the dr iver's
door .
• Turn the key to the right to lock the driver 's
door c>
,&.
& WARNING
Read and follow all WARN INGS c> .&. in Gener
al description on page 32 .
Openin g an d clos ing
Locking and unlocking the vehicle from
inside
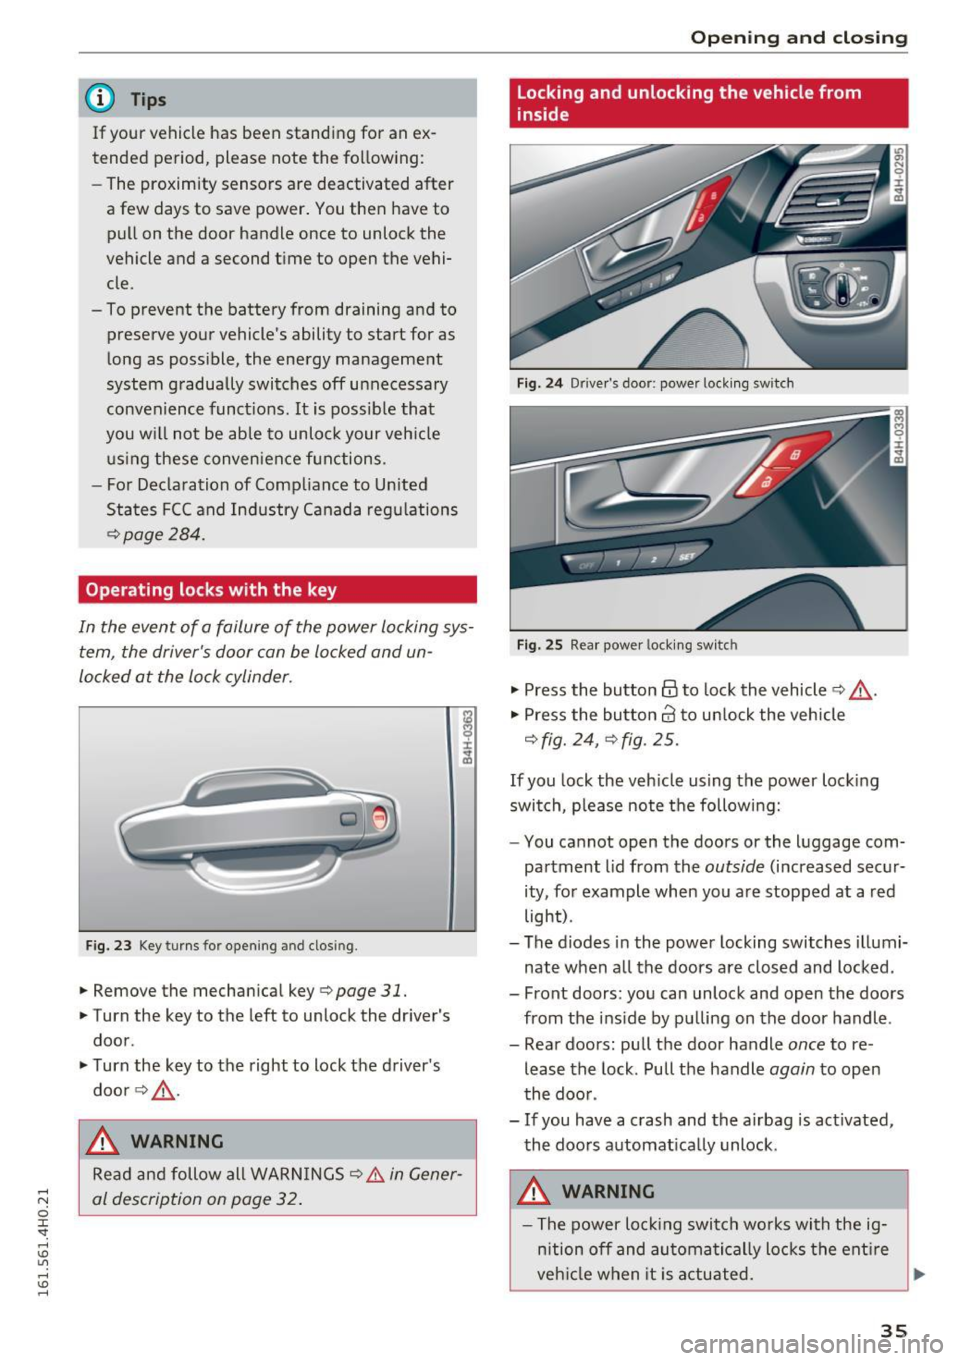
Fig. 2 4 Driver's door; power lock ing switch
Fig. 25 Rear power lock ing switc h
"' Press the button @to lock the vehicle c> &,,.
"' Press the bu tton crl to un lock the vehicle
c> fig. 24, c> fig . 25.
If you lock the veh icle using the power lock ing
switch, please note the following:
- You cannot open the doors or the luggage com
partment lid from the
outside (increased secur
ity, for example when you a re stopped at a red
light) .
- The diodes in the power locking switches illumi
nate when a ll the doors are closed and locked.
- Front doors: you can unlock and open the doors from the ins ide by pu lling on the door handle .
- Rear doors : pu ll the door handle
once to re
lease the lock . Pull the handle
again to open
the doo r.
- If you have a crash and the airbag is act ivated,
the doors automat ically unlock.
& WARNING
- The power lock ing switch wo rks with the ig
n ition off and au toma tically lo cks the ent ire
veh icle when it is a ctuated.
~
3 5
Page 41 of 302

Luggage compartment with movement
activated opening
Applies to: vehicles with convenience key and sensor-control·
led luggage compartment lid
Fig. 31 Rear of vehicle: foot movement
Requirements: You must be carrying your vehicle
key with you. You must be standing at the center
behind the luggage compartment lid. The d is
tance to the rear of the vehicle must be at least
8 inches (20 cm) . The ignition must be switched
off. Make sure you have firm footing.
.. Swing your foot forth and back below the
bumper
r=) fig . 31. Do not touch the bumper.
Once the system recognizes the movement, the
luggage compartment lid will open.
The luggage compartment lid will only open if
you make the movement as described. This pre
vents the luggage compartment lid from opening
due to similar movements such as when you walk
between the rear of the vehicle and your garage
door.
General information
In some s ituations, the function is limited or
temporarily unavailable. This may happen if:
- the luggage compartment lid was just closed .
- you park close to a hedge and the branches
move back and forth under the vehicle for a
long period of time .
- you clean your vehicle, for example with a pres
s ure washer or in a car wash .
- there is heavy rain.
- the bumper is very dirty, for example after driv-
ing on salted roads.
- there is interference to the radio signal from
the vehicle key, such as from cell phones or re
mote controls.
Open ing and closing
Luggage compartment lid emergency
release
If the central locking system fails, the luggage
compartment lid can be opened at the lock cylin
der.
A U D ,.
Fig. 32 Luggage compartment lid : mechan ica l key in the
l ock cyli nder
.. Remove the mechanical key Q page 31.
.. Insert the key in the lock cylinder as p ictured.
.. Turn the key approximately 45° to the right
r=) fig. 32. The luggage compartment lid opens .
In this position the key cannot be pulled out of
the lock cylinder.
Parental control
Mechanical child safety lock in the rear
doors
The child safety lock prevents the rear doors
from being opened from the inside.
Fig. 33 Rear doors: chil d safety lock
The child safety lock is visible only when the door
is open.
.. Remove the mechanical key
Qpage 31.
.,. To switch on the child safety lock, turn the key
in the direction of the arrow.
39
Page 49 of 302
detected by the light sensors. So always
switch on the headlights
io u nder these
weather cond itions and when driving in the
dark.
- Crashes can happen when you cannot see
the road ahead and when you cannot be
seen by other motorists. Always turn on the
headlights so that you can see ahead and so
that others can see your car from the back.
- The rear fog lights should only be turned on in accordance with traffic regulat ion, as the
lights are br ight for following traffic.
- Please obse rve legal regulations when using
the light ing systems described .
@ Tips
-The light sensor* for automatic dynam ic
headlight range control* is located in the
rear view mirror mount . You should there
fo re not app ly any st icke rs to the windshie ld
i n this area in order to prevent malfunctions
or fail ures.
- In the event of a light sensor malfunction,
the driver is not ified in the i nstr ument clus
ter display
~page 22.
-You w ill hear a warning tone if yo u open the
driver door when the exter io r lights are
switched on .
- In coo l o r damp wea ther, the inside of the
headlig hts, turn s ignals and tai l ligh ts can
fog over d ue to the temperature d if f erence
between the inside and outside. They will
clear short ly after switch ing them o n. This
does not affect the serv ice life of the light
i ng .
Lights and V ision
Emergency flasher
The emergency flasher makes other motorists
aware that you or your vehicle ore in on emer
gency situation .
~ ~
~ ·--==-..-,-.,..= ..... ·=- -,
I
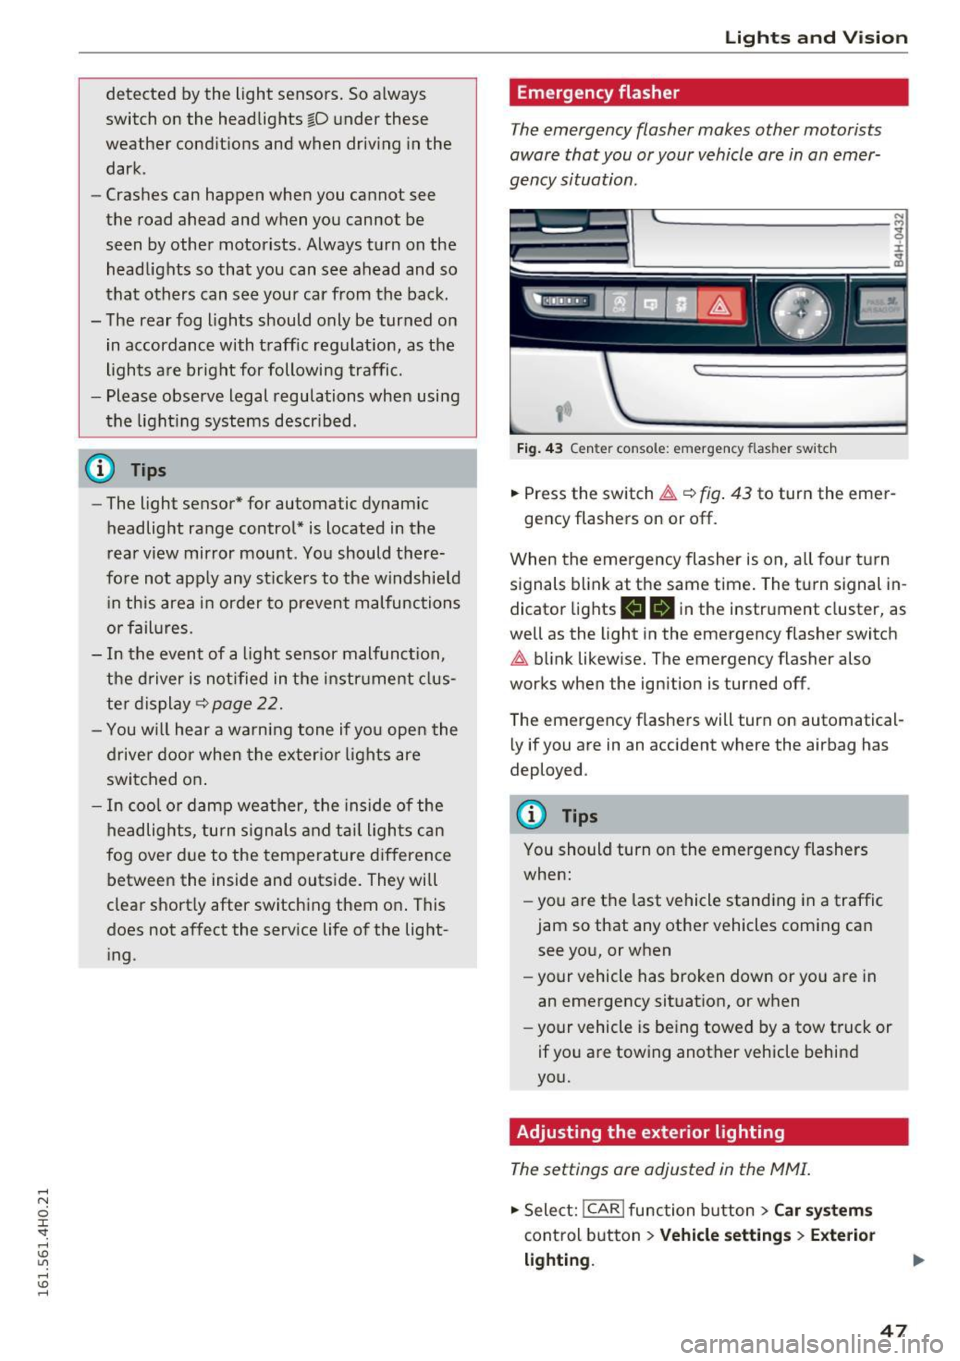
Fig . 43 Cen te r console: emergency flas her swi tch
• Press the switch~ ~fig . 43 to turn the eme r-
gency flashers on or off .
When the emergency flasher is on, a ll fo ur turn
signals blin k at the same time. The turn signal in
dicator lights
II B in the instrument cluster, as
well as the light in the emergency flasher switch
~ b link likew ise. The emergency flasher also
works when the ign ition is turned off .
The emergency flashers will turn on automatical ly if you are in an accident where the airbag has
deployed .
(l') Tips
You should turn on the eme rgency flashers
when:
- you a re t he last vehicle standing in a traffic
jam so that any other vehicles coming can see you, or when
- your vehicle has broken down or you are in
an emergency situat ion, or when
- your vehicle is be ing towed by a tow truck or
if you a re towing another vehicle behind
yo u.
Adjusting the exterior lighting
The settings ore adjusted in the MMI.
• Select: I CAR I function button > Car s yste ms
control button > Vehicle settings > Exte rior
lighting .
47
Page 51 of 302

.... N
cluster illuminates when the high beams are
on.
- The
headlight flash er works only as long as you
hold the lever -even if there are no lights
turned on. The indicator light
& in the instru
ment cluster illum inates when you use the
headlight flasher.
A WARNING
Do not use the high beam or headlight flasher
if you know that these could bl ind oncoming
traffic.
High beam assist
App lies to: vehicles with high beam assist
The high beam assist automatically switches the
high beams on or off, depending on the sur
roundings and traffic conditions.
Fig. 45 Turn s ignal and h igh bea m lever : Turning on and
off the high beam assist
Activating high beam assist g
,.._ 0 ± .,. a,
Requirement:
The light switch must be in the AU
TO pos ition, the low beam headlights must be on
and the high beam assist must be switched on in
the Infota inment ~
page 47 .
.. Press the lever forwards (Din order to activate
the high beam assist. The indicator light
II
turns on in the instrument cluster display and
the high beams switch on or off automatically.
T he ind icator light
B turns on if the high
beams were switched on.
Switching the high beams on/off manually
a Requirement: High beam ass ist is activated . J:
'SI: ....
If the high beams did not switch on/off automat
ica lly when expected, you may instead switch
them on/off manually:
.. To switch the high beams on manually, press
the lever forwards (D. The indicator light
II
turns on.
.. To switch the high beams off manually, pull the
lever backwards @. The high beam assist is de
activated.
Operating the headlight flasher
.. To operate the flashers while the high beam as
sist is active and the high beams are switched
off, pull the lever into position@. The high
beam ass ist will remain active.
Messages in the instrument cluster display
Headlight assist: System fault
Drive to your authorized Audi dealer immediate ly
to have the malfunction corrected. You can still
switch the high beams on or off manually .
Headlight assist: Unavailable . No camera view
The camera view is blocked, for example by a
sticker or debris.
The sensor is located between the interior rear
view m irror and the windshield. Therefore, do not
place any stickers in this area on the windshield .
Service setting
There is a different sensitivity setting for servic
ing. This setting can be activated by pressing and
ho lding the button on the interior rearview mir
ror for more than 18 seconds. The LED next to
the button blinks three times. If you have acci dentally selected th is service function, the origi
nal sens itiv ity will be automat ically restored the
next t ime you sw itch the ignition on.
A WARNING
High beam assist is only intended to assist
the driver. The driver is still responsible for
controlling the headlights and switching the
high beams on and off manua lly depending
on traffic, lighting and visibility conditions.
Fail ure to intervene manually may lead to r isk
Ill>-
49
Page 52 of 302

Lights and Vision
of accident . It may be necessary to operate
the high beams manually in the following sit
uations, e.g.:
- For adverse weather conditions such as fog,
heavy ra in, blow ing snow or spraying water.
- On roads where oncoming traffic may be
partially obscured such as expressways.
- If there are individuals on the road with no
lighting or poor light ing, s uch as cyclists.
- In tight curves and on steep slopes .
- In poorly lit areas .
- Wi th stro ng reflecto rs such as signs.
- If the area of the windsh ield near the sensor
is fogged ove r, dirty, icy or covered with a
s ticker.
(D Tips
- The high beam ass ist is active above a speed
of app rox.
25 mph (40 km/h).
- If after activation, your speed fa lls below
approx.
15 mph (24 km/h), the hig h beams
will automatically be switched off.
Interior lighting
Front and rear interior lighting
Fig. 46 Headliner : Front interior lights
Fig. 47 Rear headli ner: Read ing light
50
Press the appropriate button ~ fig. 46:
§]-Inter io r l ight ing on/off
~ -Door contact switch on/off . The inter io r li ght
i ng is controlled automatically.
~ -Reading lights on/off
~ -Switching the rear readi ng lig hts on/off from
the cockpit .
I REAR MODEi* -Sw itch ing the rear reading lights
on/off from the co ckpit: press the I REAR MODE!
button and then the approp ria te button ~ in the
cockpit.
Ambience lighting
Applies to: vehicles with ambience lighting
You can select a color prof ile and brightness for
the ambience lighting in various areas of the ve
hicle, called zones.
Turning ambience lighting on
.. Select in the MM I: ICAR !fu nction button> Car
sy stems
control button > Vehicle settings > In
terior light ing
> On .
Adjusting /turn ing off the brightness
.. Select in t he M MI: ICAR !f unc tion bu tton > Ca r
sys tems
control button > Vehicle settings > In
terior light ing
> Brightness .
.. Turn the knob to the desired vehicle area and
press the knob. The bar that appears indicates
the selected brightness .
.. To increase or reduce the brightness, turn the
knob and press it .
Selecting a color profile*
.. Select in the MMI: ICAR ! function button > Car
systems
control button > Vehicle settings > In
terior lighting > Color p rofile .
The ambience lighting tu rns o n when the fu nc
tion is activated in the MMI and when you turn
the headlights on while the ignition is switched
on.