display AUDI TT 2021 Owner´s Manual
[x] Cancel search | Manufacturer: AUDI, Model Year: 2021, Model line: TT, Model: AUDI TT 2021Pages: 280, PDF Size: 99.18 MB
Page 32 of 280
Opening and closing
> Press both of the outer buttons on the control
unit until the yellow LED @) turns off and the
green LED (@) blinks.
Reprogramming buttons
> Switch the ignition on.
> To reprogram an individual button, press the
desired button until the green LED (@) turns off
and the yellow LED (2) starts to blink (after ap-
proximately 20 seconds). Release the button
immediately. The programming mode is active
for five minutes.
> Continue with step 5.
@ Tips
— The distance needed between the remote
control transmitter and the garage door
opener module in the radiator grille
=> fig. 29 depends on the system you are
programming.
— Depending on the system model, you may
need to release the button on the remote
control transmitter while it is programming
and press it again. Hold every position you
try when programming for at least 15 sec-
onds before trying a new position. Keep an
eye on the vehicle turn signals while doing
this.
Rolling code programming
Applies to: vehicles with garage door opener
On some systems, programming a rolling code is
also necessary.
Identifying a rolling code
> Press the button in the control unit that is al-
ready programmed again and hold it down.
>» Watch the green LED () > page 29, fig. 28. If
the green LED blinks quickly, the system (such
as a garage door) has a rolling code.
> Program the rolling code as follows:
Activating the system motor unit
> Locate the programming button on the system
motor unit. The exact location and color of the
button may vary depending on the brand.
> Press the programming button on the system
motor unit (usually this will activate a “display”
30
on the motor unit). You now have approximate-
ly 30 seconds to program the button in the
control panel.
Programming the button in the control
panel
> Press and hold the previously programmed but-
ton in the control panel for two seconds.
> To complete rolling code programming, press
and hold the button again for two seconds.
> On some systems, the button might need to be
pressed a third time to end the programming
procedure.
After programming, the system should recognize
the signal and operate when the button in the
control panel is pressed. Now you may program
the other buttons as needed.
@ Tips
— The rolling code can be programmed more
quickly and more easily with the help of a
second person.
— If any difficulties occur when programming
the rolling code, it may be helpful to read
the system operating manual.
Page 45 of 280
8S1012721BE
Lights and Vision
ZA WARNING
For safety reasons, the windshield wiper
blades should be replaced once or twice each
year.
@) Note
— The windshield wipers must only be folded
up when in the service position! Otherwise,
you risk damaging the paint on the hood or
the windshield wiper motor.
— You should not drive your vehicle or press
the windshield wiper lever when the wiper
arms are folded away from the windshield.
The windshield wipers would move back in-
to their original position and could damage
the hood and windshield.
G) Tips
— You can also use the service position, for ex-
ample, if you want to protect the windshield
from icing by using a cover.
— You cannot activate the service position
when the hood is open.
If the & indicator light turns on, then there is a
windshield wiper malfunction. Drive to an au-
thorized Audi dealer or authorized Audi Service
Facility immediately to have the malfunction cor-
rected.
a Automatic wipers: malfunction! See owner's
manual
The light/rain sensor is malfunctioning.
You can still control all functions that are not
controlled by the rain sensor using the wind-
shield wiper lever.
Drive immediately to an authorized Audi dealer
or authorized Audi Service Facility to have the
malfunction repaired.
Digital compass
SU ica liars maar meel ial eee mela
Applies to: vehicles with digital compass
BFV-0288
a
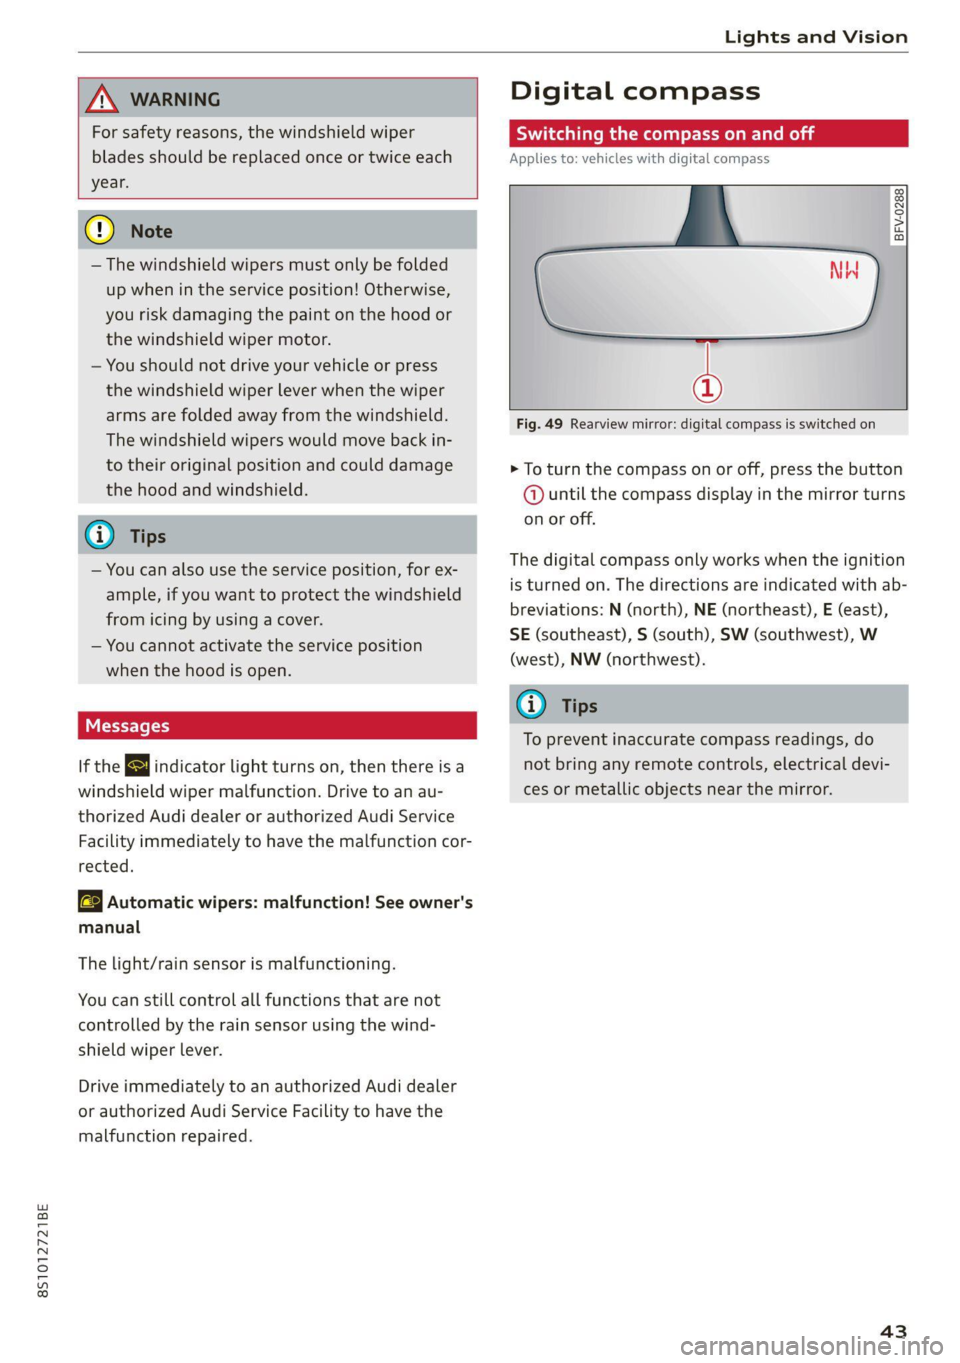
Fig. 49 Rearview mirror: digital compass is switched on
> To turn the compass on or off, press the button
@ until the compass display in the mirror turns
on or off.
The digital compass only works when the ignition
is turned on. The directions are indicated with ab-
breviations: N (north), NE (northeast), E (east),
SE (southeast), S (south), SW (southwest), W
(west), NW (northwest).
@ Tips
To prevent inaccurate compass readings, do
not bring any remote controls, electrical devi-
ces or metallic objects near the mirror.
43
Page 46 of 280
Lights and Vision
Adjusting the magnetic zone
Applies to: vehicles with digital compass
BFV-0293
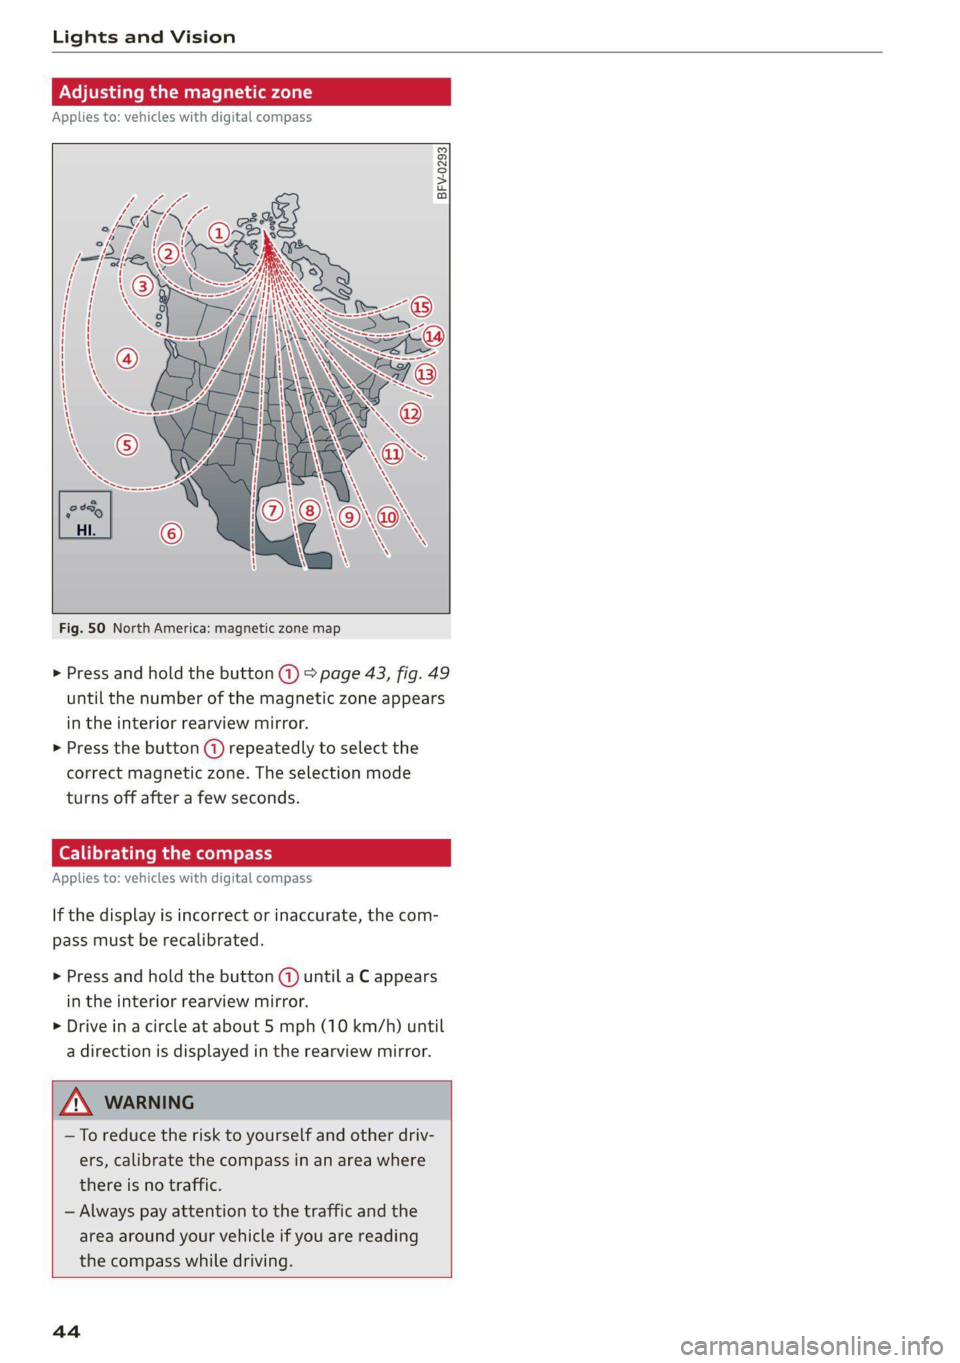
Fig. 50 North America: magnetic zone map
> Press and hold the button (@) > page 43, fig. 49
until the number of the magnetic zone appears
in the interior rearview mirror.
> Press the button (A) repeatedly to select the
correct magnetic zone. The selection mode
turns off after a few seconds.
Calibrating the compass
Applies to: vehicles with digital compass
If the display is incorrect or inaccurate, the com-
pass must be recalibrated.
> Press and hold the button () until a C appears
in the interior rearview mirror.
> Drive in a circle at about 5 mph (10 km/h) until
a direction is displayed in the rearview mirror.
—To reduce the risk to yourself and other driv-
ers, calibrate the compass in an area where
there is no traffic.
— Always pay attention to the traffic and the
area around your vehicle if you are reading
the compass while driving.
44
Page 57 of 280

8S1012721BE
Sitting correctly and safely
The locations of the airbags are labeled with
“AIRBAG”. The following airbags are installed in
your vehicle:
Driver's airbag
Front passenger's airbag
Side airbags
Applies
to: Coupe: Head curtain airbag with
ejection mitigation
©
©0080
Knee airbags
Airbags offer the best possible protection in your
vehicle during an accident when they are used to-
gether with safety belts that are fastened cor-
rectly, and when passengers are sitting in the
correct seating position. Airbags are a supple-
mentary restraint system and do not replace
safety belts.
Applies to: Coupe: Airbags may deploy during
head-on, side-impact, or rollover collisions.
Applies to: Roadster: Airbags may deploy during
head-on or side-impact collisions.
The deployment area for the airbag system can-
not be defined for every situation, since the cir-
cumstances surrounding accidents can vary wide-
ly. Factors that play an important role include the
condition of the object that the vehicle hits (hard
or soft), the angle of impact, vehicle speed, etc.
The deciding factor for the deployment of the air-
bag system is the deceleration that occurs during
an accident. Sensors in the vehicle are designed
to detect the severity of an accident in conjunc-
tion with the control module, and to provide a
targeted and timely deployment of the restraint
system. If the vehicle deceleration that is meas-
ured during an accident is below the specified
reference values in the control module, then the
airbags will not deploy, even though the vehicle
may be severely damaged from the accident. In
these cases, the vehicle occupants will be pro-
tected by the safety belts if they are fastened and
worn correctly.
The deployment of the front passenger's airbag
will depend on the occupancy of the seat
=> page 55.
Each deployed airbag is filled with gas. When this
occurs, the airbag covers open and the airbags
unfold with great force into the deployment zone
within milliseconds. Inflated airbags reduce the
movement of passengers wearing safety belts in
the direction of the impact and thus help to re-
duce the risk of injury. They can help to protect
the head, upper body, and lap, for example. How-
ever, there is the possibility that airbag deploy-
ment can cause injuries.
The airbag system only works when the ignition
is turned on.
If you or other vehicle passengers have physical
limitations that prevent sitting in a correct posi-
tion, modifications to the vehicle may be neces-
sary. For more information, contact an author-
ized Audi dealer or authorized Audi Service Facili-
ty, or call Audi customer support at
1-800-822-2834.
) Tips
Applies to: Coupe
The side curtain airbags in your vehicle have
ejection mitigation functions. This reduces
the risk of being ejected from the vehicle inte-
rior during an accident, especially in the event
of a vehicle rollover.
Advanced airbag system
Fig. 62 Headliner: indicator light to display the status of
the front passenger's airbag
The Advanced Airbag System in your vehicle has
been certified to comply with the requirements
of the United States Federal Motor Vehicle Safety
Standard (FMVSS) 208, as well as Canada Motor
Vehicle Safety Standard (CMVSS) 208 as applica-
ble at the time your vehicle was manufactured.
According to these requirements, the front Ad-
vanced Airbag System on the passenger’s side
55
>
Page 58 of 280
Sitting correctly and safely
has been certified for “suppression” for infants
approximately 12 months old and younger, and
for “low risk deployment” for children aged 3 to
6 years old (as defined in the standard).
The advanced airbag system will activate or deac-
tivate the front passenger's airbag based on the
occupancy of the seat. If a front airbag deploys
during an accident, the deployment force will
adapt to the passenger.
Components
The advanced airbag system consists of the fol-
lowing components:
— Front airbags in the steering wheel and in the
instrument panel on the front passenger's side:
these can protect the front passengers during
an accident
— Passenger occupant detection sensor in the
front
passenger's seat: this detects if the front
passenger's seat is occupied (for example, by a
person or asmall child in a child safety seat)
— Seat position sensors on the front seats: these
determine the distance between the seat and
the steering wheel or instrument panel
— Sensors in the front seat belt latch: these de-
tect if the safety belts are fastened
— PASSENGER AIR BAG OFF 8%; ON ® indica-
tor light in the headliner:this indicates if the
front passenger's airbag is activated or deacti-
vated
- indicator light in the instrument cluster:
this monitors the function of the Advanced Air-
bag System components to ensure they are
functioning correctly
How the components function together
The passenger occupant detection sensor in the
front passenger's seat detects if the front pas-
senger's seat is occupied. The passenger occu-
pant detection sensor measures the electrical ca-
pacity on the front passenger’s seat. The pas-
senger's airbag is activated or deactivated de-
pending on the electrical capacity that is meas-
ured.
The passenger's airbag is activated if:
56
— The electrical capacity is higher than the
threshold stored in the control module
— The electrical capacity is the same as or greater
than the electrical capacity of a typical adult
The passenger's airbag is deactivated if:
— The electrical capacity is lower than the thresh-
old stored in the control module
— The electrical capacity is the same as or less
than the electrical capacity of a typical one-
year-old child in a child safety seat that has
been used for certification in accordance with
FMVSS 208
If the front passenger's airbag is activated, the
PASSENGER AIR BAG ON @ indicator light
will turn on. If the front passenger's airbag is de-
activated, the PASSENGER AIR BAG OFF #;
indicator light will turn on.
The deployment force of the front airbags adapts
based on whether or not the safety belt is used
and the distance between the seat and the steer-
ing wheel/instrument panel. For example, if a
person is too close to the front airbag, the front
airbag will deploy with less force to help reduce
the risk of injury.
Meaning of PASSENGER AIR BAG OFF #4, ON
® indicator light
When the ignition is switched on, the system de-
tects whether the front passenger's seat is occu-
pied. PASSENGER AIR BAG OFF #;, ON @
will turn on for several seconds during this proc-
ess. Then it will indicate whether the front pas-
senger's airbag is activated or deactivated.
— PASSENGER AIR BAG OFF 8%; the front
passenger's airbag is deactivated and will not
deploy in the event of an accident.
— PASSENGER AIR BAG ON @: the front pas-
senger's airbag is activated and could deploy in
the event of an accident.
If a change to the occupancy status of the front
passenger's seat is detected
PASSENGER AIR BAG OFF #, ON @ will
flash for several seconds and will then display the
status of the front passenger's airbag.
Page 79 of 280
8S1012721BE
Driving
This message appears when starting or stopping
the engine if the selector lever is not in the "N" or
"P" position. The engine will not start/stop.
Starting the engine when there is a
Teles (ela)
It may not be possible to start the engine under
certain circumstances, for example, if the bat-
tery in the vehicle key is drained, if interference
is affecting the key or if there is a system mal-
function.
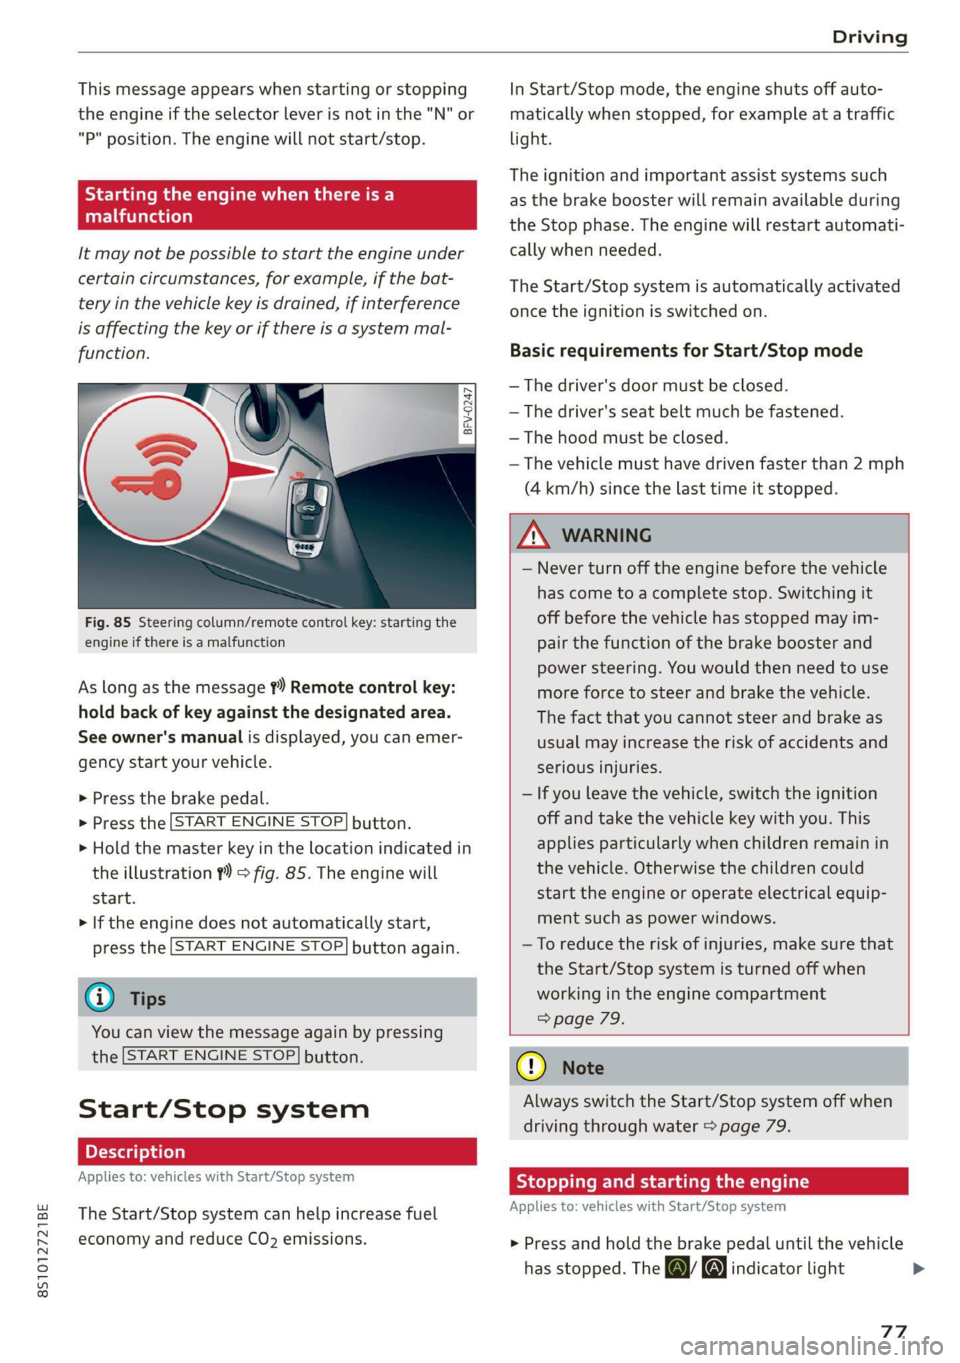
Fig. 85 Steering column/remote control key: starting the
engine if there is a malfunction
As long as the message ?) Remote control key:
hold back of key against the designated area.
See owner's manual is displayed, you can emer-
gency
start your vehicle.
» Press the brake pedal.
> Press the [START ENGINE STOP] button.
> Hold the master key in the location indicated in
the illustration ?) = fig. 85. The engine will
start.
> If the engine does not automatically start,
press the [START ENGINE STOP] button again.
@ Tips
You can view the message again by pressing
the [START ENGINE STOP] button.
Start/Stop system
Applies to: vehicles with Start/Stop system
The Start/Stop system can help increase fuel
economy and reduce CO2 emissions.
In Start/Stop mode, the engine shuts off auto-
matically when stopped, for example at a traffic
light.
The ignition and important assist systems such
as the brake booster will remain available during
the Stop phase. The engine will restart automati-
cally when needed.
The Start/Stop system is automatically activated
once the ignition is switched on.
Basic requirements for Start/Stop mode
— The driver's door must be closed.
— The driver's seat belt much be fastened.
— The hood must be closed.
— The vehicle must have driven faster than 2 mph
(4 km/h) since the last time it stopped.
Z\ WARNING
— Never turn off the engine before the vehicle
has come to a complete stop. Switching it
off before the vehicle has stopped may im-
pair the function of the brake booster and
power steering. You would then need to use
more force to steer and brake the vehicle.
The fact that you cannot steer and brake as
usual may increase the risk of accidents and
serious injuries.
— If you leave the vehicle, switch the ignition
off and take the vehicle key with you. This
applies particularly when children remain in
the vehicle. Otherwise the children could
start the engine or operate electrical equip-
ment such as power windows.
—To reduce the risk of injuries, make sure that
the Start/Stop system is turned off when
working in the engine compartment
> page 79.
@) Note
Always switch the Start/Stop system off when
driving through water > page 79.
Stopping and starting the engine
Applies to: vehicles with Start/Stop system
> Press and hold the brake pedal until the vehicle
has stopped. The a& indicator light
77
Page 80 of 280
Driving
appears in the instrument cluster once the en-
gine stops automatically.
> The engine starts again when you remove your
foot from the brake pedal. The indicator light
turns off.
Additional information for automatic
transmissions
The engine stops in the "P", "N" and "D" selector
lever positions.
If you select the “R” gear during a Stop phase
while pressing the brake pedal, the engine will
start again.
Shift to "P" quickly to prevent the engine from
starting unintentionally when shifting through
"RM.
You can control if the engine will stop or not by
reducing or increasing the amount of force you
use to press the brake pedal. For example, if you
only lightly press on the brake pedal in stop-and-
go traffic or when turning, the engine will not
switch off when the vehicle is stationary. If you
press the brake pedal harder, the engine will
switch off.
@) Tips
— Press the brake pedal during a Stop phase
to keep the vehicle from rolling.
— The ignition will turn off if you press the
START ENGINE STOP] button during a Stop
phase.
— When you stop and the Start/Stop system
turns the engine off, the ignition remains
on. Make sure the ignition is switched off
before you leave the vehicle or else the bat-
tery could drain.
General information
Applies to: vehicles with Start/Stop system
Starting and stopping the engine automat-
ically
The system checks if certain conditions are met
before and during the Stop phase, and deter-
mines if the engine stops and how long it re-
mains stopped. For example, if power usage is
high, the engine will not be stopped. Along with
78
other conditions, the following factors influence
the automatic engine start or stop:
— Environmental conditions (slopes, inclines, ele-
vation, temperature)
— Battery (charge status, temperature, power us-
age)
— Engine temperature
— Assist systems
— Driving behavior
Depending on the engine, the indicator light
may appear if the engine is not stopped.
Ignition is switched off automatically
To prevent the vehicle battery from draining, the
ignition will switch off automatically under the
following conditions:
— If the vehicle has already been driven
— If the Start/Stop system has stopped the en-
gine
— If the driver's door is opened
— If the driver's safety belt is unbuckled
— If the brake pedal is not pressed
— If the vehicle is stationary
In this case, the parking lights switch on in place
of the low beams and the message Side marker
lights will switch off automatically in 30 mi-
nutes. See owner's manual appears in the Info-
tainment system display. The side marker lights
will switch off after approximately 30 minutes or
when you lock the vehicle.
If the Start/Stop system has not turned off the
engine or if you have switched the Start/Stop sys-
tem off manually, the ignition will not be auto-
matically switched off and the engine will contin-
uetorun>A.
ZA WARNING
To reduce the risk of poisoning, never allow
the engine to run in confined spaces.
G) Tips
If you select the “D” or “N” selector lever posi-
tion after shifting into reverse, the vehicle
must be driven faster than 6 mph (10 km/h)
in order for the engine to switch off again.
Page 81 of 280
8S1012721BE
Driving
Manually switching the Start/Stop system
off ando
Applies to: vehicles with Start/Stop system
If you do not wish to use the system, you can
switch it off manually.
B8V-0645
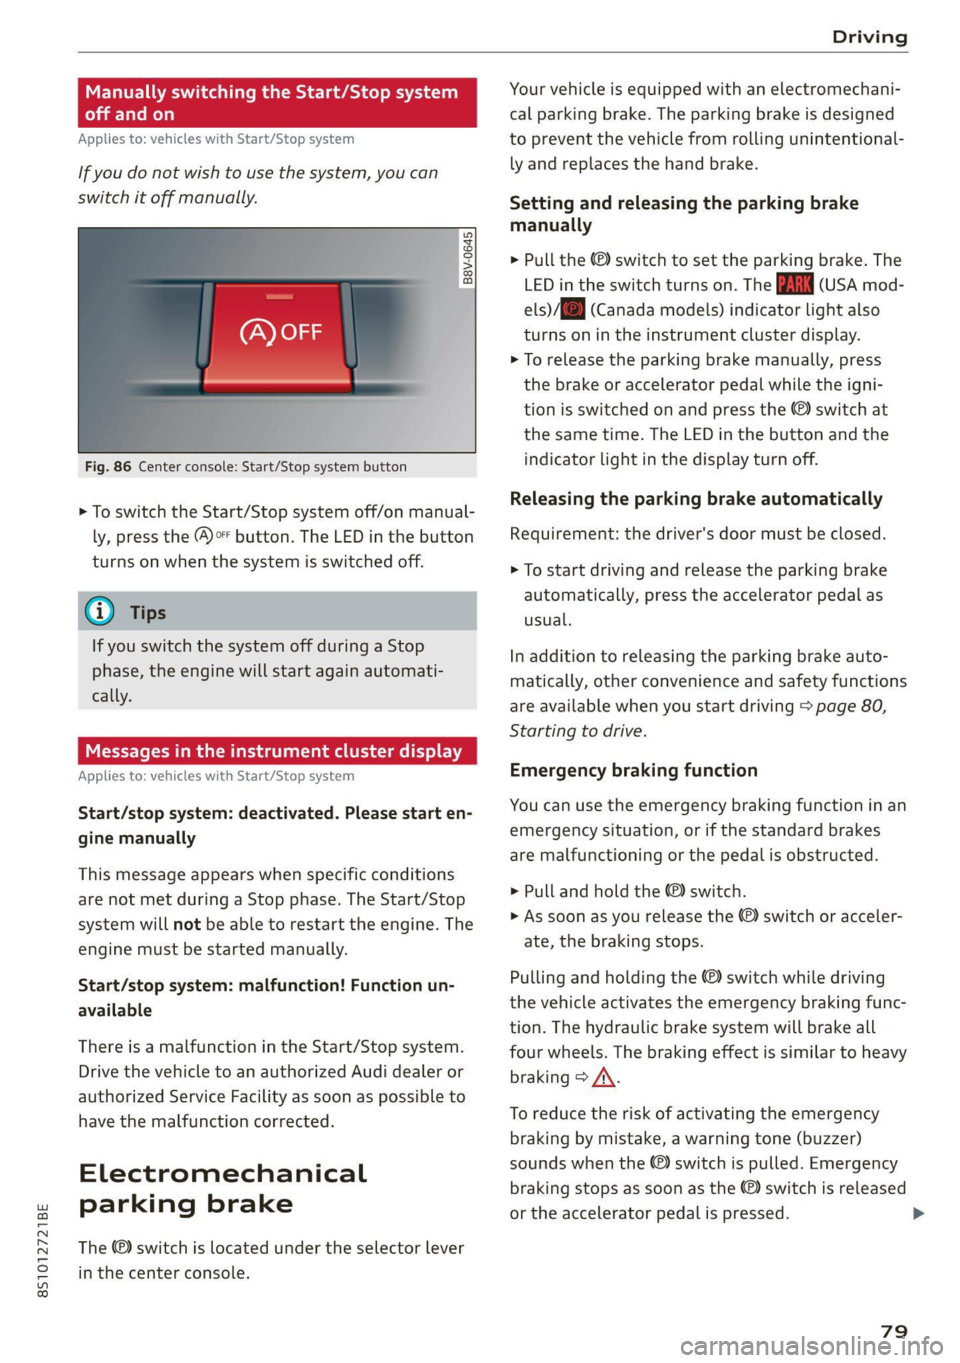
Fig. 86 Center console: Start/Stop system button
> To switch the Start/Stop system off/on manual-
ly, press the (@)o button. The LED in the button
turns on when the system is switched off.
G) Tips
If you switch the system off during a Stop
phase, the engine will start again automati-
cally.
Meee emo
Applies to: vehicles with Start/Stop system
Start/stop system: deactivated. Please start en-
gine manually
This message appears when specific conditions
are not met during a Stop phase. The Start/Stop
system will not be able to restart the engine. The
engine must be started manually.
Start/stop system: malfunction! Function un-
available
There is a malfunction in the Start/Stop system.
Drive the vehicle to an authorized Audi dealer or
authorized Service Facility as soon as possible to
have the malfunction corrected.
Electromechanical
parking brake
The ©) switch is located under the selector lever
in the center console.
Your vehicle is equipped with an electromechani-
cal parking brake. The parking brake is designed
to prevent the vehicle from rolling unintentional-
ly and replaces the hand brake.
Setting and releasing the parking brake
manually
> Pull the ©) switch to set the parking brake. The
LED in the switch turns on. The iin (USA mod-
els) /[@) (Canada models) indicator light also
turns on in the instrument cluster display.
> To release the parking brake manually, press
the brake or accelerator pedal while the igni-
tion is switched on and press the ©) switch at
the same time. The LED in the button and the
indicator light in the display turn off.
Releasing the parking brake automatically
Requirement: the driver's door must be closed.
> To start driving and release the parking brake
automatically, press the accelerator pedal as
usual.
In addition to releasing the parking brake auto-
matically, other convenience and safety functions
are available when you start driving > page 80,
Starting to drive.
Emergency braking function
You can use the emergency braking function in an
emergency situation, or if the standard brakes
are malfunctioning or the pedal is obstructed.
> Pull and hold the @®) switch.
> As soon as you release the ©) switch or acceler-
ate, the braking stops.
Pulling and holding the ©) switch while driving
the vehicle activates the emergency braking func-
tion. The hydraulic brake system will brake all
four wheels. The braking effect is similar to heavy
braking > A\.
To reduce the risk of activating the emergency
braking by mistake, a warning tone (buzzer)
sounds when the ©) switch is pulled. Emergency
braking stops as soon as the ©) switch is released
or the accelerator pedal is pressed.
79
Page 83 of 280
8S1012721BE
Driving
pressed. To reduce the risk of an accident,
do not inadvertently press the accelerator
pedal and always shift into “P” when the ve-
hicle is stopped.
— If the power supply fails, you cannot set the
parking brake once it is released, or release
it if it is set. In this case, park the vehicle on
level ground and secure it by engaging the
"P” gear. Contact an authorized Audi dealer
or authorized Audi Service Facility for assis-
tance.
ZA WARNING
— If you do not begin driving immediately after
releasing the brake pedal, your vehicle may
begin to roll backward. Press the brake ped-
al or set the parking brake immediately.
— The hill hold assist cannot hold the vehicle
on inclines in every scenario (for example,
on slippery or icy ground).
Sporty driving
Applies to: RS models
When driving in a sporty style, the wear on all ve-
hicle components is greatly increased, especially
on the engine, transmission, tires, brakes, and
suspension. This can result in increased wear. Al-
so
note the following points:
— Make sure the vehicle is in good condition.
Make sure to check the brake pads, tire tread,
and tire pressure (when tires are warm).
— Beforehand, warm up the engine by driving no
higher than two-thirds of the maximum permit-
ted engine RPM. The engine oil must be
brought to a minimum temperature of 158 °F
(60 °C).
— Before stopping the vehicle, allow the engine
and brakes to cool back down to a regular oper-
ating temperature by driving normally.
If necessary, use the following functions:
— Dynamic Audi drive select mode* > page 96
— Launch Control > page 86
— Limit ESC > page 105
@) Tips
Wear caused by load does not constitute a ve-
hicle fault as defined by the terms of the war-
ranty.
Automatic transmission
Introduction
Your vehicle is equipped with an electronically-
controlled DSG transmission called S tronic. Two
independent clutches transfer the power be-
tween the engine and transmission. It allows the
vehicle to accelerate without a noticeable inter-
ruption in traction.
The transmission shifts up or down automatically
depending on which drive program is selected.
When a moderate driving style is used, the
transmission selects the most economical driving
mode. The transmission upshifts at a lower RPM
and downshifts at a higher RPM to improve fuel
efficiency.
The transmission switches to a sporty mode after
a kick-down or when the driver uses a sporty driv-
ing style characterized by quick accelerator pedal
movements, heavy acceleration, frequent
changes in speed, and traveling at the maximum
speed.
If desired, the driver can also select the gears
manually (tiptronic mode) > page 85.
a BS a $
z 5
Pog
a
Le oe
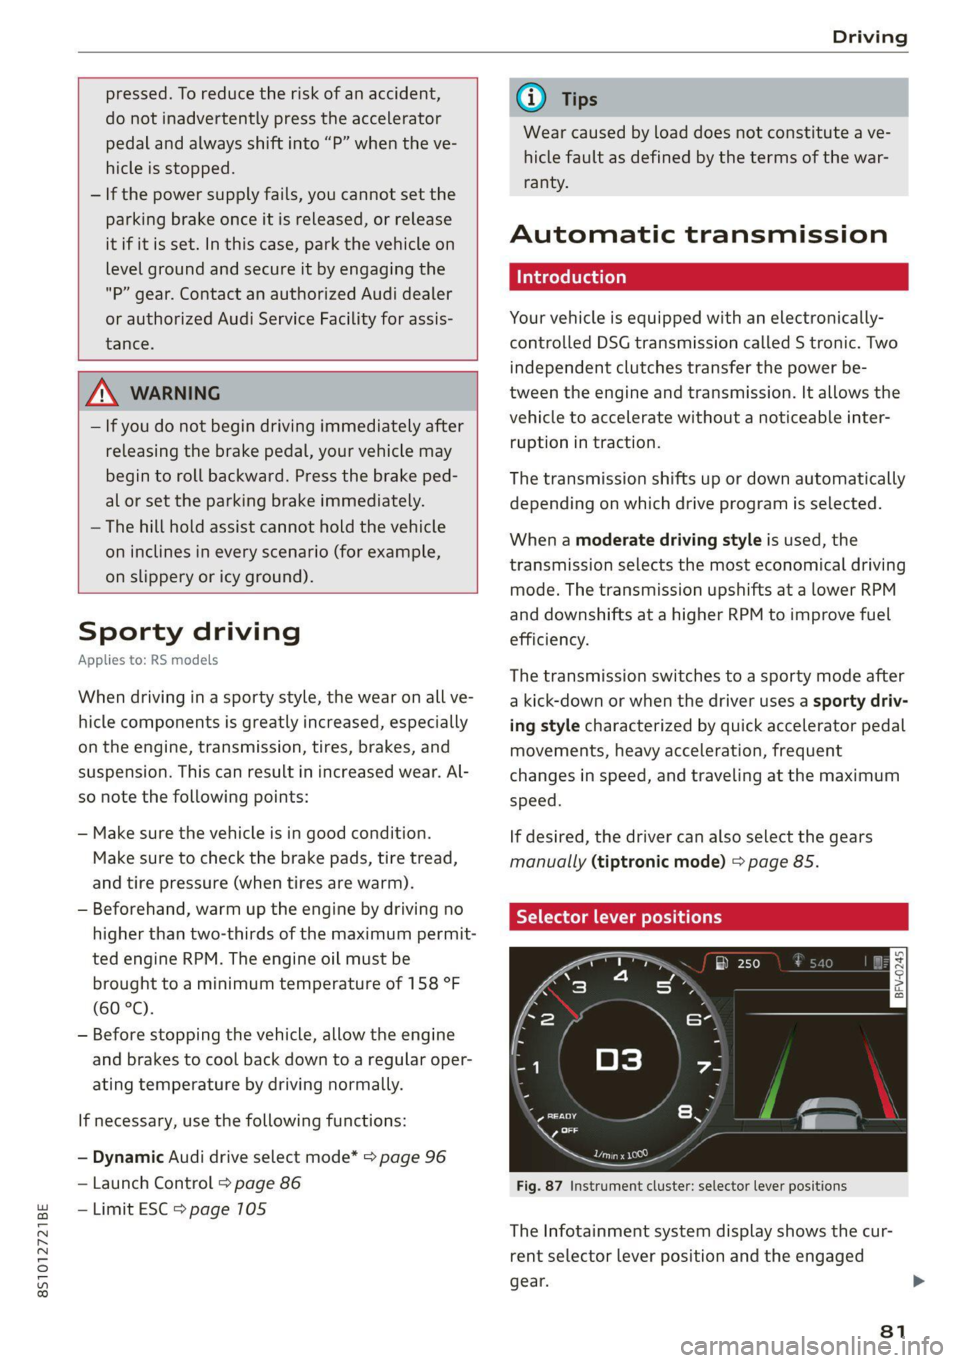
Fig. 87 Instrument cluster: selector lever positions
The Infotainment system display shows the cur-
rent selector lever position and the engaged
gear.
81
Page 84 of 280
Driving
P - Park
You can only shift into Park when the vehicle is
stationary > A.
To shift in and out of the P selector lever position,
press the interlock button in the selector lever
while pressing the brake pedal.
R - Reverse
Only shift into reverse gear when the vehicle is
stationary and the engine is running at idle
speed >A.
To select the R selector lever position, press the
interlock button while pressing the brake pedal.
The back-up lights switch on in the R position if
the ignition is switched on.
N - Neutral (idle)
The transmission is in idle in this position.
D/S - Normal position for driving forward
In the D/S selector lever position, the transmis-
sion can be operated either in the normal D mode
or in the S sport mode. To select the S sport
mode, pull the selector lever back briefly. Pulling
the lever back again will select the normal D
mode. The selected driving mode is shown in the
Infotainment display.
In the normal mode "D", the transmission auto-
matically selects the correct gear. It depends on
engine load, vehicle speed and driving style.
Select the sport mode "S" for sporty driving. The
vehicle makes full use of the engine's power.
Shifting may become noticeable when accelerat-
ing.
To move from selector lever position "N" to "D",
you must press the brake pedal and the vehicle
must be traveling less than 1 mph (2 km/h) or be
stationary > A.
— Never select "R" or "P" while driving, be-
cause this increases the risk of an accident.
— Power is still transmitted to the wheels
when the engine is running at idle. To pre-
vent the vehicle from “creeping”, you must
keep your foot on the brake in all selector
lever positions (except “P”) when the engine
is running. Otherwise, this increases the risk
of an accident.
— Do not inadvertently press the accelerator
pedal when the vehicle is stopped if a gear is
engaged. Otherwise the vehicle will start to
move immediately, even if the parking brake
is set. This could result in a crash.
— Do not press the accelerator pedal when
changing the selector lever position while
the vehicle is stationary and the engine is
running.
— Never leave your vehicle with the engine
running while in gear. If you must leave your
vehicle when the engine is running, set the
parking brake and move the selector lever to
the "P" position.
— To decrease the risk of an accident, the se-
lector lever must be in the P position and
the parking brake must be set before open-
ing the hood and working ona running en-
gine. Always read and follow the applicable
warnings > page 200, General information.
Z\ WARNING
Read and follow all WARNINGS.
— Before starting to drive, check if the desired
selector lever position is displayed next to
the selector lever.
— The vehicle can roll even if the ignition is
switched off.
82
@) Note
Never let the vehicle roll downhill with engine
off and the selector lever in the "N" position,
because this could damage the automatic
transmission and catalytic converter.
(i) Tips
— Drive select: sporty shifting characteristics
can be selected using the Dynamic driving
mode. The Infotainment display shows “S”
as the selector lever position instead of “D”.
— If you accidentally select "N" while driving,
take your foot off the accelerator pedal im-
mediately and wait for the engine to slow
down to idle before selecting "D" or "S".
— If there is a power failure, the selector lever
will not move out of the "P" position. The >