lock AUDI TT COUPE 2016 Workshop Manual
[x] Cancel search | Manufacturer: AUDI, Model Year: 2016, Model line: TT COUPE, Model: AUDI TT COUPE 2016Pages: 322, PDF Size: 52.86 MB
Page 234 of 322
Downloaded from www.Manualslib.com manuals search engine Checking and Filling
-If you a re unable to determine whether or
not a particular fuel blend
meets the speci
fications, ask your service station or its fuel
supplier.
-
Do not use fuel for which the contents can
not be identified.
- Fuel system damage and performance prob
lems resulting from
the use of fuels differ
ent from those specified are not the respon
sibility of
Audi and are not covered under
the New Vehicle or the Emission Control
System Warranties.
- If you experience a loss of fuel economy or
driveability and performance problems due
to
the use of one of these fuel blends, we
recommend
that you switch to unblended
fuel.
Gasoline additives
A major concern among many auto manufactur
ers
is carbon deposit build-up caused by the type
of gasoline
you use .
Although gasoline grades differ from one manu
facturer
to another, they have certain things in
common. All gasoline grades contain substances
that can cause deposits to collect on vital engine
parts, such as fuel injectors and intake valves.
Al
though most gasoline brands include additives to
keep engine and fuel systems clean, they are not
equally effective .
Audi recommends using TOP TIER Detergent Gas
oline.
For more information on TOP TIER Deter
gent Gasoline, please go to the official website
(www.toptiergas .com).
After an extended period
of using inadequate
fuels, carbon deposit build-ups can rob your en
gine of peak performance.
CD Note
Damage or malfunction due to poor fuel qual
ity
is not covered by the Audi New Vehicle
Limited Warranty.
232
Refueling
Fuel filler neck
The fuel filler neck is located on the right rear
side panel behind
the fuel filler flap.
If the power locking system should fail, you can
still open
the flap manually -for detailed instruc
tions see
~page 235.
You can find the fuel tank capacity of your vehicle
in ~page 299.
The label on the inside of the fuel filler flap tells
you
the correct fuel for your vehicle. For more in
formation about fuel specifications, see
~page 231.
Your vehicle fuel tank has an on board refuelling
vapor recovery system. This feature helps to pre
vent fuel vapors from escaping from
the tank and
polluting
the environment while you refuel your
vehicle .
In order to fill the tank properly while
protecting
the environment, please follow this
refueling procedure carefully.
.&. WARNING
Under normal operating conditions, never car
ry additional fuel containers in your car. Gas
canisters and other containers used to trans
port fuel can be dangerous. Such containers,
full or empty, may leak and could cause a fire
in a collision. If you must transport fuel to
use for your lawn mower, snow blower, etc.,
be very careful and always observe local and
state laws regarding the use, transportation
and storage of such fuel containers.
Make cer
tain the container
meets industry standards
(ANSI/ASTM F8S2 -86).
{[) Note
Never drive your vehicle until the fuel tank is
completely empty. The irregular supply
of
fuel can cause misfiring. Gasoline could enter
the exhaust system and damage the catalytic
converter.
Page 235 of 322
Downloaded from www.Manualslib.com manuals search engine ..... N
G: CX)
.....
"' U"I
.....
"' .....
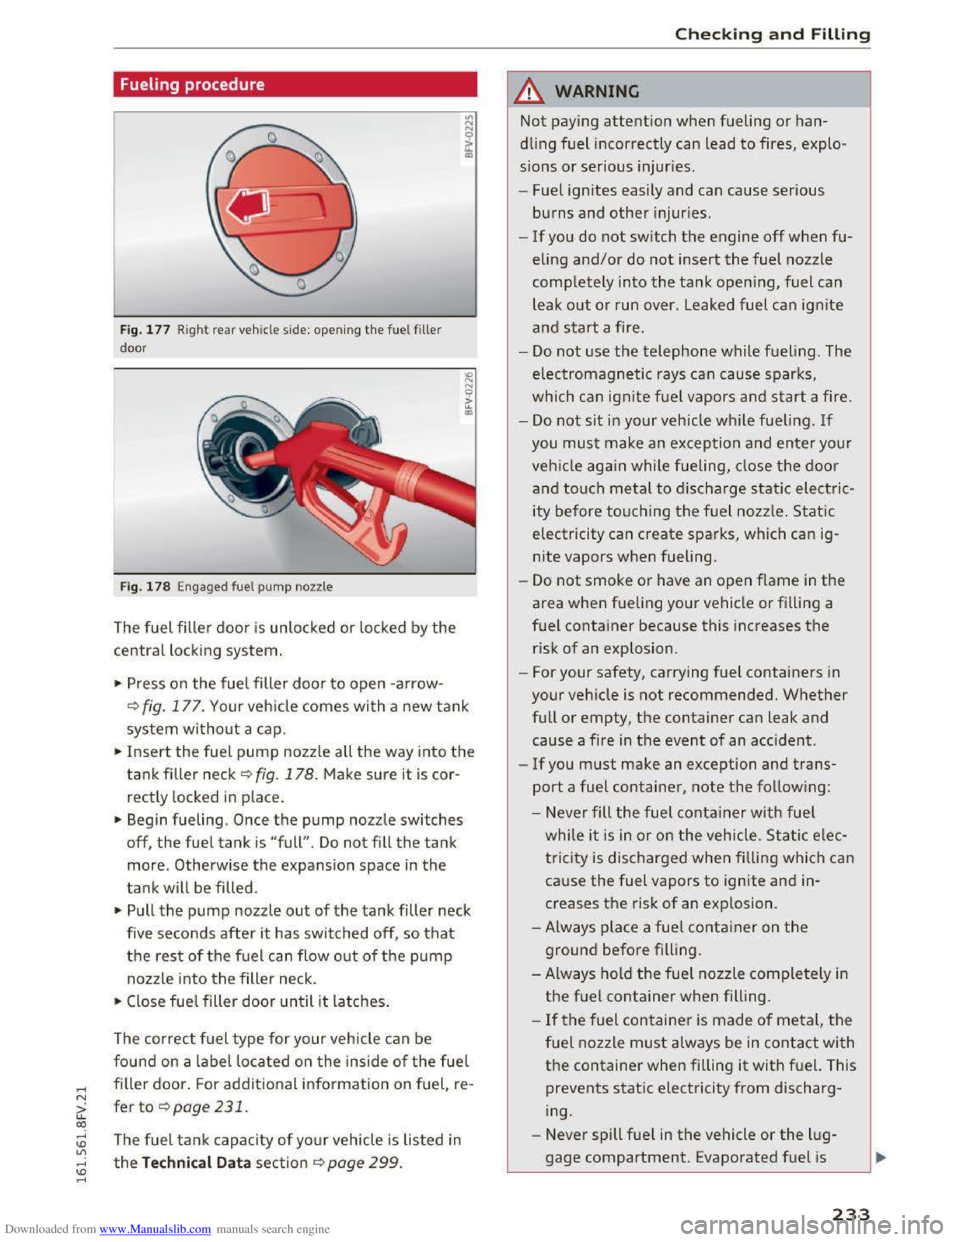
Fueling procedure
Fig. 177 Right re ar vehicle side: opening the fuel filler
door
Fig. 178 Engaged fuel pump nozzle
The fuel filler door is unlocked or locked by the
central locking system.
.. Press on the fuel filler door to open -arrow-
Q fig. 177. Your vehicle comes with a new tank
system without a cap.
.. Insert the fuel pump nozzle all the way into the
tankfiller neck ~fig. 178. Make sure it is cor
rectly locked
in place.
.. Begin fueling. Once the pump nozzle switches
off, the fuel tank is "full" . Do not fill the tank
more. Otherwise the expansion space in the
tank will be filled .
.. Pull the pump nozzle out of the tank filler neck
five
seconds after i t has switched off, so that
the rest of the fuel can flow out of the pump
nozzle into the filler neck.
.. Close fuel filler door until it latches.
The correct fuel type for your vehicle can be
found on a label located on the inside of the fuel
filler door. For additional information on fuel re-'
fer to ¢page231.
The fuel tank capacity of your vehicle is listed in
the Technical Data section Qpage 299.
Checking and Filling
.&. WARNING
Not paying attention when fueling or han
dling fuel incorrectly can lead to fires, explo
sions or serious injuries.
- Fuel igni
tes easily and can cause serious
burns and other injuries .
-
-If you do not switch the engine off when fu
eling and/or do not insert the fuel nozzle
completely into the tank opening, fuel can
leak
out or run over . Leaked fuel can ignite
and start a fire.
-
Do not use the telephone while fueling . The
electromagnetic rays can cause sparks,
which can ignite fuel vapors and start a fire.
-
Do not sit in your vehicle while fueling. If
you must make an exception and enter your
vehicl e again while fueling, close the door
and touch metal to discharge static electric
ity
before touching the fuel nozzle . Static
electricity can create sparks, which can ig
nite vapors when fueling.
-
Do not smoke or have an open f lame in the
area when fueling your vehicle or filling a
fuel container because this increases the
risk of an explosion .
- For
your safety, carrying fuel containers in
your vehicle is not recommended. Whether
full or empty, the container can leak and
cause a fire in the event of an accident .
-
If you must make an exception and trans
port a fuel container, note the following :
- Never fill
the fuel container with fuel
while it is in or on the vehicle . Static elec
tricity is discharged when filling which can
cause the fuel vapors to ignite and in
creases the risk of an exp losion .
-Always place a fuel container on the
ground before filling .
- Always hold
the fuel nozzle completely in
the fuel container when filling .
-
If the fuel container is made of metal, the
fuel nozzle must always be in contact with
the container when filling it with fuel. This
prevents static electricity from discharg
ing.
- Never
spill fuel in the vehicle or the lug
gage compartment. Evaporated fuel is
233
Page 237 of 322
Downloaded from www.Manualslib.com manuals search engine ..... N
G: CX)
.....
"' U"I
.....
"' .....
.. Guide the reserve canister filler tube into the
funnel and start the emergency fueling.
.. Remove the funnel after refueling and close the
fuel filler door so that it latches shut.
CD Note
Remove any overflowing fuel from the ve hicle
paint immediately.
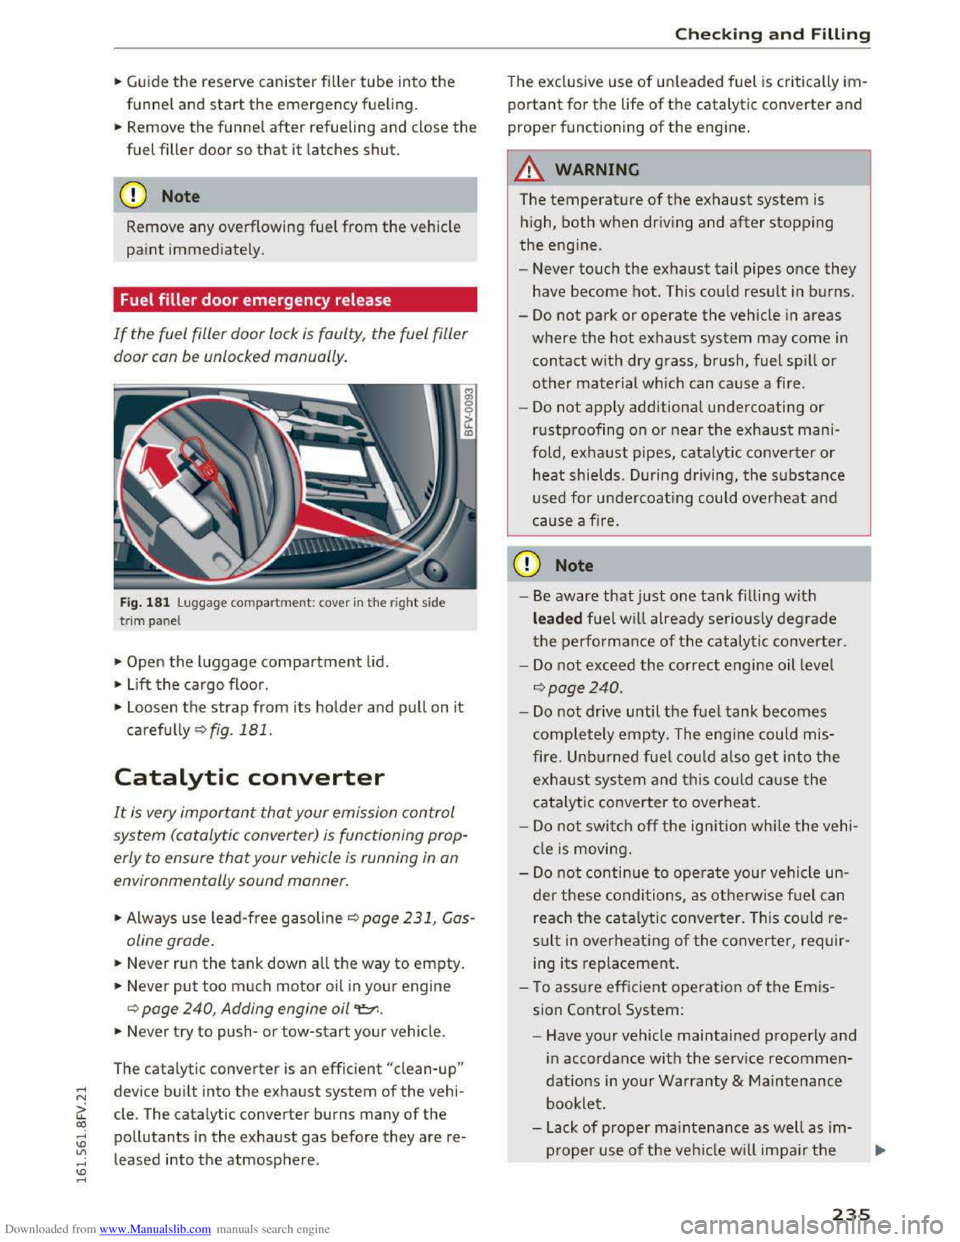
Fuel filler door emergency release
If the fuel filler door lock is faulty, the fuel filler
door con be unlocked manually.
Fig. 181 L uggage compa rtment: cover in t he r ight side
t
rim panel
.,.. Open the luggage compartment lid.
.. L ift the cargo floor .
"'
"' 0 0
it IIl
.,.. Loosen the strap from its holde r and pull on it
carefu lly Qfig. 181.
Catalytic converter
It is very important that your emission control
system (catalytic converter) is functioning prop
erly to ensure
that your vehicle is running in on
environmentally sound manner.
.,.. Always use lead-free gasoline Q page 231, Gas
oline grade .
.. Never run the tank down all the way to empty.
.. Never put too m uch motor oil in your engine
Q page 240, Adding engine oil "t::r..
.. Never try to push-or tow-start your vehicle.
The
catal ytic converter is an efficient "clean-up"
device built into the exhaust system of the vehi
cle. The catalytic
converter burns many of the
pollutants in the exhaust gas before they are re
leased into
the atmosphere .
Checking and Filling
The exclusive use of unleaded fuel is critically im
portant for the life of the catalytic converter and
proper functioning of the engine.
A WARNING
f= - I
The temperature of the exhaust system is
high, both when driving and after stopping
the engine.
- Never
touch the exhaust tail pipes once they
have become hot. This could result in burns.
-Do not park or operate the vehicle in a reas
where the hot exhaust system may come in
contact with dry grass, brush, fuel spill or
other material which can cause a fire .
-
Do not appl y additional undercoating or
r ustproofing on or near the exhaust mani
fold, exhau
st pipes, catalytic converter or
heat shields. During driving, the substance
used for un dercoating could overheat and
cause a fire.
CD Note
-Be aware that just one tank filli ng with
leaded fuel w ill already seriously degrade
the performance of th e c atalytic converter .
-
Do not exceed the correct engine oil leve l
Qpoge240 .
-Do not drive until the fuel tank becomes
completely empty. The engi ne could mis
fire. Unbu r
ned fuel coul d also get into the
exhaust system and this could cause the
ca ta lyt ic co nver ter to overheat.
-Do not swi tch off the ignition whil e the vehi
cl e is moving .
-
Do not continue to operate your vehi cle un
der these condi tions, as o therwise fuel c a n
reach the catalytic converter. This could re
sult in over heating of the converter, requir
ing
its replacement .
- T o assu re
effic ient operatio n of the E mis
sion Contro l System:
-Have your vehicle maintained properly and
in accordance wi th the service recommen
dations in yo ur Warranty & Main tenance
bookle t.
- L ack
of proper maintenance as well as im-
p r
oper use of the veh icle w ill impair the .,..
235
Page 239 of 322
Downloaded from www.Manualslib.com manuals search engine work and do not wear clothing that can
hang down into the engine.
-Limit your exposure to exhaust and chemi
cals to as short a time as possible c::> &..
/Jj._ WARNING
California Proposition 65 Warning:
- Engine
exhaust, some of its constituents,
and certain vehicle components contain or
emit chemicals known to the State of Cali
fornia to cause cancer and birth defects and
reproductive harm. In addition, certain flu
ids
contained in vehicles and certain prod
ucts of component wear contain or emit
chemicals known to the State of California
to cause cancer and birth defects or other
reproductive harm.
-Battery posts, terminals and related acces
sories contain lead
and lead compounds,
chemicals known to the State of California
to cause cancer and reproductive harms.
Wash hands after handling.
CD Note
When filling fluids, be sure not to mix the flu
ids up.
Otherwise severe malfunctions and en
gine damage will occur.
@ For the sake of the environment
You should regularly check the ground under
your vehicle in order to detect leaks quickly. If
there are visible spots from oil or other fluids,
bring your vehicle
to an authorized Audi deal
er or authorized Audi Service Facility to be
checked.
Checking and Filling
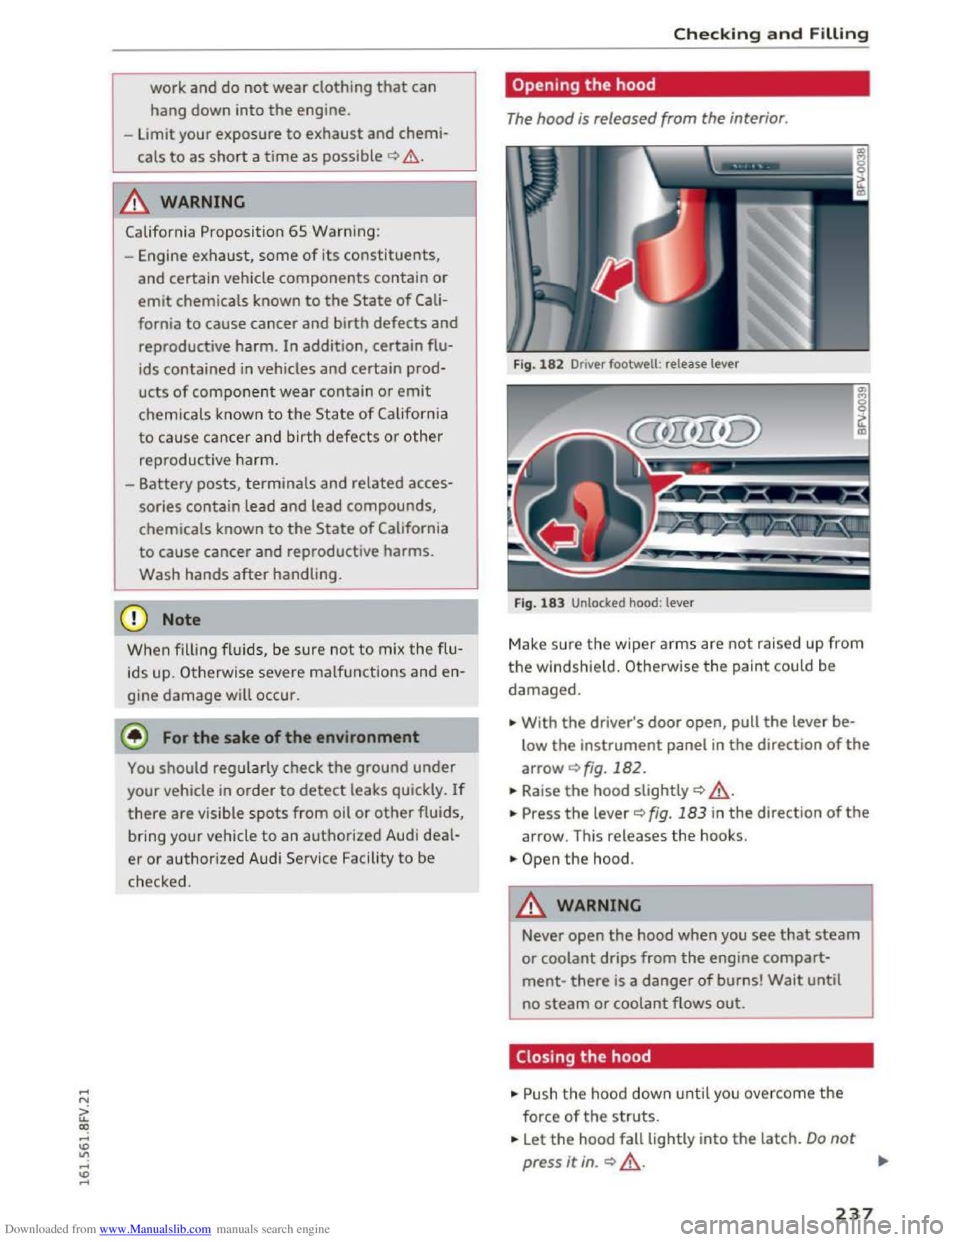
Opening the hood
The hood is released from the interior.
Fig. 182 Driver footwell : release lever
Fig.
183 Unlocked hood: lever
Make sure the wiper arms are not raised up from
the windsh ield. Otherwise the paint could be
damaged.
... With the driver's door open, pull the lever be
low the instrument panel in the direction of the
arrowc::>fig.182 .
... Raise the hood slightly c::> ,&.
... Press the lever c::>fig. 183 in the direction of the
arrow. This releases the hooks.
.. Open the hood.
.&. WARNING
Never open the hood when you see that steam
or coolant drips from the engine compart
ment-there is a danger of burns! Wait until
no steam or coolant flows out.
Closing the hood
.. Push the hood down until you overcome the
force of the struts .
... Let the hood fall lightly into the latch. Do not
press it in. c::> ,&. ...
237
Page 245 of 322
Downloaded from www.Manualslib.com manuals search engine ...... N
> u. CX> ...... u:>
"' ...... u:> ......
Read and follow the WARNINGS before check
ing anything
in the engine compartment
Qpage236.
Checking the engine coolant level
""Park your vehicle on a level surface.
"" switch the ignition off.
.. Read the coolant level on the coolant expansion
tank
Q page 238, fig. 184. The coolant level
must be between the markings when the en
gine
in cold. When the engine is warm it can be
slightly above
the upper marking.
Adding coolant
Requirement: there must be a res idual amount of
coo l
ant in the expans io n tank c:?(i) .
""Let the engine cool down.
.. Place a cloth over the coolant expansion tank
cap and unscrew
the cap counterclockwise
c:?,8..
""Add coolant mixed in the correct ratio
i:?page 242 up to the upper marking.
""Make sure that the fluid level remains stable.
Add more coolant if necessary.
"" Close the cap securely .
A coolant loss suggests a leak. Immediately drive
your vehicle
to an authorized Audi dealer or au
thorized
Audi Service Facility and have the cool
ing system inspected.
If the cooling system is not
leaking, a loss can come from
the coolant boiling
through overheating and being pushed
out of the
cooling system.
.&. WARNING
-The cooling system is pressurized and can be-
come very hot.
To reduce the risk of burns
from hot coolant:
-
Do not open the coolant expansion tank cap
w ith
the engine hot. There is a risk of burns .
- Stop
the engine and allow it to cool.
-
Protect your face, hands and arms from es-
caping coolant and
steam by covering the
coolant tank cap with a large, thick cloth.
- Turn
the coolant tank cap counterclockwise
slowly and keep light pressure on
the cap.
-
To reduce the risk of burns, do not allow any
antifreeze or coolant to dr
ip onto the ex-
Checking and Filling
ha ust system or hot engine components.
The ethylene glycol in engine coolant can
catch fire under certain circumstances.
- The coolant additive and the coolant can be
dangerous to your health.
For this reason,
keep
the coolant in the original container
away from children. There is a
risk of poi
soning.
-When working in the engine compartment,
remember
that the radiator fan can switch
on even if
the ignition is switched off, which
increases
the risk of personal injury.
CD Note
Do not add coolant if the expans ion tank is
empty . Air could enter the cooling system and
damage
the eng ine. If this is the case, do not
continu e driving. See an authorized
Audi dea l
er or authorized
Audi Service Facility for assis
tance.
Radiator fan
The radiator fan switches on automatically by it
self.
An auxiliary electric radiator fan switches on and
off depending on coolant temperature and other
vehicle operating conditions.
After you switch
the engine off, the auxiliary fan
can continue running for
up to 10 minutes -even
with
the ignit ion off. It can even switch on again
later by itself c:? & . if
- the temperature of
the engine coolant rises due
to
the heat build-up from the engine in the en
gine compartment, or
-
the engi ne compartment heats up because the
vehicle is parked in intense sunlight.
.&. WARNING
-To reduce the risk of personal injury never
touch
the radiator fan.
- The auxiliary electric fan
is temperature
controlled and can switch on suddenly even
when
the engine is not running.
243
Page 246 of 322
Downloaded from www.Manualslib.com manuals search engine Checking and Filling
-The auxiliary radiator fan switches on auto
matically when the engine coolant reaches a
certain temperature and will continue to run
until the coolant temperature drops.
Brake fluid
Checking brake fluid level
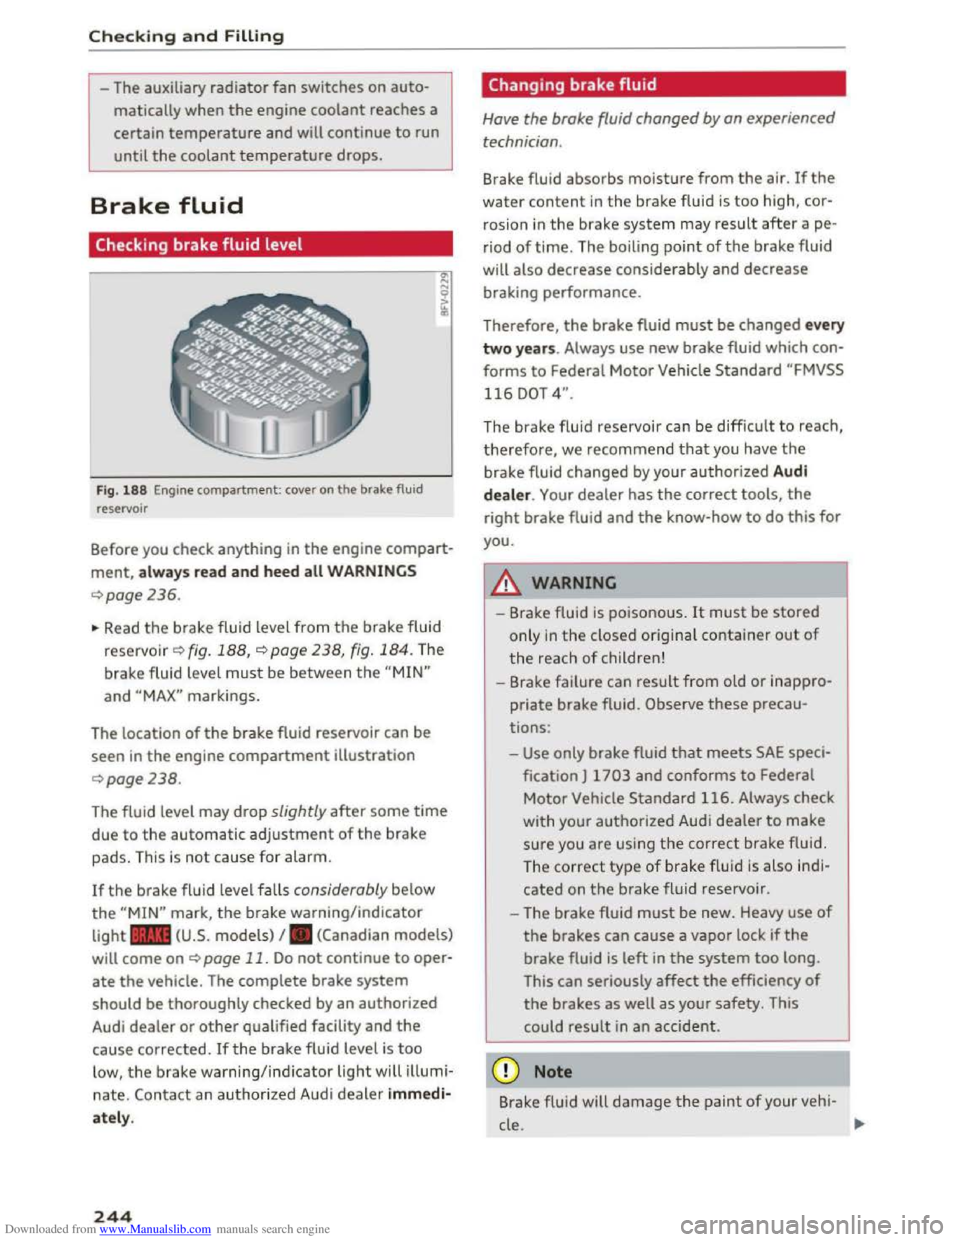
Fig. 188 Engine compartment: cover on the brake fluid
reservoir
Before you check anything in the engine compart
ment, always read and heed all WARNINGS
¢page 236.
~ Read the brake fluid level from the brake fluid
reservo ir ¢ fig. 188, ¢page 238, fig. 184. The
brake fluid level must be between the "MIN"
and "MAX" markings.
The location
of the brake fluid reservoir can be
seen in the engine compartment illustration
¢page238.
The fluid level may drop slightly after some time
due to the automatic adjustment of the brake
pads. This is not cause for alarm.
If the brake fluid level falls considerably below
the "MIN" mark, the brake warning/indicator
light .. (U.S. models) I. (Canadian models)
will come on ¢ page 11. Do not continue to oper
ate the vehicle. The complete brake system
should be thoroughly checked by an authorized
Audi dealer or other qualified facility and the
cause corrected. Ifthe brake fluid level is too
low, the brake warning/indicator light will illumi
nate. Contact an authorized Audi dealer immedi
ately.
244
Changing brake fluid
Have the brake fluid changed by an experienced
technician .
Brake fluid absorbs moisture from the air. If the
water content in the brake fluid is too high, cor
rosion in
the brake system may result after ape
riod of time. The boiling point of the brake fluid
will
also decrease considerably and decrease
braking performance.
Therefore, the brake fluid must be changed every
two years. Always use new brake fluid which con
forms to Federal Motor Vehicle Standard "FMVSS
116 DOT 4".
The brake fluid reservoir can be difficult to reach,
therefore, we recommend that you have the
brake fluid changed by your authorized Audi
dealer. Your dealer has the correct tools, the
right brake fluid and the know-how to do this for
you.
8._ WARNING
- Brake fluid is poisonous. It must be stored
only in the closed original container out of
the reach of children!
-Brake failure can result from old or inappro
priate brake fluid. Observe these precau
tions:
-Use only brake fluid that meets SAE speci
fication
J 1703 and conforms to Federal
Motor Vehicle Standard 116. Always check
with
your authorized Audi dealer to make
sure you are using the correct brake fluid.
The
correct type of brake f lui d is also ind i
cated on the brake fluid reservoir .
- The
brake fluid must be new. Heavy use of
the brakes can cause a vapor lock if the
brake fluid is left in the system too long.
This
can seriously affect the efficiency of
the brakes as well as your safety. This
could
result in an accident.
CD Note
Brake flu id will damage the paint of your veh i-
cle .
JIJ.
Page 274 of 322
Downloaded from www.Manualslib.com manuals search engine Care and cleaning
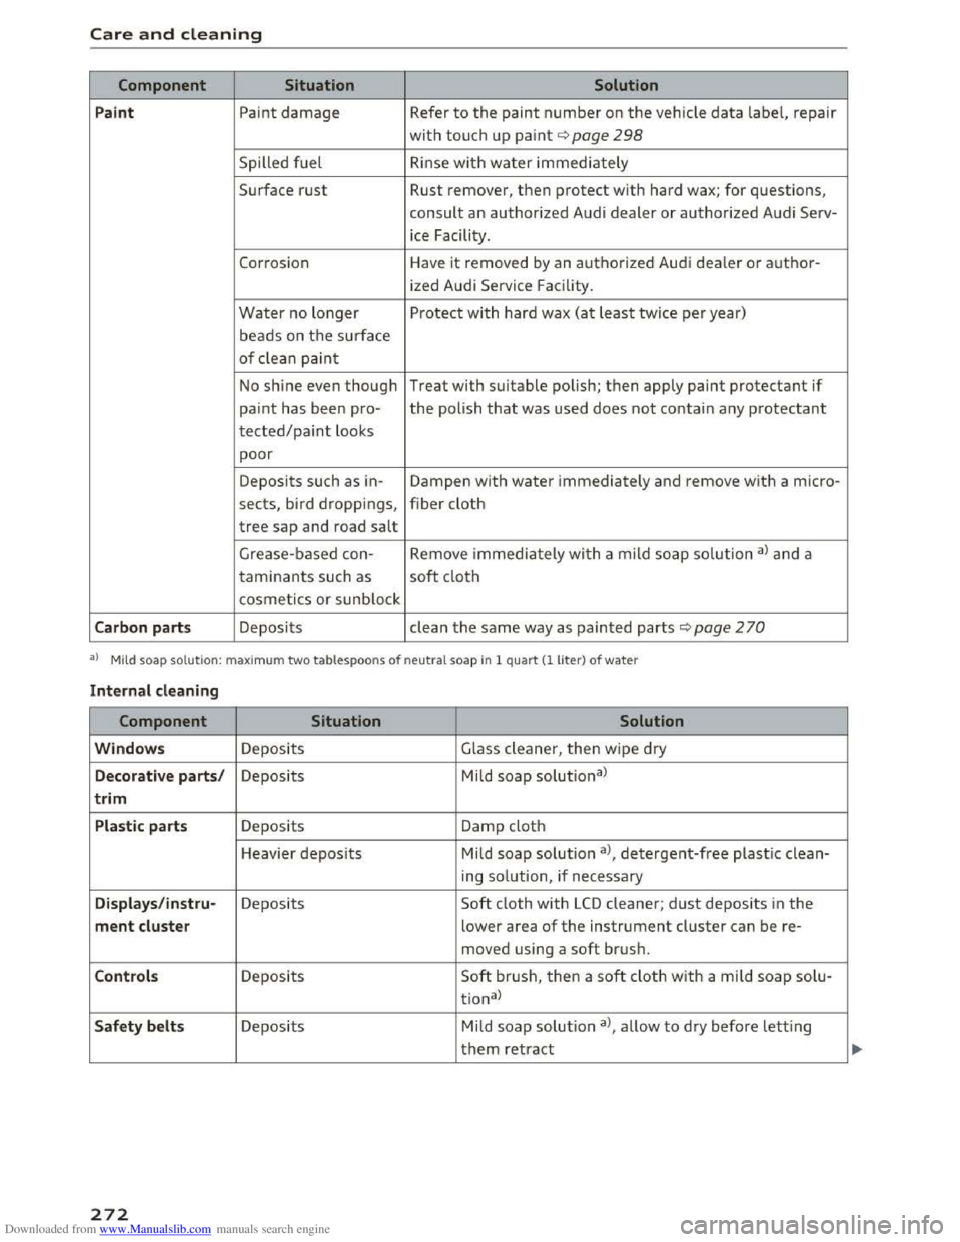
Component Situation Solution
P a int
Paint damage Refer to the paint number on the vehicle data label, repair
with touch up paint¢ page 298
Spilled fuel R inse with water immediately
Surface rust Rust remover, then protect with hard wax; for questions,
consult an authorized Audi dealer or authorized Audi Serv-
ice Facility.
Corrosion Have it removed by an authorized Audi dealer or author-
ized Audi Service Facility.
Water no longer Protect with hard wax (at least twice per year)
beads on the surface
of clean paint
No shine even though Treat with suitable polish; then apply paint protectant if
paint has been pro-the polish that was used does not contain any protectant
tected/paint looks
poor
Deposits such as in-Dampen with water immediately and remove with a micro-
sects, bird droppings, fiber cloth
tree sap and road salt
Grease -based con- Remove immediately with a mild soap solution al and a
taminants such as soft cloth
cosmetics or sunblock
Carbo n part s Deposits clean the same way as painted parts ¢page 2 70
a) Mild soap solution: maxim um two tablespoons of neutral soap in 1 quart (1 liter) of water
Int ernal cleaning
Component Situation Solution
Windows Deposits Glass cleaner, then w ipe dry
Decorat iv e parts/ Deposits Mild soap solutional
trim
Plasti c parts Deposits Damp cloth
Heavier
deposits Mild soap solution al, detergent-free plasti c clean-
ing
solution, if necessary
Dis plays/instr u-Deposits Soft cloth with LCD cleaner; dust deposits in the
ment cluste r lower area of the instrument cluster can be re-
moved using a soft brush.
Contro ls Deposits Soft bru sh, then a soft cloth with a mi ld soap solu-
tional
Safety be lts Deposits Mild soap solution al, allow to dry before letting
them retract
272
Page 280 of 322
Downloaded from www.Manualslib.com manuals search engine Emergency assista nce
-If you have a flat tire, move a safe distance
off the road. Turn off the engine, turn the
emergency flashers on and use other warn
ing devices to alert other motorists.
-Make sure that passengers wait in a safe
place away from the vehicle and well away
from the road and traffic.
-
To help prevent the vehicle from moving
suddenly and possibly slipping off the jack,
always fully
set the parking brake and block
the wheel diagonally opposite the wheel be
ing changed. When one front wheel is lifted
off the ground, placing the Automatic
Transmission in P (Park) will not prevent the
vehicle from moving.
- Before you
change a wheel, be sure the
ground is level and firm. If necessary, use a
sturdy board under the jack.
- Always
store the veh icle tool k it, the jack
and the replaced tire in the luggage com
partment¢ page 176.
Changing a wheel
When you change a wheel, follow the sequence
described
below step-by-step and in exactly that
order .
1. Remove the decorative wheel co ver*. For
more de tails see also¢ page 2 78, Decora
tive wheel covers or c::> page 2 79, Wheels
with wheel bolt caps.
2. Loosen the wheel bolts ¢page 2 79.
3. Locate the proper mounting point for the
jack and align the jack below that point
c::>page280.
4. Raise the car with the jack c::> page 280.
5. Remove the wheel with the flat tire and then
install the s pare ¢ page 281.
6. Tighten all wheel bolts lightly.
7.
Lower the veh icle with the jack .
8. Use the wheel bolt wrench and firml y tighten
all wheel bolts ¢page 279.
9. Replace the decorative wheel cover*.
278
A WARNING
Always read and follow all WARNINGS and in
formation c::> .& in Raising the vehicle on
page
280 and c::>page 282.
After changing a wheel
A wheel change is not complete without the do
ing the following.
.. Always store the vehicle tool kit, the jack* and
the replaced tire in the luggage compartment
c::>page 176.
.. Check the tire pressu re on the spare wheel im
mediately after mounting it.
.,. As soon as possib le, have the tightening tor
que s on all wheel bolts checked with a torque
wrench. The correct tightening torque is 90 ft
lb (120 Nm).
.. Have the flat t ire replac ed as soon as possible .
(0 Tips
-If you notice tha t the wheel bolts are cor
roded and difficult to turn while changing a
t ire,
they s hou ld be replaced before you
check
the tightening torque.
- Drive
at reduced speed unti l yo u have the
tightening torques checked.
-
After changing a wheel, the tire pressure in
all four tires must be checked/corrected and
the tire pressure monitoring indicator must
be stored in the Infotainment c::> page 269.
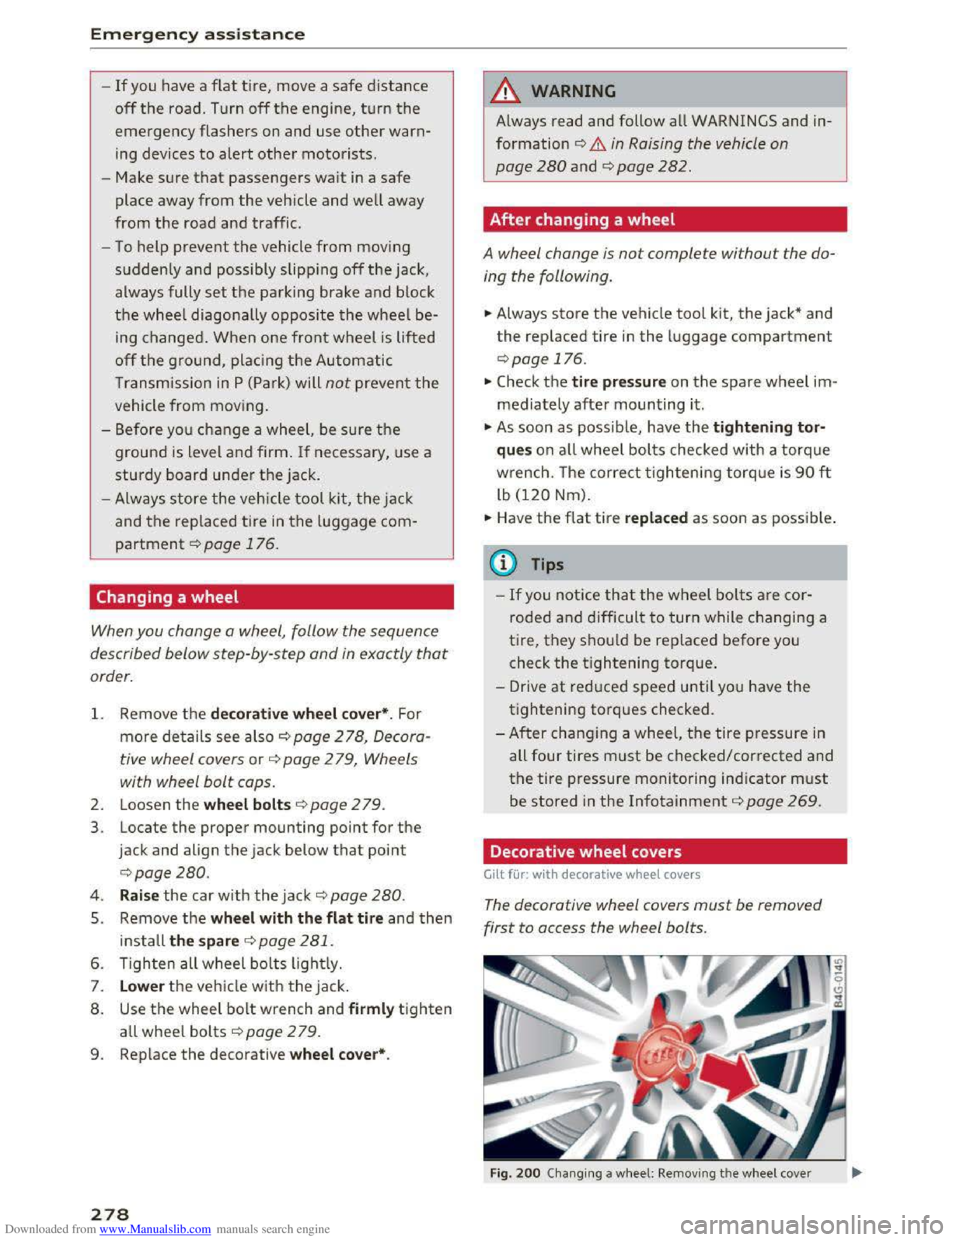
Decorative wheel covers
Gilt for: with decorative wheel covers
The decorative wheel covers must be removed
first to access the wheel bolts.
Fig. 200 Changing a w heel: Removing th e w heel cover
Page 281 of 322
Downloaded from www.Manualslib.com manuals search engine ..... N
G: CX)
.....
"' U"I
.....
"' .....
Removing
•Insert the hoo k (prov ided with the vehicle tool
kit)
in the ho le in the wheel hub cover .
• Pull off the decorative wheel co ve r ¢ fig. 200.
Wheels with wheel bolt caps
Gilt fi.ir: wit h wheel bolts with caps
The caps must be removed first from the wheel
bolts before the bolts can be unscrewed .
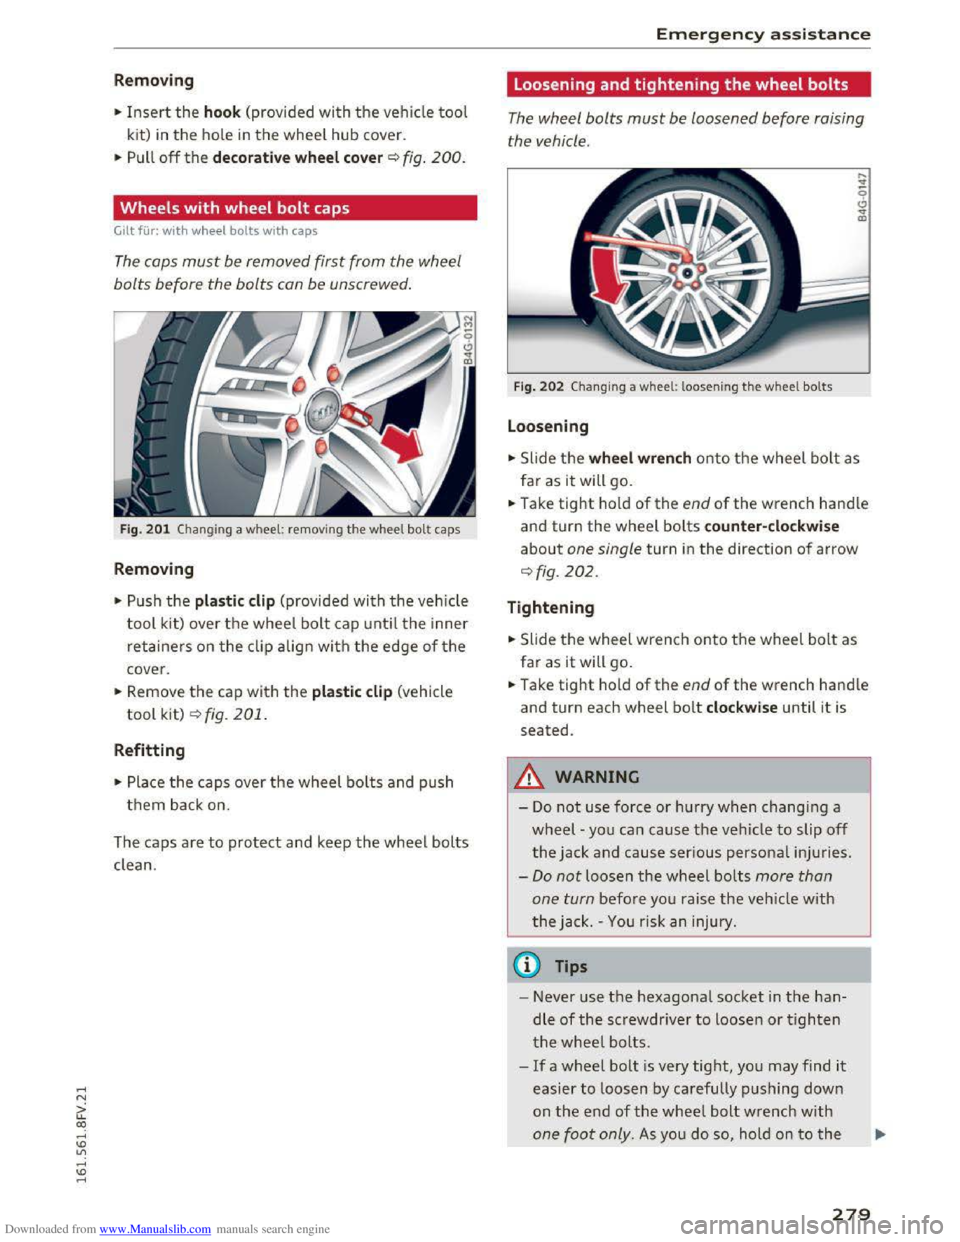
Fig. 201 Chan g in g a wheel: re moving the wheel bolt ca ps
Remov ing
•Push the plastic clip (provided with the vehicle
tool kit) over the wheel bolt cap until the inner
retainers on the clip align with the edge of the
cover.
• Remove the cap with the pla stic clip (vehicle
tool kit) ¢ fig. 201 .
Refitting
.. Place the caps over the wheel bolts and push
them back on.
The caps are to protect and keep the wheel bolts
clean .
Emergency assistance
Loosening and tightening the wheel bolts
The wheel bolts must be loosened before raising
the vehicle.
Fig. 202 Changing a whe el: loosening the wheel bolts
Loosen ing
.. Slide the whee l wrench o nto the wheel bo lt as
far as it will go.
• Take tight hold of the end of the wrench handle
and turn the wheel bolts c ounter-clockwise
about one single turn in the direction of arrow
¢fig. 202.
Tightening
• Slide the wheel w rench onto the wheel bolt as
far as it will go.
.. Take tight hold of the end of the wrench handle
and turn each wheel bolt clo ckw ise until it is
seated.
A WARNING
f=
-Do not use force or hurry when changing a
wheel -you can cause the vehicle to slip off
the jack and cause serious personal inju ries.
-Do not loosen the wheel bo lts more than
one turn
before you raise the vehicle with
the jack. -You risk an injury.
(D Tips
-Never use the hexagonal socket in the han
dle of the screwdriver to loosen or tighten
the wheel bolts.
-If a wheel bolt is very tight, you may find it
easier to loosen by carefully pushing down
on
the end of the wheel bolt w rench with
one foot only. As you do so, hold on to the
279
Page 283 of 322
Downloaded from www.Manualslib.com manuals search engine ..... N
G: CX)
.....
"' U"I
.....
"' .....
-To help prevent injury to yourself and your
passengers:
-Do not raise the vehicle until you are sure
the jack is securely engaged.
-Passengers must not remain in the vehicle
when it is jacked up.
- Make
sure that passengers wait in a safe
place away from the vehicle and well away
from
the road and traffic.
- Make
sure jack position is correct, adjust
as necessary and then continue to raise
the jack.
- Changes
in temperature or load can affect
the height of the vehicle.
CD Note
Do not lift the vehicle by the sill. Position the
vehicle jack only at the designated lifting
points on the sill. Otherwise, your vehicle will
be damaged.
Taking the wheel off/installing the spare
Follow these instructions step-by-step for chang
ing the wheel.
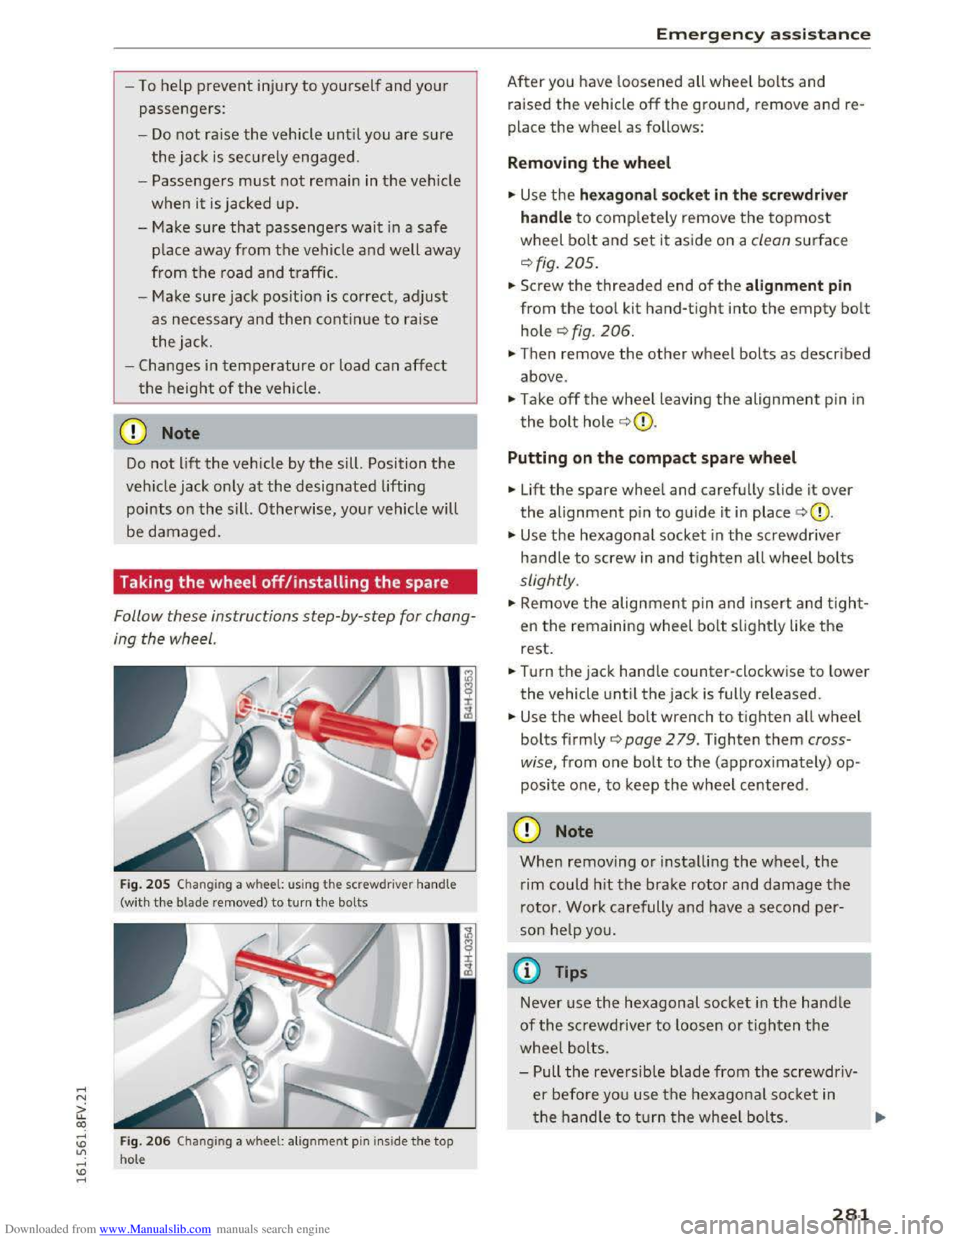
Fig. 205 Chang ing a wheel: using the screwdr ive r handle
(with
the b lade remo ved) to turn the bolts
Fig. 206 Changing a wheel: alignme nt pin inside the top
hole
Emergency assistance
After you have loosened all wheel bolts and
raised
the vehicle off the ground, remove and re
place
the wheel as follows:
Removing the wheel
.... Use the hexagonal socket in the screwdriver
handle
to completely remove the topmost
wheel bolt and set it aside on a clean surface
¢fig. 205.
.... Screw the threaded end of the alignment pin
from the tool kit hand-tight into the empty bolt
hole ¢fig. 206.
.,. Then remove the other wheel bolts as described
above .
.,. Take off the wheel leaving the alignment pin in
the bolt hole ~CD.
Putting on the compact spare wheel
... Lift the spare wheel and carefully slide it over
the alignment pin to guide it in place ¢(0.
... Use the hexagonal socket in the screwdriver
handle to screw in and tighten all wheel bolts
slightly .
.,. Remove the alignment pin and insert and tight
en the remaining wheel bolt slightly like the
rest .
.... Turn the jack handle counter-clockwise to lower
the vehicle until the jack is fully released .
.... Use the wheel bolt wrench to tighten all wheel
bolts firmly ¢ page 2 79. Tighten them cross
wise,
from one bolt to the (approximately) op
posite one, to keep the wheel centered.
CD Note
When removing or installing the wheel, the
rim could hit the brake rotor and damage the
rotor. Work carefully and have a second per
son help you.
@ Tips
Never use the hexagonal socket in the handle
of the screwdriver to loosen or tighten the
wheel bolts.
-Pull the reversible blade from the screwdriv
er before you use the hexagonal socket in
the handle to turn the wheel bolts.
281