checking oil AUDI TT COUPE 2016 Owners Manual
[x] Cancel search | Manufacturer: AUDI, Model Year: 2016, Model line: TT COUPE, Model: AUDI TT COUPE 2016Pages: 322, PDF Size: 52.86 MB
Page 6 of 322
Downloaded from www.Manualslib.com manuals search engine Table of contents
Side airbags . . . . . . . . . . . . . . . . . . . . . . . . 206
Side cu rtain airbags . . . . . . . . . . . . . . . . . . 209
Child safety . . . . . . . . . . . . . . . . . . . . . . 212
I
mportant information . . . . . . . . . . . . . . . 212
Child seats . . . . . . . . . . . . . . . . . . . . . . . . . 218
Secur ing child seats . . . . . . . . . . . . . . . . . . 223
LATCH system (Lower anchorages and
tethers
for children) . . . . . . . . . . . . . . . . . 226
Add it io nal info rmation . . . . . . . . . . . . . . . 230
Maintenance and Care ........... 231
Checking and Filling . . . . . . . . . . . . . 231
Fuel
..... .. .. ................... .. . 23 1
Refueling . . . . . . . . . . . . . . . . . . . . . . . . . . 23 2
Cat alytic conver te r . . . . . . . . . . . . . . . . . . . 235
E ng ine com partment . . . . . . . . . . . . . . . . . 236
Eng ine oil . . . . . . . . . . . . . . . . . . . . . . . . . . 239
Cooling system . . . . . . . . . . . . . . . . . . . . . . 242
Brake fluid . . . . . . . . . . . . . . . . . . . . . . . . . 244
Battery . . . . . . . . . . . . . . . . . . . . . . . . . . . . 245
W indshield washer system . . . . . . . . . . . . 248
Service in terval display . . . . . . . . . . . . . . . 249
Wheels . .. .. .. ................... . 250
Wheels and Tires . . . . . . . . . . . . . . . . . . . . 250
Tire pressu re monitoring system 267
Care and cleaning . . . . . . . . . . . . . . . . 270
General information . . . . . . . . . . . . . . . . . 270
Car washes . . . . . . . . . . . . . . . . . . . . . . . . . 270
C leaning and care information ...... .. . 271
Placing your veh icle out of service 274
Do It Yourself . . . . . . . . . . . . . . . . . . . . 275
Emergency ass istance . . . . . . . . . . . 275
General information . . . . . . . . . . . . . . . . . 275
Equipment ... .. ................... . 275
Tire mobility kit . . . . . . . . . . . . . . . . . . . . . 275
R ep lacing wheels . . . . . . . . . . . . . . . . . . . . 277
Spare tire . . . . . . . . . . . . . . . . . . . . . . . . . . 283
4
Fus e s and bulbs . . . . . . . . . . . . . . . . . . 285
E lectrica l fuses . . . . . . . . . . . . . . . . . . . . . . 28S
Bulbs. . . . . . . . . . . . . . . . . . . . . . . . . . . . . . 287
Emergency situations . . . . . . . . . . . . 288
Genera l . . . . . . . . . . . . . . . . . . . . . . . . . . . . 288
Starting by push ing o r towing . . . . . . . . . . 288
Starting with jumper cables . . . . . . . . . . . 288
Use o f jumper cables . . . . . . . . . . . . . . . . . 289
T ow ing with a tow t ruck . . . . . . . . . . . . . . 290
Raising the vehicle . . . . . . . . . . . . . . . . . . . 292
Consumer information and
technical data . . . . . . . . . . . . . . . . . . . . 294
Consumer information . . . . . . . . . . 294
Warranty coverages . . . . . . . . . . . . . . . . . . 29 4
Operat ing you r vehicle outs ide th e U .S.A.
or Canada . . . . . . . . . . . . . . . . . . . . . . . . . . 294
Audi Service Repair Manuals and
Literature . . . . . . . . . . . . . . . . . . . . . . . . . . 294
Maintenance. . . . . . . . . . . . . . . . . . . . . . . . 294
Accessor ies and technical changes . . . . . . 296
Technical data . . . . . . . . . . . . . . . . . . . . 298
Vehicle identification . . . . . . . . . . . . . . . . . 298
Weights . . . . . . . . . . . . . . . . . . . . . . . . . . . 298
Dimens ions . . . . . . . . . . . . . . . . . . . . . . . . . 299
Capacities . . . . . . . . . . . . . . . . . . . . . . . . . . 299
Gasoline eng ines 300
Index ........ ...... ............... 301
Page 237 of 322
Downloaded from www.Manualslib.com manuals search engine ..... N
G: CX)
.....
"' U"I
.....
"' .....
.. Guide the reserve canister filler tube into the
funnel and start the emergency fueling.
.. Remove the funnel after refueling and close the
fuel filler door so that it latches shut.
CD Note
Remove any overflowing fuel from the ve hicle
paint immediately.
Fuel filler door emergency release
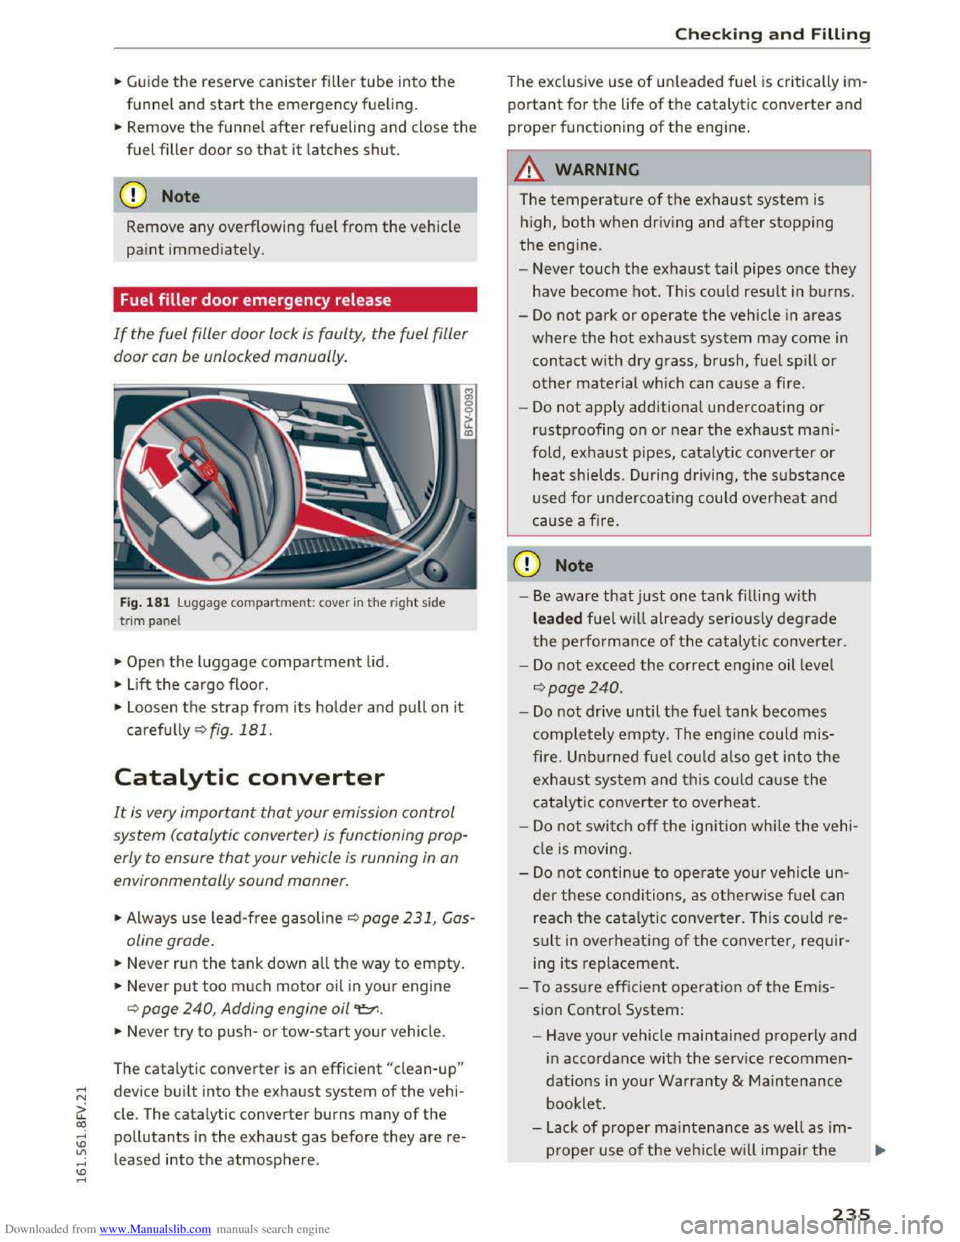
If the fuel filler door lock is faulty, the fuel filler
door con be unlocked manually.
Fig. 181 L uggage compa rtment: cover in t he r ight side
t
rim panel
.,.. Open the luggage compartment lid.
.. L ift the cargo floor .
"'
"' 0 0
it IIl
.,.. Loosen the strap from its holde r and pull on it
carefu lly Qfig. 181.
Catalytic converter
It is very important that your emission control
system (catalytic converter) is functioning prop
erly to ensure
that your vehicle is running in on
environmentally sound manner.
.,.. Always use lead-free gasoline Q page 231, Gas
oline grade .
.. Never run the tank down all the way to empty.
.. Never put too m uch motor oil in your engine
Q page 240, Adding engine oil "t::r..
.. Never try to push-or tow-start your vehicle.
The
catal ytic converter is an efficient "clean-up"
device built into the exhaust system of the vehi
cle. The catalytic
converter burns many of the
pollutants in the exhaust gas before they are re
leased into
the atmosphere .
Checking and Filling
The exclusive use of unleaded fuel is critically im
portant for the life of the catalytic converter and
proper functioning of the engine.
A WARNING
f= - I
The temperature of the exhaust system is
high, both when driving and after stopping
the engine.
- Never
touch the exhaust tail pipes once they
have become hot. This could result in burns.
-Do not park or operate the vehicle in a reas
where the hot exhaust system may come in
contact with dry grass, brush, fuel spill or
other material which can cause a fire .
-
Do not appl y additional undercoating or
r ustproofing on or near the exhaust mani
fold, exhau
st pipes, catalytic converter or
heat shields. During driving, the substance
used for un dercoating could overheat and
cause a fire.
CD Note
-Be aware that just one tank filli ng with
leaded fuel w ill already seriously degrade
the performance of th e c atalytic converter .
-
Do not exceed the correct engine oil leve l
Qpoge240 .
-Do not drive until the fuel tank becomes
completely empty. The engi ne could mis
fire. Unbu r
ned fuel coul d also get into the
exhaust system and this could cause the
ca ta lyt ic co nver ter to overheat.
-Do not swi tch off the ignition whil e the vehi
cl e is moving .
-
Do not continue to operate your vehi cle un
der these condi tions, as o therwise fuel c a n
reach the catalytic converter. This could re
sult in over heating of the converter, requir
ing
its replacement .
- T o assu re
effic ient operatio n of the E mis
sion Contro l System:
-Have your vehicle maintained properly and
in accordance wi th the service recommen
dations in yo ur Warranty & Main tenance
bookle t.
- L ack
of proper maintenance as well as im-
p r
oper use of the veh icle w ill impair the .,..
235
Page 239 of 322
Downloaded from www.Manualslib.com manuals search engine work and do not wear clothing that can
hang down into the engine.
-Limit your exposure to exhaust and chemi
cals to as short a time as possible c::> &..
/Jj._ WARNING
California Proposition 65 Warning:
- Engine
exhaust, some of its constituents,
and certain vehicle components contain or
emit chemicals known to the State of Cali
fornia to cause cancer and birth defects and
reproductive harm. In addition, certain flu
ids
contained in vehicles and certain prod
ucts of component wear contain or emit
chemicals known to the State of California
to cause cancer and birth defects or other
reproductive harm.
-Battery posts, terminals and related acces
sories contain lead
and lead compounds,
chemicals known to the State of California
to cause cancer and reproductive harms.
Wash hands after handling.
CD Note
When filling fluids, be sure not to mix the flu
ids up.
Otherwise severe malfunctions and en
gine damage will occur.
@ For the sake of the environment
You should regularly check the ground under
your vehicle in order to detect leaks quickly. If
there are visible spots from oil or other fluids,
bring your vehicle
to an authorized Audi deal
er or authorized Audi Service Facility to be
checked.
Checking and Filling
Opening the hood
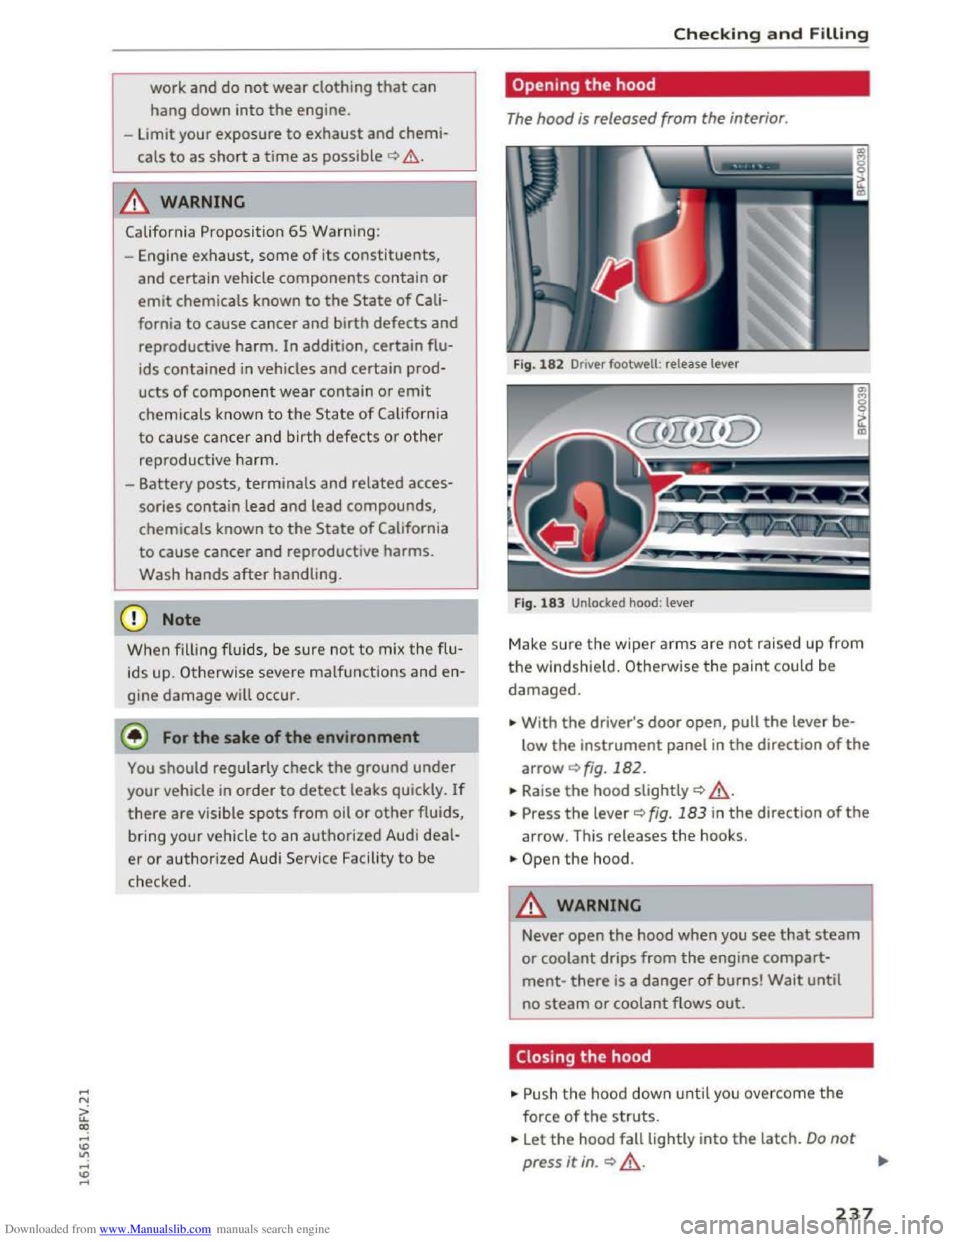
The hood is released from the interior.
Fig. 182 Driver footwell : release lever
Fig.
183 Unlocked hood: lever
Make sure the wiper arms are not raised up from
the windsh ield. Otherwise the paint could be
damaged.
... With the driver's door open, pull the lever be
low the instrument panel in the direction of the
arrowc::>fig.182 .
... Raise the hood slightly c::> ,&.
... Press the lever c::>fig. 183 in the direction of the
arrow. This releases the hooks.
.. Open the hood.
.&. WARNING
Never open the hood when you see that steam
or coolant drips from the engine compart
ment-there is a danger of burns! Wait until
no steam or coolant flows out.
Closing the hood
.. Push the hood down until you overcome the
force of the struts .
... Let the hood fall lightly into the latch. Do not
press it in. c::> ,&. ...
237
Page 240 of 322
Downloaded from www.Manualslib.com manuals search engine Checking and Filling
& WARNING
If the hood is not latched completely , it could
fly up while you are driving and obstruct your
vision.
- For safety reasons,
the hood must always be
closed securely while driving. Because of
this, always check the hood after closing it
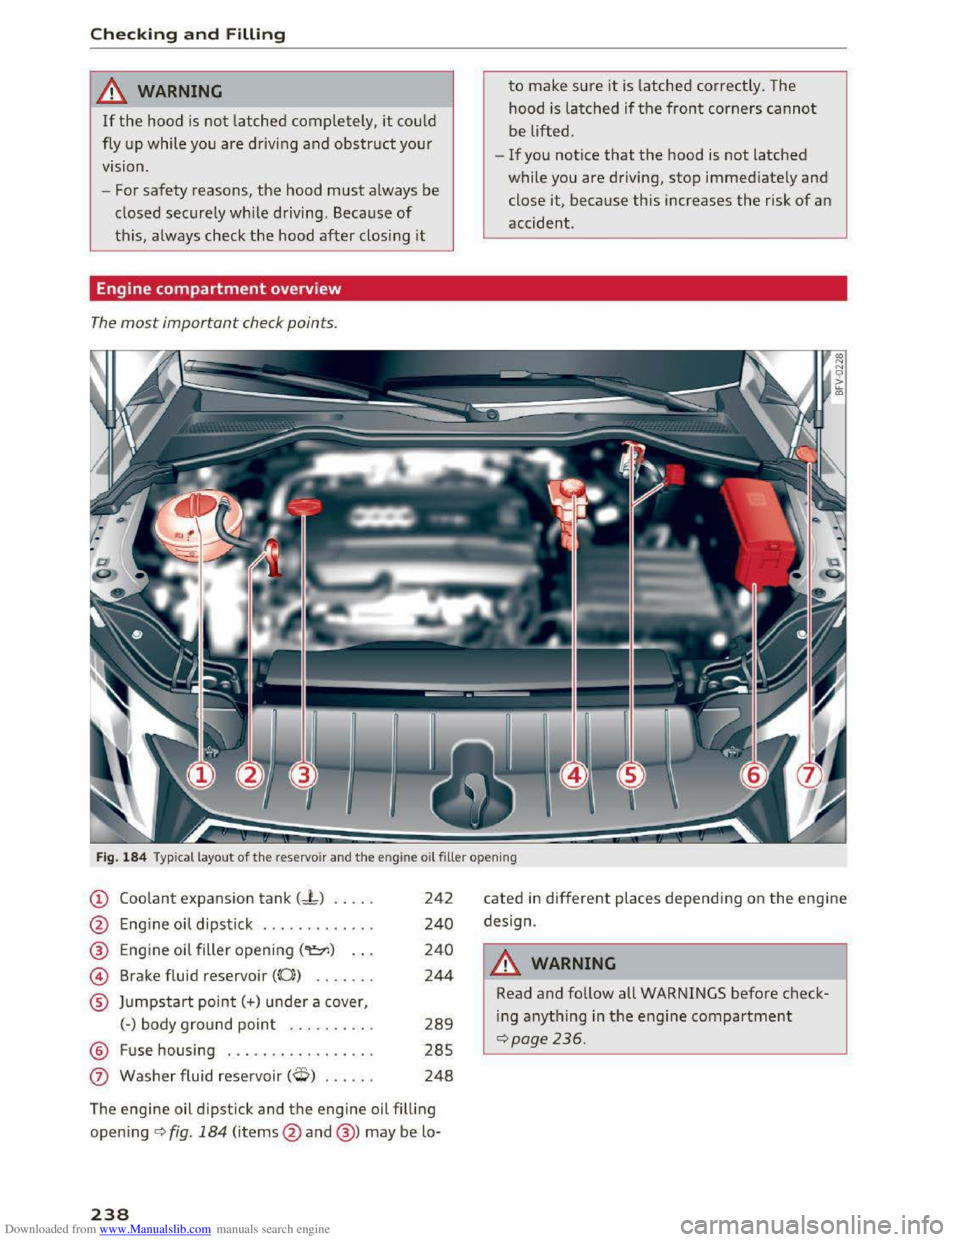
Engine compartment overview
The most important check points.
to make sure it is latched correctly. The
hood is latched
if the front corners cannot
be
lifted.
-If you notice that the hood is not latched
while you are driving, stop immediately and
close
it, because this increases the risk of an
accident .
Fig. 184 Typical layout of the reservo ir and the en gin e oil filler open ing
CD Coolant expansion tank C-t) .... .
@ Engine oil dipstick ............ .
@ Engine oil filler opening ("t:::r.) .. .
@ Brake fluid reservoir ((0)) ...... .
® Jumpstart point(+) unde r a cover,
(-)body ground point ......... .
@ Fuse housing ................ .
0 Washer fluid reservoir (W) ..... .
242
240
240
244
289
285
248
The engine oil dipstick and the engine oil filling
open ing <=>fig. 184 (items @ and @) may be lo-
238
cated in different places depending on the engine
design.
_&WARNING
Read and follow all WARNINGS before check
ing anything in the engine compartment
~page236.
Page 241 of 322
Downloaded from www.Manualslib.com manuals search engine Engine oil
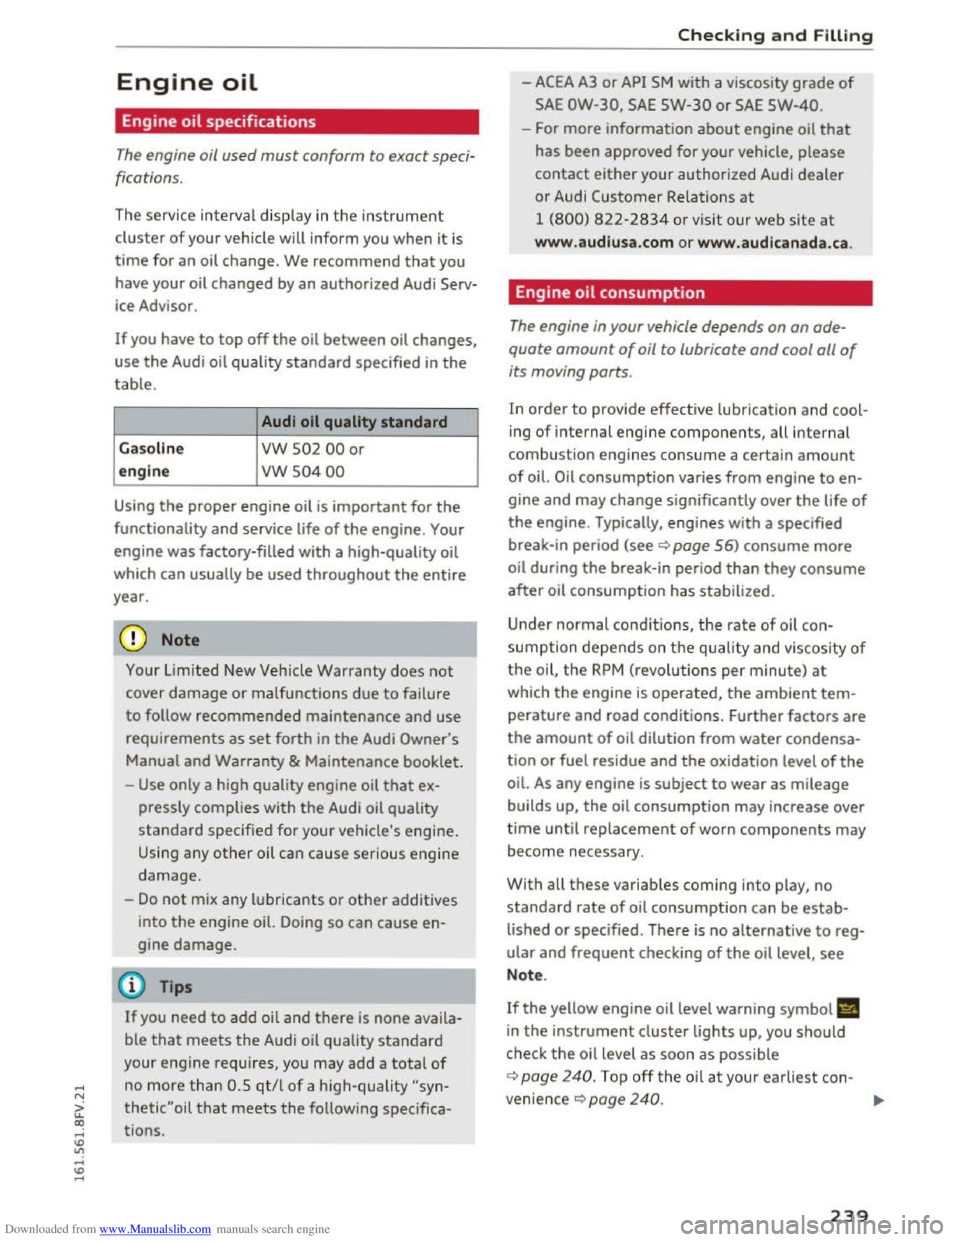
Engine oil specifications
The engine oil used must conform to exact speci
fications.
The ser vice interva l disp lay in the instrument
cluster of your vehicle will inform you when it is
time for an oil change . We recommend that you
have your
oil changed by an authorized Audi Serv
ice Advisor.
If you have to top off the oil between oil changes,
use the Audi oil quality standard specified in the
table.
Audi oil quality standard
G
asoline VW S02 00 or
engin e vw S0400
Using the proper engine oil is important for the
functionality and service life of the engine. Your
engine was factory-filled
with a high-quality oil
which
can usually be used throughout the entire
year.
CD Note
Your Limited New Vehicle Warranty does not
cover damage or malfunctions due to failure
to follow recommended maintenance and use
requirements as set forth in the Audi Owner's
Manual and Warranty
& Maintenance booklet.
-
Use only a high quality engine oil that ex-
pressly complies
with the Audi oil quality
standard specified for your vehicle's engine.
Using any other oil can cause serious engine
damage.
-
Do not mix any lubricants or other additives
into the engine oil. Doing so can cause en
gine damage.
Tips
If you need to add oil and there is none availa
ble
that meets the Audi oil quality standard
your engi
ne requires, you may add a tota l of
no more than O.S qt/l of a high-quality "syn
thetic" oil that meets the following spec ifica
tions.
Checking and F illing
-ACEA A3 or API SM with a viscosity grade of
SAE OW-30, SAE SW-30 or SAE SW-40.
-For more information about engine oil that
has been approved for your vehicle, please
contact either your
authorized Audi dealer
or Audi Customer
Relations at
1 (800) 822-2834 o r visit our web site at
www .audiusa .com or www.audicanada .ca.
Engine oil consumption
The engine in your vehicle depends on an ade
quate
amount of oil to lubricate and cool all of
its moving parts.
In order to provide effective lubrication and cool
i ng
of internal engine components, all internal
combustion engines consume a certa in amount
of oil. Oil consumption varies from engine to en
gine and may change significantly over
the life of
the engine. Typically, engines with a specified
break-in period
(see~ page 56) consume more
oil during the break-in period than they consume
after oil consumption has stabilized.
Under normal cond it ions, the rate of oil con
s u
mption depends on th e qu ality and viscos ity of
the oil, the RPM (revolutions per minute) at
which the engine is operated, the ambient tem
perature and road conditions. Further factors are
the amount of oil dilution from water condensa
tion or fuel residue and the oxidation level of the
oil. As any engine is subject to wear as mileage
builds
up, the oil consumption may increase over
t ime
until replacement of worn components may
become necessary.
With all these variab les coming into play, no
standard rate
of oil consumption can be estab
lished
or specified. There is no alternative to reg
ular and frequent checking of the oil level, see
Note .
If the yellow engine oil level warning symbol II
in the instrument cluster lights up, you should
check
the oil level as soon as possible
~page 240. Top off the oil at your earliest con-
venience
Q page 240. ..,..
239
Page 242 of 322
Downloaded from www.Manualslib.com manuals search engine Checking and Filling
.&. WARNING
Before you check anything in the engine com
partment, always read and heed all WARN
INGS¢ page 236.
CD Note
Driving with an insufficient oil level is likely to
cause severe damage to the engine.
{!) Tips
-The oil pressure warning display. is not
an indicator of the oil level. Do not rely on
it. Instead, check the oil level in your en
gine at regular intervals, preferably each
time you refuel , and always before going
on a long trip.
-If you have the impression your engi ne con
sumes excessive amounts of oil, we recom
mend that you consult an authorized Audi
dealer to have the cause of your concern
properly diagnosed. Keep
in mind that the
accurate measurement of oil consumption
requires great care and may take some
time. An authorized Audi dealer has instruc
tions about how to measure oil consump
tion accurately.
Checking the engine oil level
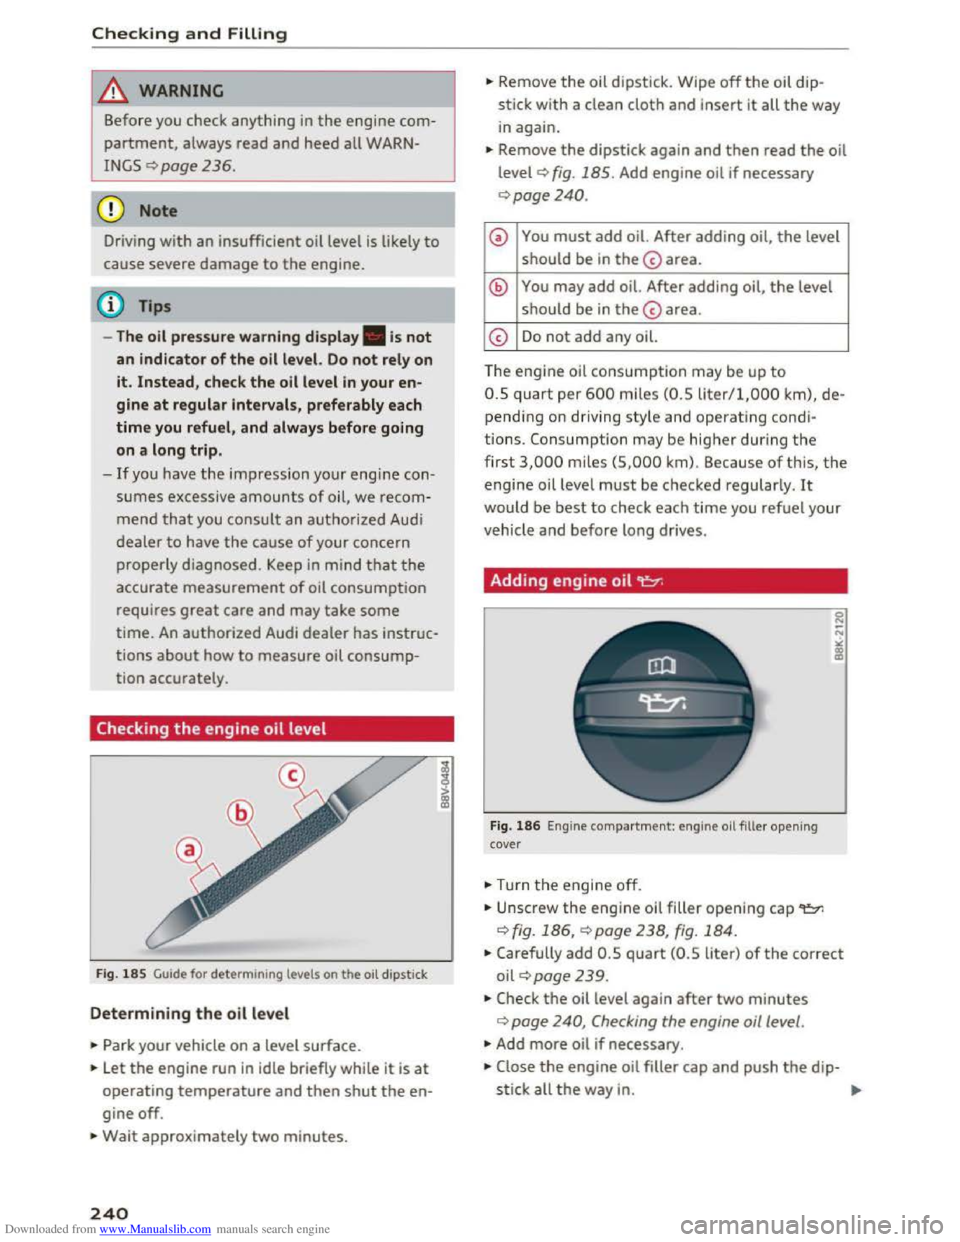
Fig. 185 Guide for determining levels on the oil dipstick
Determining the oil level
.. Park your vehicle on a level surface.
.. Let the engine run in idle briefly while it is at
operating temperature and then shut the en
gine off .
.. Wait approximately two minutes.
240
.. Remove the oil dipstick. Wipe off the oil dip
stick with a clean cloth and insert it all the way
in again.
.. Remove the dipstick again and then read the oil
level¢ fig. 185. Add engine oil if necessary
¢page240.
0 You must add oil. After adding oil, the level
should be
in the@area.
@ You may add oil. After adding oil, the level
should be
in the@area.
@
Do not add any oil.
The engine o
il consumption may be up to
0.5 quart per 600 m iles (0.5 liter/1,000 km), de
p ending on driving style and operating cond i
tions. Consumption may be higher during the
first 3,000 miles (S,000 km). Because of this, the
engine oil level must be checked regularly. It
would be best to check each time you refue l your
vehicle
and before long drives.
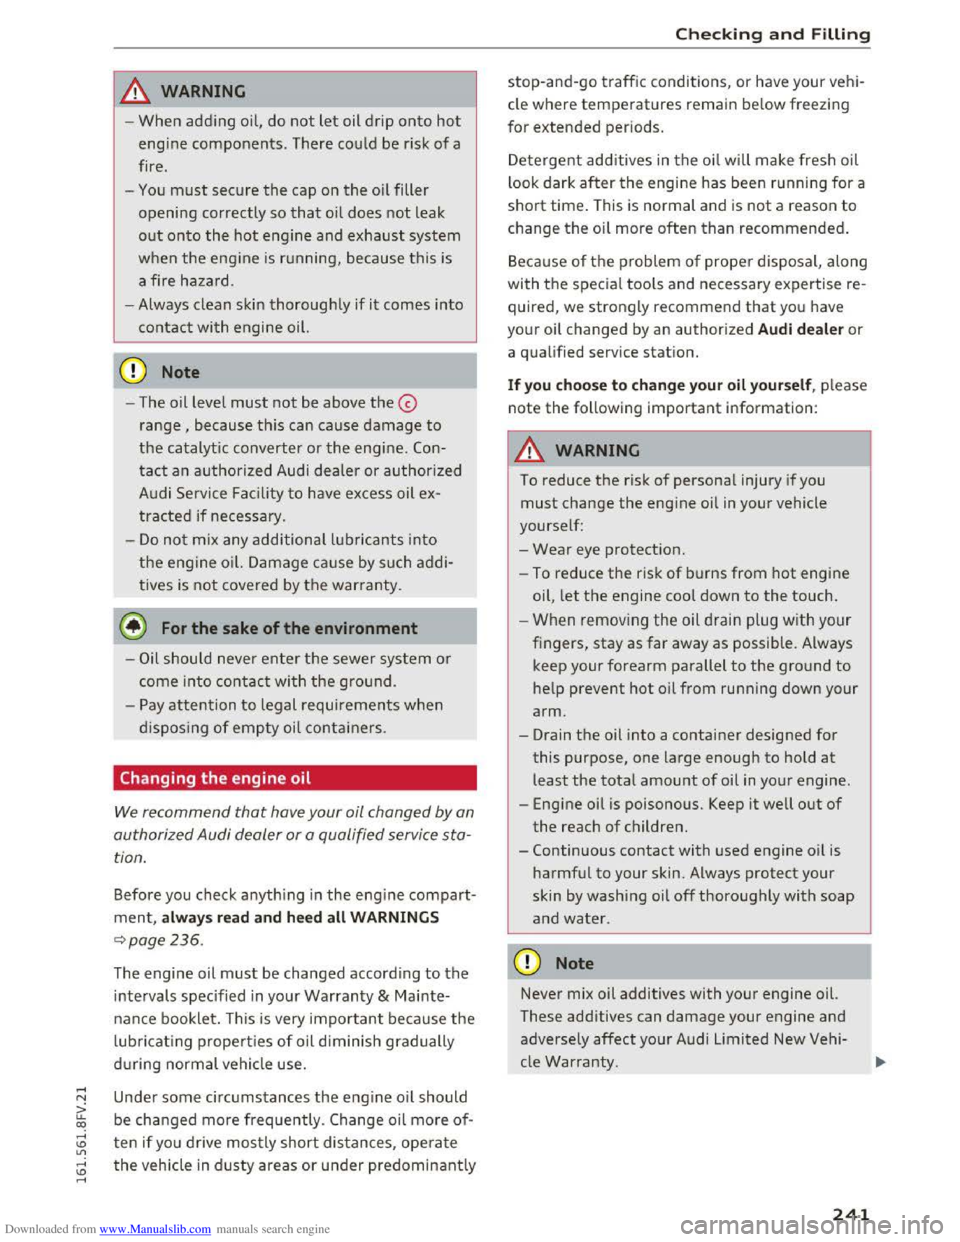
Adding engine oil 't:::?:
Fig. 186 Engine compartment: engine oil filler opening
cove r
•Turn th e engine off .
.. Unscrew the eng ine oil filler opening cap~
q fig. 186, ¢page 238, fig. 184 .
0 N
-N
" ~
.. Carefully add 0.5 quart (0.5 liter) of the correct
oil¢ page 239.
•Check the oil level again after two minutes
¢page 240, Checking the engine oil level.
•Add more oil if necessary .
.. Close the engine oil filler cap and push the dip-
stick all
the way in. IJI>
Page 243 of 322
Downloaded from www.Manualslib.com manuals search engine A WARNING
1-
-When adding oil, do not let oil drip onto hot
engine components. Th ere could be risk of a
fire.
-
You must secure the cap on the oil filler
opening correctly so that oil does not leak
out onto the hot engine and exhaust system
when the engine is r unning, because this is
a fire
hazard.
- Always clean skin thoroughly if it comes into
co ntact with engine oil.
«I) Note
-The oil level must not be above the@
range, because this can cause damage to
the catalytic converter or the engi ne. Con
tact an authorized Audi dealer or authorized
A udi Service Facility to have excess oil ex
tracted if necessary.
-
Do no t mix any additional lu bricants into
the engine oil. Damage cause by such addi
tives is not covered by the warranty.
@ For the sake of the environment
-Oil should never enter the sewer system or
come into contact with the ground.
-
Pay attention to legal requirements when
disposi ng of empty oi l containers.
Changing the engine oil
We recommend that have your oil changed by an
authorized Audi dealer or a qualified service
sta
tion.
Before you check anything in the engine compart
ment, alwa y s read and heed all WARNINGS
~page236.
The engine oil must be changed accord ing to the
intervals specified i n your Warranty & Mainte
nance booklet. This is very important be cause the
lubricati ng properties of o il d iminish gradually
dur ing normal vehi cle use.
Unde r some circumstances the engine oil should
be changed more frequently. Change oil more of
ten if yo u drive mostly short dis tances, opera te
the vehicle in dusty areas or u nder predominantly
Checking and Filling
stop-and-go traffi c conditions, or have your vehi
cle where temperatures remain be low freezing
for extended periods.
Dete r
gent additives in the oi l w ill make fresh oil
l
ook dark after the engine has been r u nning for a
short time. This is normal and is not a reason to
change the oil more often than recommended.
Beca u
se of the problem of proper disposal, along
with the special tools and necessary expertise re
quired, we strongly recommend that you have
you r o
il changed by an authorized Audi dealer or
a q ualified service station.
If you choose to change your oil yourself, please
note the following important information:
A WARNING
~ -
To reduce the risk of personal injury if you
must change the engine oil in you r vehicle
yourself:
-
Wear eye protection.
- To reduce the risk of burns from hot engine
oil, let th e engine cool down to the touch.
-When removing the oil drain plug with your
fingers,
stay as far away as possible. Always
keep your forearm parallel to the ground to
help prevent hot oil from running down your
arm.
-Drain the oil into a container designed for
this purpose, one large enough to hold at
least the total amount of oil in your engine.
-Engine oil is poisonous. Keep it well out of
the reach of children.
-
Continuous contact with used engine oil is
harmful to your skin. Always protect your
skin by washing oil off thoroughly with soap
and water.
CD Note
Never mix oil additives with your engine oil.
These additives can damage your engine and
adversely affect yo ur Audi Limited New Vehi
cle Warranty.
241
Page 244 of 322
Downloaded from www.Manualslib.com manuals search engine Checking and Filling
@) For the sake of the environment
-Before changing your oil, first make sure
you know where you can properly dispose of
the used oil.
- Always
dispose of used engine oil properly.
Do not dump it on garden soil, wooded
areas, into open streams or down sewage
drains.
- Recycle
used engine oil by taking it to a used
engine oil collection facility in your area, or
contact a service station.
Coo Ling system
Coolant
The engine coolant performs two functions: it
keeps
the engine from overheating and it pro
tects the engine from freezing in the winter.
The cooling system is sealed and generally re
q uires
little attention.
The cooling
system has been filled at the factory
with a
permanent coolant which does not need to
be changed. The coolant consists of a mixture of
specially conditioned water and the manufactur
er's glycol-based coolant additive G13 antifreeze
with anticorrosion additives (50% for USA mod
els; 60% for Canadian models). This mixture
both assures the necessary frost protection and
protects metal components in the engine's cool
ing
system from corrosion and scaling. It also
raises
the boiling point of the coolant.
Do not reduce the concentrat ion of the coolant in
the summer by addi ng p la in water. The propor
tion of coolant additive must be at least 50°/o
but not more than 60°/o to maintain antifreeze
protection and cooling efficiency. If the coolant
frost protection is too low, the coolant could
freeze and damage the vehicle heating and en
gine cooling system.
For year-round driving,
antifreeze is added at the
factory for temperatures down to:
- -
31 °F ( -35 °C) USA
- -40 °F ( -40 °C) Canada.
242
If you must add coolant, use a mixture of water
and coolant additive. Mixing the coolant additive
with distilled
water is recommended.
A WARNING
~ h . Before you check anything in t e engine com-
partment, always read and heed all WARN
INGS C)page 236.
CD Note
-Before winter sets in, have the coo lant
checked to see if the coolant additive in you r
vehicle is
sufficient to meet the climate con
d itions. This is especia l
ly important if you
live
in a regio n where the winter is extre m e
ly cold . If necessary, increase the proportion
o f coo la
nt ad ditive to 60o/o.
-When add ing coolant additive to your cool
ing
system, remember:
-We recommend using only coolant addi
tive G12++
or G13 (check the label) for
your vehicle. This coolant additive is avail
able at authorized Audi dealers. Other
types of antifreeze can significantly re
duce corrosion protection. The resulting
corrosion can cause a loss of coolant and
serious engine damage.
-Do not add any type of radiator leak sealant
to your vehicle's engine coolant. Adding ra
dia to r repair fluid may adversely
affect the
func tion and performance of your cooling
system and could result in damage not cov
ered by your New Veh icle Limited W arranty .
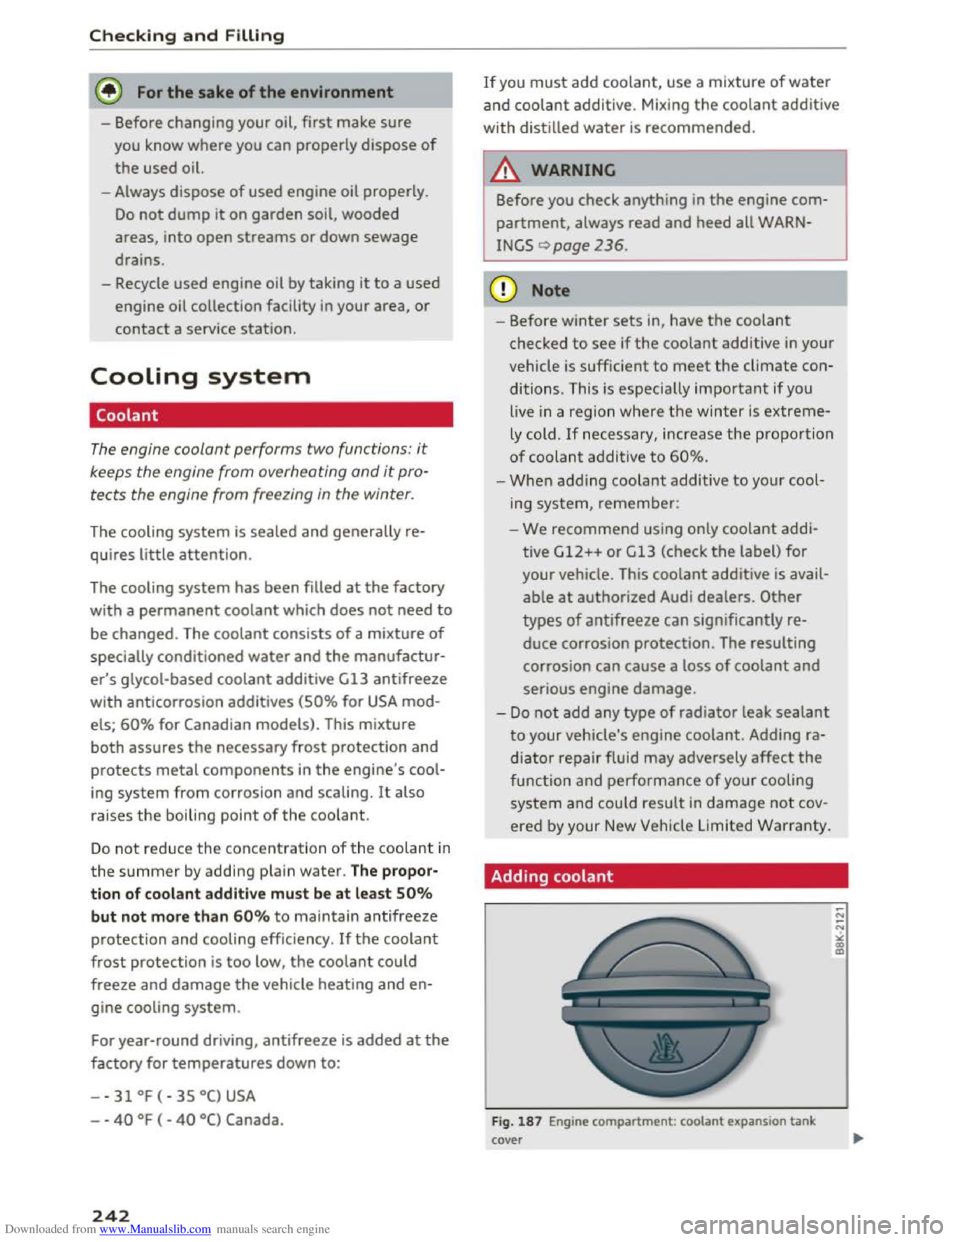
Adding coolant
Fig. 187 Engine compartment : coolant expansion tank
cover
Page 245 of 322
Downloaded from www.Manualslib.com manuals search engine ...... N
> u. CX> ...... u:>
"' ...... u:> ......
Read and follow the WARNINGS before check
ing anything
in the engine compartment
Qpage236.
Checking the engine coolant level
""Park your vehicle on a level surface.
"" switch the ignition off.
.. Read the coolant level on the coolant expansion
tank
Q page 238, fig. 184. The coolant level
must be between the markings when the en
gine
in cold. When the engine is warm it can be
slightly above
the upper marking.
Adding coolant
Requirement: there must be a res idual amount of
coo l
ant in the expans io n tank c:?(i) .
""Let the engine cool down.
.. Place a cloth over the coolant expansion tank
cap and unscrew
the cap counterclockwise
c:?,8..
""Add coolant mixed in the correct ratio
i:?page 242 up to the upper marking.
""Make sure that the fluid level remains stable.
Add more coolant if necessary.
"" Close the cap securely .
A coolant loss suggests a leak. Immediately drive
your vehicle
to an authorized Audi dealer or au
thorized
Audi Service Facility and have the cool
ing system inspected.
If the cooling system is not
leaking, a loss can come from
the coolant boiling
through overheating and being pushed
out of the
cooling system.
.&. WARNING
-The cooling system is pressurized and can be-
come very hot.
To reduce the risk of burns
from hot coolant:
-
Do not open the coolant expansion tank cap
w ith
the engine hot. There is a risk of burns .
- Stop
the engine and allow it to cool.
-
Protect your face, hands and arms from es-
caping coolant and
steam by covering the
coolant tank cap with a large, thick cloth.
- Turn
the coolant tank cap counterclockwise
slowly and keep light pressure on
the cap.
-
To reduce the risk of burns, do not allow any
antifreeze or coolant to dr
ip onto the ex-
Checking and Filling
ha ust system or hot engine components.
The ethylene glycol in engine coolant can
catch fire under certain circumstances.
- The coolant additive and the coolant can be
dangerous to your health.
For this reason,
keep
the coolant in the original container
away from children. There is a
risk of poi
soning.
-When working in the engine compartment,
remember
that the radiator fan can switch
on even if
the ignition is switched off, which
increases
the risk of personal injury.
CD Note
Do not add coolant if the expans ion tank is
empty . Air could enter the cooling system and
damage
the eng ine. If this is the case, do not
continu e driving. See an authorized
Audi dea l
er or authorized
Audi Service Facility for assis
tance.
Radiator fan
The radiator fan switches on automatically by it
self.
An auxiliary electric radiator fan switches on and
off depending on coolant temperature and other
vehicle operating conditions.
After you switch
the engine off, the auxiliary fan
can continue running for
up to 10 minutes -even
with
the ignit ion off. It can even switch on again
later by itself c:? & . if
- the temperature of
the engine coolant rises due
to
the heat build-up from the engine in the en
gine compartment, or
-
the engi ne compartment heats up because the
vehicle is parked in intense sunlight.
.&. WARNING
-To reduce the risk of personal injury never
touch
the radiator fan.
- The auxiliary electric fan
is temperature
controlled and can switch on suddenly even
when
the engine is not running.
243
Page 246 of 322
Downloaded from www.Manualslib.com manuals search engine Checking and Filling
-The auxiliary radiator fan switches on auto
matically when the engine coolant reaches a
certain temperature and will continue to run
until the coolant temperature drops.
Brake fluid
Checking brake fluid level
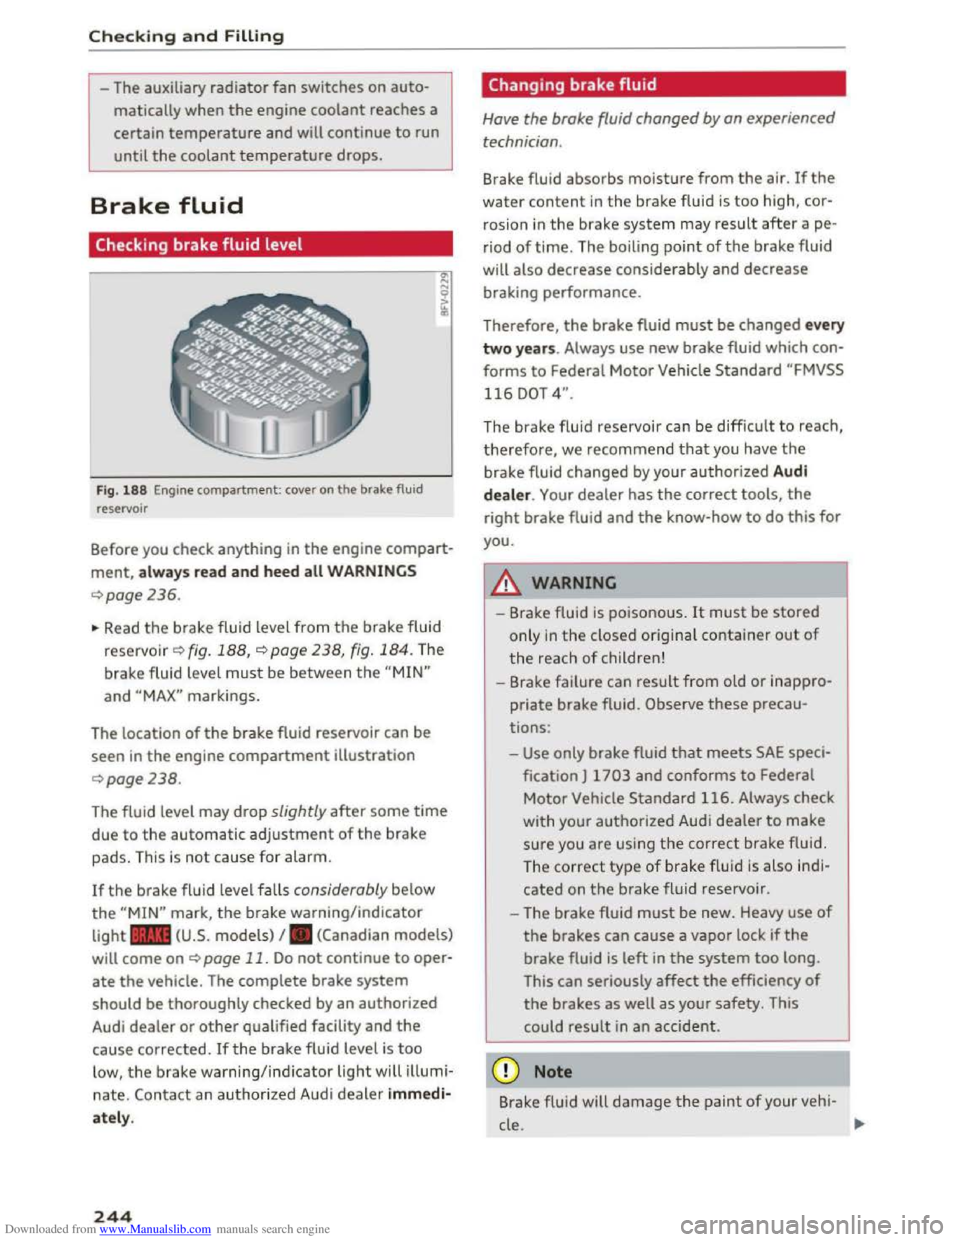
Fig. 188 Engine compartment: cover on the brake fluid
reservoir
Before you check anything in the engine compart
ment, always read and heed all WARNINGS
¢page 236.
~ Read the brake fluid level from the brake fluid
reservo ir ¢ fig. 188, ¢page 238, fig. 184. The
brake fluid level must be between the "MIN"
and "MAX" markings.
The location
of the brake fluid reservoir can be
seen in the engine compartment illustration
¢page238.
The fluid level may drop slightly after some time
due to the automatic adjustment of the brake
pads. This is not cause for alarm.
If the brake fluid level falls considerably below
the "MIN" mark, the brake warning/indicator
light .. (U.S. models) I. (Canadian models)
will come on ¢ page 11. Do not continue to oper
ate the vehicle. The complete brake system
should be thoroughly checked by an authorized
Audi dealer or other qualified facility and the
cause corrected. Ifthe brake fluid level is too
low, the brake warning/indicator light will illumi
nate. Contact an authorized Audi dealer immedi
ately.
244
Changing brake fluid
Have the brake fluid changed by an experienced
technician .
Brake fluid absorbs moisture from the air. If the
water content in the brake fluid is too high, cor
rosion in
the brake system may result after ape
riod of time. The boiling point of the brake fluid
will
also decrease considerably and decrease
braking performance.
Therefore, the brake fluid must be changed every
two years. Always use new brake fluid which con
forms to Federal Motor Vehicle Standard "FMVSS
116 DOT 4".
The brake fluid reservoir can be difficult to reach,
therefore, we recommend that you have the
brake fluid changed by your authorized Audi
dealer. Your dealer has the correct tools, the
right brake fluid and the know-how to do this for
you.
8._ WARNING
- Brake fluid is poisonous. It must be stored
only in the closed original container out of
the reach of children!
-Brake failure can result from old or inappro
priate brake fluid. Observe these precau
tions:
-Use only brake fluid that meets SAE speci
fication
J 1703 and conforms to Federal
Motor Vehicle Standard 116. Always check
with
your authorized Audi dealer to make
sure you are using the correct brake fluid.
The
correct type of brake f lui d is also ind i
cated on the brake fluid reservoir .
- The
brake fluid must be new. Heavy use of
the brakes can cause a vapor lock if the
brake fluid is left in the system too long.
This
can seriously affect the efficiency of
the brakes as well as your safety. This
could
result in an accident.
CD Note
Brake flu id will damage the paint of your veh i-
cle .
JIJ.