ECU AUDI TT COUPE 2017 Owners Manual
[x] Cancel search | Manufacturer: AUDI, Model Year: 2017, Model line: TT COUPE, Model: AUDI TT COUPE 2017Pages: 322, PDF Size: 79.73 MB
Page 6 of 322
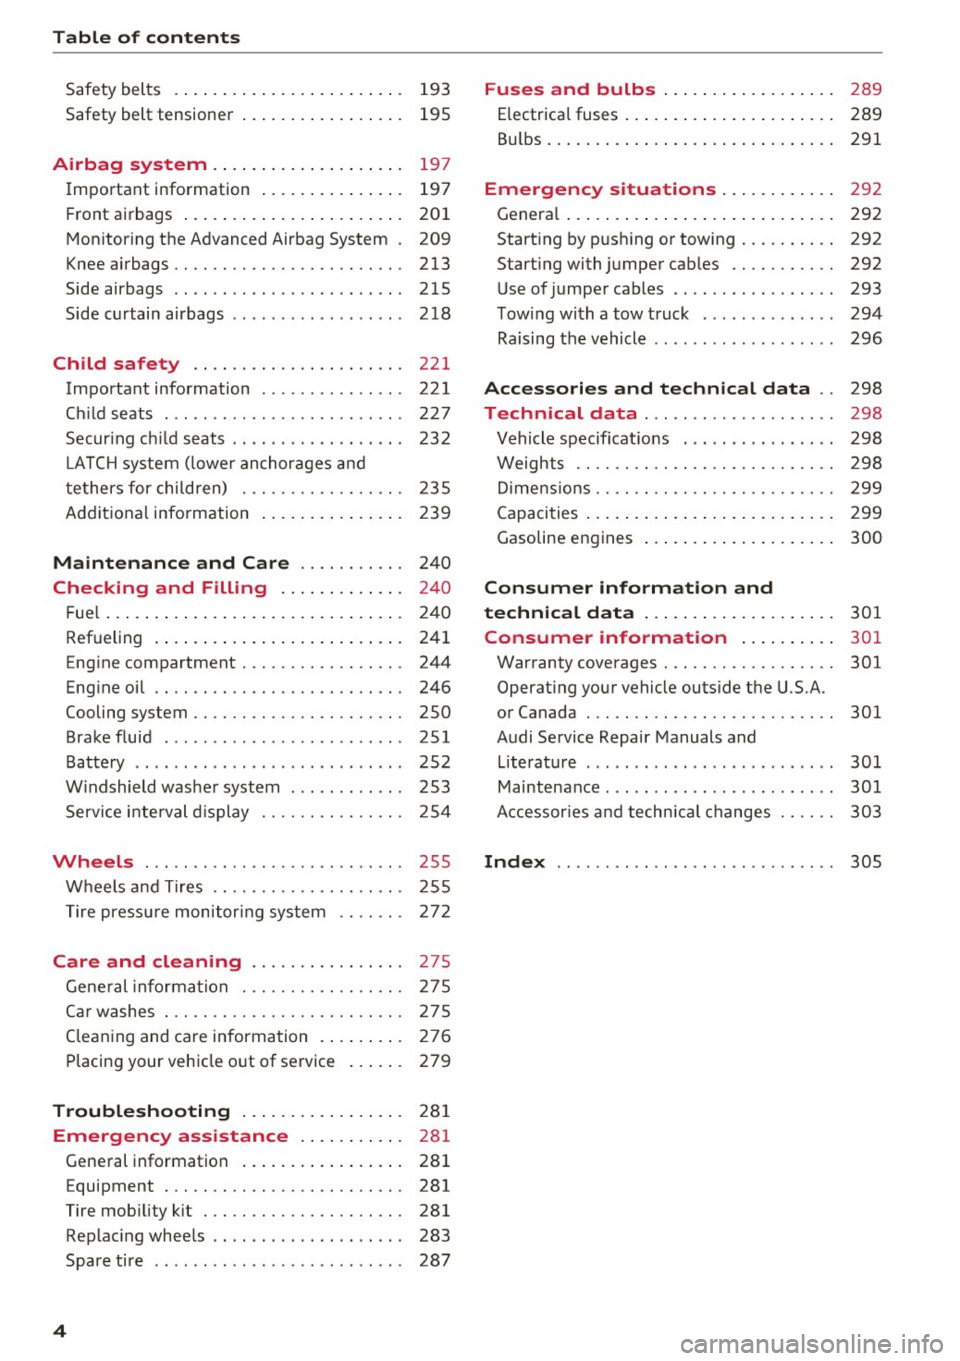
Table of content s
Safety belts . . . . . . . . . . . . . . . . . . . . . . . . 193
Safety belt tensione r . . . . . . . . . . . . . . . . . 195
Airbag system ... . ...... ... .. .. ... 19 7
I mportant info rmation . . . . . . . . . . . . . . . 197
F ront airbags . . . . . . . . . . . . . . . . . . . . . . . 201
Mon itoring the Advanced Airbag System . 209
Knee airbags .. .. ................. ... 213
Side airbags . . . . . . . . . . . . . . . . . . . . . . . . 215
Side curtain airbags . . . . . . . . . . . . . . . . . . 218
Child safety . . . . . . . . . . . . . . . . . . . . . . 221
Important information . . . . . . . . . . . . . . . 221
Ch ild seats . . . . . . . . . . . . . . . . . . . . . . . . . 227
Secur ing ch ild seats . . . . . . . . . . . . . . . . . . 232
L A TCH system (lowe r an chorages a nd
t e thers for chi ldren) . . . . . . . . . . . . . . . . . 235
Addit ional info rmation . . . . . . . . . . . . . . . 239
Maintenance and Care . . . . . . . . . . . 24 0
Checking and Filling . . . . . . . . . . . . . 240
F ue l. .. .. .... .. ... .. ..... ... .. .. ... 24 0
Refueling . . . . . . . . . . . . . . . . . . . . . . . . . . 241
E ng ine compartment . . . . . . . . . . . . . . . . . 244
Eng ine oil . . . . . . . . . . . . . . . . . . . . . . . . . . 246
Cooling system . . . . . . . . . . . . . . . . . . . . . . 250
Brake f luid . .. .. ..... ........... ... . 251
Batte ry . . . . . . . . . . . . . . . . . . . . . . . . . . . . 252
W indshield washe r system . . . . . . . . . . . . 253
Service i nterval d isplay 254
Wheels ... .... .......... ...... ... . 255
Wheels a nd Tires . . . . . . . . . . . . . . . . . . . . 255
T ire press ure monitor ing sys tem 272
Care and cleaning . . . . . . . . . . . . . . . . 275
Gene ral information . . . . . . . . . . . . . . . . . 275
C ar washes . .. .. ............. .... .. . 275
Clean ing and care information . . . . . . . . . 276
P lacing your vehicle out of service . . . . . . 279
Troubleshooting . . . . . . . . . . . . . . . . . 28 1
Emergency assistance . . . . . . . . . . . 281
Gene ral information . . . . . . . . . . . . . . . . . 281
E quipment . . . . . . . . . . . . . . . . . . . . . . . . . 281
Tire mob ility k it . . . . . . . . . . . . . . . . . . . . . 281
Replac ing whee ls . . . . . . . . . . . . . . . . . . . . 283
Spare ti re . . . . . . . . . . . . . . . . . . . . . . . . . . 287
4
Fuses and bulbs . . . . . . . . . . . . . . . . . . 289
E lectrica l fuses . . . . . . . . . . . . . . . . . . . . . . 289
Bu lbs .. ... .. .. .. .. .. .. . ... .... ... .. 291
Emergency situations . . . . . . . . . . . . 292
Genera l . . . . . . . . . . . . . . . . . . . . . . . . . . . . 292
Start ing by push ing or tow ing . . . . . . . . . . 292
Start ing with jumper cables . . . . . . . . . . . 292
Use o f jumper cables . . . . . . . . . . . . . . . . . 293
T owing with a tow truck . . . . . . . . . . . . . . 294
Raising the vehicle . . . . . . . . . . . . . . . . . . . 296
Accessories and technical data . . 298
Technical data . . . . . . . . . . . . . . . . . . . . 298
Vehicle spec ificat ions . . . . . . . . . . . . . . . . 298
Weights . . . . . . . . . . . . . . . . . . . . . . . . . . . 298
D imens ions. . . . . . . . . . . . . . . . . . . . . . . . . 299
Capaci ties . . . . . . . . . . . . . . . . . . . . . . . . . . 299
Gasoline engines . . . . . . . . . . . . . . . . . . . . 300
Consumer information and
technical data . . . . . . . . . . . . . . . . . . . .
301
Consumer information . . . . . . . . . . 301
Warranty coverages . . . . . . . . . . . . . . . . . . 301
Operat ing your vehicle outside the U .S.A.
or Canada . . . . . . . . . . . . . . . . . . . . . . . . . . 301
Audi Se rvice Repair Manuals and
Lite rat ure . . . . . . . . . . . . . . . . . . . . . . . . . . 301
Maintenance. .. .. .. .. ... ... .... ... .. 301
Accessor ies a nd techn ica l changes . . . . . . 303
Index .......... ... ............. ... 305
Page 25 of 322
CD
CD
.... N
" N .... 0
0
Ill co
Tachometer
The tachometer displays the engine speed in rev
olutions per minute (RPM) .
The beginning of the red zone in the tachometer
indicates the maximum permissible engine speed
for all gears once the engine has been broken in
and when it is warm. Before reaching the red
zone, you should shift into the next higher gear,
choose the Dor S selector lever position, or re
move your foot from the accelerator pedal.
@ Note
The needle in the tachometer may only be in
the red area of the gauge for a short per iod of
time or there is a risk of damaging the engine .
The location where the red zone begins varies
depending on the engine.
@) For the sake of the environment
Upshifting early helps you to save fuel and re
duce operating noise.
Odometer
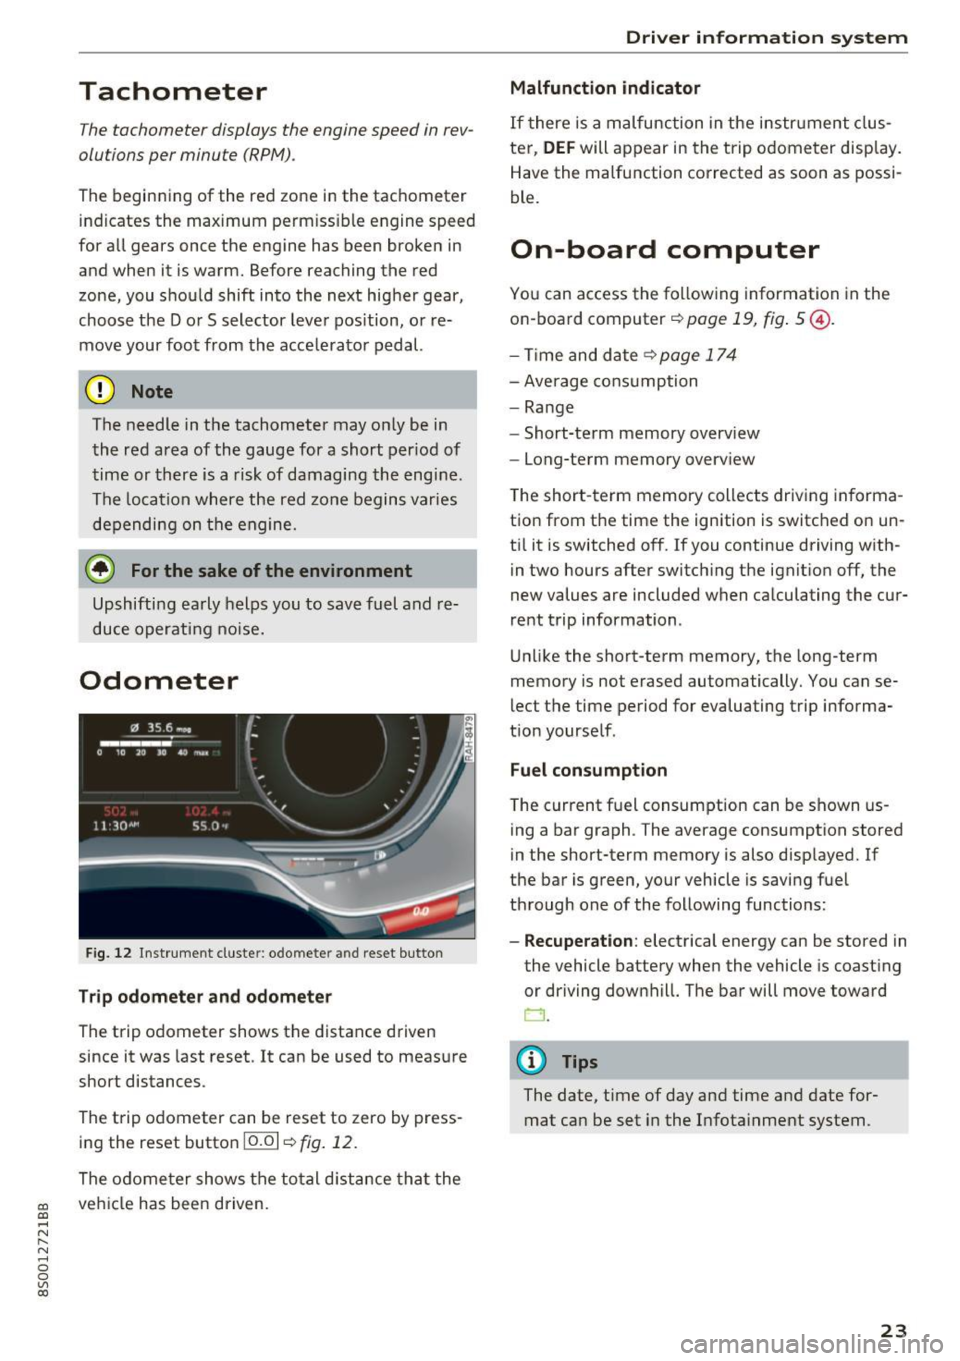
Fig. 12 Instrument cluste r: odomete r and reset button
Trip odometer and odometer
The trip odometer shows the distance driven
since it was last reset . It can be used to measure
short distances .
The trip odometer can be reset to zero by press ing the reset button 10.01
r=> fig. 12.
The odometer shows the total d istance that the
veh icle has been driven.
Driver in forma tion system
Malfunction indicator
If there is a malfunction in the instrument clus
ter,
DEF will appear in the trip odometer disp lay.
Have the malfunction corrected as soon as possi
ble.
On-board computer
You can access the following information in the
on-board computer
r=> page 19, fig . 5 @ .
-Time and date ~page 174
-Average consumption
-Range
- Short-term memory overv iew
- Long-term memory overview
The short -term memory collects driving informa
tion from the time the ignition is switched on un
til it is switched off. If you continue driving with·
in two hours after switching the ignition off, the
new values are included when calculating the cur
rent trip information .
Unlike the short-term memory, the long-term
memory is not erased automatically. You can se
lect the time period for evaluating trip informa
tion yourself .
Fuel consumption
The current fuel consumption can be shown us
ing a bar graph . The average consumption stored
in the short-term memory is also displayed. If
the bar is green, your vehicle is saving fuel
through one of the following functions:
- Recuperation : electrical energy can be stored in
the vehicle battery when the vehicle is coasting or driving downhill. The bar will move toward
CJ .
(D Tips
The date, time of day and time and date for
mat can be set in the Infotainment system.
23
Page 34 of 322

Opening and closing
Power window
Controls
The driver can control all power windows.
Fig. 26 Driver's door: power w indow controls
All power window sw itches have a two-stage
function:
Opening and closing the windows
N
N
M 0 ::':, (X) m
"'To open or close the w indow completely, press
the switch down or pu ll the switch up br iefly to
the second level. The operation will stop if the
switch is pressed/p ulled aga in.
.. To se lect a position in between opened and
closed, press/pull the switch to the first level
until the desired window position is reached.
Power window switches
(D Left doo r
@ Right door
A WARNING
- Pay careful attention when closing the win
dows. Pinching could cause serious injur ies.
- When locking the vehicle from outside, the
vehicle must be unoccupied since the win dows can no longer be opened in an emer
gency .
(D Tips
- You can still open and close the windows for
approximately 10 minutes after turning the i gnition
off. The power windows do not
switch
off until the driver's door or front
passenger's door has been opened.
- When you open the doors, the w indows au
tomatically lower approximately 10 mm.
32
· Convenience opening/closing
All windows can be opened and closed at the
same time.
Convenience opening feature
.. Press the~ button on the remote control key
until all windows reach the desired position.
Convenience closing feature
.. Press the (TI button on the remote control key
until a ll windows are closed~&. or
Convenience closing with the convenience
key*
.. Touch the sensor* on the door handle long
enough until all windows are closed . Do not
place your hand in the door handle when doing
this.
Setting convenience opening in the
Infotainment system
.. Select in the Infotainment system : IMENU! but
ton
>Ve hicle > left control button >V ehicle set
t in gs .
To enable the convenience window opening func
tion, the
Long press to open windows function
must be switched
on .
A WARNING
-Never close the w indows carelessly or in an
uncontrolled manner, because this increas
es the risk of injury.
- For security reasons, the windows can only
be opened and closed with the remote con
trol key at a maximum distance of approx i
mate ly 6 ft (2 m) away from the vehicle.
When pressing the~ button, always watch
the windows while they are closing so that
no one is pinched in the window. The closing
process will stop immediately when the~
button is released.
Page 35 of 322
CD
CD
.... N
" N ...... 0
0
Ill co
Correcting power window malfunctions
You can reactivate the one-touch up/down func
tion if it malfunctions.
~ Pull the power window switch up until the win
dow is completely raised.
~ Release the switch and pull it up again for at
least one second .
Garage door opener
(Homelink)
Description
Applies to: vehicles with garage door opener (Homelink)
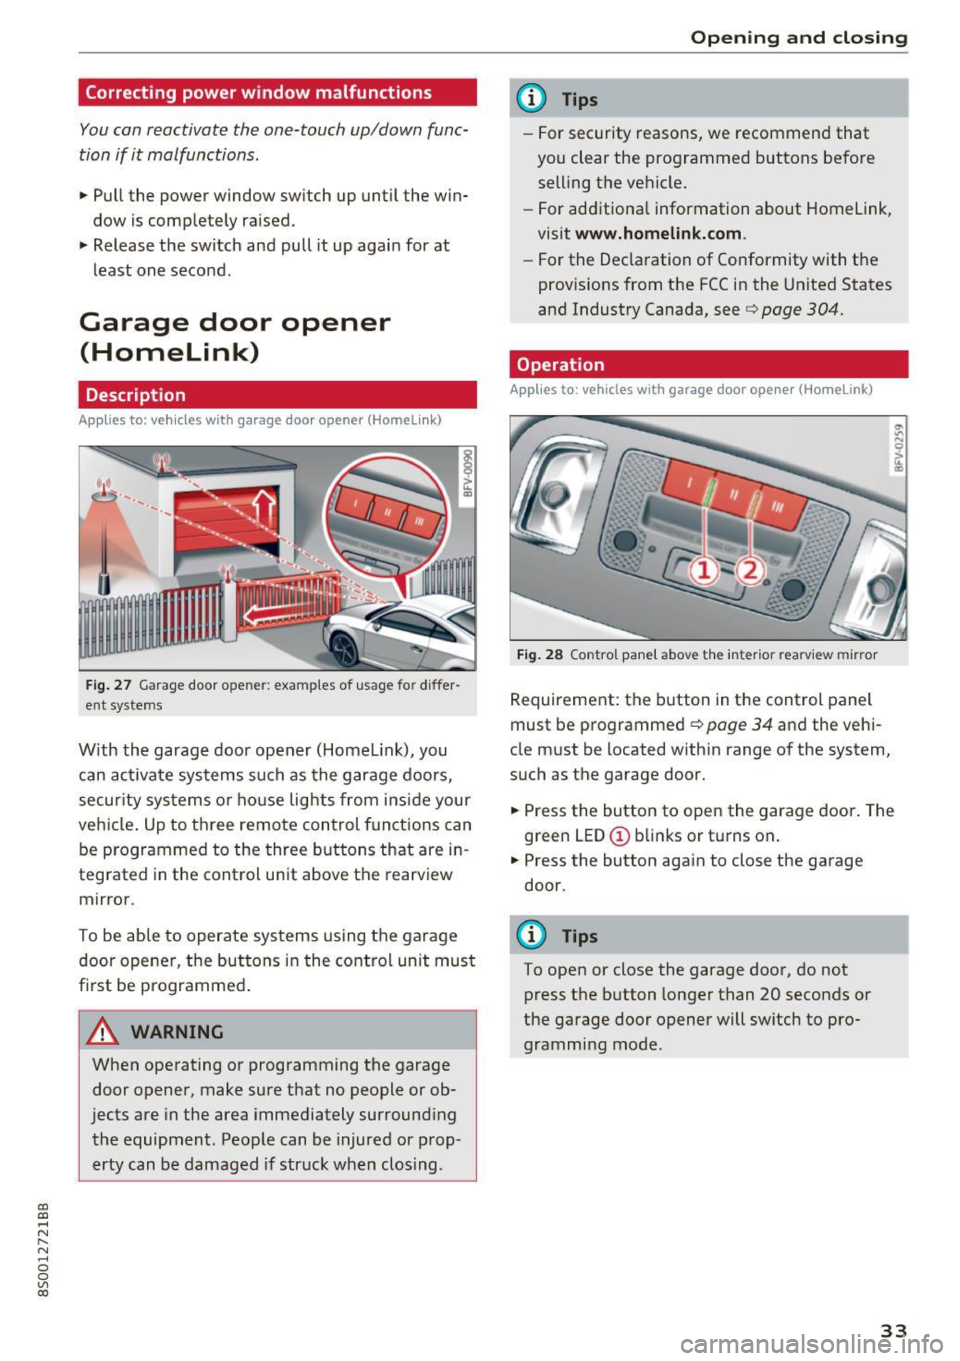
Fig. 27 Garage door o pen er: examples of usage for differ
ent sy stems
With the garage door opener (Homelink), you
can act ivate systems such as the garage doors,
security systems or house lights from inside your
vehicle. Up to three remote control functions can
be programmed to the three buttons that are in
tegrated in the control unit above the rearview
mirror.
To be able to operate systems using the garage door opener, the buttons in the control unit must
first be programmed .
A WARNING
When operating or programming the garage
door opener, make sure that no people or ob
jects are in the area immediately surrounding
the equipment . People can be injured or prop
erty can be damaged if struck when closing.
Open ing and closing
(D Tips
-For security reasons, we recommend that
you clear the programmed buttons before selling the vehicle.
- For add itiona l information about Homelink,
visit
www.homelink.com.
- For the Declaration of Conformity with the
provisions from the FCC in the United States
and Industry Canada, see ¢
page 304.
Operation
Applies to: vehicles with garage door opener (Home Link)
Fig. 28 Control pane l above the interior rearview mirror
Requirement: the button in the control panel
must be programmed ¢
page 34 and the vehi
cle must be located within range of the system,
such as the garage door.
~ Press the button to open the garage door. The
green LED(!) blinks or turns on.
~ Press the button again to close the garage
door.
(D Tips
To open or close the garage door, do not press the button longer than 20 seconds or
the garage door opener will switch to pro
gramming mode .
33
Page 47 of 322
CD
CD
.... N
" N ...... 0
0
Ill co
Easy seat entry
Applies to: vehicles with entry assistance
Easy seat entry makes it easier to get into the
back seats .
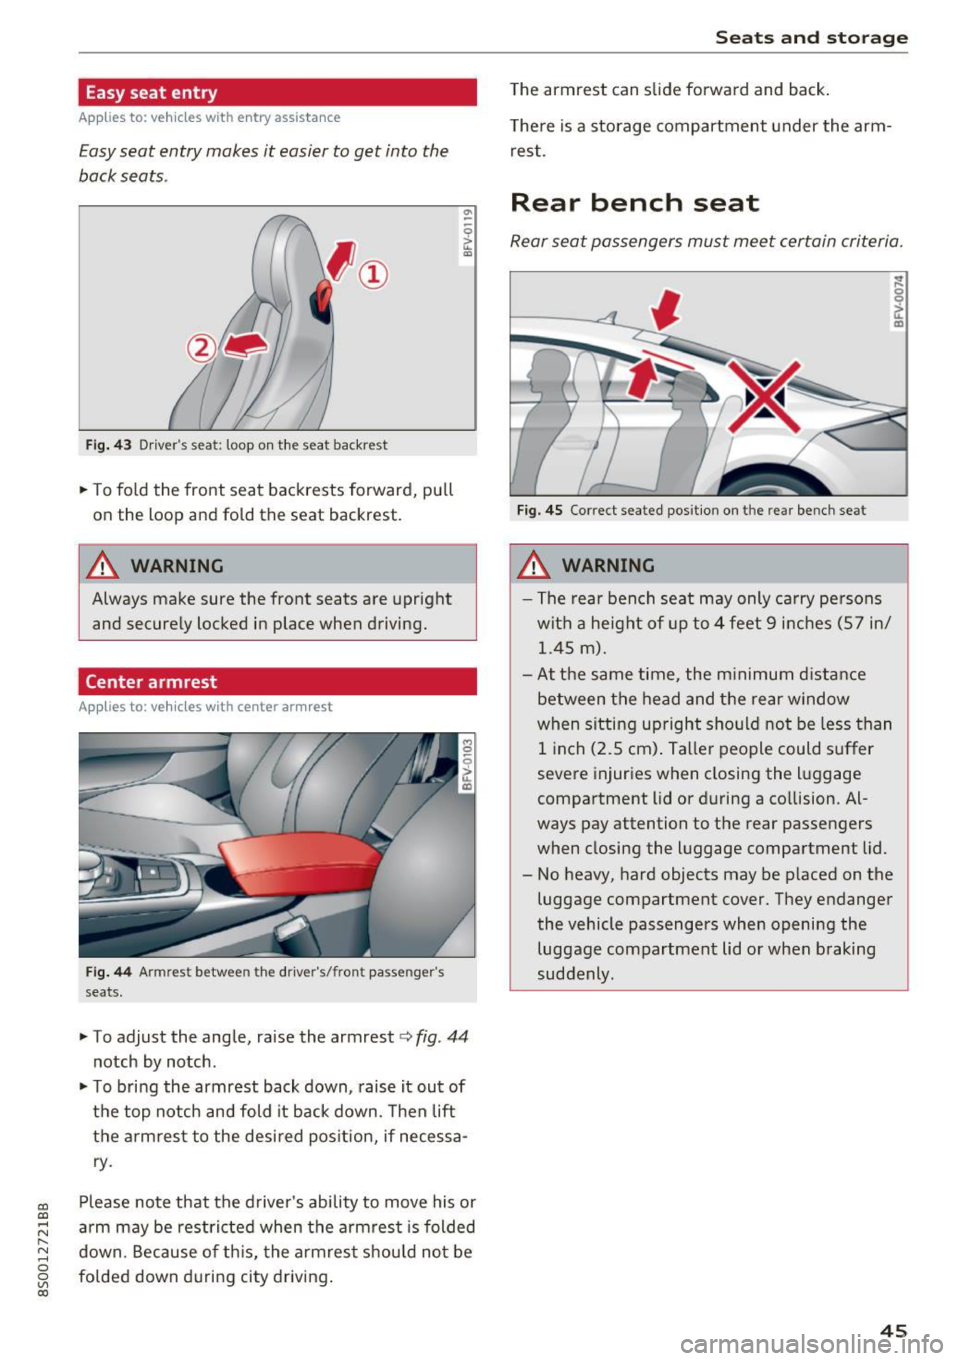
Fig. 43 Driver 's sea t: loop on the seat backr est
~ To fold the front seat backrests forward, pull
on the loop and fold the seat backrest.
A WARNING
Always make sure the front seats are upright
and securely locked in place when driving.
Center armrest
Applies to: vehicles with center arm rest
Fig . 44 A rmr est b etw een the driver's/fr ont passen ger's
seats .
°' -
~ To ad just the angle, raise the armrest <=> fig. 44
notch by notch .
~ To bring the armrest back down , raise it out of
the top notch and fold it back down . T hen lift
the armrest to the desired position, if necessa
ry .
Please note that the driver's ability to move his or
arm may be restricted when the armrest is folded
down . Because of this, the armrest should not be
folded down during c ity driving.
Seats and storage
The armrest can slide forward and back.
There is a storage compartment under the arm
rest.
Rear bench seat
Rear seat passengers must meet certain criteria .
Fig. 45 Correct sea ted pos it io n on t he re ar bench seat
_&. WARNING
- The rear bench seat may only carry persons
with a height of up to 4 feet 9 inches (57 in/
1.45
m).
- At the same time, the minimum distance
between the head and the rear window
when sitting upright should not be less than
1 inch (2.5 cm) . Taller people could suffer
severe injuries when closing the luggage
compartment lid or during a collision. Al
ways pay attention to the rear passengers
when closing the luggage compartment lid.
- No heavy, hard objects may be placed on the
luggage compartment cover. They endanger
the vehicle passengers when opening the luggage compartment lid or when braking
suddenly .
45
Page 50 of 322
Sea ts and stor age
Roof rack
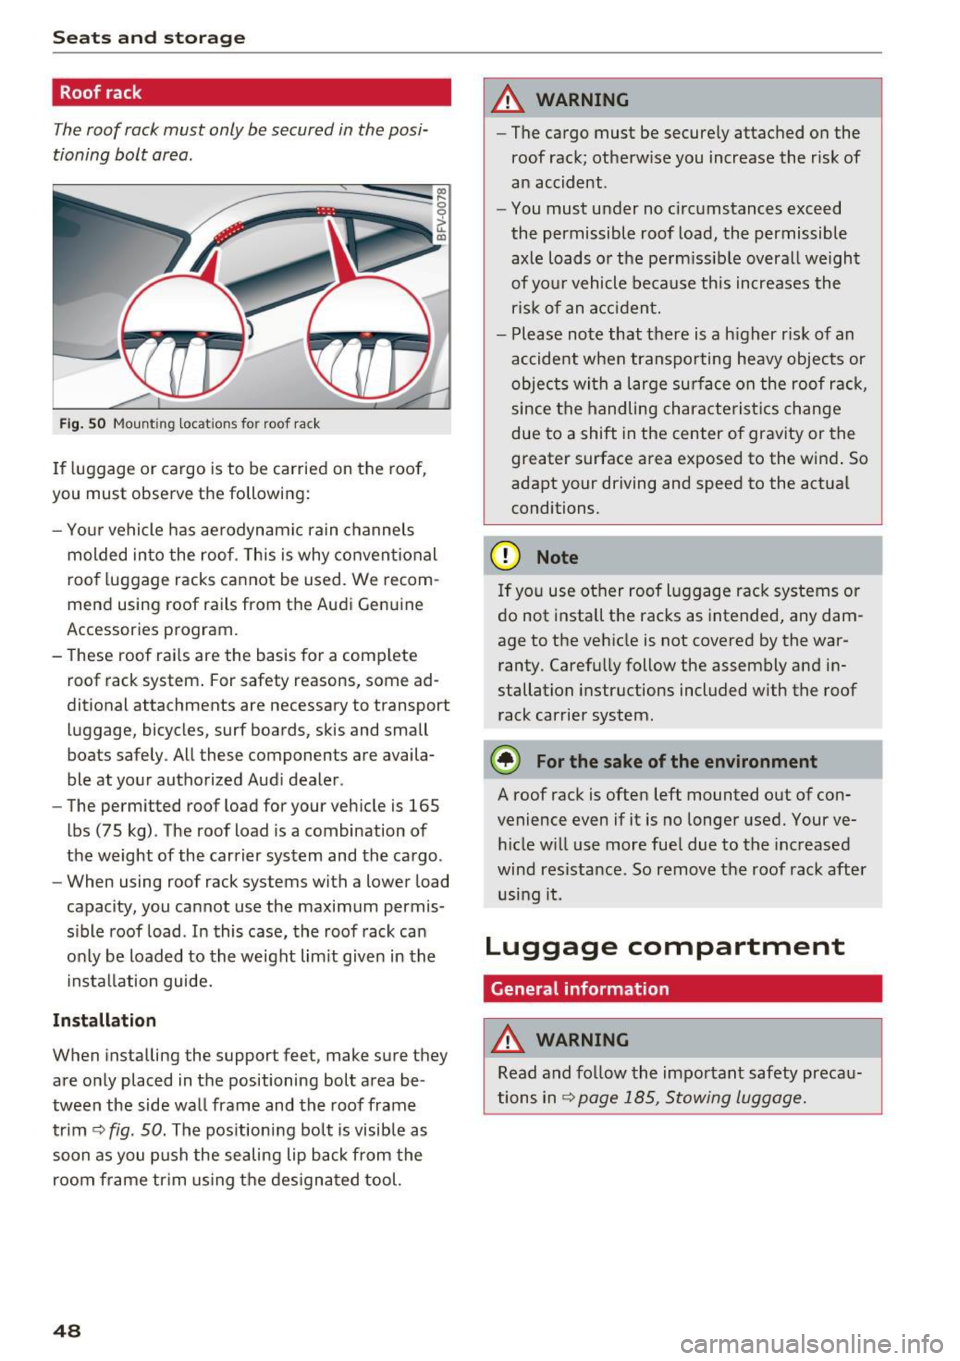
The roof rack must only be secured in the posi
tioning bolt area.
Fig . SO Mount ing locat ions fo r roof rac k
If luggage or cargo is to be carried on the roof,
you must observe the following:
- Yo ur vehicle has ae rodynami c rain channels
molded in to the roof . T h is is why convent ional
roo f luggage racks ca nnot be used . We recom
mend using roof rails from the Aud i Genu ine
Accessories program.
- These roof rai ls are the bas is for a complete
roof rack system . For safety reasons, some ad
ditional attachments are necessary to transport luggage, bicycles, surf boards, skis and small
boats safely . All these components are availa
ble at yo ur authorized Aud i dealer .
- The permitted roof load for your veh icle is 165
lbs (75 kg) . The roof load is a combination of
the weight of the carrier system and the cargo .
- When using roof rack systems with a lower load
capacity, you cannot use the maximum permis
s ible roof load . In this case, the roof rack can
o nly be loaded to the weight lim it given in the
i nstallation guide.
Inst allation
When installing the support feet, make sure they
are only placed in the positioning bolt area be
tween the side wa ll frame and the roof frame
trim ¢
fig. 50. The positioning bolt is visible as
soon as you push the sealing lip back from the
room frame tr im us ing t he des igna ted tool.
48
A WARNING
- The cargo must be secure ly attached on the
roof rack; otherw ise you increase the r isk of
an accident .
- You must u nder no circ umstances exceed
the permissible roof load, the permissible
axle loads o r the pe rm issib le overa ll we ight
of yo ur vehicle be cause this increases the
ris k of an a cc iden t.
- Please note that there is a h igher r is k of an
accident when transporting heavy objec ts or
objec ts wi th a l arge sur face on the roof r ack,
since the handling characterist ics change
due to a shift in the center of gravity or the
greater surface area exposed to the wind . So
adapt your driving and speed to the actual
conditions.
(D Note
If yo u use ot her roof l uggage rack systems or
do not install the racks as intended, any dam
age to the vehicle is not covered by the war ranty . Carefu lly follow the assembly and in
stallation instructions included with the roof
rack carrier system.
® For the sake of the environment
A roof rack is often left mounted out of con
venience even if it is no longer used. Your ve hicle w ill use more fue l due to the inc reased
wind res istance. So remove t he roof rack after
u sing it.
Luggage compartment
General information
A WARNING
Read and fo llow the important safety preca u
tions in
Q page 185, Stowing luggage.
Page 51 of 322
CD co .... N
" N ...... 0
0
Ill co
Luggage compartment cover
The luggage compartment cover blocks the view
into the luggage compa rtment.
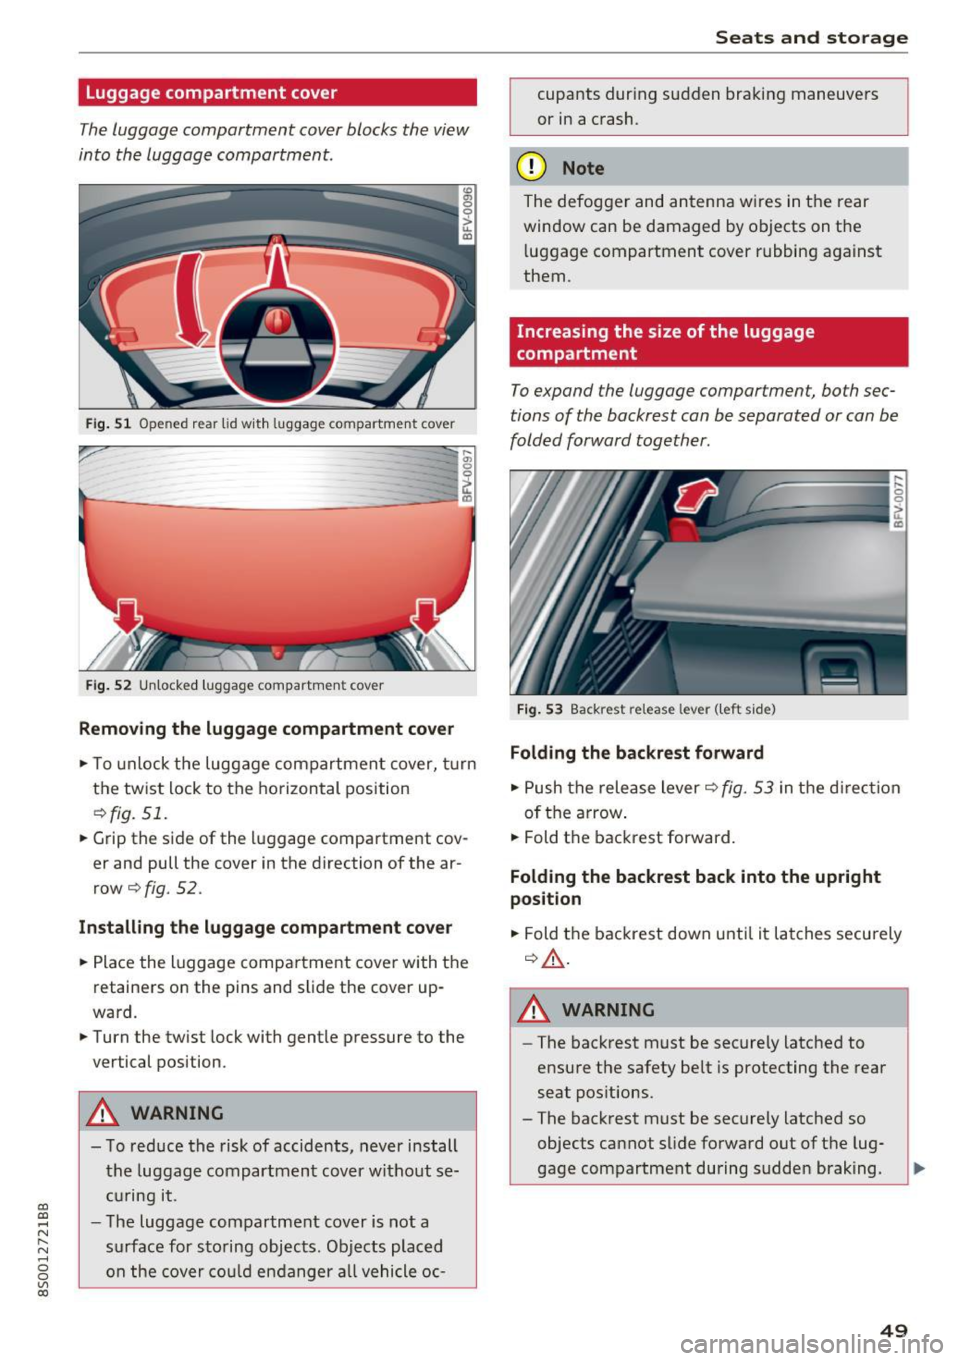
Fi g. 51 Opened rear lid wit h luggage compartment cover
... gi 0
~
ir----- ----------- ------CD
Fig. 52 Unlocked luggage compartment cover
Removing the luggag e compartment cover
.,. To unlock the luggage compartment cover, turn
the twist lock to the horizontal position
¢fig. 51.
.. Grip the s ide of the luggage compartment cov
er and pull the cover in the direction of the ar
row¢
fig. 52.
Install ing the luggage compartment cover
.. Place the luggage compartment cover with the
retainers on the pins and slide the cover up
ward .
.. Turn the twist lock with gentle pressure to the
vertical position.
_&. WARNING
- To red uce the risk of accidents, never install
the luggage compartment cover without se
c ur ing it.
- The luggage compartment cover is not a
surface for s to ring objects. Objects placed
on the cover cou ld en danger a ll vehicle oc-
Seats and storag e
cupants during sudden bra king maneuvers
or in a crash.
(D Note
The defogge r and antenna w ires in t he rear
window can be damaged by objects on t he
l uggage compartment cover rubbing against
them.
Increasing the size of the luggage
compartment
To expand the luggage compartment, both sec
tions of the backrest can be separated or can be
folded forward together .
Fig . 53 Backrest release lever ( left side)
Folding the backrest forward
.. Push the rele ase lever¢ fig. 53 in the d irection
of t he arrow .
.. Fold t he backrest forward .
Folding the backrest back into the upright
position
.,. Fold the backrest down u ntil it la tches secu rely
¢ _&. .
_&. WARNING
-The back rest must be securely latched to
ensure the safety be lt is protecting the rear
seat pos itions.
- The back rest must be securely latched so
objects cannot slide fo rward out of the lug
gage compartment during sudden braking.
49
Page 59 of 322
CD
CD
.... N
" N ...... 0
0
Ill co
Steering
Adjusting the steering wheel position
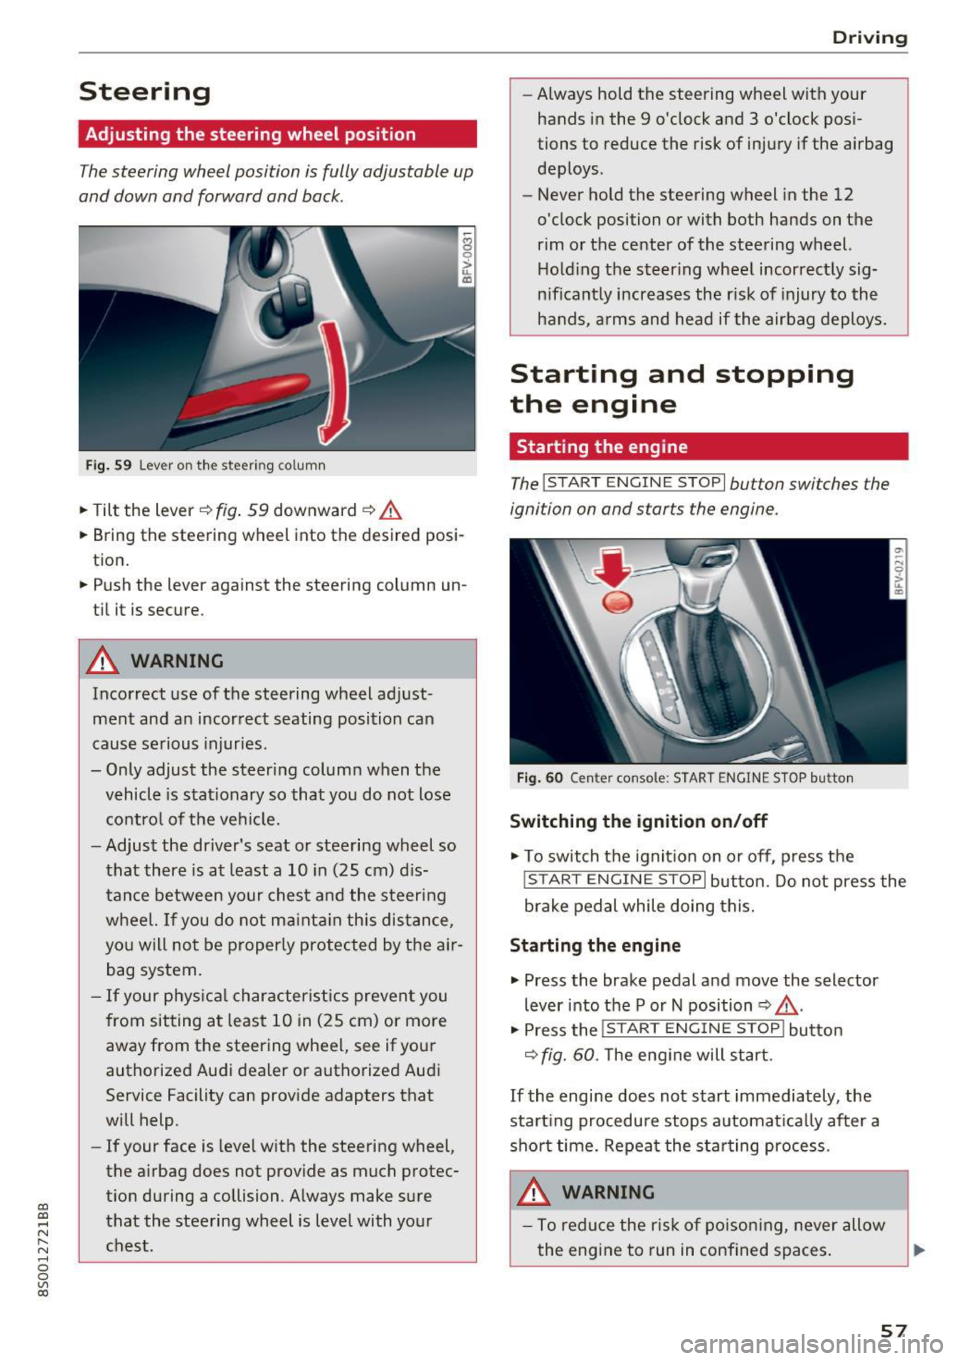
The steering wheel position is fully adjustable up
and down and forward and back.
Fi g. 59 Lever on th e steering column
... Tilt the lever c:::> fig . 59 downward c:::> A
... Bring the steering wheel into the desired posi
tion .
... Push the lever against the steering column un
t il it is secure.
A WARNING
Incorrect use of the steering wheel ad just
ment and an incor rect seating posi tion ca n
cause se rious injuries.
- Only adjust the steeri ng column when the
vehicle is stat ionary so that you do not lose
cont ro l of the ve hicl e.
- Adjus t the dr iver's seat or steering wheel so
that there is at least a 10 in (25 cm) d is
t an ce betwee n your chest a nd t he s teering
w heel. If y ou d o not m aint ain this dis tan ce,
yo u will n ot be proper ly protected by the a ir
bag system.
- If your phys ic al characteris tics p reven t you
from sit ting a t least 1 0 in ( 25 cm) or mo re
away from the steering whee l, see if yo ur
authorized Audi dea ler or autho rized Audi
Service Facility can prov ide adapters that
will help.
- If your face is leve l with the steering wheel,
the a irbag does not provide as much protec
t io n during a collision. Always make s ure
tha t the steering wheel is leve l with yo ur
chest.
D rivi ng
-Always hold the steering wheel with your
hands i n the 9 o'clock and 3 o'clock pos i
tions to reduce the risk of injury if the airbag
deploys.
- Never hold the steering wheel in the 12
o'clock position or with both hands on the
rim or the center of the stee ring wheel.
H old ing the steer ing whee l incorrect ly sig
n ificant ly increases the r isk of injury to the
hands, a rms and head if the air bag deploys.
Starting and stopping
the engine
Starting the engine
The ! S TART ENGINE STOPI button switches the
ignition on and starts the engine .
Fig . 60 Center console: START ENGINE STOP b utto n
Switching the ignition on /off
... To switch t he ignit io n on or off, press t he
!START ENGI NE STOPI but ton. Do not press the
brake pedal while doing this.
Starting the engine
... Press the brake pedal a nd move the selector
lever into the P or N position
c:::> ,&. .
... Press the !START ENGINE STOP I butto n
<=:> fig. 60. The eng ine will start.
If the engine does not start immediately, the
sta rt ing procedure stops a utoma tica lly after a
sho rt time. Repea t the s ta rt ing process .
A WARNING
- To redu ce the r is k of p oisoni ng, never allow
the eng ine to run in confined spaces.
57
Page 62 of 322
Driving
Electromechanical
parking brake
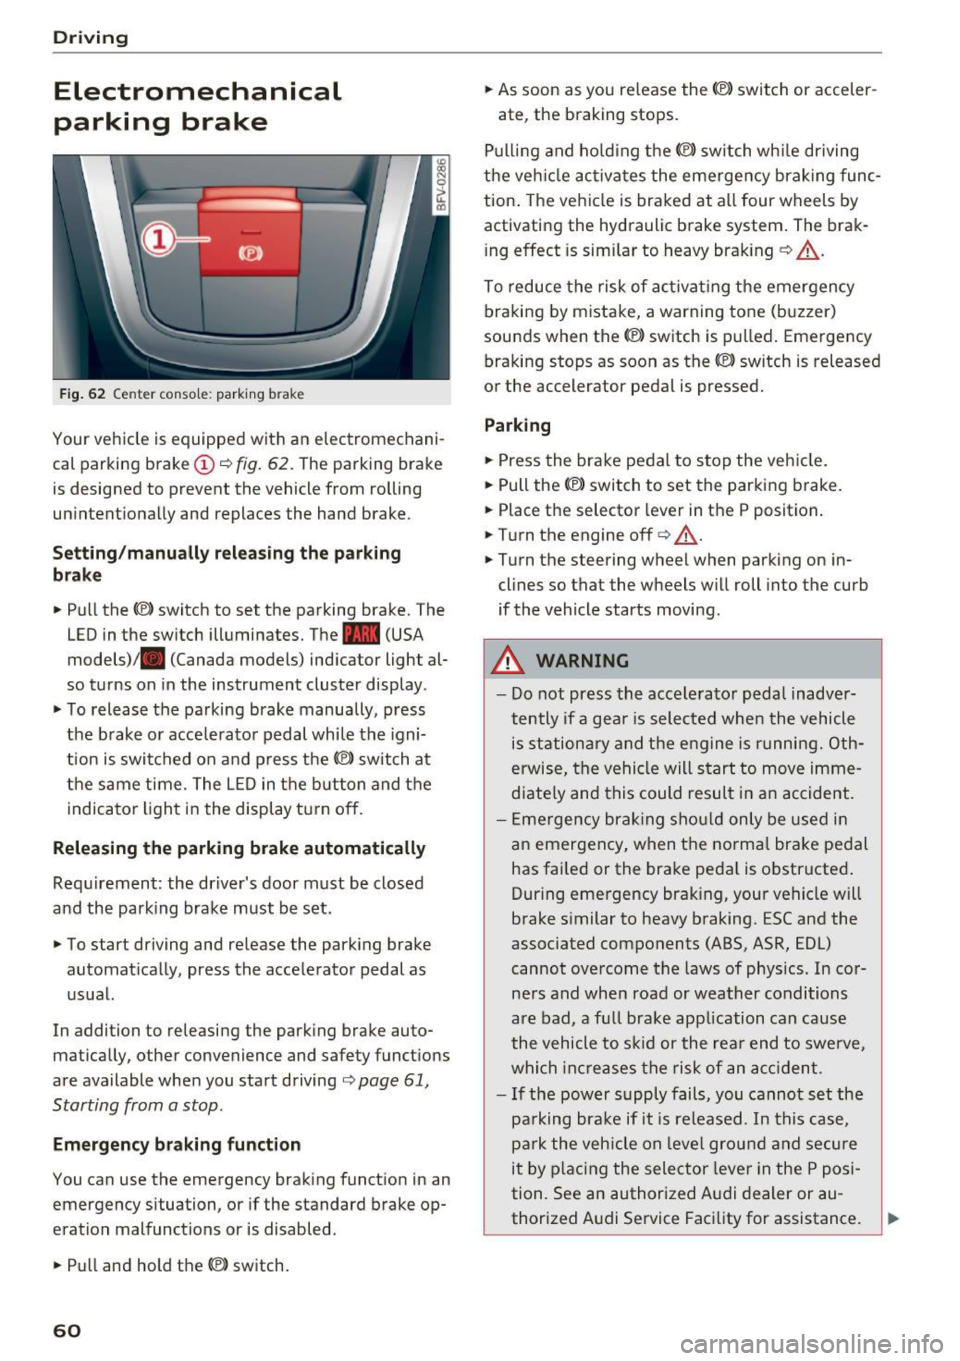
Fig . 62 Center conso le: par king brake
Your vehicle is equipped with an electromechani
cal parking brake(!)
o fig. 62. The parking brake
is designed to prevent the vehicle from rolling
unintentionally and replaces the hand brake.
Setting /manuall y re le asing the parking
bra ke
.. Pull the(®) switch to set the parking brake. The
LED in the switch illuminates. The -(USA
models)/ . (Canada models) indicator light al
so turns on in the instrument cluster display .
.. To release the parking brake manua lly, press
the brake o r acce lerato r pedal while the igni
tion is swi tched on a nd p ress the
«el) switch at
the same time. The L ED in the b utton and the
indicator light in the display t urn off.
Releasing the parking brake automatically
Req uirement: the driver's door must be closed
and the park ing brake must be set.
.. To start driving and release the park ing brake
automat ically, press the accelerator pedal as
u su al.
In addition to releasing the park ing brake auto
mat ica lly, other convenience and safety functions
are available when you start driving
o page 61,
Starting from a stop .
Emergency braking function
You can use the emergency brak ing function in an
emergency situation, or if the standard brake op
eration mal functions or is disabled .
.. Pull and hold th e®> switch.
60
.. As soon as you re lease the (®) switch or acceler-
ate, the braking stops.
P ulli ng and ho ld ing the®) switch wh ile driving
the ve hicle ac tiva tes the emerge ncy braking func
tion . The vehi cle is braked at a ll four wheels by
activating the hydraulic brake system . The brak
i ng effect is sim ilar to heavy brak ing
o ,A .
To reduce the risk of act ivat ing the emergency
braking by mistake, a warning tone (buzzer)
sou nds when the© switch is pulled . Emergency
bra king stops as soon as the®) switch is released
or the accelerator pedal is pressed.
Parking
.. Press the bra ke pedal to stop the veh icle.
.. Pull the®> switch to set the parking brake.
.. Place the selector lever in t he P position .
.. Turn the engine off
cc> ,A.
.. Turn the steering wheel when parking on in
cl ines so that the wheels w ill roll into the curb
if the vehicle starts moving.
.&. WARNING
- Do not press the acce lera to r pedal inadve r
tently if a gea r is selec ted whe n the vehicle
is st ation ary and the e ngine is runni ng. Oth
erwise, the vehi cle will s tart to move imme
diate ly and this could result i n an accident.
- E mergency brak ing sho uld only be used i n
an emergency, when the norma l bra ke pe dal
has failed or the brake peda l is o bstr ucted .
During emergency brak ing, your vehicle will
brake s imilar to heavy braking. ESC and the
associated components (ABS, ASR, EDL)
cannot ove rcome the laws of physics. In co r
ners and when road or weather conditions
are bad, a fu ll brake application can cause
the vehicle to s kid or the rea r end to swe rve,
whi ch in crease s the risk of an ac cident.
- I f the power supply fails, you cannot set the
pa rking bra ke if it is released. In this ca se,
p ar k the vehicle on leve l grou nd and secure
it by plac ing the sele ctor lever in the P pos i
tion. See an authorized A udi dealer or au -
thorized A udi Service Facil ity for assistance.
~
Page 71 of 322
CD
CD
.... N
" N ,-I 0
0
Ill co
Selector lever emergency release
If the vehicle's power supply fails, the selector lever can be released in an emergency.
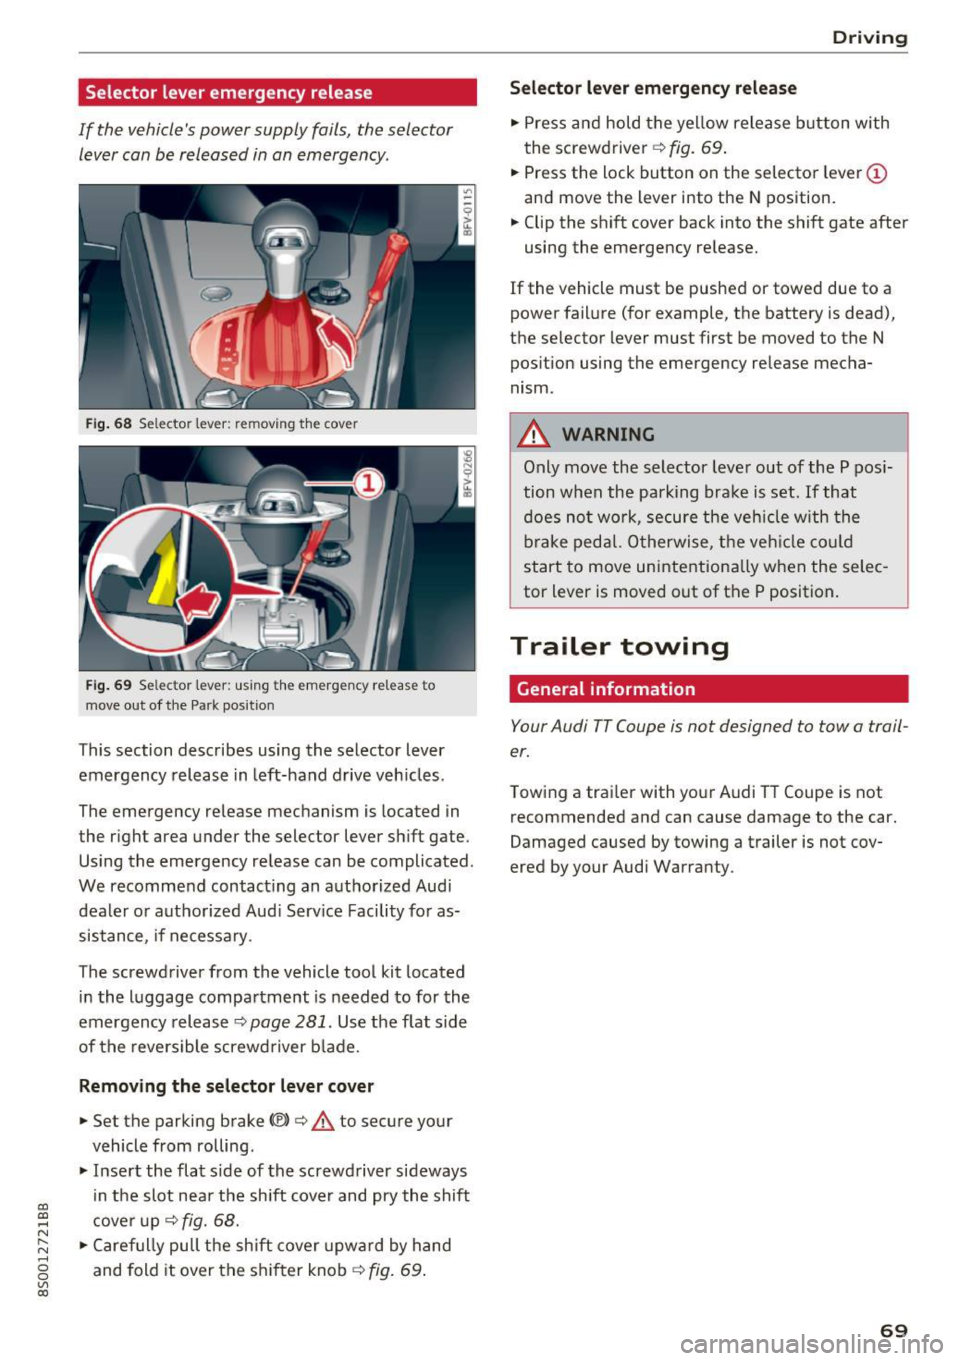
Fig . 68 Selector lever: remov ing t he cover
Fig . 69 Selec tor lever : us ing the eme rgency re lease to
move out of t he Park pos it ion
This section describes using the selector lever
emergency release in left-hand drive veh icles .
The emergency release mechanism is located in
the right area under the selector lever shift gate.
Using the emergency release can be complicated.
We recommend contact ing an authorized Audi
dealer o r authorized Aud i Serv ice Facility fo r as
sistance, if necessary .
The screwdriver from the vehicle tool kit located
i n the luggage compartment is needed to for the
emergency release ¢
page 281. Use the flat side
of the reversible screwd river b lade.
Removing the selector lever c over
.,. Set the parking brake CV)¢ A to secure your
vehicle from ro lling .
.,. In se rt the flat side of the screwdriver sideways
in the slot nea r the shift cover and pry the shift
c ove r up
¢fig. 68 .
.,. Caref ully pull t he shift cover upw ard by hand
and fold it over the sh ifter knob ¢
fig. 69.
Drivi ng
Selector l ever emergency r elease
.,. Press and hold the yellow release b utton with
the screwdriver ¢
fig. 69.
.,. Press the lock button on the selector lever
(D
and move the lever into the N position .
.,. Clip the shift cover back into the shift gate after
using the emergency re lease.
If the vehicle must be pushed or towed due to a
power failure (for example, the battery is dead),
the selector lever must first be moved to the N
pos ition using the emergency re lease mecha
nism.
A WARNING
Only move the selector lever out of the P pos i
tion when the parking bra ke is set. If that
d oes no t wo rk, secure the ve hicle w ith the
bra ke ped al. Otherwise, t he veh icle co ul d
st art to move uninte ntiona lly w hen the selec
tor lever is moved out of the P position.
Trailer towing
General information '
Your Audi TT Coupe is not designed to tow a trail
er.
Towing a trailer with you r Audi TT Coupe is not
recommended and can cause damage to the car.
Damaged caused by towing a trailer is not cov
ered by your Audi Warranty.
69