tow AUDI TT ROADSTER 2008 Owner's Manual
[x] Cancel search | Manufacturer: AUDI, Model Year: 2008, Model line: TT ROADSTER, Model: AUDI TT ROADSTER 2008Pages: 316, PDF Size: 70.1 MB
Page 193 of 316
![AUDI TT ROADSTER 2008 Owners Manual [ i ] Tips
• If the pow er st eering sy stem sho uld fa il, or if the e ng ine is not
running (for examp le , whi le being towed), you will stil l be able to
st eer the ve hicl AUDI TT ROADSTER 2008 Owners Manual [ i ] Tips
• If the pow er st eering sy stem sho uld fa il, or if the e ng ine is not
running (for examp le , whi le being towed), you will stil l be able to
st eer the ve hicl](/img/6/57671/w960_57671-192.png)
[ i ] Tips
• If the pow er st eering sy stem sho uld fa il, or if the e ng ine is not
running (for examp le , whi le being towed), you will stil l be able to
st eer the ve hicle . How eve r, more e ffort w ill be required to do so.
• I f the powe r steering system is not f unctioning pr ope rly, contact
your authorized Audi dea ler immediate ly.
Ap plies to vehicles : wit h A ll Wheel Driv e
Driving w ith your quattro®
With All Wheel Drive, all four w heels ar e dri ven.
General information
With All W hee l Dr ive, power is d is tr ibute d to all fou r whee ls . T his
happens automat ica lly depending on your driving style and the
r oad cond itio ns at the time. See also =>
page 186, "E lec tronic diffe r
entia l lock ( EDU" .
Winter tires
When driving in the winter, your vehic le with All Wheel Drive has an
advantage, even wi th regula r t ir es . In winter road conditions it may
be advisable to mount winter tires (or all -season tires) for improved
driveabi lit y an d braking : these tires m ust be mounted on
all four
wheels .
See also=> page 254 , "Win ter t ires" .
Snow chains
Where tire cha ins are mandatory on certain roads, this normally
a lso a pplies t o vehic le s wi th Al l Wheel Drive =>
page 255, "Sn ow
chains".
Replacing wheels /tires
Vehicles with A ll Wheel Drive must always have tires of the same
s iz e. Also av oid t ires w it h d iff eren t tr ead dep ths. For details see
page=>
page 249, " New tires and replacing tires and whee ls " .
Controls and equip
ment Safety first Vehicle operation
Intelligent technology
Off
-Road driving?
Your Audi d oes not have en ough gr ound clea rance to be use d as a n
off -road vehicle. It is therefore best to avoid roug h tracks and
u neven terrain as much as possible. A lso refer to=>
page 194.
& WARNING
Always adjust your driving to road and traffic conditions. Do not
let the extra safety afforded by All Wheel Drive tempt you into
taking extra risks .
• Although the All Wheel Drive is very effective , always
remember that braking capacity is limited by tire traction. You
should therefore not drive at e xcessive speeds on icy or slippery
road surfaces.
• On wet road su rfaces , be careful not to dr ive too fast because
the front wheels could begin to slide on top of the water (aqua
planing ).
If this should occur , you will have no warning from a
sudden increase in engine speed as with a front -wheel drive
vehicle . Always d rive at speeds which are suited to the road condi
tions. -risk of cra sh. •
Vehicle care Do-it-yourself service Technical data
Page 195 of 316
New brake pads
Remember that new brake pads do not have a full braking
effec t during the first 250 miles (400 kilometres) after they
are installed.
New brake pads have to be "burnished in" before they have optima l
grab=> &.
During the break -in period, you should avoid putting severe loads
on the brakes. Severe loads include, for example, sudden hard
braking, in particular at very high speeds or, for example, on moun
tain passes.
& WARNING
U ntil the y develop the m axim um "b ite " fo r be st stoppi ng p owe r,
th e s urfaces on new br ake p ads re quir e some " brea king -in " during
th e ini tia l 100 to 150 miles 1 150 to 200 k ilom etres) of nor ma l c ity
driving . You can comp ensa te fo r thi s by press ing the brak e ped al
more fi rml y. T his appl ie s w henev e r ne w pad s a re in sta lled . •
Catalytic converter
It is very important that your emission control system
(catalytic converter) is fu nctioning properly to ensure that
y o ur vehicle is running in an environmentally s ound
manner.
- Always use lead-free gasoline~ page 214, "Fuel supply".
- Never run the tank down a ll the way to empty.
- Never put too much motor o il in your engine~
page 225,
"Adding engine oi l 'l=:;r\11
•
- Neve r try to push -or tow -s tart your ve hicle.
Controls and equip
ment Safety first Vehicle operation
Dri
ving and environm ent
The catalytic converter is an efficient "clean-up" device built into the
exhaust system of the vehicle . The cataly tic converter burns many
of the pollutants in the exhaust gas before they are re leased into the
atmosphere.
The exclusive use of un leaded fuel is critica lly important for the l ife
of the catalytic converter and proper functioning of the engine.
& WARNING
• Do not park or oper ate th e ve hi cle in are a s whe re the hot
exha ust sys te m may c ome in conta ct wi th dr y grass, bru sh , fu el
s pill or other mat eri al which can cau se a fi re.
• Do not app ly a dditi onal u nder co at ing or ru stpr oofing on or
near the exhau st m anifold , exh au st pipe s, cata ly tic convert er or
he at shi elds. During dri ving, the s ubstance use d f or und ercoa ting
c ould ov erheat an d ca u se a fire.
0 Note
• Be aware that just one tank fi lling with
le ad ed fuel wi ll a lready
seriously degrade the performance of the catalytic converter.
• Do not exceed the correct engine oil level =>
page 225.
• Do not drive until the fuel tank becomes completely empty. The
engine could misfire . Unburned fuel could a lso get into the exhaust
system and this could cause the catalytic converter to overheat .
• Do not turn off the igni tion wh ile the vehicle is moving.
• Do not continue to operate your vehicle under these conditions,
as otherwise fue l can reach the cata lytic converter. This could resu lt
in overheating of the converter, requiring its replacement .
• To assure efficient operation of the Emiss ion Control System:
- Have your vehicle maintained properly and in accordance with
the service recommendations in your Maintenance & Warranty
booklet.
Vehicle care Do-it-yourself service Technical data
Page 198 of 316
___ D_ r_iv _ in_... g"'- a_ n_ d_ e_ n_ v_i_r _ o _n_ m __ e_n _ t _______________________________________________ _
The engine and catalytic converter have to reach their optimal oper
ating temperature
to reduce fuel consumption and noxious emis
sions effectively.
• Just after starting, a cold engine in a mid -size car burns the fuel
at a poor rate of 6-8 miles per gallon (30-40 l/100kml. Half a mile
down the road, the mileage improves to 12 MPG (20 1/100 kml. It will
take the engine no less than
two and a half miles (4 km) of driving to
warm up to its proper operating temperature and operate at an
economic mileage. This explains why taking the car for short trips is
a rather wasteful convenience.
• The
outside temperature is also critical in this regard. Your car
consumes more fuel in the winter than in the summer.
Trailer towing
General information
Your Audi TT Roadster is not designed to tow a trailer.
Towing a trailer with your Audi TT Roadster is not recommended
and can cause damage to the car. Damaged caused by towing a
traile r is not covered by your Audi Warranty. •
Page 207 of 316
_____________________________________________ C_ l_ e _a_ n_ in_ g_a _ n_d_ p_ r_ o_ t _e_ c_t _io _ n __ _
•
Occasiona lly apply a co lorless vinyl or leather preservative to retain
t he material's luster and pliability.
& WARNING
Alway s read and he ed all WARNING S and the information
~ pag e 200. •
Aluminum trim
Use only neutr al- pH products to remove spots and deposits from
a lum inum surfaces . Chrome care products and alka line cleaners
wi ll attack aluminum surfaces and can damage them over time.
& WARNING
Alway s read and heed all WARNINGS and the information
~ pa ge2 00.•
Touch -up paint
Min or paint damages should be touched up immediately.
- Use e ither a touch -up pa int stick or spray paint to cover
m ino r scratches and nicks.
Your Audi dealer has touch -up paint for minor scra tches and stone
chips. Scratches shou ld be touched up soon after they occur to
prevent corrosion .
The nu mber for the or iginal vehicle paint can be found on the
vehicle identification label~
page 288 .
& WARNING
Always re ad and h eed all W ARNINGS and the inf ormation
:=> page 200 . •
Windows
Clear vision to all sides .
Clean a ll windows regu lar ly to remove road film and
ca rwas h wax bu ildup.
Remove snow f rom windows us ing a b rush .
- Use a plastic ice sc rape r to rem ove ice from windows a nd
m irr ors .
- Rem ove o ther res idue on the wind ows with a spray-o n
glass clea ner.
Wipe the windows dry with a c lean piece of cloth or
kitchen p aper towel.
The best way to remove snow from windows and mirrors is to use a
brush . Use a non -abrasive
plastic ice s craper -better still, a spray
deicer -to remove
ic e from windows and mirrors .
The windows must not be c leaned with insect remover or wax since
these can interfere with the function of the windshield wiper b lades
(chatter).
Oil, grease or silicone residue can be removed w ith
glas s cle ane r or
sil ic one remo ver . However, wax residue requires the use of a
specially formulated so lvent . Please contact your Audi dealer for
advice on safe products for wax removal.
Windows should also be cleaned on the ins ide at regular intervals . ..,_
Vehicle care I t •
Page 212 of 316
___ C_ le_ a _ n_i_n ~g _ a_ n_ d __ p_r _o _t _e _c_ t_ i_o _n ___________________________________________ _
clothing materials can discolor leather seats (especially if such
clothing is damp and was not dyed correctly). Dust and dirt particles
in pores, folds, and seams can have an abrasive effect and can
damage the leather surface as well as weaken seams.
The leather should be cleaned regularly as needed. After having
been used for a relatively long time, your leather seats will acquire
a rich aged finish. This is a characteristic of natural leather and a
sign of true quality.
In order to maintain the value of this natural product over the life of
your vehicle, you should follow the recommendations below:
0 Note
• To keep your leather from bleaching out, do not allow it to be
exposed to bright sunlight for long periods of time. If you have to
leave the vehicle parked outside for long periods, cover the leather
to protect it from direct exposure to sunlight.
• Sharp objects on clothing, such as zippers, rivets or sharp pieces
on belts can leave permanent scratches or scrape marks on the
surface of the leather.
[ i J Tips
• After each time you clean the leather and at regular intervals, use
a leather preservative creme that contains UV -blockers and that
works into the leather. This creme will nourish and moisturize the leather, helping it to breathe and stay supple. It also helps to build
up a protective coating on the surface.
• Clean the leather every 2 -3 months, and clean any areas that get
soiled.
• Remove fresh marks made by ballpoint pens, ink, lipstick, shoe
polish, etc. as soon as possible.
• Preserve the color of the leather as needed by using a special
colored leather care creme to touch up areas of uneven color. •
Applies to vehicles: w ith natu ral leather
Cleaning and caring for leather upholstery
and trim
Natural leather requires special care and attention.
Normal cleaning
-Clean soiled areas with a slightly moistened cotton or
woolen cloth.
More stubborn dirt
- More stubborn dirt can be removed using a cloth satu
rated with a mild soap solution (2 tablespoons mild
liquid soap).
- Never allow the soap solution to saturate the leather, and
make certain that no water soaks into the seams.
Wipe off the soap solution with a soft, dry cloth.
Cleaning spots
-Remove fresh water-based spots (such as coffee, tea,
juices, blood) with an absorbent cloth or paper towel.
- Remove fresh
grease or oil-based spots (such as butter,
mayonnaise, chocolate) with an absorbent cloth or paper
towel, or use the cleaner from the leather care kit if the
spot has not yet penetrated into the surface of the
leather.
- Use an oil/grease dissolving spray, if
oil/grease spots
have dried on.
- Remove specific kinds of spots (ballpoint pen, felt
marker, fingernail polish, water-based paint, shoe polish,
etc.) with a spot remover specifically formulated for leather. ..,_
Page 249 of 316
& WARNING (continued)
• Tires on a vehicle that has been overloaded can fail suddenly,
including a blowout and sudden deflation , causing loss of control
and a crash .•
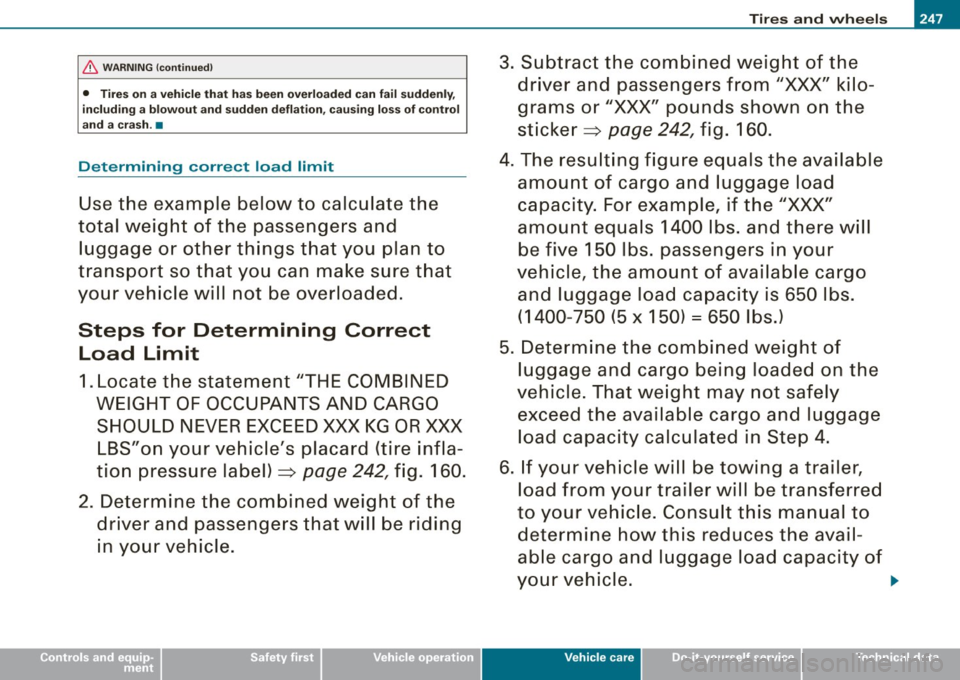
Determining correct load limit
Use the example below to calculate the
total weight of the passengers and
luggage or other things that you plan to
transport so that you can make sure that
your vehicle will not be overloaded.
Steps for Determining Correct
Load Limit
1. Locate the statement "THE COMBINED
WEIGHT OF OCCUPANTS AND CARGO SHOULD NEVER EXCEED XXX KG OR XXX
LBS"on your vehicle 's placard (tire infla
tion pressure label)=;>
page 242, fig. 160.
2. Determine the combined weight of the driver and passengers that will be riding
in your vehicle.
Tires and wheels 1111111
3. Subtract the combined weight of the driver and passengers from
"XXX" kilo
grams or
"XXX" pounds shown on the
sticker =;>
page 242, fig. 160.
4. The resulting figure equals the available amount of cargo and luggage load
capacity. For example, if the
"XXX"
amount equals 1400 lbs. and there will be five 150 lbs. passengers in your
vehicle, the amount of available cargo and luggage load capacity is 650 lbs.
( 1400 -750 (5 x 150) = 650 I bs.)
5. Determine the combined weight of
luggage and cargo being loaded on the
vehicle. That weight may not safely exceed the available cargo and luggage
load ca pa city calculated in Step 4.
6. If your vehicle will be towing a trailer, load from your trailer will be transferred
to your vehicle. Consult this manual to determine how this reduces the avail
able cargo and luggage load capacity of
your vehicle. .,_
Vehicle care I • •
Page 264 of 316
11111...__W_ h_ a _ t_d_ o_ l _d _o_ n_ o_ vv_ ? ______________________________________________ _
What do I do now?
Trunk escape handle
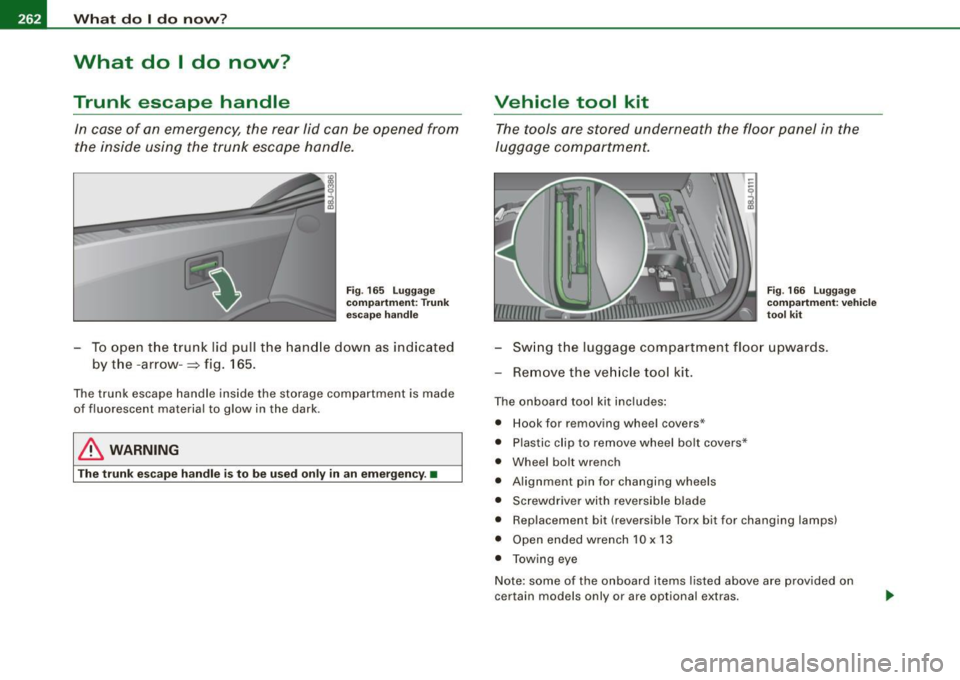
In case of an emergency, the rear lid can be opened from
the inside using the trunk escape handle.
F ig . 165 Lug gag e
co mp artm ent: T runk
escape handl e
- To open the trunk lid pull the hand le down as indicated
by t h e -arrow -~ fig. 165.
The trunk escape handle inside the storage compartment is made
of fluorescent materia l to glow in the dark.
& WARNING
The tr un k es cap e handl e is to b e use d onl y in an em ergen cy. •
Vehicle tool kit
The tools are st ored underneath the floor panel in the
luggage c ompartment.
Fi g. 16 6 Lugga ge
co mpa rtm ent : ve hic le
t o ol kit
- Sw ing the luggage compartment floo r upwards .
- Remove the ve hicle tool kit .
The onboard tool ki t includes:
• Hook for removing wheel covers *
• Plastic clip to remove wheel bolt covers*
• Wheel bolt wrench
• Alignment pin for changing wheels
• Screwdriver wi th reversible blade
• Replacement bit (r eve rsible Torx bit for changing lamps)
• Open ended wrench 10 x 13
• Towing eye
Note: some of the on board items listed above are prov ided on
certain models only or a re optional extras.
Page 280 of 316
.,,___E_ m_ e_r -=g :...e_ n _ c-=y _ s_ i_t _u _a _t_ i_o _n_ s _______________________________________________ _
Emergency situations
General
This chapter is intended for trained emergen cy crew s and working
personnel who have the necessary tools and equ ipment to perform
the se operations. •
Starting by pushing or towing
0 Note
Vehicles with an automatic tran smission cannot be started by
pushing or towing . •
Starting with jumper cables
If n ecess ary, the e ngin e c an b e starte d by conne ctin g it to
the ba ttery of anoth er vehicle .
If the engine shou ld fai l to start because of a discharged or weak
ba tte ry, the bat te ry can be connected t o the ba ttery of
another
vehic le, using a pair of jumper cables to start the engine.
Jumper cables
Use
only jumper cables of suffic iently large cross section to safely
c a rr y th e st arter cu rre nt. Re fer to th e m an ufacture r's spec ific a tio ns.
Use on ly jump er cables wh ic h have
insulated termina l c lamps and
a re prope rly marked for distinction :
plus (+l cable in mo st cas es c olo red red
minus (-l cable in most cases co lored black .
& WARNING
Batteries contain electricity , acid , and gas . Any of these can cause
very serious or fatal injury. Follow the instructions below for safe
handling of your vehicle 's battery .
• Always shield your eyes and avoid leaning over the battery
whenever possible .
• A discharged battery can already freeze at temperatures just
below 32 °F (0 °Cl. Before connecting a jumper cable, the frozen
battery must be thawed completely , otherwise it could explode .
• Do not allow battery a cid to contact eyes or skin . Flush any
contacted area with water immediately.
• Improper use of a booster battery to start a vehicle may cause
an explosion.
• Vehicle batteries generate e xplosive gases . Keep sparks, flame
and lighted cigarettes away from batteries.
• Do not try to jump start any vehicle with a low ac id level in the
battery.
• The voltage of the booster battery must also have a 12-Volt
rating . The capacity (Ahl of the booster battery should not be
lower than that of the discharged battery . Use of batteries of
different voltage or substantially different "Ah " rating may cause
an e xplosion and personal injury .
• Never charge a frozen battery. Gas trapped in the ice may cause
an explosion .
• Never charge or use a battery that has been frozen . The battery
case may have be weakened.
• Use of batteries of different voltage or substantially different
capacity (Ah ) rating may cause an explosion and injury . The
capacity (Ahl of the booster battery should not be lower than that
of the discharged battery . .,_
Page 283 of 316
________________________________________________ E_ m_ e_r ,,::g c..e_ n _ c..::y;._ s_ i_t _u _a_ t_ i_o _n_ s _ ___._
Emergency towing with commercial
tow truck
General hints
Your Audi requires special handling for towing.
The following information is to be used by commercial tow truck
operators who know how to operate their equipment safely.
• Never tow your Audi, towing will cause damage to the engine
and transmission.
• Never wrap the safety chains or winch cables around the brake
lines.
• To prevent unnecessary damage, your Audi must be transported
with a car carrier (flatbed truck).
• To load the vehicle on to the flat bed, use the towing loop found
in the vehicle tools and attach to the front or rear anchorage
=> page 281 and=> page 282.
& WARNING
A vehicle being towed is not safe for passengers. Never allow
anyone to ride in a vehicle being towed, for any reason. •
Front towing loop
Do not install the front towing loop until it is needed.
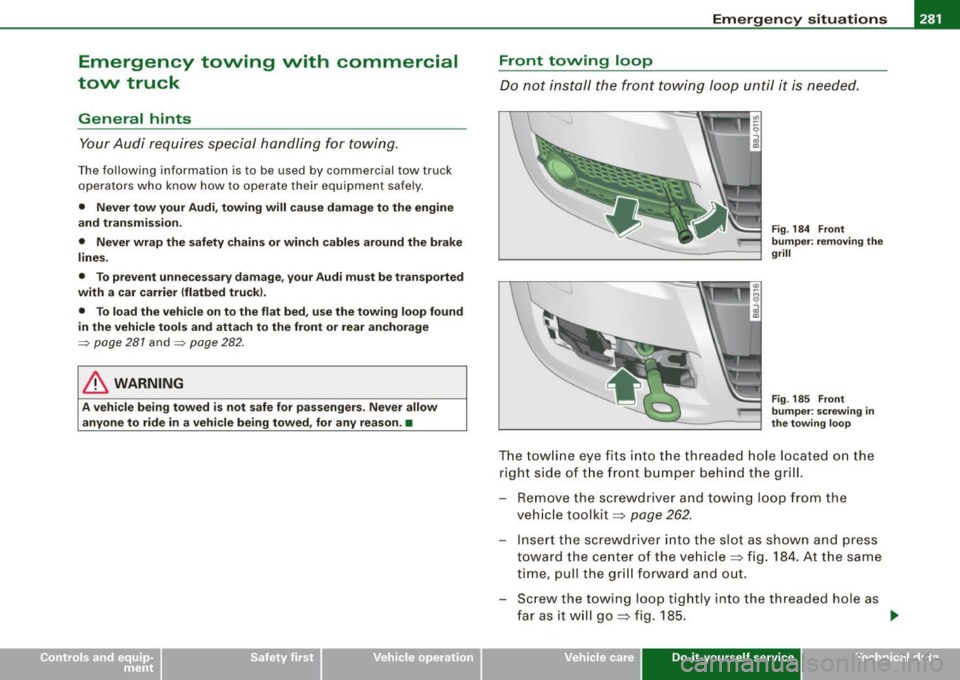
Fig. 184 Front
bumper: removing the
grill
Fig . 185 Front
bumper: screwing
in
the towing loop
The towline eye fits into the threaded hole located on the
right side of the front bumper behind the grill.
- Remove the screwdriver and towing loop from the
vehicle toolkit=>
page 262.
-Insert the screwdriver into the slot as shown and press
toward the center of the vehicle => fig. 184. At the same
time, pull the grill forward and out.
- Screw the towing loop tightly into the threaded hole as
far as it will go => fig. 185.
~
Vehicle care Do-it-yourself service irechnical data
Page 284 of 316
IIJ!I Emergency situations L-----=----!.___;:_;_:_=..::..:..:.=~------------------------
When it is no longer needed, unscrew the towline eye and put it
back into the on -board toolkit. Make sure to have the towline eye
stored in the vehicle at all times.
When installing the grill for the air duct, be sure that the tabs on the grill are first inserted into their guides on the vehicle. Then push the
grill into position.
& WARNING
If the towing loop is not screwed in as far as it will go, the thread
can pull out when the vehicle is towed -potential risk of an
accident. •
Rear towing loop
Do not install the rear towing loop until it is needed.
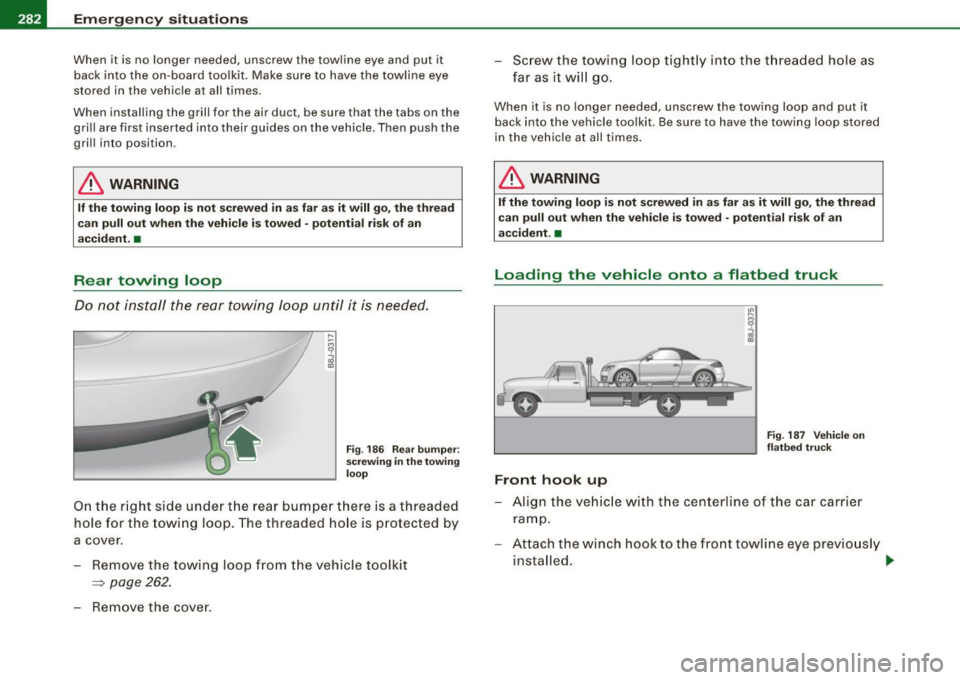
Fig. 186 Rear bumper :
screwing in the towing
loop
On the right side under the rear bumper there is a threaded
hole for the towing loop. The threaded hole is protected by
a cover.
Remove the towing loop from the vehicle toolkit
=:> page 262.
-Remove the cover. -
Screw the towing loop tightly into the threaded hole as
far as it will go.
When it is no longer needed, unscrew the towing loop and put it
back into the vehicle toolkit . Be sure to have the towing loop stored
in the vehicle at all times.
& WARNING
If the towing loop is not screwed in as far as it will go, the thread
can pull out when the vehicle is towed -potential risk of an
accident. •
Loading the vehicle onto a flatbed truck
Front hook up
Fig. 187 Vehicle on
flatbed truck
- Align the vehicle with the centerline of the car carrier
ramp.
- Attach the winch hook to the front towline eye previously
installed. .,,_