tow AUDI TT ROADSTER 2011 Owners Manual
[x] Cancel search | Manufacturer: AUDI, Model Year: 2011, Model line: TT ROADSTER, Model: AUDI TT ROADSTER 2011Pages: 260, PDF Size: 64.11 MB
Page 4 of 260
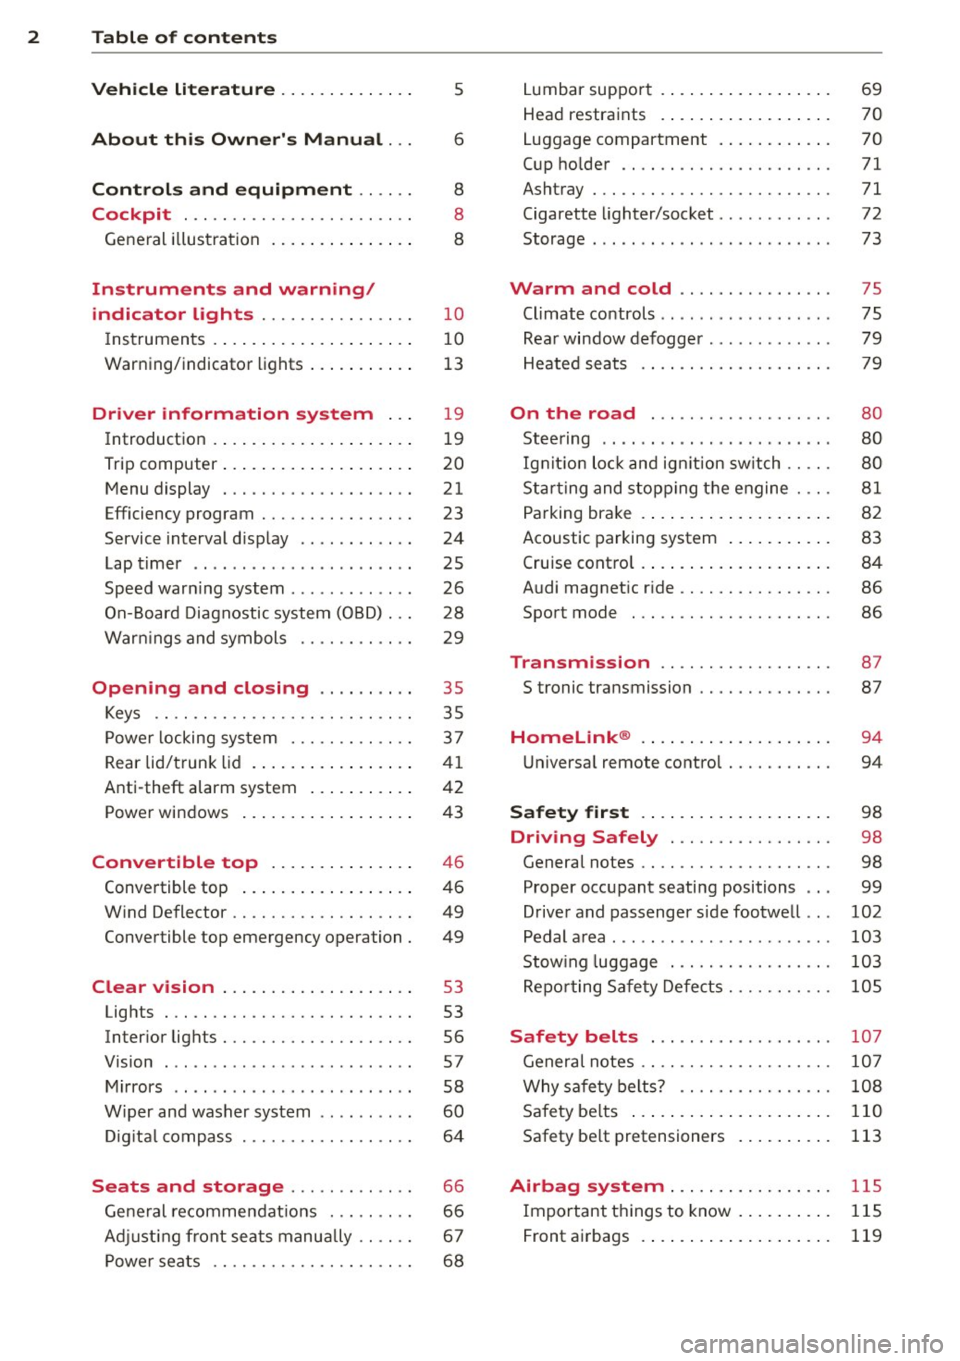
2 Table of contents
Vehicle liter ature .. .. .. .. .. ... .
About this Owner's Manual ...
Controls and equipment .. ... .
Cockpit ................ .... .. . .
General illus tra tion .... ... .. .. ... .
Instruments and warning/
indicator lights ........ .. .. .. . .
Instruments . .. .. ..... ... .. .. ... .
War ning/indicator lights ... .. ... .. .
Driver information system .. .
Introduction . .. .. ..... ... .. .. ... .
Trip computer .. .. ..... ... .. .. ... .
M enu display . ........... .... ... .
Efficiency program ........ .. .. .. . .
Service interval d isp lay .. .. .. .. .. . .
Lap timer .. .. ........ ...... ... . .
Speed war ning system ...... ..... . .
On- Board Diagnostic system (OBD) .. .
5
6
8
8
8
10
10
1 3
19
1 9
20
21
23
24
25
26
28
War nings and symbols . . . . . . . . . . . . 29
Opening and closing .. .. .. .. . . 35
Keys . . . . . . . . . . . . . . . . . . . . . . . . . . . 35
P ower locking sys tem ..... .. .. .. . .
Rear lid/trunk lid . ..... ... .. .. ... .
37
41
Anti-theft alarm system . . . . . . . . . . . 42
Power windows .. ..... ... .. .. ... .
Convertible top ....... .. .. ... .
Convertible top .. ..... ... .. .. ... .
W ind Deflector ........... .. .. ... .
Convertible top emergency operation .
Clear vision .. . .... ... .. .. .. ... .
Lights . .. ................. .. ... .
Inter ior lights ............ .. .. ... .
V 1s1on ..... .. ........ .... ... .. . .
Mirrors .. .. ................ ... . .
W iper and washer system . ... .. .. . .
Di gita l c ompass .......... .. .. .. . .
Seats and storage ..... .. .. .. . .
Ge ne ral recomme ndat ions . .. .. .. . .
Ad justing front sea ts manually .. ... .
P ower seats ............. .. .. ... .
43
46
46
49
49
53
53
56
57
58
60
64
66
66
67
68
L umbar suppo rt . .... .. ..... .... . .
Hea d restraints . ... ... ..... ... .. .
Luggage compartment . ..... ... .. .
C up ho lder ...... ............. .. .
Ashtray ... .... .. ............. .. .
Cigarette lighter/socket ........... .
Storage ..... .. .. .. ... .. ... ..... .
Warm and cold .... ...... ... .. .
Climate co ntrols .. ... .. .. ... ..... .
Rea r window defogger ............ .
Heated seats .... ............. .. .
On the road ... ............... .
Stee ring .. .. ... . .. ... .. ... ... .. .
Ig nitio n lock and ig nition sw itch .. .. .
St art ing and stopp ing t he engine . .. .
P a rking brake .... .. ... ..... ... .. .
Acoustic parking system ..... ... .. .
Cruise cont ro l .. .. ... .. ..... .... . .
Audi magnet ic r ide ... .......... .. .
Sport mode ... .. ............... . 69
70
70
71
71
72
73
75
75
79
79
80
80
80
81
8 2
83
84
86
86
Transmission . . . . . . . . . . . . . . . . . . 8 7
S tronic transmission ........... .. .
Homelink ® .... .. .... .... ... .. .
U niversa l remote control ........ .. .
Safety first .... ... .. ..... ... .. .
87
94
94
98
Driving Safely . . . . . . . . . . . . . . . . . 98
General notes . . . . . . . . . . . . . . . . . . . . 98
Proper occupant seating positions . . . 99
D river and passenger s ide footwe ll . . .
102
Pedal a rea . . . . . . . . . . . . . . . . . . . . . . . 103
Stow ing luggage . . . . . . . . . . . . . . . . . 103
Re po rting Sa fe ty Defe cts . . . . . . . . . . . lOS
Safety belts . . . . . . . . . . . . . . . . . . . 107
Genera l notes . . . . . . . . . . . . . . . . . . . . 10 7
Why sa fe ty belts? . . . . . . . . . . . . . . . . 108
S afety be lts . . . . . . . . . . . . . . . . . . . . . 110
Safety be lt pretensioners . . . . . . . . . . 113
Airbag system ... ... ..... ... .. . 115
Important things to know . . . . . . . . . . 115
Front airbags . . . . . . . . . . . . . . . . . . . . 119
Page 5 of 260
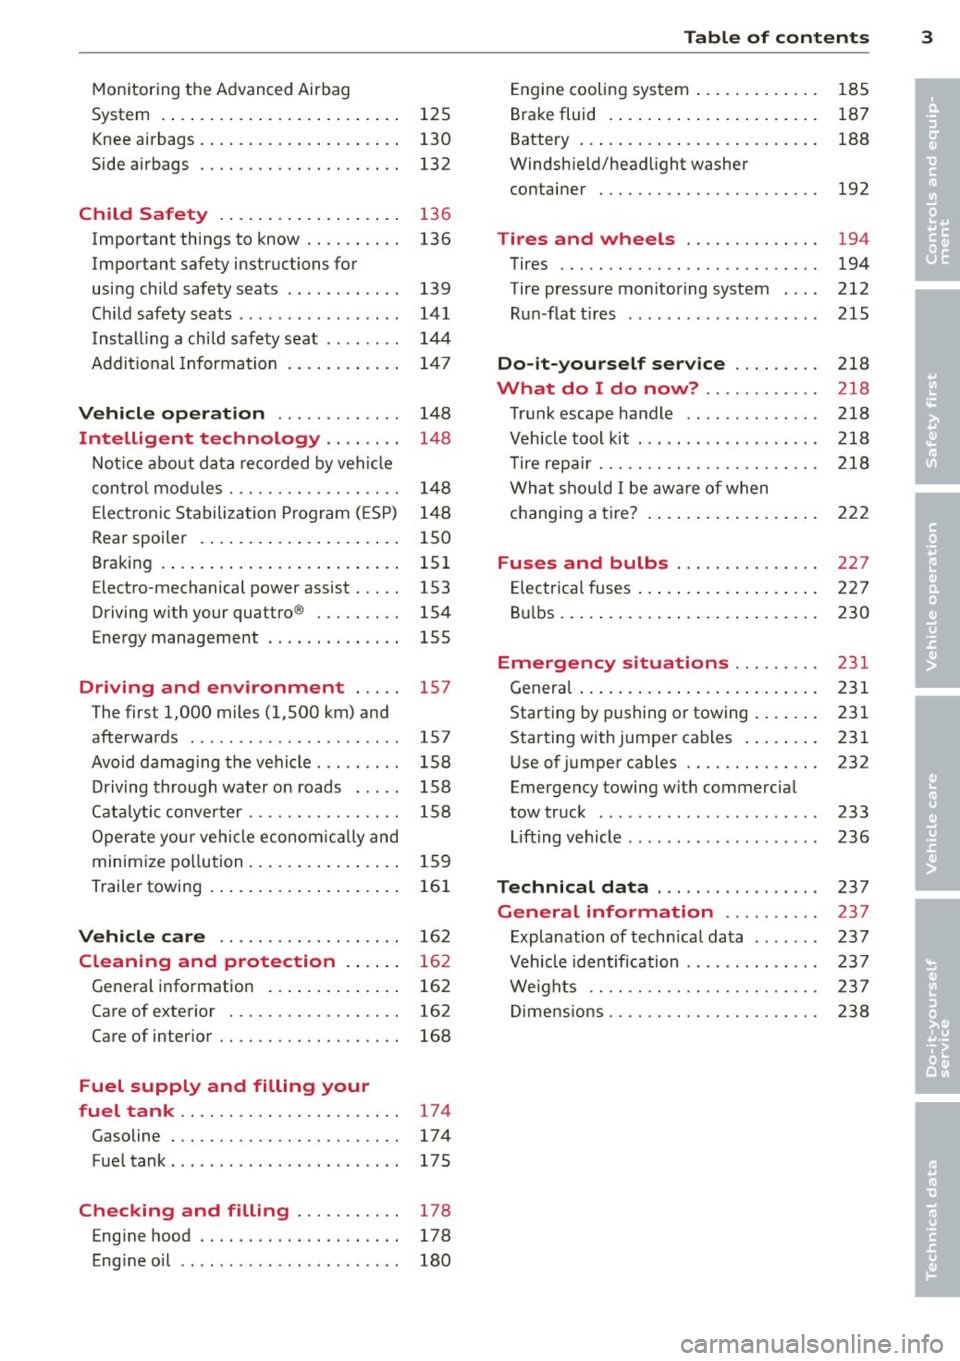
Monitoring the Advanced Airbag
System . . . . . . . . . . . . . . . . . . . . . . . . . 125
Knee airbags . . . . . . . . . . . . . . . . . . . . . 130
Side airbags . . . . . . . . . . . . . . . . . . . . . 132
Child Safety . . . . . . . . . . . . . . . . . . . 136
Important things to know . . . . . . . . . . 136
Important safety instructions for
using child safety seats . . . . . . . . . . . . 139
Ch ild safety seats . . . . . . . . . . . . . . . . . 141
Install ing a child safety seat . . . . . . . . 144
Addit io n al Information 14 7
Vehicle operat ion . . . . . . . . . . . . . 148
Intelligent technology . . . . . . . . 148
N ot ice about data recorded by vehi cle
con trol mod ules . . . . . . . . . . . . . . . . . . 148
E lect ronic S tabilization Program ( ESP) 1 48
Rear spoiler . . . . . . . . . . . . . . . . . . . . . 150
Braking . . . . . . . . . . . . . . . . . . . . . . . . . 151
Electro-mechanical power assist . . . . . 153
Driving w ith your quattro ® . . . . . . . . . 154
Energy management . . . . . . . . . . . . . . 155
Driving and environment . . . . . 157
The first 1,000 miles (1,500 km) and
afterwards . . . . . . . . . . . . . . . . . . . . . . 157
Avoid damaging the vehicle . . . . . . . . . 158
Driving through water on roads . . . . . 158
Cata lytic conve rter . . . . . . . . . . . . . . . . 158
Opera te you r vehi cle econom ic all y and
minim ize po llution . . . . . . . . . . . . . . . . 15 9
Trailer towing . . . . . . . . . . . . . . . . . . . . 161
Vehicle care . . . . . . . . . . . . . . . . . . . 162
Cleaning and protection . . . . . . 162
Gene ral information . . . . . . . . . . . . . . 162
Care of exterior . . . . . . . . . . . . . . . . . . 162
Care of inter ior . . . . . . . . . . . . . . . . . . . 168
Fuel supply and filling your
fuel tank .. ................. .. ..
174
Gasoline . . . . . . . . . . . . . . . . . . . . . . . . 17 4
Fue ltank ..... ................ ... 175
Checking and filling . . . . . . . . . . . 178
Eng ine hood . . . . . . . . . . . . . . . . . . . . . 178
Eng ine oil . . . . . . . . . . . . . . . . . . . . . . . 180
Table of contents 3
Engine cooling system .. ..... ... .. . 185
B rake fluid . ... .... . ... ...... ... . 187
•
Battery ... .. .. .. .. . .. ... .... ... . 188 •
Windsh ie ld/headlight washer
container . .. .. .. .... ........... .
192
Tires and wheels ........... .. . 194
Tires ..... .. .. .. .. . ............ . 194
Tire pressure mo nitoring system . .. .
212
R un -flat t ires .. .. .. . .. .... .... .. . 215
Do -it-yourself service ........ . 218
What do I do now? .. ...... ... . 218
T ru nk escape handle ............. . 218
V ehicle tool kit . .. ... .. .. ... ..... . 218
T ire repa ir ... .. ...... ........... . 218
What shou ld I be awa re of when
h . t
' 7 c anging a ire ... .. . .. .. ..... ... . 222
Fuses and bulbs .............. . 227
E lectr ica l fuses ... .. .. .. .. .... ... . 227
B ul bs ... .. .. .... .. . .. .. ..... ... .
230
Emergency situations ........ . 231
Genera l ... .. .... .. . .. .. ..... ... .
231
Starting by pushing or towing . ... .. . 231
Starting with jumper cables .. ... .. . 231
U se of jumper cables ............. .
232
Emergency towing wit h commercia l
tow truck ....... .. ............. . 233
Li fting vehicle .. .. .. .. .. ...... ... . 236
Technical data ..... .... ... .... . 237
General information ... ... ... . 237
E xplanation of techn ica l data ...... . 237
Vehicle identification ........... .. . 237
We ights .. .. .. .. .. .. ........... . 237
Di mens ions .. .. .. .. ............. . 238
Page 20 of 260
18 Instrument s and w arn ing /indic ato r light s
See your authorized Audi dealer as soon as
possible .
A WARNING
-If the B warning light does not go
out, or if it comes on while driv ing, the
ABS system is not working properly. The
vehicle can then be stopped only with
the brakes operating without ABS sup port . You will not have the protection
ABS provides. Contact you r A udi dealer
as soon as possible.
- USA models: If both, the~ warning
light and the Bwarning light come
on at the s ame t ime, the rear wheels
cou ld lock up first under hard braking.
Lock-up of the rear whee l brakes can
cause loss of vehicle control and an acci
dent. Have yo ur vehicle repaired immed i
ately by your authorized Audi dealer or a
qualified workshop. Dr ive slowly and
avo id sudden, hard brake applicat ion .
-Canada models: If both, the brake warn
ing light . and the ABS warning light
II] come on at the same t ime, the rear
wheels co uld lock up first unde r hard
braking. Loc k-up of the rear wheel b rakes
can ca use loss of vehicle control and a n
acc iden t. Have you r vehicle repaired im
me diately by your authorized Audi dealer
or a q ualified workshop. Drive slowly and
avo id sudden, hard brake applicat ion
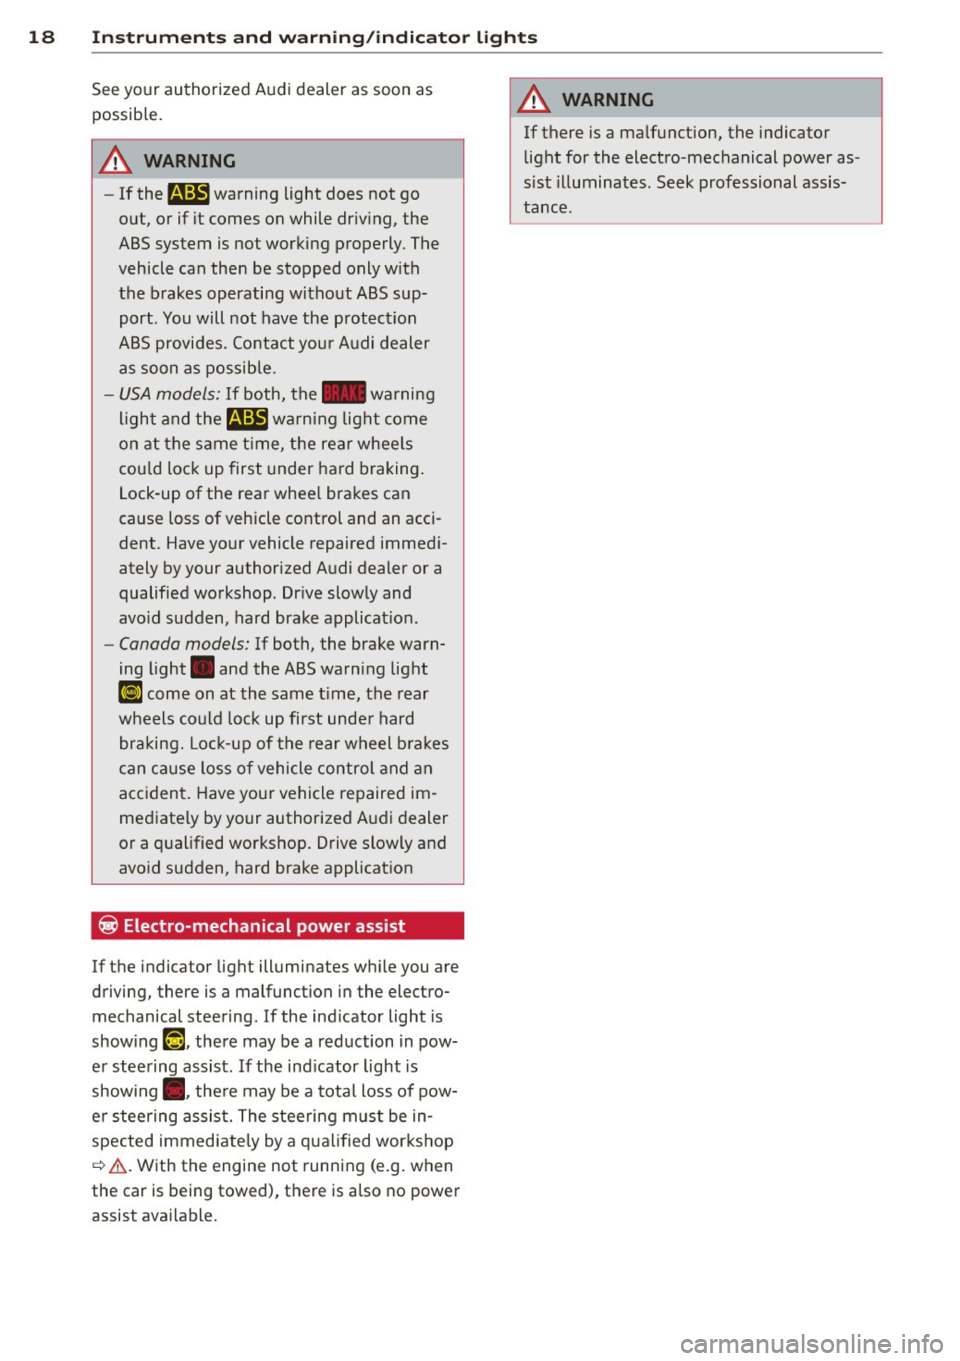
~ Electro-mechanical power assist
If the indicator light illuminates w hile you are
driving, there is a malfunction i n the electro
mechanical steering. If the ind icator light is
show ing
E'2:'~ . the re may be a red uction in pow
e r stee ring assist. If the ind icator light is
show ing • • the re may be a tota l loss of pow
e r steering assis t. T he steering must be in
spected immediate ly by a q uali fied wor ks hop
¢ .&, .With the engine not running (e.g . when
the car is being towed), there is a lso no powe r
assist ava ilable.
A WARNING
-
If there is a ma lfunction, the indicator
light for the electro-mechanical power as
sist illuminates. Seek professional assis
tance.
Page 48 of 260
46 Convertible top
Convertible top
Convertible top
General information
The comprehensively engineered design of the
fabric convertible top allows it to be operated
quickly and simply. When open, the converti ble top is stowed completely in a tonneau pro
vided specifically for this purpose.
In normal operating conditions, the converti
ble top is wind- and waterproof. Under certain
circumstances, a small quantity of droplets
might form, but only in extremely inclement
weather, e.g. torrential or continuous heavy
rain. This is normal and not a cause for con
cern.
Follow the care instructions
~ page 164,
Convertible top care
to maintain the converti
ble top's attractive appearance and to keep it
wind- and waterproof. Please follow these in
structions as well:
- Stow and open the convertible top only
when it is clean. When the top is folded
away, sharp-edged contaminants can build
up as silt and cause wear spots on the rear
window, which may damage the convertible
top over time. Of course, ice and snow
should also be removed before opening the
convertible top .
- Under no circumstances should you use
sharp-edged or abrasive objects to remove
ice and snow. Use a commercial ice scraper
to remove ice from of the rear window.
- The convertible top should be opened only if
it is completely d ry. If the convertible top is
opened and then stored wet, unattractive
indentations may develop. In addition, over
time, mold and mildew stains can develop.
- Do not leave the convertible top open for
several weeks at a time; instead, open and
close it from time to time so that the fabric
does not discolor where it folds, and to pre
vent creases from forming. This is especially
important if it happens to be stowed while
still damp on occasion . -
Because the fabric becomes less flexible
when temperatures drops below zero, we
recommend not operating the convertible
top below O°C.
A WARNING
-
- When operating the convertible top,
make sure that any external factors (e .g.
the wind) do not impair its function or
endanger other drivers.
- Never drive while the convertible top is
not properly secured . Otherwise, it may
be pulled open by the wind. This can
cause injuries and damage to the vehicle
- danger of an accident!
- When opening and closing the converti-
ble top make sure to keep yourself and
others clear of all moving parts. Risk of
injury!
(D Note
- Always make sure that there is enough
clearance above the vehicle so that the
convertible top is not damaged when
opening and closing.
- Do not place any objects in the tonneau
to avoid damage when opening the con
vertible top .
@ Tips
-The convertible top should be operated
only with the ignition switched on.
- When parking the car with the converti
ble top open, bear in mind that the vehi
cle's interior is not protected from dam
age due to unexpected weather condi
tions, or unauthorized access. It is there
fore advisable to close the convertible
top before leaving the vehicle. If objects
are left inside the vehicle, they should be
locked in the luggage compartment.
Page 55 of 260

Clear vision Lights
Switching the headlights on and off
Fig . 57 Instrument pane l: light switch
F ig. 58 Instrument pane l: light switch w ith daytime
running lights (DRL)
The light switch must not be overturned past
the stops in
either dire ct ion.
Switching on automatic headlight
control*
.,. Turn the light switch to AUTO* ¢ fig. 57 .
Switching on the side ma rker lights
.,. Turn the light switch to ,oo:.
Switching on the headlights and high
beam
.,. Turn the light switch to gD .
.,. Push the high beam lever forward towards
the instrument panel¢
page 55.
Switching off the lights
.,. Turn the light switch to 0.
The headlights only work when the ignition is
switched on. While starting the engine or
when switching
off the ignition, the head-
Clear vision 53
lights will go off and only the side marker
lights will be on.
Daytime running lights (DRL) (USA
models)
The daytime r unning lights can be turned on
or
off using this function. If the function is ac
tive, the daytime running lights are turned on
automatica lly when the ignition is switched
on.
The daytime running lights are activated
only
when the light switch is at the AUTO* or DRL *
position.
Daytime running lights (Canada models
only)
The daytime running lights are activated only
when the light switch ¢ fig. 57 is either at the
0 or the ,oo: position.
The daytime r unning lights function cannot be
turned
off .
Automatic headlight control*
In the switch position AUTO the automatic
headlight control
is turned on. The low
beams are turned on automatically through a
light sensor as soon as ambient brightness
(e .g. when driving into a tunnel) falls below a
value preset at the factory. When ambient
brightness increases aga in, the low beams are
turned
off again automatica lly c:> & .
In the AUTO position the low beams are
switc hed
off automatically when the ignition
is tur ned
off.
Light Sensor Malfunction*
In the event of a light sensor malfunction, the
driver is notified in the instrument cluster dis
play:
ral Automatic headlights/automatic wipers
defective
For safety reasons the low beams are turned
on permanen tly with the switch in
AUTO* .
However, you can continue to turn the lights
on and
off using the light switch. Have the ..,.
Page 57 of 260
The benefit o f adaptive light is that the curve
and the edg e of th e road are better i lluminat
ed
c::> fig . 59. T he adaptive light is controlled
automatically , depend ing on veh icle speed
and steering wheel ang le.
When driving a round bends, the head lights
are contro lled according to steer ing wheel an
g le. So that there is no black area ahead of the
ve hicle, the two main beams pivo t at different
angles.
(D Tips
T he system works above a speed of about
6 mph (10 km/h) .
Front fog lights
Use the light switch to turn on the front fog
lights.
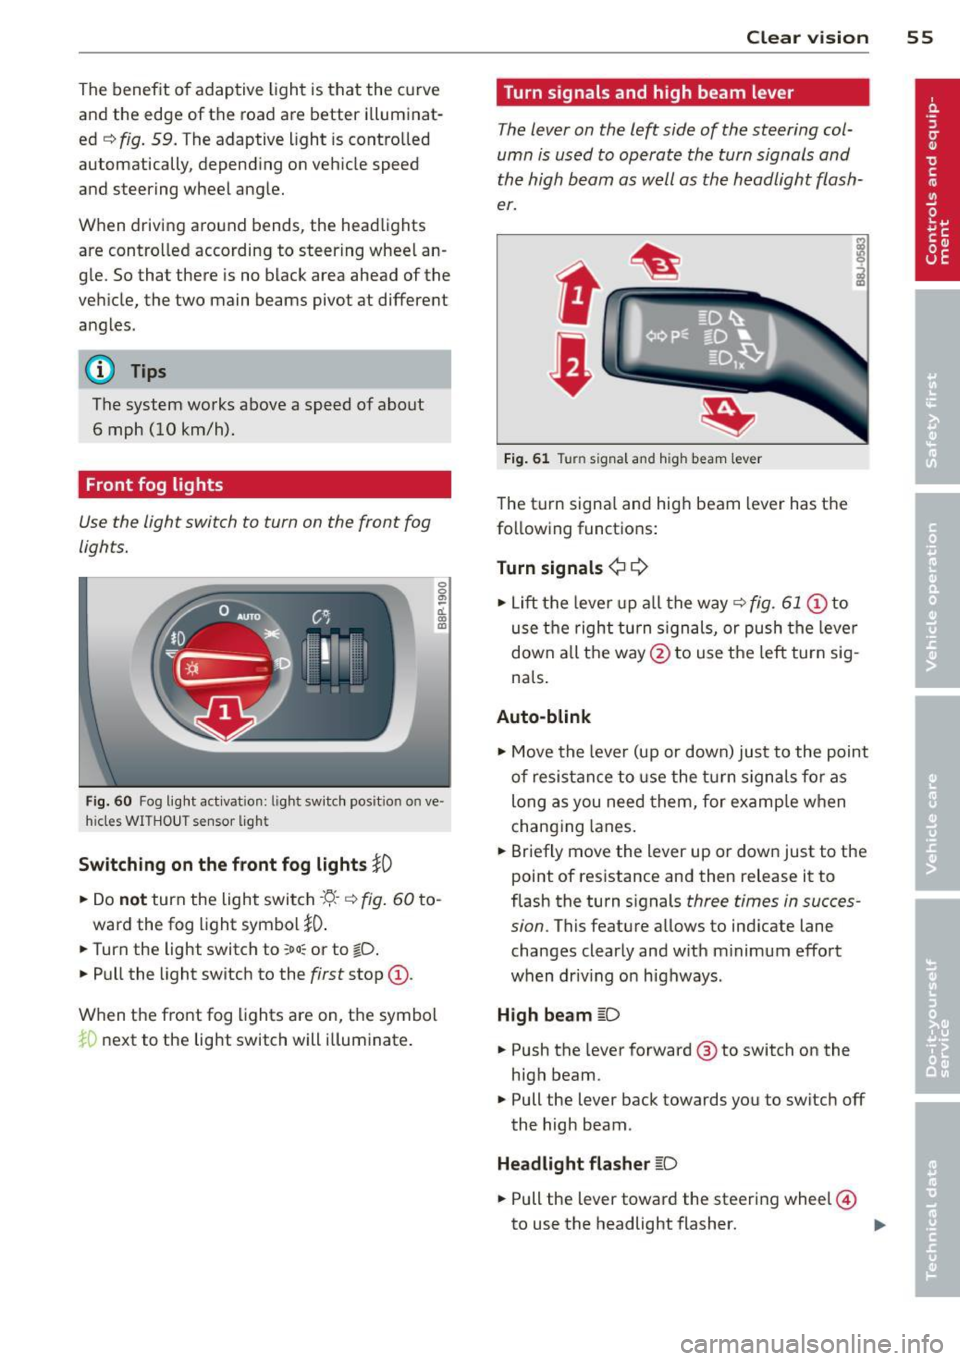
0 0
"' -ci. a) a,
F ig . 6 0 Fog l ig ht activat ion : ligh t switc h pos it io n on ve ·
hides WIT HO UT s ensor lig ht
Switching on the f ront fog lights }0
• Do not turn the light swi tch -'ti--c::> fig . 60 to -
ward the fog light symbol
}D .
• Turn the light switch to ~oo; or to tD .
• Pull the light switch to the first stop @.
When t he front fog lights are on, the symbo l
iD next to the lig ht switch will illuminate .
Clear vision 55
Turn signals and high beam lever
The lever on the left side of the steering col
umn is used to operate the turn signals and
the high beam as well as the h eadlight flash
er.
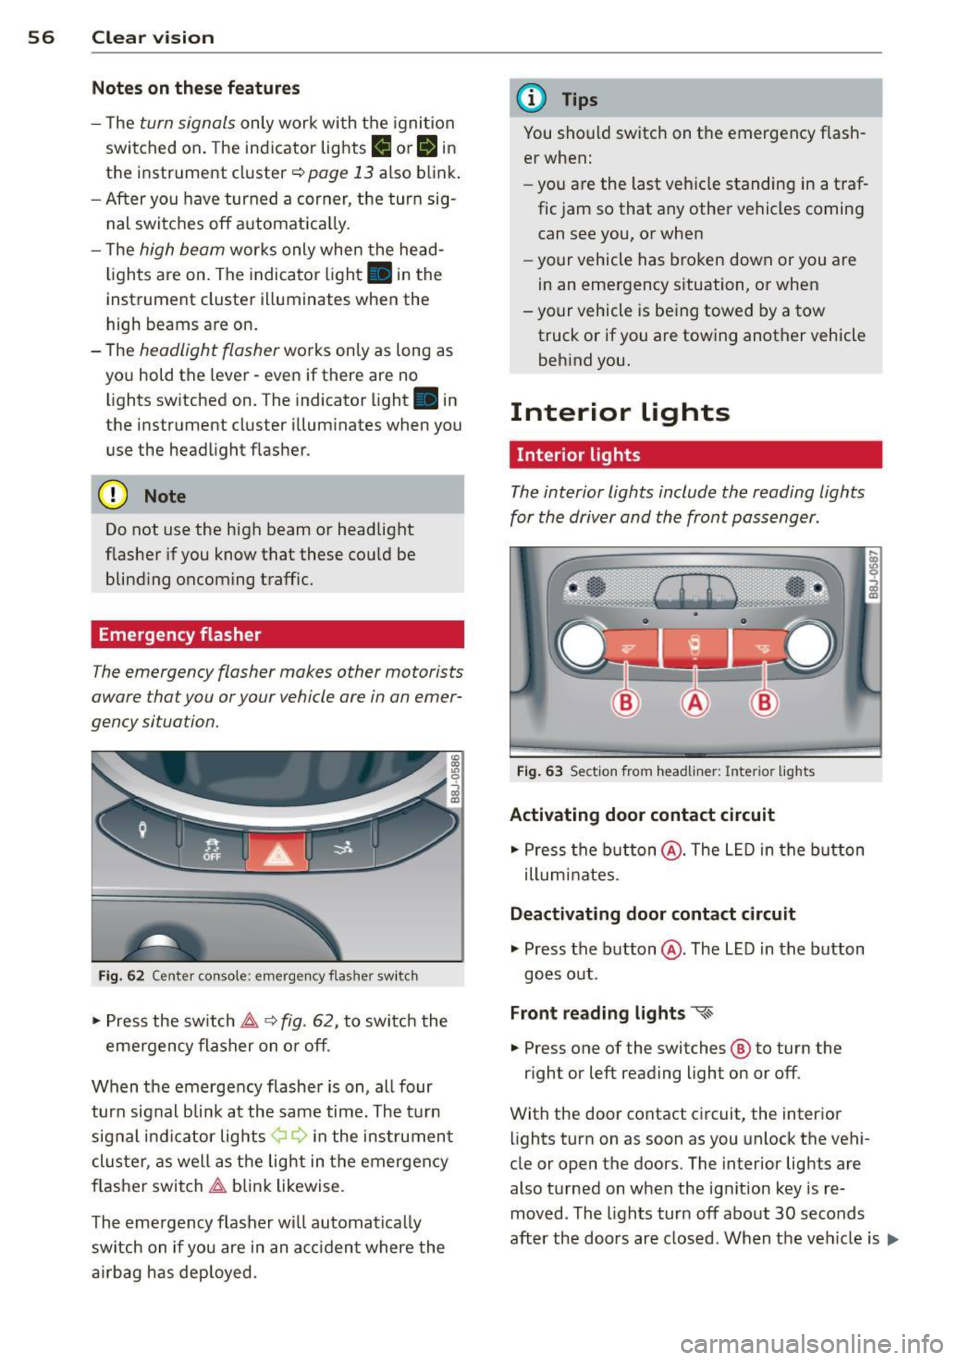
t
'
Fi g. 61 Tu rn signal and high beam lever
The turn signa l and high beam lever has t he
following functions:
Turn signals ¢
9
• Lift the leve r up a ll the way c::> fig. 61 @ to
use t he right turn s ignals, or push the leve r
down all the way@to use t he left tur n sig
na ls .
Auto -blink
• Move the leve r (up or down) just to the point
of resistan ce to use the turn signa ls fo r as
long as you need them, for e xamp le w hen
chang ing lanes.
• Briefly move the lever up or down just to the
point of resistance and then release it to
flash the turn s ignals
three times in succes
sion .
This featu re allows to ind icate lane
changes clearly and w ith m inimum effort
when driv ing o n highways .
High beam
~D
• Push the lever forward @ to switch on the
high beam .
.. Pull the lever back towards you to switch off
the high beam .
Headlight flasher
~D
• Pull the lever toward the steering wheel@
to use the headlight flasher. ..,.
Page 58 of 260
56 Clear vis ion
Notes on the se feature s
- The turn signals only work with the ignition
swit ched on . The indicator lights
(I or IN in
the instr ument cl uster ¢
page 13 also b link .
- After you have turned a corner, the turn sig-
nal switches off a utomat ica lly.
- T he
high beam works only when the head
lights are on. The indicator light . in the
instrument cluster illuminates when the
high beams a re on.
- The
headlight flasher wo rks on ly as long as
yo u hold the lever -even if there are no
lights switched on. The indicator light . in
the instrument cl uster illum inates when you
use the headlight f lasher.
(D Note
Do not use the high beam or headlight
flasher if you know that these cou ld be
blind ing oncoming traffic.
Emergency flasher
The emergency flasher makes other motorists
aware that you or your vehicle are in an emer
gency situation.
F ig . 6 2 Cente r console: emerge ncy flas her sw itch
,. Press the switch ~ ~ fig. 62, to switch the
eme rgency flasher on or off .
When the emergency f lashe r is on, a ll four
turn sig nal bli nk at the same time. The t urn
sig nal i ndi ca tor lights ¢ Q in the ins trument
cluster, as well as the lig ht in t he emergen cy
f lasher switch ~ blink likewise .
The emergency flasher w ill automat ica lly
switch on if you are in an a cciden t where the
a irbag has deployed.
(D Tips
You should switch on t he emergency f lash
er when:
- you are the last veh icle standing in a traf
fic jam so that any other vehicles coming can see you, or when
- your vehicle has broken down or you are
in an emergency s ituation, or when
- your vehicle is being towed by a tow
truck or if you are tow ing another vehicle
beh ind you.
Interior lights
' Interior lights
The interior lights include the reading lights
for the driver and the front pass enger.
F ig . 63 Sect ion from headliner: Interio r lights
Activating door contact circuit
,. Press the b utton @. The L ED in the b utton
illum inates.
Deactivating door contact circuit
,. Press the button @. The LED in the button
goes o ut.
Front reading lights "<~
.. Press one of the switches ® to turn the
r ight or left reading light on or off.
With the door contact circuit, the interior lights turn on as soon as you unlock the vehi-
cle or open the doors. The interior lig hts are
also t urned on when the ign ition key is re
moved . The lights turn off about 30 seconds
after the doo rs ar e closed. When the ve hicle is
lilJJ,
Page 62 of 260
60 Clear vis ion
leaving the vehicle or, if that is not possi
ble, open windows and doors all the way.
- If electrolyte gets into the eyes, flush
them thoro ughly with large amounts of
clean water for at least 15 m inutes;
med ica l attent ion is recommended.
- If electrolyte contacts sk in, f lush affect
ed area with clean water for at least 15
minutes and then was h affected area
with soap and water; medical attention is recommended. Thoroughly wash af
fected clothing and shoes before reuse.
- If swallowed and person is conscious,
rinse mo uth w ith water for at least 15
m in utes . Do not i ndu ce vom iting u nless
ins truc ted to do so by medica l professio
nal. Get medical attention immedia tely.
(D Note
Electrolyte leak ing from a broken m irror
glass attacks the veh icle paint and plast ic
surfa ces. Clean up spilled electroly te im
mediately wi th clear water and a sponge.
@ Tips
- If automatic dimming for the in sid e
mirror i s switched off, the outside m ir
rors are al so not dimmed automaticall y.
- Automa tic dimming for the m irror only
opera tes p roperly i f the sunshade * for
the rear window is retracted, o r the light
striking the ins ide mir ro r is not hindered
by other objects .
Wiper and washer
system
Windshield wiper
The windshield wiper lever controls both the
windshield wipers and the washer system.
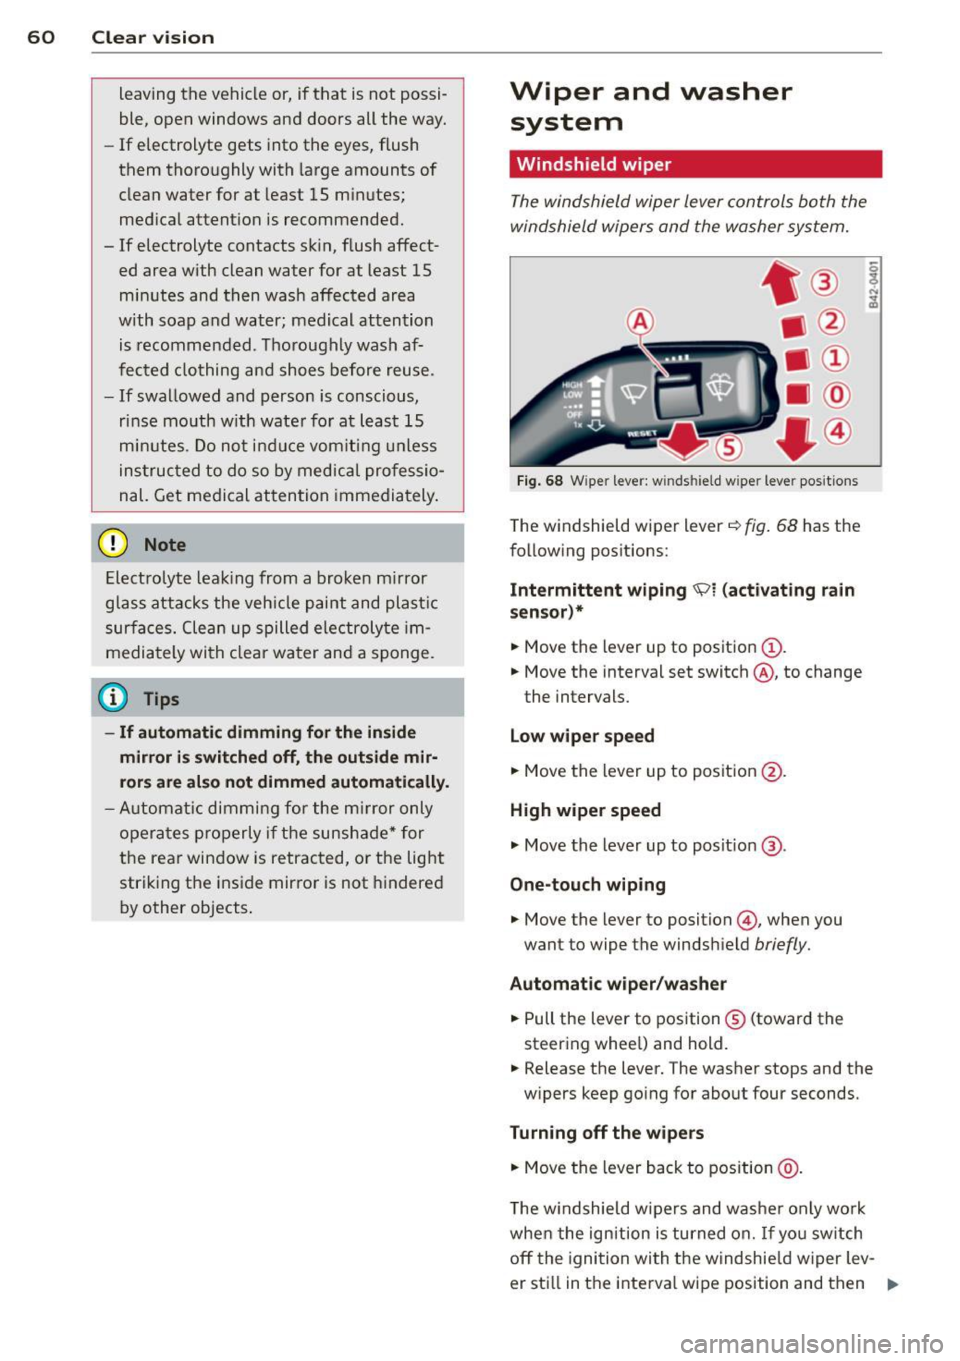
F ig . 68 W ipe r leve r: w inds hield w ipe r leve r posit ions
T he windshield wiper lever~ fig. 68 has the
following pos itions:
Intermittent w iping \91 (activating r ain
sens or)*
.,. Move the lever up to position (!) .
.,. Move the interval set switch @, to change
the intervals.
Low wiper spe ed
.,. Move the lever up to posit ion @.
High w iper speed
.,. Move the lever up to posit ion ®·
One-touch wiping
.,. Move the lever to position @ , when you
want to wipe the windshield
briefly.
Automatic wiper /wa sher
.,. Pull the lever to position ® (toward the
steering whee l) and hold .
.,. Release the lever. The washer stops and the
w ipers keep go ing for about four seconds.
Turning off the wipers
.,. Move the lever back to position @ .
The w indshield wipers and washer only wo rk
whe n the ign ition is turned on.
If you sw itch
off the ignition with the windshie ld w iper lev-
er sti ll in the interva l wipe position and then
Ill>
Page 79 of 260
.. Turn the knob@'* page 75, fig. 87 to the
left to switch the climate control system off.
The LED next to the word OFF comes on.
Setting fan spe ed 8fs
.. Turn the knob@'* page 75, fig. 87 to the
setting you want to adjust fan speed (air
quantity).
I n automat ic mode the cl imate control sys
tem automatically regulates fan speed de
pending on interior tempera ture. You can ad-
Air distribution
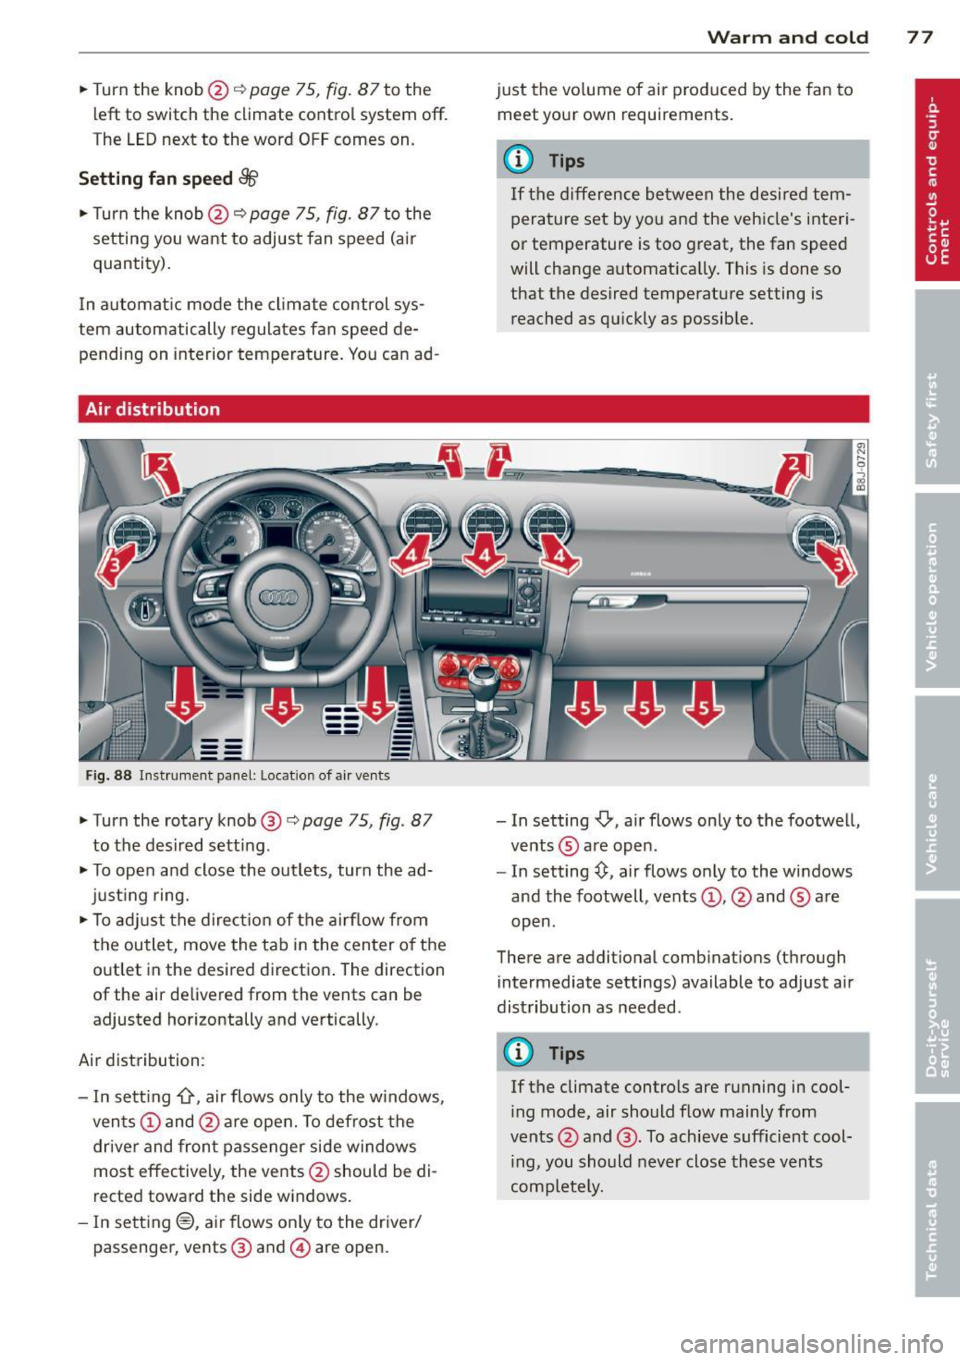
F ig. 88 In st rume nt pa nel: locat ion of a ir vents
.. Turn the rotary knob@'* page 75, fig. 87
to the des ired setting .
.. To ope n and close the out lets, turn the ad
just ing ring .
.,. To ad just the dire ct io n of the airf low from
the outlet,
move t he tab in the center o f the
outlet in the desired direction . The direction
of the air delivered from the vents can be
adjusted horizontally and vertically.
A ir distribution:
- In se tting
{r, air flows only to the w indows,
vents (!) and @are open. To defrost the
driver and fron t passenger side w indows
most effectively, the vents @should be di
rected toward the side windows .
- In sett ing®, a ir flows on ly to the dr ive r/
passenge r, ve nts @ and @ are open.
Warm and cold 77
just the vo lume of air p roduced by the fan to
meet your own requirements .
a) Tips
If the difference be tween the desi red tem
perature set by yo u and the vehicle's inte ri
or temperature is too g reat, the fan speed
will change a utomat ica lly. This is done so
that the desired temperature setting is
reached as qu ickly as possible.
- In setting
-0, air flows only to the footwel l,
vents ® are ope n.
- In setting~' air flows on ly to the wi ndows
and the footwell , vents @, @ and ® are
open.
There are additional comb inations (through
intermediate settings) available to adjust a ir
distribution as needed.
(D Tips
If the climate controls are running in cool
i ng mode, air should flow mainly from
vents @and @. To achieve sufficient cool
i ng, you should never close thes e vents
complete ly.
Page 83 of 260
You should always lock the steering whenever
you leave your vehicle . This makes a vehicle
theft even more difficu lt ¢ & .
Ignition ke y safe ty lock
After switching off the ignition, the ig nit ion
key can only be removed from the ign ition
l ock when the selector lever is in the "P"
(Park) position . After you have removed the
key, the selector lever is locked and cannot be
moved.
Ignition on @
If it is difficult to turn the key after you have
inse rted it into the ignition lock, turn the
steering whee l back and forth. This will take
the load
off the steering lock mechan ism and
you will be able to turn the key freely and start the engine.
Starting the engin e@
In this position the engine starts . While the
engine is starting, the power supply to the headlights and other e lectr ica l consumers is
tempo rarily interrupted to conserve battery
power . After the engine has started, release
the key and it will return to posit io n @ .
Before the starter can be operated again the
key must be turned back to position@. The
non-r epeat lock prevents you from damag ing
the sta rter when the engine is runn ing .
A WARNING
-Never remove the key from the ign ition
lock whi le the vehicle is moving. The
steering wheel will lock causing loss of
control.
- If you have to leave your ve hicle -even
f or just a m in ute -always remove the ig
ni tion key and take it with you. This is es
pecially important if yo u a re going to
leave chi ldren behind in the vehicle. The
children cou ld start the engine or use
other vehicle controls. Unsupervised use
of vehicle controls (for example, power
windows) can cause serious personal in
jur ies .
-
On th e ro ad 81
(D Tips
If the vehicle battery has been disconnect
ed and then reconnected, then yo u must
l eave the key in posit ion @ for about 5
seconds before you can start the engine.
Starting and stopping
the engine
' Starting the engine
The engine can only be started with an origi
nal Audi key .
.,. Se t the par king brake.
.,. Move the selector lever in P or
N q ,& .
.,. Tu rn the ignition key to position ®
~ page 80, fig. 90 -do not depress the gas
peda l when starting the engine!
.,. Let go of the key as soon as the engine
starts.
A cold engine may at first be loud after it has
been started. This is due to the hydraulic
valves bu ild ing up the oil pressure. Th is nor
mal and no need for concern .
If the engine does not start immediately, stop
trying after 10 seconds and then try to restart
the engine about 30 seconds later.
A WARNING
-Never start or let the eng ine run in a con-
fined o r enclosed area . Exhaust fumes
from the engine contain carbon monoxide,
a colorless and odo rless gas. Ca rbon mon
oxide can be f atal if inhaled.
- Never leave the engine id ling unattend
ed. An una ttended veh icle with a runn ing
engine poses a danger o f personal injury
or theft .
(D Note
-Avo id high engine speeds, fast accelera
tion or heavy engine loads while the en
gine is still cold. This could damage the
engine.
- The engine cannot be started by pushing
or towing the vehicle . .,..