homelink AUDI TT ROADSTER 2014 Owners Manual
[x] Cancel search | Manufacturer: AUDI, Model Year: 2014, Model line: TT ROADSTER, Model: AUDI TT ROADSTER 2014Pages: 244, PDF Size: 60.87 MB
Page 4 of 244
2 Table of contents Vehicle literature .. .. .. .. .. ... .
About this Owner's Manual ...
Controls and equipment .. ... .
Cockpit ................ .... .. . .
General illus tration .... ... .. .. ... .
Instruments and warning/
indicator lights ........ .. .. .. . .
Ins truments . .. .. ..... ... .. .. ... .
War ning/ indi cator lights ... .. ... .. .
Driver information system .. .
Introduct ion . .. .. ..... ... .. .. ... .
Trip computer .. .. ..... ... .. .. ... .
M enu display . ........... .... ... .
Efficiency program ........ .. .. .. . .
Service interval d isp lay ..... ... .. . .
Lap timer .. .......... ........ .. .
On- Board Diagnostic system (OBD) .. .
Opening and closing .. .. .. .. . .
Keys ........................ .. .
P owe r locking system ............ .
R ear lid/ trun k li d ................ .
Ant i- t heft ala rm system ... .. .. .. . .
P owe r win dows .. ..... ... .. .. ... .
Convertible top .............. .
Convertible top ....... ... .. .. ... .
W ind Deflector . .. ..... ... .. .. ... .
Conve rtible top eme rgency o peration .
Clear vision .. .. ..... ... .. .. ... .
Lights ...... .. .. ..... ... .. .. ... .
Inter ior lights .. . ...... ... .. .. ... .
V1s1on . .. ................. .. ... .
W iper and washer system .. .. .. ... .
D ig ita l compass ........... .... .. .
Seats and storage ....... .. .. . .
Ge neral recommendat ions ........ .
Ad just ing front seats manually .. ... .
P owe r seats ... .... ...... .. .. .. . .
5
6
8
8
8
1 0
1 0
12
2 2
2 2
23
24
27
28
29
30
32
32
34
37
3 8
39
4 1
41
44
4 4
4 8
48
5 1
52
54
58
60
60
61
62
H ead res traints . . . . . . . . . . . . . . . . . . 63
L uggage compartmen t . . . . . . . . . . . . 63
Cup holder . . . . . . . . . . . . . . . . . . . . . . 6 4 Asht
ray ... .... .. ... .. ..... .... . .
Cigarette lighter/socket . ..... ... .. .
Storage ... .. .. .. .. ... .. .. .. .. .. .
Warm and cold ... .. ..... .... . .
Climate controls .. .. .... .... ... .. . 6
4
65
66
68
68
On the road . . . . . . . . . . . . . . . . . . . 73
Stee ring . ..... .. ... .. ..... ... .. .
Ignition lock and ignition sw itch .. .. .
Starting and stopping the engine ... .
Parking brake ................... .
Starting on hills ....... .......... .
S peed warning system ............ .
Cru ise con trol ... . ... ... .... ... .. .
Audi mag netic ride ............... .
Spo rt mode . ................. .. .
Acoustic parking sys tem
Transmission ................. .
S troni c transmission . ... .... ... .. .
Homelink ... .. ... .......... .. .
U nivers al remote contro l ...... .. .. .
Safety first .. .. ... .......... .. .
Driving Safely .............. .. .
Genera l notes .... ... .. ..... ... .. .
Pro per occ upant seatin g positions . . .
Drive r and passenger side footwe ll .. .
Pedal area . .... .. ............. .. .
Stow ing luggage . ............. .. .
Repo rting Sa fety Defects .......... .
Safety belts .................. .
General notes ................... .
Why safety belts? ... .. ....... ... .
Safety belts ..... ............... .
Safety be lt pretensioners ......... .
73
73
74
75
76
76
78
8 0
80
8 0
82
8 2
89
89
92
92
92
93
96
97
97
99
101
101
102
10 4
107
Airbag system . . . . . . . . . . . . . . . . . 109
Important th ings to know . . . . . . . . . . 109
Fron t air bags . . . . . . . . . . . . . . . . . . . . 113
Moni to ring the Adv ance d Ai rbag
System . . . . . . . . . . . . . . . . . . . . . . . . .
119
Page 91 of 244
Homelink
Universal remote
control
General information
The HomeLink universal remote control can
be programmed with hand-held transmitters
from existing equipment.
You must first program the Homelink trans
mitter before you can use the system
~ page 89, Programming the HomeLink
transmitter.
In order to program the Homelink transmit
ter for devices utilizing rolling code, a second
person on a ladder who can safely reach the
garage door opener motor is recommended.
It is also necessary to locate the "learn" but
ton on your garage door opener motor . Refer
to the operating instructions for the opener, as the location and color of this button may
vary by manufacturer .
You can still use the origina l remote control
for the device at any time.
A WARNING
-
- Never use the Homelink transmitter
with any garage door opener that does
have not the safety stop and reverse fea
ture as requ ired by federal safety stand
ards. This includes any garage door open
er model manufactured before April 1,
1982.
- A garage door opener which cannot de
tect an object, signaling the door to stop
and reverse does not meet current feder
al safety standards. Using a garage door
opener without these features increases
risk of serious injury or death.
- For safety reasons never release the
parking brake or start the engine while
anyone is standing in front of the vehicle.
- A garage door or an estate gate may
sometimes be set in motion when the Homelink remote control is being pro
grammed. If the device is repeatedly ac-
Homelink 89
tivated, this can overstrain motor and
damage its electrical components -an
overheated motor is a fire hazard!
- To avoid possible injuries or property
damage, please always make absolutely
certain that no persons or objects are lo
cated in the range of motion of any
equipment being operated.
(!) Tips
- If you would like more information on
Homelink, where to purchase the Home
Link compat ible products, or would like
to purchase the Homelink Home Light
ing Package, please call toll-free:
1-800-355-3515.
- For Declaration of Compliance to United
States FCC and Industry Canada regu la
tions
~page 229.
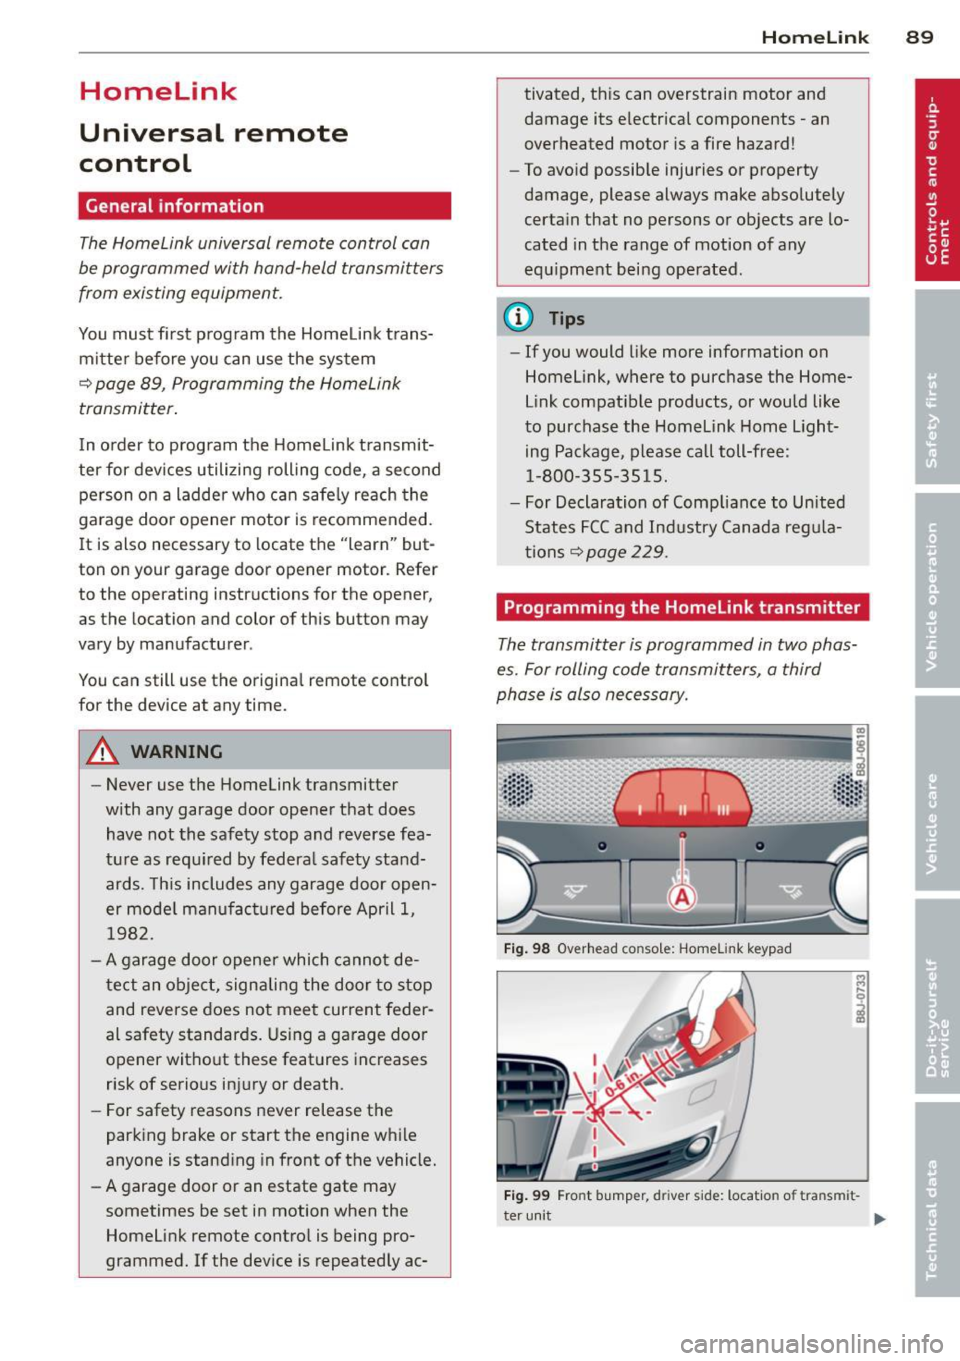
Programming the Homelink transmitter
The transmitter is programmed in two phas
es. For rolling code transmitters, a third
phase is also necessary.
Fig. 98 Overhead co nsole: Homelink keypad
Fig. 99 Fro nt bumper, d river side: locatio n of tra nsm it-
ter unit
IJ-
Page 92 of 244
90 Homelink
Phase 1:
programming the overhead keypad
1. Make sure yo ur vehicle is wit hin o peratin g
range of the remote contro lled garage
door opener .
2. Set the parking brake¢.&. in General in
formation on page 89 .
3. Tur n the ignition on . Do not sta rt the e n
g ine!
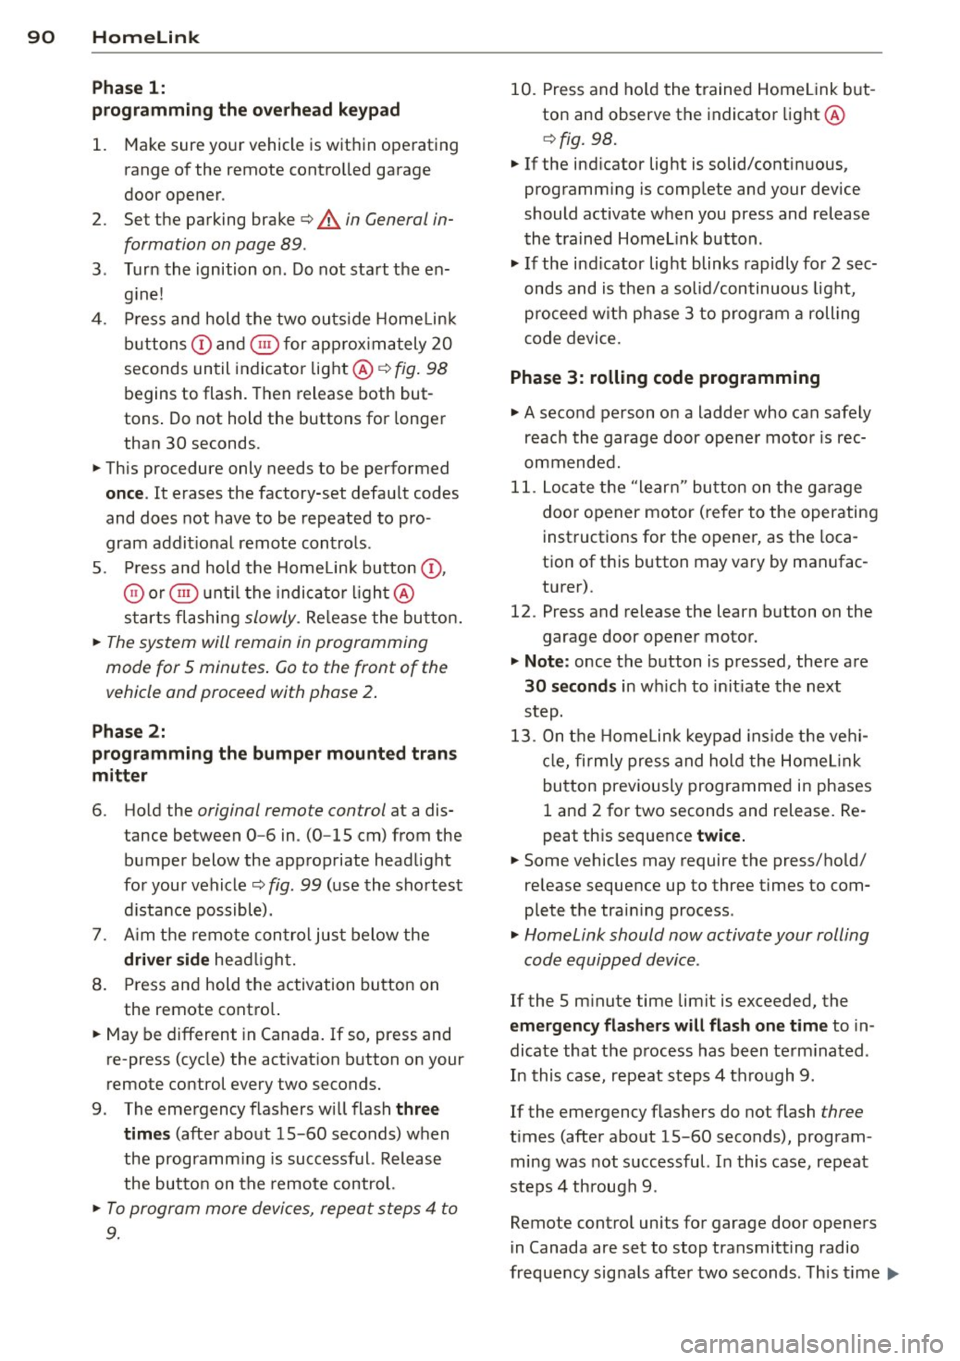
4 . Pr ess and hold the two ou ts ide Home Link
b uttons
(D and @for app rox imately 2 0
seconds un til indicator light @¢fig . 98
begins to flash. Then release both but
tons . Do not hold the buttons for longe r
than
30 seconds.
.,. This procedure only needs to be performed
once . It erases the factory-set defau lt codes
and does not have to be repeated to pro
gram addit ional remote cont rols .
S . Press and hold the Hom elink button
(D ,
® or @ unt il the indica to r li gh t@
starts flashi ng
slowly. Re lease the bu tton.
.,. The system will remain in programming
mode for 5 minutes .
Co to the front of the
vehicle and proceed with phase 2 .
Phase 2:
programming the bumper mounted tran s
mitter
6 . Hold the original remote control at a dis
tance between
0 -6 in . (0 -15 cm) from the
b umper below the appropriate head light
fo r you r vehicle
q fig. 99 (u se the sho rtest
d istance possible).
7 . Aim t he remo te con trol jus t below the
driver side hea dligh t.
8 . Pr ess and hold the activation button on
the remote cont ro l.
.,. May be different in Canada. If so, press and
re-press (cycle) the activat ion b utton on your
remote control every two seconds.
9 . The eme rgency flashers will flash
three
time s
(after abo ut 15 -60 seconds) when
the programm ing is successf ul. Release
the butto n on the remote control.
.,. To program more devi ces, repea t steps 4 to
9.
10. Press and ho ld the trained Homelink but
ton and observe the indicator light @
¢fig. 98.
.,. If the ind icator lig ht is solid/contin uous,
prog ramm ing is comp lete and your device
should activate when you press and release
t he tra ined Homel ink b utton .
.,. If the ind icator light blinks rapidly fo r
2 se c
onds and is then a so lid/continuous ligh t,
procee d w ith p hase
3 to progr am a roll ing
code device.
Phase 3: rolling code programming
.,. A seco nd person o n a ladde r who can safely
reach th e garage door opene r moto r is rec
ommended .
11. Loc ate t he "lear n" bu tton on t he g arage
doo r opener motor ( re fer to the operating
inst ructions for the opener, as the loca
tion of t his button may vary by man ufac
turer).
12. Press and release the learn b utton on the
garage door opene r motor .
.,. Note : once the b utton is p ressed, the re a re
30 seconds in w hich to in it iate the next
step.
13. On t he Home link keypad ins ide t he ve hi
cl e, fi rmly press and hol d the Home link
bu tton prev ious ly progr ammed in phases
1 an d 2 for two seconds and release. Re
peat th is sequence
twice.
.,. Some vehicles may require the press/hold/
release sequence up to three times to com
plete the trai ning process .
.,. Homelink should now activate your rolling
code equipped d evice .
If the 5 minute time limit is exceeded , the
emergency flashers will flash one time to in
dicate that the p rocess has been te rm ina ted .
In this case, repeat steps 4 through 9.
If the emergency flashers do not flash
three
t imes (afte r about 15 -60 seconds) , program
ming was not successful. I n this case, repeat
steps 4 through 9 .
Remote contro l units for garage do or openers
in Canada are set to stop transmitting radio
fr eq uency sig nals afte r two seconds. Th is t ime ..,.
Page 93 of 244
may not be sufficient for the Homelink sys
tem to learn the radio frequency signal. Per
form all other steps as descr ibed above.
Operating the Homelink transmitter
The HomeLink transmitter works in the same
manner as the original hand held remote con
trol that came with the system.
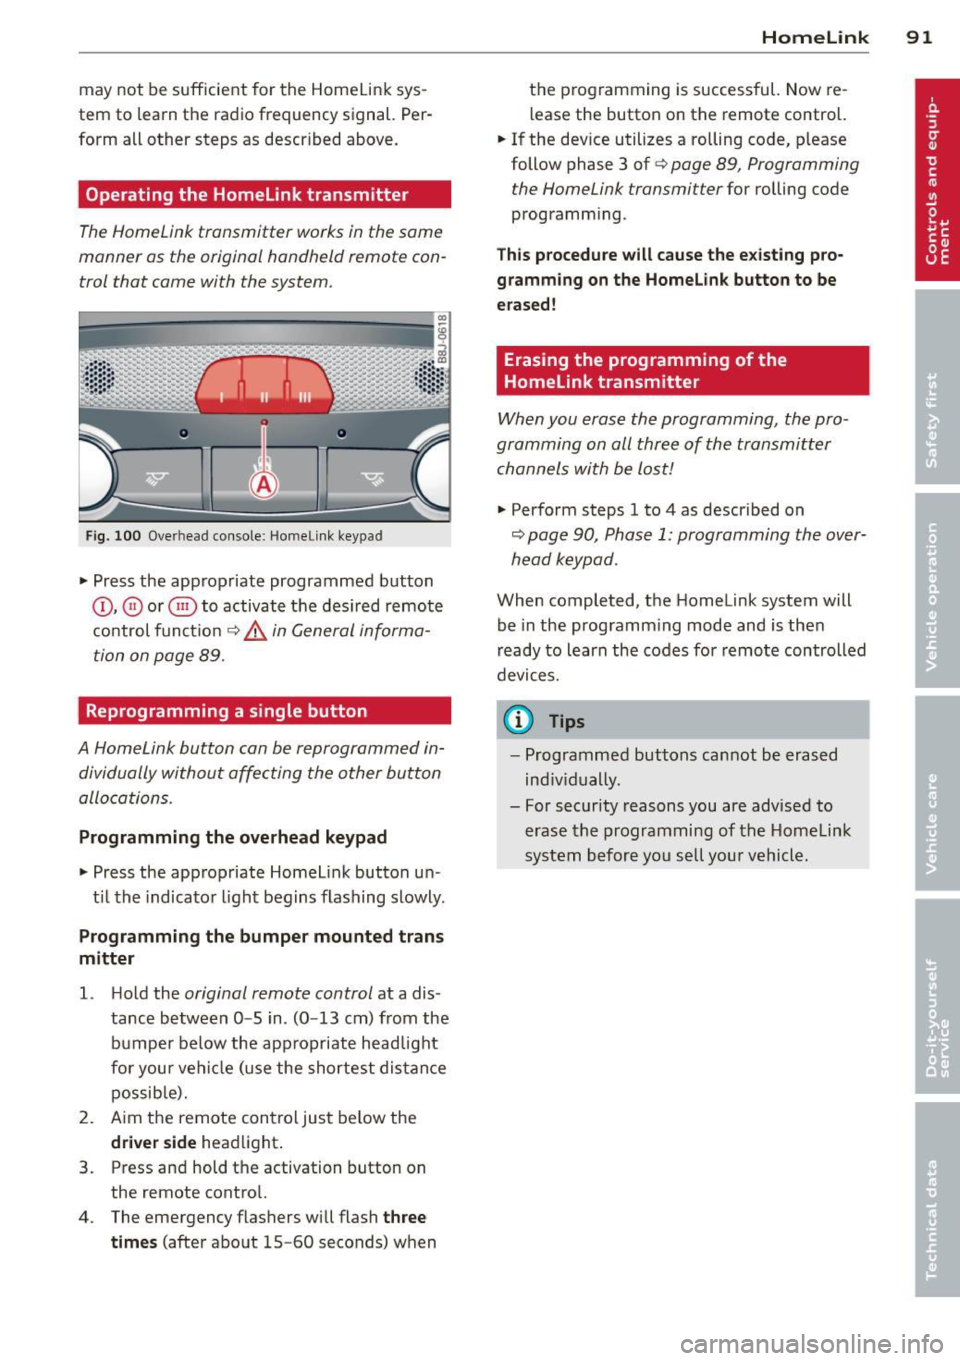
Fi g. 100 Overhead co nsole: Homeli nk keypad
• Press the app ropriate programmed button
© , @ or@ to activat e th e des ired remote
c o ntrol func tion
¢ &. in General informa
tion on page 89.
Reprogramming a single button
A HomeLink button can be reprogrammed in
dividually without affecting the other button
allocations.
Programming the overhead keypad
• Press the app ropriate Homel ink button u n-
t il t he indicato r light begins flashing slowly .
Programming the bumper mounted tran s
mitter
1. H old the original remote control at a dis
tance between
0 -5 in . (0 -13 cm) from the
bumper below the appropriate headlight
fo r you r vehi cle (u se the sh ortest dis tan ce
possib le).
2. A im the remote con tro l just below the
driver side head light.
3. Press and hold the activation button on the remote contro l.
4 . The emergency flashers wi ll flash
three
times
(after about 15 -60 seconds) w hen
Homelink 91
the p rogramming is successful. Now re
l ease the button on the remote control.
• If the dev ice utilizes a rolling code, p lease
follow phase 3 of ¢
page 89, Programming
the Home Link transmitter
for rolling code
programm ing .
Th is p rocedu re will cause the e xisting pro
gramming on the Homelink button to be
erased!
Erasing the programming of the
Homelink transmitter
When you erase the programming, the pro
gramming on all three of the transmitter channels with be lost!
• Perform steps 1 to 4 as described on
~ page 90, Phase 1: programming the over
head k eypad .
When completed, the Homelink system will
be in the prog ramm ing mode and is then
r eady to learn the codes fo r remote controlled
devices.
(D Tips
- Programmed buttons can not be erased
ind iv idually.
- For security reasons you are advised to erase the programming of the Homelink
system before yo u se ll you r vehicle.
Page 231 of 244
Technical Modifications
Our guidelines must be complied with when technical modifications are made .
Always consult an authorized Aud i dealer be
fore starting work on any modifications.
This will he lp ensure that vehicle function,
performance and safety are not impaired
¢ .&. .
Attempting to work on electronic components
and the software used with them can cause
malfunctions. Beca use of the way electronic
components are interconnected with each
other, such malfunctions can also have an ad
verse affect on other systems that are not di
rectly involved . Th is means that you r isk both
a substantial reduction in the operational
safety of you r vehicle and an inc reased wea r of
vehi cle parts¢ _&..
Author ized Audi dealers w ill perform th is
wo rk in a professiona l and competent ma nner
or, in spec ial cases, refer you to a p rofessional
company that specializes in such mod ifi ca
tions .
_& WARNING t=
Improper repairs and modifications can
change the way vehicle systems wo rk and
cause damage to the veh icle and ser ious
personal injury.
(D Note
If emergency repairs must be performed
elsewhere, have the veh icle examined by
an authorized A udi dealersh ip as soon as
possible.
Declaration of Compliance, Telecommu
nication or Electronic Systems
-
Radio Frequency Devices and Radiocommuni
cation Equipment User Manual Notice.
The manufacturer is not responsible for any
radio or TV interference caused by unauthor
i zed modifications to th is equ ipment.
Con sumer In formation 229
D evices
T he following devices each comply wi th FCC
Pa rt 15 .1 9, FCC Part 15.2 1 and RSS -Gen Iss ue
1:
- Cell phone pac kage
- Electron ic immobilizer
- Homelink un iversal remote co ntrol
- Remote control key
FCC Part 15.19
This device complies with part 15 of the FCC
Ru les. Operation is subject to the fo llow ing
two conditions:
(1) This devi ce may not cause harm ful inte r
ference, and
( 2 ) this device must accept any inte rfe rence
received, including inter ference that may
ca use undes ired operation .
FCC Part 15.21
CAUTION:
Changes or mod ificat ions not expressly ap
proved by the party responsible for compli
ance could vo id the user's authority to operate
the eq uipment.
RSS-Gen Issue 1
Operation is sub ject to the fo llow ing two con
dit ions:
(1) this device may not ca use interference,
and
(2) this device must accep t any inte rference,
incl uding interference tha t may cause unde
s ired operation of the device .
•
•
Page 234 of 244
232 Index
Temperature ............ ... .. .... .. 69
Ventilation .... ........... ... .... .. 68
C lock . . . . . . . . . . . . . . . . . . . . . . . . . . . . . . 11
Clutch overheating . . . . . . . . . . . . . . . . . . . 87
Cold ti re inflation pressure ..... ... ... . 185
Com ing home .............. .... ..... 49
Compass mirror ............ ... .... .. 58
Compl iance .. ............. .. .. .. .. . 229
Consumer Information . . . . . . . . . . . 99, 226
Contacting NHTSA .......... ... .... .. 99
Controls Cleaning . .... ........... .. .. .... . 157
Controls and displays .................. 8
Convenience close/open feature Pow er top . . . . . . . . . . . . . . . . . . . . . . . . . 43
Windows . ................. ..... .. 40
Conve rtible child safety seats .. .. .... . 135
Convertible locking retractor Activating .................... ... . 140
Deactivating .................. .... 140
Using to secure a ch ild safety seat 138, 140
Convertible top .. .......... .. .. .... .. 41
Automatic convertible top ............ 43
Eme rgency operation . . . . . . . . . . . . . . . . 44
General information ........... ..... 41
manual convertible top ........ .. .. .. 42
Warn ing/ indictor lights .............. 17
W ind deflecto r ..................... 44
Cooling system . . . . . . . . . . . . . . . . . . . . . 172
Expansion tank ... ..... ..... .. .. .. . 173
Cornering light ............ .. .. .. .. .. 49
C ruise control . . . . . . . . . . . . . . . . . . . . . . . 78
Changing speed . . . . . . . . . . . . . . . . . . . . 79
Pr esetting your speed . . . . . . . . . . . . . . . 79
Switching
off .............. .. .... .. 79
Sw itching on ....................... 78
Warning/indicator lights ... .. .. .. .. . . 21
Cup holder . . . . . . . . . . . . . . . . . . . . . . . . . . 64
Current fuel mileage 23
D
Damping
refer to Audi magnetic ride . .. .. .. .. . . 80
Data recorder . . . . . . . . . . . . . . . . . . . . . . 142
Date display . . . . . . . . . . . . . . . . . . . . . . . . 11
Daytime running lights ................ 48 D
ecla ration of compliance
Cell phone package ................ 229
E lectronic immob ilizer .............. 229
Homelink universal remote control ... 229
Remote control key ............ .... 229
D ecorative decals
Cleaning . ..... .. ............. .... 157
D eco rative parts/tr im
Cleaning .. .... .. ............. .... 157
def What does this mean when it appears in
the tr ip odometer display? ........... 12
Defective light bulb warning ........... 20
Defrosting the windows .......... .. .. . 71
Determining correct load limit ........ 190
Digital clock . . . . . . . . . . . . . . . . . . . . . . . . 11
Dig ital compass . . . . . . . . . . . . . . . . . . . . . 58
Dimensions . .... .. ............. .... 224
Dimming the rearview mirror .......... 53
Dipst ick
Reading the dipst ick properly ........ 170
Displays Cleaning .. .... .. ............. .... 157
D istance ......... .. .............. .. 23
Driver information system
Boost ........ .. .. ................ 26
Engine oil temperature .............. 26
Menu button . . . . . . . . . . . . . . . . . . . . . . 25
Menu display . . . . . . . . . . . . . . . . . . . . . . 24
Open door or front lid warning ........ 22
Outside temperature display . . . . . . . . . . 22
Red symbo ls ... ... ................ . 13
Service interval display . . . . . . . . . . . . . . 28
Setting ........................... 26
Sound system display . . . . . . . . . . . . . . . 22
Tr ip computer .. .................. .. 23
yellow symbols . . . . . . . . . . . . . . . . . . . . . 13
Driver seat
refer to Seating position . . . . . . . . . . . . . 93
Driving Run-flat tires .... ............. .... 203
Driving safely . .. .. ... .......... .... . 92
Driving through water ............... 151
Duplicat e key ..... ............. ..... 32
Dust filter . . . . . . . . . . . . . . . . . . . . . . . . . . 69
Page 236 of 244
234 Index
F
Fan ... . ... ... .. .. ..... ... .. .. .... .. 69
Radiator ... .. . .. ..... ... .. .. .... . 174
Fasten ing
B ooste r seats ............ .... .. .. .
137
Conve rtible c hild safety se ats . .. .. .. . 135
Infant sea ts
F lat t i re 13 5
Changing .. ... ......... ... .. .. ... 209
Floor mats . . . . . . . . . . . . . . . . . . . . . . . . . . 97
Fog lights . . . . . . . . . . . . . . . . . . . . . . . . . . 5 0
Fo ld ing master key w ith remote contro l .. 32
Foot pedals . . . . . . . . . . . . . . . . . . . . . . . . . 97
For the sake of the environmen t
G asoline fumes and the environmen t ..
163
Le tting you r engine warm up ... .. .. . . 74
Refue ling . . . . . . . . . . . . . . . . . . . . . . . . 163
Saving fue l by early upshifting . ..... . . 10
Fr ont airbags
D escr ipt ion . . . . . . . . . . . . . . . . . . . . . . .
113
H owtheywork ...... .......... .... 118
Fronta l collisions and the laws of physics 102
F ront seats . . . . . . . . . . . . . . . . . . . . . . . . . 60
Ad justing ....................... ..
94
Ad just ing the manual seats . .... .... .. 61
C hi ld restra ints in the front seat ... .. . 110
Fu el
Additives ... ... . ...... ... .. .. .... .
161
Blended gasoline ........... .. .... . 161
Current fuel mileage . . . . . . . . . . . . . . . . 23
Fill er neck .. .. .. ...... .... ... .. .. . 162
Fue l gauge . ... ......... ... .. .. ... . 12
Fuel supp ly too low . . . . . . . . . . . . . . . . . 20
Gasoline ... ... .......... .. .. .. .. . 16 1
Gasoline additives ........ .... .... . 162
Octane rating . ........... .. .. .. .. . 16 1
Recommendation .... ... .. .. .. .... . 161
Refue lling . .. .. .. ..... ... .. .. .... . 163
Reserve . ... ... . ...... ... .. .. .... .. 1 2
Tank capacity .............. .. .... . 224
Unlock ing the fue l filler flap by hand .. 164
Fu el economy messages (efficiency pro-
gram) ... .... ... . ...... ... .. .. .... ..
27
Fuse ar rangement ....... .. .. .. .. .. . 2 14
G
Garage doo r opener ( Homelink) .... . .. . 89
Gas discha rge lamps ..... .. ... ..... ..
2 16
Ga uges
Engine coolant temperature . . . . . . . . . .
11
Fuel gauge . . . . . . . . . . . . . . . . . . . . . . . . 12
Tachometer . . . . . . . . . . . . . . . . . . . . . . . 10
General illustration
Instruments and controls .. ... .. .. .. .. 8
Generator (warning/ indicator l igh ts) . .. .
16
G lossary of tire and loading terminology 182
G love compartment . . . . . . . . . . . . . . . . . . 66
G ross Vehicle We ight Rating (GVWR) ... 223
H
Head lights ..... .. .......... ... ... .. 48
adaptive light . . . . . . . . . . . . . . . . . . . . . . 49
Cleaning . . . . . . . . . . . . . . . . . . . . . . . . . 156
defective . . . . . . . . . . . . . . . . . . . . . . 20, 2 1
Fron t fog lights . . . . . . . . . . . . . . . . . . . . 50
Switching off .... ... .. ..... ... .. .. . 4 8
Switching on ..... .. ... ..... ... .. .. . 48
Washe r system . . . . . . . . . . . . . . . . . . . . . SS
Xenon headlights .............. .. .. . 48
He ad restr aints .. .. ............. .. ... 95
Adjusting ..... .. .. .... .... ... .. .. . 95
Heated
exter io r mir ro rs . . . . . . . . . . . . . . . . . . . .
52
fron t seats (cl ima te control) ..... .. .. . 72
rear window ...................... . 71
Heated seats . . . . . . . . . . . . . . . . . . . . . . . . 72
Heate d washer jets
Wiper and washer system .. ... .. .. .. .
54
H eating .. .. ...... ............. ..... 68
Hig h beam . . . . . . . . . . . . . . . . . . . . . . 48, 50
High voltage warning label .. ... .. .. .. 223
Hill Descent Assist . ... .. ......... ... . 85
Hill ho ld assist
Starting on hills ............... .....
76
Homel in k unive rsal remote control . ... . 89
Hood Open ing .. .. .. .. .................
165
Re le a se lever . . . . . . . . . . . . . . . . . . . . . 165
Hor n .... .. .. .. .. ............... .. .. 8
How many ai rba gs does my vehicle have?
115
Page 239 of 244
Programming the Homelink universa l re
mote contro l . . . . . . . . . . . . . . . . . . . . . . . . 89
Pr oper occupa nt seating posit ions .. .. .. 93
Proper safety belt pos ition . . . . . . . . . . . . 105
P roper seat ing position
Fr ont passenger .. ..... ... .. .. .. .... 94
Occupants .. .... .. .... ... .. .. .. .... 93
Pr otec ting . .. .. ........... .. .. .. ... 157
Q
Quartz clock . . . . . . . . . . . . . . . . . . . . . . . . 11
q uattro
refer to All-wheel dr ive .... .. .. .. .. . 147
Question What happens to unbelted occupants? 102
Why safety be lts? ..... ... .. .. .. .. . 10 1
R
Radiato r fan ... ... ..... ... .. .. .. ... 174
Ra in sensor defect ive . . . . . . . . . . . . . . . . . 21
Reading lights . ... .. .... ... .. .. .... .. 51
Rear lid ... .. .. ........... .. .. .. .... 37
Emergency release . . . . . . . . . . . . . . . . . . 38
Rear lig ht defective . . . . . . . . . . . . . . . . . . 20
Rear spoiler . ... .... .... ... .. .. .. ... 144
Rear view mir ro r . . . . . . . . . . . . . . . . . . . . . 53
Rear window defogger . . . . . . . . . . . . . . . . 71
Refue lling ... .. .... .... ... .. .. .. ... 163
Release lever for hood .. .... .. .. .. .. . 165
Remote control . . . . . . . . . . . . . . . . . . 33, 36
Remote cont rol garage door opene r
( H omelink) . . . . . . . . . . . . . . . . . . . . . . . . . 89
Remote master key Un lock ing and locking ........ .... ... 35
Remote rear lid release . . . . . . . . . . . . . . . 3 7
Rep air manua ls ............ .... .. .. . 226
Repa irs
A irbag system ... ... ..... .. .. .. .. . 122
Replacement parts ......... .. .. .. .. . 228
Replacing Wheel rims ... .. .. .... ... .. .. .... . 192
Replacing a fuse . . . . . . . . . . . . . . . . . . . . 213
Replacing light bulbs .... ... .. .. .. .. . 216
Replacing tire s and wheels . .. .. .. .. .. . 193
Replacing w indshield wiper blades .. .. .. 57
Inde x 237
Reporting Sa fety Defects . ..... ... .. .. . 99
Reset button . . . . . . . . . . . . . . . . . . . . . . . . 12
Resetting remote contro l ......... .. .. . 36
Retractor . . . . . . . . . . . . . . . . . . . . . . . . . . 10 4
Reverse (Automat ic transm iss ion) . . . . . . . 82
Rims Cleaning . ... .. .. .. . .. ... .... ... .. 1S6
Replacing . .. .. .. ................. 192
Ru n-flat tires .. .. .. ................. 202
Drivi ng ... .. .. .... . ... ...... ... .. 203
Introduction . . . . . . . . . . . . . . . . . . . . . . 202
Rep lacing de fects parts . ..... ... .. .. 204
s
SA FE . ... .. .. .. .... .. .. ...... ... .. . 12
Safe driving habits ................. .. 92
Safety be lt pos ition .... ............. 105
Safety be lts worn by pregnant women 106
Safety be lt pretensioner
Se rvice an d disposa l ... .. ..... ... .. 107
Safety be lts . .. .. .... ... .. ..... ..... 104
Cleaning .. .. .. .. .. . .............. 15 7
Danger to passengers who do not wear a
sa fe ty belt . ..... .. . .. .. ..... ... .. 10 2
Fastening ... .... .. . .. .. ..... ... .. 104
Improperly worn ... . ... ...... ... .. 106
Not worn . .. .. .. ................. 102
pretensioners .. .. ................. 107
Safe ty be lt pos ition . ... .. ..... ... .. 105
Safety i nstructions .. .............. . 103
Secu ring child safety seats .. ... ... .. 138
Spec ial considerations for pregnant
women ... .. .. .. .. . .............. 106
Unf astening . .. .. .. .. ........... .. 1 06
Warning/ind icator light . ..... ... .. .. 101
WhyYOUMUSTwearthem ... ... .. .. 101
Wor n properly ... .. . ... ...... ... .. 103
Safety be lt warning ligh t . . . . . . . . . 16, 101
Safety compliance sticker ........ .. .. 223
Safety equipment .. .. . ... ...... ... .. . 92
Safety featu res for occupant rest raint and
protection .. .. .. .. ................. . 92
Safety gu idelines
Seat adjustment . . . . . . . . . . . . . . . . . . . . 60
•
•
Page 241 of 244
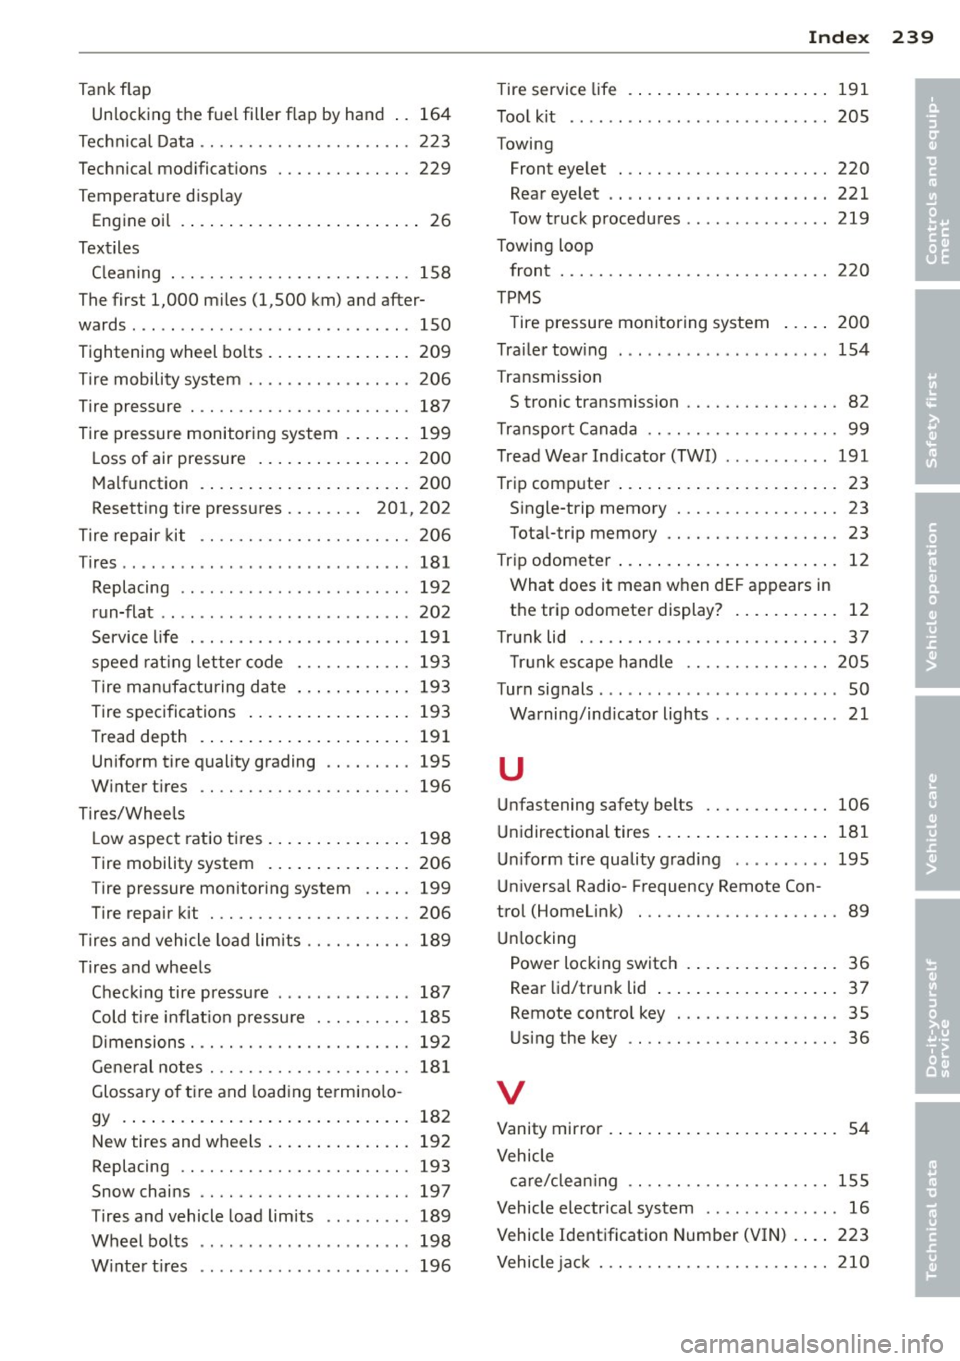
Tank flap Unlocking the fue l filler flap by hand 164
Techn ical Data ............. .... .. ... 223
Technical mod ificat ions ..... .. .. .. .. . 229
Temperature d isp lay
Eng ine oi l .. ... .. ..... ... .. .. .. .... 26
Textiles Clean ing . .. .. ........... .. .. .. ... 158
The first 1,000 miles (1,500 km) and after-
wards . . . . . . . . . . . . . . . . . . . . . . . . . . . . . 1 SO
Tightening wheel bo lts ... ... .. .. .. .. . 209
T ire mobility system ........ .. .. .. .. . 206
Tire pressure . ............. .... .. .. . 187
Tire pressure monitoring system . ... .. . 199
L oss of air pressure .... ... .. .. .. .. . 200
M alf unction . ... ...... ... .. .. .. ... 200
Resett ing tire pressures . . . . . . . . 201, 202
T ire repai r kit ............. .... .. ... 206
T ires ...... ... ...... ............. .. 181
Replacing . . . . . . . . . . . . . . . . . . . . . . . . 192
run-flat .................... ... ... 202
Service life . . . . . . . . . . . . . . . . . . . . . . . 19 1
spee d rating letter code ... .. .. .. .. . 193
Tire man ufacturing date ... .. .. .. .. . 193
Tire specifica tions ..... ... .. .. .. .. . 193
Tread depth . ..... .... ... .. .. .. ... 191
Uniform t ire quality grading .. .. .. .. . 195
W inte r tires ............. .... .. ... 196
T ires/Whee ls
L ow aspec t ratio tires ... ... .. .. .. .. . 198
Tire mobility system ... ... .. .. .. .. . 206
T ire pressure monitoring system .. .. . 199
Tire repa ir kit ............ .... .. .. . 206
T ires and vehicle load lim its .. .. .. .. .. . 189
Tires and whee ls
Checking tire pressu re ...... ... ... .. 187
Cold t ire inflat ion p ressu re . .. .. .. .. . 185
Di mensions . .. ........... .. .. .. ... 19 2
Ge neral notes ............ .... .. .. . 18 1
Glossary of t ire and load ing termino lo -
gy . ..... .. .. ... .. ..... ... .. .. ... 182
New tires and wheels . . . . . . . . . . . . . . . 192
Replacing .. ............. .... .. ... 193
Snow chains .. ........... .. .. .. ... 197
T ires and vehicle load limits .. .. .. .. . 189
Wheel bol ts . . . . . . . . . . . . . . . . . . . . . . 198
W inte r tir es .............. ... ... .. 196
Inde x 239
Tire service life . ..... . .. .. ..... ... .. 191
Tool kit .......... .. ............... 205
Towing Front eye let . .. .. ................. 220
Rear eyelet .. .. .. .. . ... ...... ... .. 221
T ow t ruck procedures .......... .... . 219
Towing loop front ....... .. .. .... ............. 220
T PMS
T ire pressure monitoring system ... .. 200
T ra iler tow ing ... .. .. . .. .... .... .. .. 154
Transmission S tronic transmission ........... .. .. . 82
T ran spo rt Canada .. .. . .............. . 99
T read Wea r Ind icator (TWI) ........... 191
T rip comp ute r . .... .. . .. .. ..... ... .. . 23
S ingle-trip memory ................ . 23
Tota l-trip memory ................. . 23
T rip odometer ... .. .. .. .. ...... ... .. . 12
Wha t does it mean w hen dEF appears in
the trip odometer display? ... ... .. .. . 12
T runk lid ... .. .. .. ................. . 37
T ru nk escape ha ndle ........... .. .. 205
Turn signals . .. .. .... ... ....... ...... SO
Warning/ind icator lights . .......... .. 21
u
Unfastening safety belts
106
U nidirectional tires ... . ... .... ... .. .. 181
Uniform tire quality grading ......... . 195
U niversa l Radio- F requency Remote Con -
trol (Homelink) . .. ................. . 89
Unl ocking
Power locking switc h .... .... ... .. .. . 36
Rea r lid/trunk lid .... .. ..... ... .. .. . 37
Remote contro l key . ........... .... . 35
U sing the key .. .. .... ........... .. . 36
V
Vanity mirror . . . . . . . . . . . . . . . . . . . . . . . . 54
Vehicle car e/clea n in g .. ...... ......... .. .. 155
Vehicle electrica l system . .. .. ... ... .. . 16
Vehicle Identification Number (VIN) . ... 223
Vehicle jac k ... .. .... ... .......... .. 210
•
•