parking brake AUDI TT ROADSTER 2014 Owners Manual
[x] Cancel search | Manufacturer: AUDI, Model Year: 2014, Model line: TT ROADSTER, Model: AUDI TT ROADSTER 2014Pages: 244, PDF Size: 60.87 MB
Page 4 of 244
2 Table of contents Vehicle literature .. .. .. .. .. ... .
About this Owner's Manual ...
Controls and equipment .. ... .
Cockpit ................ .... .. . .
General illus tration .... ... .. .. ... .
Instruments and warning/
indicator lights ........ .. .. .. . .
Ins truments . .. .. ..... ... .. .. ... .
War ning/ indi cator lights ... .. ... .. .
Driver information system .. .
Introduct ion . .. .. ..... ... .. .. ... .
Trip computer .. .. ..... ... .. .. ... .
M enu display . ........... .... ... .
Efficiency program ........ .. .. .. . .
Service interval d isp lay ..... ... .. . .
Lap timer .. .......... ........ .. .
On- Board Diagnostic system (OBD) .. .
Opening and closing .. .. .. .. . .
Keys ........................ .. .
P owe r locking system ............ .
R ear lid/ trun k li d ................ .
Ant i- t heft ala rm system ... .. .. .. . .
P owe r win dows .. ..... ... .. .. ... .
Convertible top .............. .
Convertible top ....... ... .. .. ... .
W ind Deflector . .. ..... ... .. .. ... .
Conve rtible top eme rgency o peration .
Clear vision .. .. ..... ... .. .. ... .
Lights ...... .. .. ..... ... .. .. ... .
Inter ior lights .. . ...... ... .. .. ... .
V1s1on . .. ................. .. ... .
W iper and washer system .. .. .. ... .
D ig ita l compass ........... .... .. .
Seats and storage ....... .. .. . .
Ge neral recommendat ions ........ .
Ad just ing front seats manually .. ... .
P owe r seats ... .... ...... .. .. .. . .
5
6
8
8
8
1 0
1 0
12
2 2
2 2
23
24
27
28
29
30
32
32
34
37
3 8
39
4 1
41
44
4 4
4 8
48
5 1
52
54
58
60
60
61
62
H ead res traints . . . . . . . . . . . . . . . . . . 63
L uggage compartmen t . . . . . . . . . . . . 63
Cup holder . . . . . . . . . . . . . . . . . . . . . . 6 4 Asht
ray ... .... .. ... .. ..... .... . .
Cigarette lighter/socket . ..... ... .. .
Storage ... .. .. .. .. ... .. .. .. .. .. .
Warm and cold ... .. ..... .... . .
Climate controls .. .. .... .... ... .. . 6
4
65
66
68
68
On the road . . . . . . . . . . . . . . . . . . . 73
Stee ring . ..... .. ... .. ..... ... .. .
Ignition lock and ignition sw itch .. .. .
Starting and stopping the engine ... .
Parking brake ................... .
Starting on hills ....... .......... .
S peed warning system ............ .
Cru ise con trol ... . ... ... .... ... .. .
Audi mag netic ride ............... .
Spo rt mode . ................. .. .
Acoustic parking sys tem
Transmission ................. .
S troni c transmission . ... .... ... .. .
Homelink ... .. ... .......... .. .
U nivers al remote contro l ...... .. .. .
Safety first .. .. ... .......... .. .
Driving Safely .............. .. .
Genera l notes .... ... .. ..... ... .. .
Pro per occ upant seatin g positions . . .
Drive r and passenger side footwe ll .. .
Pedal area . .... .. ............. .. .
Stow ing luggage . ............. .. .
Repo rting Sa fety Defects .......... .
Safety belts .................. .
General notes ................... .
Why safety belts? ... .. ....... ... .
Safety belts ..... ............... .
Safety be lt pretensioners ......... .
73
73
74
75
76
76
78
8 0
80
8 0
82
8 2
89
89
92
92
92
93
96
97
97
99
101
101
102
10 4
107
Airbag system . . . . . . . . . . . . . . . . . 109
Important th ings to know . . . . . . . . . . 109
Fron t air bags . . . . . . . . . . . . . . . . . . . . 113
Moni to ring the Adv ance d Ai rbag
System . . . . . . . . . . . . . . . . . . . . . . . . .
119
Page 16 of 244
14 Instruments and warning/indicator lights
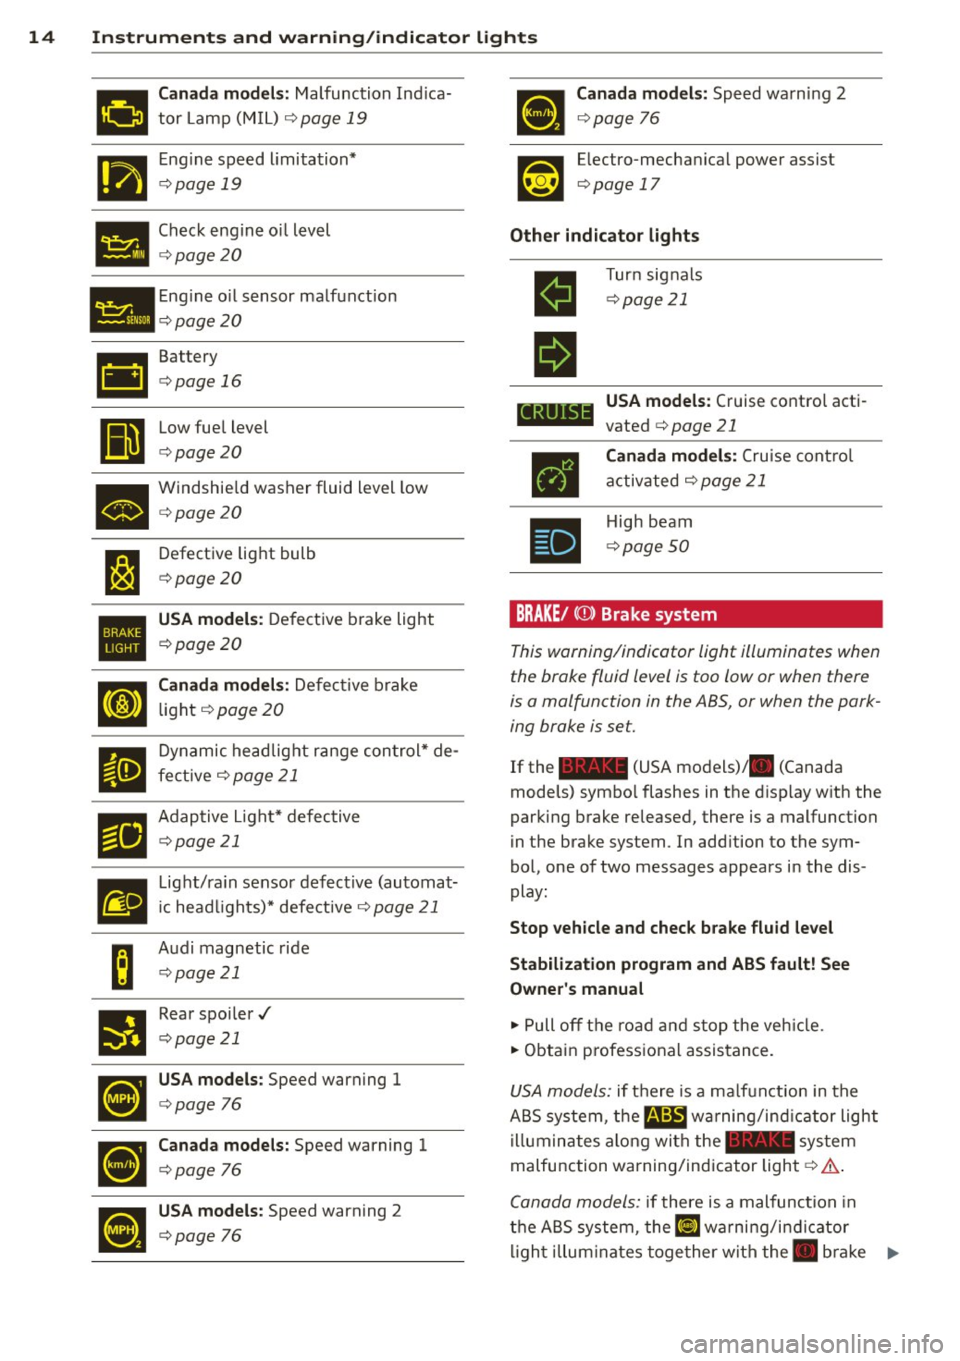
111'!!1 Canada models: Malfunction Indica
mil tor Lamp (M IL) ¢ page 19
I'm Engine speed limitation*
1111111 ¢ page 19
• Check engine o
il level ¢ page20
• Engine
oil sensor malfunction ¢ page20
•
II
Battery
¢page 16
Low fuel level
¢page20
• Windshie
ld washer fluid level low ¢ page20
l:J
Defective light bulb
¢page20
•
USA models : Defective brake light
¢page 20
Cl
Canada models: Defective brake
light
¢ page 20
II
Dynamic headlight range control* de-
fective ¢
page 21
El
Adaptive L ight* defective
¢page 21
m
Light/rain sensor defective (automat-
ic head lights)* defective ¢
page 21
B
Audi magnetic ride
¢page 21
•
Rear spoiler../
¢page 21
~
USA models : Speed warning 1
¢page 76
•
Canada models: Speed warning 1
¢page 76
•
USA models : Speed warning 2
¢page 76
Canada models: Speed warning 2
¢page 76
Electro-mechanical power assist
¢ page 17
Other indicator lights
II
II
CRUIS
•
Turn signals
¢page 21
USA models: Cruise control acti
vated ¢
page 21
Canada models: Cruise control
activated ¢
page 21
High beam
¢page 50
BRAKE/ (CD) Brake system
This warning/indicator light illuminates when
the brake fluid level is too low or when there
is a malfunction in the ABS, or when the park
ing brake is set.
If the - (USA models)/ . (Canada
models) symbo l flashes in the disp lay with the
parking brake released, there is a malfunction
in the brake system. In addition to the sym
bol, one of two messages appears in the dis
play:
Stop vehicle and check brake fluid level
Stabilization program and ABS fault! See
Owner's manual
.,. Pull off the road and stop the vehicle.
.,. Obtain p rofessional assistance.
USA models: if there is a ma lfunction in the
ABS system, the
m;B warning/ind icator light
illuminates along with the - system
malfunction warning/indicator light¢
A.
Canada models: if there is a malfunction in
the ABS system, the~ warning/i ndicator
lig ht i llum inates together with the. bra ke ..,_
Page 17 of 244
Instrument s and warnin g/indic ator ligh ts 15
system ma lfunction warning/indicator light
c> ,&. .
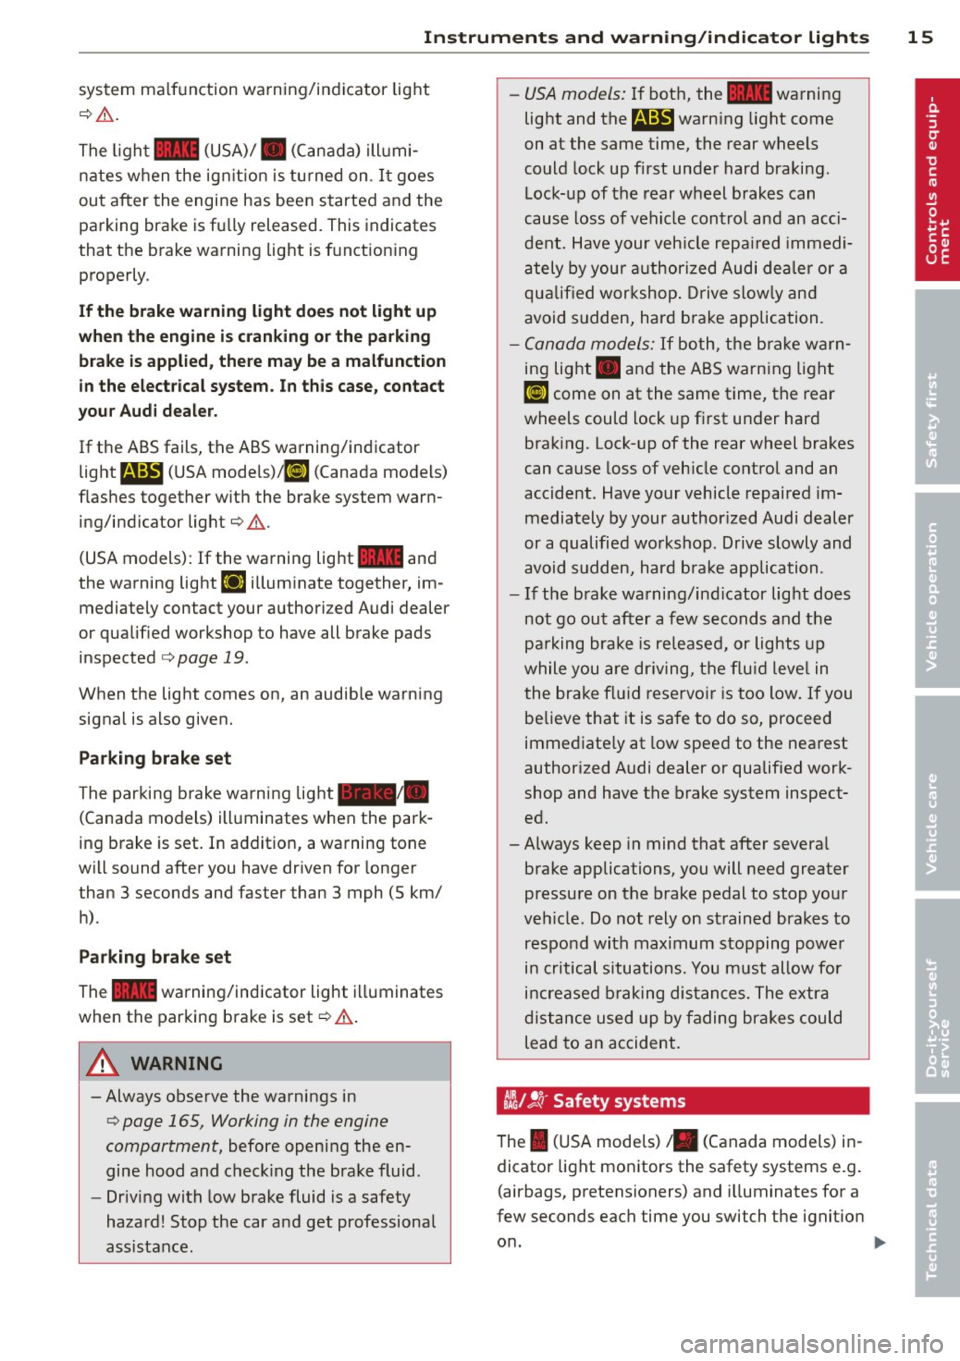
The ligh t 1111 (USA)/ . (Canada) illumi
nates when the ignit ion is tu rned on. I t goes
out after the engine has been started and the
parking brake is fully released. This indicates
that the brake warning lig ht is funct ion ing
properly.
If the brake warn ing light doe s not light up
w hen the engin e is cr anking o r the p arking
br ak e is applied, th ere m ay be a malfun ction
in th e electrical syste m. In thi s cas e, conta ct
y ou r A udi dealer .
If the ABS fails, the ABS warning/indicator
light
E (USA mode ls)! EIJ (Canada models)
f lashes together with the brake system warn
ing/indicator light
c> ,&. .
(USA models): If the warning light 1111 and
the warning light
EiJ illum inate together, im
mediately contact your author ized Audi dealer
or qualified workshop to have all brake pads
inspected
c> page 19.
When the light comes on, an audible warning
signa l is also given.
Parking brake set
The parking brake warning light_ /_
(Canada models) illuminates when the park
ing brake is set. In addition, a warning tone
will sound after you have driven for longer
than 3 seconds and faster than 3 mph (5 km/
h).
Park ing brak e set
The 1111 warning/indicator light illuminates
when the parking brake is set
c> &..
A WARNING
-Always observe the warnings in
c> page 165, Working in the engine
compartment, before opening the en
gine hood and check ing the bra ke fluid.
- Driv ing with low brake fluid is a safety
hazard! Stop the car and get professional
assistance. -
USA models: If both, the
1111 warning
light and the
E warn ing light come
on at the same time, the rear wheels
could lock up first under hard braking.
Lock-up of the rear wheel brakes can
cause loss of vehicle contro l and an acci
dent. Have your veh icle repa ired immedi
ately by your authorized Audi dealer or a
qualified workshop . Drive s low ly and
avoid sudden, hard brake application.
- Canada models:
If both, the b rake warn
ing light . and the ABS warning light
EiJ come on at the same time, the rear
wheels could lock up f irst under hard
brak ing. Lock-up of the rear wheel brakes
can cause loss of veh icle control and an
accident. Have your vehicle repaired im
mediately by your author ized Audi dealer
or a qualified wo rkshop. Drive slowly and
avoid sudden, hard brake application.
- If the b rake warning/ind icator light does
not go out after a few seconds and the
pa rking brake is re leased, or lights up
while you are dr iving, the flu id leve l in
the brake fl uid reservo ir is too low . If you
believe that it is safe to do so, proceed
immediate ly at low speed to the nea rest
author ized Audi dealer or qualif ied work
shop and have the brake system inspect
ed.
-Always keep in mind that after severa l
brake applications, you will need greater
pressure on the brake pedal to stop your
veh icle. Do not rely on strained brakes to
respond with maximum stopping powe r
i n critical s ituations. You must allow for
increased b raking dis tances. The extra
distance used up by fading bra kes could
lead to an accident.
tli1 !.!r Safety systems
The I ( U SA models) . (Canada mode ls) in
dicator light monitors the safety systems e.g.
(airbags, pretensioners) and i lluminates for a
few seconds each time you switch the ignitio n
o n.
Page 77 of 244
@ For the sake of the environment
To avoid unnecessary engine wear and to reduce exhaust emissions, do not let your
vehicle stand and warm up. Be ready to
drive off immediately after start ing your
veh icle. Mainta in moderate speed until the
engine is completely warm . Remember,
the engine performs best at operating
temperature .
Stopping the engine
.,. Turn the ignition key to position @
¢page 73, fig. 82.
_& WARNING
-Never turn off the engine before the ve
hicle has come to a complete stop. The
full function of the brake booster and the
power steering is not guaranteed. You
must use more force to turn or brake if
necessary . Because you cannot steer and
brake as you usually would, this could
lead to crashes and serious injur ies.
- The radiator fan can continue to run for
up to 10 minutes even after you have
turned off the eng ine and removed the
ignition key. The radiator fan can also
turn on again if the engine coolant heats
up because of intense sunlight or heat
build-up in the engine compartment .
(D Note
Do not stop the engine immediately after
hard or extended driving. Keep the engine
r un ning for approximately two minutes to
prevent excessive heat build-up.
On the road 75
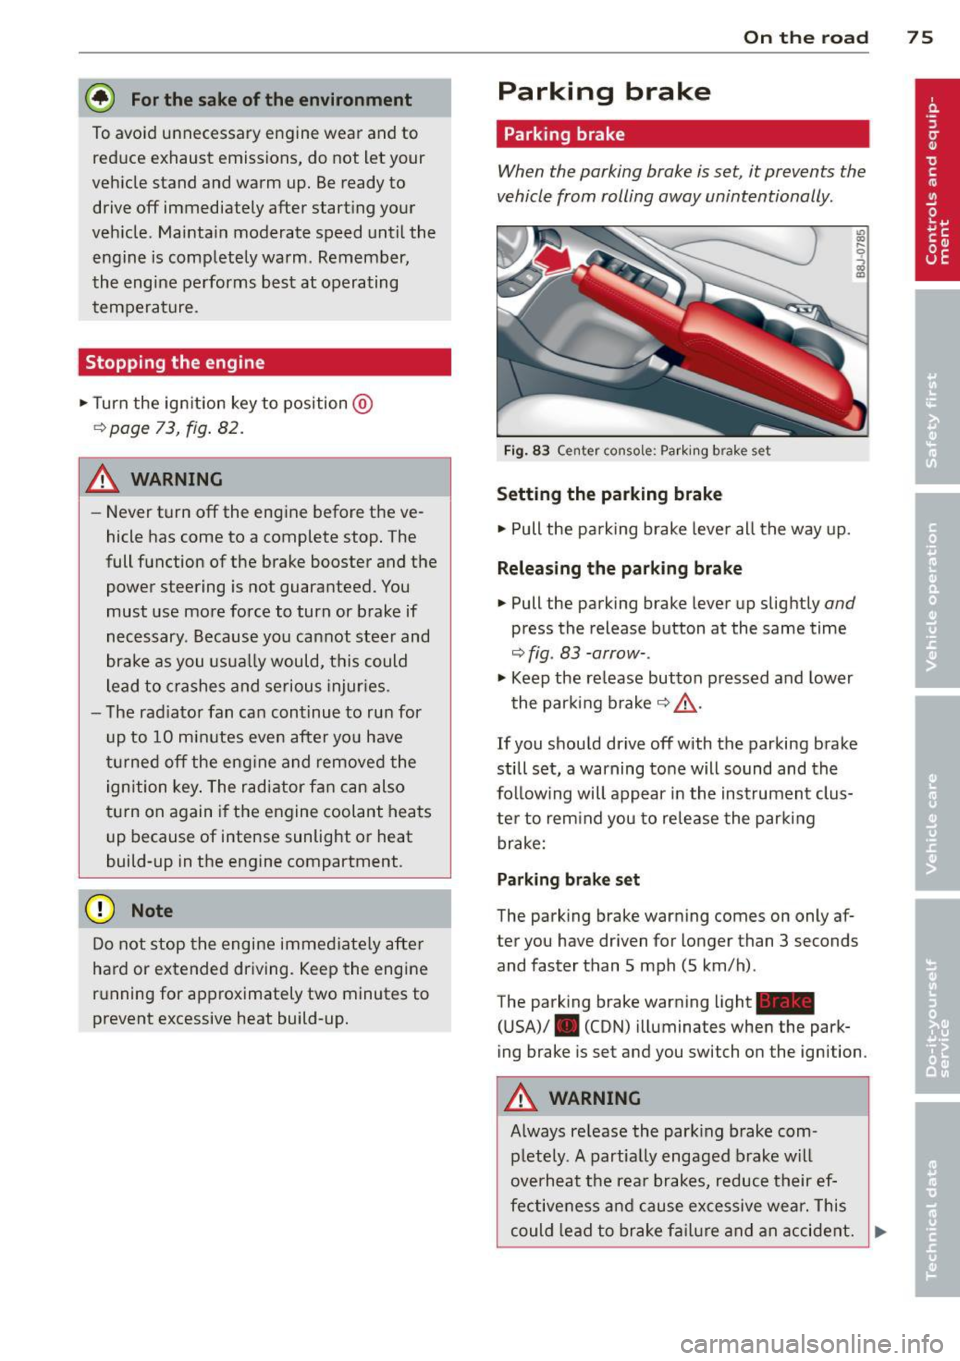
Parking brake
Parking brake
When the parking brake is set, it prevents the
vehicle from rolling away unintentionally .
Fig. 83 Center console: Parki ng b rake set
Setting the parking brake
.. Pull the parking brake lever all the way up.
Releasing the parking brake
.. Pull the parking brake lever up slightly and
press the release button at the same time
¢ fig. 83 -arrow-.
.,. Keep the re lease button pressed and lower
the parking brake¢&_ .
If you should drive off with the parking brake
still set, a warning tone will sound and the
follow ing will appear in the instrument clus
ter to rem ind you to release the parking
brake:
Parking brake set
The parking brake warning comes on only af
ter you have driven for longer than 3 seconds
and faster than 5 mph (5 km/h) .
The parking brake warning light_
(USA)/ . (CON) illuminates when the park
ing brake is set and you switch on the ignition .
A WARNING
Always re lease the park ing brake com -
pletely. A partially engaged brake will
overheat the rear brakes, reduce their ef
fectiveness and cause excessive wear. This
could lead to brake failure and an accident. .,.
Page 78 of 244
76 On the road
On ly afte r th e ve hic le has come to com
plete stop, shou ld you f irm ly set t he park
ing b rake and either move the selector lev
er i nto "P".
Parking
P a rkin g
"' Stop the vehicle using the brake pedal.
"' Set the parki ng brake firmly .
"' Swi tc h off the engine.
"' Mov e the selector lever into the P pos ition
~ A -
.. When on incl ines or decli nes, turn the steer
ing wheel so that the vehicle will roll into
the curb if it begins to move .
A WARNING
This is how you can reduce the risk of in
jury when leaving your veh icle.
- Never park the vehicle where it can come
in contact with dry grass, spilled fuel or
any other flammable mater ials.
- Never allow anyone -especia lly small
children -to remain in the vehicle when
it is locked. Locked doors make it more
difficult for rescuers to access the pas
senger compartment in the event of an
eme rgency. Danger to life!
- Never leave children unsupervised in the
vehicle . Children could re lease the park
ing brake o r move the gea rshift lever out
of gear. The vehicle could start to roll
away and ca use an accident.
- N o matter wha t the season is, the tem
perature in a par ked vehicle can rea ch
dangero us levels .
Starting on hills
Applies to vehicles: wit h hill h old ass ist
H ill hold assist ma kes it easie r to sta rt on
h ill s.
The system is act ivated when the brake pedal
i s depressed
for a few s econds .
After releasing the brake pedal, the brake
power is held for a brief moment to prevent
the vehicle from rolling back when start ing . At
th is time, you can easi ly beg in to move your
vehicle.
A WARNING
-- If you did not begin moving immed iate ly
after releasing the brake pedal, under
c e rtain ci rcumstances, the vehicle would
begin to ro ll backwa rd. Depr ess the
b rake ped al immedi ately o r engage the
hand brake .
- Should t he e ngine sta ll, dep ress the
b ra ke ped al immediate ly or eng age the
hand b rake .
- I n or der to prevent the vehicle from roll
ing back unintentionally when s tarti ng in
s top -and-go traffic, keep the brake pedal
depressed for a few seconds before driv
ing off.
(J} Tips
You can find o ut if yo ur vehicle is eq uipped
with "Hill hold ass ist" at an autho rized
A udi dealersh ip.
Speed warning system
Overview
The speed warning system helps you to keep
your driving speed below a set speed limit.
The speed warn ing system warns the driver if
he exceeds a previous ly stored max imum
speed . A warning tone will sound as soon as
the ve hicle speed exceeds the set speed by
about 3 mph (3 km/h). At the same time, a
warning symbo l appea rs in the display.
The speed warn ing system has
two warning
thr esho lds
that f unction independently of
each other and that have somewhat different
purposes:
Speed warning 1
You can use speed warning 1 to set the maxi mum speed while you are driving . This setting
will remain in effect unti l yo u tur n off the ..,.
Page 85 of 244
engaged, the engine should never be
speeded up unintentionally (e.g. manual ly from under the hood). Otherwise the
vehicle will immediately start to move -
sometimes even if the parking brake is
firmly applied - risk of an accident!
- Before you or other persons open the
hood and work on a running engine, the
selector lever must be moved to P and
the parking brake applied firmly - risk of
an accident! Follow the warning stickers.
@ Tips
If you have inadvertently sh ifted into N
while the veh icle is moving, you should re
move your foo t from the accelerator and
wait until the engi ne speed has dropped to
id le before shifting back to Dor S.
Selector lever lock
Applies to vehicles: with S tro nic
The selector lever lock prevents a gear from
being engaged occidentally and unintention
ally setting the vehicle in motion .
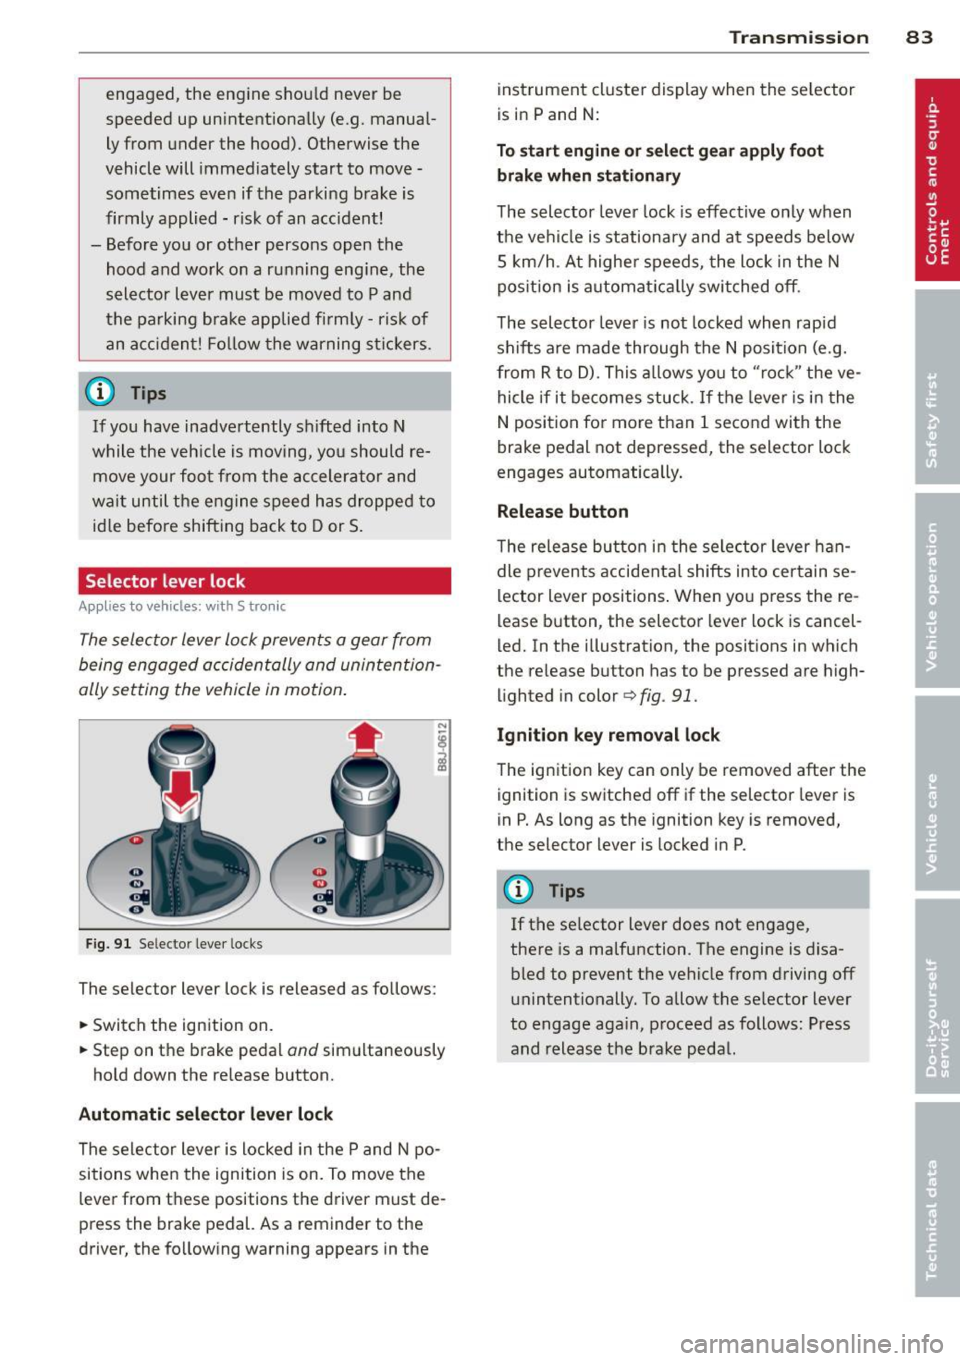
Fig. 91 Selector lever locks
The selector lever lock is released as follows:
.,. Switch the ignition on.
.,. Step on the brake pedal
and simultaneously
hold down the re lease button.
Automatic selector lever lock
The selector lever is locked in the P and N po
sitions when the ignition is on. To move the
l ever from these positions the driver must de
press the brake pedal. As a reminder to the
driver, the following warning appears in the
Transmission 83
instrument cluster display when the se lector
is in P and N:
To start engine or select gear apply foot
brake when stationary
The selector lever lock is effective only when
the vehi cle is stationary and a t speeds below
S km/h . At higher speeds, the lock in the N
pos ition is automat ically switched off.
The selector lever is not locked when rapid
shifts are made through the N position (e.g.
from R to D) . This allows you to "rock " the ve
hicle if it becomes stuck. If the lever is in the
N position for more than 1 second with the
brake pedal not depressed, the selector lock
engages automatically .
Release button
The release butto n in the selector lever han
dle prevents accidental shifts into certain se
lector lever positions . When you press the re
lease button , the selector lever lock is cancel
led. In the illustration, the positions in which
the release button has to be pressed are high
lighted in color
¢ fig . 91.
Ignition key removal lock
The ignition key can only be removed after the
ignition is switched off if the selector lever is
in P. As long as the ignition key is removed,
the selector lever is locked in P.
(y Tips
If the se lector lever does not engage,
there is a malfunction . The engine is disa
bled to prevent th e vehicle from driving off
unintentionally. To allow the selector lever
to engage again, proceed as follows: Press
and release the brake pedal.
Page 86 of 244
84 Transmi ssion
Driving Notes
Appl ies to vehicles: with S tron ic
The forward gears are shifted up or down au
tomatically.
--
-
-
-
-
-
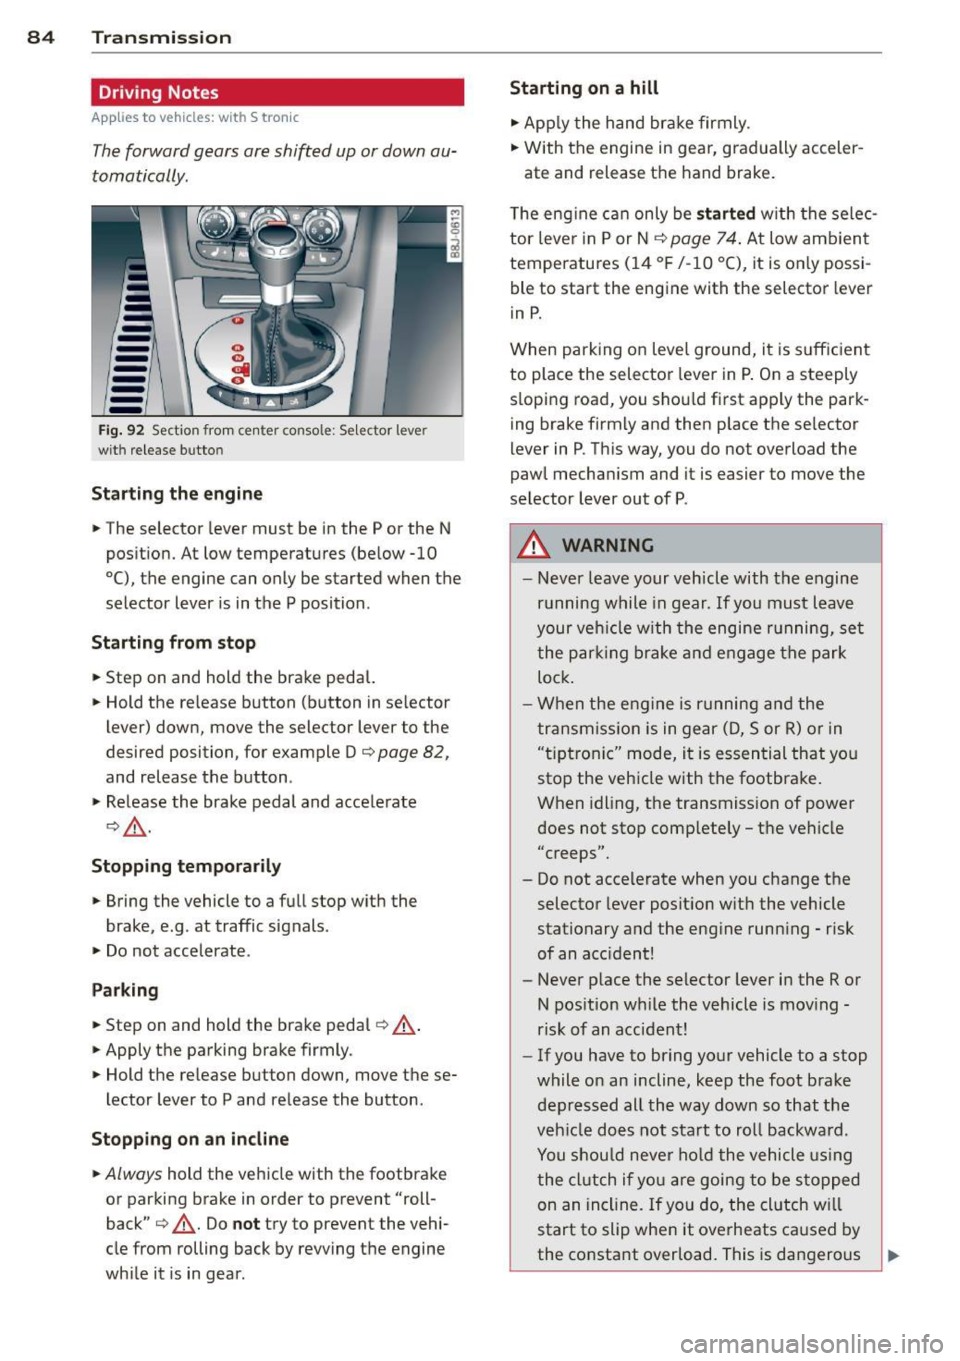
--Fig. 92 Section from ce nter console: Se lector leve r
wit h release b utto n
Starting the engin e
• The selector lever must be in the P or the N
posit ion. At low temperatures (be low -10
0
(), the engine can only be started when the
selector lever is in the P position .
Starting f rom sto p
.. Step on and hold the brake pedal.
• Hold the re lease button (button in se lector
lever) down, move the selector lever to the
desired position, for example Do
page 82,
and release the button.
• Re lease the brake pedal and acce lerate
o .&_ .
Stopp ing tem pora rily
• Bring the vehicle to a full stop with the
brake, e.g . at traffic signals .
• Do not accelerate .
Pa rkin g
.. Step on and hold the brake peda l o A .
• Apply the parking brake firmly .
• Hold the release button down, move these
lector lever to P and release the button .
Stopping on an incline
• Always hold the vehicle with the footbrake
or parking brake in order to prevent "roll
back" o
,&. Do not try to prevent the vehi
cle from rolling back by revving the engine
while it is in gear .
Starting on a hill
• Apply the hand brake firmly .
• With the engine in gear, gradually acceler-
ate and release the hand brake.
T he eng ine can only be
s tar ted w ith the selec
tor leve r in P or No
page 74 . At low amb ient
temperatures (14
° F /-10 °C), it is only possi
ble to start the engine with the selector lever
in P.
When parking o n level ground, it is s ufficient
to place the selector lever in P . On a steeply
s loping road, you shou ld first apply the park
ing brake f irmly and then place the selector
lever in P. Th is way, you do not overload the
pawl mechanism and it is easier to move the
selector lever out of P .
A WARNING
- Never leave your vehicle with the engine
running while in gear . If you must leave
your veh icle w ith the engine r unning, set
the park ing brake and engage the park
lock .
- When the engine is running and the transmiss ion is in gear (D, Sor R) or in
"t iptronic" mode, it is essential that you
stop the vehicle with the footbrake.
When idling, the transmission of power does not stop comp letely -the vehicle
"creeps".
- Do not accelerate when you change the
selector lever position w it h the vehicle
stationary and the engine runn ing -risk
of an acc ident!
- Never p lace the selector lever in the R or
N pos ition wh ile the vehicle is mov ing -
risk of an acc ident!
- If you have to bring your vehicle to a stop
while on an incline, keep the foot brake depressed all the way down so that the
veh icle does not start to rol l backward.
You shou ld never ho ld the vehicle using
the clutch if you are going to be s topped
on an incline. If you do, the cl utch w ill
start to slip when it overheats ca used by
the constant overload. This is dangerous
~
Page 90 of 244
88 Transmission
shift gate. Using the emergency re lease can
be complicated. We recommend contacting
your author ized Audi dealer for assistance, if
necessary.
Removing the selector lever boot
.,. Activate the parking brake .
.,. Carefully pry the selector lever boot out o f
t h e trim ® using a sma ll screwdriver .
.,. Pull both sides of the se lector lever boot up-
ward in the direction of the arrow @ .
.,. Fold the selector lever boot upward.
Selector lever eme rgency release
.,. Press the release lever down and hold it in
place
¢ fig . 97 .
.,. Press the release button in the selector lever
© and move the lever into the N pos ition .
.,. Clip the selector lever boot back into the
shift gate after using the emergency re
lease .
If the vehicle must be pushed or towed due to
a power failure (for example, the battery is
discharged), the selector lever must first be
moved to the N pos ition using the emergency
r e lease mechanism.
_& WARNING
Only move the selector lever out of the P
position when the parking brake is activat
ed. Otherwise, the vehicle could start to
move unintentiona lly when the selector
lever is moved out of the P position.
.
Page 91 of 244
Homelink
Universal remote
control
General information
The HomeLink universal remote control can
be programmed with hand-held transmitters
from existing equipment.
You must first program the Homelink trans
mitter before you can use the system
~ page 89, Programming the HomeLink
transmitter.
In order to program the Homelink transmit
ter for devices utilizing rolling code, a second
person on a ladder who can safely reach the
garage door opener motor is recommended.
It is also necessary to locate the "learn" but
ton on your garage door opener motor . Refer
to the operating instructions for the opener, as the location and color of this button may
vary by manufacturer .
You can still use the origina l remote control
for the device at any time.
A WARNING
-
- Never use the Homelink transmitter
with any garage door opener that does
have not the safety stop and reverse fea
ture as requ ired by federal safety stand
ards. This includes any garage door open
er model manufactured before April 1,
1982.
- A garage door opener which cannot de
tect an object, signaling the door to stop
and reverse does not meet current feder
al safety standards. Using a garage door
opener without these features increases
risk of serious injury or death.
- For safety reasons never release the
parking brake or start the engine while
anyone is standing in front of the vehicle.
- A garage door or an estate gate may
sometimes be set in motion when the Homelink remote control is being pro
grammed. If the device is repeatedly ac-
Homelink 89
tivated, this can overstrain motor and
damage its electrical components -an
overheated motor is a fire hazard!
- To avoid possible injuries or property
damage, please always make absolutely
certain that no persons or objects are lo
cated in the range of motion of any
equipment being operated.
(!) Tips
- If you would like more information on
Homelink, where to purchase the Home
Link compat ible products, or would like
to purchase the Homelink Home Light
ing Package, please call toll-free:
1-800-355-3515.
- For Declaration of Compliance to United
States FCC and Industry Canada regu la
tions
~page 229.
Programming the Homelink transmitter
The transmitter is programmed in two phas
es. For rolling code transmitters, a third
phase is also necessary.
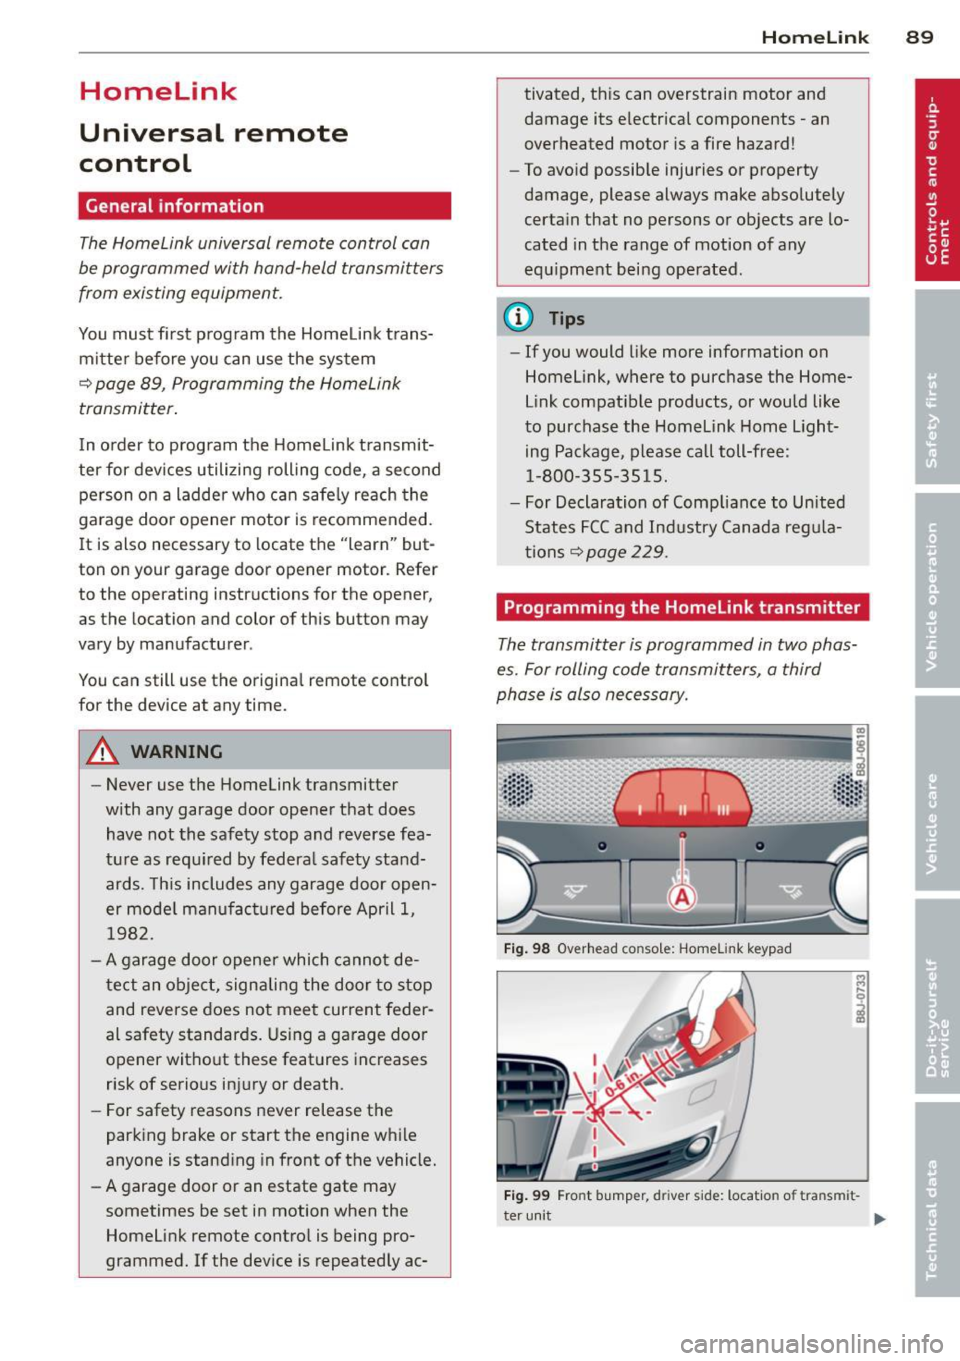
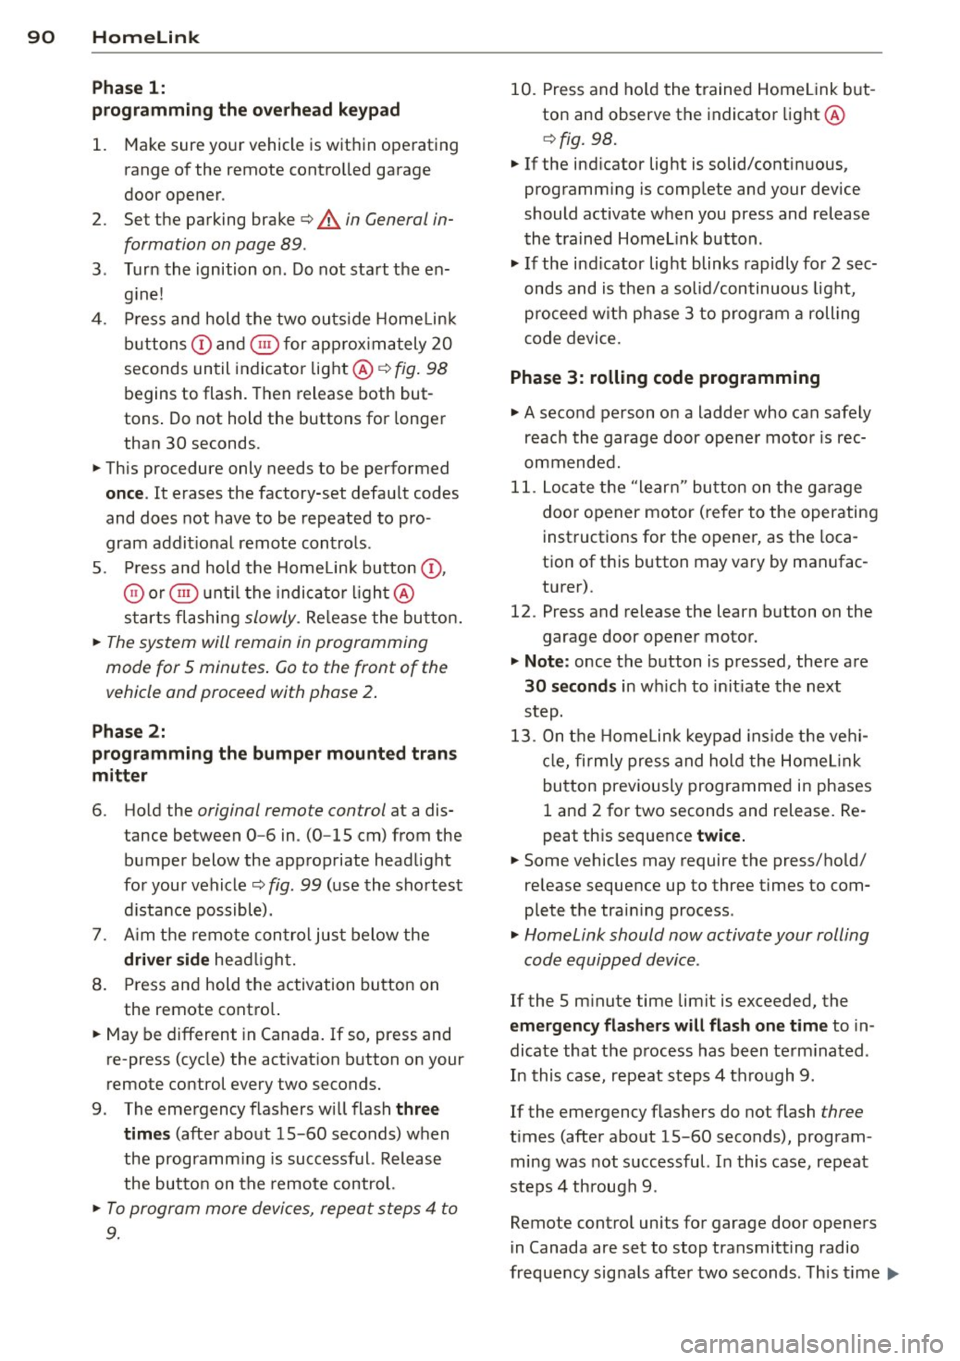
Fig. 98 Overhead co nsole: Homelink keypad
Fig. 99 Fro nt bumper, d river side: locatio n of tra nsm it-
ter unit
IJ-
Page 92 of 244
90 Homelink
Phase 1:
programming the overhead keypad
1. Make sure yo ur vehicle is wit hin o peratin g
range of the remote contro lled garage
door opener .
2. Set the parking brake¢.&. in General in
formation on page 89 .
3. Tur n the ignition on . Do not sta rt the e n
g ine!
4 . Pr ess and hold the two ou ts ide Home Link
b uttons
(D and @for app rox imately 2 0
seconds un til indicator light @¢fig . 98
begins to flash. Then release both but
tons . Do not hold the buttons for longe r
than
30 seconds.
.,. This procedure only needs to be performed
once . It erases the factory-set defau lt codes
and does not have to be repeated to pro
gram addit ional remote cont rols .
S . Press and hold the Hom elink button
(D ,
® or @ unt il the indica to r li gh t@
starts flashi ng
slowly. Re lease the bu tton.
.,. The system will remain in programming
mode for 5 minutes .
Co to the front of the
vehicle and proceed with phase 2 .
Phase 2:
programming the bumper mounted tran s
mitter
6 . Hold the original remote control at a dis
tance between
0 -6 in . (0 -15 cm) from the
b umper below the appropriate head light
fo r you r vehicle
q fig. 99 (u se the sho rtest
d istance possible).
7 . Aim t he remo te con trol jus t below the
driver side hea dligh t.
8 . Pr ess and hold the activation button on
the remote cont ro l.
.,. May be different in Canada. If so, press and
re-press (cycle) the activat ion b utton on your
remote control every two seconds.
9 . The eme rgency flashers will flash
three
time s
(after abo ut 15 -60 seconds) when
the programm ing is successf ul. Release
the butto n on the remote control.
.,. To program more devi ces, repea t steps 4 to
9.
10. Press and ho ld the trained Homelink but
ton and observe the indicator light @
¢fig. 98.
.,. If the ind icator lig ht is solid/contin uous,
prog ramm ing is comp lete and your device
should activate when you press and release
t he tra ined Homel ink b utton .
.,. If the ind icator light blinks rapidly fo r
2 se c
onds and is then a so lid/continuous ligh t,
procee d w ith p hase
3 to progr am a roll ing
code device.
Phase 3: rolling code programming
.,. A seco nd person o n a ladde r who can safely
reach th e garage door opene r moto r is rec
ommended .
11. Loc ate t he "lear n" bu tton on t he g arage
doo r opener motor ( re fer to the operating
inst ructions for the opener, as the loca
tion of t his button may vary by man ufac
turer).
12. Press and release the learn b utton on the
garage door opene r motor .
.,. Note : once the b utton is p ressed, the re a re
30 seconds in w hich to in it iate the next
step.
13. On t he Home link keypad ins ide t he ve hi
cl e, fi rmly press and hol d the Home link
bu tton prev ious ly progr ammed in phases
1 an d 2 for two seconds and release. Re
peat th is sequence
twice.
.,. Some vehicles may require the press/hold/
release sequence up to three times to com
plete the trai ning process .
.,. Homelink should now activate your rolling
code equipped d evice .
If the 5 minute time limit is exceeded , the
emergency flashers will flash one time to in
dicate that the p rocess has been te rm ina ted .
In this case, repeat steps 4 through 9.
If the emergency flashers do not flash
three
t imes (afte r about 15 -60 seconds) , program
ming was not successful. I n this case, repeat
steps 4 through 9 .
Remote contro l units for garage do or openers
in Canada are set to stop transmitting radio
fr eq uency sig nals afte r two seconds. Th is t ime ..,.