AUDI TT ROADSTER 2015 Manual Online
Manufacturer: AUDI, Model Year: 2015, Model line: TT ROADSTER, Model: AUDI TT ROADSTER 2015Pages: 244, PDF Size: 60.74 MB
Page 81 of 244
Audi magnetic ride
Applies to vehicles: with magnetic ride
Damping can be adjusted to the driver's pref
erence and it adapts automatically to the cur
rent driving situation.
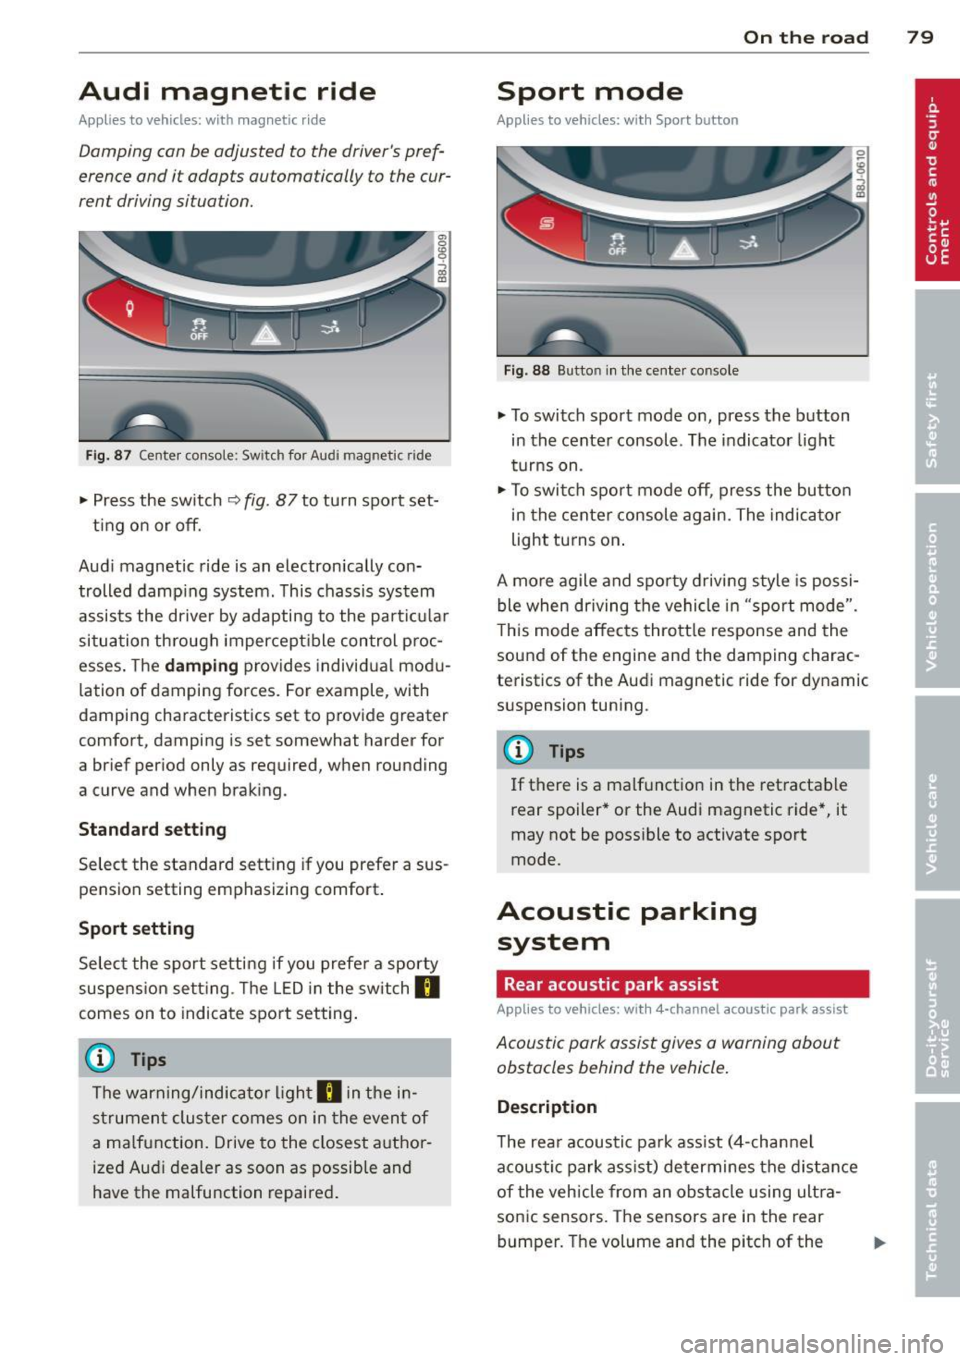
Fig. 87 Ce nter console : Switc h for Au di magnet ic ride
• Press the sw itch Q fig . 87 to tu rn sport set-
t ing on or off.
Aud i magnetic ride is an electronically con
trolled damping system. This chassis system
assists the dr iver by adapting to the particular
situation through imperceptible control proc
esses. The
da mping provides individua l modu
lation of damping forces. For example, with
damping characteristics set to provide greater
comfort, damping is set somewhat harder for
a brief period only
as required, when rounding
a curve and when braking.
St andard setti ng
Select the standard sett ing if you prefer a sus
pension setting emphasizing comfort .
Sport setting
Select the sport setting if you prefer a sporty
suspens ion setting . The LED in the switch
R
comes on to indicate sport setting.
@ T ips
The warning/indicator light R in the in
strument cluster comes on in the event of
a ma lfunction. Drive to the closest author
ized Audi dealer as soon as possible and
have the malfunction repaired.
On th e road 7 9
Sport mode
Applies to vehicles: wit h Sport button
Fig . 88 Butto n in the center console
.,. To switch sport mode on, press the button
in the center console . The indicator light
turns on.
• To switch sport mode off, press the button
in the center console again. The indicator
light turns on .
A more agile and sporty driving style is possi
ble when driving the vehicle in "sport mode".
T his mode affects throttle response and the
sound of the engine and the damping charac
teristics of the Audi magnetic ride for dynamic
suspension tuning .
(1} Tips
If there is a malfunction in the retractable
rear spoiler* or the Audi magnetic ride*, it
may not be poss ible to activate sport
mode.
Acoustic parking system
Rear acoustic park assist
Applies to vehicles: with 4-channe l acoustic park assist
Acoustic park assist gives a warning about
obstacles behind the vehicle.
D es cription
The rear acoustic park assist (4-channel
acoustic park assist) determines the distance
of the vehicle from an obstacle using ultra
sonic sensors. The sensors are in the rear
bumper. The volume and the pitch of the
Page 82 of 244
80 On the road
chimes can be adjusted through the menu dis
p lay
~ page 24 .
The range at which the sensors start to meas
ure is
a b ou t:
To the side 2 feet (0.60 m)
Center rea r 5 feet (1.60 m)
Activation
The parking assist
is activated when r ev erse
ge ar is engaged . A b rief tone confi rms that
the system is activated .
Backing up
Distance warning when back ing up starts
when an obstacle is detected in the range of
the park assist system . As the d istance de
creases, the time i nterva l between the audible
tones becomes shorter.
When the d istance is less than 1 foot (0.30
m), the tone becomes cont inuous . At this
poi nt you should stop backing up.
Please note that low objects already signalled
by a warning can disappear from the system 's
detection range and w ill not continue to be
signalled.
Potenti al malfunction s
If a warning buz zer sounds for a few seconds
when the ignition is sw itched on, there is a
system malfunction w ith the acoustic park as
sist . If the malfunction persists unti l the igni
tion is switched off , there will be no acoustic
warn ing at the next attempt to activate the
system . Have the problem corrected.
There is no confirmation tone when reverse
gear is engaged if there is a system ma lfunc
tion .
For the park ing ass ist to operate, the sensors
must be kept clean and free of ice.
_& WARNING
- Sensors have blind spots in which objects
cannot be detected . Pay special attention
to sma ll children and animals. They can- not a
lways be detected by the sensors -
danger of an accident!
- The parking assist cannot rep lace the
driver's attention. The driver alone is re
sponsible for parking and similar driving maneuvers. Always watch where you are
driving.
(D Note
Low obstacles already signa lled by a warn
i ng can d isappear from the system's detec
tion range as they are approached and w ill
not continue to be signalled. Objects such
as barrier chains, trailer draw bars, th in
painted vertical poles, o r fences may not
be detected by the system - risk of dam
age .
@ Tips
For the parking assist to operate, the sen
sors must be kept clean and free of snow
and ice.
Page 83 of 244
Transmission S tronic transmission
Introduction
Your vehicle is equipped with a S tronic trans miss ion, also called a double-clutch system/
transmission.
Power is transferred between the engine and
the transmission by means of two i ndepend
ent clutches. They replace the to rque convert
e r of conventional automat ic transm iss ions
and a llow the vehicle to acce lerate without a
noticeable break in the power flow .
W ith the aid
of tiptr oni c, the gea rs can op
tionally be sh ifted
manually¢ page 84.
Selector lever positions
All the selector lever positions are explained
in this section.
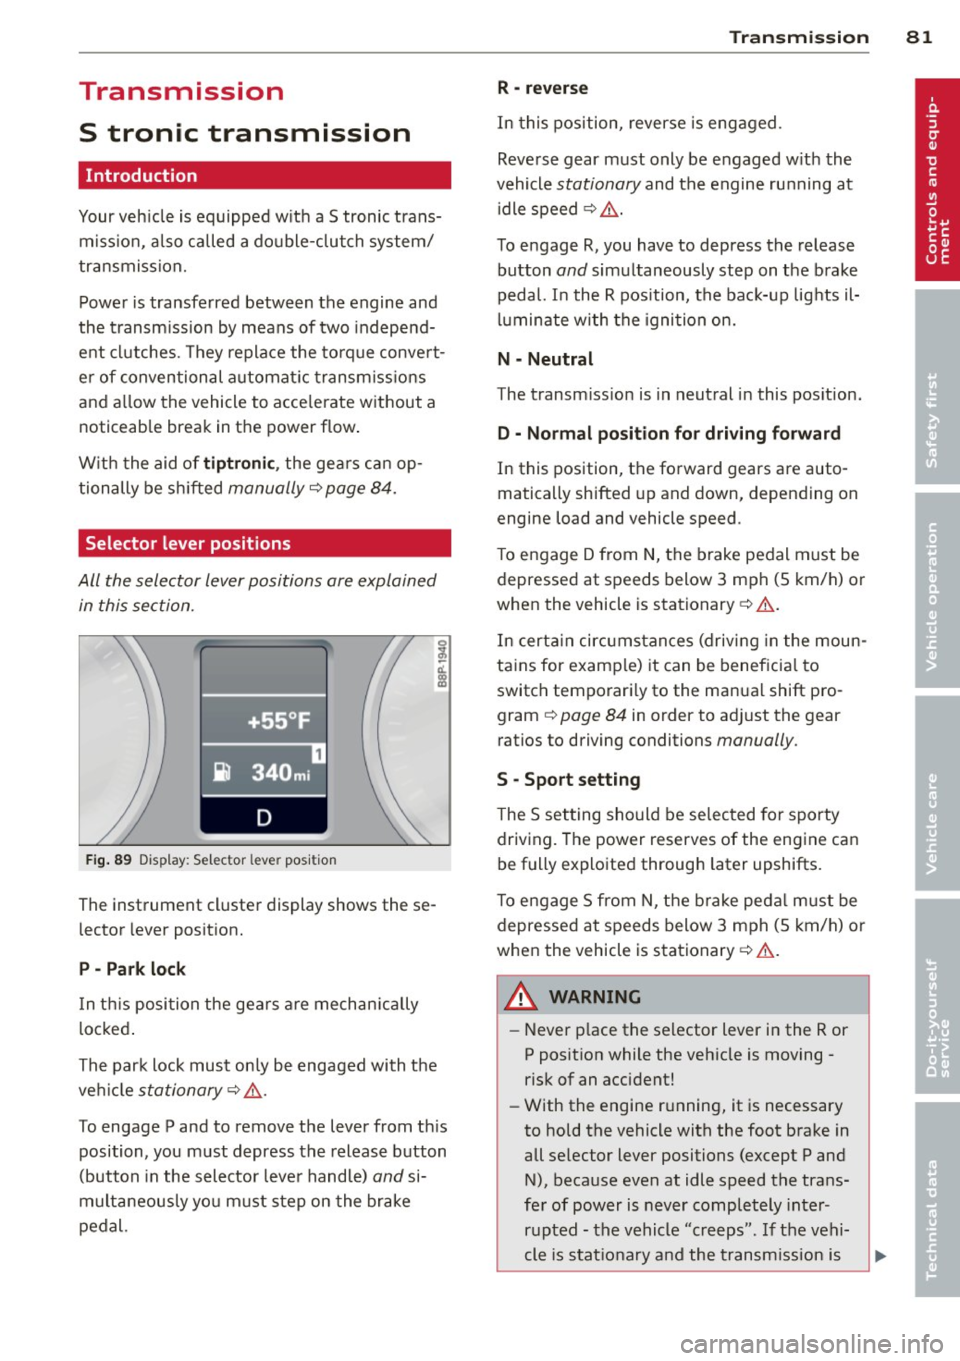
F ig . 89 Display: Selector lever position
The instrument cluster display shows these
l ector lever position.
P -Park loc k
In th is position the gea rs are mechan ically
l ocked .
The park lock must on ly be engaged with the
ve hicle
stationary¢ /1. .
To engage P and to remove the lever from th is
position, you must depress the release button
(button in the selector lever handle)
and si
multaneously you must step on the brake
pedal.
Tran sm iss ion 8 1
R -re ver se
In this position, reverse is engaged.
Reverse gear must only be engaged w ith the
vehicle
stationary and the engine ru nning at
idle speed ¢
/1..
To engage R, you have to depress the release
button
and simultaneously step on the brake
pedal. I n the R pos ition, the bac k-up lights il
luminate w ith the ignition on.
N -Neutral
The transm iss ion is in neutral in this pos ition.
D -Normal po sition fo r dri ving fo rward
In this position, the forward gears are auto
matically shifted up and down, depending on
engine load and vehicle speed.
T o engage D from
N, the brake pedal must be
depressed at speeds below 3 mph (5 km/h) or
when the vehicle is stationary¢&. .
In certa in circ umstances (driving in the moun
tains for examp le) it can be beneficia l to
switch temporari ly to the man ual shift pro
gram ¢
page 84 in order to adjust the gear
ratios to driving conditions
manually .
S -Sport setting
The S set ting should be se lected for sporty
driving. The power reserves of the engine can
be fully exploited through later upshifts.
T o e ngage 5 from N, the b rake peda l must be
depressed at speeds below 3 mph (5 km/h) or
when the vehicle is stationary¢&. .
A WARNING
-Never p lace the selector lever i n the R or
P posit ion while the veh icle is moving -
risk of an accident!
- With the engine r unning, it is necessary
to hold the vehicle with the foot brake in
all se lector lever positions (except P and
N), because even at idle speed the trans
fe r of power is never completely inter
r u pted -the vehicle "creeps". If t he vehi
cle is stat io nary and the transm ission is
Page 84 of 244
82 Transmi ssion
engag ed, the engine shou ld neve r be
spe eded up unintentionally (e.g. manual
ly from under the hood). Otherwise the
vehicle will immediately start to move -
sometimes even if the parking brake is
firmly applied -risk of an accident!
- Before you or other persons open the
hood and work on a running eng ine, the
selector lever must be move d to P and
t h e parking bra ke applied fi rm ly -ris k of
an a ccident! Fo ll ow the warning stickers .
a) Tips
If you have inadvertently s hifted into N
while the veh icle is moving, you should r e
move your foo t from the accelerato r and
wait until the eng ine speed h as droppe d to
id le before shifting back to Dor S.
Selector lever lock
The selec tor Lever Lo ck prevents a gear from
being engaged occidentally and unintention
ally setting the vehicle in motion .
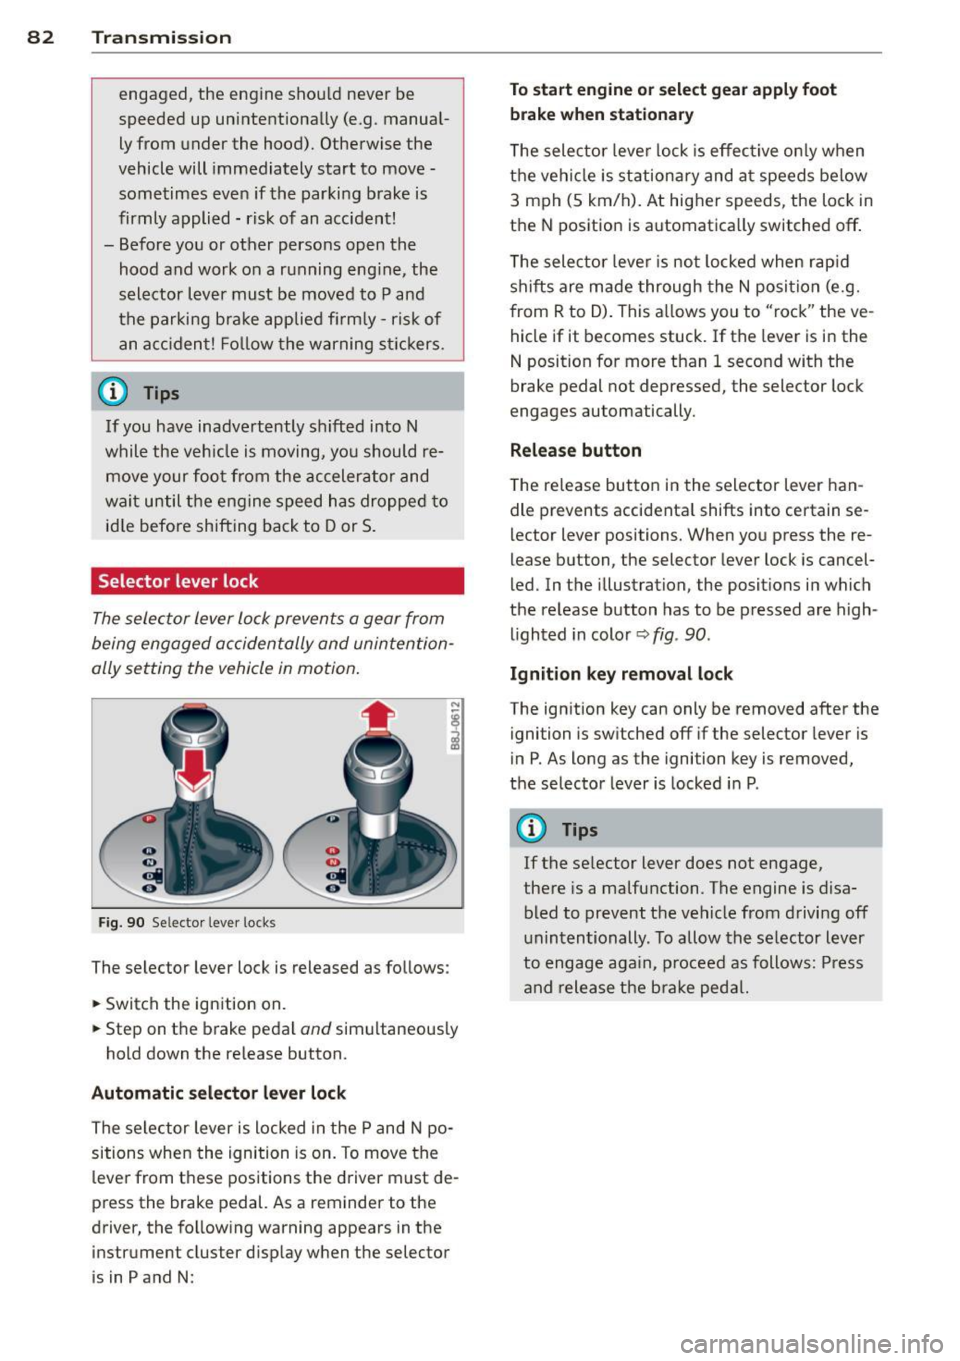
Fig. 90 Selecto r lever lo cks
The selector lever lock is released as follows:
.. Switch the ign ition on .
.. Step on the brake pedal
and simultaneous ly
hold down the release button .
Automatic selector lever lock
The selector lever is locked in the P and N po
sitions when the ignition is on. To move the
leve r from t hese positions the d river m ust de
press the brake pedal. As a reminder to the
driver, the fo llowing warning appears in the
inst rument cluster d isp lay when the selector
is in P and N :
To start engine or select gear apply foot
brake when stationar y
The selec tor leve r lock is effec tive on ly w hen
t h e veh icle is stationary and a t speeds below
3 m ph (5 km/h). At higher speeds, the lock in
t h e N position is automatica lly switched off .
T he selec tor leve r is not locked whe n rap id
shifts are made through the N posi tion (e.g.
from R to D). This a llows you to "rock" the ve
hicle if it becomes stuck. If the lever is in the
N position for more than 1 second with the
brake pedal not depre ssed, the selector lock
engages au tomatically.
Release button
T he re lease bu tton in the selector lever han
dle prevents accidenta l shifts into certain se
lector leve r positions. When you press the re
lease button, the selector lever lock is cancel
led. In the illustration, the posit ions i n which
the re lease button has to be p res sed are high
lighted in color ~
fig. 90 .
Ignition key remo val lock
The ign it ion key can only be removed after the
ignition is sw itched off if the selector lever is
in P . As long as the igni tion key is removed ,
the selector lever is locked in P.
(D Tips
If the se lector lever does not engage,
the re is a malfunction. The engine is disa
bled to prevent t he veh icle from drivi ng off
unintentionally . To allow the selector lever
to engage aga in, p roceed as follows: Press
an d release the bra ke peda l.
Page 85 of 244
Driving Notes
The forward gears are shifted up or down au
tomatically.
--
-
-
-
-
-
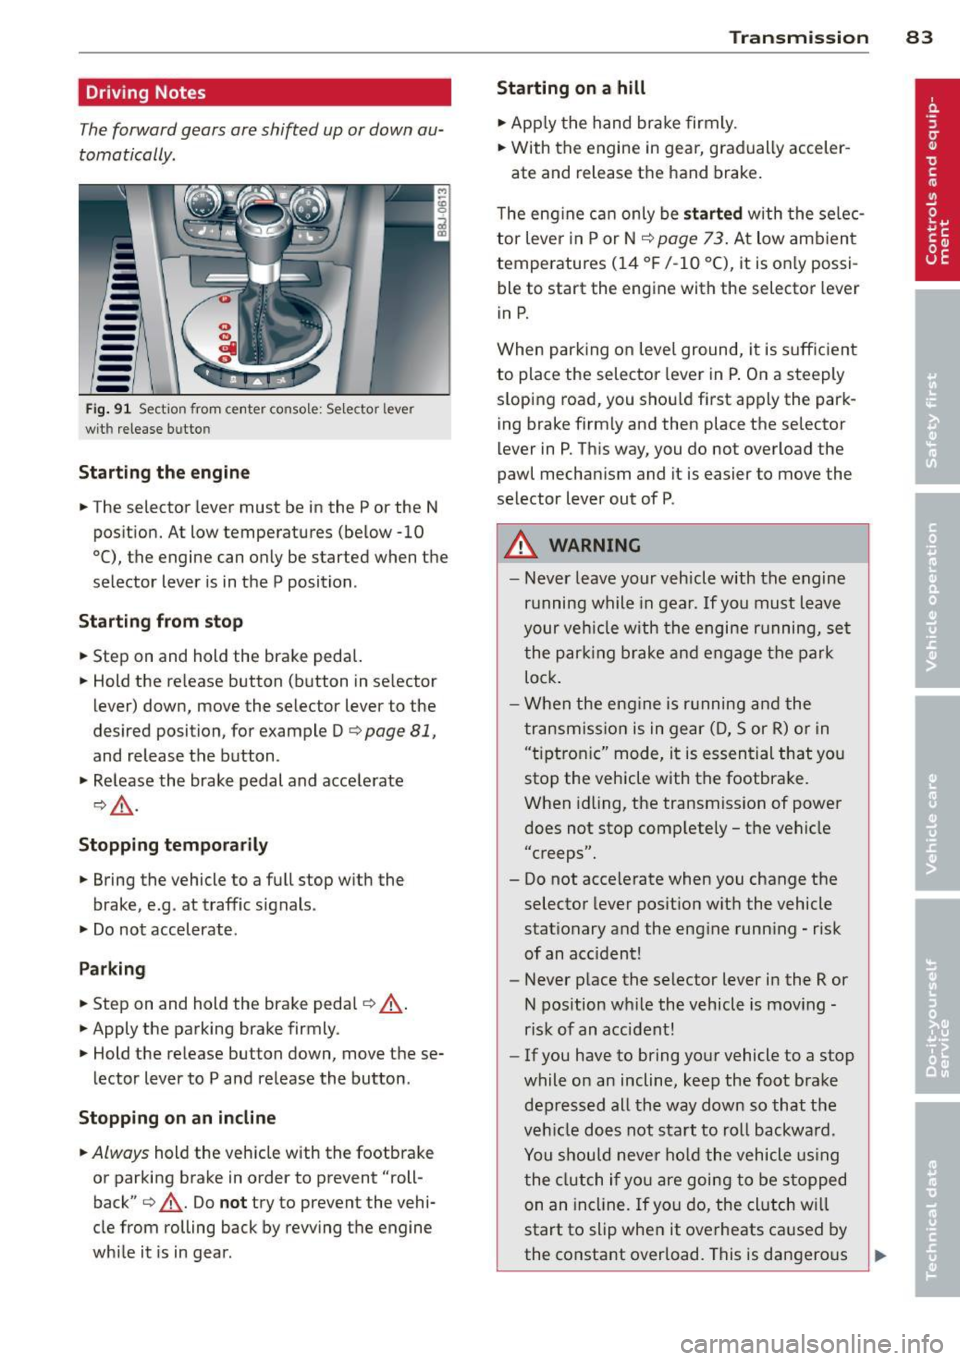
--Fig . 91 Sect io n from center co nsole: Sele ctor leve r
wit h release bu tto n
Starting the engine
.. The selector lever must be in the P or the N
position. At low temperatures (below -10
0 (), the engine can only be started when the
selector lever is in the P position .
Starting from stop
.. Step on and hold the brake pedal.
.. Hold the release button (button in se lector
lever) down, move the selector lever to the
desired position, for example D
c:> page 81,
and release the button .
.. Release the brake pedal and accelerate
¢,& .
Stopping temporarily
.. Bring the vehicle to a full stop with the
brake, e.g . at traffic signals .
.. Do not accelerate .
Parking
.. Step on and hold the brake pedal¢_& .
.. Apply the parking brake firmly.
.. Hold the release button down, move these
lector lever to P and release the button.
Stopping on an incline
.. Always hold the vehicle with the footbrake
or parking brake in order to prevent "roll
back"
¢ _& . Do not try to prevent the vehi
cle from rolling back by rewing the engine
while it is in gear.
Transmission 83
Starting on a hill
.. Apply the hand brake firmly.
.. With the engine in gear, gradually acceler-
ate and release the hand brake.
The engine can only be
started with the selec
tor lever in P or N
c:> page 7 3. At low amb ient
temperatures (14
°F /-10 °C), it is only possi
ble to start the engine with the selector lever
in P.
When parking on level ground, it is sufficient
to place the selector lever in P. On a steeply
sloping road, you should first apply the park
ing brake firmly and then place the selector
lever in P. This way, you do not overload the
pawl mechanism and it is easier to move the
selector lever out of P .
A WARNING
- Never leave your vehicle with the engine
running while in gear . If you must leave
your veh icle with the engine running, set
the parking brake and engage the park
lock .
- When the engine is running and the
transmission is in gear (D, Sor R) or in
"t iptroni c" mode, it is essential that you
stop the vehicle with the footbrake .
When idling, the transmission of power
does not stop completely - the vehicle
"creeps".
- Do not accelerate when you change the selector lever position with the vehicle
stationary and the engine running - risk
of an accident!
- Never place the selector lever in the R or
N position while the vehicle is moving -
risk of an accident!
- If you have to bring your vehicle to a stop
while on an incline, keep the foot brake depressed all the way down so that the
vehicle does not start to roll backward .
You should never hold the vehicle using
the clutch if you are going to be stopped
on an incline. If you do, the clutch w ill
start to slip when it overheats caused by
the constant overload. This is dangerous .,.
Page 86 of 244
84 Transmi ssion
because if the veh icle starts to roll
backward, you could cause an accident. If
the clutch should start to slip, you will
feel the vehicle "jerk" and the selector lever disp lay will start b linki ng .
- Before driv ing down a steep slope, re
duce you r speed and shift into a lower
gear with "tiptronic" .
- Do not ride the brakes or app ly the brake
peda l too often or too lo ng . Constant
braking causes the b rakes to over heat
and substan tially red uces bra king pe r
fo rm ance, in cr ease s bra king dis tance or
c a uses comp lete failure o f th e b rake sys
tem.
Hill Descent Assist
Hill Descent Assist helps the driver when driv
ing down inclines .
Hill Descent Ass ist is activated by pressing the
b rake w hile desce nding w hen the selecto r lev
e r i s in D/S. The S tronic t ra nsm ission au to
mat ically shifts dow n to a gea r su itab le for
the incline. Hill Descent Assist at tempts to
maintain th e current vehicle spe ed whe n the
brak ing occu rs, as far as phys ica l and techni
cal lim its a llow. It may be necessary to adjust
the speed using the brakes.
Hill Descent Assist switches off when the in
cline levels out or when the gas pedal is press
ed.
On vehi cles with cruise contro l* ¢
page 77 ,
Hill Descent Assist is a lso activated when the
speed is set.
_& WARNING
H ill Descent Assist ca nnot overcome p hys i
cal limitations, so it may not be possib le to
ma intain a constant vehicle speed under
all circ ums tances . Always be ready to ap
ply t he bra kes .
tiptronic operation
Tiptronic allows the driver to shift gears man
ually .
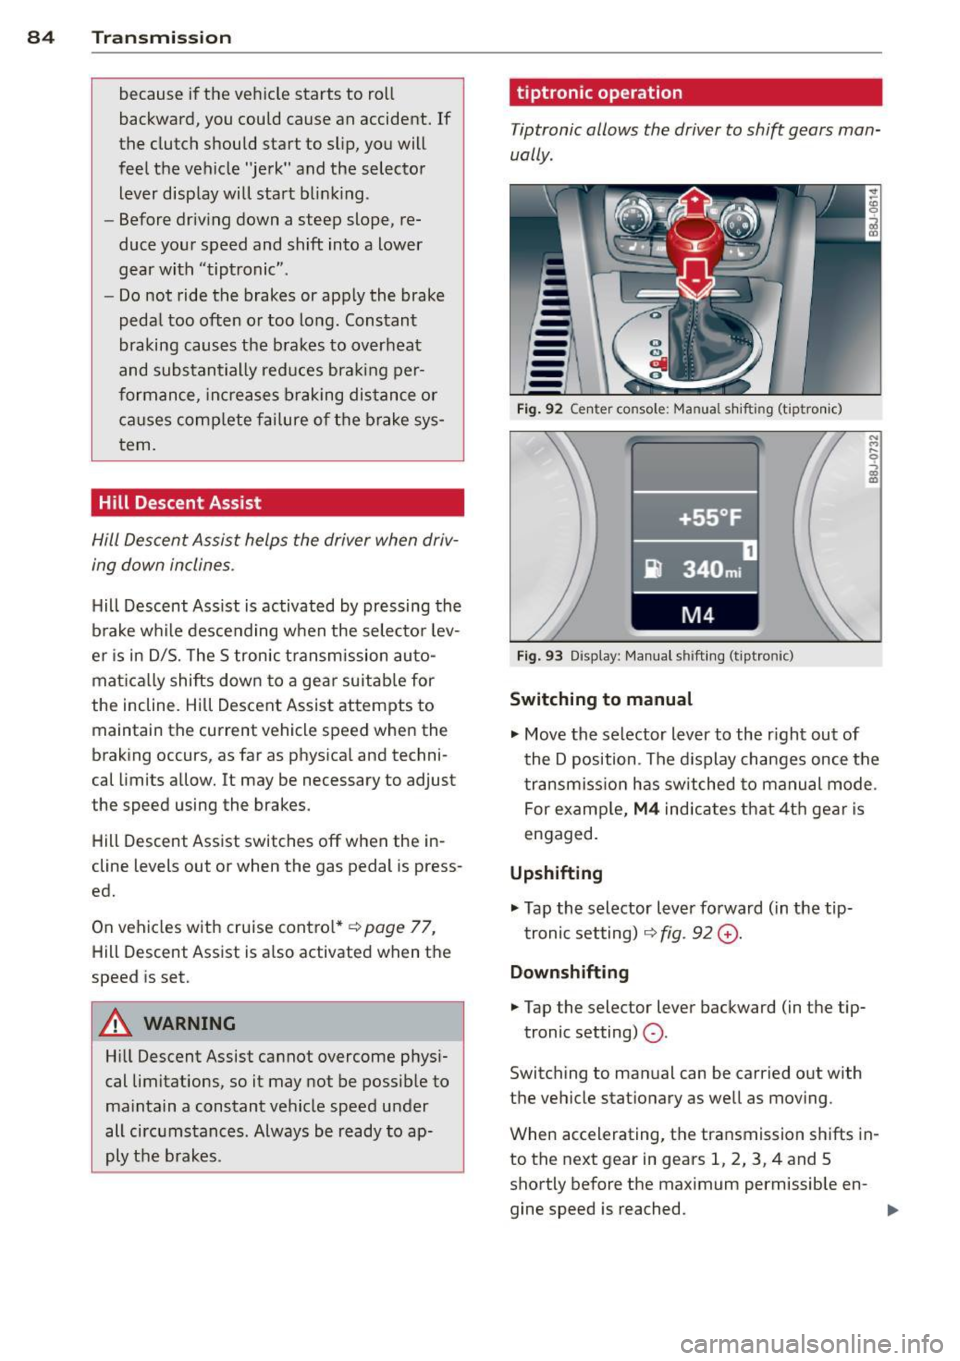
Fig . 92 Ce nte r co nso le: Ma nua l shiftin g (t iptro nic)
Fig . 9 3 D isp lay: Ma nua l shi fting (t ip tro nic )
Switching to manual
.... M .... 0
~
... Move the selector lever to the r ight out of
t he D position . The d isplay changes once the
t ra nsmiss io n has sw itched to ma nual mode .
For examp le,
M4 ind ica tes that 4t h gea r is
engaged.
Upshifting
.,. Tap the selector lever fo rward ( in the tip
t ronic setting) ¢
fig. 92 G) .
Downshifting
... Tap the selector lever backward (in t he tip-
tronic setting)
Q .
Switch ing to man ual can be carried out with
the vehicle stationary as we ll a s mov ing .
When accelerating, the transmission sh ifts in
to th e next gear in gears 1, 2, 3, 4 and S
shortly before the maximum permissible en -
gine speed is reached. ..,.
Page 87 of 244
If you have selected a lower gear than the cur
rent one, the transmission will only shift down
when the engine cannot be overspeeded .
If kick-down is actuated, the transmission
shifts into a lower gear independent ly of
speed and engine rpm .
Steering wheel with Tiptronic controls
The selector paddles allow the driver to keep
both hands on the steering wheel when shift
ing gears.
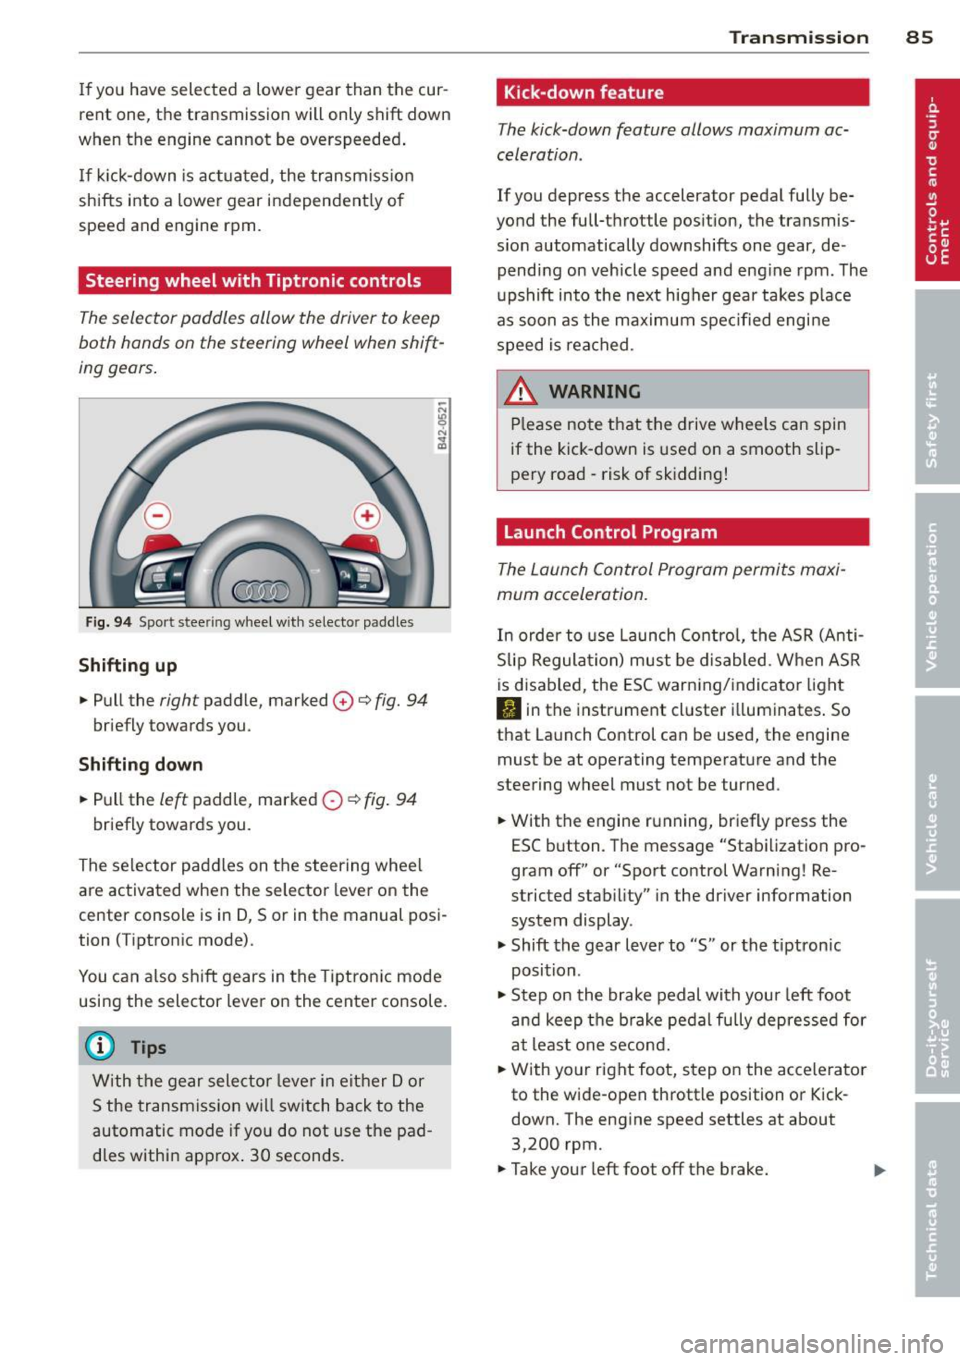
Fig. 94 Sport stee ring wheel with selecto r paddles
Shifting up
.,. Pull the right paddle, marked 0 ¢ fig. 94
briefly towards you .
Shifting down
.. Pull the left paddle, marked 0 ¢ fig. 94
briefly towards you.
The selector paddles on the steering wheel
are activated when the selector lever on the
center console is in D, Sor in the manual posi
tion (Tiptronic mode).
You can also shift gears in the Tiptronic mode
using the selector lever on the center console.
@ Tips
With the gear selector lever in either Dor
S the transmission will switch back to the
automatic mode if you do not use the pad
dles within approx . 30 seconds.
Transmission 85
Kick -down feature
The kick-down feature allows maximum ac
celeration .
If you depress the accelerator pedal fully be
yond the full-throttle position, the transmis
sion automatically downshifts one gear, de
pending on vehicle speed and engine rpm. The
upshift into the next higher gear takes place
as soon as the maximum specified engine
speed is reached.
_&. WARNING
Please note that the drive wheels can spin
if the kick-down is used on a smooth slip
pery road -risk of sk idding!
Launch Control Program
The Launch Control Program permits maxi
mum acceleration.
In order to use Launch Control, the ASR (Anti
Slip Regulation) must be disabled. When ASR
is disabled, the ESC warning/indicator light
I) in the instrument cluster illuminates. So
that Launch Control can be used, the engine must be at operating temperature and the
steering wheel must not be turned .
.. With the engine running, briefly press the
ESC button . The message "Stabilization pro
gram off" or "Sport control Warning! Re
stricted stability" in the driver information
system display.
.. Shift the gear lever to "S" or the tiptron ic
position .
.. Step on the brake pedal with your left foot
and keep the brake pedal fully depressed for
at least one second .
.. With your right foot, step on the accelerator
to the wide-open throttle position or Kick
down. The engine speed settles at about
3,200 rpm.
.. Take your left foot off the brake.
Page 88 of 244
86 Transmis sion
& WARNING ,-
- Always adapt your driving to the traffic
flow.
- Only use Launch Control when road and
traffic conditions allow it and other driv
ers will not be endangered or annoyed by
your driving and the acceleration of the
vehicle .
- Make sure that ESC remains enabled.
With the ESC disabled, the vehicle could
brake away, particularly on a slick and
slippery road - risk of skidding!
- Once acce lerat ion is finished, switch ASR
on again by briefly pushing the ESC but
ton.
(j) Tips
- The transmission temperature may in
crease significantly after using the Launch Control Program. If that hap
pens, the program may not be available
for a few minutes.
It will be available
again after a cool-down period.
- When accelerating using the Launch
Control program, all vehicle parts are
subject to heavy loads . This can result in
increased wear.
Back-up program
In the event of a system malfunction, there is
a back-up program.
In the event of system malfunction, the auto
matic transmission switches to the fail-safe
mode. Al l of the selector lever position dis
plays for the automatic transmission are high
lighted with a light background in the instru
ment cluster display . In some cases you can
not use reverse gear any more.
If the transmission switches to fail-safe mode, you should take the vehicle to an au
thorized Audi dealership as soon as possible
to have the condition corrected .
Clutch is overheating
• Clutch is overheating! Please stop vehi
cle!
If the symbols are illum inated, the clutch is
overheating and could be damaged if you con
t inu e to drive. Stop the vehicle and allow the
transmission to cool with the se lector lever in
the P position while the engine runs at idle. If
the warning does not turn off, do not continue driving. See your authorized Audi dealer or
qualified repair facility for assistance. Other
wise serious transmission damage could re
sult . Once the indicator light has turned off,
drive to your authorized Audi dealer or quali
fied repa ir facility immed iately to have the
malfunction corrected .
Selector lever emergency release
If the vehicle's power supply fails, the selec
tor lever can be released in an emergency.
--
-
-
-
-
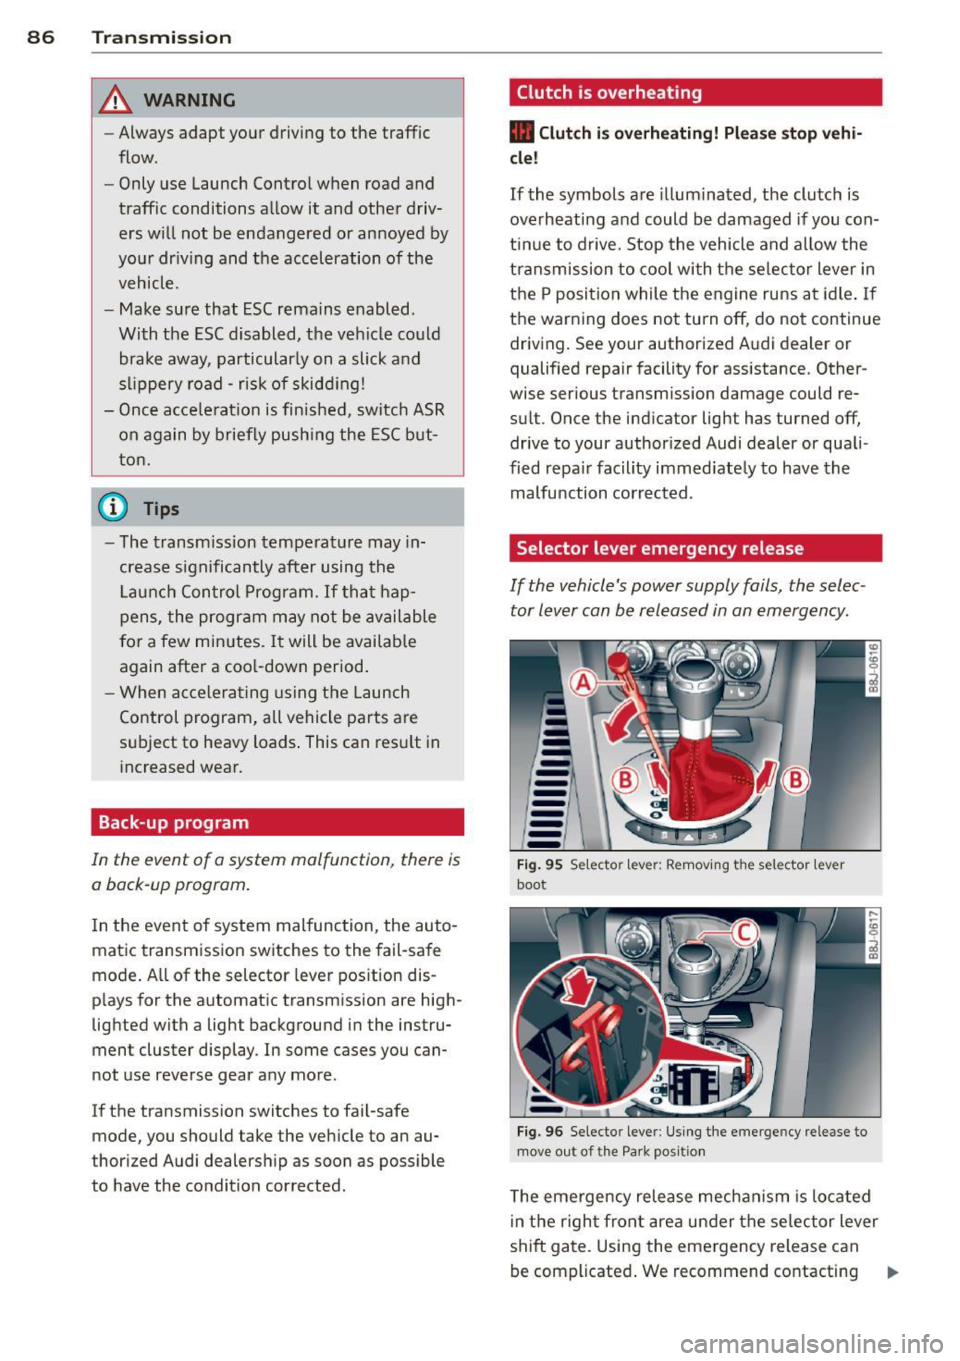
---Fig. 95 Selecto r lev er: Remov ing the selector le ver
boot
Fig. 96 Selecto r lever : Using the emerge ncy release to
move out of the Park positio n
The emergency release mechanism is located
i n the right front area under the selector lever
shift gate. Using the emergency release can
be complicated. We recommend contacting ..,_
Page 89 of 244
your authorized Audi dealer for assistance, if necessary .
Removing the selector lever boot
.,. Activate the parking b rake .
.,. Carefu lly pry the selector lever boot out of
the tr im @ using a small screwdriver .
.,. Pull both sides of the se lector lever boot up-
ward in the direction of the arrow @ .
.,. Fold the selector lever boot upward.
Selector lever eme rgency re le ase
.,. Press the release lever down and ho ld it in
place ¢ fig . 96 .
.,. Press the release button in the selector lever
© and move the lever into the N position .
.,. Clip the selector lever boot back into the
shift gate after using the emergency re lease.
If the vehicle m ust be pushed or towed due to
a power failure (for example, the battery is
d ischarged), the selector lever must first be
moved to the N pos ition using the emergency
release mechanism .
A WARNING
Only move the se lector lever out of the P
posi tion when the parking b rake is activat
ed. O therw ise, the vehicle could sta rt to
move unintentionally when the selector
lever is moved out of the P position.
Tran sm iss ion 87
Page 90 of 244
88 Homelin k
Homelink
Universal remote
control
General information
The Homelink universal remote control can
be programmed with hand-held transmitters
from existing equipment .
You must first program the Homelink trans
mitter before you can use the system
~ page 88 , Programming the Homelink
transmitter.
In order to program the Homelink transmit
ter for devices utilizing rolling code, a second
person on a ladder who can safely reach the
garage door opener motor is recommended.
It is also necessary to locate the "learn" but
ton on your garag e door open er motor . Refer
to the ope rating instructions for the opener ,
as the location and color of this bu tton may
vary by manufacturer .
You can still use the original remote control
for the device at any time.
A WARNING
-
- Never use the Homelink transmitter
with any garage door opener that does
have not the safety stop and reverse fea
ture as required by federal safety stand
ards. This includes any garage door open
er model manufactured before April 1,
1982.
- A garage door opener which cannot de
tect an object, signaling the door to stop
and reverse does not meet current feder
al safety standards. Using a garage door
opener without these features increases
risk of serious injury or death.
- For safety reasons never release the
parking brake or start the engine while
anyone is standing in front of the vehicle.
- A garage door or an estate gate may
sometimes be set in motion when the
Homelink remote control is being pro
grammed. If the device is repeatedly ac- tivated, this can overstrain motor and
damage its electrical components - an
overheated motor
is a fire hazard!
- To avoid possible injuries or property
damage, please always make absolutely
certain that no persons or objects are lo
cated in the range of motion of any
equipment being operated.
(!) Tips
- If you would like more information on
Homelink, where to purchase the Home
Link compatible products, or would like
to purchase the Homelink Home Light
ing Package, please call toll-free :
1-800-355-3515.
- For Declaration of Compliance to United
States FCC and Industry Canada regula
tions ~
page 228.
Programming the Homelink transmitter
Fig. 97 Overhead co nsole: Homelink keypad
Fig. 98 Front bumper , driver side: lo catio n of tra n smi t
te r unit
The transmitter is programmed in two phases.
For rolling code transmitters, a third phase is
also necessary.
ll-