hood release AUDI TT ROADSTER 2017 Owners Manual
[x] Cancel search | Manufacturer: AUDI, Model Year: 2017, Model line: TT ROADSTER, Model: AUDI TT ROADSTER 2017Pages: 314, PDF Size: 76.54 MB
Page 9 of 314
co
co
.... N
" N .... 0
" "' c:o
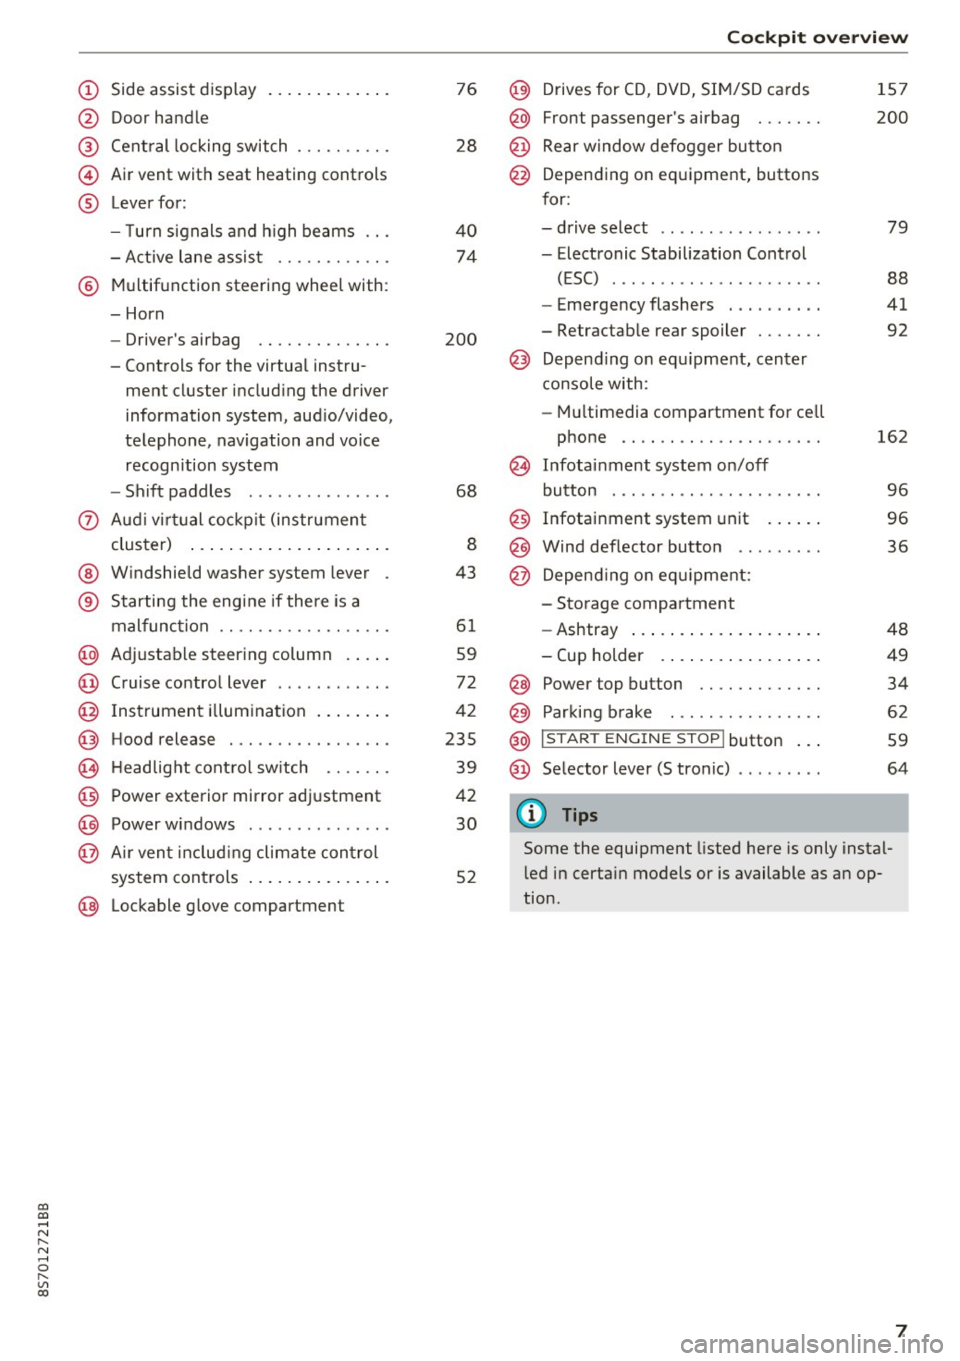
(!) Side assist display ..... ... .. .. .
@ Door handle
®
©
®
Cent ral locking switch
Air vent with seat heating controls
Lever for:
- T urn s ignals and h igh beams .. .
- Active lane assis t ......... .. .
® Multifunction steering wheel with :
- Horn
- Driver's ai rbag .. ......... .. .
- Controls for the virtual instru-
ment cluster includ ing the driver
information system, aud io/video,
telephone, navigation and voice
recogn ition system
- Shift paddles . .... ..... ... . .
0 Aud i v ir tu al co ckpit (instrument
cluster) ... .... .. .... ... .. .. .
@ W indshield washer system lever
® S tarting the engi ne if the re is a
mal func tion .. ........... .. .. .
@ Adjustab le st eering column . ... .
@ Cruise co ntrol lever .. ..... ... . .
@ Ins trument i llum ination ... .. .. .
@ Hood release . .... ......... .. .
0 H eadlight cont rol sw itch .... .. .
@ Power exterior mirror adjustment
@ Power windows . .... ..... ... . .
@ A ir ven t incl uding climate con trol
system controls ... .... ... .. .. .
@ Lockable g love compartment
76
28
40
74
200
68
8
43
6 1
59
72
42
235
39
42
30
52
Coc kpit o ve rv iew
@) Drives for CD, DVD, SI M/SD cards
@ Front passenger's ai rbag ...... .
@ Rear window defogger bu tton
@ Depending on equipment, buttons
for:
- drive select .. .. ............ .
- Electronic Stabilization Control
(ESC) ..... .. .. ............ .
- Emergency flashers . ...... .. .
- Retractab le rear spoiler ...... .
@ Depend ing on equ ipment , center
co nsole with:
- Mu ltimedia compartment for cell
phone .... .. .............. .
~ Infotai nment system on/off
button . .. .. .. .. ............ .
@ Infotainment system unit ... .. .
@ Wind deflector button ........ .
@ Depending o n eq uipment:
- Storage compartment
- Ashtray ... .. ... .. .. ..... .. .
- Cup holder .. ... .. .. ..... .. .
@ Power top button ............ .
@ Parking b rake . .. ............ .
@ I S TAR T ENGINE ST OP I butto n ...
@ Selector lever (S tronic)
@ Tips
1S7
200
79
88
41
92
162
9 6
96
36
48
49
34
62
59
64
Some the equipment listed here is only instal
l ed in certa in models or is available as an op
tion.
7
Page 13 of 314
co
co
.... N
" N .... 0
" "' c:o
If brake assist (brake booster) is not working, you
have to use much more force when braking the
vehicle. See an authorized Audi dealer or author
ized Audi Service Facility for assistance.
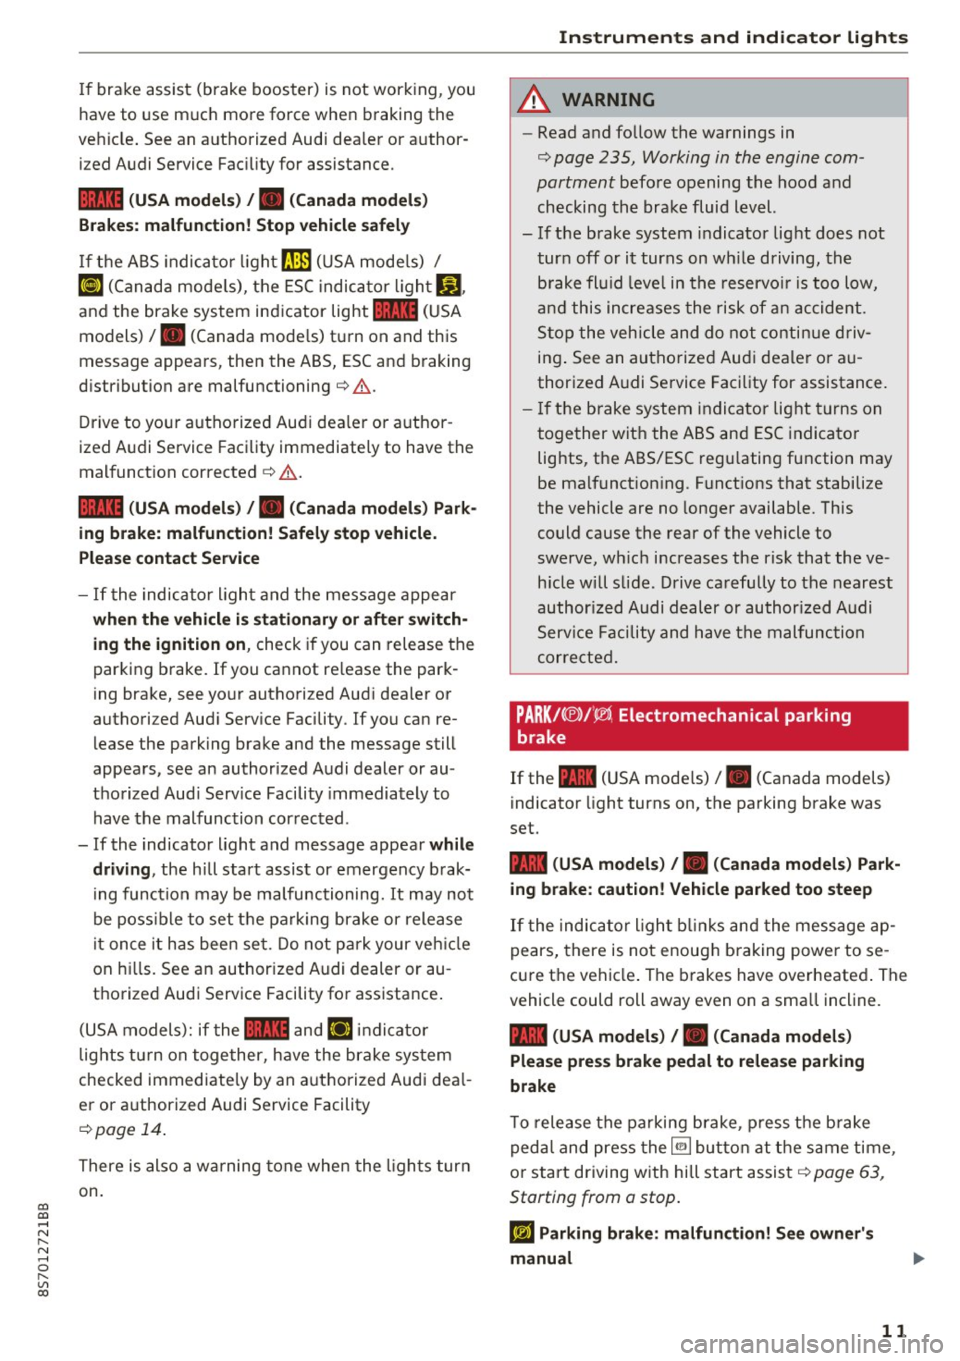
1111 (USA models) /. (Canada models)
Brakes: malfunction! Stop vehicle safely
If the ABS indicator light til) (USA models) /
¢cj (Canada models), the ESC indicator light J.il
and the brake system indicator light 1111 (USA
models)/ . (Canada models) turn on and this
message appears, then the ABS, ESC and braking
distribution are malfunctioning¢ ,&..
Drive to your authorized Audi dealer or author
ized Audi Service Facility immediately to have the
malfunction corrected ¢
&.
1111 (USA models) /. (Canada models) Park
ing brake: malfunction! Safely stop vehicle.
Please contact Service
- If the indicator light and the message appear
when the vehicle is stationary or after switch
ing the ignition on,
check if you can release the
parking brake . If you cannot release the park
ing brake, see your authorized Audi dealer or
authorized Audi Service Facility . If you can re
lease the parking brake and the message still
appears, see an authorized Audi dealer or au
thorized Audi Service Facility immediately to
have the malfunction corrected .
- If the indicator light and message appear
while
driving,
the hill start assist or emergency brak
ing function may be malfunctioning. It may not
be possible to set the parking brake or release
it once it has been set. Do not park your vehicle
on hills. See an authorized Audi dealer or au
thorized Audi Service Facility for assistance.
(USA models): if the
1111 and EiJ indicator
lights turn on together, have the brake system
checked immediately by an authorized Audi deal
er or authorized Audi Service Facility
¢page 14.
There is also a warning tone when the lights turn
on.
Instruments and indicator lights
A WARNING
- Read and follow the warnings in
¢ page 235, Working in the engine com
partment
before opening the hood and
checking the brake fluid level.
- If the brake system indicator light does not
turn off or it turns on while driving, the
brake fluid level in the reservoir is too low,
and this increases the risk of an accident.
Stop the vehicle and do not continue driv
ing. See an authorized Audi dealer or au
thorized Audi Service Facility for assistance.
- If the brake system indicator light turns on
together with the ABS and ESC indicator
lights, the ABS/ESC regulating function may
be malfunctioning. Functions that stabilize
the vehicle are no longer available. This
could cause the rear of the vehicle to
swerve, which increases the risk that the ve
hicle will slide . Drive carefully to the nearest
authorized Audi dealer or authorized Audi
Service Facility and have the malfunction
corrected.
PARK /(®)/¢), Electromechanical parking
brake
If the -(USA models)/ . (Canada models)
indicator light turns on, the parking brake was
set.
- (USA models) I. (Canada models) Park
ing brake: caution! Vehicle parked too steep
If the indicator light blinks and the message ap
pears, there is not enough braking power to se
cure the vehicle. The brakes have overheated. The
vehicle could roll away even on a small incline.
- (USA models) I. (Canada models)
Please press brake pedal to release parking
brake
To release the parking brake, press the brake
pedal and press the~ button at the same time,
or start driving with hill start assist¢
page 63,
Starting from a stop.
Jlj Parking brake: malfunction! See owner's
manual
11
Page 14 of 314
Instruments and indicator lights
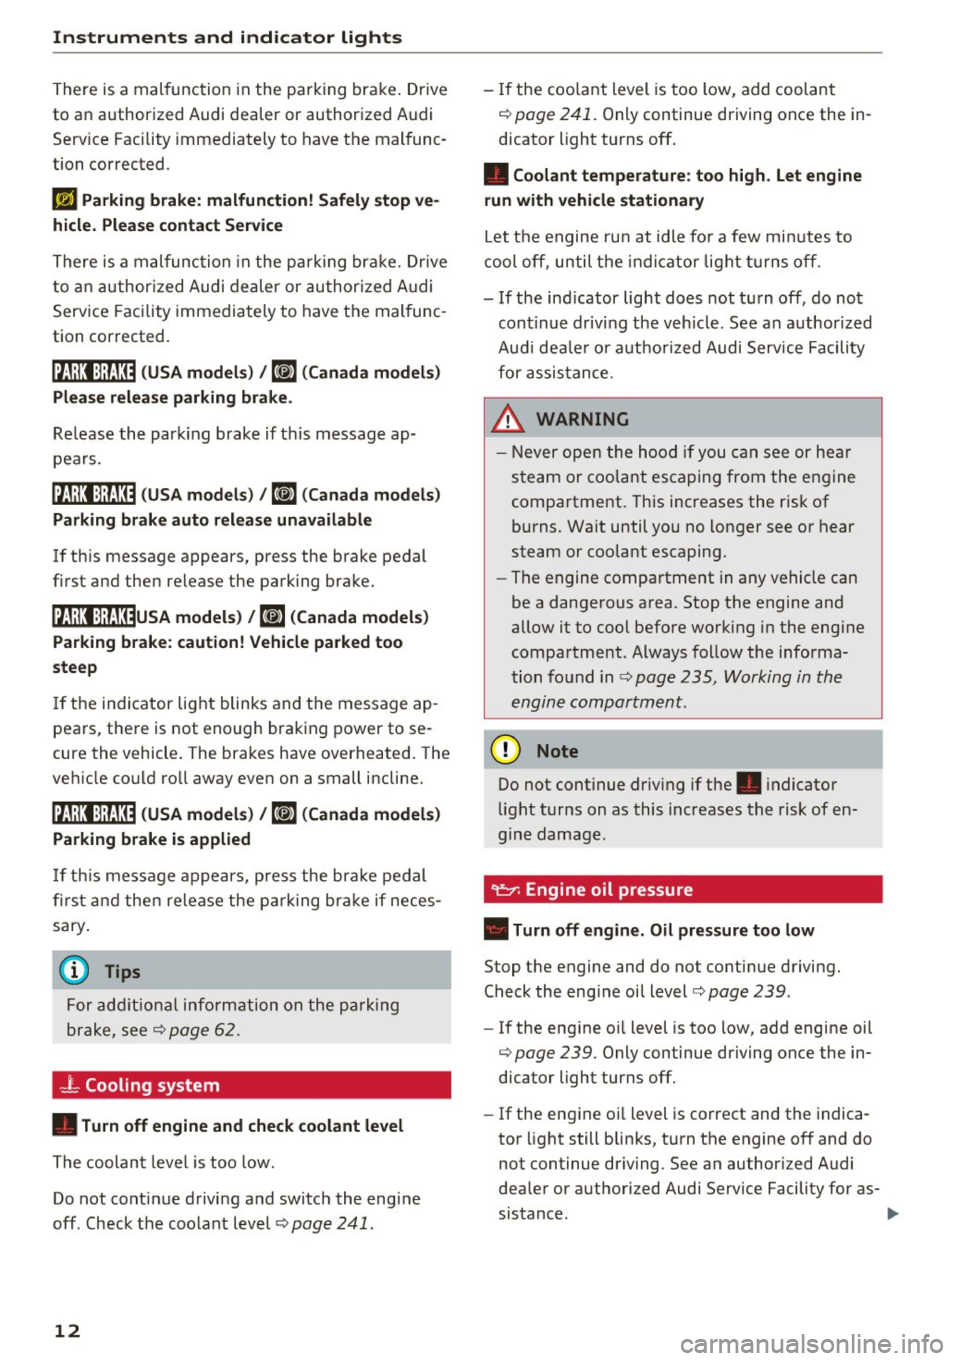
There is a malfunction in the parking brake . Dr ive
to an authorized Audi dealer or authorized Audi
Serv ice Facility immediately to have the malfunc
tion corrected .
1ij Parking brake: ma lfunction! Safely stop ve
hicle . Ple ase contact Se rvice
There is a malfunction in the parking br ake. Dr ive
to an author ized Audi dealer or author ized A udi
Service Facility immediately to have the mal func
tion corrected.
ltJil:Jl:)jf;U~ (USA model s) /
6] (Canada model s)
Ple ase rele ase p arking brake .
Re lease the park ing brake if this message ap
pea rs .
IZJill :ljfj:0 (USA mod els) /
6] (C an ad a model s)
Parking brake auto rel ea se unavail able
If th is message appears, press the brake pedal
first and then release the parking brake.
IZ,i!;t:Jjf;U~U SA mod els ) /
K@)
steep
If the indicator light blinks and the message ap
pears, there is not enough braking power to se
cure the vehicle. The brakes have overheated. The
veh icle could roll away even on a small incline.
ltJ ilJ :jjJ:1:0 (USA model s) /
K@j
I f th is message appears, press the bra ke pedal
fi rst and then release the pa rking brake if neces
sary .
(D Tips
For add it iona l information on the park ing
brake, see ¢
page 62.
-L Cooling system
• Turn off engine and check coolant le vel
The coolan t leve l is too low.
Do not cont inue drivi ng and switch the engine
off . Check the coolant level¢
page 241 .
12
-If the coo lant level is too low , add coolant
¢
page 241. Only continue driving once the in
dicator light turns off.
• Coo la nt temperature : to o high . Let engine
run with veh icle stationa ry
Let the engine ru n at idle fo r a few minutes to
cool off, until t he ind icator lig ht t urns off .
- If the ind icator light does not turn off , do not
cont inue driving the veh icle. See an authorized
Audi dea le r or authorized Audi Service Facility
for assistance.
.&_ WARNING
- Never ope n the hood if you can see or hea r
steam or coo lant escaping from the engine
compartment. This increases the risk of
burns. Wait until you no longer see or hear
steam or coolant escaping.
- The engine compartment in any vehicle can
be a dangerous area. Stop the engine and
allow it to cool before working in the engine
compartment . Always follow the informa
tion found in
Q page 235, Working in the
engine compartment .
(D Note
Do not continue driv ing if the . indicator
light turns on as this increases the risk of en
g ine damage.
"I!::?': Engine oil pressure
• Turn off engin e. Oil pre ssure to o low
Stop the engine and do not continue driving. Check the eng ine oil level¢
page 239.
-If the eng ine oi l level is too low, add engine oil
¢
page 239 . Only continue driving once the in
dicator light turns off.
-If the engine oi l level is correct and the indica
tor light still blinks, turn the engine off and do
not continue dr iving . See an author iz ed Audi
dea ler or authori zed Audi Service Facility for as-
sistance . .,.
Page 28 of 314
Opening and clo sin g
LED and batteries in the remote control key
fr=-~=;;;;- --~
I
Fig . 15 Re mote contro l key : rem ov ing the ba ttery h olde r
F ig. 16 Re mote cont ro l key (re ar side ): re m ovi ng the bat
tery ho lder
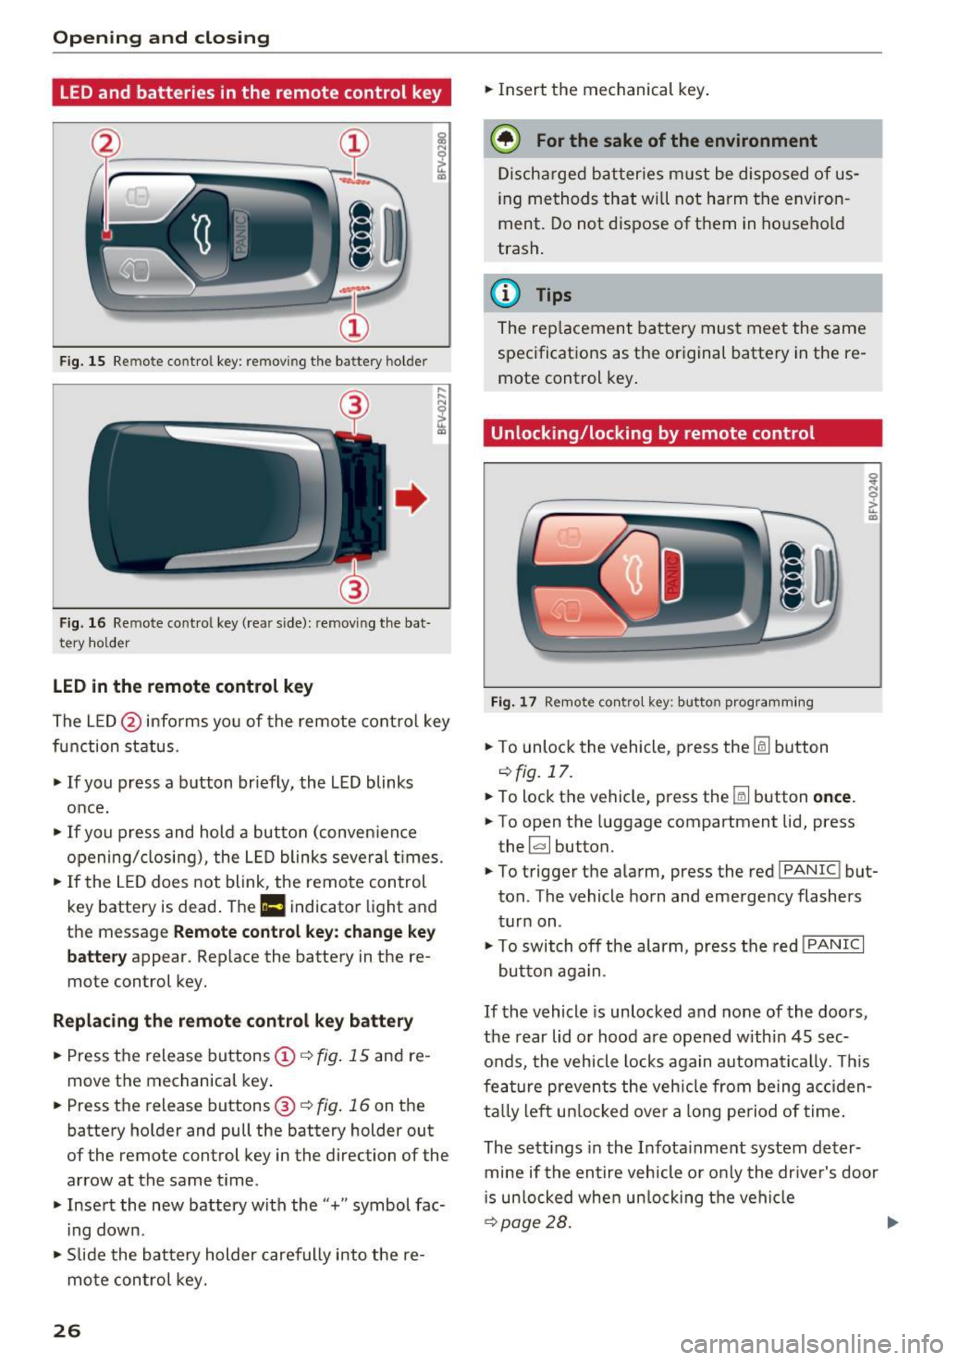
LED in the remote control k ey
The LE D @ info rms you of the remote control key
function status .
.,. If you press a b utton briefly, the LED blinks
once.
.,. If you press and hold a button (conven ience
opening/closing), the LED blinks several t imes .
.,. If the L ED does not blink , the remote control
key battery is dead . The
Ill indicator light and
th e m essag e
Rem ote control key : cha nge ke y
b att ery
appea r. Rep lace the battery in the re
mote con trol key.
R eplacing th e remot e co ntrol k ey batt ery
.,. Press the release buttons@¢ fig. 15 and re
move the mechanical key .
.,. Pre ss the r ele as e buttons @¢
fig. 16 on th e
battery holder and pull the battery holde r out
of the remo te control key in the dire ction o f the
arrow at the same t ime .
.,. Insert the new battery with the"+" symbol fac·
ing down .
.,. Slide the batte ry holder carefully into the re
mote control key.
26 .,.
Insert the mechanical key .
@ For the sake of the environment
Discharged batter ies m ust be disposed of us
ing methods that wi ll not harm the environ
ment. Do not dispose of them in ho usehold
trash.
(D Tips
The rep lacement battery must meet the same
spec ificat ions as the or iginal battery in the re
mote control key .
Unlocking/locking by remote control
Fig. 17 Remot e con tro l key: butt on programming
.,. To unlock the vehicle , pr ess the lil button
¢fig.17 .
.,. To lock the vehicle, press th e Iii button once .
.,. To open the luggage compartment lid, press
the ~ button.
.,. To trigger the alarm, press the red
!PAN IC! but·
ton . The vehicle horn and emergency flashers
turn on .
.,. To switch off the alarm, press the red
! PANIC I
button aga in .
If the vehicle is unlocked and none of the doors,
the rear lid or hood are opened within 45 sec
onds, the vehicle locks again automatically . T his
fea ture prevents the veh icle from being acc iden
ta lly left un locked over a long period of time .
The sett ings in the Infota inment system deter·
mine if the entire vehicle o r only the dr iver's door
i s un locked whe n un locking the veh icle
¢ page 28. .,.
Page 67 of 314
CD
CD
.... N
" N ...... 0 r--. V, co
-Do not inadvertently press the accelerator
pedal when the vehicle is stopped if a gear is
engaged. Otherwise the vehicle will start to
move immediately, even if the parking brake
is set . This could result in a crash .
- Do not press the accelerator pedal when
changing the selector lever position while
the vehicle is stationary and the engine is
running.
- Never leave your vehicle with the engine running while in gear.
If you must leave
your vehicle when the engine is running, set
the parking brake and move the selector lev
er to the P position .
- To decrease the risk of an accident, these
lector lever must be in the P position and
the parking brake must be set before open
ing the hood and working on a running en
gine. Always read and follow the applicable
warnings¢
page 235, Working in the en
gine compartment.
{[) Note
Never let the vehicle roll downhill with engine
off and the selector lever in the
N position,
because this could damage the automatic
transmission and catalytic converter.
@ Tips
- Drive select: sporty shifting characteristics
can be selected using the
Dynamic driving
mode. The Infotainment display shows 5 as
the selector lever position instead of D.
- If you accidentally select N while driving,
take your foot off the accelerator pedal im
mediately and wait for the engine to slow
down to idle before selecting Dor 5 .
- If there is a power failure, the selector lever
will not move out of the P position. The
emergency release can be used if this hap
pens. Left-hand drive vehicles
q page 71.
Driving
Selector lever lock
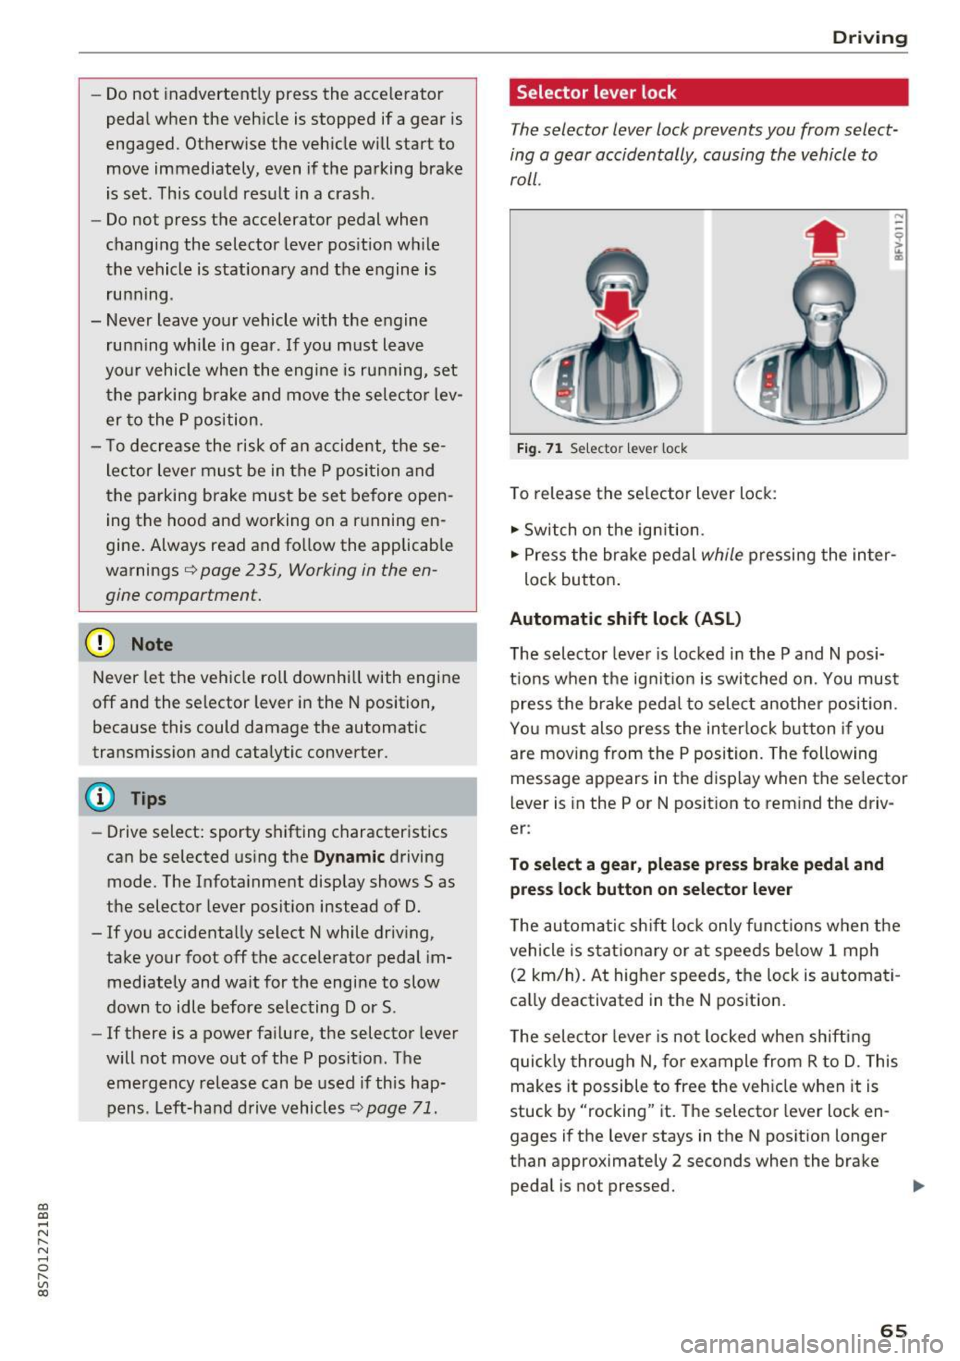
The selector lever lock prevents you from select
ing a gear accidentally, causing the vehicle to
roll.
Fig. 71 Selecto r lever lock
To release the selector lever lock:
.,. Switch on the ignition.
.,. Press the brake pedal
while pressing the inter-
lock button.
Automatic shift lock (ASL)
The selector lever is locked in the P and N posi
tions when the ignition is switched on. You must press the brake pedal to select another position.
You must also press the interlock button if you
are moving from the
P position. The following
message appears in the display when the selector
lever is in the P or
N position to remind the driv
er:
To select a gear, please press brake pedal and press lock button on selector lever
The automatic shift lock only functions when the
vehicle is stationary or at speeds below 1 mph
(2 km/h). At higher speeds, the lock is automati
cally deactivated in the N position.
The selector lever is not locked when shifting
quickly through N, for example from R to D. This
makes it possible to free the vehicle when it is
stuck by "rocking" it. The selector lever lock en
gages if the lever stays in the N position longer
than approximately 2 seconds when the brake
pedal is not pressed.
II>-
65
Page 69 of 314
co
co
.... N
" N .... 0
" "' c:o
Starting on a hill
"' Set the parking brake .
"'With the driving gear selected, press the accel
erator pedal carefully. The parking brake will
release automatically if your safety belt is fas
tened .
Under certain circumstances, such as driving in
the mountains, it may be useful to switch tempo
rarily to the manual shift program in order to
manually adjust the gears to the driving condi
tions ¢
page 68.
When parking on a level surface, simply place the
selector lever in the P position. On inclines, acti
vate the parking brake first and then move the selector lever to the P position ¢
page 62. This
prevents the locking mechanism from being
loaded too heavily and will make it easier to
move the selector lever out of the P position .
.8, WARNING
- The vehicle can roll even when the engine is
switched off.
- Unintended vehicle movement can lead to
serious injuries.
- Never leave your vehicle with the engine
running while in gear.
If you must leave
your vehicle when the engine is running, set
the parking brake and move the selector lev
er to the P position.
- Power is still transferred to the wheels
when the engine is running at idle. To pre
vent the vehicle from "creeping", you must keep your foot on the brake when the en
gine is running and the selector lever is in
the D, Sor R position or "tiptronic" mode is
selected.
- Do not inadvertently press the accelerator
pedal when the vehicle is stationary. Other
wise the vehicle will start to move immedi ately, even if the parking brake is set. This
could result in a crash.
- Do not press the accelerator pedal when
changing the selector lever position while
the vehicle is stationary and the engine is running .
Driving
-Never engage the R or P selector level posi
tions while driving. It could cause a crash.
- Before driving down a steep slope, reduce
your speed and shift into a lower gear with "ti ptronic".
- Do not ride the brakes or press the brake
pedal too often or too long when driving
downhill. Constant braking causes the brakes to overheat and substantially re
duces braking performance, increases brak
ing distance or causes complete failure of
the brake system.
- If you must stop on an incline, always hold
the vehicle in place with the foot brake or
parking brake to prevent it from rolling
back .
- Never hold the vehicle on an incline with a
slipping clutch. The clutch opens automati
cally when it becomes too hot from the
overload. The
mJ indicator light turns on
and a message appears ¢
page 70 when
the clutch is overloaded.
- If the engine must run while you are work
ing in the engine compartment with the
hood open, make sure a gear is not engag
ed. The selector lever must be firmly in the
P position and locked in place and the park
ing brake must be set ¢
page 235. Other
wise, the vehicle could begin moving when
increasing the engine speed, even with the
parking brake set .
(!) Note
- When stopping on an incline, do not try to
hold the vehicle in place by pressing the ac
celerator pedal while a driving gear is se
lected. This can cause the automatic trans
mission to overheat and can damage it. Set
the parking brake or press the brake pedal
to prevent the vehicle from rolling.
- Allowing the vehicle to roll when the engine
is stopped and the selector lever is in the N
position will damage the automatic trans
mission because it is not lubricated under
those circumstances.
67
Page 207 of 314
CD
CD
.... N
" N ...... 0 r--. V, co
front three-point safety belts with pretensioners
and load limiters to help reduce the risk of in jury
in a wide range of accident and crash situations .
Be sure to read the important information about
safety and heed the WARNINGS in this chapter.
Dep loyment of the Advanced Airbag System and
the act ivat ion of the safety belt pretensioners de
pend on the deceleration measured by the crash
sensors and registered by the electronic control
un it . Crash severity depends on speed and decel
eration as wel l as the mass and stiffness of the
vehicle or object invo lved in the c rash .
On the passenger side, regardless of safety belt
use, the front passenger frontal airbag w ill be
turned off if the electrical capac itance measured
by the capacit ive passenger detection system on
the fro nt passenger seat is less than the amount
p rogr ammed in the elect ronic control uni t. The
front passenger fronta l airbag will also be turned
off if the capacitance measured by the system for
the front passenger seat equals that of an infant
of about one year of age in one of the child seats
that was used to certify the Advanced Airbag Sys
tem under Federal Motor Veh icle Safety Standard
208. The
PA SSENGER AIR BAG OFF,;; light
comes on and stays on to tell you when the front
Advanced Airbag System on the passenger side has been turned off
Q page 208.
& WARNING
T o red uce the risk of i njury when an a irbag in
flates, a lways wear safety belts proper ly .
- If you are unrestrained, lean ing fo rw ar d, s it
t ing s idew ays or o ut o f pos ition in any way,
your risk of i nju ry is much higher.
- Yo u w ill also re ceive se rious injur ies and
cou ld even be killed if you are up aga inst the
airbag or too close to it when it inf lates -
even with an Advanced Airbag
~page 196.
Airb ag sys tem
More important things to know about front
airbags
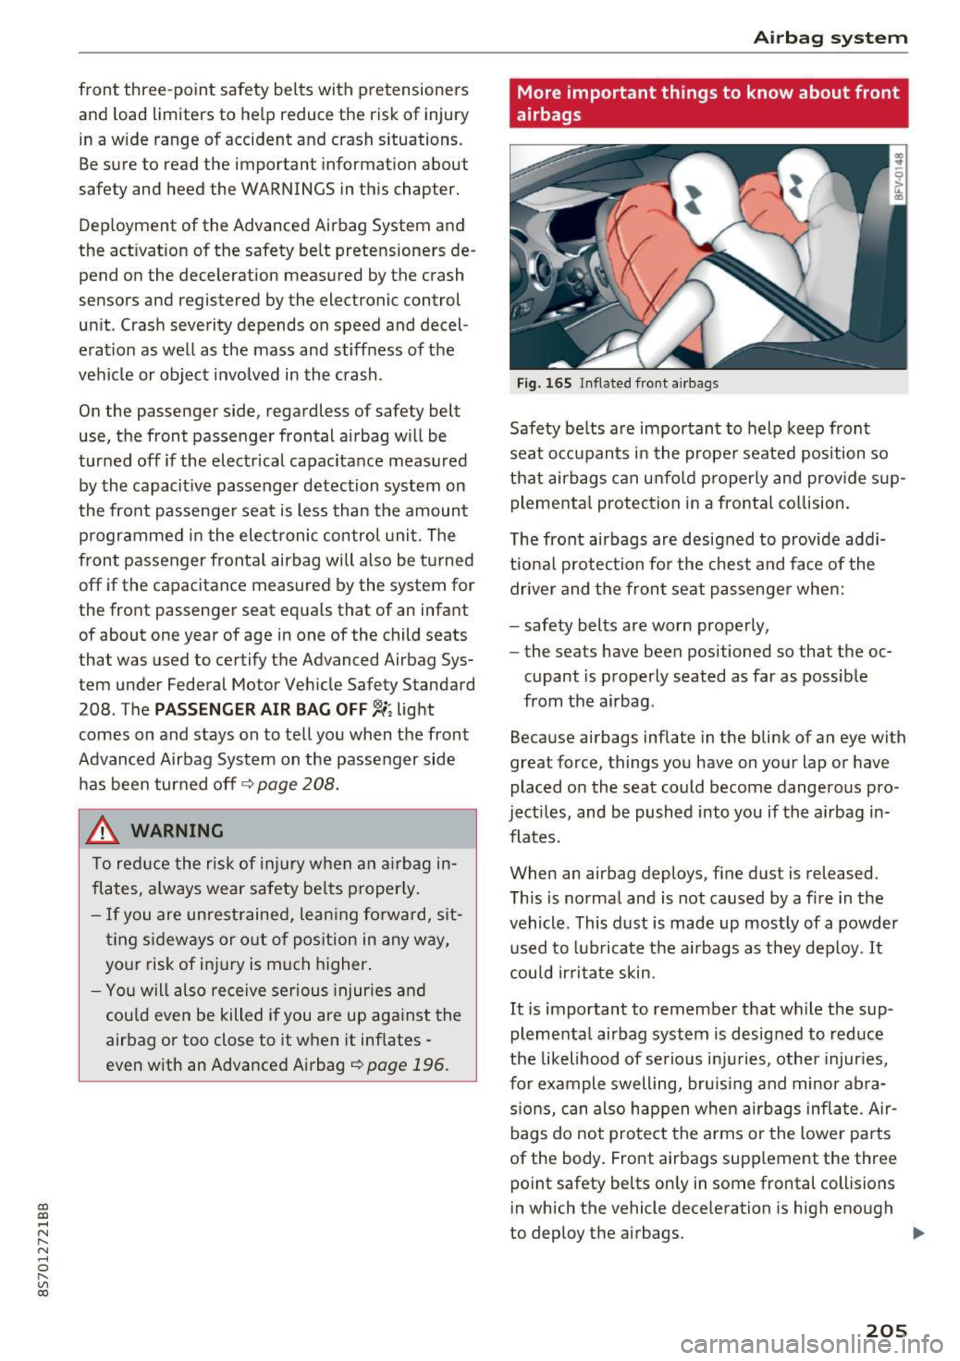
Fig. 165 I nflated fro nt ai rbags
Safety be lts are impo rtan t to he lp keep front
seat oc cupants in the proper seated position so
that airbags can unfo ld properly and prov ide s up
pleme nta l protection i n a fronta l co llision .
The front airbags are designed to provide addi
t iona l protec tion fo r the chest and face of the
driver and the fron t seat passenger whe n:
- safety belts are worn properly,
- the seats have been positioned so that t he oc-
cupant is properly seated as far as possible
from the a irbag .
Because airbags inflate in the blink of an eye with
great force, things you have on your lap or have
placed on the seat could become dangerous pro
ject iles, and be pushed into you if the a irbag i n
flates.
When an airbag deploys, fine dust is released.
This is norma l and is not caused by a fire in the
vehicle . This dust is made up mostly of a powder
used to lub rica te t he a irbags as they deploy.
It
cou ld irritate skin.
It is important to remembe r that wh ile the sup
pleme nta l airbag system is designed to reduce
the likelihood of serio us inj uries, othe r injuries,
for example swelling, bru is ing and minor abra
s ions, can also happen when a irbags inflate . Air
bags do not prote ct the arms or the lower p arts
of the body. Front airbags supp lement the three
point safety belts on ly in some frontal collisions
in which the vehicle dece leration is high enough
to deploy the airbags.
II>
205
Page 238 of 314
Checking and Filling
-Engine exhaust, some of its constituents,
and certain vehicle components contain or
emit chemicals known to the State of Cali
fornia to cause cancer and birth defects and reproduct ive harm . In addition, certain flu
ids contained in veh icles and certain prod
ucts of compo nent wear con tain or emit
c hemicals known to the State of Califo rnia
to cause cance r and birth defects or other
reproductive harm .
- Battery posts, termina ls and re lated acces
sories contain lead and lead compounds, chemicals known to the State of California
to cause cancer and reproductive harms .
Wash hands after handling .
(D Note
When fil lin g flu ids, be sure not to mix the flu
ids up . Otherwise severe ma lfunctions and en
gine damage w ill occur .
@ For the sake of the environment
You shou ld regularly chec k the ground under
your vehicle in order to detect leaks qu ickly. If
there are visible spots from oil or other fluids,
bring your vehicle to an authorized Aud i deal
er or author ized Audi Se rvice Facility to be
checked.
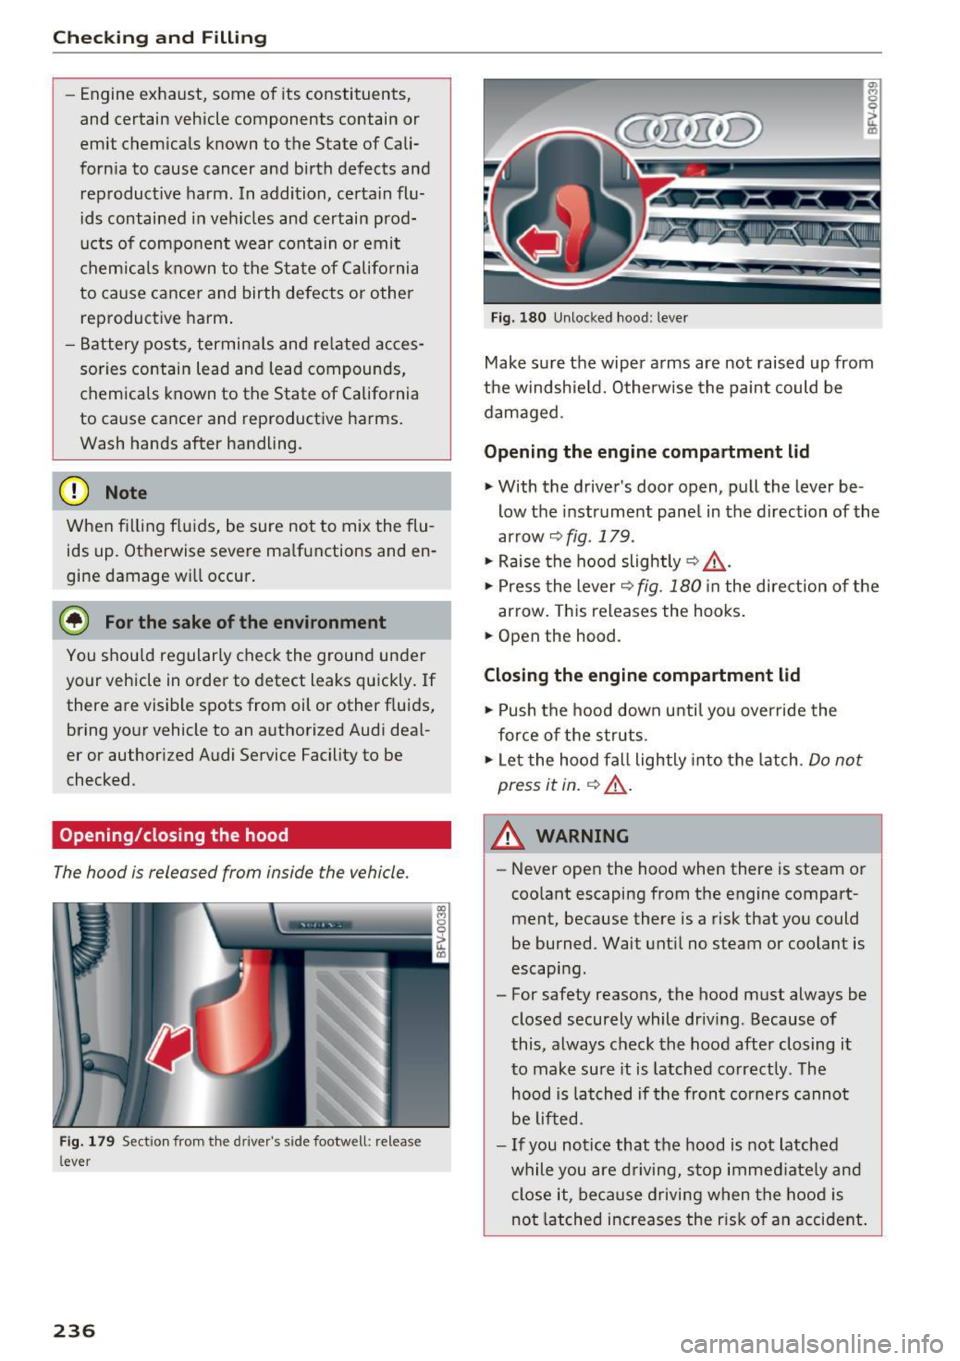
Opening/closing the hood
The hood is released from inside the vehicle.
F ig . 17 9 Sect io n from the driv er' s s ide footwell: relea se
l ever
236
~ 0 0
ct Q)
F ig. 1 80 Unlocked hood : lev er
Make su re the wiper a rms are not raised up from
the windshie ld. Otherw ise the paint could be
dam aged .
Opening the engine compartment lid
"With the driver's door open, pull the lever be -
low the instrument pane l in the direction of the
arrow
9 fig . 179 .
" Raise the hood slightly 9 ,& .
"Press the lever 9 fig. 180 in the direct ion of the
arrow . This releases the hooks .
" Open the hood.
Closing the engine compartment lid
" Push the hood down u ntil yo u over ride the
for ce of the s truts .
" Let the hood fa ll lightly into the latch .
Do not
press it in.
~ ,& .
&_ WARNING
-Never open the hood when there is steam o r
coo lant escaping from the engine compart
ment, because there is a risk that yo u could
be burned. Wait unt il no steam or coolant is
escaping.
- For safety reasons, the hood must always be
closed securely while dr iving . Because of
this, always chec k the hood after closing i t
to make sure it is latched correctly . T he
hood is lat ched if the front corners canno t
be lifted .
- If you notice that the hood is not latched
while you are d riving, s top imme diate ly and
close it, because d riving when the hood is
no t latched increases the r isk o f an accident .
Page 303 of 314
co
co
.... N
" N .... 0
" "' c:o
Luggage compartment lid . . . . . . . . . . . . . . 30
Power top . . . . . . . . . . . . . . . . . . . . . . . . . . . 37
E me rgency release
Selec to r l eve r . . . . . . . . . . . . . . . . . . . . . . . . 7 1
Emergency starting . . . . . . . . . . . . . . . . . . . 284
Emi ssions data . . . . . . . . . . . . . . . . . . . . . . . 290
E nergy management . . . . . . . . . . . . . . . . . . . 93
Eng ine
Coolant . . . . . . . . . . . . . . . . . . . . . . . . . . . . 241
Starting . . . . . . . . . . . . . . . . . . . . . . . . . 59, 60
Starting w it h jumper cables . . . . . . . . . . . 284
Stopping . . . . . . . . . . . . . . . . . . . . . . . . . . . . 60
Eng ine compartment
Opening/closing the hood . . . . . . . . . . . . . 236
Ove rview. ...................... ... . 237
Safety preca utions . . . . . . . . . . . . . . . . . . . 235
Engine control (indicato r light) . . . . . . . . . . . 1 5
E ng ine oi l . . . . . . . . . . . . . . . . . . . . . . . . . . . 237
Adding .. .. .. ............... .. ..... 239
Changing . . . . . . . . . . . . . . . . . . . . . . . . . . 24 0
Checking the oil leve l . . . . . . . . . . . . . . . . . 239
Consumption . . . . . . . . . . . . . . . . . . . . . . . 239
Dipstick . . . . . . . . . . . . . . . . . . . . . . . . . . . . 239
Indicator light . . . . . . . . . . . . . . . . . . . . . . . 12
O il consumption . . . . . . . . . . . . . . . . . . . . . 238
Specification and viscos ity . . . . . . . . . . . . . 23 7
Engine speed limitatio n (indicator light) . . . 15
E nter ing characters/numbers (speller) . . . . 102
Enter ing letters (speller) . . . . . . . . . . . . . . . 102
E nvironment
Proper disposal of d rained engine oil . . . . 24 0
Unleaded gaso line . . . . . . . . . . . . . . . . . . . 231
E xte rio r ligh ting . . . . . . . . . . . . . . . . . . . . . . . 39
Exterior mirrors
Adj ust ing . . . . . . . . . . . . . . . . . . . . . . . . . . . 42
D immi ng . ..... ........... ...... ... .. 43
H eating .. .. .. ............... .. .... .. 42
External voice operat ion................ 113
F
Factory default settings (MMI)
176
F ader (so und) . . . . . . . . . . . . . . . . . . . . . . . . 179
Fasten ing
Booster seats . . . . . . . . . . . . . . . . . . . . . . . 225
Conve rtible c hild safety sea ts . . . . . . . . . . 224
Infant seats . . . . . . . . . . . . . . . . . . . . . . . . 223
Index
Fast forwarding/rewind ing (a udio/video
file) . . . . . . . . . . . . . . . . . . . . . . . . . . . . . . . . 164
F ast forwarding (audio/video file) . . . . . . . . 164
Fast route . . . . . . . . . . . . . . . . . . . . . . . . . . . 143
F avorites
Media . . . . . . . . . . . . . . . . . . . . . . . . . . . . . 166
Nav igation . . . . . . . . . . . . . . . . . . . . . . . . . 138
Telephone.......................... 119
F ile fo rmats (media d rives) . . . . . . . . . . . . . 169
Floor mats . . . . . . . . . . . . . . . . . . . . . . . . . . . 18S
F og lights/rea r fog light(s) . . . . . . . . . . . . . . 39
Foot peda ls . . . . . . . . . . . . . . . . . . . . . . . . . . 184
Footwell lighting . . . . . . . . . . . . . . . . . . . . . . 41
F or the sake o f the env ironmen t
Environmentally -friend ly driving . . . . . . . . 57
Fueling . . . . . . . . . . . . . . . . . . . . . . . . . . . . 233
Leaks. .... .... ................... .. 236
F ree text search . . . . . . . . . . . . . . . . . . . . . . 104
Medi a . . . . . . . . . . . . . . . . . . . . . . . . . . . . . 166
Navigation . . . . . . . . . . . . . . . . . . . . . . . . . 137
Radio . . . . . . . . . . . . . . . . . . . . . . . . . . . . . 152
Telephone. . . . . . . . . . . . . . . . . . . . . . . . . . 122
F ree ze p ro tection
Coo lant . . . . . . . . . . . . . . . . . . . . . . . . . . . . 2 41
Freq uency band .... .............. 151, 153
F ront airbags
Description . . . . . . . . . . . . . . . . . . . . . . . . . 200
How they work . . . . . . . . . . . . . . . . . . . . . . 205
F rontal collisions and the laws o f physics . . 190
Front seats Adjusting . . . . . . . . . . . . . . . . . . . . . . . . . . 183
Child restra ints in the fron t sea t . . . . . . . . 1 97
also refer to Seats . . . . . . . . . . . . . . . . . . . . 47
Fuel . . . . . . . . . . . . . . . . . . . . . . . . . . . . . . . . 231
Additives . . . . . . . . . . . . . . . . . . . . . . . . . . . 231
B lended gaso line ... .. ... ..... .... ... 231
Cons umption . . . . . . . . . . . . . . . . . . . . . . . 290
C urren t fu el consum ption . . . . . . . . . . . . . . 23
E thano l . . . . . . . . . . . . . . . . . . . . . . . . . . . . 2 31
F uel fi lle r nec k . . . . . . . . . . . . . . . . . . . . . . 232
Fuel gauge . . . . . . . . . . . . . . . . . . . . . . . . . . . 8
Fuel tank capacity . . . . . . . . . . . . . . . . . . . 291
Gasoline addit ives . . . . . . . . . . . . . . . . . . . 232
Indicator light . . . . . . . . . . . . . . . . . . . . . . . 16
Sav ing fuel . . . . . . . . . . . . . . . . . . . . . . . 57, 80
301