ECO mode AUDI TT ROADSTER 2018 Owners Manual
[x] Cancel search | Manufacturer: AUDI, Model Year: 2018, Model line: TT ROADSTER, Model: AUDI TT ROADSTER 2018Pages: 310, PDF Size: 46.95 MB
Page 32 of 310
Opening and clo sin g
Correcting power w indow malfunctions
You can reactivate the one-touch up/down func
tion if it malfunctions .
.. Pull the power window sw itch up unt il the win
dow is completely raised.
.. Release the sw itch and pull it up again for at
least one second .
Garage door opener
(Homelink)
Description
Applies to: vehicles with garage door opener (Homelink)
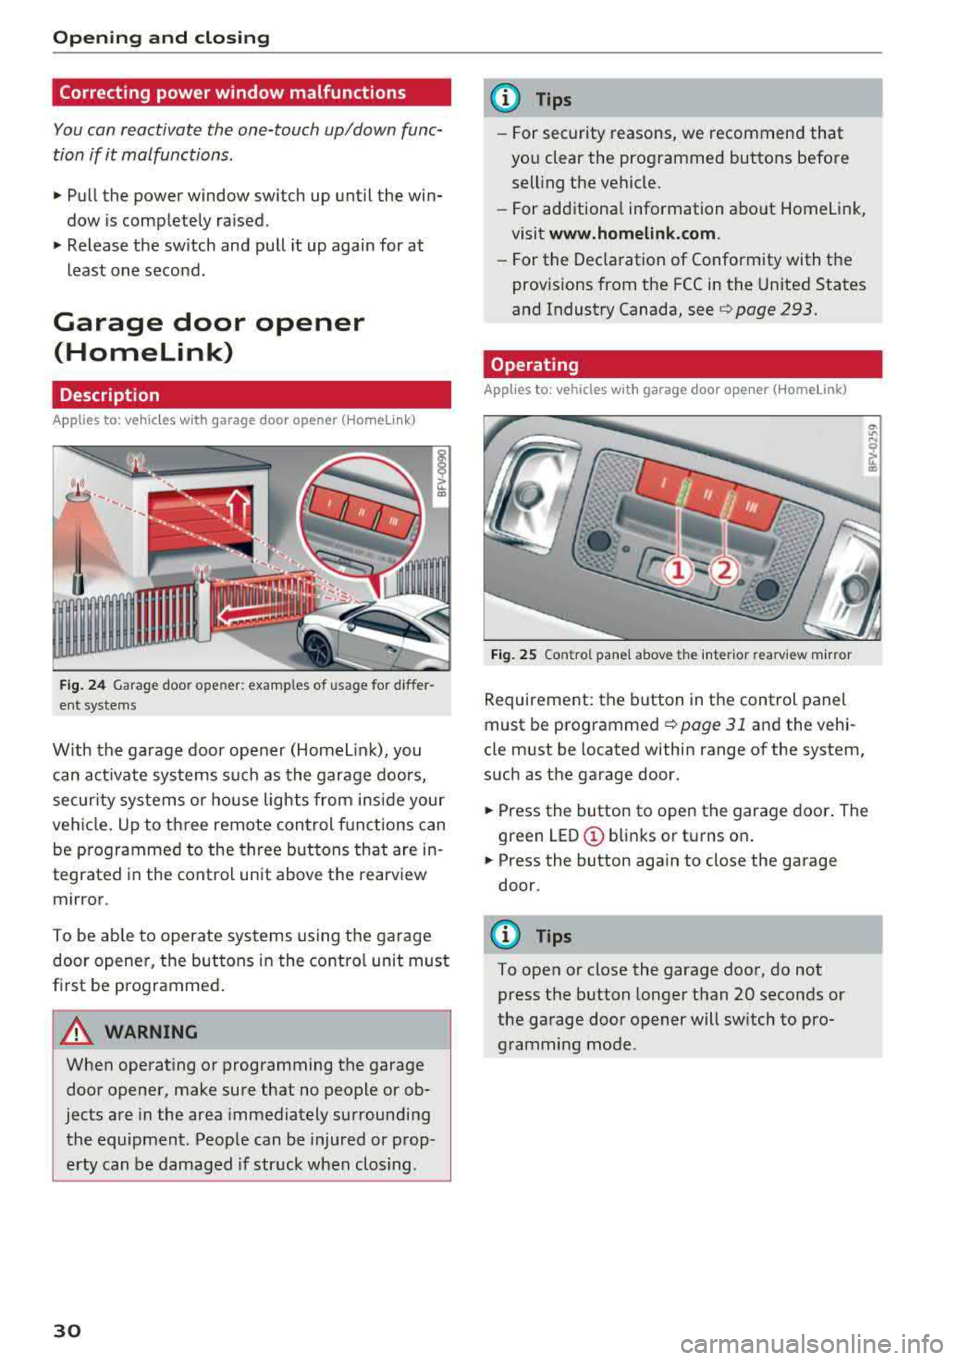
Fig . 24 Garage door ope ner: exa mples o f usage fo r differ
ent systems
W ith the garage door opener (Homelin k), you
can activate systems such as the garage doors,
secur ity systems o r house lights from inside your
veh icle. Up to three remote control f unctions can
be programmed to the three buttons that are in
tegrated in the control unit above the rearview
mirror .
To be ab le to operate systems using the garage
door opener, the buttons in the contro l unit must
first be programmed .
A WARNING
When operating or programming the garage
door opener, make sure that no people or ob
jects are in the area immediately surrounding
the equipment . Peop le can be injured or prop
erty can be damaged if str uck when closing .
30
@ Tips
-For security rea.sons, we recommend that
you clear the programmed buttons before
selling the vehicle .
- For additiona l information about Homelink,
visit
www.homeli nk.com .
-For the Dec laration of Conformity with the
prov isions from the FCC in the United States
and Industry Canada, see
c;, page 293.
Operating
App lies to : vehicles with garage door opener (Homelink)
F ig . 25 Co ntro l pane l above t he inter ior rea rv iew mirror
Requirement: the button in the control panel
must be
programmed ¢ page 31 and the vehi
cle must be located within range of the system,
such as the garage door.
.. Press the button to open the garage door . The
green
LED © blinks or turns on .
.. Press the button aga in to close the garage
door.
(D Tips
To open or close the garage door, do not
press the button longer than 20 seconds or
the garage door opener will switch to pro gramming mode.
Page 33 of 310
Cl co ..... N ,....
N ...... 0 ,....
Vl co
Programming the transmitter
Applies to: vehicles with garage door opener (Homelink)
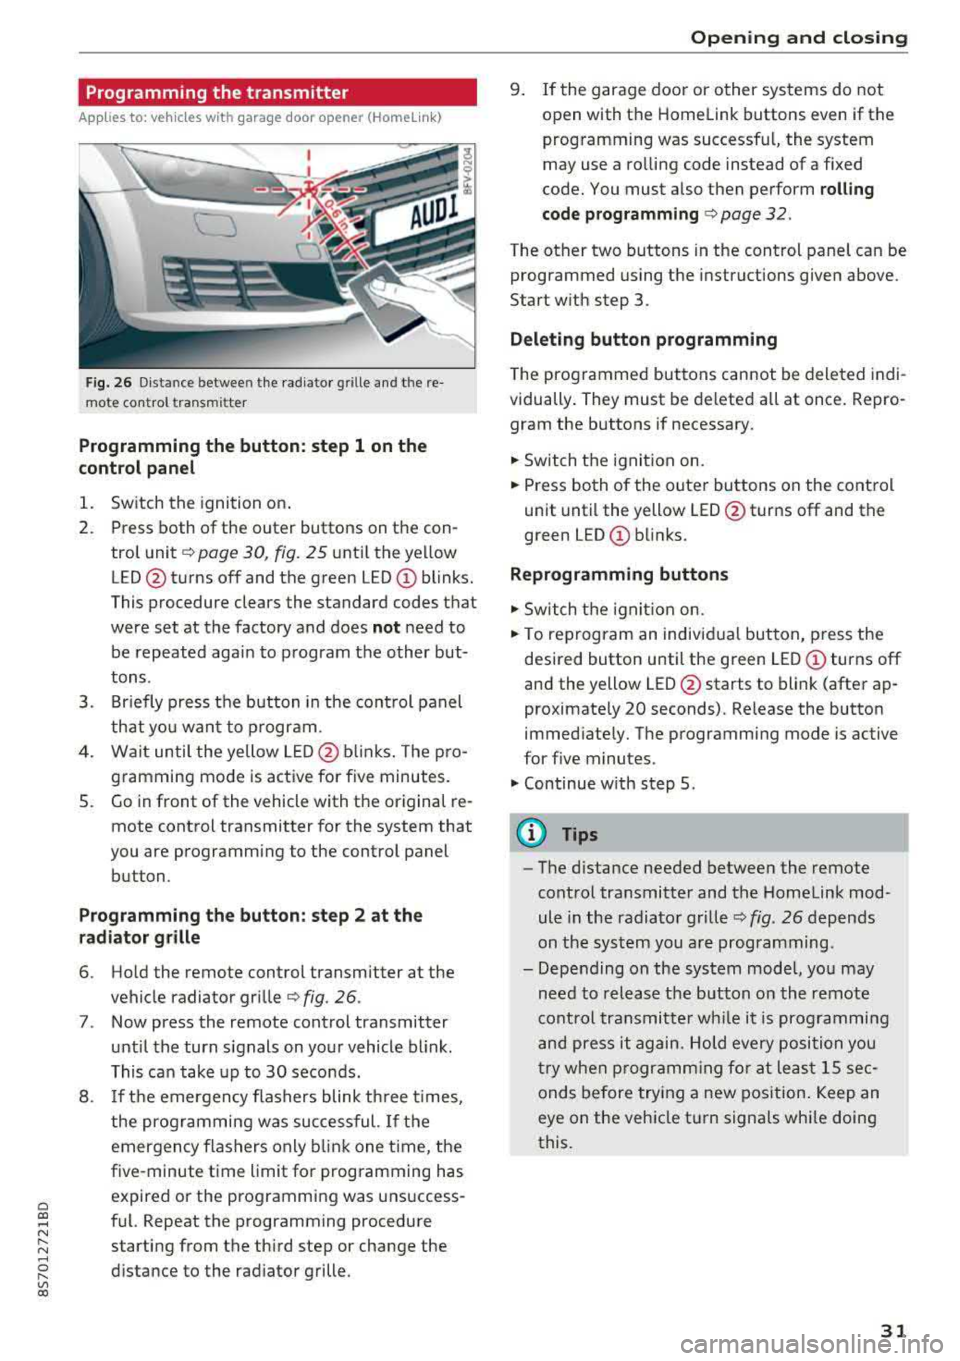
Fig. 26 Distance betwee n the radia tor grille and t he re
mote control transmitter
Programming the button: step 1 on the
control panel
1. Switch the ignition on.
2. Press both of the outer buttons on the con
trol unit
c:, page 30, fig. 25 unt il the yellow
LED @turns off and the green
LED (!) blinks.
This procedure clears the standard codes that
were set at the factory and does
not need to
be repeated again to program the other but
tons .
3. Briefly press the button in the control panel
that you want to program.
4. Wait until the yellow LED@blinks. The pro
gramming mode is active for five minutes.
S. Go in front of the vehicle with the original re
mote control transmitter for the system that
you are programming to the control panel button.
Programming the button: step 2 at the
radiator grille
6. Hold the remote control transmitter at the
vehicle radiator grille
¢fig . 26 .
7. Now press the remote control transmitter
until the turn signals on your vehicle blink.
This can take up to 30 seconds.
8 . If the emergency flashers blink three times,
the programming was successful. If the
emergency flashers only blink one time, the
five-minute time limit for programming has
expired or the programming was unsuccess
ful. Repeat the programming procedure
starting from the third step or change the
distance to the radiator grille .
Opening and closing
9. If the garage door or other systems do not
open with the Home link buttons even if the
programming was successful, the system
may use a ro lling code instead of a fixed
code. You must also then perform
rolling
code programming
c:, page 32 .
The other two buttons in the control panel can be
programmed using the instructions given above.
Start with step 3.
Deleting button programming
The programmed buttons cannot be deleted indi
vidually. They must be deleted all at once. Repro
gram the buttons if necessary.
"' Switch the ignit ion on.
"' Press both of the outer buttons on the control
unit until the yellow LED@turns off and the
green LED
0) blinks.
Reprogramming buttons
"' Switch the ignit ion on.
"'To reprogram an individual button, press the
desired button until the green LED
0) turns off
and the yellow LED@starts to blink (after ap
proximately 20 seconds). Release the button immediately. The programming mode is active
for f ive minutes.
"'Continue w ith step 5 .
(D Tips
-The d istance needed between the remote
control transmitter and the Homelink mod
ule in the radiator grille
c:, fig. 26 depends
on the system you are programming.
- Depending on the system model, you may need to release the button on the remote
cont rol transmitter while it is programming
and press it again. Hold every position you
try when programming for at least 15 sec
onds before trying a new position. Keep an
eye on the vehicle turn signals while doing
this.
31
Page 45 of 310
Cl 00 .-< N r-N .-< 0 r-Vl 00
Move the windshield wiper lever to the corre
sponding position:
@ -Windshield wipe rs off
(D -Interval mode . T o increase/decrease the w ip
er intervals, move the sw itch
@ to the left/rig ht.
I n vehicles with a ra in senso r*, the wipe rs turn o n
in the ra in once the vehicle speed exceeds ap
p roximate ly 2 mph (4 km/h). The h igher the sen
sitivity of the rain sensor* is set (switch @to the
right), the earlier the winds hield wipers react to
mo isture on the windshield. You can deact ivate
the ra in sensor mode* in the Infotainment sys
tem, which switches the intermittent mode on.
Select in the Infotainment system:
IMENU I but
ton>
V ehicle > left control button >Driv er a ssis
tance > Rain sensor > Off .
@-Slow wiping
@-Fast wiping
© -Sing le w ipe. If yo u hold t he leve r in th is posi
tion longer, the wipers sw itch from s low w iping
to fast wiping.
® -Clea n the wi ndshield . To e liminate water
d roplets, the windsh ield wipers pe rform one af
terwipe after several seconds wh ile driving in
temperatures above 39 ° F (4 °C). You can switc h
this function off by moving the lever to position
@ within 10 seconds of the afterwipe. The after
wipe function is reactivated the next t ime you
switch the ignition on.
C lean the headlights*. The headlight washer sys
tem* only functions when the lights are switched
on. The headlights are automat ically cleaned the
f irst time and every fifth t ime the lever is moved
to position
® ·
A WARNING
- T he ra in sensor* is o nly intended to ass ist
the d river. The dr ive r may st ill be responsi
ble fo r manua lly swit ching the wi pe rs on
based on v is ibility co ndi tions.
- T he w indshie ld ma y not be treated with wa
te r-repell ing winds hield coa ting age nts. Un
f avor ab le cond itions, s uch a s wetness, dar k
ness, and when the s un is low, can cause in
creased g lare, which increases the risk of an
-
Light s and Vision
accident. Wiper b lade chatter is also possi
b le.
- Properly functioning windshield wiper
b lades are required for a clear v iew and safe
driving¢ page 44, Replacing windshield
wiper blades.
@ Note
- If there is frost, make sure the windshield
w iper blades are not frozen to the wind
shield. Switching on the w indshield w ipers
when the blades are frozen to the wind shield can damage the w iper blades.
- The windshie ld w iper system must be
sw itched off (lever in posit io n 0) before us
ing a car wash. This prevents the w ipers
from switc hing on un intent io nally and caus
ing damage to the winds hield wiper system.
(D Tips
- T he windsh ie ld w ipers sw itch off when the
ign ition is switched off. You can activate the
w indshield w ipe rs after the ignition is
sw itched back on by mov ing the w indshield
w iper lever to a ny posi tion.
- Wor n or d irty w indshie ld w iper blades res ult
in st reaking. This can affect t he rain senso r*
function. Chec k your w indshie ld w iper
blades reg ularly.
- Th e washer fluid no zzles in the winds hield
washe r system are heated* at low tempera
t ur es when the ignition is on .
- Whe n stopping tempo rar ily, such as at a
traffic lig ht, the speed of the windshield
wipers automatica lly reduces by one level.
Cleaning windshield wiper blades
Clean the wiper b lades when you see w iper
streaks. C lean the wiper blades with a soft towel
and glass cleaner .
.,. Place the windshie ld wiper arms in the service
position
¢ page 44.
.,. Fold the windshie ld wiper arms away from the
w indshield .
.,,.
43
Page 47 of 310
Cl co .... N ,..._
N .... 0 ,..._
Vl co
(D Tips
To prevent inaccurate compass readings, do not bring any remote controls, e lectr ica l devi
ces or metallic objects near the mirror .
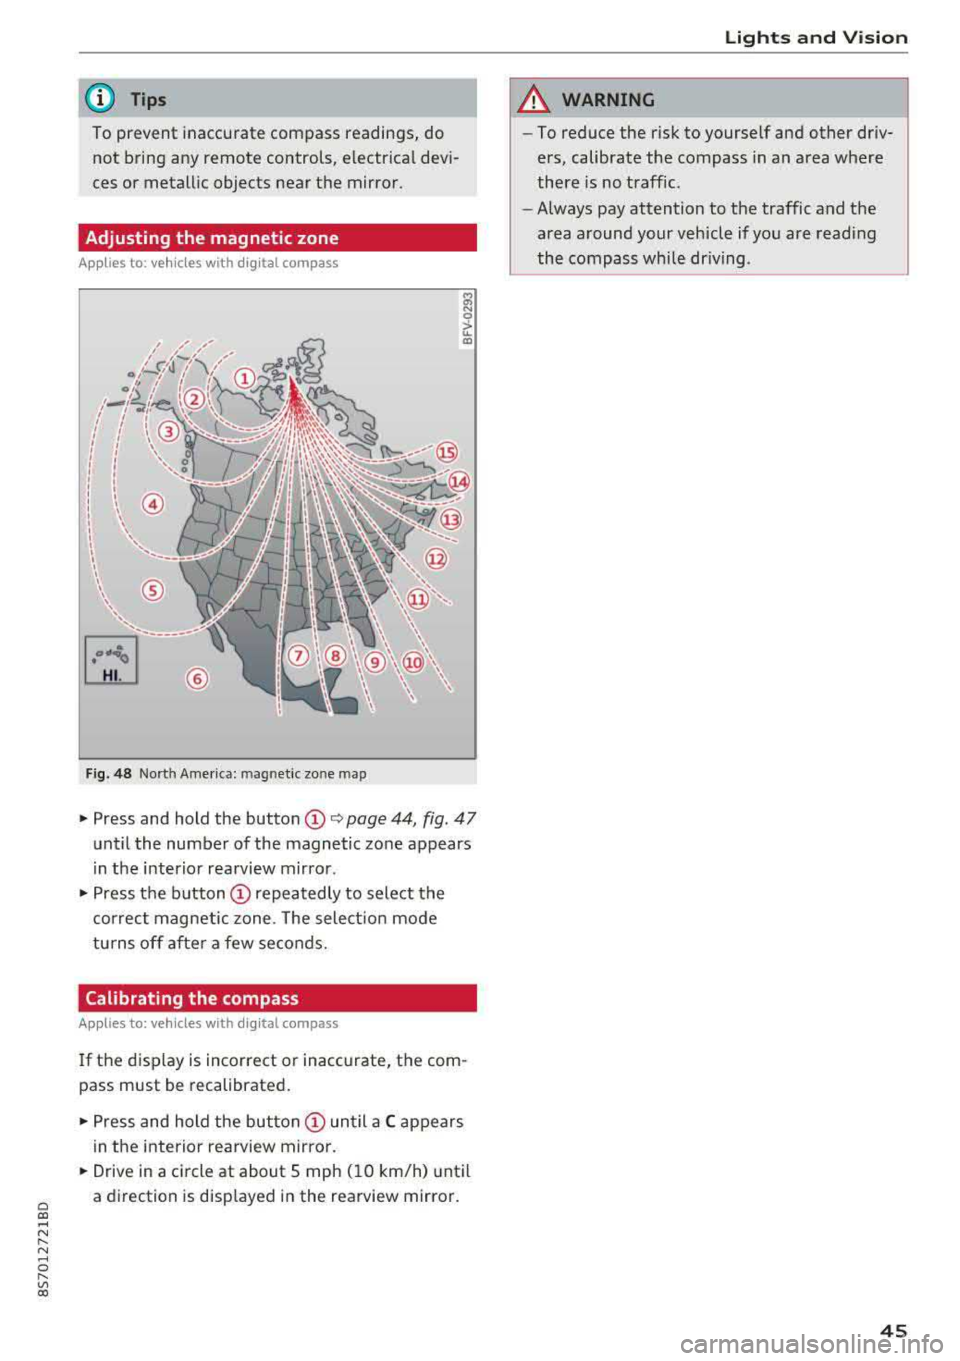
Adjusting the magnetic zone
Applies to: vehicles with digital compass
I
I I
' I
I I
®
' ' ' '
®
Fig. 48 Nort h Ame rica: mag netic zo ne map
~ N 0
> u. ID
• Press and hold the button (D Q page 44, fig . 47
until the number of the magnetic zone appears
in the interior rearview mirror .
• Press the button (D repeatedly to select the
correct magnetic zone . The select ion mode
turns off after a few seconds.
Calibrating the compass
Applies to: vehicles with digital compass
If the display is incorrect or inaccurate, the com
pass must be recalibrated.
• Press and hold the button (D until a C appears
in the interior rearview mirror .
.,. Drive in a circle at about 5 mph ( 10 km/h) until
a direction is displayed in the rearview mirror .
Lights and Vision
A WARNING
-To reduce the risk to yourself and other driv
ers, calibrate the compass in an area where
there is no traffic.
- Always pay attention to the traffic and the
area around your vehicle if you are reading
the compass while driving .
45
Page 54 of 310
Warm and cold
Automatic climate control system controls
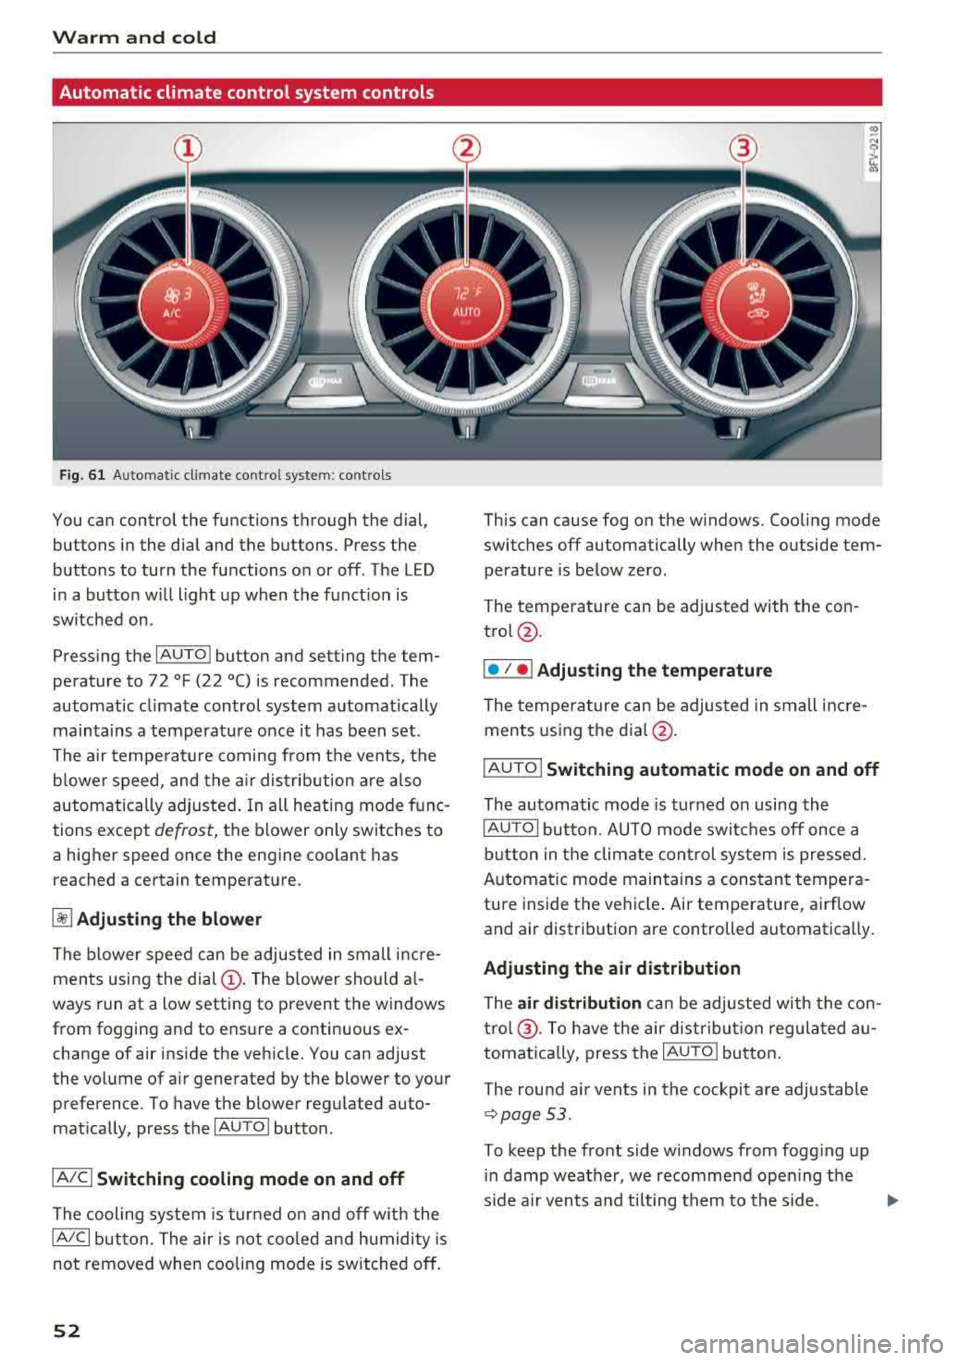
Fig. 6 1 Automatic climate co ntrol syste m: contro ls
You can control the functions through the dial,
buttons in the dial and the buttons . Press the
buttons to turn the functions on or off. The LED i n a button w ill light up when the funct ion is
sw itched on.
Pressing the
IAU TO ! button and setting the tem
pe rature to 72
°F (22 °() is recommended. The
automatic climate control system automatically
maintains a temperature once it has been set .
The a ir tempe rature coming from the vents, the
b lower speed, and the a ir dis tribution are a lso
automatically a djusted . In all heati ng mode func
tions except
defrost, the blower only switches to
a higher speed once the engine coolant has reached a certain temperat ure.
~ Adjusting the blower
The blower speed can be adjusted in small inc re
ments using the
dial (!). The b lower should a l
ways run at a low setting to prevent the windows
from fogging and to ensure a continuous ex
change of air ins ide the vehicle. You can adjust
the volume of a ir generated by the blower to your
preference. To have the blower regulated auto
mat ically, press the
IAU TOI butto n.
IA/C l Switching cooling mode on and off
The cooling system is turned on and off w ith the
IA/C l button. The air is not coo led and humidity is
not removed when cooling mode is switched off.
52
This can cause fog on the w indows. Coo ling mode
switches off automatically when the outside tem
perature is below zero.
The temperature can be adjusted with the con
trol@ .
I• I • I Adjusting th e tempe rature
The temperature can be adjusted in sm all incre
ments using the
d ia l@ .
IAUTO I Switching automatic mode on and off
The automatic mode is turned on using the
IAUTOI button. AUTO mode switches off once a
button in the climate cont rol system is pressed.
Automat ic mode maintains a constant tempera
ture inside the vehicle . Air temperature, airflow
and air distribution are controlled automatically.
Adjusting the air distribution
The air distribution can be adjusted w ith the con
tro l@ . To have the air d istribu tion regulated au
tomatica lly, press the
I AUTO l button.
The round a ir vents in the cockpit a re adjustable
¢ page 53.
To keep the front side windows from fogg ing up
i n damp weather, we recommend ope ning the
s ide a ir vents a nd tilting them to the side.
Page 55 of 310
Cl co .... N ,....
N ...... 0 ,....
Vl co
1- 1 Switching recirculation mode on and off
The recir cu lation mode can be turned o n m anu al
l y o r automat ically* .
- Swi tching m anual rec ircula tion mo de on an d
off: p res s
l'-"" I
- Automa tic* recircu lation mode: au to rec ircula
t io n needs to be ac tiva ted in the Info tainmen t
system. Selec t in the Infot ainme nt system :
I MENU I button > Vehicle > le ft co nt rol but ton
>Vehicle settings > Air conditioning > Auto re
circulation .
The ai r quality sensor that is de
s igned for diese l and gasoline exhaust auto
matically switches the recircu lation mode on or
off depend ing o n the level of pollutants in the
o utside air .
In recircu lation mode , the a ir inside the vehicle is
circu lated and fi ltered. This prevents the unfil
tered ai r outside the vehicle from entering the
ve hicle interio r. Switch ing recircu lation mode on
when dr iving t hrough a tunnel or when s itti ng i n
traffic is recomme nded
¢ .&, .
Recirculation mode is switched off by pressing
the
!""' I button o r I AUTO I or! MAX !.
I@ MAXI Switching defr ost on and off
The winds hield and side windows are defrosted
or cleared of condensation as q uickly as possib le.
The optimum amount of a ir flows main ly out of
the vents under the windshield. Rec irculat ion
mode switches off . The temperature is cont rolled
automatically .
The
IAU TOI button switches the defroster off .
I@ REAR I Switching the rear window defogger
on and off
I f the rear w indow defogger is activated when
the ignition is switched on, the battery manage
ment determines based on the batte ry charge if
it is possib le to turn on . Ot herwise , the rea r win
dow defogger functions with the engine running
and switches off automatically after approxi
mate ly 10
-2 0 mi nutes, depen ding on the out
side tem per ature.
To prevent t he rear w indow defogge r from
switch ing off automatically, press and ho ld the
I@ REARI b utton fo r more than two seconds. This
Warm and cold
remains stored up to approx imately 15 minutes
after t urning off the ignition.
A WARNING
-
You should not use the reci rculat ion mode for
an extended period since no fresh a ir is drawn
i n . With the air-conditioning switched off, the
windows can fog up, which increases the risk
of an acc ident .
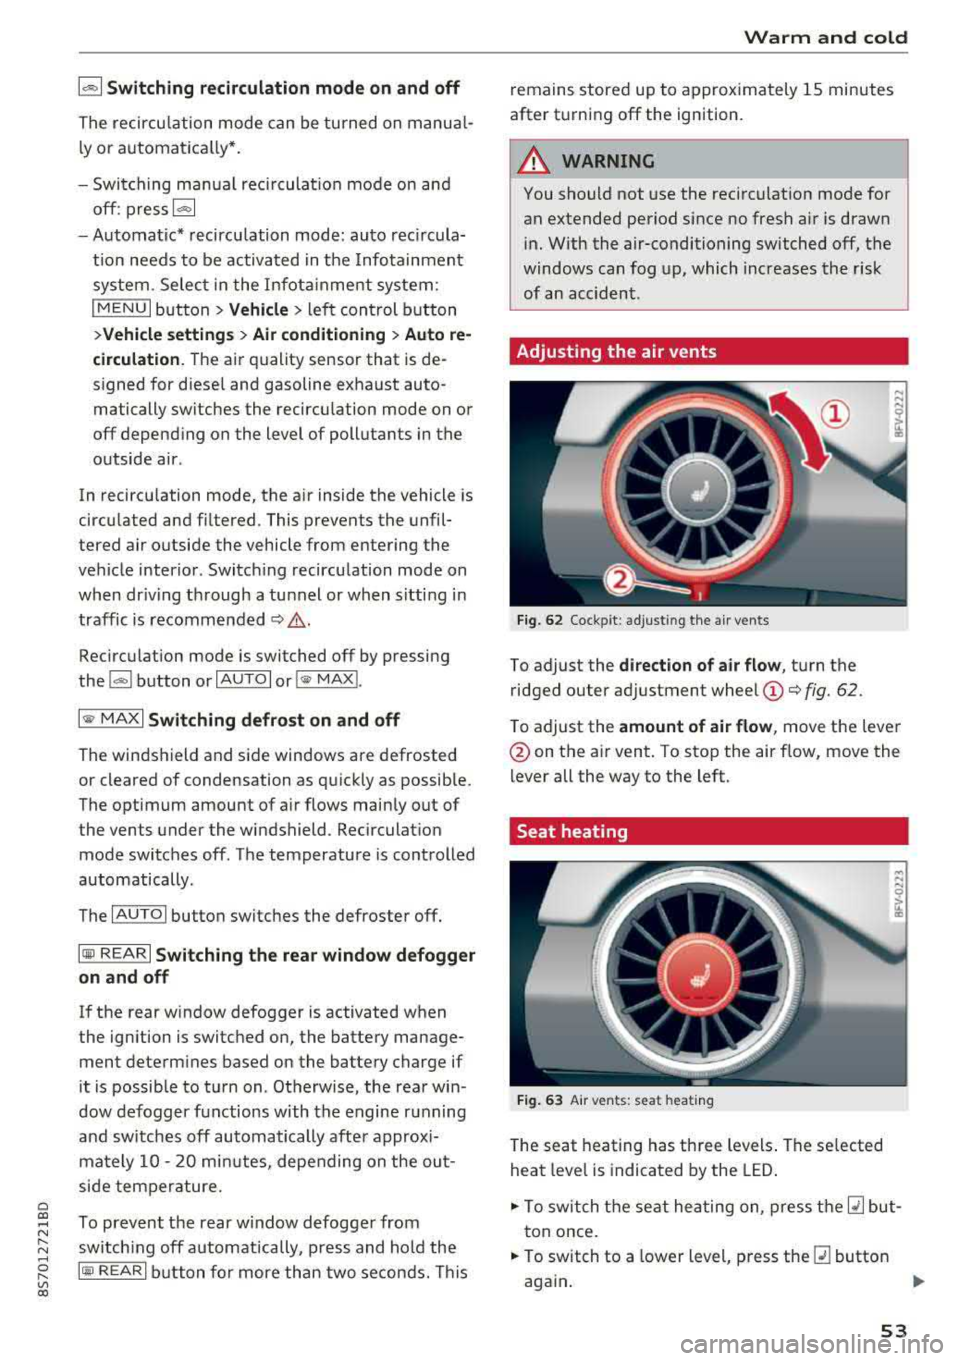
Adjusting the air vents
Fig. 62 Cock pit: a djust ing the a ir ven ts
To adjust the di rection of air flow, tu rn the
ridged outer ad justment wheel
(D ¢ fig. 62.
T o adjust the
amount of air flow , move the lever
@on the a ir vent . To stop the air flow, move the
lever all the way to the left.
Seat heating
Fig. 63 A ir ve nts: seat heat ing
T he seat heating has th ree levels . The se lected
heat leve l is indicat ed by the LED .
.,. To switch the seat he ating on, press t he Q] but
t on once.
.,. To switch to a lower level, p ress the Q] button
aga in .
""
53
Page 58 of 310
Drivin g
Driving
General information
Breaking in
A new vehicle must be broken in for the first 1,000 mi les (1,500 km). Do not dr ive at speeds
t hat will exceed 2/3 of the max imum pe rm itted
engine speed (RPM) for the first 600 miles
(1,000 km), and avoid fu ll acceleration during
this period . You may gradually start increasing
the RPM and the speed between 600 miles
(1,000 km) and 1,000 miles (1,500 km) .
During the first hours of use, the engine has a
higher internal friction than later on when all
moving parts have settled into place with each
other.
How the vehicle is driven d uring the first 1,000
miles (1,500 km) a lso affects the engine quality .
Drive at moderate engine speeds after the initial
break-in per iod, part icu larly when running a cold
eng ine . Th is will reduce eng ine wear and improve
the m ileage.
Do not drive at too
low of an engine speed (RPM).
Shift down if the engine stops running "smooth ly". Extremely high eng ine speeds are automati
cally reduced .
Reducing the risk of vehicle damage
@ Note
When driving on poo r roads, by cu rbs and on
s teep ramps, make su re t hat low-hang ing
compone nts such as the spo ile r and exha ust
system do not come into contact with these
or they could be damaged. This especially ap
plies to vehicles with low ground clearance
and veh icles that are heavily loaded.
Driving through water on roads
Note the following to reduce the r isk of vehicle
damage when driv ing through water, for example
on flooded roads :
- The water must not be any higher than the bot
tom of the vehicle body .
56
-Do not drive faster than walking speed .
A WARNING
After driving through water or m ud, the effec
tiveness of the brakes may be red uced due to
mo isture on the brake rotors and brake pads.
A few careful brake applications shou ld dry
off the brakes and restore the full braking ef
fect .
@ Note
Vehicle components such as the engine,
transmission, suspension or electr ica l system
can be severely damaged by driving through
water.
{D Tips
- Determine the depth before driving through
water.
- Do not stop the vehicle, drive in reverse or
switch t he engine off whe n driving through
water.
- Keep in mind that oncom ing vehicles may
create waves that raise the water level and
make it too deep fo r yo ur vehicle to drive
throug h safe ly.
- Avoid driv ing th rough salt water, because
this ca n cause cor rosion .
Economical and environmentally-friendly
driving
The amount o f fuel consumption, the environ
mental impact and the wear to the engine,
bra kes and tires depends mostly on your d riving
style. With an ant icipatory and economic driving
sty le, fuel consumpt ion can be reduced by ap
prox imately 10-15% . The follow ing t ips will help
you conserve the environment and your money at
t h e same time .
Anticipatory dri ving
A vehicle uses the most fuel when accelerating.
When you drive with anticipation, you do not
need to brake as often and so you acce lerate less .
When poss ible, let you r vehicle coast with a
gear
engag ed ,
for examp le, when you not ice that the
next t raff ic light is red.
Ill>
Page 65 of 310
Cl co .... N ,....
N ...... 0 ,....
Vl co
Automatic transmission
Introduction
Your vehicle is equipped with an electronically
controlled DSG transmiss ion called S tronic. Two
independent clutches transfer the power be
tween the engine and transmission . It allows the
vehicle to accelerate without a noticeab le inter
ruption in traction.
The transmission upshifts or downsh ifts auto
mat ica lly. The driving style continuously influen
ces the selection of the driving program.
When a
mod erat e d rivin g sty le is used, the
transmission selects the most economical d riving
mode. The transmiss ion upsh ifts at a lower RPM
and downshifts at a higher RPM to improve fuel
efficiency.
The transm ission switches to a spo rty mode after
a kick-down or when the driver uses a
s po rt y
d riv ing sty le
characterized by quick accelerator
pedal movements, heavy acce leration, frequent
changes in speed and traveling at the maximum
speed.
If desired, the driver can also select the gears
manually ( tipt roni c mod e).
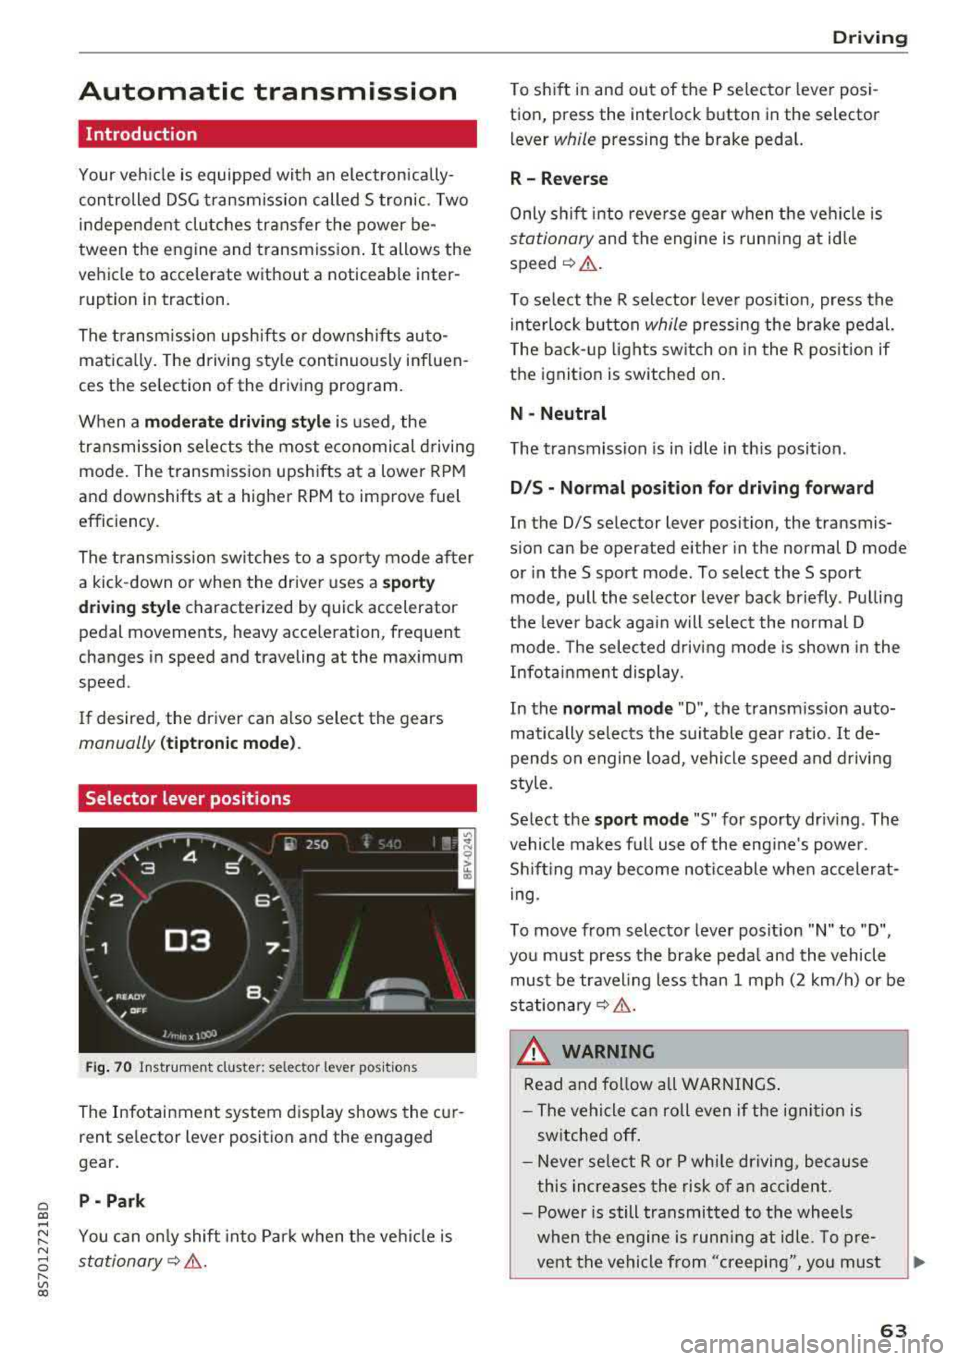
Selector lever positions
Fig . 70 Instrumel'lt cluster: selector lever positions
The Infotainment system d isplay shows the cur
rent se lector lever position and the engaged
gear.
P -Pa rk
You can on ly shift into Park when the vehi cle is
stationary¢ &.
Drivi ng
To shift in and out of the P selector lever posi
tion, press the inter lock button in the selector
lever
while pressing the brake pedal.
R- Reverse
Only s hift into reverse gear when the vehicle is
stationary and the engine is runn ing at id le
speed¢ &.
To se lect the R selector leve r pos ition, press the
in terlock button
while press ing the brake pedal.
T he back-up lights sw itch on in the R pos ition if
the ignition is switched on.
N -Neutral
The t ransmission is in idle in th is posit ion.
D IS -Norm al position fo r driving forward
In the D/S se lector lever position, the transmis
s ion can be operated either in the normal D mode
or in the S sport mode . To select the S sport
mode, pull the selector lever back briefly . Pulling
the leve r back aga in will selec t the normal D
mode. The selected d riving mode is shown in the
Infotainment display.
In the
n ormal mode "D", the transm ission auto
matically selects the suitable gear ratio.
It de
pends on engine load, vehicle speed and driving
sty le.
Select the
s p o rt mod e "S" for sporty driving . The
vehicle makes full use of the eng ine 's powe r.
Shifting may become noticeable whe n accelerat
i ng.
To move from selector lever pos ition
"N" to "D",
you m ust press the brake peda l and the vehicle
must be traveling less than 1 mph (2 km/h) or be
stationary¢ &.
A WARNING
Read and fo llow all WARNI NGS .
- The vehicle can roll even if the ignit ion is
switched off .
- Never se lect R or P whi le driving, because
this increases the risk of an accident .
- Power is still transmitted to the wheels
when the engine is runn ing at idle. To pre
vent the vehicle from "creeping", yo u must
63
Page 66 of 310
Driving
keep your foot on the brake in all selector
lever positions (except P) when the engine is
running. Otherwise, this increases the risk
of an accident.
- Do not inadvertently press the accelerator
pedal when the vehicle is stopped if a gear is
engaged. Otherwise the vehicle will start to
move immediately, even if the parking brake
is set . This could result in a crash.
- Do not press the accelerator pedal when changing the selector lever position while
the vehicle is stationary and the engine is
running.
- Never leave your vehicle with the engine
running while in gear.
If you must leave
your vehicle when the engine is running, set
the parking brake and move the selector lev
er to the "P" position.
- To decrease the risk of an accident, these
lector lever must be in the P position and
the parking brake must be set before open
ing the hood and working on a running en
gine. Always read and follow the applicable
warnings¢ page 233, Working in the en
gine compartment .
(D Note
Never let the vehicle roll downhill with engine
off and the selector lever in the "N" position,
because this could damage the automatic
transmission and catalytic converter .
{D) Tips
- Drive select: sporty shifting characteristics
can be selected using the
Dynamic driving
mode . The Infotainment display shows Sas
the selector lever position instead of D.
- If you accidentally select "N" while driving,
take your foot off the accelerator pedal im
mediately and wait for the engine to slow
down to idle before selecting "D" or "S".
- If there is a power failure, the selector lever
will not move out of the "P" position. The
emergency release can be used if this hap
pens. Left-hand drive
vehicles¢ page 69.
64
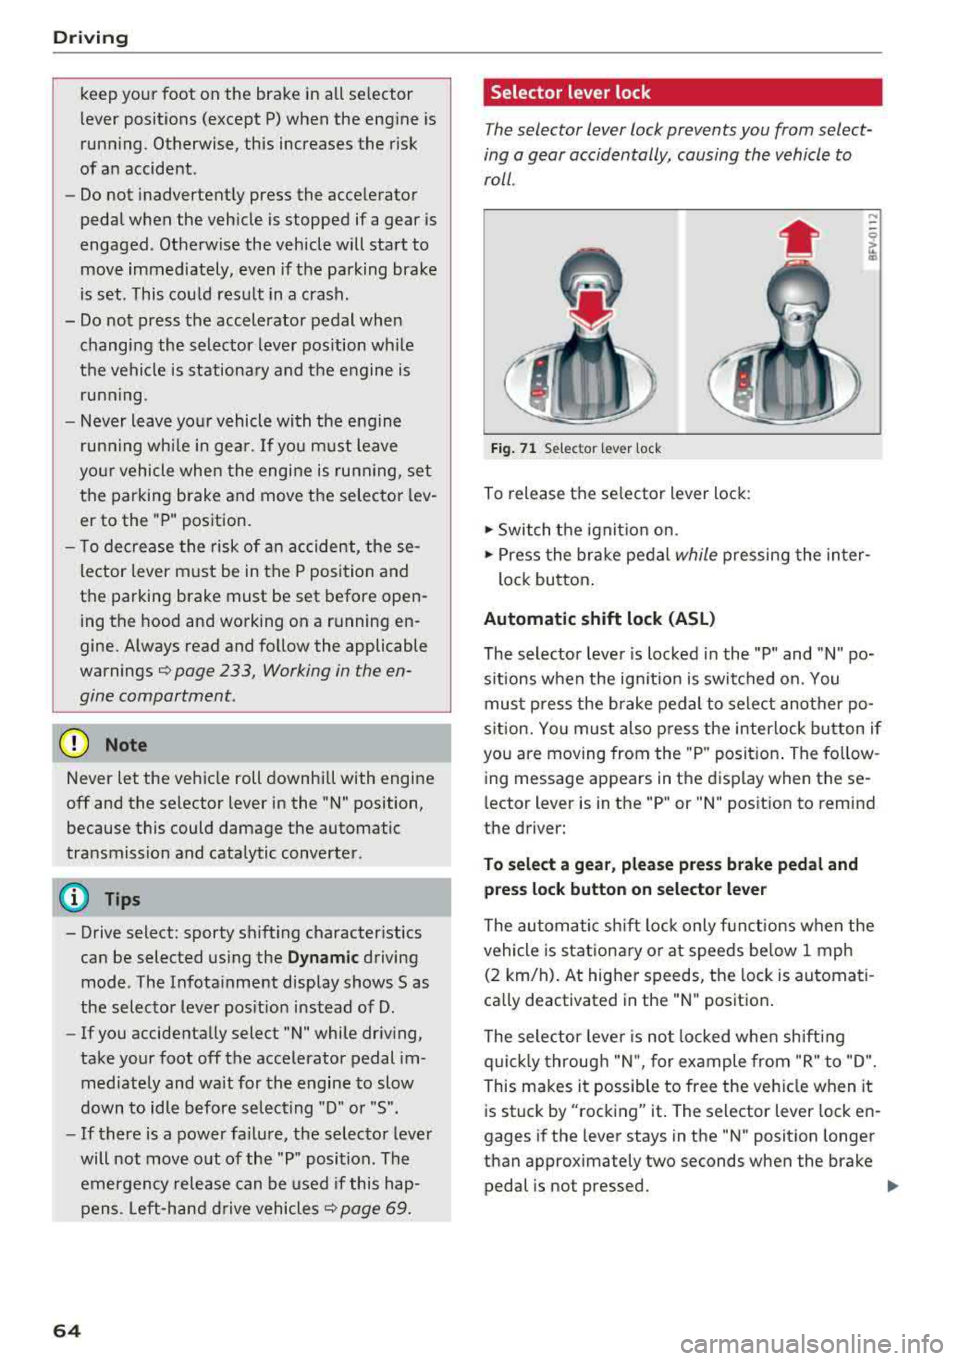
Selector lever lock
The selector lever lock prevents you from select
ing a gear accidentally, causing the vehicle to
roll .
Fig. 71 Selector lever lock
To release the selector lever lock:
.., Switch the ignition on.
....
.., Press the brake pedal while pressing the inter-
lock button.
Automatic shift lock (ASL)
The selector lever is locked in the "P" and "N" po
sitions when the ignition is switched on. You
must press the brake pedal to select another po
sition. You must also press the interlock button if
you are moving from the "P" position. The follow
ing message appears in the display when these
lector lever is in the "P" or
"N" position to remind
the driver:
To select a gear, please press brake pedal and press lock button on selector lever
The automatic shift lock only functions when the
vehicle is stationary or at speeds below 1 mph
(2 km/h). At higher speeds, the lock is automati
cally deactivated in the "N" position.
The selector lever is not locked when shifting
quickly through "N", for example from "R" to "D".
This makes it possible to free the vehicle when it
is stuck by "rocking" it. The selector lever lock en
gages if the lever stays in the "N" position longer
than approximately two seconds when the brake
pedal is not pressed.
Iii>
Page 68 of 310
Driving
When parking on a level surface, simply place the
selector lever in the "P" position. On inclines, ac
tivate the parking brake first and then move the
selector lever to the "P " position
c> page 61 . This
prevents the locking mechanism from being
loaded too heavily and will make it easier to
move the selector lever out of the "P" position.
A WARNING
- The vehicle can roll even when the engine is
switched off .
- Unintended vehicle movement can lead to
serious injuries.
- Never leave your vehicle with the engine
running while in gear . If you must leave
your vehicle when the engine is running, set
the parking brake and move the selector lev
er to the P position.
- Power is still transferred to the wheels
when the engine is running at idle. To pre
vent the vehicle from "creeping", you must
keep your foot on the brake when the en
gine is running and the selector lever is in
the "D" , "S" or "R" position or "tiptronic"
mode is selected.
- Do not inadvertently press the accelerator
pedal when the vehicle is stationary. Other
wise the vehicle will start to move immedi
ately, even if the parking brake is set . This
could result in a crash .
- Do not press the accelerator pedal when
changing the selector lever position while
the vehicle is stationary and the engine is
running .
- Never engage the R or P selector level posi
tions while driving. It could cause a crash .
- Before driving down a steep slope, reduce
your speed and shift into a lower gear with
"ti ptron i c" .
- Do not ride the brakes or press the brake
pedal too often or too long when driving
downhill. Constant braking causes the
brakes to overheat and substantially re
duces braking performance, increases brak
ing distance or causes complete failure of
the brake system.
- If you must stop on an incline, always hold
the vehicle in place with the foot brake or
66
parking brake to prevent it from rolling
back .
- Never hold the vehicle on an incline with a
slipping clutch. The clutch opens automati
cally when it becomes too hot from the
overload. The
ml indicator light turns on
and a message appears
c> page 68 when
the clutch is overloaded .
- If the engine must run while you are work
ing in the engine compartment with the
hood open, make sure a gear is not engag
ed. The selector lever must be firmly in the
P position and locked in place and the park
ing brake must be set
c> page 233. Other
wise, the vehicle could begin moving when
increasing the engine speed, even with the
parking brake set.
@ Note
- When stopping on an incline, do not try to
hold the vehicle in place by pressing the ac
celerator pedal while a driving gear is se
lected. This can cause the automatic trans
mission to overheat and can damage it. Set
the parking brake or press the brake pedal
to prevent the vehicle from rolling.
- Allowing the vehicle to roll when the engine
is stopped and the selector lever is in the N
position will damage the automatic trans
mission because it is not lubricated under
those circumstances.
- The transmission can overheat and be dam
aged under certain driving and traffic condi
tions such as frequent starts, creeping for a
long time , or stop-and-go traffic . When the
ml or. indicator light turns on, stop the
vehicle at the next opportunity and let the
transmission cool
c> page 68.
- Allowing the vehicle to roll when the engine
is stopped will damage the S tronic trans
mission because it is not lubricated
c> page 285, Towing with a tow truck .
(D Tips
For safety reasons, the parking brake is re
leased automatically only when the driver's
safety belt is fastened.