Button BMW 3 SERIES CONVERTIBLE 2013 E93 Owner's Guide
[x] Cancel search | Manufacturer: BMW, Model Year: 2013, Model line: 3 SERIES CONVERTIBLE, Model: BMW 3 SERIES CONVERTIBLE 2013 E93Pages: 311, PDF Size: 7.05 MB
Page 46 of 311
41
Opening and closing
Controls
Unlocking the trunk lid separately
Press the button on the ou
tside of the trunk lid.
This corresponds to pressing the button.
If the vehicle detects that a remote
control has been accide ntally left inside
the locked vehicle's trunk after the trunk lid is
closed, the lid will reopen. The hazard warning
flashers flash and a signal sounds. <
Switching on radio readiness
Pressing the Start/Stop button switches on
radio readiness.
Do not depress the brake or the clutch; other-
wise, the engine will start immediately.
Starting the engine
The engine can be started or the ignition can be
switched on when a remote control is inside the
vehicle. It is not necessa ry to insert a remote
control into the ignition lock, refer to page 62.
Switching off the engine in cars with
automatic transmission
The engine can only be switched off when the
selector lever is in po sition P, refer to page 64.
To switch the engine off when the selector lever
is in position N, the remote control must be in
the ignition lock.
Malfunction
Local radio waves can in terfere with the func-
tion of Comfort Access, for example when a
mobile phone is in the immediate vicinity of the
remote control or by when a mobile phone is
being charged in the vehicle.
If this happens, open or close the vehicle via the
buttons on the remote co ntrol or using the inte-
grated key. To start the engine afterward, insert
the remote control into the ignition lock.
Warning lamps
The warning lamp in the instrument
cluster lights up when you attempt to
start the engine: the engine cannot
be started. The remote co ntrol is not inside the
vehicle or is malfunctioning. Take the remote contro
l with you inside the
vehicle or have it checked. If necessary, insert
another remote control in to the ignition lock.
The warning lamp in the instrument
cluster lights up wh ile the engine is
running: the remote control is no
longer inside the vehicle. After the engine is
switched off, the engine can only be restarted
within approx. 10 seconds.
The indicator lamp in the instrument
cluster lights up and a message
appears on the Control Display:
replace the battery in the remote control.
Replacing the battery
The remote control for Comfort Access con-
tains a battery that will need to be replaced from
time to time.
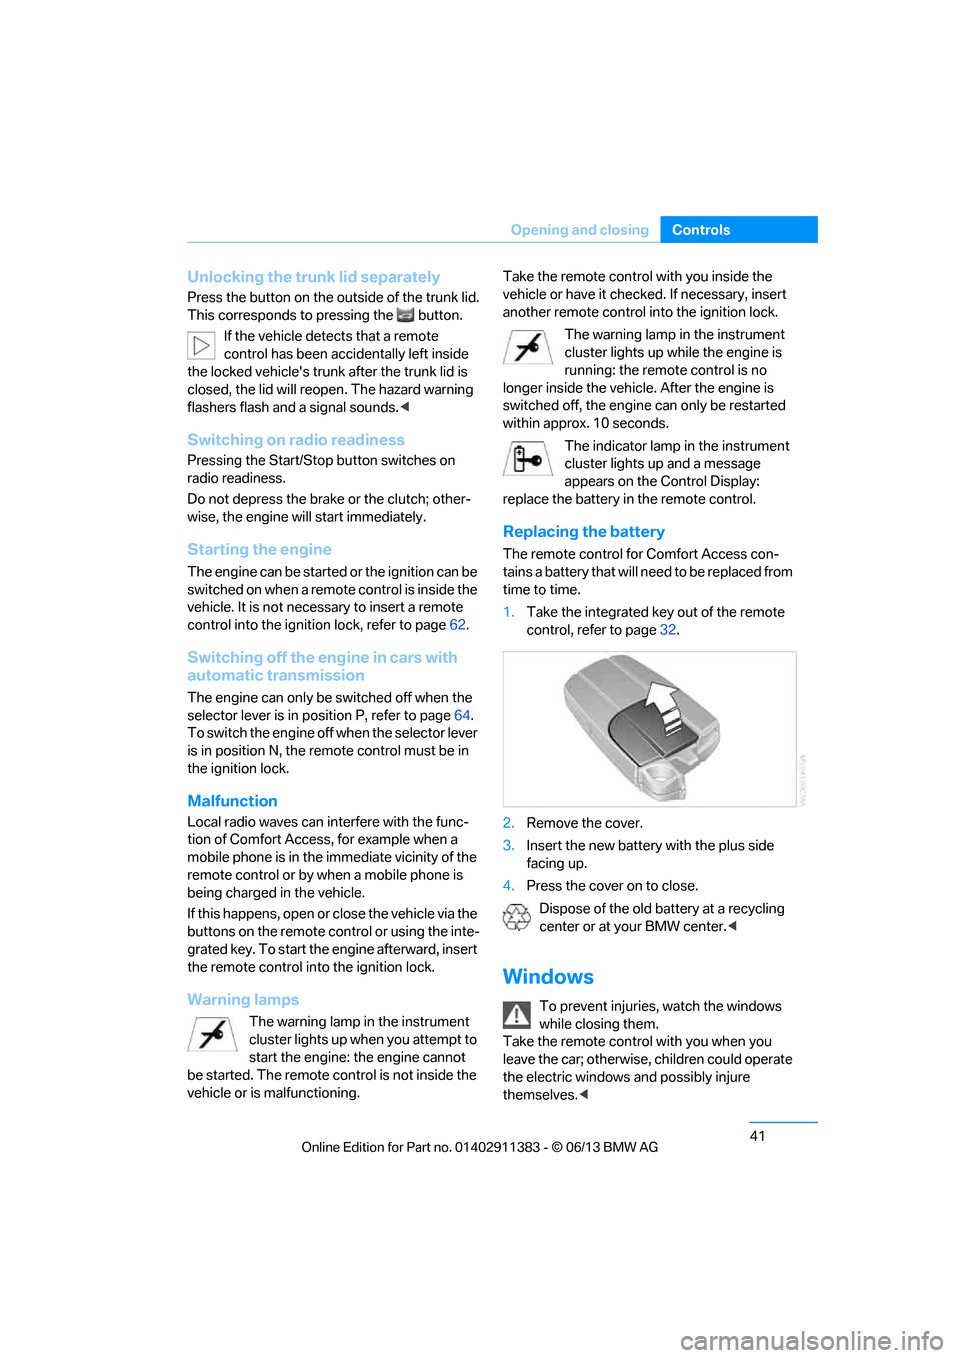
1. Take the integrated ke y out of the remote
control, refer to page 32.
2. Remove the cover.
3. Insert the new battery with the plus side
facing up.
4. Press the cover on to close.
Dispose of the old battery at a recycling
center or at your BMW center. <
Windows
To prevent injuries, watch the windows
while closing them.
Take the remote contro l with you when you
leave the car; otherwise, children could operate
the electric windows and possibly injure
themselves. <
00320051004F004C00510048000300280047004C0057004C005200510003
Page 50 of 311
45
Opening and closing
Controls
Before moving the ha
rdtop, make sure
that there are no objects on or next to the
trunk partition, the storage compartment on the
left side of the trunk is closed, and the maximum
loading height in th e trunk has not been
exceeded; otherwise, damage may occur. <
Opening and closing
When the vehicle is stationary and at radio
readiness or beyond, refer to page62:
If possible, conserve the battery by only
operating the retractable hardtop when
the engine is running.
Before closing the retractable hardtop, remove
all foreign objects from the windshield frame as
these could prevent the hardtop from closing
properly. <
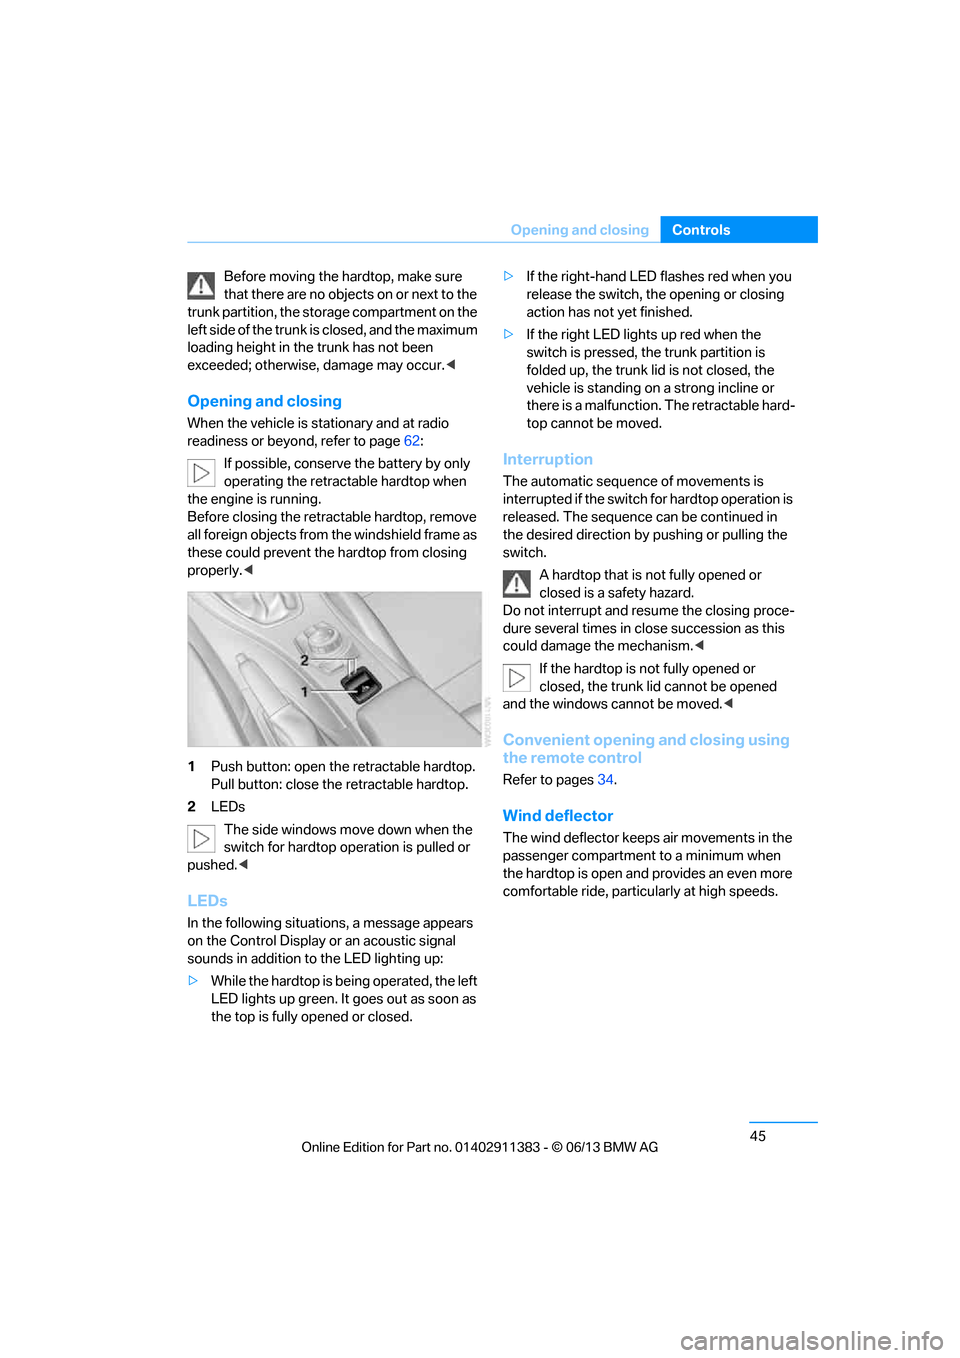
1 Push button: open th e retractable hardtop.
Pull button: close the retractable hardtop.
2 LEDs
The side windows move down when the
switch for hardtop operation is pulled or
pushed. <
LEDs
In the following situations, a message appears
on the Control Display or an acoustic signal
sounds in addition to the LED lighting up:
>While the hardtop is be ing operated, the left
LED lights up green. It goes out as soon as
the top is fully op ened or closed. >
If the right-hand LED flashes red when you
release the switch, the opening or closing
action has not yet finished.
> If the right LED lights up red when the
switch is pressed, the trunk partition is
folded up, the trunk lid is not closed, the
vehicle is standing on a strong incline or
there is a malfunction. The retractable hard-
top cannot be moved.
Interruption
The automatic sequence of movements is
interrupted if the switch for hardtop operation is
released. The sequence can be continued in
the desired direction by pushing or pulling the
switch.
A hardtop that is not fully opened or
closed is a safety hazard.
Do not interrupt and resume the closing proce-
dure several times in close succession as this
could damage the mechanism. <
If the hardtop is not fully opened or
closed, the trunk lid cannot be opened
and the windows cannot be moved. <
Convenient opening and closing using
the remote control
Refer to pages34.
Wind deflector
The wind deflector keeps air movements in the
passenger compartment to a minimum when
the hardtop is open and provides an even more
comfortable ride, particularly at high speeds.
00320051004F004C00510048000300280047004C0057004C005200510003
Page 56 of 311
51
Adjustments
Controls
Head restraints
Correctly adjusted head restraint
A correctly adjusted head
restraint reduces the
risk of neck injury in the event of an accident.
Correctly adjust the he ad restraints of all
occupied seats; otherwise, there is an
increased risk of inju ry in an accident.<
Height
Adjust the head restraint so that its center is
approximately at ear level.
Distance
Adjust the distance so that the head restraint is
as close as possible to the back of the head.
Front active head restraints
In a rear collision of a sufficient strength, the
active head restraint re duces the distance to
the head.
Do not use seat or head restraint covers
that could impair the function of the active
head restraint.
Do not hang any items, e.g. clothes hangers,
directly on the head re straints. Attach only
BMW approved accessories to the seat or head
restraint.
Otherwise, the protective function of the active
head restraint will not be ensured and its full
potential in reducing the risk of injury in the
event of a rear collision may not be realized.
In the event of faults, immobilization, or after the
active head restraints have been triggered,
have the testing, repair, or disassembly per-
f o r m e d o n l y b y y o u r B M W c e n t e r o r a w o r k s h o p
that has the required explosives licenses.
Unprofessional attempts to work on the system
could lead to failure in an emergency or to
undesired airbag activation, either of which
could result in personal injury.<
For technical reasons, the head restraint
cannot be removed.<
Coupe: front seats
Height adjustment
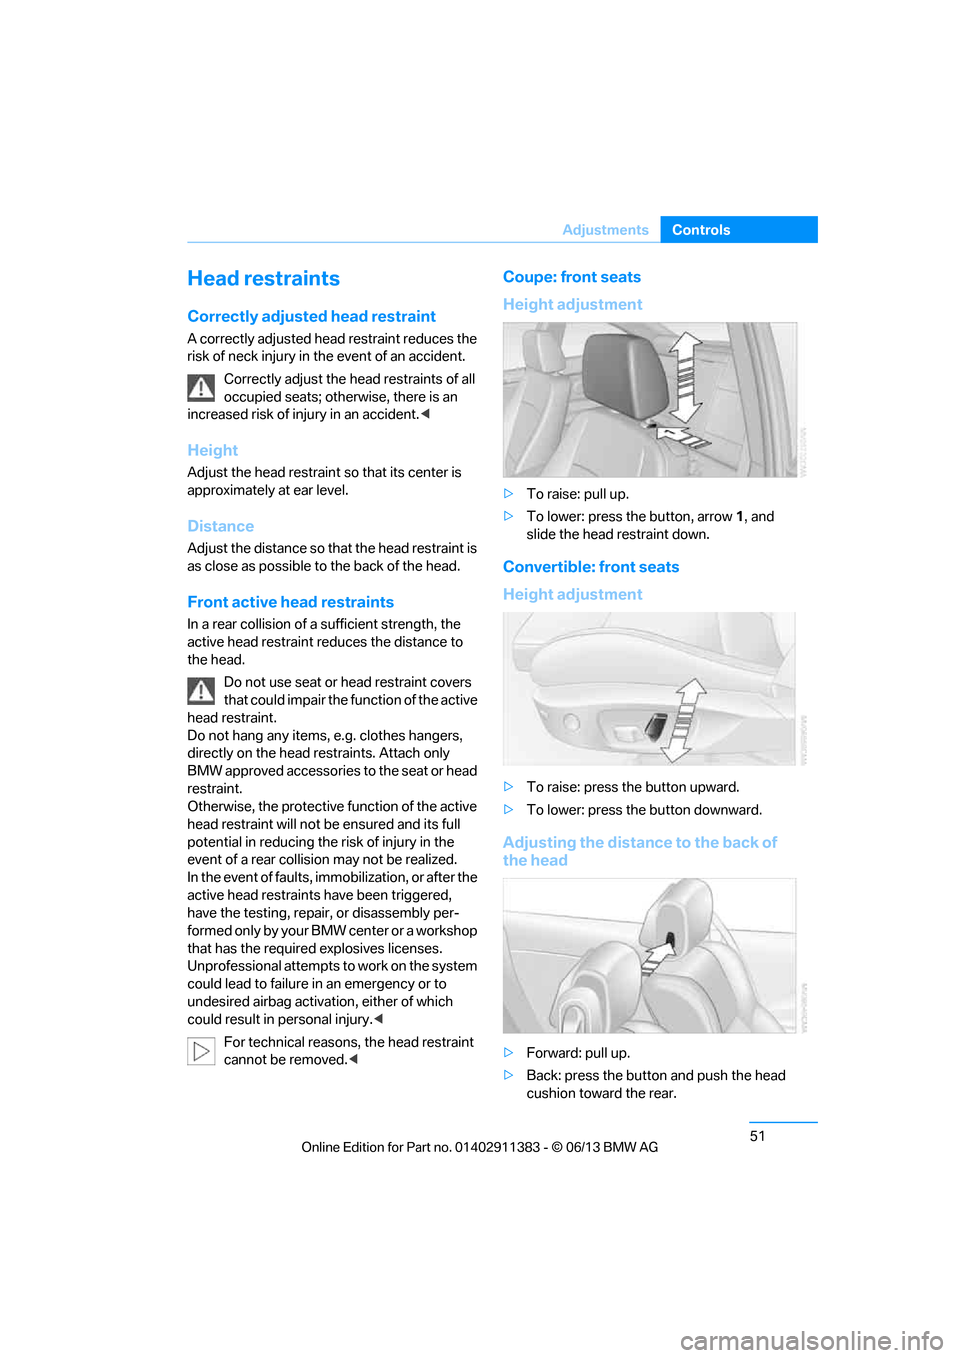
> To raise: pull up.
> To lower: press the button, arrow 1, and
slide the head restraint down.
Convertible: front seats
Height adjustment
> To raise: press the button upward.
> To lower: press th e button downward.
Adjusting the distance to the back of
the head
>Forward: pull up.
> Back: press the button and push the head
cushion toward the rear.
00320051004F004C00510048000300280047004C0057004C005200510003
Page 57 of 311
52
ControlsAdjustments
Do not insert objects behind the head
cushion; otherwise, the head restraint
may not function properly. <
Coupe: rear seats
Height adjustment
>To raise: pull up.
> To lower: press the button, arrow 1, and
slide the head restraint down.
Removing
Only remove a head rest raint if no one will be
sitting on the seat in question.
1. Pull up as far as it will go.
2. Press the button, arrow 1, tilt the rear seat
backrest slightly forward and pull the head
restraint all the way out.
Entering the rear seats
Coupe: seat with manual longitudinal
adjustment
Easy entry
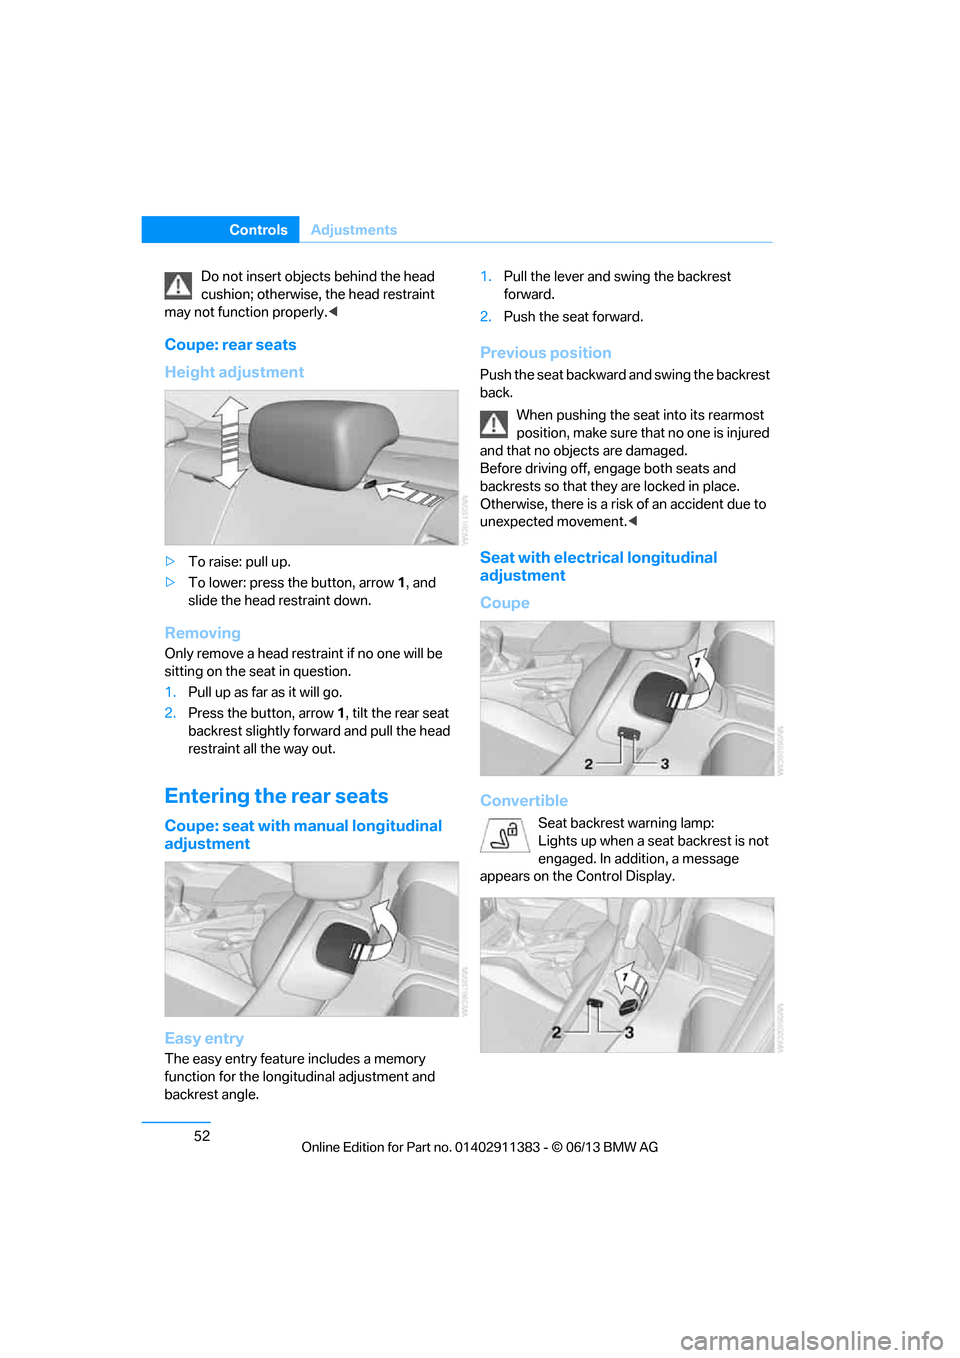
The easy entry feature includes a memory
function for the longitudinal adjustment and
backrest angle. 1.
Pull the lever and swing the backrest
forward.
2. Push the seat forward.
Previous position
Push the seat backward and swing the backrest
back.
When pushing the seat into its rearmost
position, make sure that no one is injured
and that no objects are damaged.
Before driving off, en gage both seats and
backrests so that they are locked in place.
Otherwise, there is a risk of an accident due to
unexpected movement. <
Seat with electrical longitudinal
adjustment
Coupe
Convertible
Seat backrest warning lamp:
Lights up when a seat backrest is not
engaged. In addition, a message
appears on the Control Display.
00320051004F004C00510048000300280047004C0057004C005200510003
Page 58 of 311
53
Adjustments
Controls
Easy entry
The easy entry feature includes a memory
function for the longitudinal adjustment and
backrest angle.
1.
Pull lever 1 and swing the backrest forward.
2. Press the front end 2 of the switch until the
seat has moved into the desired position.
Previous position
Press the rear end 3 of the switch until the seat
automatically stops in its previous position, and
fold the backrest back. If you release the switch
before the previous seat position is reached,
the seat will stop at its current position.
When sliding the seat backward, make
sure no one is injure d and no objects are
damaged.
Before driving off, engage both seats and
backrests so that they are locked in place.
Otherwise, there is a risk of an accident due to
unexpected movement. <
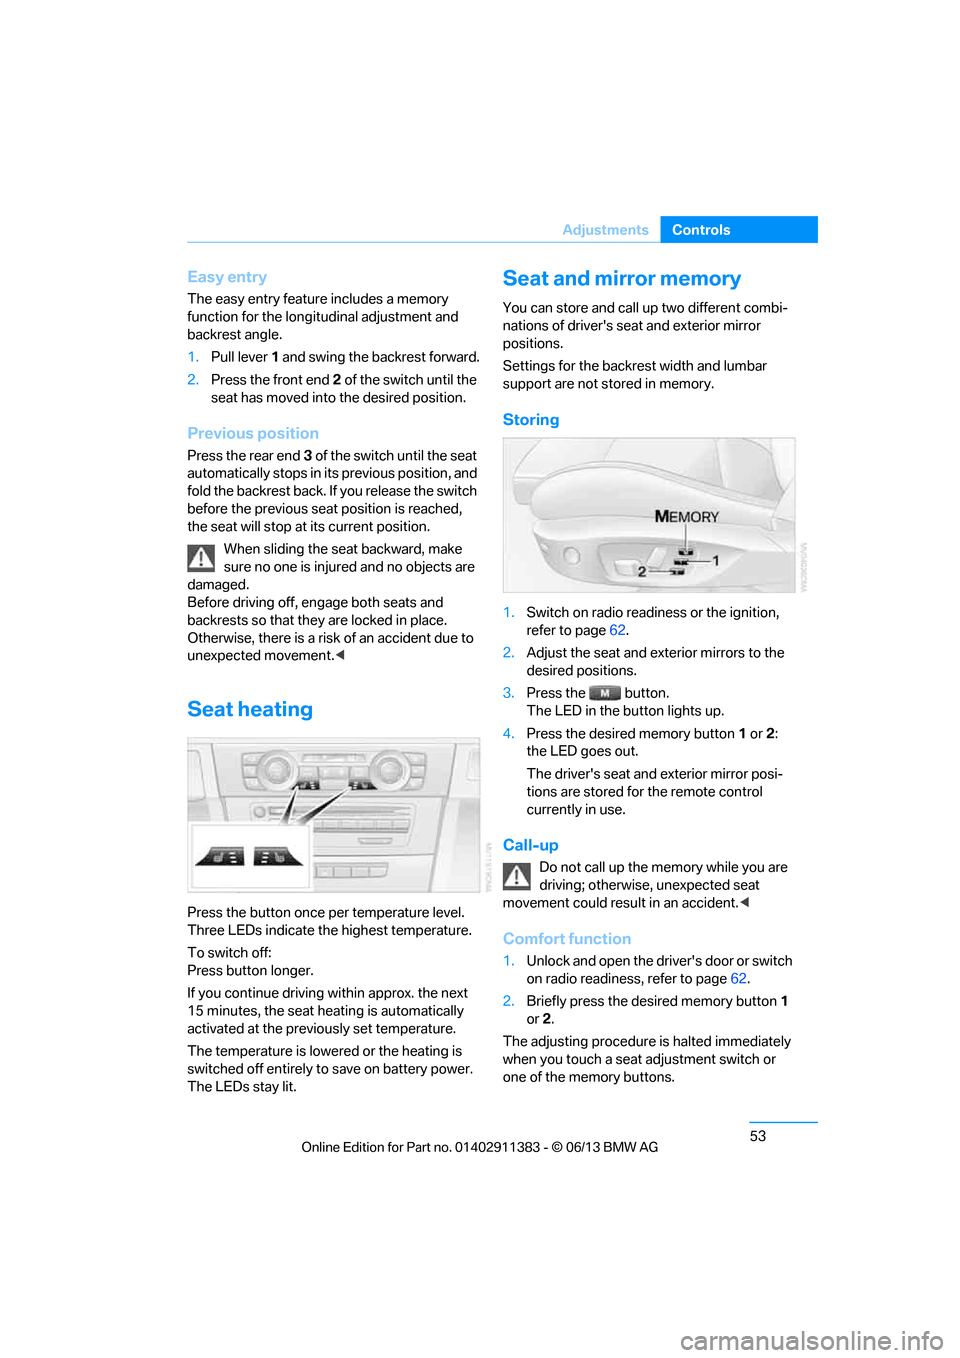
Seat heating
Press the button once per temperature level.
Three LEDs indicate the highest temperature.
To switch off:
Press button longer.
If you continue driving within approx. the next
15 minutes, the seat heating is automatically
activated at the previo usly set temperature.
The temperature is lowered or the heating is
switched off entirely to save on battery power.
The LEDs stay lit.
Seat and mirror memory
You can store and call up two different combi-
nations of driver's seat and exterior mirror
positions.
Settings for the backrest width and lumbar
support are not stored in memory.
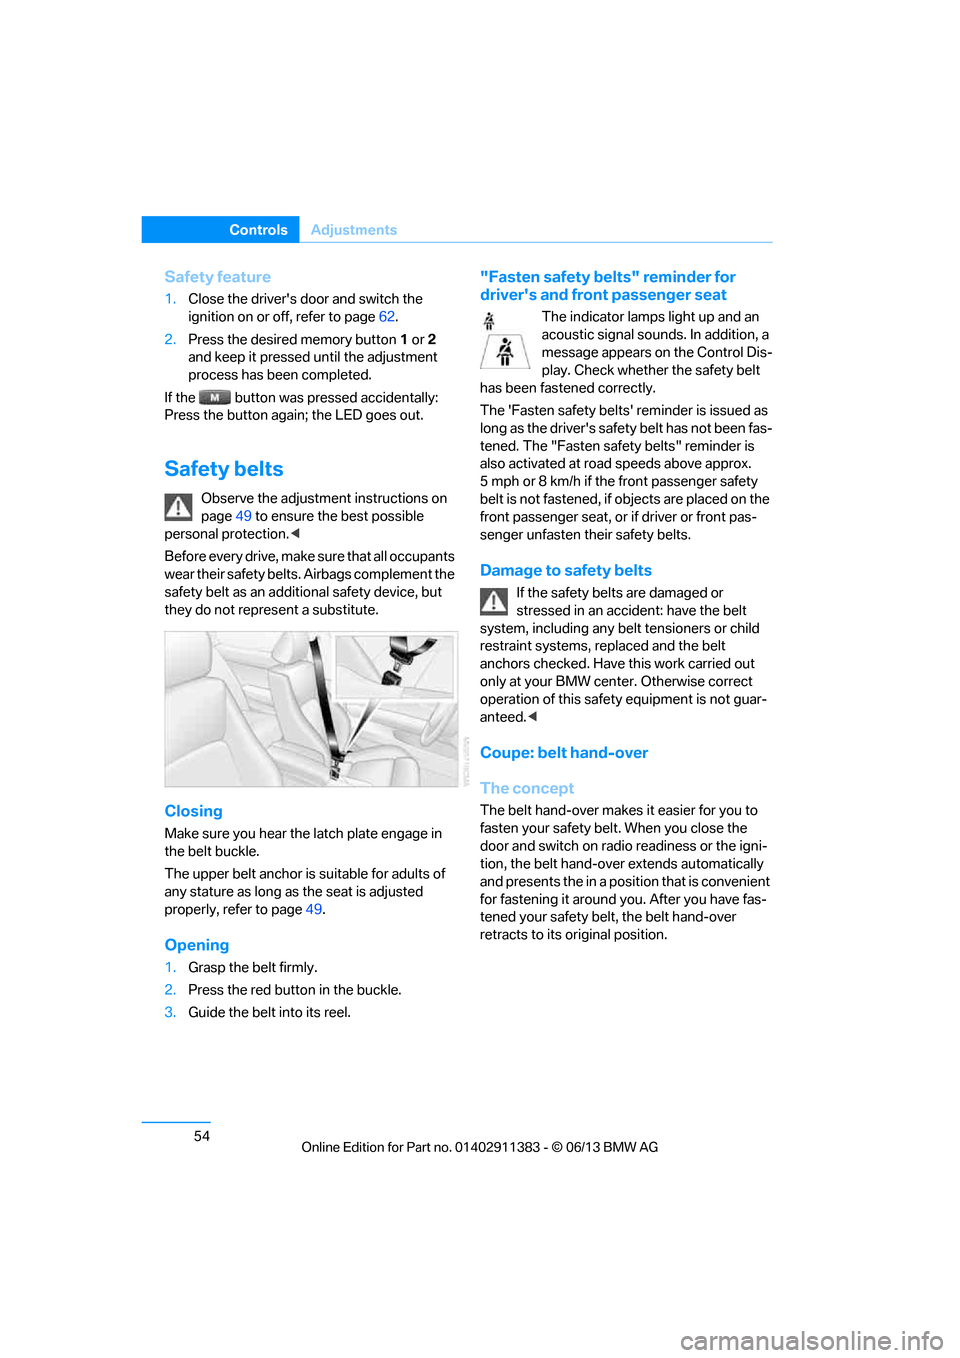
Storing
1. Switch on radio readiness or the ignition,
refer to page 62.
2. Adjust the seat and exterior mirrors to the
desired positions.
3. Press the button.
The LED in the button lights up.
4. Press the desired memory button 1 or 2:
the LED goes out.
The driver's seat and exterior mirror posi-
tions are stored for the remote control
currently in use.
Call-up
Do not call up the memory while you are
driving; otherwise, unexpected seat
movement could result in an accident. <
Comfort function
1.Unlock and open the driver's door or switch
on radio readiness, refer to page 62.
2. Briefly press the desired memory button 1
or 2.
The adjusting procedure is halted immediately
when you touch a seat adjustment switch or
one of the memory buttons.
00320051004F004C00510048000300280047004C0057004C005200510003
Page 59 of 311
54
ControlsAdjustments
Safety feature
1.Close the driver's door and switch the
ignition on or off, refer to page 62.
2. Press the desired memory button 1 or 2
and keep it pressed until the adjustment
process has been completed.
If the button was pr essed accidentally:
Press the button again; the LED goes out.
Safety belts
Observe the adjustment instructions on
page 49 to ensure the best possible
personal protection. <
Before every drive, make sure that all occupants
wear their safety belts. Airbags complement the
safety belt as an additi onal safety device, but
they do not repres ent a substitute.
Closing
Make sure you hear the latch plate engage in
the belt buckle.
The upper belt anchor is suitable for adults of
any stature as long as the seat is adjusted
properly, refer to page 49.
Opening
1.Grasp the belt firmly.
2. Press the red button in the buckle.
3. Guide the belt into its reel.
"Fasten safety belts" reminder for
driver's and front passenger seat
The indicator lamps light up and an
acoustic signal sounds. In addition, a
message appears on the Control Dis-
play. Check whether the safety belt
has been fastened correctly.
The 'Fasten safety belts' reminder is issued as
long as the driver's safety belt has not been fas-
tened. The "Fasten safety belts" reminder is
also activated at road speeds above approx.
5 mph or 8 km/h if the front passenger safety
belt is not fastened, if objects are placed on the
front passenger seat, or if driver or front pas-
senger unfasten their safety belts.
Damage to safety belts
If the safety belts are damaged or
stressed in an accident: have the belt
system, including any belt tensioners or child
restraint systems, replaced and the belt
anchors checked. Have this work carried out
only at your BMW center. Otherwise correct
operation of this safety equipment is not guar-
anteed. <
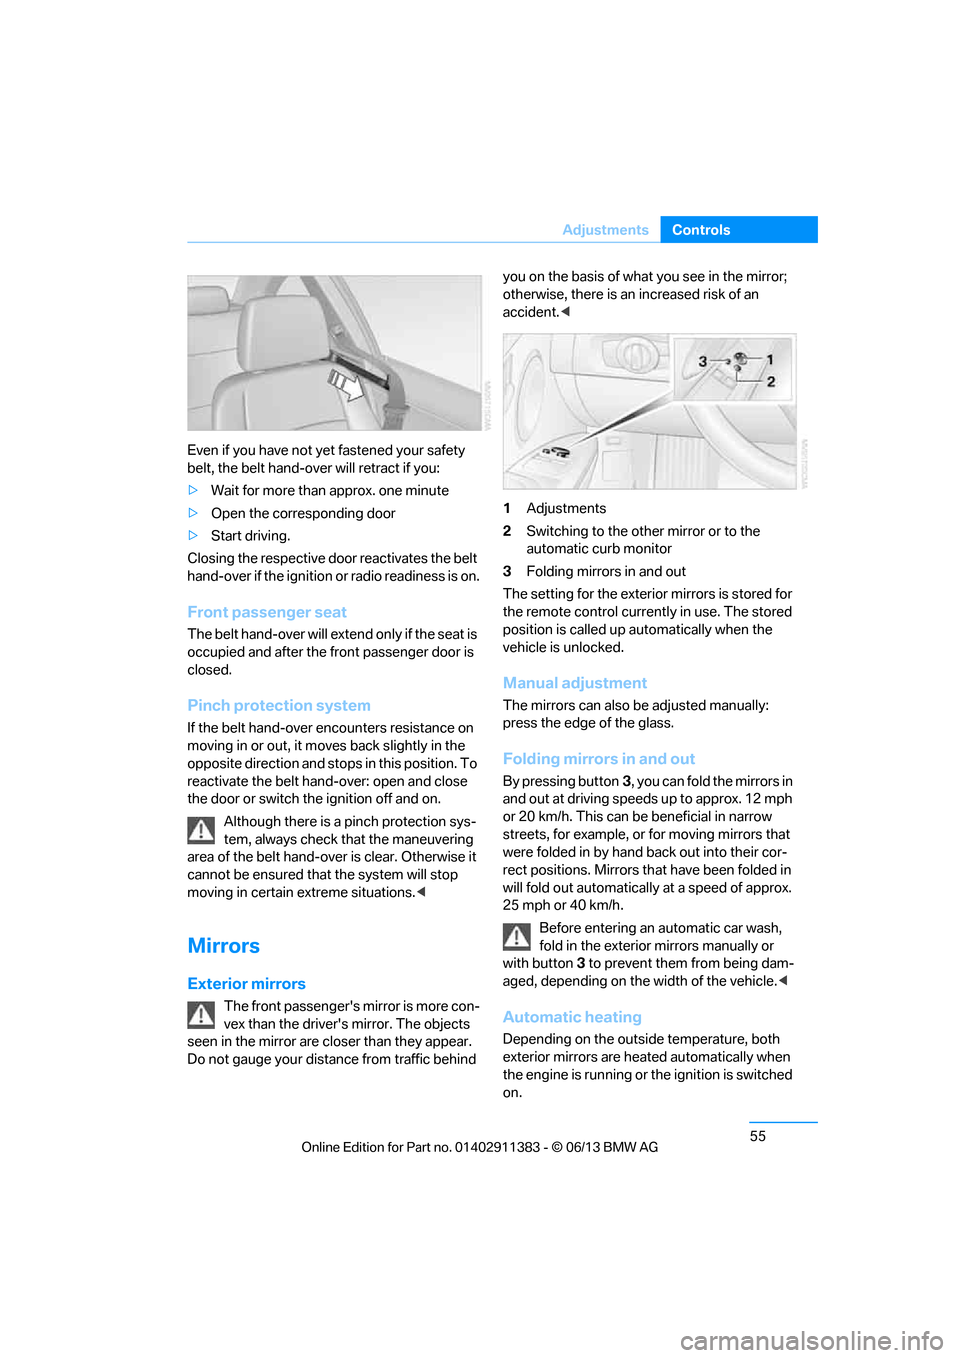
Coupe: belt hand-over
The concept
The belt hand-over makes it easier for you to
fasten your safety belt. When you close the
door and switch on radio readiness or the igni-
tion, the belt hand-ove r extends automatically
and presents the in a position that is convenient
for fastening it around you. After you have fas-
tened your safety belt , the belt hand-over
retracts to its original position.
00320051004F004C00510048000300280047004C0057004C005200510003
Page 60 of 311
55
Adjustments
Controls
Even if you have not yet fastened your safety
belt, the belt hand-over will retract if you:
>
Wait for more than approx. one minute
> Open the corresponding door
> Start driving.
Closing the respective do or reactivates the belt
hand-over if the ignition or radio readiness is on.
Front passenger seat
The belt hand-over will exte nd only if the seat is
occupied and after the front passenger door is
closed.
Pinch protection system
If the belt hand-over en counters resistance on
moving in or out, it moves back slightly in the
opposite direction and stops in this position. To
reactivate the belt hand -over: open and close
the door or switch the ignition off and on.
Although there is a pinch protection sys-
tem, always check that the maneuvering
area of the belt hand-ove r is clear. Otherwise it
cannot be ensured that the system will stop
moving in certain extreme situations. <
Mirrors
Exterior mirrors
The front passenger's mirror is more con-
vex than the driver's mirror. The objects
seen in the mirror are closer than they appear.
Do not gauge your distan ce from traffic behind you on the basis of what you see in the mirror;
otherwise, there is an increased risk of an
accident.
<
1 Adjustments
2 Switching to the other mirror or to the
automatic curb monitor
3 Folding mirrors in and out
The setting for the exterior mirrors is stored for
the remote control currently in use. The stored
position is called up automatically when the
vehicle is unlocked.
Manual adjustment
The mirrors can also be adjusted manually:
press the edge of the glass.
Folding mirrors in and out
By pressing button 3, you can fold the mirrors in
and out at driving speeds up to approx. 12 mph
or 20 km/h. This can be beneficial in narrow
streets, for example, or for moving mirrors that
were folded in by hand back out into their cor-
rect positions. Mirrors th at have been folded in
will fold out automatically at a speed of approx.
25 mph or 40 km/h.
Before entering an automatic car wash,
fold in the exterior mirrors manually or
with button 3 to prevent them from being dam-
aged, depending on the width of the vehicle. <
Automatic heating
Depending on the outside temperature, both
exterior mirrors are heated automatically when
the engine is running or the ignition is switched
on.
00320051004F004C00510048000300280047004C0057004C005200510003
Page 62 of 311
57
Adjustments
Controls
3.
Swing the lever back up.
Do not use force to swing the lever
back up; otherwise, the mechanism
will be damaged. <
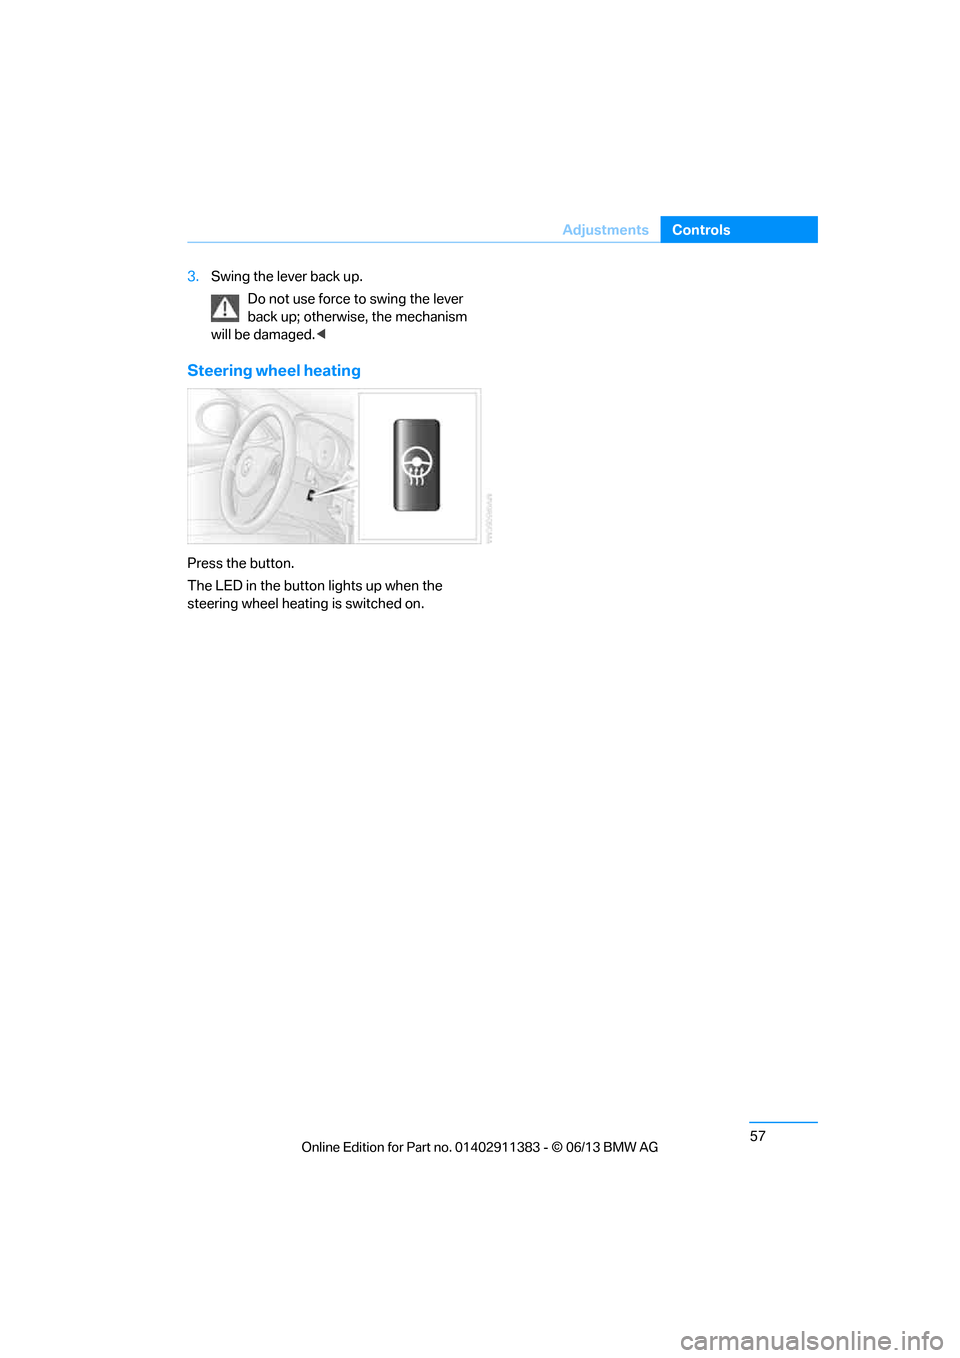
Steering wheel heating
Press the button.
The LED in the button lights up when the
steering wheel heating is switched on.
00320051004F004C00510048000300280047004C0057004C005200510003
Page 67 of 311
62
ControlsDriving
Driving
Vehicle equipment
In this chapter, all pr oduction, country, and
optional equipment that is offered in the model
range is described. For this reason, descrip-
tions will be given of some equipment that may
not be available in a vehi cle, for example due to
the special options or national-market version
selected. This also app lies to safety related
functions and systems.
Ignition lock
Insert the remote control into the
ignition lock
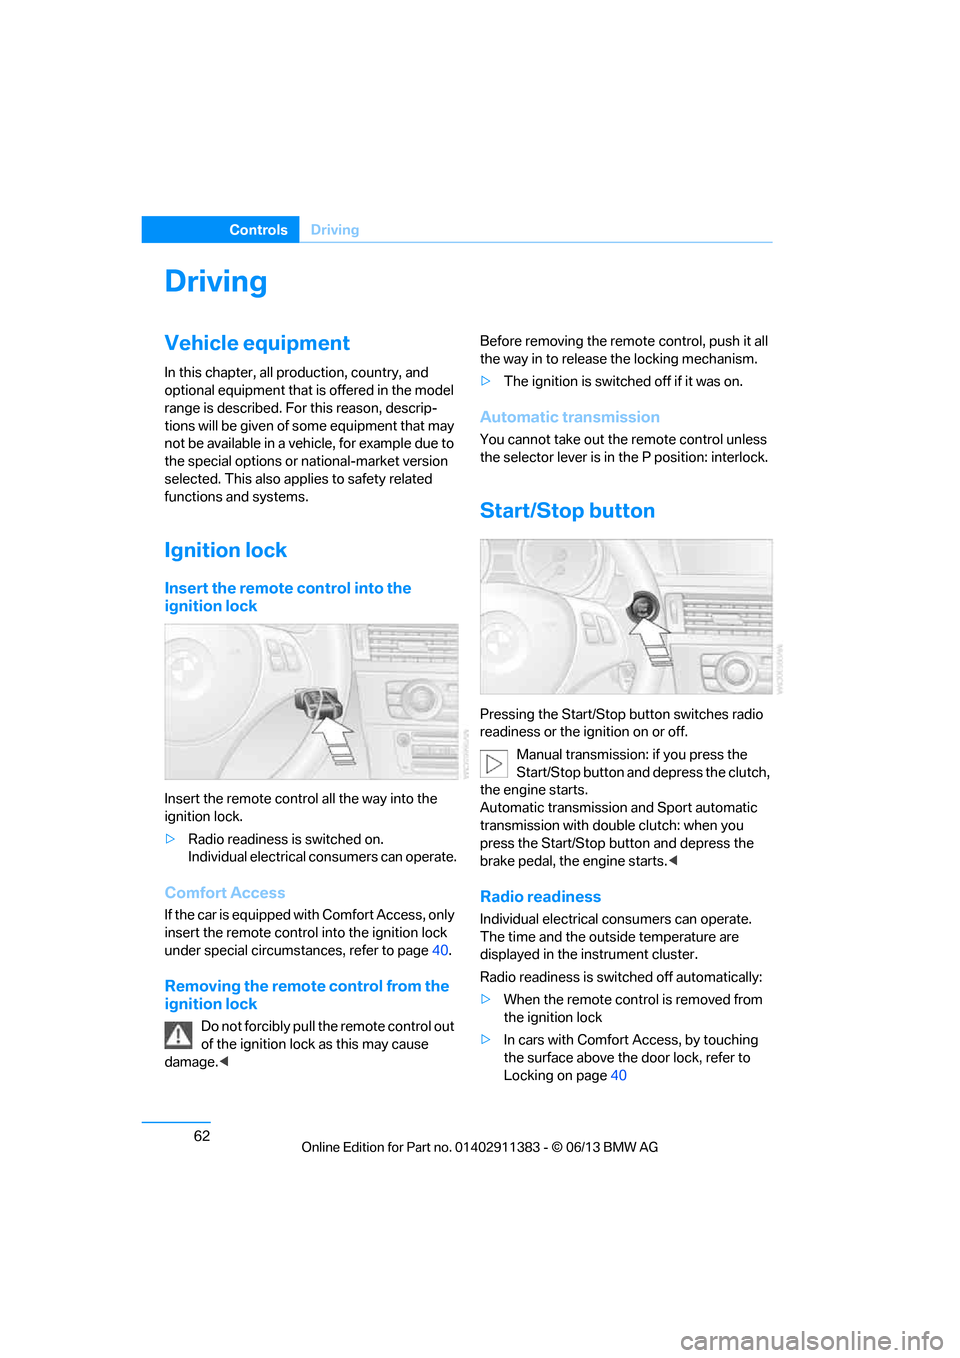
Insert the remote contro l all the way into the
ignition lock.
> Radio readiness is switched on.
Individual electrical consumers can operate.
Comfort Access
If the car is equipped wi th Comfort Access, only
insert the remote control into the ignition lock
under special circumstances, refer to page 40.
Removing the remote control from the
ignition lock
Do not forcibly pull the remote control out
of the ignition lock as this may cause
damage. < Before removing the remote
control, push it all
the way in to release the locking mechanism.
> The ignition is switched off if it was on.
Automatic transmission
You cannot take out the remote control unless
the selector lever is in the P position: interlock.
Start/Stop button
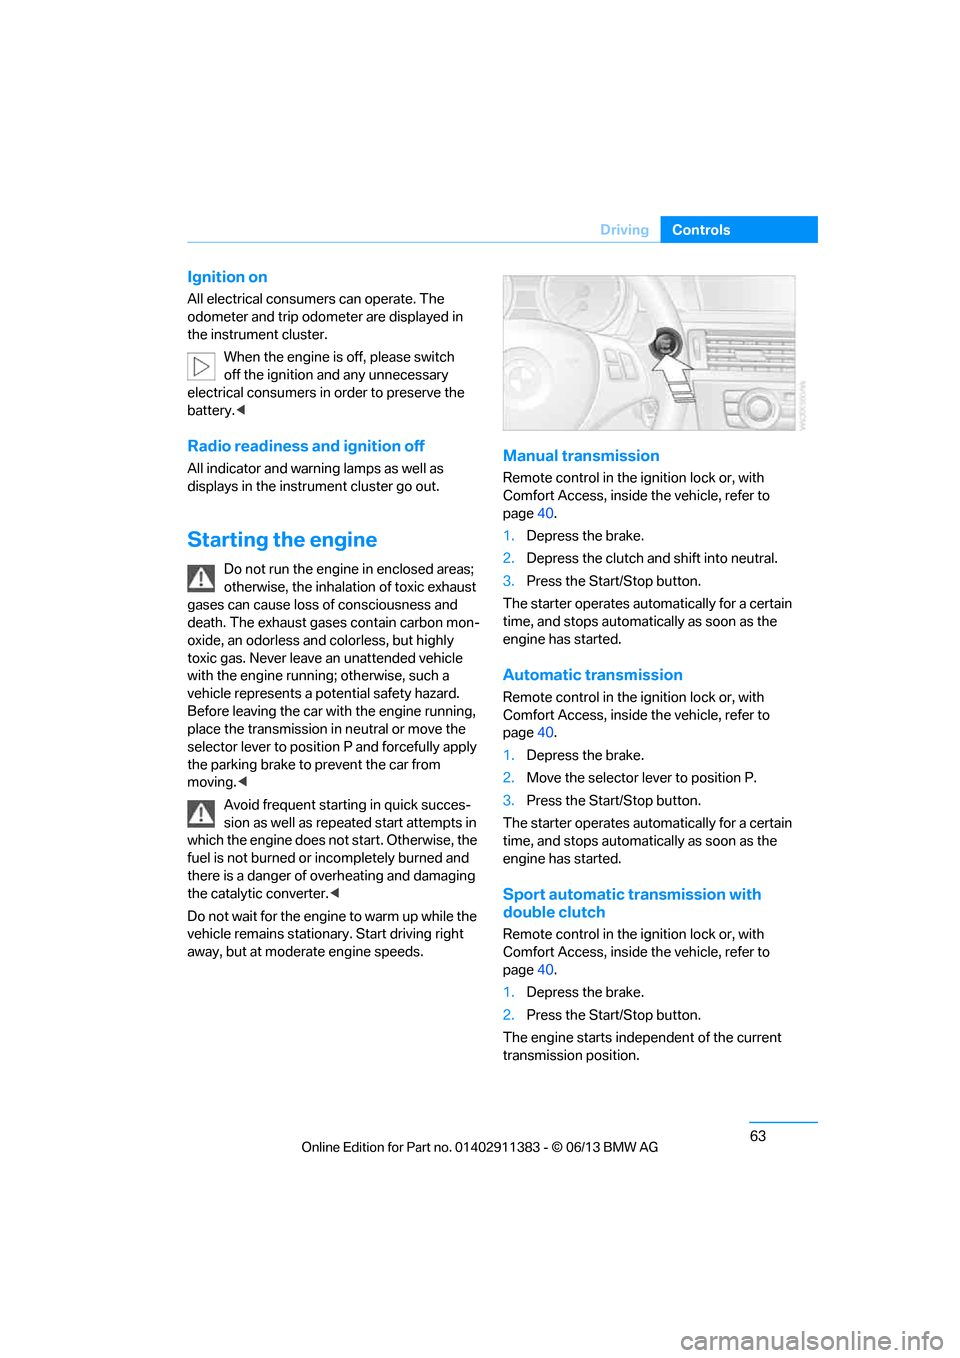
Pressing the Start/Stop button switches radio
readiness or the ignition on or off.
Manual transmission: if you press the
Start/Stop button and depress the clutch,
the engine starts.
Automatic transmission and Sport automatic
transmission with double clutch: when you
press the Start/Stop button and depress the
brake pedal, the engine starts. <
Radio readiness
Individual electrical consumers can operate.
The time and the outside temperature are
displayed in the instrument cluster.
Radio readiness is switched off automatically:
> When the remote cont rol is removed from
the ignition lock
> In cars with Comfort Access, by touching
the surface above the door lock, refer to
Locking on page 40
00320051004F004C00510048000300280047004C0057004C005200510003
Page 68 of 311
63
Driving
Controls
Ignition on
All electrical consumers can operate. The
odometer and trip odometer are displayed in
the instrument cluster.
When the engine is off, please switch
off the ignition and any unnecessary
electrical consumers in order to preserve the
battery. <
Radio readiness and ignition off
All indicator and warning lamps as well as
displays in the instrument cluster go out.
Starting the engine
Do not run the engine in enclosed areas;
otherwise, the inhalation of toxic exhaust
gases can cause loss of consciousness and
death. The exhaust gases contain carbon mon-
oxide, an odorless and colorless, but highly
toxic gas. Never leave an unattended vehicle
with the engine running; otherwise, such a
vehicle represents a po tential safety hazard.
Before leaving the car with the engine running,
place the transmission in neutral or move the
selector lever to positi on P and forcefully apply
the parking brake to prevent the car from
moving. <
Avoid frequent starting in quick succes-
sion as well as repeat ed start attempts in
which the engine does not start. Otherwise, the
fuel is not burned or incompletely burned and
there is a danger of overheating and damaging
the catalytic converter. <
Do not wait for the engine to warm up while the
vehicle remains stationary. Start driving right
away, but at moderate engine speeds.
Manual transmission
Remote control in the ignition lock or, with
Comfort Access, inside the vehicle, refer to
page 40.
1. Depress the brake.
2. Depress the clutch and shift into neutral.
3. Press the Start/Stop button.
The starter operates automatically for a certain
time, and stops automati cally as soon as the
engine has started.
Automatic transmission
Remote control in the ignition lock or, with
Comfort Access, inside the vehicle, refer to
page 40.
1. Depress the brake.
2. Move the selector lever to position P.
3. Press the Start/Stop button.
The starter operates automatically for a certain
time, and stops automati cally as soon as the
engine has started.
Sport automatic transmission with
double clutch
Remote control in the ignition lock or, with
Comfort Access, inside the vehicle, refer to
page 40.
1. Depress the brake.
2. Press the Start/Stop button.
The engine starts independent of the current
transmission position.
00320051004F004C00510048000300280047004C0057004C005200510003