Button BMW 3 SERIES CONVERTIBLE 2013 E93 Repair Manual
[x] Cancel search | Manufacturer: BMW, Model Year: 2013, Model line: 3 SERIES CONVERTIBLE, Model: BMW 3 SERIES CONVERTIBLE 2013 E93Pages: 311, PDF Size: 7.05 MB
Page 131 of 311
126
ControlsPractical interior accessories
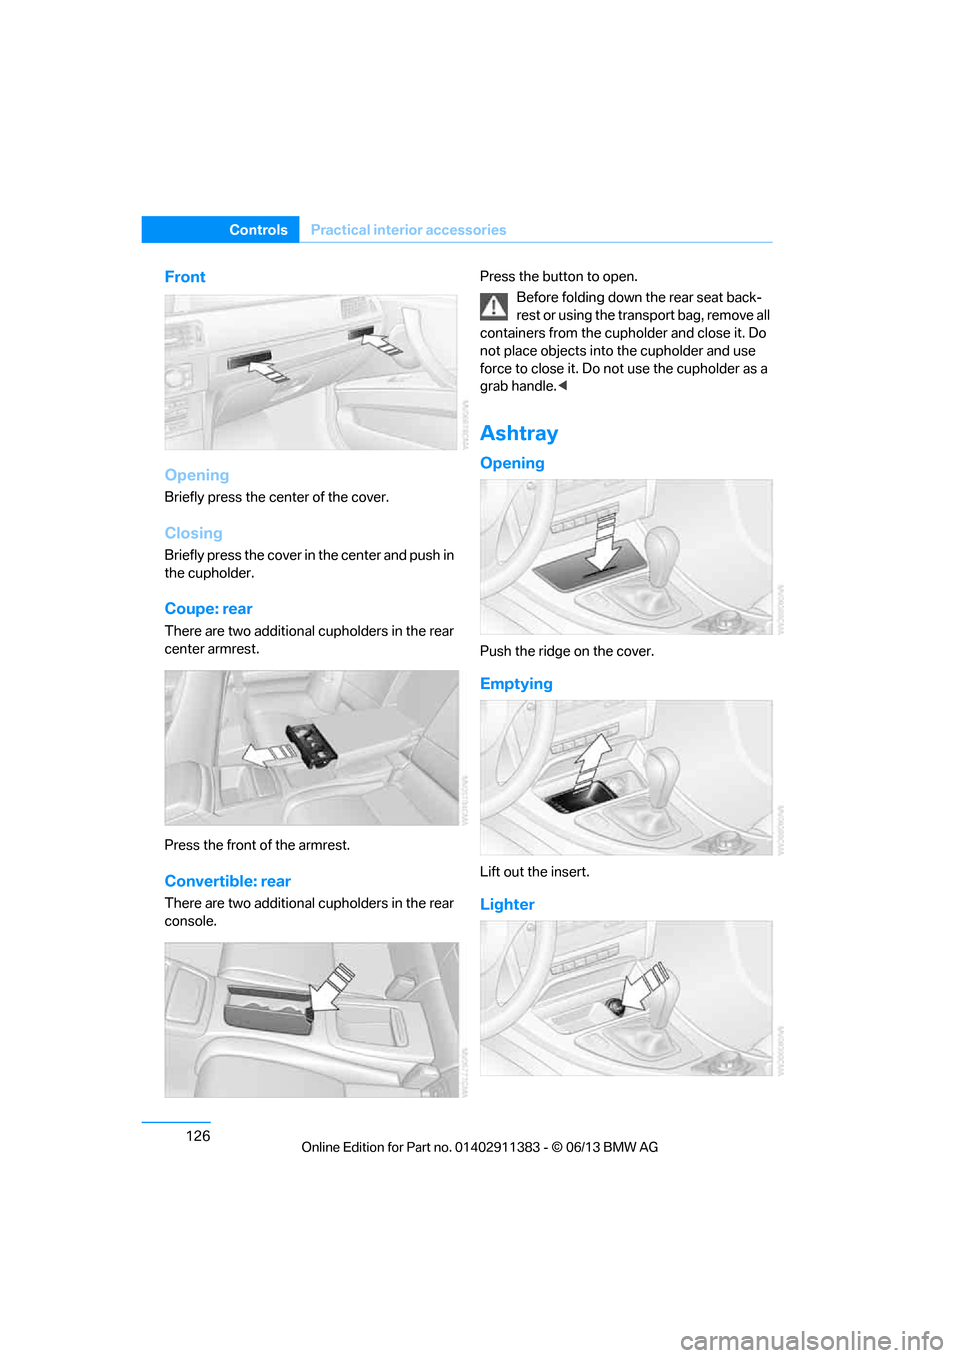
Front
Opening
Briefly press the center of the cover.
Closing
Briefly press the cover in the center and push in
the cupholder.
Coupe: rear
There are two additional cupholders in the rear
center armrest.
Press the front of the armrest.
Convertible: rear
There are two additional cupholders in the rear
console. Press the button to open.
Before folding down the rear seat back-
rest or using the transport bag, remove all
containers from the cupholder and close it. Do
not place objects into the cupholder and use
force to close it. Do not use the cupholder as a
grab handle. <
Ashtray
Opening
Push the ridge on the cover.
Emptying
Lift out the insert.
Lighter
00320051004F004C00510048000300280047004C0057004C005200510003
Page 133 of 311
128
ControlsPractical interior accessories
Closing
Return the rear seat backrest to its upright
position and engage it.
When returning the backrest to its seating
position, make sure th at the seat's lock-
ing mechanism engages properly. Otherwise,
cargo could be thrown around in the event of
sharp braking or swervi ng and endanger the
occupants. <
The lashing eyes in the trunk provide you with a
way to attach trunk nets or draw straps for
securing suitcases an d luggage, refer to
page 140.
Convertible:
Cargo loading
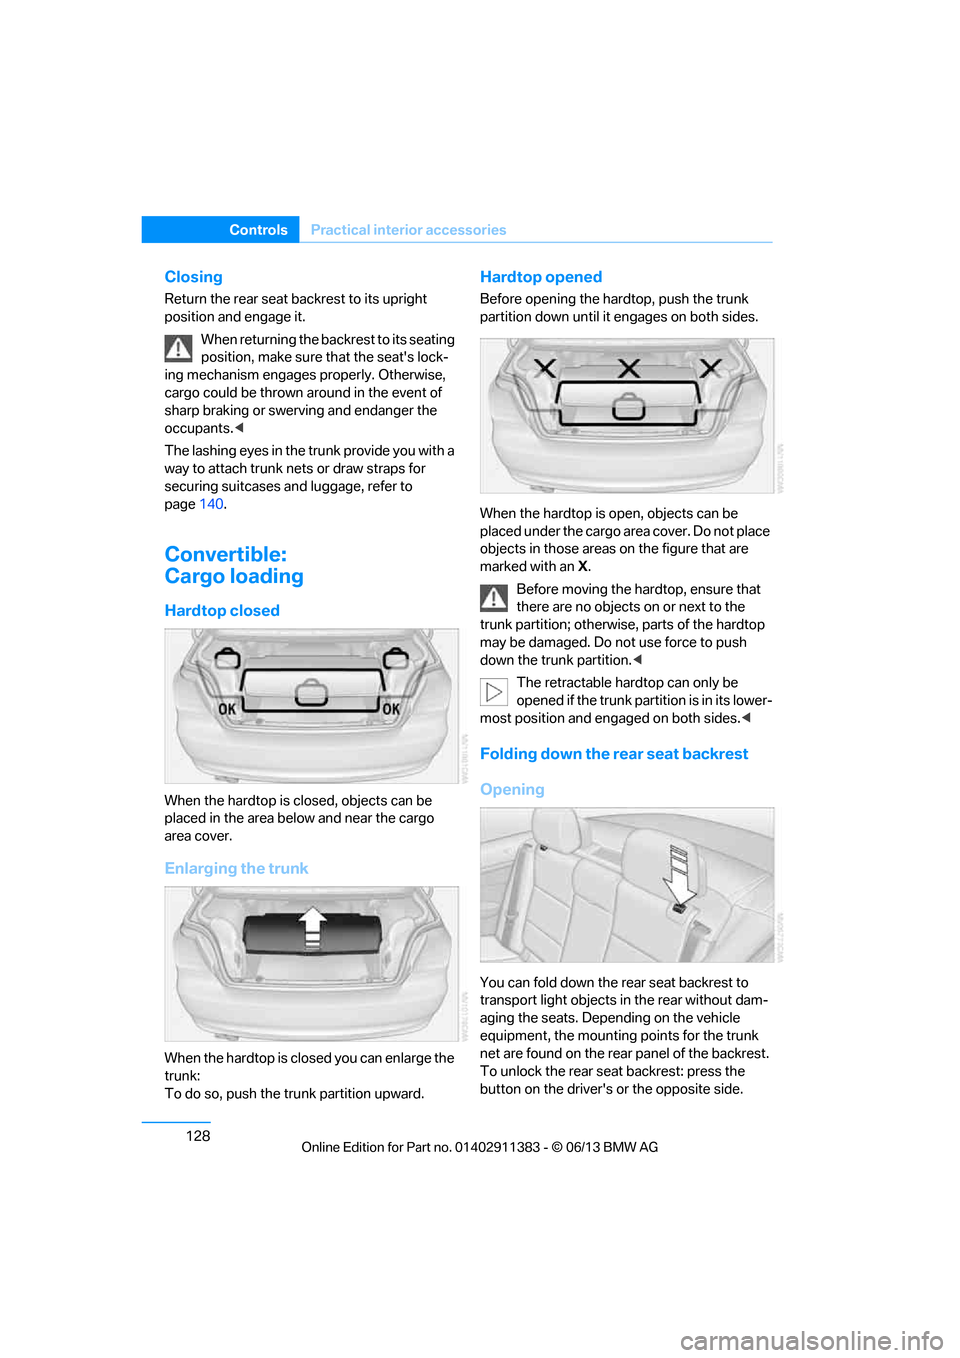
Hardtop closed
When the hardtop is closed, objects can be
placed in the area below and near the cargo
area cover.
Enlarging the trunk
When the hardtop is closed you can enlarge the
trunk:
To do so, push the trunk partition upward.
Hardtop opened
Before opening the hard top, push the trunk
partition down until it engages on both sides.
When the hardtop is open, objects can be
placed under the cargo area cover. Do not place
objects in those areas on the figure that are
marked with an X.
Before moving the ha rdtop, ensure that
there are no objects on or next to the
trunk partition; otherwise, parts of the hardtop
may be damaged. Do not use force to push
down the trunk partition. <
The retractable hard top can only be
opened if the trunk partition is in its lower-
most position and engaged on both sides. <
Folding down the rear seat backrest
Opening
You can fold down the rear seat backrest to
transport light objects in the rear without dam-
aging the seats. Depending on the vehicle
equipment, the mounting points for the trunk
net are found on the rear panel of the backrest.
To unlock the rear seat backrest: press the
button on the driver's or the opposite side.
00320051004F004C00510048000300280047004C0057004C005200510003
Page 134 of 311
129
Practical interior accessories
Controls
Closing
Return the rear seat backrest to the upright
seating position and engage it.
When returning the backrest to its seating
position, make sure th at the seat's lock-
ing mechanism engages properly. Otherwise,
cargo could be thrown around in the event of
sharp braking or swerving and endanger the
occupants. <
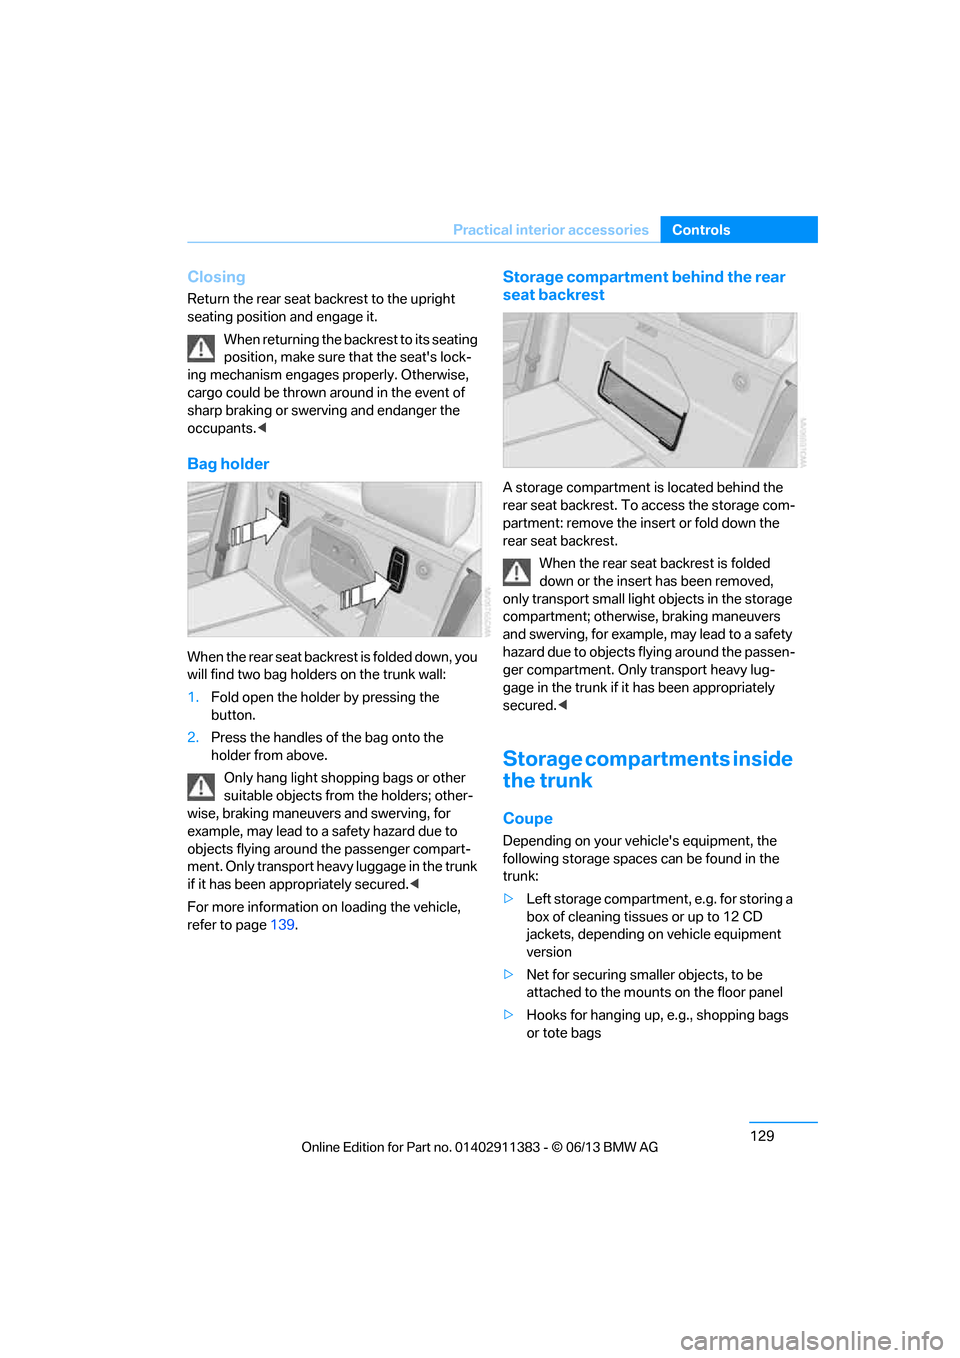
Bag holder
W h e n t h e r e a r s e a t b a c k r e s t i s f o l d e d d o w n , y o u
will find two bag holders on the trunk wall:
1.Fold open the holder by pressing the
button.
2. Press the handles of the bag onto the
holder from above.
Only hang light shopping bags or other
suitable objects from the holders; other-
wise, braking maneuvers and swerving, for
example, may lead to a safety hazard due to
objects flying around the passenger compart-
ment. Only transport heav y luggage in the trunk
if it has been appropriately secured. <
For more information on loading the vehicle,
refer to page 139.
Storage compartment behind the rear
seat backrest
A storage compartment is located behind the
rear seat backrest. To access the storage com-
partment: remove the inse rt or fold down the
rear seat backrest.
When the rear seat backrest is folded
down or the insert has been removed,
only transport small light objects in the storage
compartment; otherwise, braking maneuvers
and swerving, for example, may lead to a safety
hazard due to objects flying around the passen-
ger compartment. Only transport heavy lug-
gage in the trunk if it has been appropriately
secured. <
Storage compartments inside
the trunk
Coupe
Depending on your vehicle's equipment, the
following storage spaces can be found in the
trunk:
>Left storage compartment, e.g. for storing a
box of cleaning tissues or up to 12 CD
jackets, depending on vehicle equipment
version
> Net for securing smaller objects, to be
attached to the mounts on the floor panel
> Hooks for hanging up, e.g., shopping bags
or tote bags
00320051004F004C00510048000300280047004C0057004C005200510003
Page 135 of 311
130
ControlsPractical interior accessories
>Rubber strap on the left trim panel for
securing small objects such as a folding
umbrella
> Net for small objects on the right trim panel
of the trunk
Convertible
Depending on your vehi cle's equipment, the
following storage spaces can be found in the
trunk:
> Storage compartment on the left side of the
trunk. To open turn handle by 90°.
> Net for securing smaller objects, to be
attached to the mounts on the floor panel
> Rubber strap for subdividing the trunk; can
be hooked onto the lateral lashing eyes
> Stowage compartmen t under the floor
panel
Folding up the floor panel
Do not exceed the maximum permissible
load of 55 lbs/25 kg for the storage
compartment under the fl oor panel; otherwise,
damage may result. <
Coupe
Press the floor panel up and secure it with the
catch.
Convertible
To lift, grab hold of the floor panel at the open-
ing at the rear of the panel.
Lashing eyes
You will find lashing eyelets in the trunk for
securing luggage items with nets or tensioning
straps, refer to page 140.
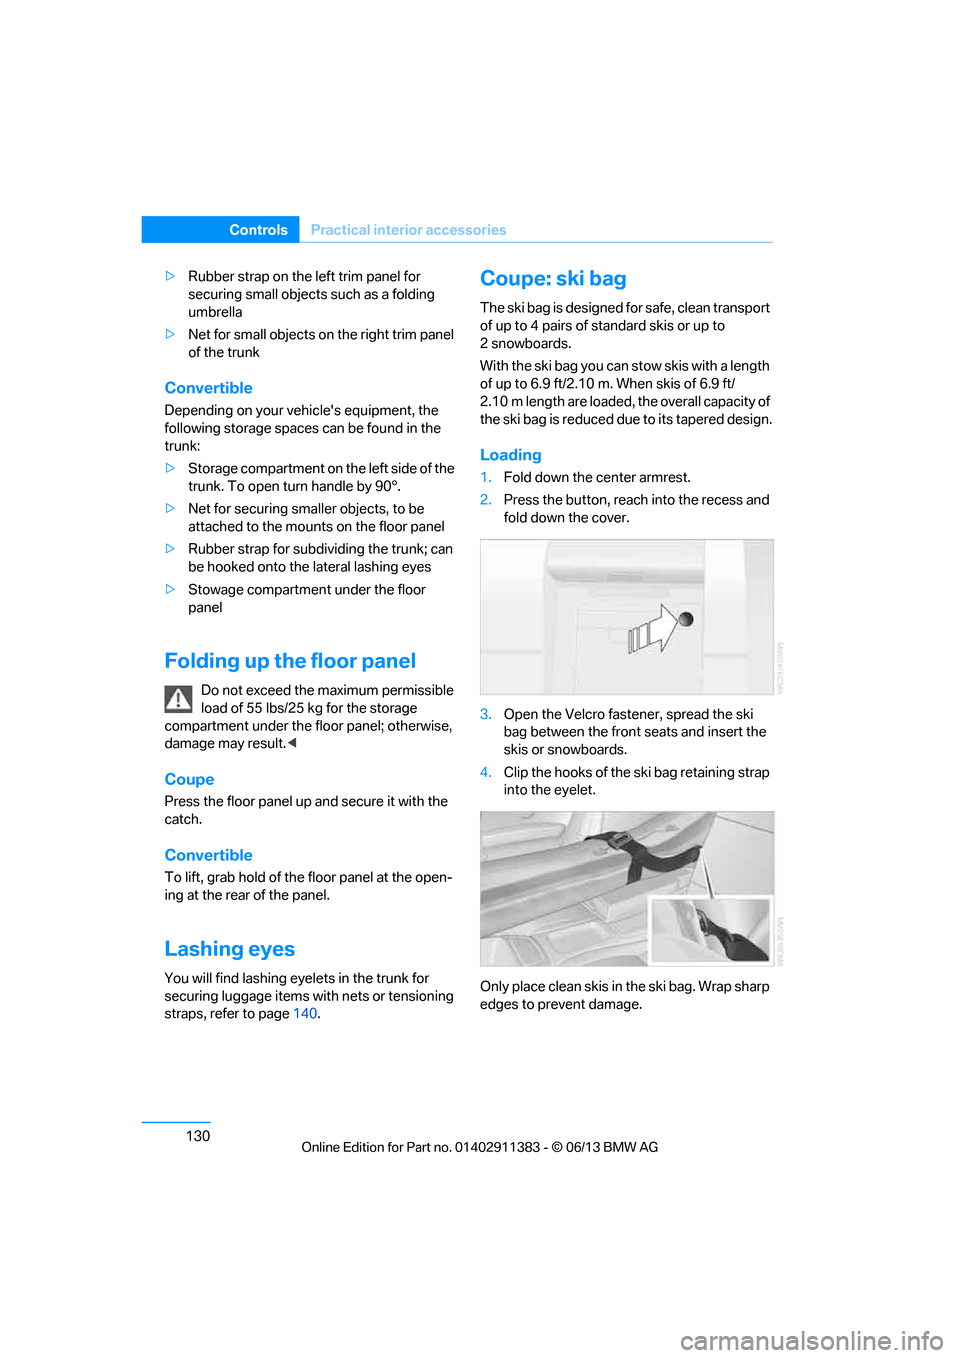
Coupe: ski bag
The ski bag is designed for safe, clean transport
of up to 4 pairs of standard skis or up to
2snowboards.
With the ski bag you can stow skis with a length
of up to 6.9 ft/2.10 m. When skis of 6.9 ft/
2.10 m length are loaded, the overall capacity of
the ski bag is reduced due to its tapered design.
Loading
1. Fold down the center armrest.
2. Press the button, reach into the recess and
fold down the cover.
3. Open the Velcro fastener, spread the ski
bag between the front seats and insert the
skis or snowboards.
4. Clip the hooks of the ski bag retaining strap
into the eyelet.
Only place clean skis in the ski bag. Wrap sharp
edges to prevent damage.
00320051004F004C00510048000300280047004C0057004C005200510003
Page 136 of 311
131
Practical interior accessories
Controls
Securing cargo
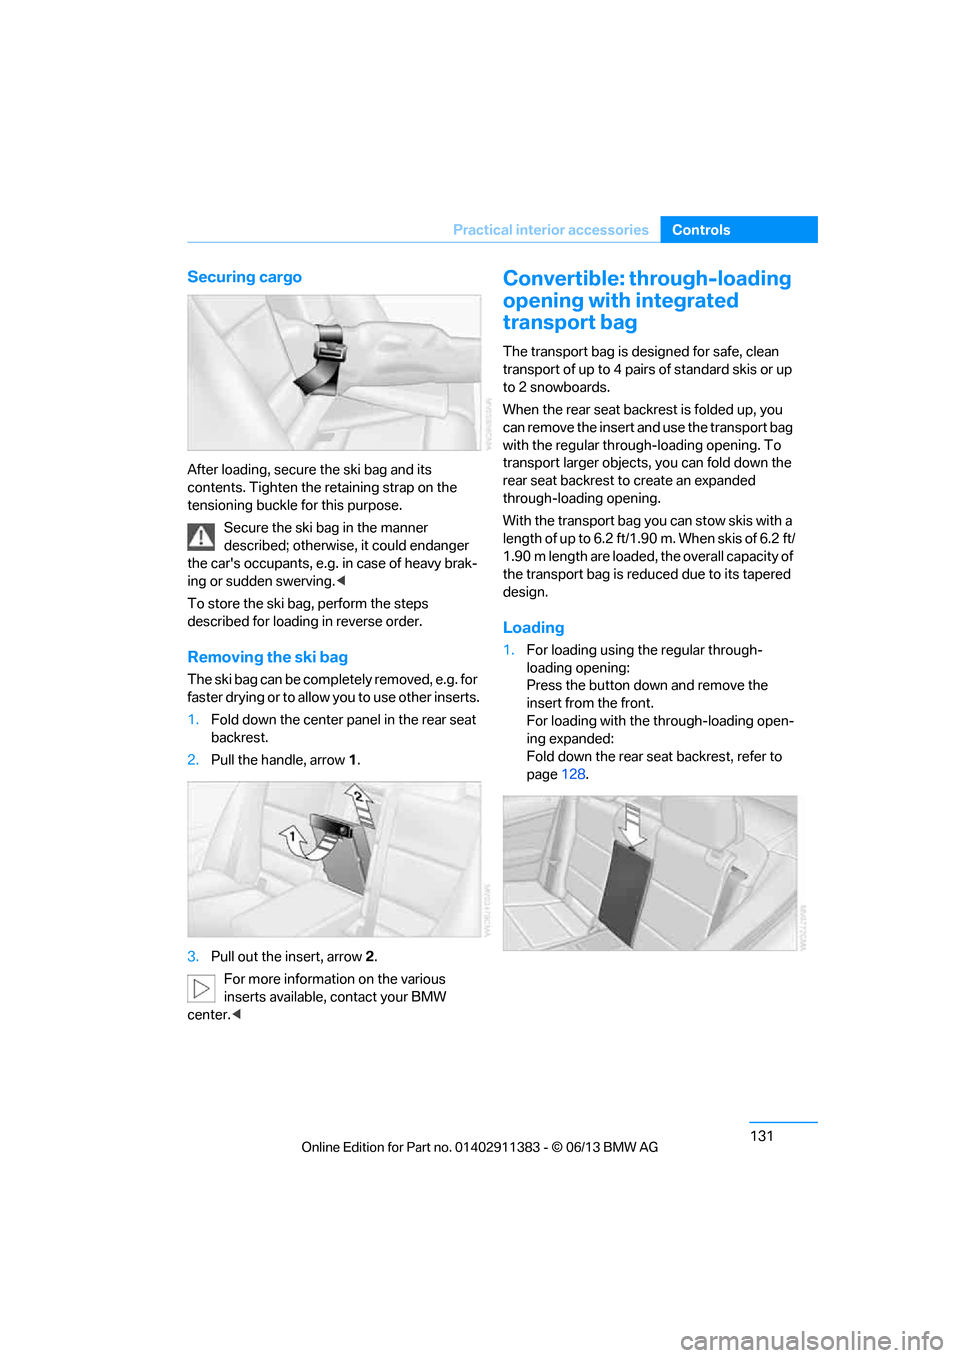
After loading, secure the ski bag and its
contents. Tighten the retaining strap on the
tensioning buckle for this purpose.
Secure the ski bag in the manner
described; otherwise, it could endanger
the car's occupants, e.g. in case of heavy brak-
ing or sudden swerving. <
To store the ski bag, perform the steps
described for loadin g in reverse order.
Removing the ski bag
The ski bag can be comple tely removed, e.g. for
faster drying or to allow you to use other inserts.
1. Fold down the center panel in the rear seat
backrest.
2. Pull the handle, arrow 1.
3. Pull out the insert, arrow 2.
For more information on the various
inserts available, contact your BMW
center. <
Convertible: through-loading
opening with integrated
transport bag
The transport bag is designed for safe, clean
transport of up to 4 pairs of standard skis or up
to 2 snowboards.
When the rear seat backrest is folded up, you
can remove the insert and use the transport bag
with the regular through-loading opening. To
transport larger objects, you can fold down the
rear seat backrest to create an expanded
through-loading opening.
With the transport bag you can stow skis with a
length of up to 6.2 ft/1.90 m. When skis of 6.2 ft/
1.90 m length are loaded, the overall capacity of
the transport bag is reduced due to its tapered
design.
Loading
1. For loading using the regular through-
loading opening:
Press the button down and remove the
insert from the front.
For loading with the through-loading open-
ing expanded:
Fold down the rear seat backrest, refer to
page 128.
00320051004F004C00510048000300280047004C0057004C005200510003
Page 149 of 311
144
NavigationNavigation system
Navigation system
Vehicle equipment
In this chapter, all pr oduction, country, and
optional equipment that is offered in the model
range is described. Equipment is also described
that is not available because of, for example,
selected options or country version. This also
applies to safety related functions and systems.
General information
The navigation system can determine the pre-
cise position of the vehicle, with the aid of satel-
lites and vehicle sensors, and can reliably guide
you to every entered destination.
Enter data only with the vehicle station-
ary, and always give priority to the appli-
cable traffic regulations in the event of any con-
tradiction between traffi c and road conditions
and the instructions issu ed by the navigation
system. Failure to take to this precaution can
place you in violation of the law and put vehicle
occupants and other road users in danger. <
Accessing navigation system
1.Press the button.
2. "Navigation"
The navigation syst em can also be
accessed directly with the button on the
controller.
Navigation data
General information
Navigation data and au thorization codes are
available from your BMW center. Navigation
data are stored in the vehicle and can be
updated. >
Depending on the data volume, a data
update may take several hours.
> Update data while dr iving to reduce the
drain on the battery.
> Only the main functions of the navigation
system are available during updating.
The update is resumed automatically when a
trip is continued after an interruption.
> You can inquire as to the status of the
update.
> The data are stored in the vehicle.
> After the update, the system restarts.
> The medium that holds the navigation
data can be removed after the update is
completed.
Information about navigation data
1."Navigation"
2. Open "Options".
3. "Navigation system version":
Information about the data version is
displayed.
Updating the navigation data
Inserting navigation DVD
1.Insert the navigation DVD into the DVD
player with the labe led side facing up.
2. Follow the instructions on the Control
Display.
3. Enter the authorization code of the naviga-
tion DVD and change the DVD if needed.
00320051004F004C00510048000300280047004C0057004C005200510003
Page 150 of 311
145
Navigation system
Navigation
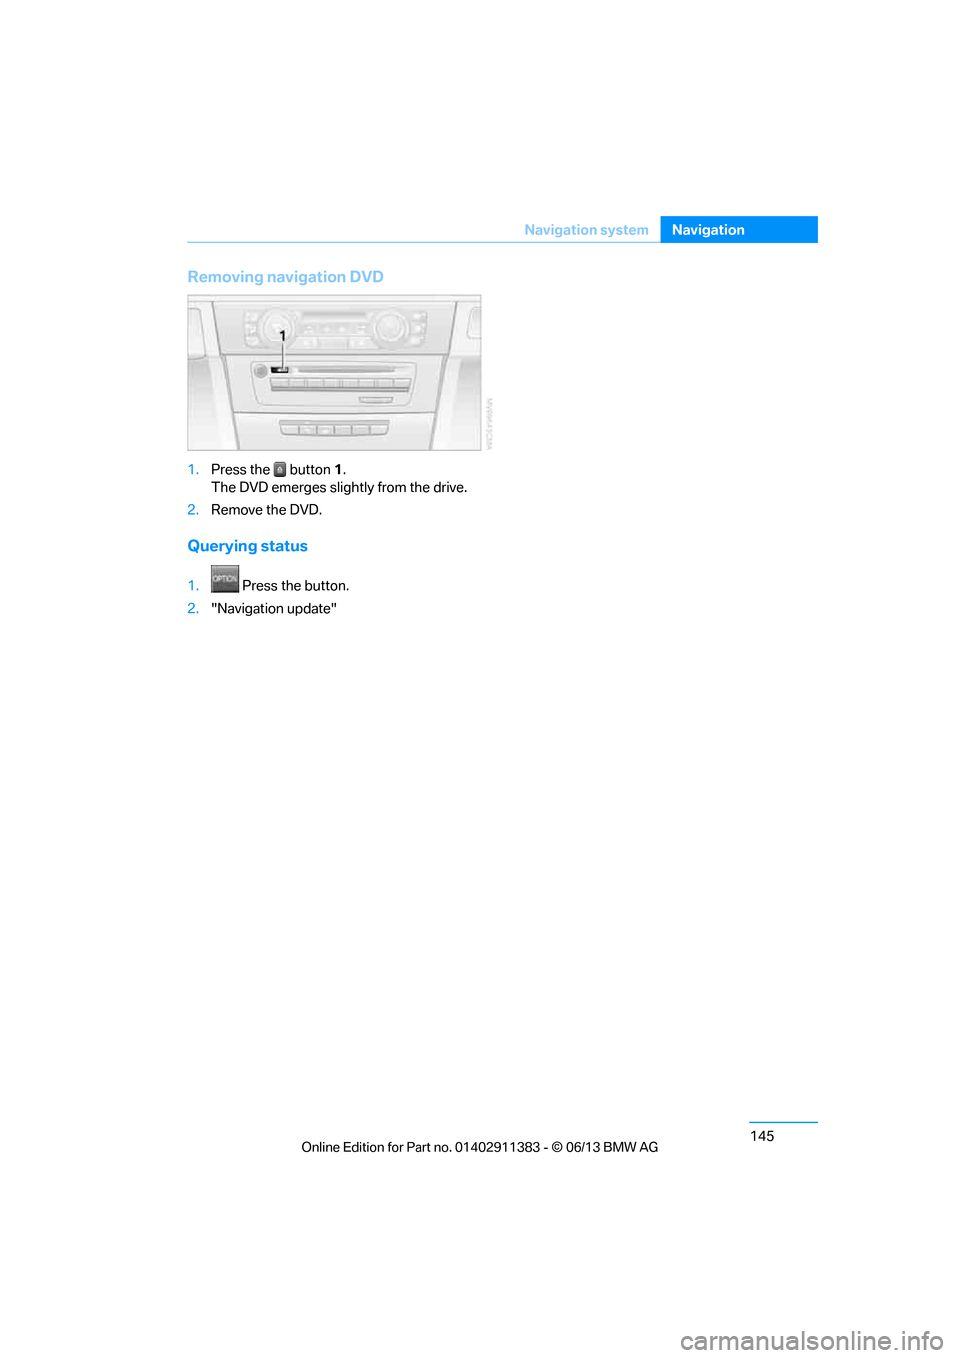
Removing navigation DVD
1.
Press the button 1.
The DVD emerges slightly from the drive.
2. Remove the DVD.
Querying status
1. Press the button.
2. "Navigation update"
00320051004F004C00510048000300280047004C0057004C005200510003
Page 151 of 311
146
NavigationDestination entry
Destination entry
Vehicle equipment
In this chapter, all pr oduction, country, and
optional equipment that is offered in the model
range is described. Equipment is also described
that is not available because of, for example,
selected options or country version. This also
applies to safety related functions and systems.
General information
In entering your destination you can select from
the following options:
> Entering a destination manually, see below
> Selecting destination from address book,
refer to page 148
> Last destinations, refer to page 149
> Special destinations, refer to page 149
> Entering a destination on the map, refer to
page 151
> Selecting home addr ess, refer to page149
> Destination entry via voice, refer to
page 152
> Destination entry via BMW Assist, refer to
page 151
You can also store a navigation destination on
the programmable memo ry keys, refer to
page 25.
Entering a destination
manually
To make it easier to enter town/city names and
street names, the system assists you with auto-
matic name completion and entry comparison,
refer to page 155. This makes it possible to
enter different spellings and completes your
entry automatically so that stored town/city
names and street names can be accessed
quickly. 1.
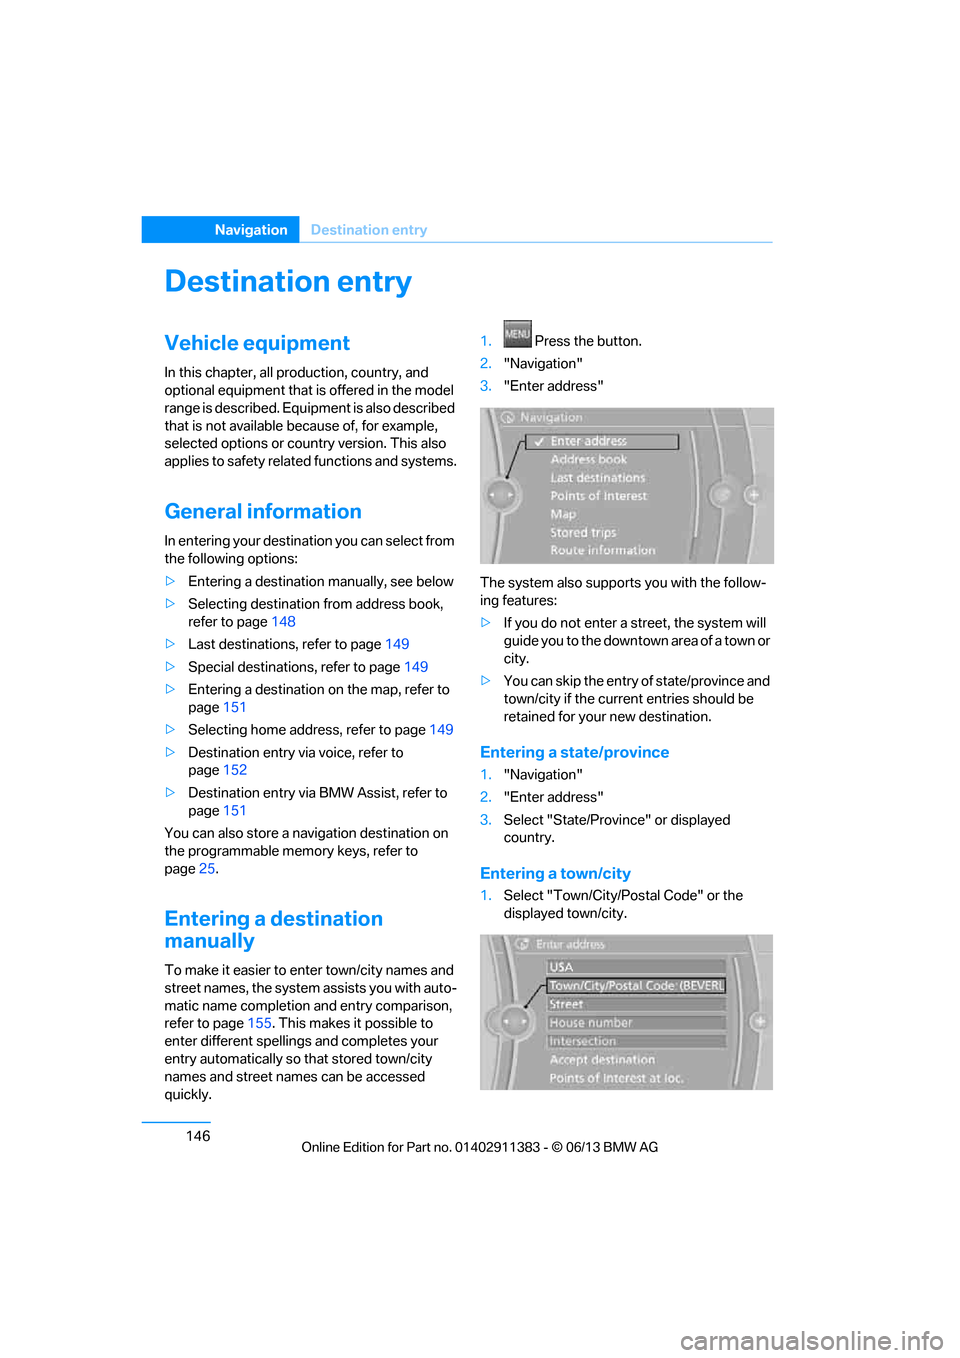
Press the button.
2. "Navigation"
3. "Enter address"
The system also supports you with the follow-
ing features:
> If you do not enter a street, the system will
guide you to the downtown area of a town or
city.
> You can skip the entry of state/province and
town/city if the curren t entries should be
retained for your new destination.
Entering a state/province
1. "Navigation"
2. "Enter address"
3. Select "State/Provi nce" or displayed
country.
Entering a town/city
1. Select "Town/City/Postal Code" or the
displayed town/city.
00320051004F004C00510048000300280047004C0057004C005200510003
Page 157 of 311
152
NavigationDestination entry
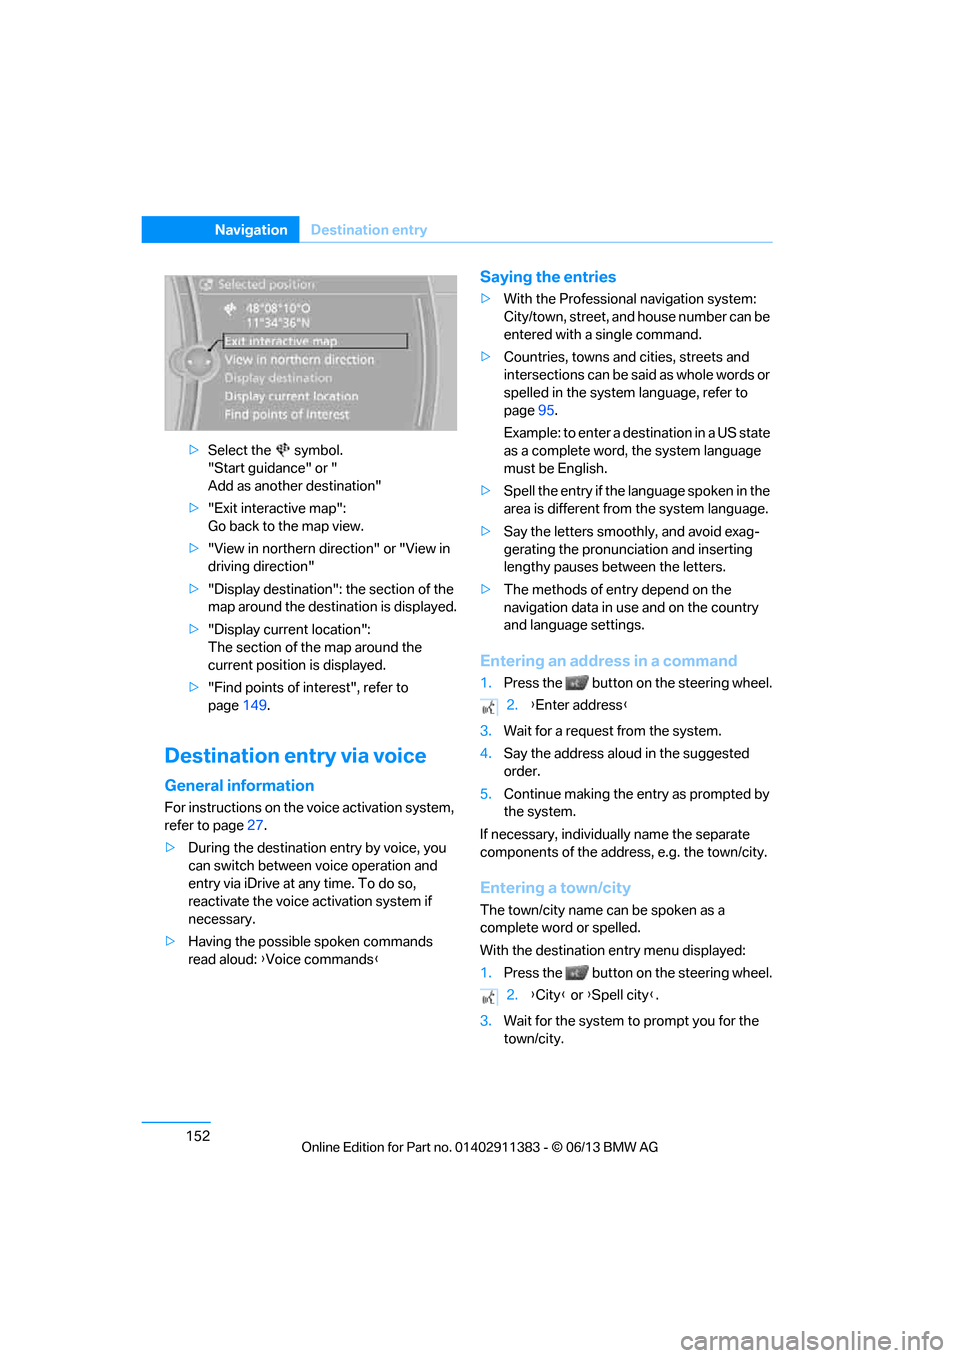
>Select the symbol.
"Start guidance" or "
Add as another destination"
> "Exit interactive map":
Go back to the map view.
> "View in northern direction" or "View in
driving direction"
> "Display destination": the section of the
map around the destination is displayed.
> "Display current location":
The section of the map around the
current position is displayed.
> "Find points of interest", refer to
page 149.
Destination entry via voice
General information
For instructions on the voice activation system,
refer to page 27.
> During the destination entry by voice, you
can switch between voice operation and
entry via iDrive at any time. To do so,
reactivate the voice ac tivation system if
necessary.
> Having the possible spoken commands
read aloud: {Voice commands }
Saying the entries
>With the Professional navigation system:
City/town, street, and house number can be
entered with a single command.
> Countries, towns and cities, streets and
intersections can be said as whole words or
spelled in the system language, refer to
page 95.
Example: to enter a destination in a US state
as a complete word, the system language
must be English.
> Spell the entry if the language spoken in the
area is different from the system language.
> Say the letters smoothly, and avoid exag-
gerating the pronunciation and inserting
lengthy pauses between the letters.
> The methods of entry depend on the
navigation data in use and on the country
and language settings.
Entering an address in a command
1.Press the button on the steering wheel.
3. Wait for a request from the system.
4. Say the address aloud in the suggested
order.
5. Continue making the entry as prompted by
the system.
If necessary, individua lly name the separate
components of the addres s, e.g. the town/city.
Entering a town/city
The town/city name can be spoken as a
complete word or spelled.
With the destination entry menu displayed:
1.Press the button on the steering wheel.
3. Wait for the system to prompt you for the
town/city.
2. {Enter address }
2. {City } or {Spell city }.
00320051004F004C00510048000300280047004C0057004C005200510003
Page 162 of 311
157
Destination guidance
Navigation
4.
Turn the controller: enter the desired
mileage.
5. Press the controller.
Resuming the original route
If the route section should no longer be
bypassed:
1."Navigation"
2. "Route information"
3. "New route for"
4. "Remove blocking"
Gas station re commendations
The remaining range is calculated and filling
stations along the route are displayed.
Even with the most up-t o-date navigation data,
information about certain special destinations
may have changed; for ex ample, filling stations
may not be in operation.
1. "Navigation"
2. "Route information"
3. "Recommended refuel"
A list of filling stations is displayed.
4. Select a gas station.
5. Select the symbol.
6. "Start guidance": route guidance to the
selected filling station is started.
"Add as another dest ination": the filling
station is incorporated into the route.
Destination guidance
through voice instructions
Switching voice instructions on/off
Voice instructions can be switched on or off
during destination guidance.
1. "Navigation"
2. "Map"
3. "Voice instructions"
For rapid access, the feature can be stored on a
programmable memory key, refer to page25.
Repeating a voice instruction
1."Navigation"
2. "Map"
3. Highlight the symbol.
4. Press the controller twice.
Adjusting volume for voice instructions
The volume can be adjusted only while a voice
instruction is being issued.
1.Have the last voice instruction repeated, if
necessary.
2. Turn the button during the voice instruction
to select the desired volume.
The setting is stored for the remote control
currently in use.
Map view
Displaying the map view
1. "Navigation"
2. "Map"
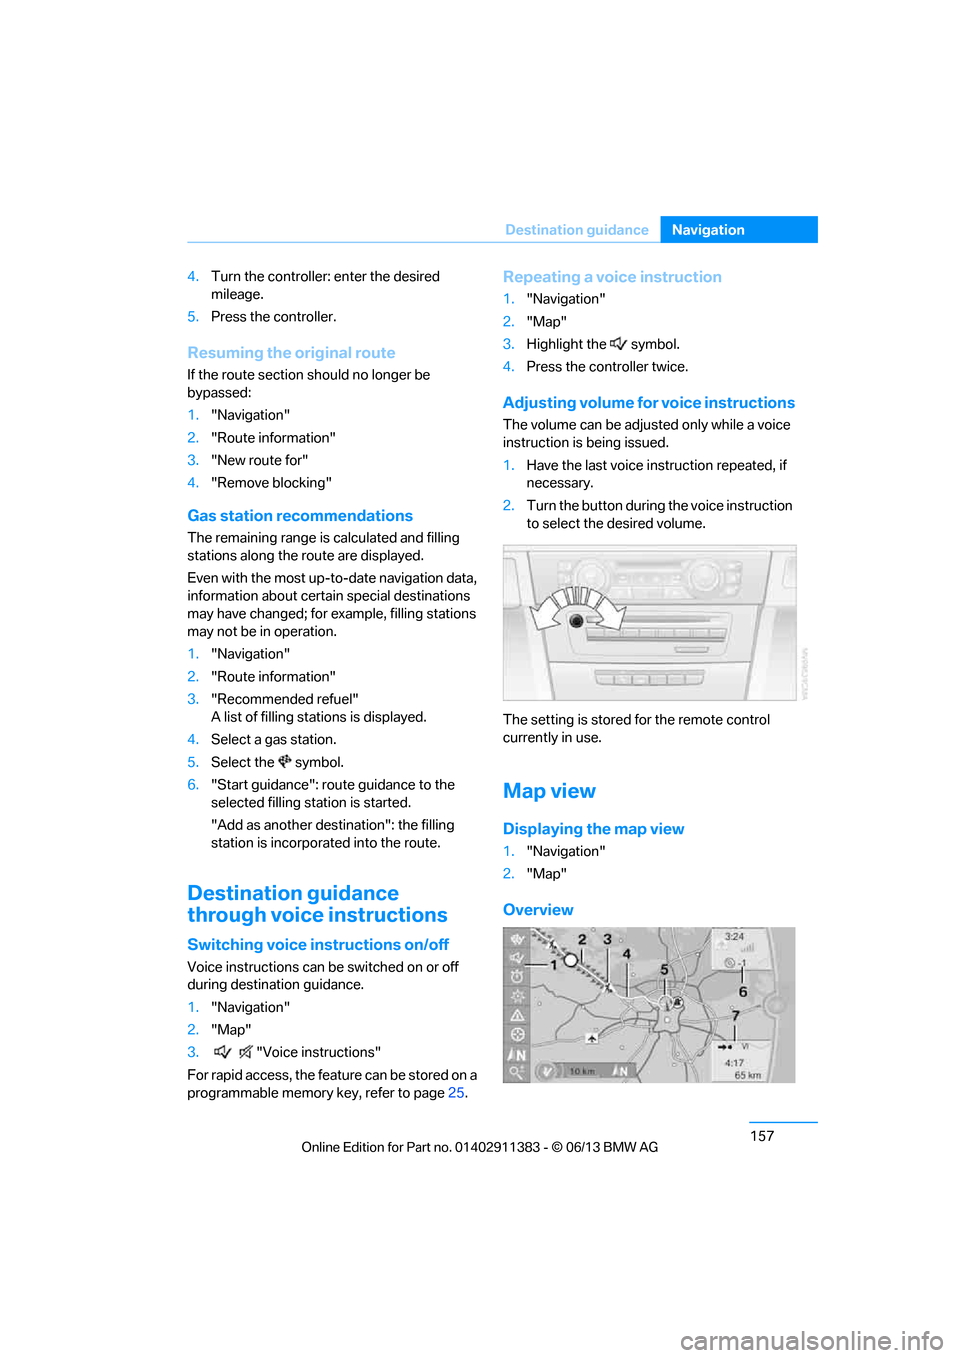
Overview
00320051004F004C00510048000300280047004C0057004C005200510003