Installation BMW 318i 1992 E36 Owners Manual
[x] Cancel search | Manufacturer: BMW, Model Year: 1992, Model line: 318i, Model: BMW 318i 1992 E36Pages: 759
Page 231 of 759
2
.
On
MS
270R/A4S
310R
transmissions
:
Remove
front
5
.
Installation
is
reverse
of
Rmoval
.
and
rear
oil
sump
mounting
bolts
andremove
sumps
"
Always
replace
sea¡
for
drain
plug
and
al¡
gasket(s)
andand
sump
gaskets
.
O-rings
.
"
Clean
sump
and
sump
magnet(s)
using
a
lint-free
NOTE-
cloth
.
The
MS
270
R/A4S
310
R
transmissions
may
be
fitted
"
On
MS
270R/A4S310R
transmissions
:
Use
new
bolts
with
ASE
(inch)
bolts
.
at
sump
and
tighten
bolts
in-line,
one
after
other
(do
nottighten
bolts
in
a
cross-wise
pattern)
.
3
.
On
A5S
310Z
transmission
:
Remove
oil
sump
mount-
"
On
MS
310Z
transmission,
be
sureto
instan
rounded
ing
bolts
and
brackets,
noting
position
of
brackets
.
Re-
sump
clamping
brackets
at
corners
of
sump
.
move
"
Fill
transmission
with
approved
fluid
.
sump
and
sump
gasket
.
"
Check
fluid
level
as
described
under
ATF
leve¡,
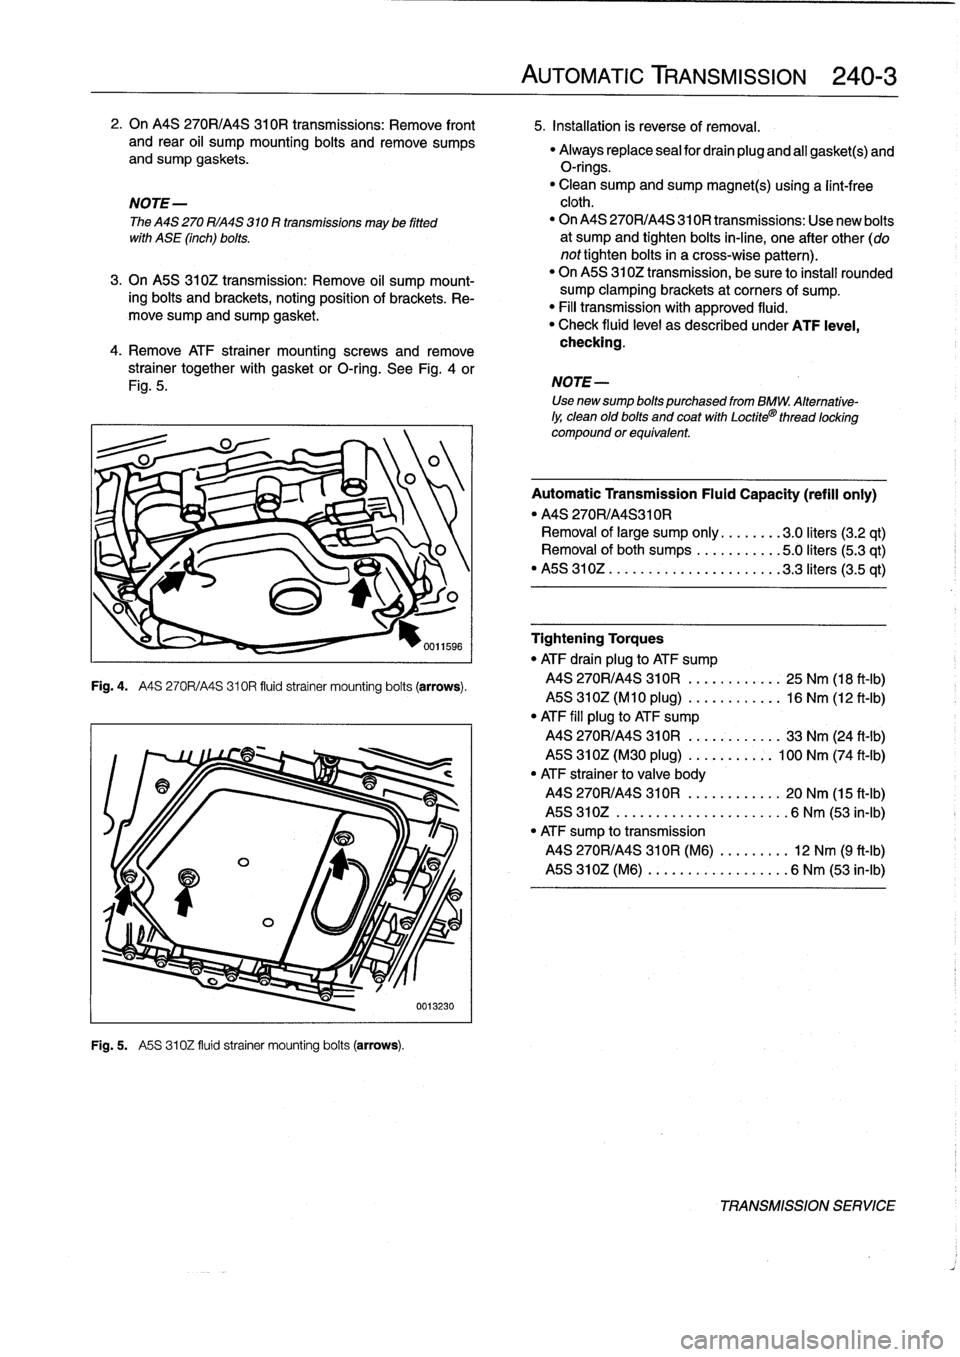
4
.
Remove
ATF
otra¡ner
mount¡ng
screws
and
remove
checking
.
strainer
together
with
gasket
orO-ring
.
See
Fig
.
4
or
Fig
.
5
.
Fig
.
4
.
A4S
270R/A4S310R
fluid
strainer
mounting
boits
(arrows)
.
Fig
.
5
.
A5S
310Z
fluid
strainer
mounting
boits
(arrows)
.
0013230
AUTOMATIC
TRANSMISSION
240-
3
NOTE-
Use
newsump
bolts
purchased
from
BMW
.
Alternative-
ly,
clean
old
bolts
and
coat
with
Loctite®
thread
locking
compound
or
equivalent
Automatic
Transmission
Fluid
Capacity
(refill
only)
"
MS
270R/A4S310R
Removal
of
large
sump
only
........
3
.0liters
(3.2
qt)
Removal
ofboth
sumps
...........
5
.0liters(5
.3
qt)
"
MS
310Z
..
..
..................
3
.3liters
(3.5
qt)
Tightening
Torques
"
ATF
drain
plug
to
ATF
sump
MS
270R/A4S
310R
..........
..
25
Nm
(18
ft-Ib)
MS
310Z(M10
plug)
..........
..
16
Nm
(12
ft-Ib)
"
ATF
fill
plug
to
ATF
sump
MS
270R/A4S
310R
..........
..
33
Nm
(24
ft-Ib)
MS
310Z(M30
plug)
.....
..
..
:.
100
Nm
(74
ft-Ib)
"
ATF
strainer
to
valve
body
MS
270R/A4S
310R
.....
..
.
...
.
20
Nm
(15
ft-Ib)
MS
310Z
..............
..
.
...
..
6
Nm
(53
in-lb)
"
ATF
sump
to
transmission
MS
270R/A4S
310R
(M6)
.
..
.
..
...
12
Nm
(9
ft-¡b)
MS
310Z
(M6)
..........
..
.
..
...
6
Nm
(53
in-¡b)
TRANSMISSION
SERVICE
Page 232 of 759
240-
4
AUTOMATIC
TRANSMISSION
TRANSMISSION
REMOVALAND
INSTALLATION
Removal
and
installation
of
thetransmission
is
best
accom-
plished
on
a
lift
using
a
transmission
jack
.
Use
caution
and
safe
workshop
practices
when
working
beneath
car
and
low-
ering
transmission
.
WARNING
-
To
lift
the
vehicle
safely,
see010
Fundamentals
for
the
Do-it-Yourself
Owner
.
CAUTION-
"
Be
sure
the
vehicle
is
properly
supported
.
The
removal
of
the
transmission
may
upset
the
bal-
ance
of
the
vehicle
on
a
lift
.
"
Tilting
the
engine
to
remove
the
transmission
can
lead
to
damage
to
various
components
due
to
lack
of
clearance
.
-On
carswith
AST
remove
throttle
body
.
-Remove
brake
fluid
reservoir
if
necessary
.
Torx-head
bolts
are
used
to
mount
thetransmission
to
the
bellhousing
.
Be
sure
to
have
appropriate
tools
on
hand
before
starting
thejob
.
2
.
Install
engine
support
across
engine
bay
.
Raise
and
safely
support
vehicle
.
See
Fig
.
6
.
WARNING
-
"
When
raising
thecar
using
a
floor
jack
or
a
hy-
draulic
lift,
carefully
position
the
jack
pad
to
pre-
vent
damaging
the
car
body
.
A
suitable
liner
(wood,
rubber,
etc
.)
should
be
placed
between
the
jack
and
the
car
to
prevent
body
damage
.
"
Watch
the
jack
closely
.
Make
sure
it
stays
stable
and
does
not
shift
or
tilt
.
As
the
car
is
raised,
the
car
may
roll
slightty
and
the
jack
may
shift
.
CAUTION-
Removal
of
transmission
will
cause
engine
to
tip
unlessengine
support
is
used
.
TRANSMISSION
REMOVAL
AND
INSTALLATION
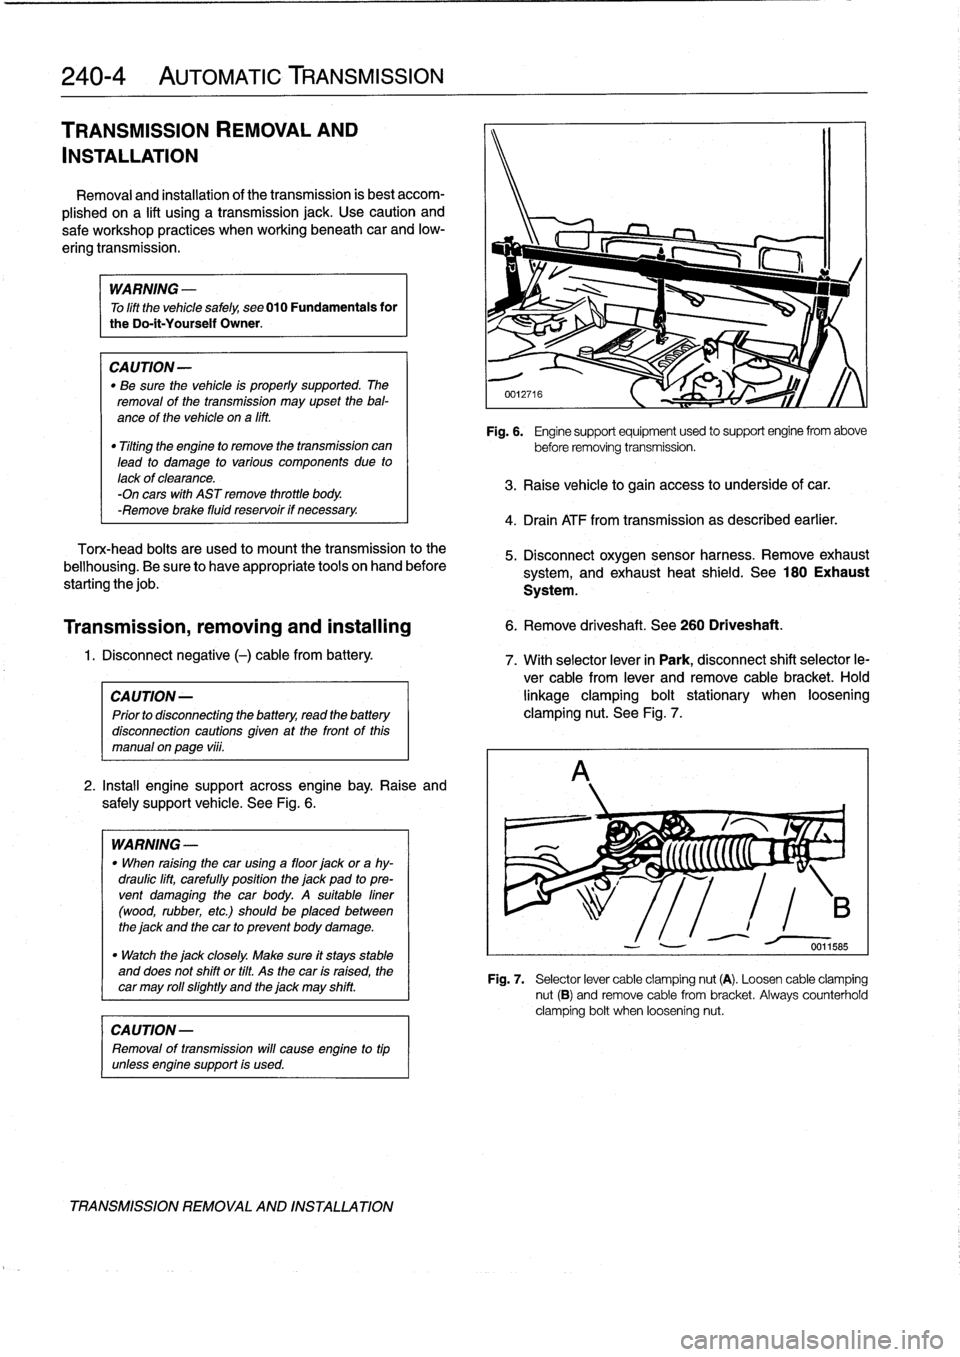
Fig
.
6
.
Engine
support
equipment
used
to
support
engine
from
above
before
removing
transmission
.
3
.
Raise
vehicle
to
gain
access
to
underside
of
car
.
4
.
Drain
ATF
from
transmission
as
described
earlier
.
5
.
Disconnect
oxygen
sensor
harness
.
Remove
exhaust
system,
and
exhaust
heat
shield
.
See
180
Exhaust
System
.
Transmission,
removing
and
installing
6
.
Remove
driveshaft
.
See
260
Driveshaft
.
1
.
Disconnect
negative
(-)
cable
from
battery
.
7
.
With
selector
lever
in
Park,
disconnect
shift
selector
le-
ver
cable
from
lever
and
remove
cable
bracket
.
Hold
CA
UTION-
linkage
clamping
bolt
stationary
when
loosening
Prior
to
disconnectiog
the
battery,
read
the
battery
clamping
nut
.
See
Fig
.
7
.
disconnection
cautions
given
at
the
front
of
this
manual
on
page
vi¡¡
.
Fig
.
7
.
Selector
lever
cable
clamping
nut
(A)
.
Loosen
cable
clamping
nut
(B)
and
remove
cable
from
bracket
.
Always
counterholdclamping
bolt
when
loosening
nut
.
Page 233 of 759
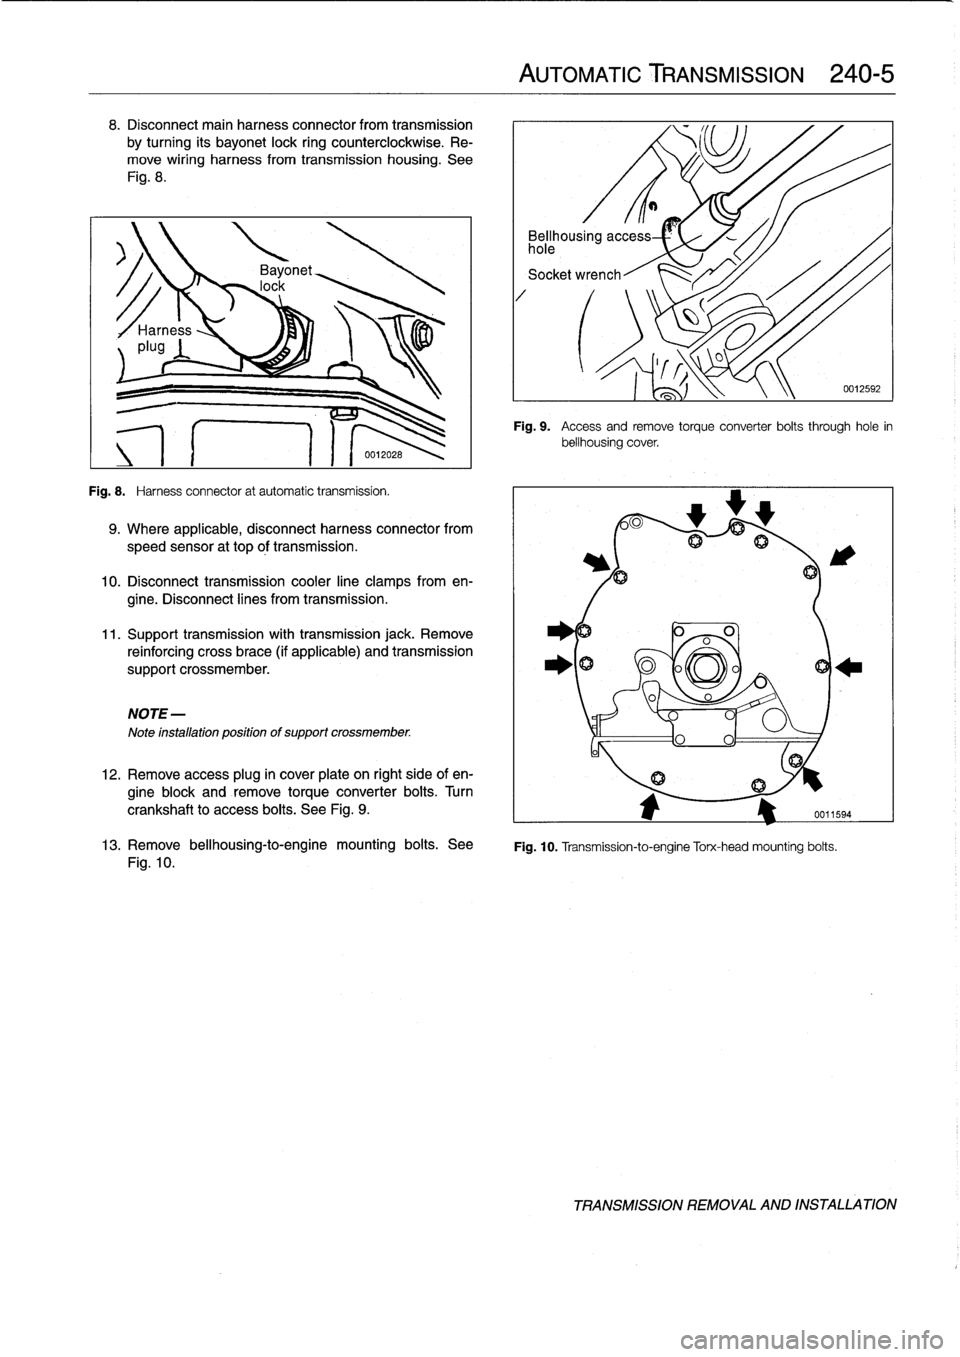
8
.
Disconnect
main
harness
connector
from
transmission
by
turning
its
bayonet
lock
ring
counterclockwise
.
Re-
move
wiring
harness
from
transmission
housing
.
See
Fig
.
8
.
Fig
.
8
.
Harness
connector
at
automatic
transmission
.
9
.
Where
applicable,
disconnect
harness
connector
from
speed
sensor
at
top
óf
transmission
.
10
.
Disconnect
transmission
cooler
line
clamps
from
en-
gine
.
Disconnect
lines
from
transmission
.
11
.
Support
transmission
with
transmission
jack
.
Remove
reinforcing
cross
brace
(if
applicable)
and
transmission
support
crossmember
.
NOTE-
Note
installation
positionof
support
crossmember
.
12
.
Remove
access
plug
in
cover
plate
on
right
side
of
en-
gine
block
and
remove
torqueconverter
bolts
.
Turn
crankshaft
to
access
boits
.
See
Fig
.
9
.
AUTOMATIC
TRANSMISSION
240-
5
Bellhousing
access
hole
Socket
wrench
Fig
.
9
.
Access
andremove
torque
converter
boits
through
hole
in
bellhousing
cover
.
0
A
fij
13
.
Remove
bellhousing-to-engine
mounting
bolts
.
See
Fig
.
10
.
Transmission-to-engine
Torx-head
mounting
bolts
.
Fig
.
10
.
0012592
TRANSMISSION
REMOVAL
AND
INSTALLATION
Page 234 of 759
240-
6
AUTOMATIC
TRANSMISSION
14
.
Remove
transmission
by
pulling
back
and
down
.
Lower
jack
to
allow
transmission
to
clear
vehicle
.
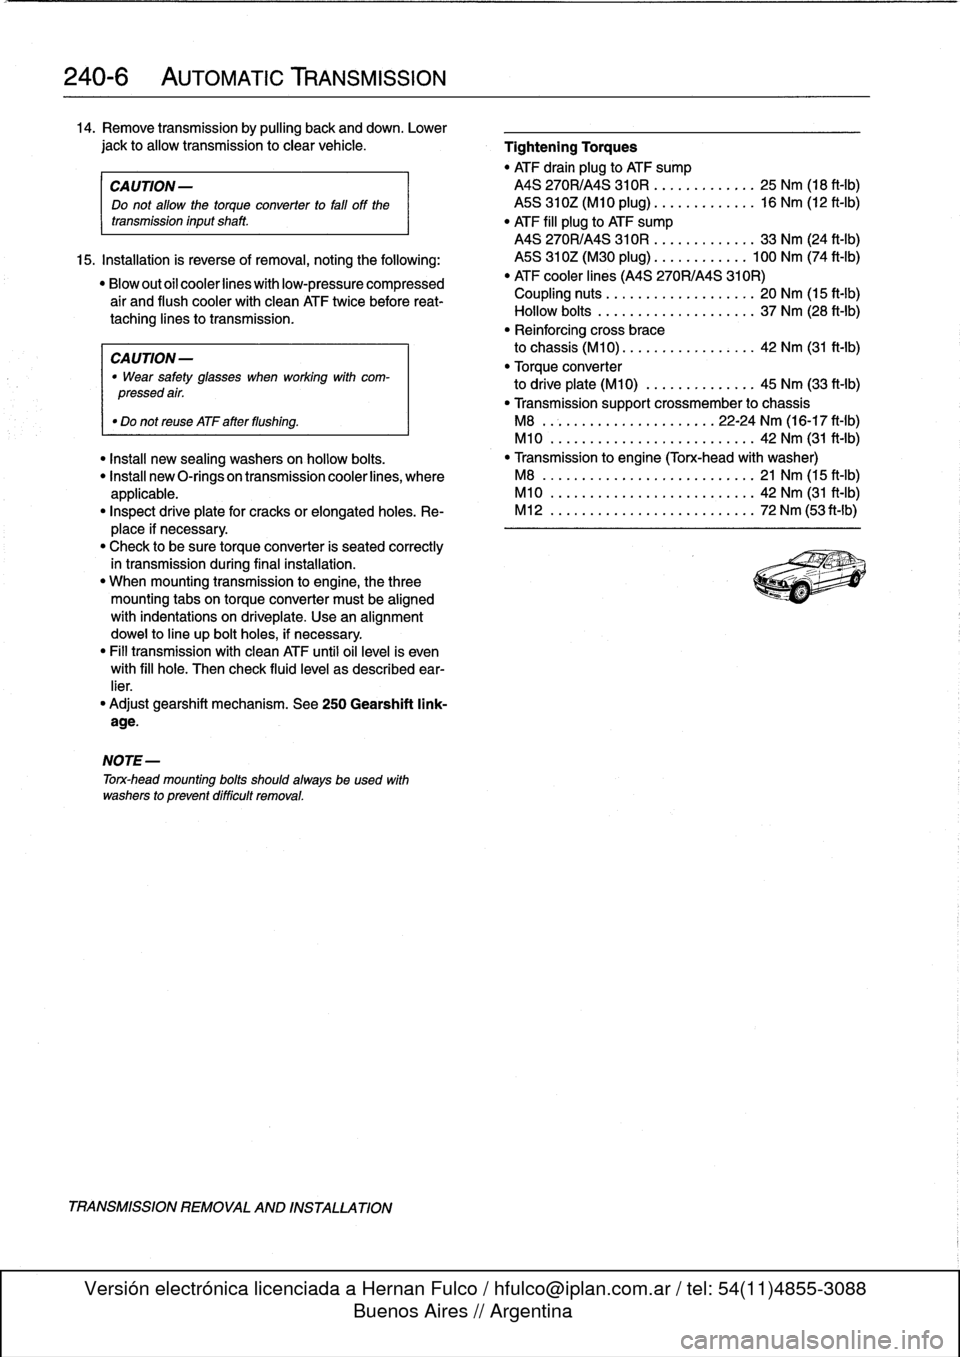
Tightening
Torques
"
ATF
drain
plug
to
ATF
sump
CA
UTION-
MS
270R/A4S
310R
....
..
....
.
..
25
Nm
(18
ft-Ib)
Do
not
allow
the
torque
converter
to
fati
off
the
ASS
310Z(M10
plug)
..
..
..
.
.
..
.
..
16
Nm
(12
ft-Ib)
transmission
inputshaft
.
"
ATF
fill
plug
to
ATF
sump
MS
270R/A4S
310R
..
..
....
..
..
.
33
Nm
(24
ft-Ib)
15
.
Installation
is
reverse
of
removal,
noting
the
following
:
MS
310Z(M30
plug)
......
.
.
..
.
.
100
Nm
(74
ft-Ib)
"Blowoutofcoolerlineswithlow-pressurecompressed
"
ATF
cooler
lines
(A4S
270R/A4S
310R)
air
and
flush
coolerwith
clean
ATF
twice
before
reat-
Coupling
nuts
............
.
.
..
..
.
20
Nm
(15
ft-Ib)
taching
lines
to
transmission
.
Hollow
bolts
.........
.
.....
..
..
.
37
Nm
(28
ft-Ib)
"
Reinforcing
cross
brace
CAUTION-
to
chassis
(M10)
.............
.
..
.
42
Nm
(31
ft-Ib)
"
Wear
safety
glasses
when
working
with
com-
"
Torque
converter
pressedair
.
to
driveplate
(M10)
.........
..
.
..
45
Nm
(33
ft-Ib)
"
Transmissionsupport
crossmember
to
chassis
"
Do
not
reuse
ATF
after
flushing
.
M8
......................
22-24
Nm
(16-17
ft-1b)
M10
................
.
....
..
.
..
42
Nm
(31
ft-Ib)
"
Install
new
sealing
washers
on
hollow
bolts
.
"
Transmissíon
to
engine
(Torx-head
with
washer)
"
Insta¡¡
new
O-rings
on
transmission
cooler
lines,
where
M8
......................
..
.
..
21
Nm
(15
ft-Ib)
applicable
.
M10
.....................
..
..
.
42
Nm
(31
ft-Ib)
"
Inspect
driveplate
for
cracks
or
elongatedholes
.
Re-
M12
................
.
....
..
.
..
72
Nm
(53ft-Ib)
place
if
necessary
.
"
Check
to
be
sure
torque
converter
is
seated
correctly
in
transmission
during
final
installation
.
"
When
mounting
transmission
to
engine,
the
three
mounting
tabs
on
torque
converter
must
be
aligned
with
indentations
on
driveplate
.
Use
an
alignment
dowel
to
line
up
bolt
holes,
if
necessary
.
"
Fill
transmission
with
clean
ATF
until
oil
leve¡
is
even
with
fill
hole
.
Then
check
fluid
leve¡
as
described
ear-
lier
.
"
Adjust
gearshift
mechanism
.
See
250
Gearshift
link-
age
.
NOTE-
Torx-head
mounting
bolts
shouldalwaysbe
used
with
washers
to
prevent
difficult
removal
.
TRANSMISSION
REMOVAL
AND
INSTALLATION
Page 238 of 759
250-
4
GEARSHIFT
LINKAGE
r%
;
5
(((((C
"
~
;
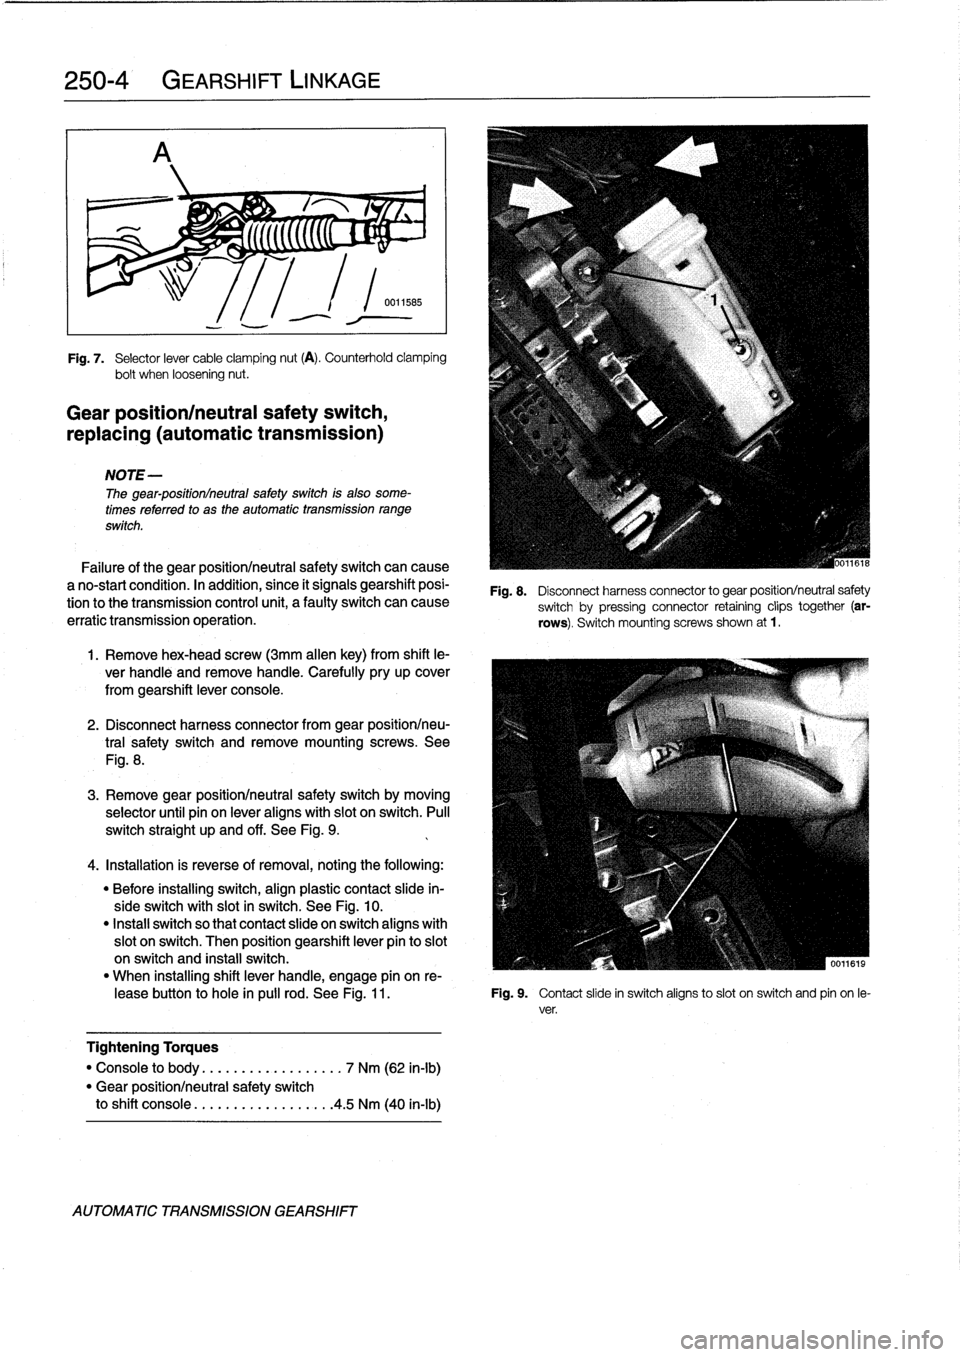
Fig
.
7
.
Selector
lever
cable
clamping
nut
(A)
.
Counterhold
clamping
bolt
when
loosening
nut
.
Gear
position/neutral
safety
switch,
replacing
(automatic
transmission)
NOTE-
The
gear-positionlneutral
safetyswitch
is
also
some-
times
referred
to
as
the
automatic
transmission
range
switch
.
Failure
of
the
gear
positionlneutral
safetyswitch
can
cause
a
no-start
condition
.
In
acidition,
since
it
signals
gearshift
posi-
tion
tothe
transmission
control
unit,
a
faulty
switch
can
cause
erratic
transmission
operation
.
1
.
Remove
hex-head
screw
(3mm
allen
key)
from
shift
le-
ver
handle
and
remove
handle
.
Carefully
pry
up
cover
from
gearshift
lever
console
.
2
.
Disconnect
harness
connector
from
gear
positionlneu-
tral
safety
switch
andremove
mounting
screws
.
See
Fig
.
8
.
3
.
Remove
gear
positionlneutral
safety
switch
by
moving
selector
until
pin
on
lever
aligns
with
slot
on
switch
.
Pull
switch
straight
up
and
off
.
See
Fig
.
9
.
4
.
Installation
is
reverse
of
removal,
noting
the
following
:
"
Before
installing
switch,
align
plastic
contact
slide
in-
sideswitch
with
slot
in
switch
.
See
Fig
.
10
.
"
Instan
switch
so
that
contact
slide
on
switch
aligns
with
slot
on
switch
.
Then
position
gearshift
lever
pin
to
slot
on
switch
and
install
switch
.
"
When
installing
shift
lever
handle,
engage
pín
on
re
leasebutton
to
hole
in
pulí
rod
.
See
Fig
.
11
.
Fig
.
9
.
Contact
slide
in
switch
aligns
toslot
on
switch
and
pin
on
le-
ver
.
Tightening
Torques
"
Console
to
body
..............
...
.
7
Nm
(62
in-lb)
"
Gear
positionlneutral
safety
switch
to
shift
console
.................
.
4
.5
Nm
(40
in-lb)
AUTOMATIC
TRANSMISSION
GEARSHIFT
Fig
.
8
.
Disconnect
harness
connector
to
gear
position/neutral
safety
switch
by
pressing
connector
retaining
clips
together
(ar-
rows)
.
Switch
mountingscrews
shown
at
1
.
Page 245 of 759
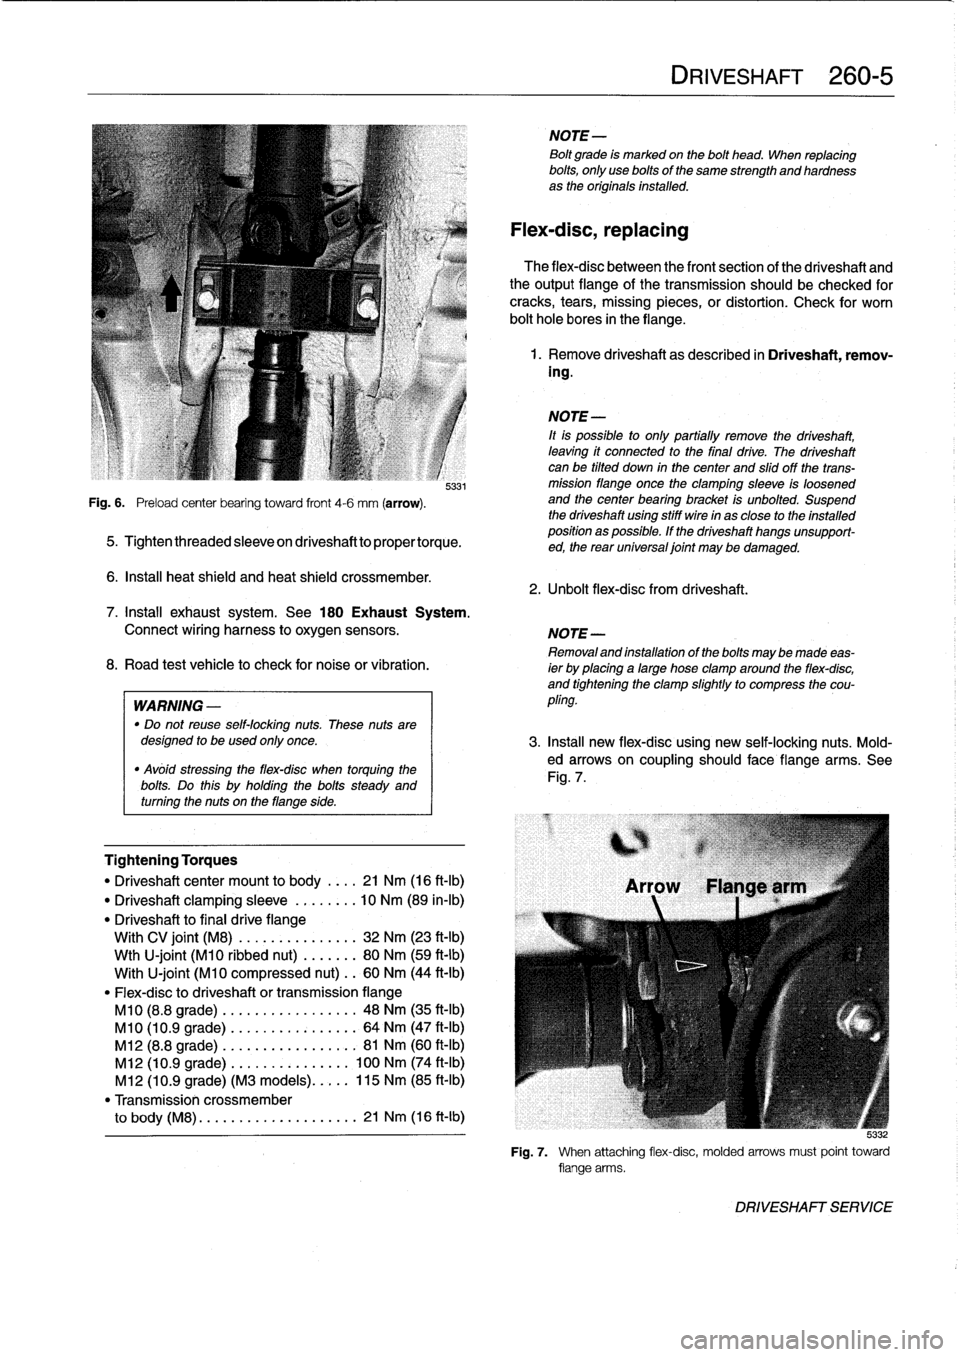
Fig
.
6
.
Preload
center
bearing
toward
front
4-6
mm
(arrow)
.
5331
5
.
Tightenthreadedsleeveondriveshafttopropertorque
.
6
.
Insta¡¡
heat
shield
and
heat
shield
crossmember
.
Tightening
Torques
"
Driveshaftcenter
mount
to
body
.
.
..
21
Nm
(16
ft-Ib)
"
Driveshaft
clamping
sleeve
.....
.
.
.
10
Nm
(89
in-lb)
"
Driveshaft
to
final
drive
flange
With
CV
joint
(M8)
............
...
32
Nm
(23
ft-Ib)
Wth
U-joint
(M10
ribbed
nut)
....
...
80
Nm
(59
ft-Ib)
With
U-joint
(M10
compressed
nut)
..
60
Nm
(44
ft-Ib)
"
Flex-disc
to
driveshaft
or
transmissionflange
M10
(8.8
grade)
.........
.
....
..
.
48
Nm
(35
ft-Ib)
M10
(10
.9
grade)
........
.
....
...
64
Nm
(47
ft-Ib)
M12
(8.8
grade)
........
.....
..
.
.
81
Nm
(60
ft-Ib)
M12
(10
.9
grade)
.
.
....
......
...
100
Nm
(74
ft-Ib)
M12
(10
.9
grade)
(M3
models)
..
.
.
.
115
Nm
(85
ft-Ib)
"
Transmission
crossmember
to
body
(M8)
.
....
...........
....
21
Nm
(16
ft-Ib)
NOTE-
Bolt
grade
is
markedon
the
bolt
head
.
When
replacing
bolts,
only
use
bolts
of
the
same
strength
and
hardnessas
the
originalsinstalled
.
Flex-disc,
replacing
The
flex-disc
between
the
front
section
of
the
driveshaft
and
theoutputflange
of
the
transmission
should
be
checked
for
cracks,
tears,
missing
pieces,
or
distortion
.
Check
for
worn
bolt
hole
bores
in
theflange
.
1
.
Remove
driveshaft
as
described
in
Driveshaft,
remov-
ing
.
NOTE-
¡t
is
possible
to
only
partially
remove
the
driveshaft,
leaving
it
connected
to
the
final
drive
.
The
driveshaft
canbe
tilted
down
in
thecenter
and
slidoff
the
trans-
mission
flange
once
the
clamping
sleeve
is
loosened
and
the
center
bearing
bracket
is
unbolted
.
Suspend
the
driveshaft
using
stiff
wire
in
as
close
to
the
installed
position
as
possible
.
If
the
driveshaft
hangs
unsupport-
ed,
the
rear
universal
joint
may
be
damaged
.
2
.
Unbolt
flex-dísc
from
driveshaft
.
DRIVESHAFT
260-
5
7
.
Install
exhaust
system
.
See
180
Exhaust
System
.
Connect
wiring
harness
to
oxygen
sensors
.
NOTE-
Removaland
installation
of
the
boltsmaybe
made
eas-
8
.
Road
test
vehicle
to
check
for
noiseor
vibration
.
ier
by
placing
a
large
hose
clamp
around
the
flex-disc,
and
tightening
the
clamp
slightlyto
compress
the
cou
WARNING
-
pling
.
"
Do
not
reuse
self-locking
nuts
.
These
nuts
aredesigned
to
beused
only
once
.
3
.
Insta¡¡
new
flex-disc
using
new
self-locking
nuts
.
Mold-
"
Avóid
stressing
the
flex-disc
when
torquing
the
ed
arrows
on
coupling
should
face
flange
arms
.
See
bolts
Do
this
holding
the
bolts
Fig
.
7
.
steady
and
.
uy
turning
the
nuts
on
theflange
side
.
5
:132
Fig
.
7
.
When
attaching
flex-disc,
molded
arrows
must
point
toward
flange
arms
.
DRIVESHAFT
SERVICE
Page 247 of 759
6
.
Before
installation,
make
sure
dust
guard
is
on
drive-
2
.
Pack
cavity
behind
centering
guide
with
heavy
grease
shaft,
and
then
press
center
mount
onto
driveshaft
until
grease
is
flush
with
bottom
edge
of
guide
.
flush
with
dust
guard
.
3
.
Insert
14
mm
(approximately
%z
in
.)
diameter
mandrel
7
.
Place
clamping
sleeve,
washer,
and
rubber
bushing
on
or
metal
rod
finto
guide
.
Strike
guide
with
hammer
to
front
driveshaft
section
.
Lubricate
splines
with
molyb-
force
centering
guide
out
.
denum
disulfide
grease
(Molykote
0
Longterm
2
or
equivalent)
and
then
reassemble
driveshaft
.
NOTE-
The
mandrel
should
fit
snugly
in
thecentering
guideso
NOTE-
that
the
greasecannot
escapearound
the
sides
of
the
Do
not
retighten
clamping
sleeve
until
driveshaft
is
in-
mandrel
.
stalled
.
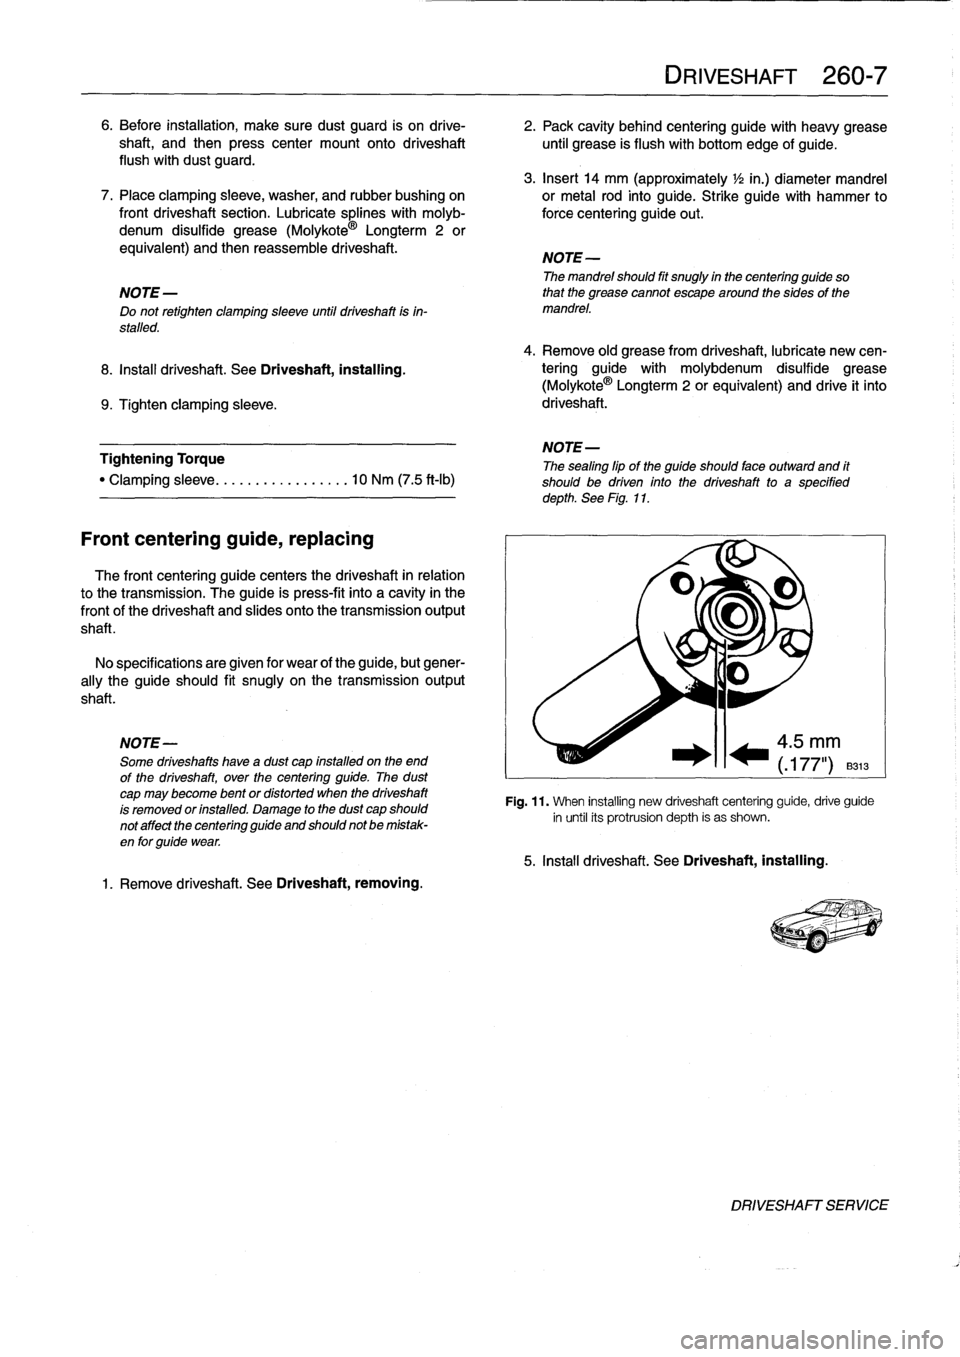
4
.
Remove
old
greasefrom
driveshaft,
lubricate
new
cen
8
.
Insta¡¡
dríveshaft
.
See
Driveshaft,
installing
.
tering
guide
with
molybdenum
disulfide
grease
(Molykote
®
Longterm2
or
equivalent)
and
drive
it
finto
9
.
Tighten
clamping
sleeve
.
driveshaft
.
NOTE-
Tightening
Torque
The
sealing
lip
of
the
guide
should
face
outward
and
it
"
Clamping
sleeve
.....
...
.
..
......
10
Nm
(7
.5
ft-Ib)
shouldbe
driven
into
the
driveshaft
to
a
specified
depth
.
See
Fig
.
11
.
Front
centering
guide,
replacing
The
front
centering
guide
centers
the
driveshaft
in
relation
to
the
transmission
.
The
guide
is
press-fit
finto
a
cavity
in
the
frontof
the
driveshaft
and
slides
onto
the
transmission
output
shaft
.
No
specifications
are
given
for
wear
of
the
guide,
but
gener-
ally
theguide
should
fit
snugly
on
thetransmissionoutput
shaft
.
NOTE-
Some
driveshafts
have
a
dust
cap
installed
on
the
end
of
the
driveshaft,
over
thecentering
guide
.
The
dust
cap
may
become
bent
or
distorted
when
the
driveshaft
is
removed
or
installed
.
Damage
to
the
dust
capshould
not
affect
the
centering
guide
and
should
not
be
mistak-
en
for
guide
wear
.
1
.
Remove
driveshaft
.
See
Driveshaft,
removing
.
®RIVESHAFT
260-
7
~)I~
4
.5
mm
(
.177")
B313
Fig
.
11
.
When
installing
new
driveshaft
centering
guide,
drive
guide
in
until
its
protrusion
depth
is
as
shown
.
5
.
Install
driveshaft
.
See
Driveshaft,
installing
.
DRIVESHAFT
SERVICE
Page 258 of 759
310-2
FRONT
SUSPENSION
WARNING-
"
Physical
safety
could
be
impaired
if
procedures
described
here
areundertaken
without
the
proper
service
tools
and
equipment
.
Be
sure
to
have
the
right
tools
onhand
before
beginning
any
job
.
"
Do
notreuse
self-locking
nuts
or
bolts
.
They
are
designed
to
beused
only
once
and
may
fail
if
re-
used
.
Always
replace
self-locking
fasteners
any
timethey
are
loosenedor
removed
.
"
Do
not
install
bolts
and
nuts
coated
with
under-
coating
wax,
as
the
correct
tightening
torque
can-
not
beassured
.
Always
clean
the
threads
with
solventbefore
installation,
or
install
new
parts
.
"
Do
not
attempt
to
weld
or
straighten
any
suspen-
sion
components
.
Replace
damaged
parts
.
SHOCK
ABSORBERS
AND
SPRINGS
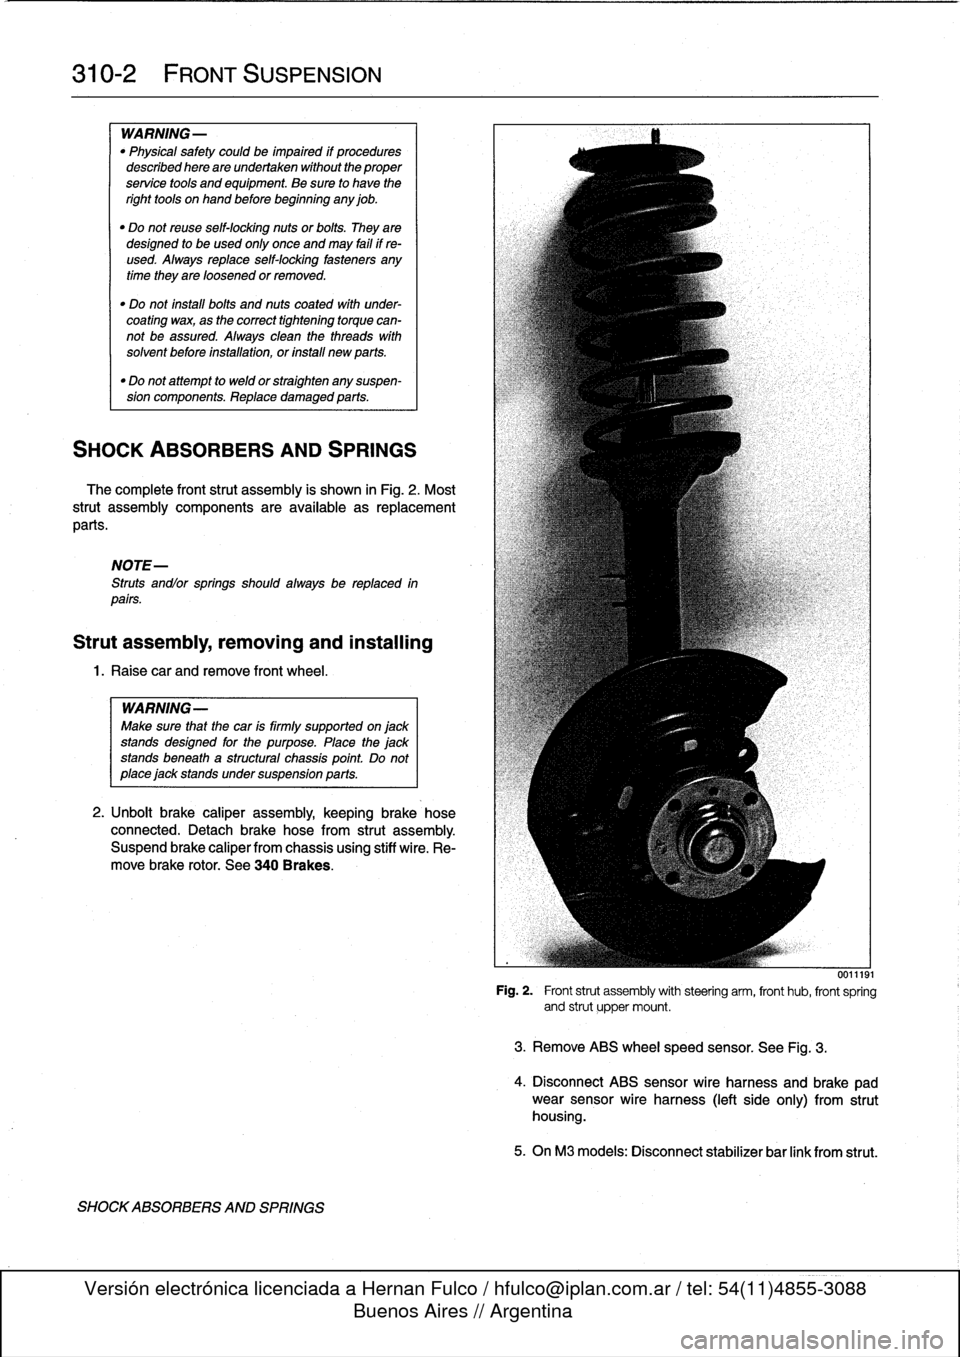
The
complete
front
strut
assembly
is
shown
in
Fig
.
2
.
Most
strut
assembly
components
are
available
asreplacement
parts
.
NOTE-
Struts
andlor
springs
shouldalways
be
replaced
in
parts
.
Strut
assembly,
removing
and
installing
1
.
Raisecar
and
remove
front
wheel
.
WARNING-
Make
sure
that
the
car
is
firmly
supported
on
jack
standsdesigned
for
the
purpose
.
Place
the
jack
standsbeneath
a
structural
chassis
point
Do
not
place
jack
stands
under
suspension
parts
.
2
.
Unbolt
brake
caliper
assembly,
keepingbrake
hose
connected
.
Detach
brake
hose
from
strut
assembly
.
Suspend
brake
caliper
from
chassis
using
stiff
wire
.
Re-
move
brake
rotor
.
See
340
Brakes
.
SHOCKABSORBERS
AND
SPRINGS
0011191
Fig
.
2
.
Front
strut
assembly
with
steering
arm,
front
hub,
front
spring
and
strut
upper
mount
.
3
.
Remove
ABS
wheelspeed
sensor
.
See
Fig
.
3
.
4
.
Disconnect
ABS
sensor
wire
harness
and
brake
pad
wear
sensor
wire
harness
(left
side
only)
from
strut
housing
.
5
.
OnM3
modeis
:
Disconnect
stabilizer
bar
link
from
strut
.
Page 259 of 759
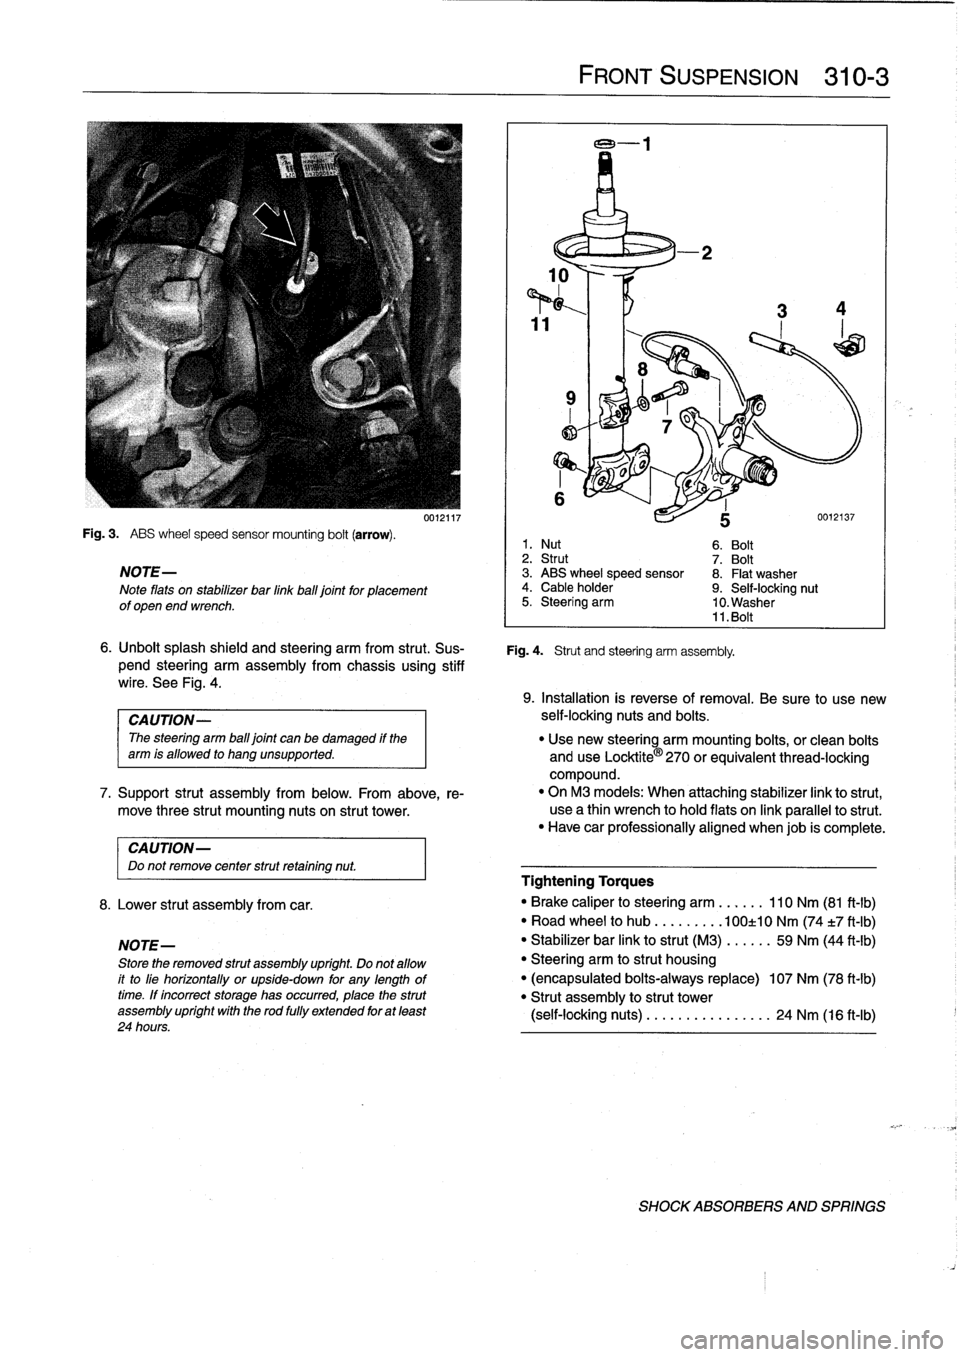
Fig
.
3
.
ABS
wheel
speed
sensor
mounting
bolt
(arrow)
.
NOTE-
Note
flats
on
stabilizer
bar
linkball
joint
for
placement
of
open
end
wrench
.
CAUTION-
Do
not
remove
center
strut
retaining
nut
.
8
.
Lower
strut
assembly
from
car
.
NOTE-
Store
the
removed
strut
assembly
upríght
.
Do
not
allow
it
to
líe
horizontally
or
upside-down
for
any
lengthoftime
.
If
íncorrect
storage
has
occurred,
place
the
strut
assembly
upríght
wíth
the
rod
fully
extended
for
at
least
24
hours
.
0012117
FRONT
SUSPENSION
310-3
6
.
Unbolt
splash
shield
and
steering
arm
from
strut
.
Sus-
Fig
.
4
.
Strut
and
steering
arm
assembly
.
pend
steering
arm
assembly
from
chassis
using
stiff
wire
.
See
Fig
.
4
.
1
.
Nut
6
.
Bolt
2
.
Strut
7
.
Bolt
3
.
ABS
wheel
speed
sensor
8
.
Flat
washer
4
.
Cable
holder
9
.
Self-locking
nut
5
.
Steering
arm
10
.
Washer
11
.
Bolt
9
.
Installation
is
reverse
of
removal
.
Be
sure
to
use
new
CAUTION-
self-locking
nuts
and
bolts
.
The
steering
arm
ball
joint
can
be
damaged
if
the
"
Use
new
steering
arm
mounting
bolts,
or
clean
bolts
arm
is
allowed
to
hang
unsupported
.
and
use
Locktite
®
270
orequivalent
thread-locking
compound
.
7
.
Support
strut
assembly
from
below
.
From
above,
re-
"
On
M3
models
:
When
attaching
stabilizer
link
to
strut,
move
three
strut
mounting
nuts
on
strut
tower
.
use
a
thin
wrench
to
hold
flats
on
link
parallelto
strut
.
"
Have
car
professionally
aligned
When
job
is
complete
.
Tightening
Torques
"
Brake
caliper
to
steering
arm
......
110
Nm
(81
ft-lb)
"
Road
wheel
to
hub
.........
100±10
Nm
(74
t7
ft-Ib)
"
Stabilizer
bar
link
to
strut
(M3)
.....
.
59
Nm
(44
ft-lb)
"
Steering
arm
to
strut
housing
"
(encapsulated
bolts-always
replace)
107
Nm
(78
ft-lb)
"
Strut
assembly
to
strut
tower
(self-locking
nuts)
........
...
..
..
.
24
Nm
(16
ft-Ib)
SHOCK
ABSORBERS
AND
SPRINGS
Page 262 of 759
310-
6
FRONT
SUSPENSION
3
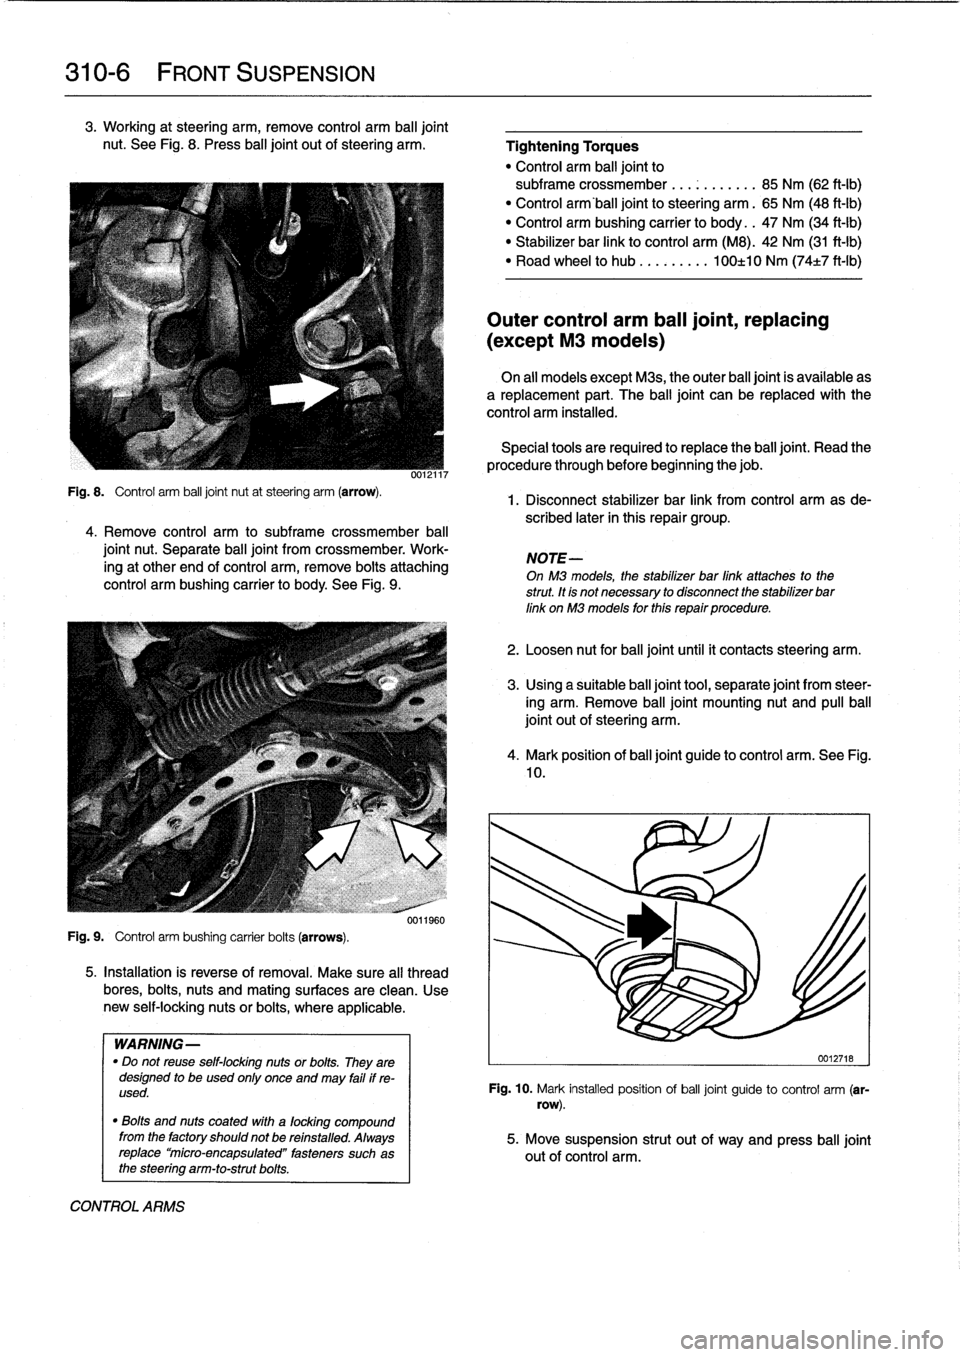
.
Working
at
steering
arm,
remove
control
arm
balljoint
nut
.
See
Fig
.
8
.
Press
ball
joint
out
ofsteering
arm
.
Fig
.
8
.
Control
arm
ball
joint
nut
at
steering
arm
(arrow)
.
4
.
Remove
control
arm
to
subframe
crossmember
ball
joint
nut
.
Separate
ball
joint
from
crossmember
.
Work-
ing
at
other
end
of
control
arm,
remove
bolts
attaching
control
arm
bushing
carrier
to
body
.
See
Fig
.
9
.
Fig
.
9
.
Control
arm
bushing
carrier
bolts
(arrows)
.
0012117
0011960
5
.
Installation
is
reverse
of
removal
.
Make
sure
al¡
thread
bores,
bolts,
nuts
and
mating
surfaces
are
clean
.
Use
new
self-locking
nutsor
bolts,
where
applicable
.
WARNING-
"
Do
not
reuse
self-locking
nuts
or
bolts
.
They
are
designed
to
be
used
only
once
and
may
failif
re-
used
.
"
Bolts
and
nuts
coated
with
a
focking
compound
from
the
factory
shouldnot
be
refnstalled
.
Always
replace`micro-encapsulated"
fasteners
such
as
the
steering
arm-to-strutbolts
.
CONTROL
ARMS
Tightening
Torques
"
Control
arm
balljoint
to
subframe
crossmember
.
..
...
...
.
.
85
Nm
(62
ft-Ib)
"
Control
arm'ball
joint
to
steering
arm
.
65
Nm
(48
ft-Ib)
"
Control
arm
bushing
carrier
to
body
.
.
47
Nm
(34
ft-Ib)
"
Stabilizer
bar
link
to
control
arm
(M8)
.
42
Nm
(31
ft-Ib)
"
Road
wheel
to
hub
.
...
...
.
.
100±10
Nm
(74±7
ft-Ib)
Outer
control
arm
ball
joint,
replacing
(except
M3
models)
On
all
models
except
Mas,
the
outer
balljoint
is
available
as
a
replacement
part
.
The
ball
joint
can
be
replaced
with
the
control
arm
installed
.
Special
tools
are
requiredto
replace
the
balljoínt
.
Read
the
procedure
through
before
beginning
thejob
.
1
.
Disconnect
stabilizer
bar
link
from
control
arm
asde-
scribed
later
in
this
repair
group
.
NOTE-
On
M3
models,
the
stabilizer
bar
link
attaches
to
the
strut
.
tt
fs
not
necessary
to
disconnect
the
stabilizer
bar
link
on
M3
models
for
thfs
repair
procedure
.
2
.
Loosen
nut
for
balljointuntil
it
contacts
steering
arm
.
3
.
Using
a
suitable
ball
joint
tool,
separate
joint
from
steer-
íng
arm
.
Remove
ball
joint
mounting
nut
and
pullball
joint
out
of
steering
arm
.
4
.
Mark
position
of
balljoint
guide
to
control
arm
.
See
Fig
.
10
.
0012718
Fig
.
10
.
Mark
installed
position
of
ball
joint
guide
to
control
arm
(sr-
row)
.
5
.
Move
suspension
strut
out
of
way
and
press
ball
joint
out
of
control
arm
.