tire BMW 323I SEDAN 2008 E90 Owner's Manual
[x] Cancel search | Manufacturer: BMW, Model Year: 2008, Model line: 323I SEDAN, Model: BMW 323I SEDAN 2008 E90Pages: 274, PDF Size: 8.88 MB
Page 5 of 274
Reference
At a glance
Controls
Driving tips
Communications
Navigation
Entertainment
Mobility
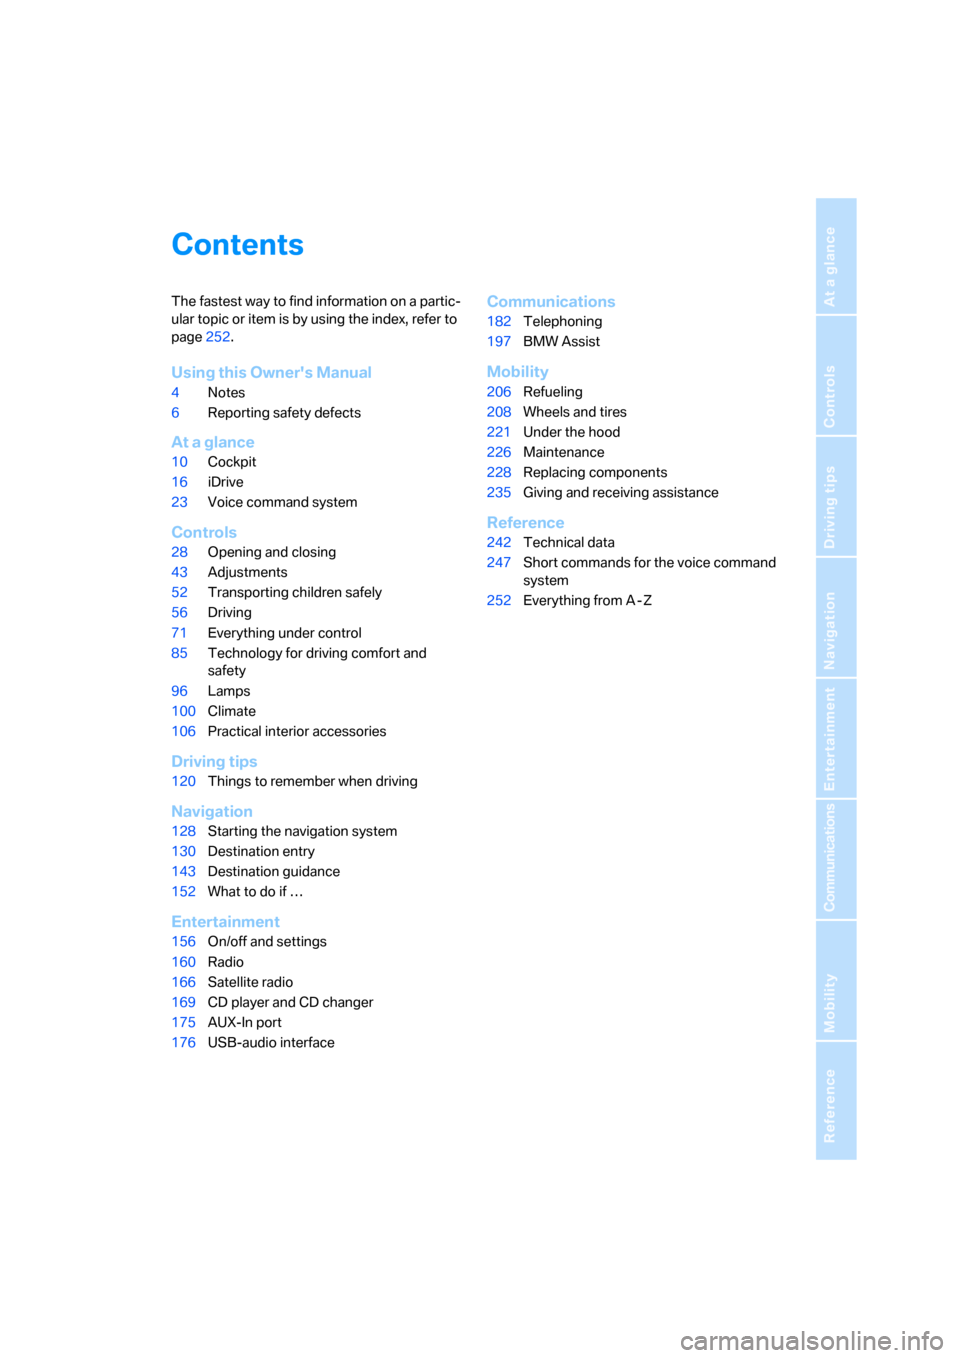
Contents
The fastest way to find information on a partic-
ular topic or item is by using the index, refer to
page252.
Using this Owner's Manual
4Notes
6Reporting safety defects
At a glance
10Cockpit
16iDrive
23Voice command system
Controls
28Opening and closing
43Adjustments
52Transporting children safely
56Driving
71Everything under control
85Technology for driving comfort and
safety
96Lamps
100Climate
106Practical interior accessories
Driving tips
120Things to remember when driving
Navigation
128Starting the navigation system
130Destination entry
143Destination guidance
152What to do if …
Entertainment
156On/off and settings
160Radio
166Satellite radio
169CD player and CD changer
175AUX-In port
176USB-audio interface
Communications
182Telephoning
197BMW Assist
Mobility
206Refueling
208Wheels and tires
221Under the hood
226Maintenance
228Replacing components
235Giving and receiving assistance
Reference
242Technical data
247Short commands for the voice command
system
252Everything from A - Z
Page 7 of 274
5Reference
At a glance
Controls
Driving tips
Communications
Navigation
Entertainment
Mobility
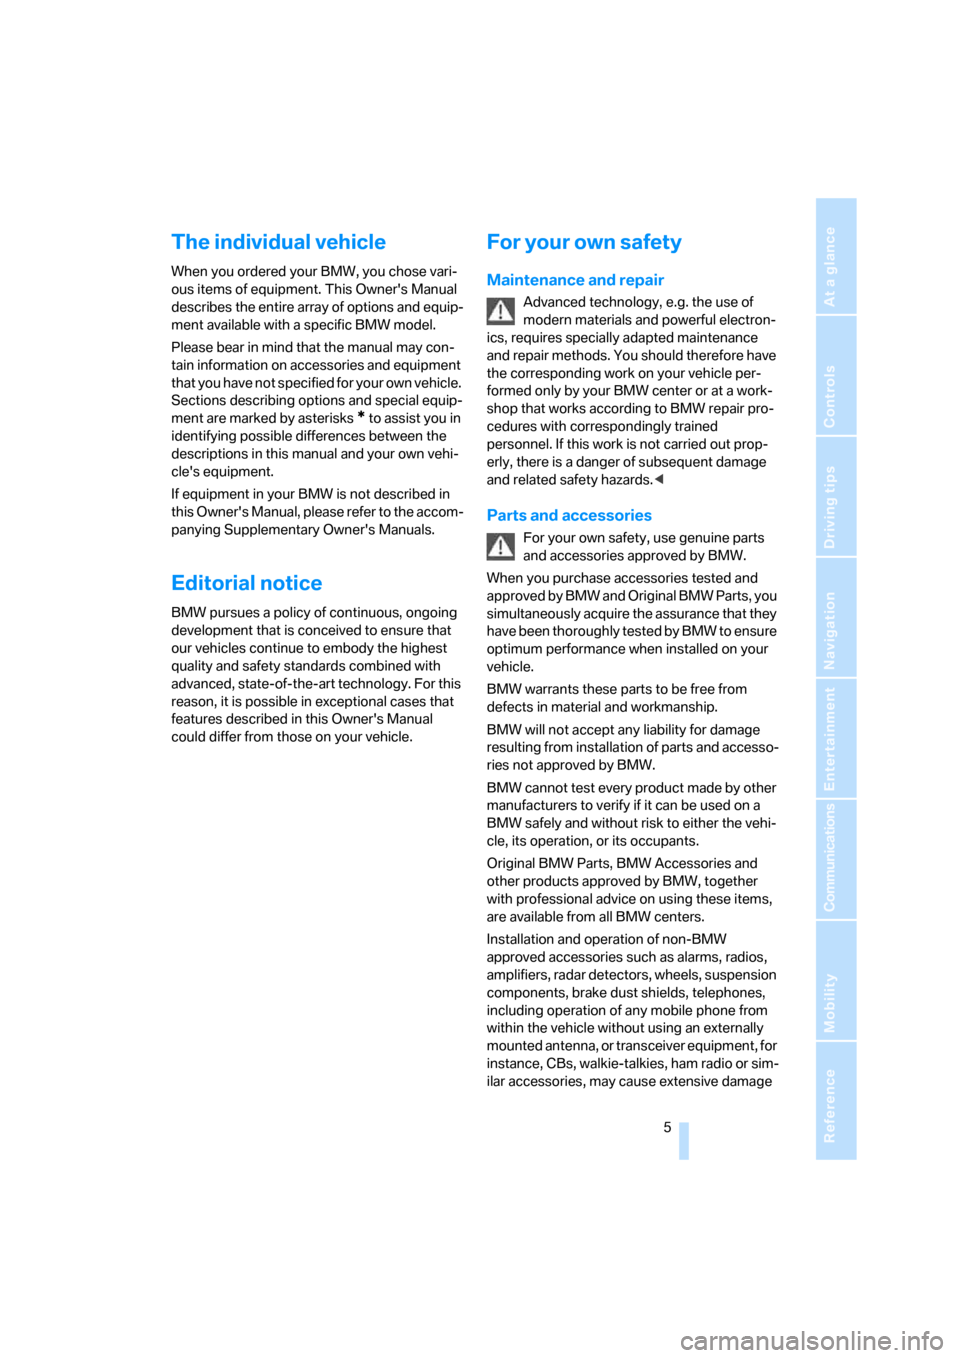
The individual vehicle
When you ordered your BMW, you chose vari-
ous items of equipment. This Owner's Manual
describes the entire array of options and equip-
ment available with a specific BMW model.
Please bear in mind that the manual may con-
tain information on accessories and equipment
that you have not specified for your own vehicle.
Sections describing options and special equip-
ment are marked by asterisks
* to assist you in
identifying possible differences between the
descriptions in this manual and your own vehi-
cle's equipment.
If equipment in your BMW is not described in
this Owner's Manual, please refer to the accom-
panying Supplementary Owner's Manuals.
Editorial notice
BMW pursues a policy of continuous, ongoing
development that is conceived to ensure that
our vehicles continue to embody the highest
quality and safety standards combined with
advanced, state-of-the-art technology. For this
reason, it is possible in exceptional cases that
features described in this Owner's Manual
could differ from those on your vehicle.
For your own safety
Maintenance and repair
Advanced technology, e.g. the use of
modern materials and powerful electron-
ics, requires specially adapted maintenance
and repair methods. You should therefore have
the corresponding work on your vehicle per-
formed only by your BMW center or at a work-
shop that works according to BMW repair pro-
cedures with correspondingly trained
personnel. If this work is not carried out prop-
erly, there is a danger of subsequent damage
and related safety hazards.<
Parts and accessories
For your own safety, use genuine parts
and accessories approved by BMW.
When you purchase accessories tested and
approved by BMW and Original BMW Parts, you
simultaneously acquire the assurance that they
have been thoroughly tested by BMW to ensure
optimum performance when installed on your
vehicle.
BMW warrants these parts to be free from
defects in material and workmanship.
BMW will not accept any liability for damage
resulting from installation of parts and accesso-
ries not approved by BMW.
BMW cannot test every product made by other
manufacturers to verify if it can be used on a
BMW safely and without risk to either the vehi-
cle, its operation, or its occupants.
Original BMW Parts, BMW Accessories and
other products approved by BMW, together
with professional advice on using these items,
are available from all BMW centers.
Installation and operation of non-BMW
approved accessories such as alarms, radios,
amplifiers, radar detectors, wheels, suspension
components, brake dust shields, telephones,
including operation of any mobile phone from
within the vehicle without using an externally
mounted antenna, or transceiver equipment, for
instance, CBs, walkie-talkies, ham radio or sim-
ilar accessories, may cause extensive damage
Page 13 of 274
At a glance
11Reference
Controls
Driving tips
Communications
Navigation
Entertainment
Mobility
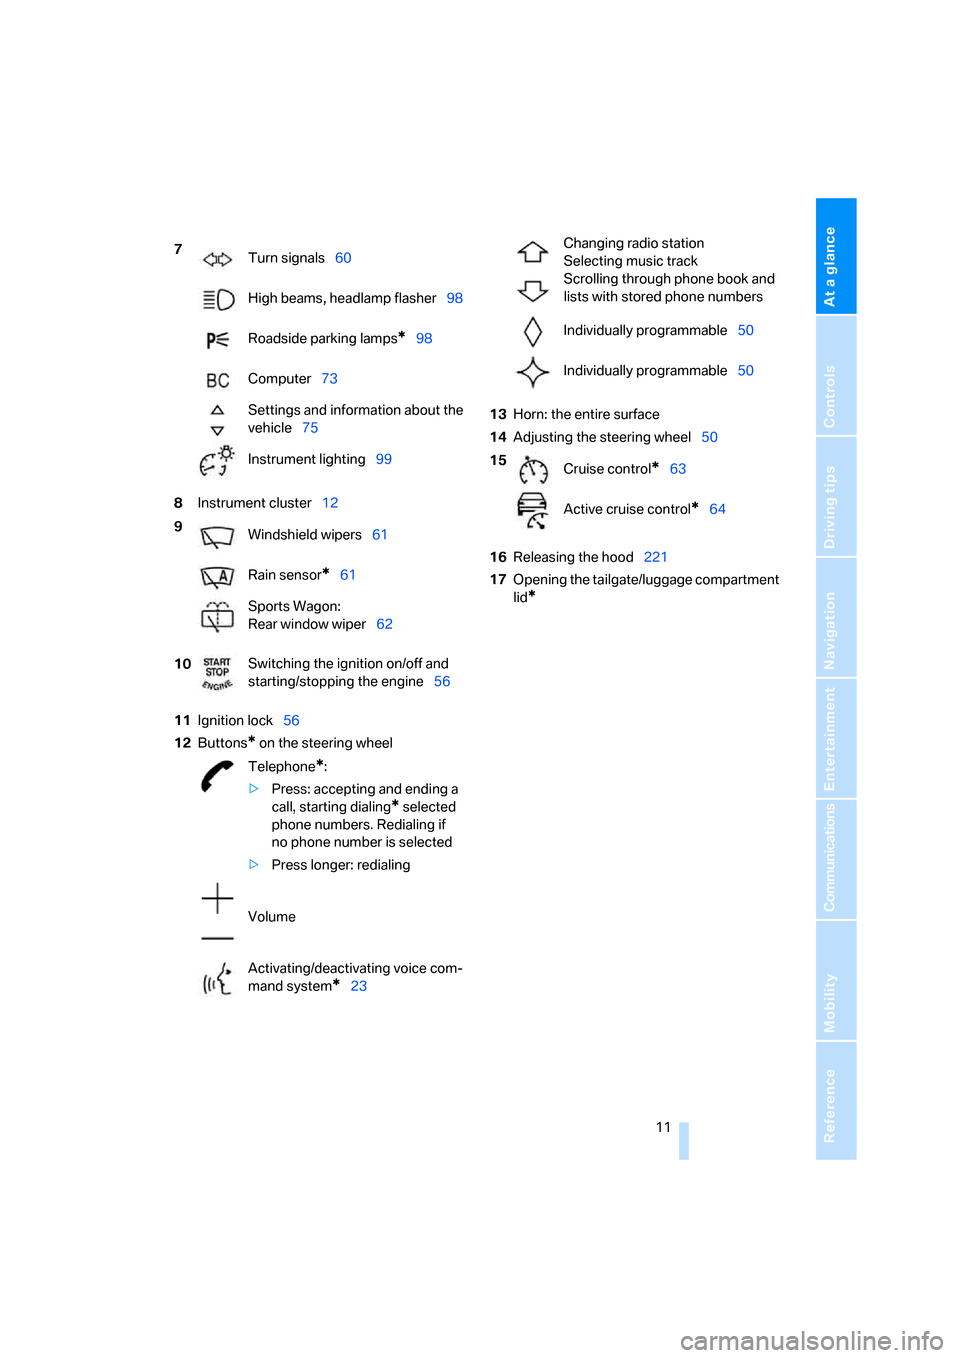
8Instrument cluster12
11Ignition lock56
12Buttons
* on the steering wheel13Horn: the entire surface
14Adjusting the steering wheel50
16Releasing the hood221
17Opening the tailgate/luggage compartment
lid
*
7
Turn signals60
High beams, headlamp flasher98
Roadside parking lamps
*98
Computer73
Settings and information about the
vehicle75
Instrument lighting99
9
Windshield wipers61
Rain sensor
*61
Sports Wagon:
Rear window wiper62
10Switching the ignition on/off and
starting/stopping the engine56
Telephone
*:
>Press: accepting and ending a
call, starting dialing
* selected
phone numbers. Redialing if
no phone number is selected
>Press longer: redialing
Volume
Activating/deactivating voice com-
mand system
*23
Changing radio station
Selecting music track
Scrolling through phone book and
lists with stored phone numbers
Individually programmable50
Individually programmable50
15
Cruise control
*63
Active cruise control
*64
Page 24 of 274
iDrive
22 If the car is equipped with two drives and a
CD with compressed audio files is played,
the current track is stored.<
Executing a function
... Press the key.
The function is executed immediately. This
means that, for example, if a phone number is
selected, the connection is established, or if a
navigation destination is called up, destination
guidance is started.
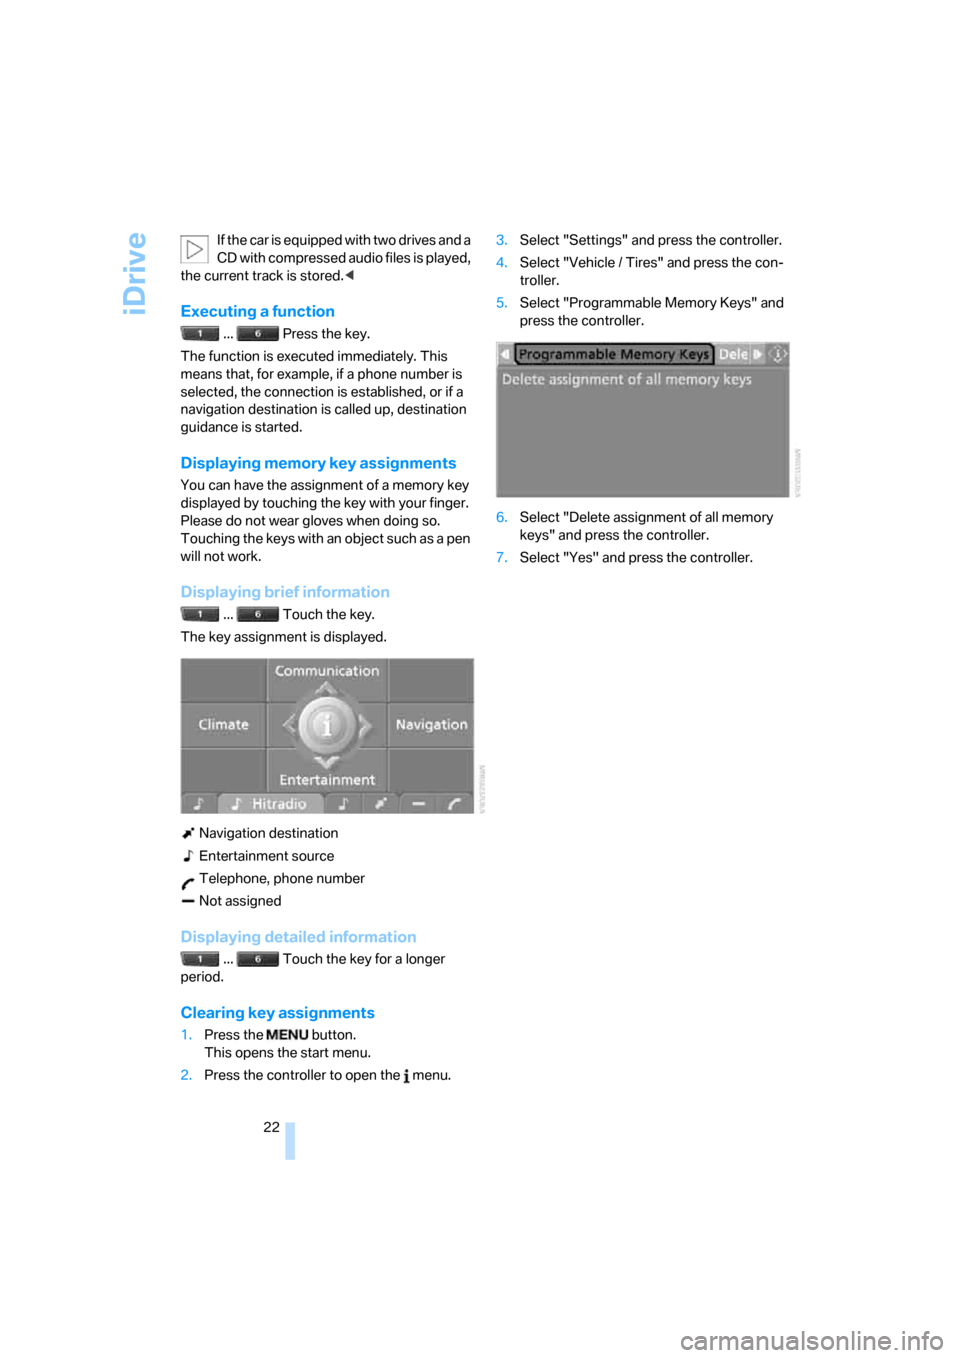
Displaying memory key assignments
You can have the assignment of a memory key
displayed by touching the key with your finger.
Please do not wear gloves when doing so.
Touching the keys with an object such as a pen
will not work.
Displaying brief information
... Touch the key.
The key assignment is displayed.
Navigation destination
Entertainment source
Telephone, phone number
Not assigned
Displaying detailed information
... Touch the key for a longer
period.
Clearing key assignments
1.Press the button.
This opens the start menu.
2.Press the controller to open the menu.3.Select "Settings" and press the controller.
4.Select "Vehicle / Tires" and press the con-
troller.
5.Select "Programmable Memory Keys" and
press the controller.
6.Select "Delete assignment of all memory
keys" and press the controller.
7.Select "Yes" and press the controller.
Page 32 of 274
Opening and closing
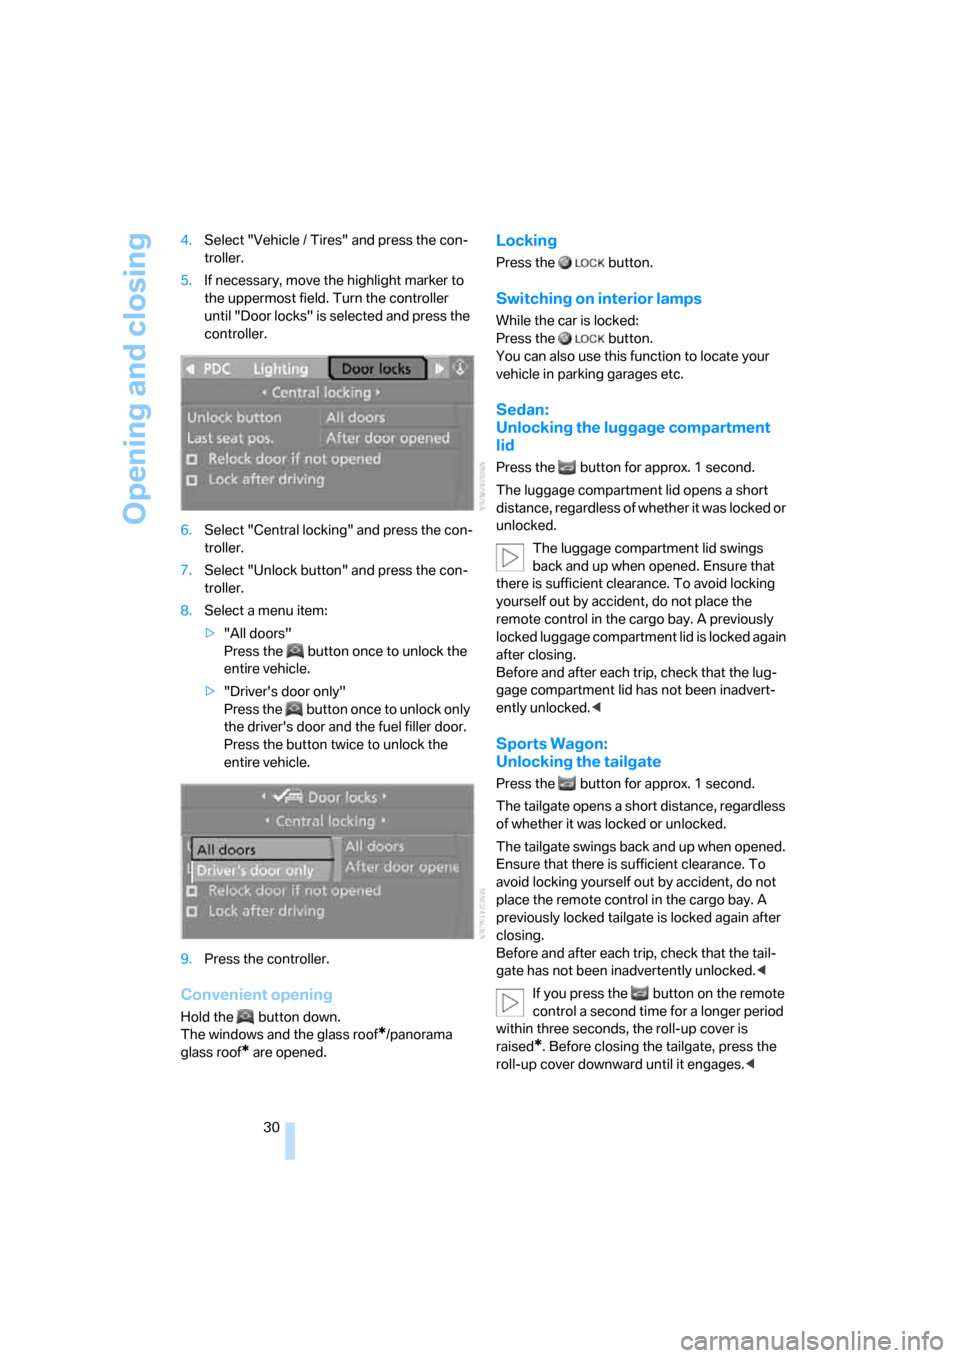
30 4.Select "Vehicle / Tires" and press the con-
troller.
5.If necessary, move the highlight marker to
the uppermost field. Turn the controller
until "Door locks" is selected and press the
controller.
6.Select "Central locking" and press the con-
troller.
7.Select "Unlock button" and press the con-
troller.
8.Select a menu item:
>"All doors"
Press the button once to unlock the
entire vehicle.
>"Driver's door only"
Press the button once to unlock only
the driver's door and the fuel filler door.
Press the button twice to unlock the
entire vehicle.
9.Press the controller.
Convenient opening
Hold the button down.
The windows
and the glass roof*/panorama
glass roof
* are opened.
Locking
Press the button.
Switching on interior lamps
While the car is locked:
Press the button.
You can also use this function to locate your
vehicle in parking garages etc.
Sedan:
Unlocking the luggage compartment
lid
Press the button for approx. 1 second.
The luggage compartment lid opens a short
distance, regardless of whether it was locked or
unlocked.
The luggage compartment lid swings
back and up when opened. Ensure that
there is sufficient clearance. To avoid locking
yourself out by accident, do not place the
remote control in the cargo bay. A previously
locked luggage compartment lid is locked again
after closing.
Before and after each trip, check that the lug-
gage compartment lid has not been inadvert-
ently unlocked.<
Sports Wagon:
Unlocking the tailgate
Press the button for approx. 1 second.
The tailgate opens a short distance, regardless
of whether it was locked or unlocked.
The tailgate swings back and up when opened.
Ensure that there is sufficient clearance. To
avoid locking yourself out by accident, do not
place the remote control in the cargo bay. A
previously locked tailgate is locked again after
closing.
Before and after each trip, check that the tail-
gate has not been inadvertently unlocked.<
If you press the button on the remote
control a second time for a longer period
within three seconds, the roll-up cover is
raised
*. Before closing the tailgate, press the
roll-up cover downward until it engages.<
Page 33 of 274
Controls
31Reference
At a glance
Driving tips
Communications
Navigation
Entertainment
Mobility
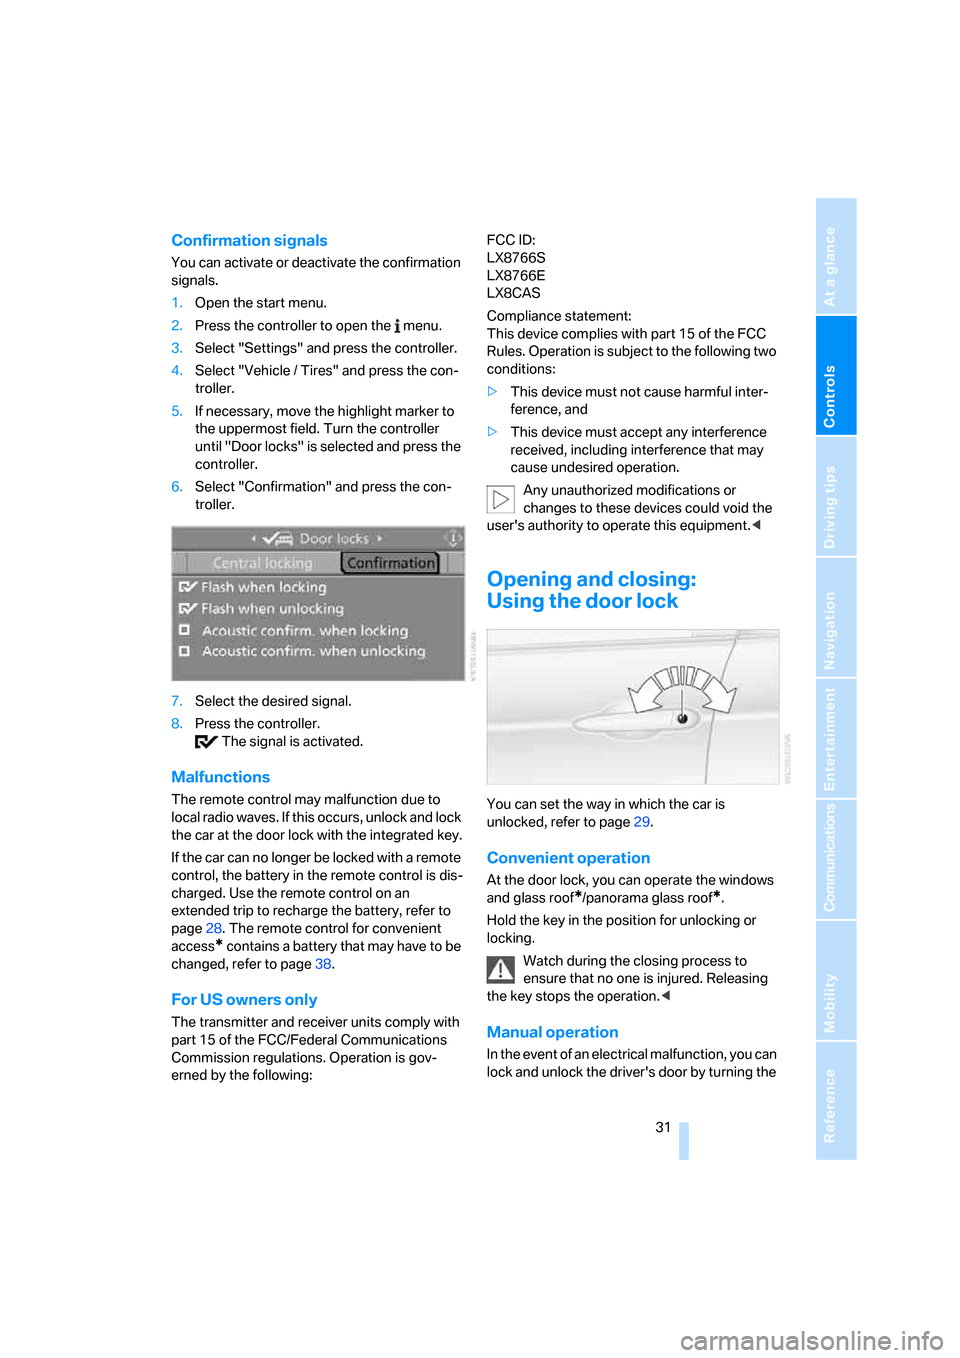
Confirmation signals
You can activate or deactivate the confirmation
signals.
1.Open the start menu.
2.Press the controller to open the menu.
3.Select "Settings" and press the controller.
4.Select "Vehicle / Tires" and press the con-
troller.
5.If necessary, move the highlight marker to
the uppermost field. Turn the controller
until "Door locks" is selected and press the
controller.
6.Select "Confirmation" and press the con-
troller.
7.Select the desired signal.
8.Press the controller.
The signal is activated.
Malfunctions
The remote control may malfunction due to
local radio waves. If this occurs, unlock and lock
the car at the door lock with the integrated key.
If the car can no longer be locked with a remote
control, the battery in the remote control is dis-
charged. Use the remote control on an
extended trip to recharge the battery, refer to
page28. The remote control for convenient
access
* contains a battery that may have to be
changed, refer to page38.
For US owners only
The transmitter and receiver units comply with
part 15 of the FCC/Federal Communications
Commission regulations. Operation is gov-
erned by the following:FCC ID:
LX8766S
LX8766E
LX8CAS
Compliance statement:
This device complies with part 15 of the FCC
Rules. Operation is subject to the following two
conditions:
>This device must not cause harmful inter-
ference, and
>This device must accept any interference
received, including interference that may
cause undesired operation.
Any unauthorized modifications or
changes to these devices could void the
user's authority to operate this equipment.<
Opening and closing:
Using the door lock
You can set the way in which the car is
unlocked, refer to page29.
Convenient operation
At the door lock, you can operate the windows
and glass roof
*/panorama glass roof*.
Hold the key in the position for unlocking or
locking.
Watch during the closing process to
ensure that no one is injured. Releasing
the key stops the operation.<
Manual operation
In the event of an electrical malfunction, you can
lock and unlock the driver's door by turning the
Page 34 of 274
Opening and closing
32 integrated key to the corresponding limit posi-
tions in the door lock.
Opening and closing:
From inside
This button serves to unlock or lock doors and
the luggage compartment lid/tailgate, but does
not activate the anti-theft system. The fuel filler
door remains unlocked.
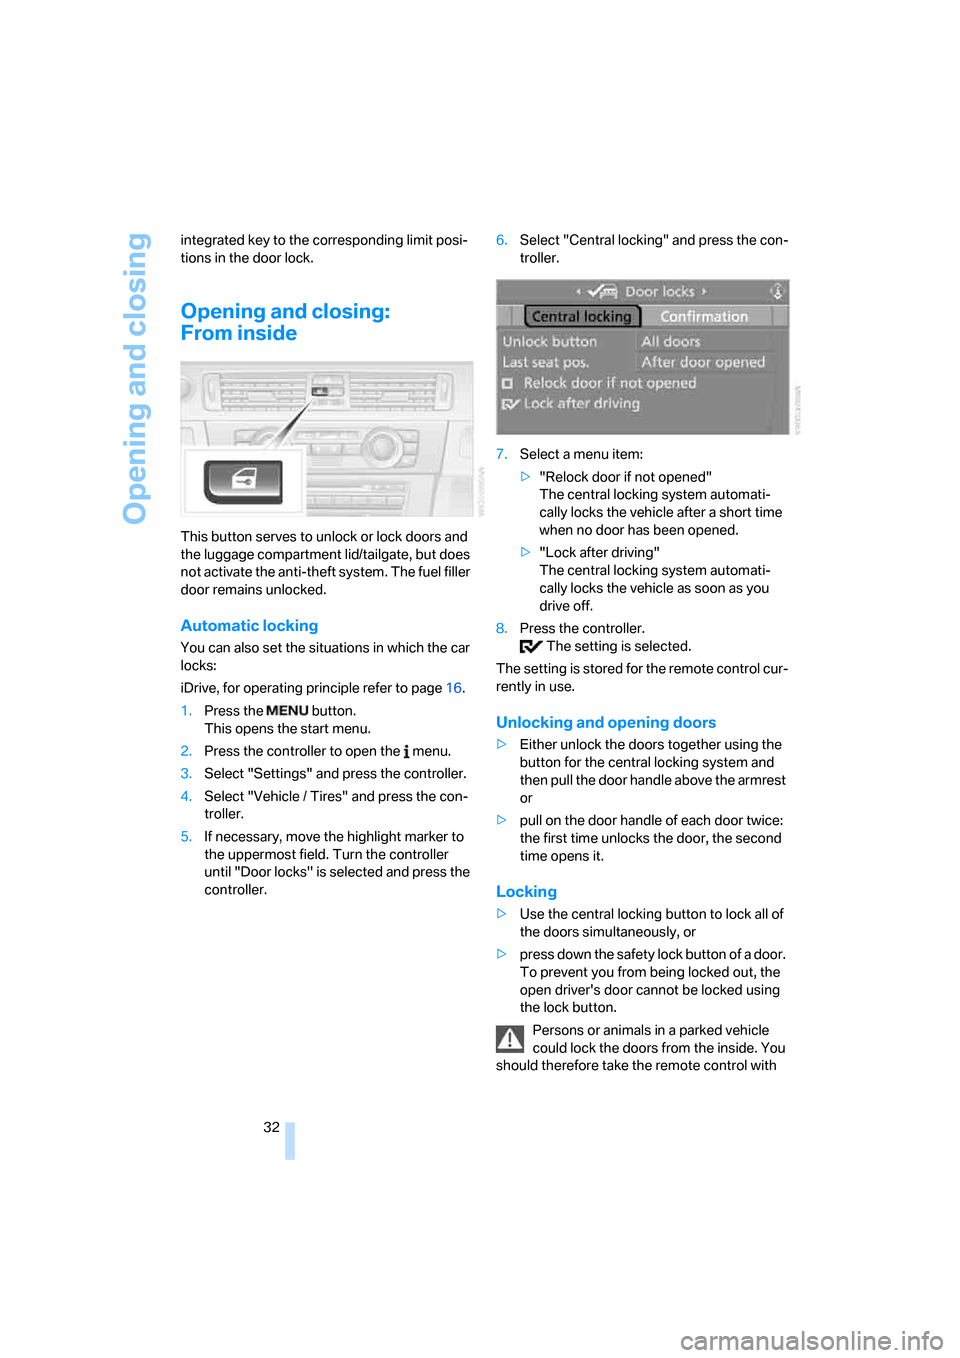
Automatic locking
You can also set the situations in which the car
locks:
iDrive, for operating principle refer to page16.
1.Press the button.
This opens the start menu.
2.Press the controller to open the menu.
3.Select "Settings" and press the controller.
4.Select "Vehicle / Tires" and press the con-
troller.
5.If necessary, move the highlight marker to
the uppermost field. Turn the controller
until "Door locks" is selected and press the
controller.6.Select "Central locking" and press the con-
troller.
7.Select a menu item:
>"Relock door if not opened"
The central locking system automati-
cally locks the vehicle after a short time
when no door has been opened.
>"Lock after driving"
The central locking system automati-
cally locks the vehicle as soon as you
drive off.
8.Press the controller.
The setting is selected.
The setting is stored for the remote control cur-
rently in use.
Unlocking and opening doors
>Either unlock the doors together using the
button for the central locking system and
then pull the door handle above the armrest
or
>pull on the door handle of each door twice:
the first time unlocks the door, the second
time opens it.
Locking
>Use the central locking button to lock all of
the doors simultaneously, or
>press down the safety lock button of a door.
To prevent you from being locked out, the
open driver's door cannot be locked using
the lock button.
Persons or animals in a parked vehicle
could lock the doors from the inside. You
should therefore take the remote control with
Page 49 of 274
Controls
47Reference
At a glance
Driving tips
Communications
Navigation
Entertainment
Mobility
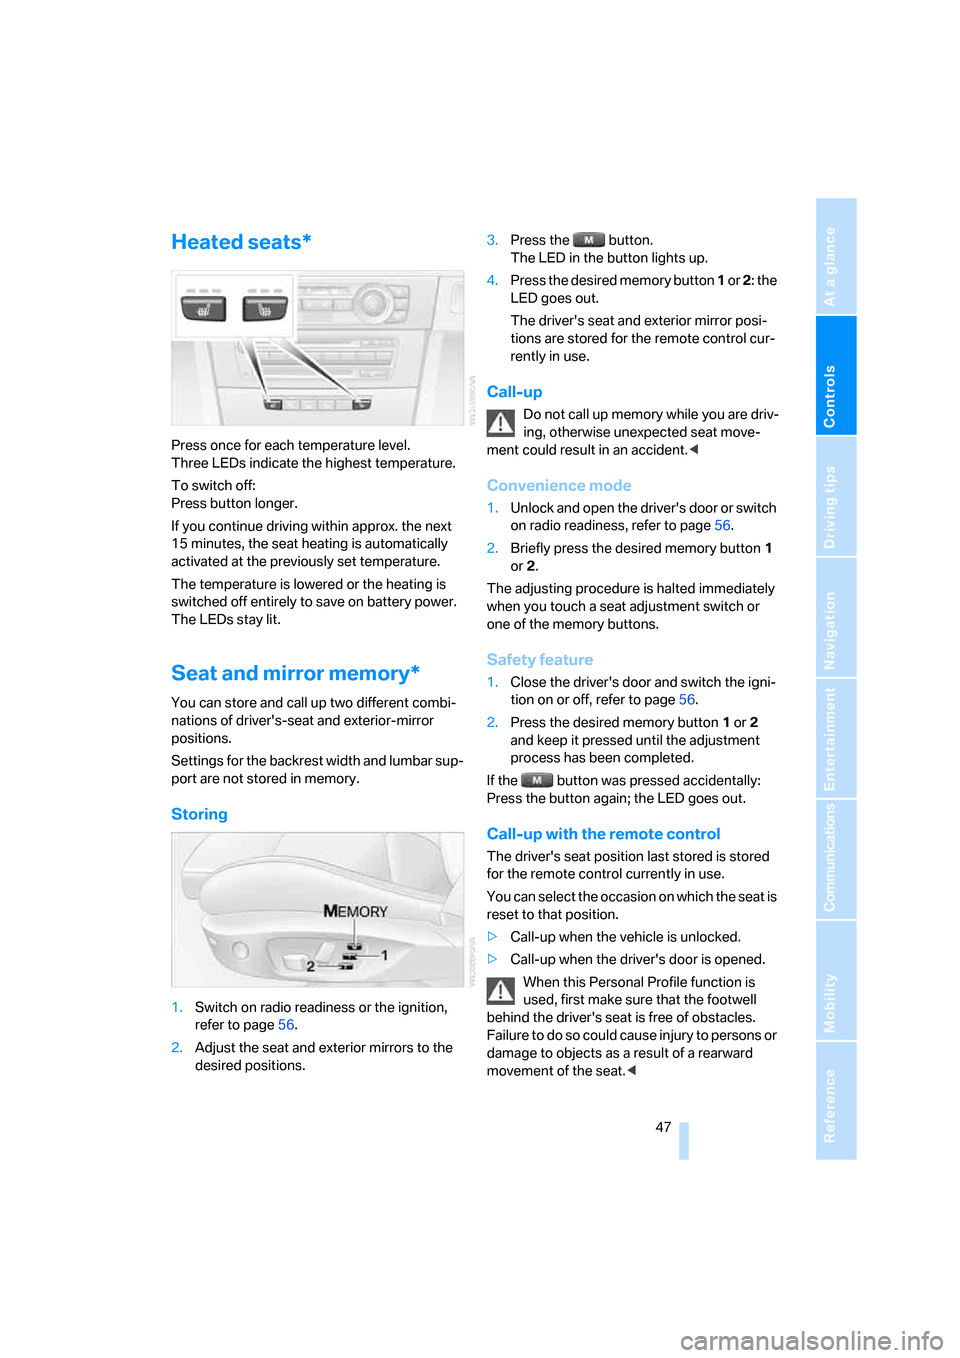
Heated seats*
Press once for each temperature level.
Three LEDs indicate the highest temperature.
To switch off:
Press button longer.
If you continue driving within approx. the next
15 minutes, the seat heating is automatically
activated at the previously set temperature.
The temperature is lowered or the heating is
switched off entirely to save on battery power.
The LEDs stay lit.
Seat and mirror memory*
You can store and call up two different combi-
nations of driver's-seat and exterior-mirror
positions.
Settings for the backrest width and lumbar sup-
port are not stored in memory.
Storing
1.Switch on radio readiness or the ignition,
refer to page56.
2.Adjust the seat and exterior mirrors to the
desired positions.3.Press the button.
The LED in the button lights up.
4.Press the desired memory button 1 or 2: the
LED goes out.
The driver's seat and exterior mirror posi-
tions are stored for the remote control cur-
rently in use.
Call-up
Do not call up memory while you are driv-
ing, otherwise unexpected seat move-
ment could result in an accident.<
Convenience mode
1.Unlock and open the driver's door or switch
on radio readiness, refer to page56.
2.Briefly press the desired memory button1
or 2.
The adjusting procedure is halted immediately
when you touch a seat adjustment switch or
one of the memory buttons.
Safety feature
1.Close the driver's door and switch the igni-
tion on or off, refer to page56.
2.Press the desired memory button1 or2
and keep it pressed until the adjustment
process has been completed.
If the button was pressed accidentally:
Press the button again; the LED goes out.
Call-up with the remote control
The driver's seat position last stored is stored
for the remote control currently in use.
You can select the occasion on which the seat is
reset to that position.
>Call-up when the vehicle is unlocked.
>Call-up when the driver's door is opened.
When this Personal Profile function is
used, first make sure that the footwell
behind the driver's seat is free of obstacles.
Failure to do so could cause injury to persons or
damage to objects as a result of a rearward
movement of the seat.<
Page 50 of 274
Adjustments
48 The adjusting procedure is halted immediately
when you touch a seat adjustment switch or
one of the memory buttons.
Selecting automatic call-up
iDrive, for operating principle refer to page16.
1.Open the start menu.
2.Press the controller to open the menu.
3.Select "Settings" and press the controller.
4.Select "Vehicle / Tires" and press the con-
troller.
5.If necessary, move the highlight marker to
the uppermost field. Turn the controller
until "Door locks" is selected and press the
controller.
6.Select "Central locking" and press the con-
troller.
7.Select "Last seat pos." and press the con-
troller.
8.Select "After unlocking" or "After door
opened".
9.Press the controller.
Switching off automatic call-up
Select "Deactivated" and press the controller.
Safety belts
Observe the adjustment instructions on
page44 to ensure the best possible per-
sonal protection.<
Before every drive, make sure that all occupants
wear their safety belts. Airbags complement the
safety belt as an additional safety device, but
they do not represent a substitute.
On the rear seats, the center belt buckle marked
with the letters CENTER is solely intended for
the center passenger.
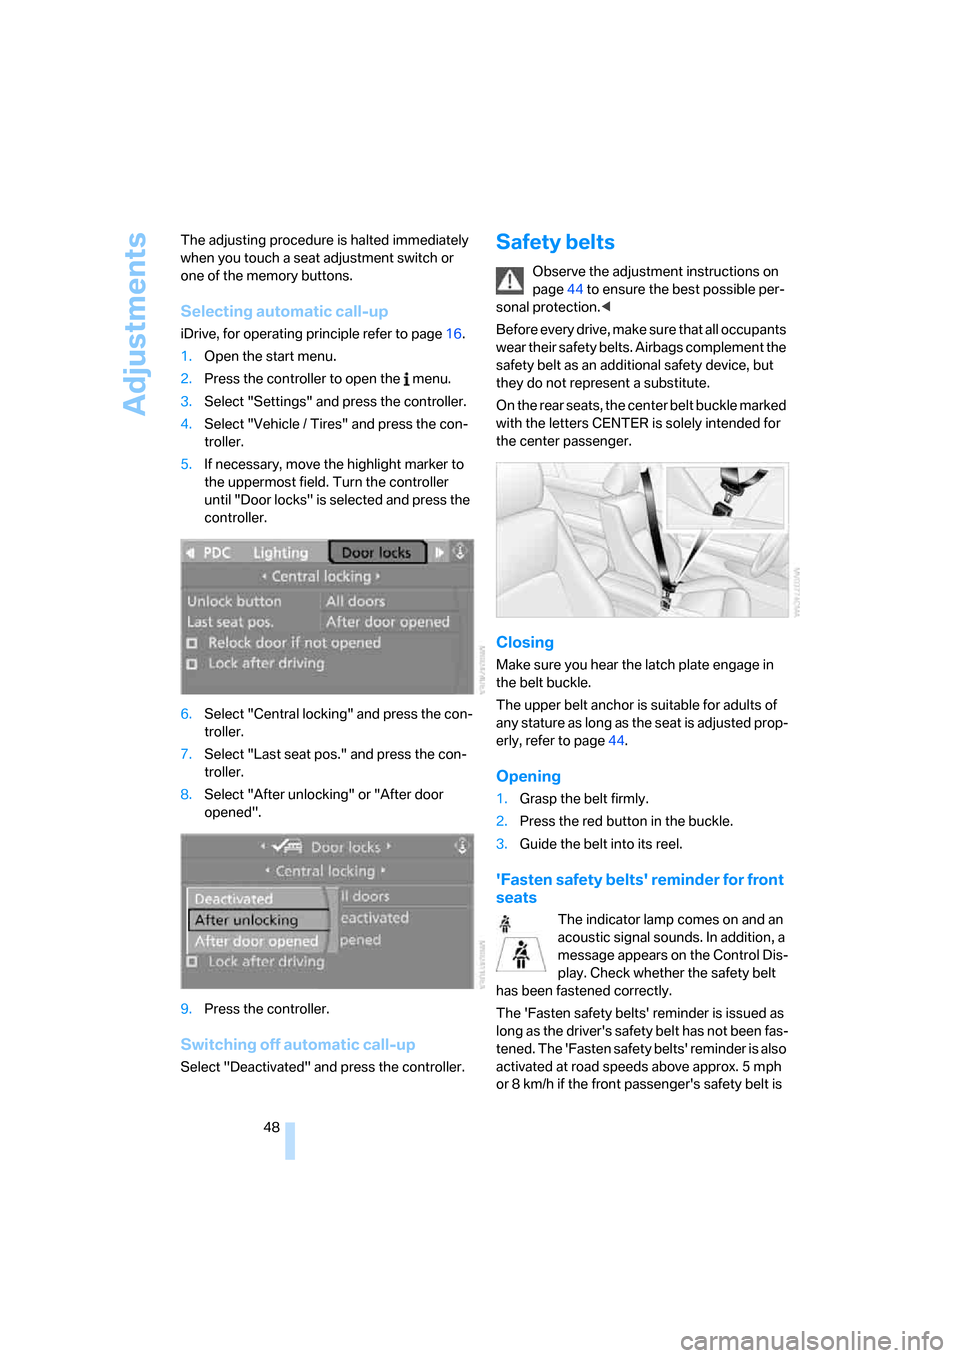
Closing
Make sure you hear the latch plate engage in
the belt buckle.
The upper belt anchor is suitable for adults of
any stature as long as the seat is adjusted prop-
erly, refer to page44.
Opening
1.Grasp the belt firmly.
2.Press the red button in the buckle.
3.Guide the belt into its reel.
'Fasten safety belts' reminder for front
seats
The indicator lamp comes on and an
acoustic signal sounds. In addition, a
message appears on the Control Dis-
play. Check whether the safety belt
has been fastened correctly.
The 'Fasten safety belts' reminder is issued as
long as the driver's safety belt has not been fas-
tened. The 'Fasten safety belts' reminder is also
activated at road speeds above approx. 5 mph
or 8 km/h if the front passenger's safety belt is
Page 63 of 274
Controls
61Reference
At a glance
Driving tips
Communications
Navigation
Entertainment
Mobility
Unusually rapid flashing of the indicator
lamp indicates that a turn signal indicator
has failed.<
Indicating a turn briefly
Press the lever as far as the resistance point for
as long as you wish to indicate a turn.
Triple turn signal activation
Press the lever as far as the resistance point.
The turn signals flash three times.
You can activate or deactivate this function.
iDrive, for operating principle refer to page16.
1.Open the start menu.
2.Press the controller to open the menu.
3.Select "Settings" and press the controller.
4.Select "Vehicle / Tires" and press the con-
troller.
5.If necessary, move the highlight marker to
the uppermost field. Turn the controller
until "Lighting" is selected and press the
controller.
6.Select "Triple turn signal" and press the
controller.
Triple turn signaling is activated.
The setting is stored for the remote control cur-
rently in use.
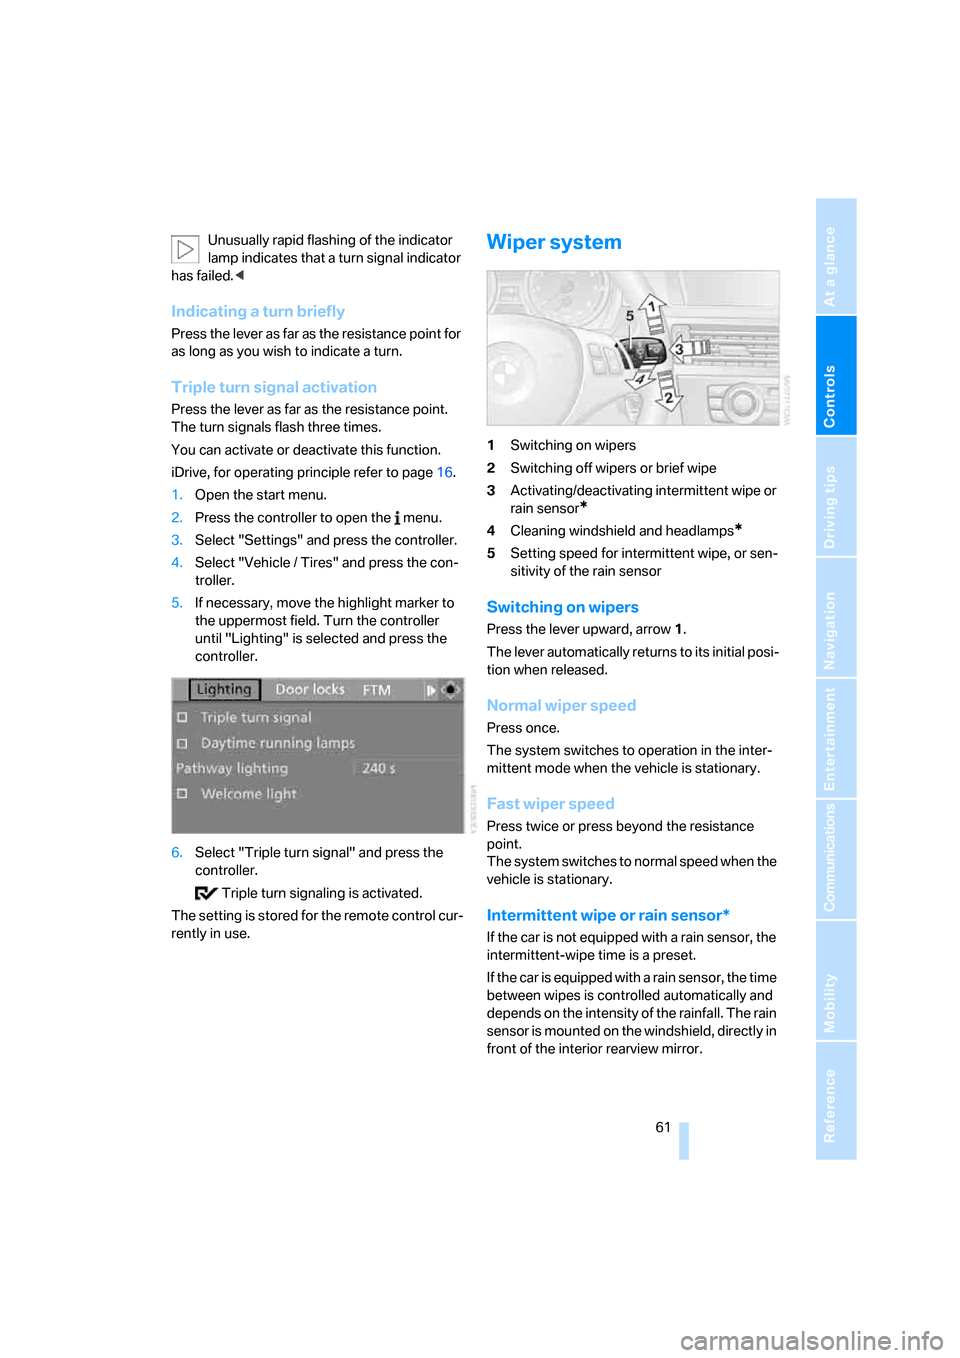
Wiper system
1Switching on wipers
2Switching off wipers or brief wipe
3Activating/deactivating intermittent wipe or
rain sensor
*
4Cleaning windshield and headlamps*
5Setting speed for intermittent wipe, or sen-
sitivity of the rain sensor
Switching on wipers
Press the lever upward, arrow 1.
The lever automatically returns to its initial posi-
tion when released.
Normal wiper speed
Press once.
The system switches to operation in the inter-
mittent mode when the vehicle is stationary.
Fast wiper speed
Press twice or press beyond the resistance
point.
The system switches to normal speed when the
vehicle is stationary.
Intermittent wipe or rain sensor*
If the car is not equipped with a rain sensor, the
intermittent-wipe time is a preset.
If the car is equipped with a rain sensor, the time
between wipes is controlled automatically and
depends on the intensity of the rainfall. The rain
sensor is mounted on the windshield, directly in
front of the interior rearview mirror.