door lock BMW 328Ci CONVERTIBLE 2000 E46 User Guide
[x] Cancel search | Manufacturer: BMW, Model Year: 2000, Model line: 328Ci CONVERTIBLE, Model: BMW 328Ci CONVERTIBLE 2000 E46Pages: 199, PDF Size: 1.77 MB
Page 46 of 199

46n
Manual convertible top
Starting from either ignition key
position 1 or if with a door open: if
the side windows are closed, lower
them slightly by pressing the unlocking
button.c
4 Position the rear convertible top bar
vertically and hold it firmly
You can support the rear convert-
ible top bar when you raise it
by pressing on the indicated area
(arrow).c46cde073
5 Open the convertible top compart-
ment lid all the way
6 Lay the rear convertible top bar in the
convertible top compartment
7 Lift the convertible top off in the front
and then lay it down in the back
Press the convertible top com-
pletely into the compartment. This
makes it easier to close the convertible
top compartment lid, especially at low
temperatures.c46cde068
Page 48 of 199

48n
Manual convertible top
Starting from either ignition key
position 1 or with a door open:
If the side windows are closed, lower
them slightly by depressing the respec-
tive button. After closing the convertible
top, either close the side windows or
put them at the height desired.c
5 Do not position the rear convertible
top bar vertically until the convertible
top has been swung forward as far as
possible
6 Press the convertible top compart-
ment lid down from above. The lid
locks for the convertible top are
equipped with sensors that carry out
the closing procedure
In order to avoid any pinching,
move the convertible top com-
partment lid from above only.c
The central locking system auto-
matically unlocks when the con-
vertible top compartment lid is closed,
i. e., the luggage compartment lid is no
longer locked and can be opened
again.c
7 Using the locking handle, pull the
front convertible top frame onto the
windshield frame, and lock the con-
vertible top by turning the handle
until you hear it engage
8 Close the windows that were slightly
lowered, or position them at the de-
sired height.
The rear convertible top bar will be
automatically pressed onto the convert-
ible top compartment lid, and because
of the pressure, will be sealed off when
closed.Should the convertible top start to
flutter at higher speeds, increase
the airflow into the passenger area via
the ventilation controls to avoid creat-
ing a vacuum.c
Page 51 of 199
51n
IndexDataTechnologyRepairsCar careControlsOverview
The fully automatic convertible top
*
Wind deflector
*
Convenience operation from the
driver's door lock>To open: with the door closed, turn
the key to the "Unlock" position and
hold it
>To close: with the door closed, turn
the key to the "Lock" position and
hold it.
Releasing the key stops the movement.
For safety reasons, to keep the closing
process in view, you cannot use the re-
mote control for convenience operation.
At higher speeds, the lower air
pressure in the passenger com-
partment may create a vacuum and
cause the convertible top to start flut-
tering. Increase the air supply via the
ventilation controls so that a vacuum
does not occur in the vehicle.c
The wind deflector cuts down air turbu-
lence within the passenger area, thus
affording a pleasant ride, even at higher
speeds. It is delivered in a protective
casing, and because of its minimal size,
can easily be stowed in the luggage
compartment.Installation1 Take the wind deflector out of its
protective casing
Page 57 of 199
57n
IndexDataTechnologyRepairsCar careControlsOverview
Seat and mirror memory
*
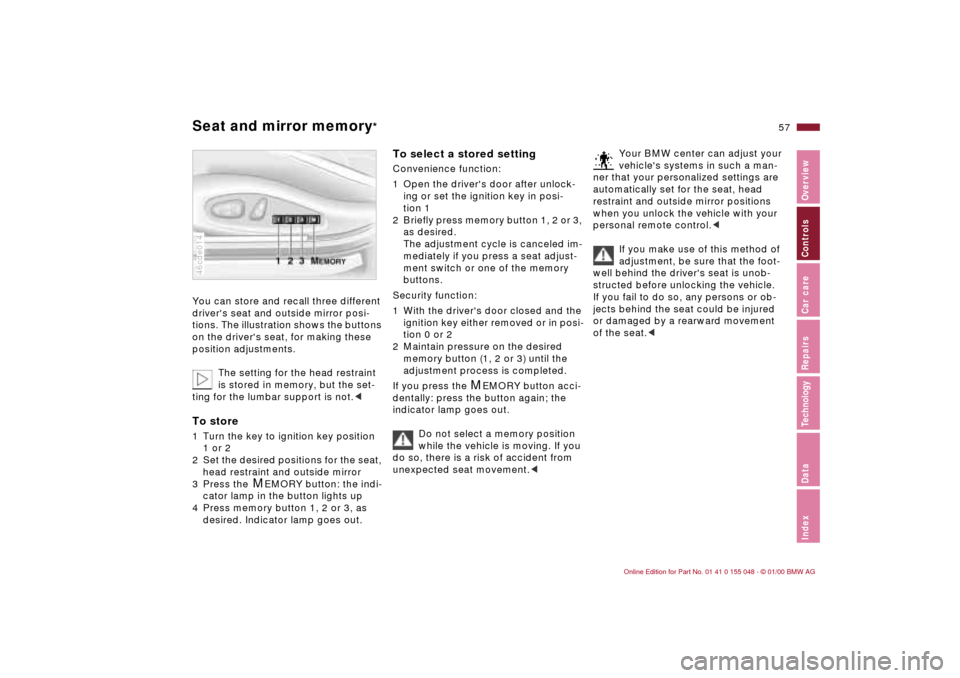
You can store and recall three different
driver's seat and outside mirror posi-
tions. The illustration shows the buttons
on the driver's seat, for making these
position adjustments.
The setting for the head restraint
is stored in memory, but the set-
ting for the lumbar support is not.
2 Set the desired positions for the seat,
head restraint and outside mirror
3 Press the
M
EMORY button: the indi-
cator lamp in the button lights up
4 Press memory button 1, 2 or 3, as
desired. Indicator lamp goes out.
46cde014
To select a stored setting Convenience function:
1 Open the driver's door after unlock-
ing or set the ignition key in posi-
tion 1
2 Briefly press memory button 1, 2 or 3,
as desired.
The adjustment cycle is canceled im-
mediately if you press a seat adjust-
ment switch or one of the memory
buttons.
Security function:
1 With the driver's door closed and the
ignition key either removed or in posi-
tion 0 or 2
2 Maintain pressure on the desired
memory button (1, 2 or 3) until the
adjustment process is completed.
If you press the
M
EMORY button acci-
dentally: press the button again; the
indicator lamp goes out.
Do not select a memory position
while the vehicle is moving. If you
do so, there is a risk of accident from
unexpected seat movement.<
Your BMW center can adjust your
vehicle's systems in such a man-
ner that your personalized settings are
automatically set for the seat, head
restraint and outside mirror positions
when you unlock the vehicle with your
personal remote control.<
If you make use of this method of
adjustment, be sure that the foot-
well behind the driver's seat is unob-
structed before unlocking the vehicle.
If you fail to do so, any persons or ob-
jects behind the seat could be injured
or damaged by a rearward movement
of the seat.<
Page 64 of 199
64n
AirbagsSitting correctly with airbags
For your safety, comply with the
following instructions for the air-
bags. If you do not, the airbags may not
be able to provide their maximum pro-
tection. All passengers in the vehicle
should be aware of and comply with
this information:
The airbags are supplemental restraint
devices designed to provide extra pro-
tection; they are not a substitute for
safety belts. Wear your safety belt at all
times. The airbags will not be triggered
in the event of a minor accident, a vehi-
cle roll-over, or collisions from the rear.
In these instances, the safety belt pro-
vides optimal protection.
Airbags are located under cover panels
in the steering wheel, in the dashboard
and in the side trim panels in the front.
Adjust your seat to a position that pro-
vides maximum distance between you
and the steering wheel, the instrument
panel and the door while still allowing
comfortable and safe access to all
vehicle controls.
To avoid sustaining hand and arm inju-
ries, always grasp the steering wheel
on the rim with the hands at the 9 and
3 o'clock positions. Do not place your
hands on the center pad.
Never allow any objects to obstruct the
area between the airbag and an occu-
pant.
Do not use the cover panel above the
passenger-side airbag as a storage
area.
Do not apply adhesive materials to the
cover panels of the airbags, cover them
or modify them in any other way.
Do not install a rear-facing child re-
straint system in the front passenger
seat of this car.
Children under 13 years of age and
children less than 5 feet (150 cm) tall
should ride only in the rear seat.
Infants or small children should never
be held on the lap of a passenger.
If your car is equipped with side airbags
in the rear passenger area, be sure that
child restraints are mounted correctly
and provided with the greatest-possible
distance between the airbags in the
side trim panels. Do not allow children
to lean out of the child's seat in the di-
rection of the side trim panels. If they
do so, serious injuries can occur if the
airbag is triggered.
(infants and small children in appropri-
ate child restraint systems; larger chil-
dren and adults using the safety belts).
Never let an occupant's head rest near
or on a side airbag because the inflating
airbag could cause a serious or fatal in-
jury. Please note that the word "Airbag"
imprinted on the door trim panel indi-
cates the airbag's location.
Accident research shows that the saf-
est place for children in an automobile
is in the rear seat. However, a child sit-
ting in the rear seat and not properly re-
strained may place his or her head on
or near the airbag, if so equipped. For
example, a child — even though belted
— may fall asleep with his or her head
against the side airbag. It may be diffi-
cult for a driver to ensure that children
in the rear seat will remain properly po-
sitioned at all times and not place their
heads on or near the side airbag.
Therefore, we recommend that the rear
seat side airbags, if so equipped, be
deactivated if children will travel in the
rear seat.
The rear seat side airbags may already
have been deactivated, either at the
time of manufacture or by a BMW
center. Labels in the rear door opening
Page 84 of 199
84n
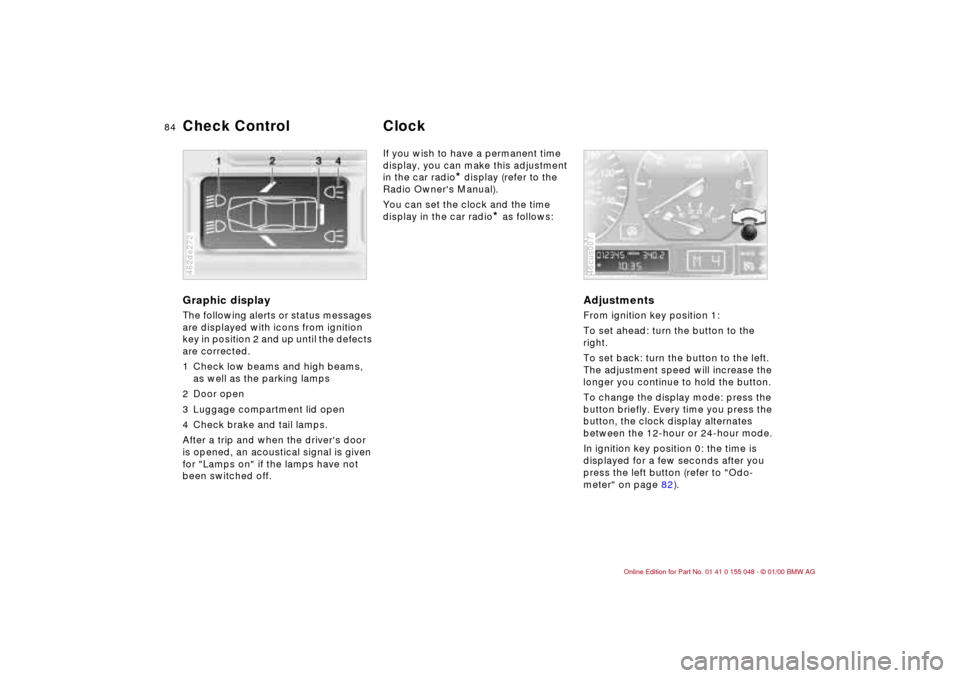
Graphic display
The following alerts or status messages
are displayed with icons from ignition
key in position 2 and up until the defects
are corrected.
1 Check low beams and high beams,
as well as the parking lamps
2 Door open
3 Luggage compartment lid open
4 Check brake and tail lamps.
After a trip and when the driver's door
is opened, an acoustical signal is given
for "Lamps on" if the lamps have not
been switched off.462de272
If you wish to have a permanent time
display, you can make this adjustment
in the car radio
* display (refer to the
Radio Owner's Manual).
You can set the clock and the time
display in the car radio
* as follows:
Adjustments From ignition key position 1:
To set ahead: turn the button to the
right.
To set back: turn the button to the left.
The adjustment speed will increase the
longer you continue to hold the button.
To change the display mode: press the
button briefly. Every time you press the
button, the clock display alternates
between the 12-hour or 24-hour mode.
In ignition key position 0: the time is
displayed for a few seconds after you
press the left button (refer to "Odo-
meter" on page 82).46cus007
Check Control
Clock
Page 99 of 199
99n
IndexDataTechnologyRepairsCar careControlsOverview
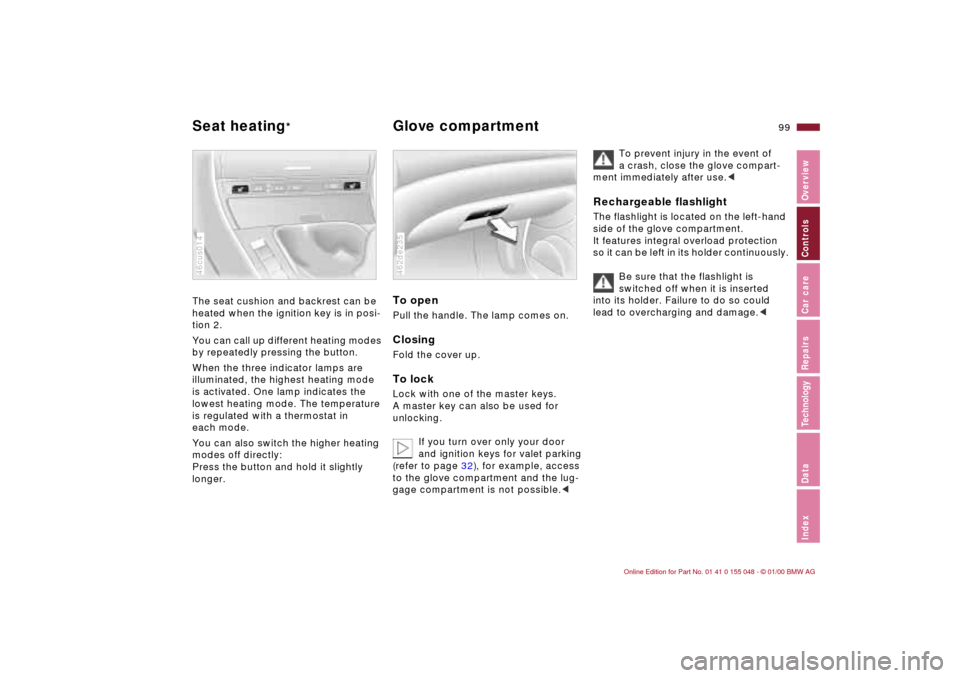
The seat cushion and backrest can be
heated when the ignition key is in posi-
tion 2.
You can call up different heating modes
by repeatedly pressing the button.
When the three indicator lamps are
illuminated, the highest heating mode
is activated. One lamp indicates the
lowest heating mode. The temperature
is regulated with a thermostat in
each mode.
You can also switch the higher heating
modes off directly:
Press the button and hold it slightly
longer.46cus014
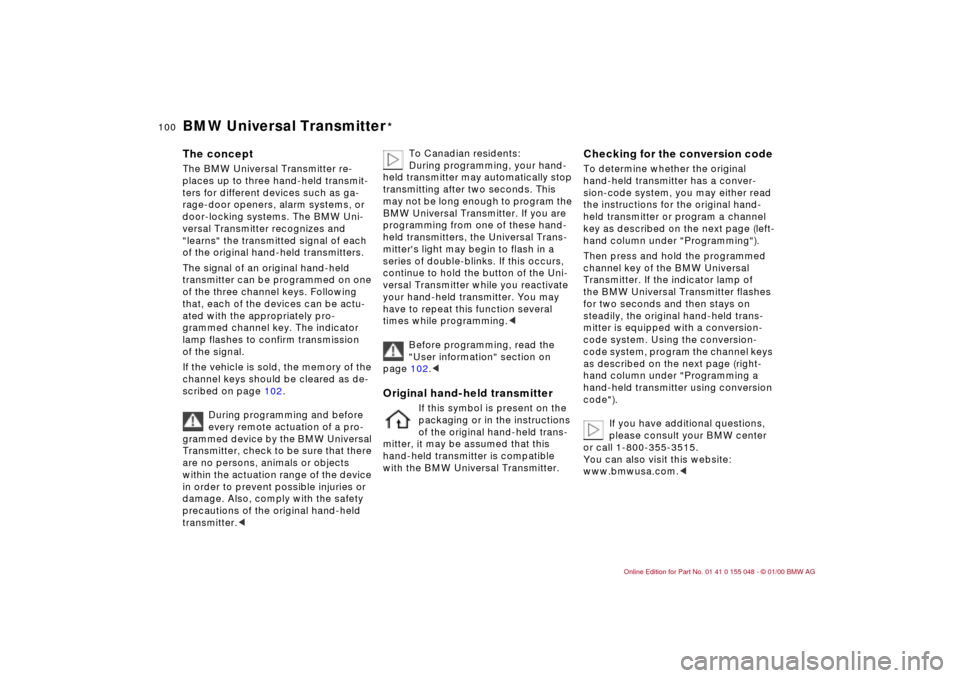
To open Pull the handle. The lamp comes on.ClosingFold the cover up.To lockLock with one of the master keys.
A master key can also be used for
unlocking.
If you turn over only your door
and ignition keys for valet parking
(refer to page 32), for example, access
to the glove compartment and the lug-
gage compartment is not possible.<462de235
To prevent injury in the event of
a crash, close the glove compart-
ment immediately after use.<
Rechargeable flashlight The flashlight is located on the left-hand
side of the glove compartment.
It features integral overload protection
so it can be left in its holder continuously.
Be sure that the flashlight is
switched off when it is inserted
into its holder. Failure to do so could
lead to overcharging and damage.<
Seat heating
*
Glove compartment
Page 100 of 199
100n
BMW Universal Transmitter
*
The concept The BMW Universal Transmitter re-
places up to three hand-held transmit-
ters for different devices such as ga-
rage-door openers, alarm systems, or
door-locking systems. The BMW Uni-
versal Transmitter recognizes and
"learns" the transmitted signal of each
of the original hand-held transmitters.
The signal of an original hand-held
transmitter can be programmed on one
of the three channel keys. Following
that, each of the devices can be actu-
ated with the appropriately pro-
grammed channel key. The indicator
lamp flashes to confirm transmission
of the signal.
If the vehicle is sold, the memory of the
channel keys should be cleared as de-
scribed on page 102.
During programming and before
every remote actuation of a pro-
grammed device by the BMW Universal
Transmitter, check to be sure that there
are no persons, animals or objects
within the actuation range of the device
in order to prevent possible injuries or
damage. Also, comply with the safety
precautions of the original hand-held
transmitter.<
To Canadian residents:
During programming, your hand-
held transmitter may automatically stop
transmitting after two seconds. This
may not be long enough to program the
BMW Universal Transmitter. If you are
programming from one of these hand-
held transmitters, the Universal Trans-
mitter's light may begin to flash in a
series of double-blinks. If this occurs,
continue to hold the button of the Uni-
versal Transmitter while you reactivate
your hand-held transmitter. You may
have to repeat this function several
times while programming.<
Before programming, read the
"User information" section on
page 102.<
Original hand-held transmitter
If this symbol is present on the
packaging or in the instructions
of the original hand-held trans-
mitter, it may be assumed that this
hand-held transmitter is compatible
with the BMW Universal Transmitter.
Checking for the conversion code To determine whether the original
hand-held transmitter has a conver-
sion-code system, you may either read
the instructions for the original hand-
held transmitter or program a channel
key as described on the next page (left-
hand column under "Programming").
Then press and hold the programmed
channel key of the BMW Universal
Transmitter. If the indicator lamp of
the BMW Universal Transmitter flashes
for two seconds and then stays on
steadily, the original hand-held trans-
mitter is equipped with a conversion-
code system. Using the conversion-
code system, program the channel keys
as described on the next page (right-
hand column under "Programming a
hand-held transmitter using conversion
code").
If you have additional questions,
please consult your BMW center
or call 1-800-355-3515.
You can also visit this website:
www.bmwusa.com.<
Page 118 of 199
118n
Winter operationWinter is often accompanied by rapid
changes in weather, requiring not only
a different driving style, but also certain
preparations to the vehicle itself to en-
sure that your vehicle operates safely
and trouble free throughout the winter
months.CoolantBe sure that the coolant mixture con-
tains the year-round ratio of 50:50
water and antifreeze/corrosion protec-
tion. This mixture provides protection
against freezing down to approx. –34 7
(–37 6). Replace the coolant every four
years.LocksBMW door lock deicer can be used to
free them if frozen. This deicer also
contains lubricant.
After its use, treatment with BMW lock
barrel grease is recommended.
Rubber seals and components To prevent the weather stripping from
freezing, apply a spray-on rubber treat-
ment or silicone spray to the door, hood
and luggage compartment lid seals.
A full range of car care products is
available from your BMW center.
them in pairs on the rear wheels only
and comply with the manufacturer's
safety precautions. Do not exceed a
maximum speed of 30 mph (50 km/h).
In this type of exceptional situation
where the snow chains are mounted,
deactivate the DSC. Refer to page 88.
Starting offWhen starting off from a full stop in
deep snow or when "rocking" the vehi-
cle to free it, it may be effective to
deactivate the DSC system for a short
period. Refer to page 88.Driving on low-traction road
surfacesUse smooth, gentle pressure to control
the accelerator pedal. Avoid excessive
engine speeds and shift to the next
higher gear at an early point. On down-
hill grades or slopes, shift down to the
next lower gear at an early point. Main-
tain an adequate distance between
yourself and the vehicle ahead.
Page 145 of 199

145n
IndexDataTechnologyRepairsCar careControlsOverview
Cleaning and caring for your convertible topDo not use spot removers, paint thin-
ners, solvents, gasoline or similar sub-
stances for removing spots from the
convertible top or from the rear win-
dow. These materials destroy the rub-
ber layer, which will lead to leaks. Use
only BMW-approved cleaners.
Cleaning agents can contain sub-
stances that are dangerous or
that pose health risks. For this reason,
always comply with the warnings and
danger notices on the packaging.
Open the doors or windows on your
vehicle when cleaning the interior.
Never clean your vehicle with solvents
not specifically intended for it.c
Getting your vehicle ready for
cleaningIn order to maintain free access to your
convertible top compartment, rest the
rear convertible top bar against the
convertible top compartment lid (refer
to illustration).
Release the lid locks for the con-
vertible top first; refer to page 45
or 50.<46cde072
Hardtop
*
Please note and follow the information
about caring for your vehicle, which
starts on page 139.