bolt BMW 528i 1999 E39 Workshop Manual
[x] Cancel search | Manufacturer: BMW, Model Year: 1999, Model line: 528i, Model: BMW 528i 1999 E39Pages: 1002
Page 278 of 1002
Downloaded from www.Manualslib.com manuals search engine
I Camshaft Timing Chain
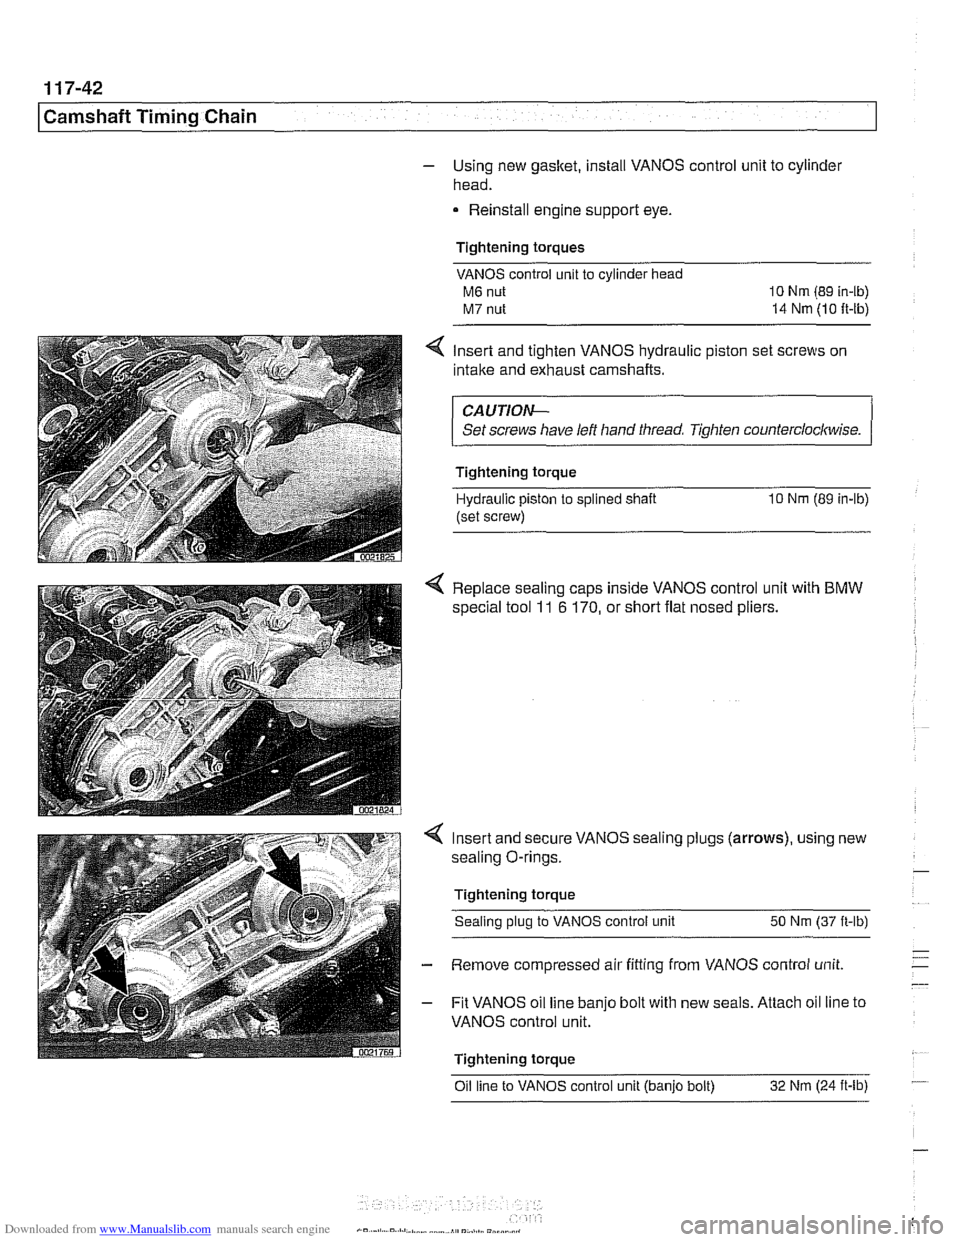
- Using new gasket, install VANOS control unit to cylinde~
head.
Reinstall engine support eye.
Tightening torques VANOS control unit to cylinder head
M6 nut 10 Nm (89 in-lb)
M7 nut 14 Nm (10 ft-ib)
4 Insert and tighten VANOS hydraulic piston set screws on
intake and exhaust camshafts.
CAUTIOI\C
Set screws have left hand thread Tighten counterclocltwise.
Tightening torque
Hydraulic piston
to splined shaft 10 Nm (89 in-lb)
(set screw)
4 Replace sealing caps inside VANOS control unit with BMW
special tool 11 6 170, or short flat nosed pliers.
Insert and secure VANOS sealing plugs (arrows), using new
sealing O-rings.
Tightening torque Sealing plug to VANOS control unit 50 Nm (37
it-lb)
Remove compressed air fitting from VANOS control unit
Fit VANOS oil line banjo bolt with new seals. Attach oil line to
VANOS control unit.
Tightening torque Oil line to VANOS control unit (banjo bolt) 32
Nm (24
it-lb) -
Page 280 of 1002
Downloaded from www.Manualslib.com manuals search engine
Camshaft Timing Chain
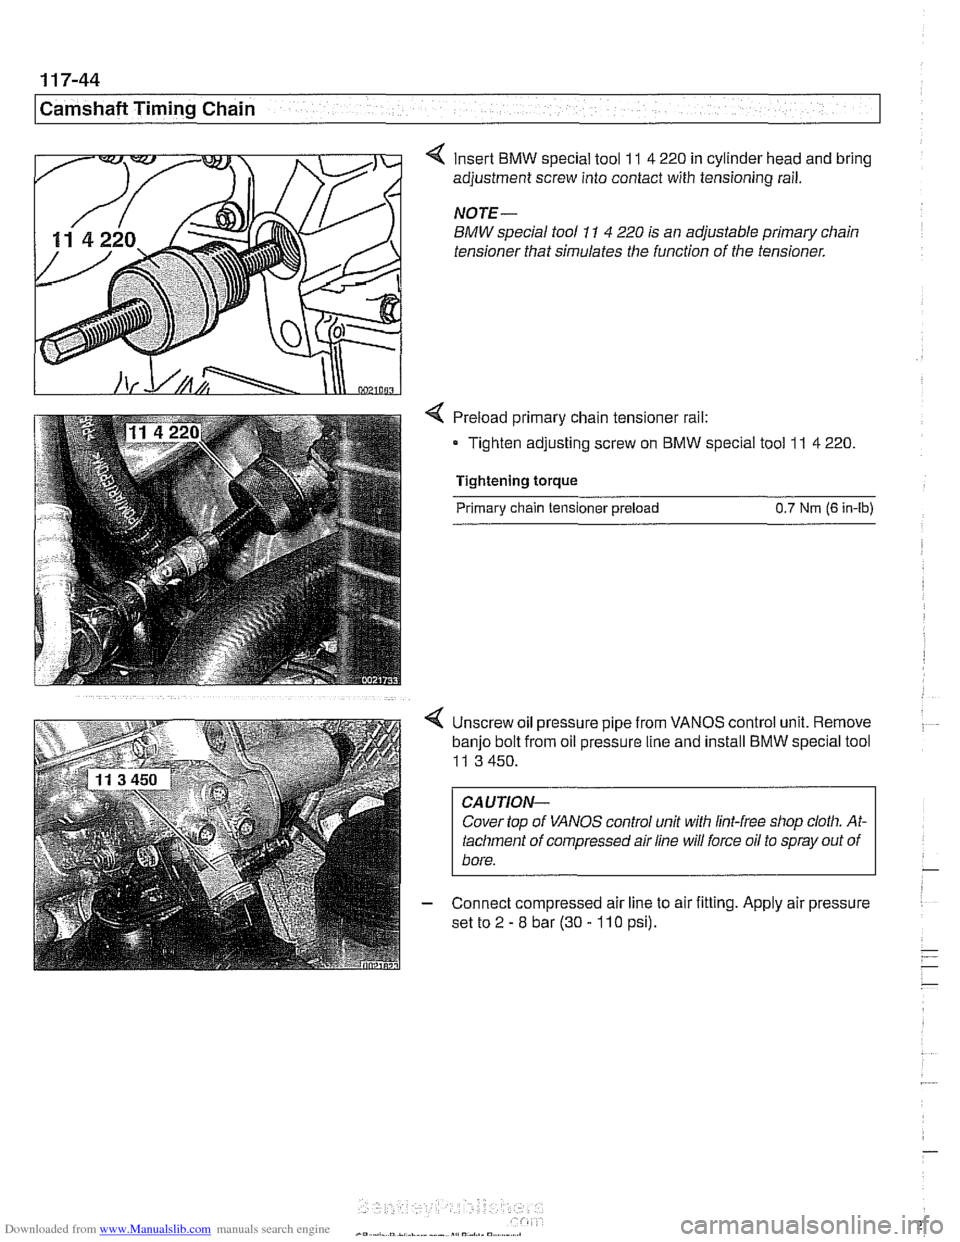
Insert BMW special tool 11 4 220 in cylinder head and bring
adjustment screw into contact with tensioning rail.
NOTE-
BMW special tool 11 4 220 is an adjustable primary chain
tensioner that simulates the function of the tensioner.
Preload primary chain tensioner rail:
Tighten adjusting screw on
BMW special tool 11 4 220.
Tightening torque
Primary chain tensioner preload 0.7 Nm (6 in-lb)
4 Unscrew oil pressure pipe from VANOS control unit. Remove
banjo bolt from oil pressure line and install BMW special tool
11 3 450.
CA UTIOPI-
Cover top of VANOS control unit with lint-free shop cloth. At-
tachment of compressed air line will force oil to spray out of
- Connect compressed air line to air fitting. Apply air pressure
set to
2 - 8 bar (30 - 110 psi).
Page 282 of 1002
Downloaded from www.Manualslib.com manuals search engine
1 17-46
Camshaft Timing Chain
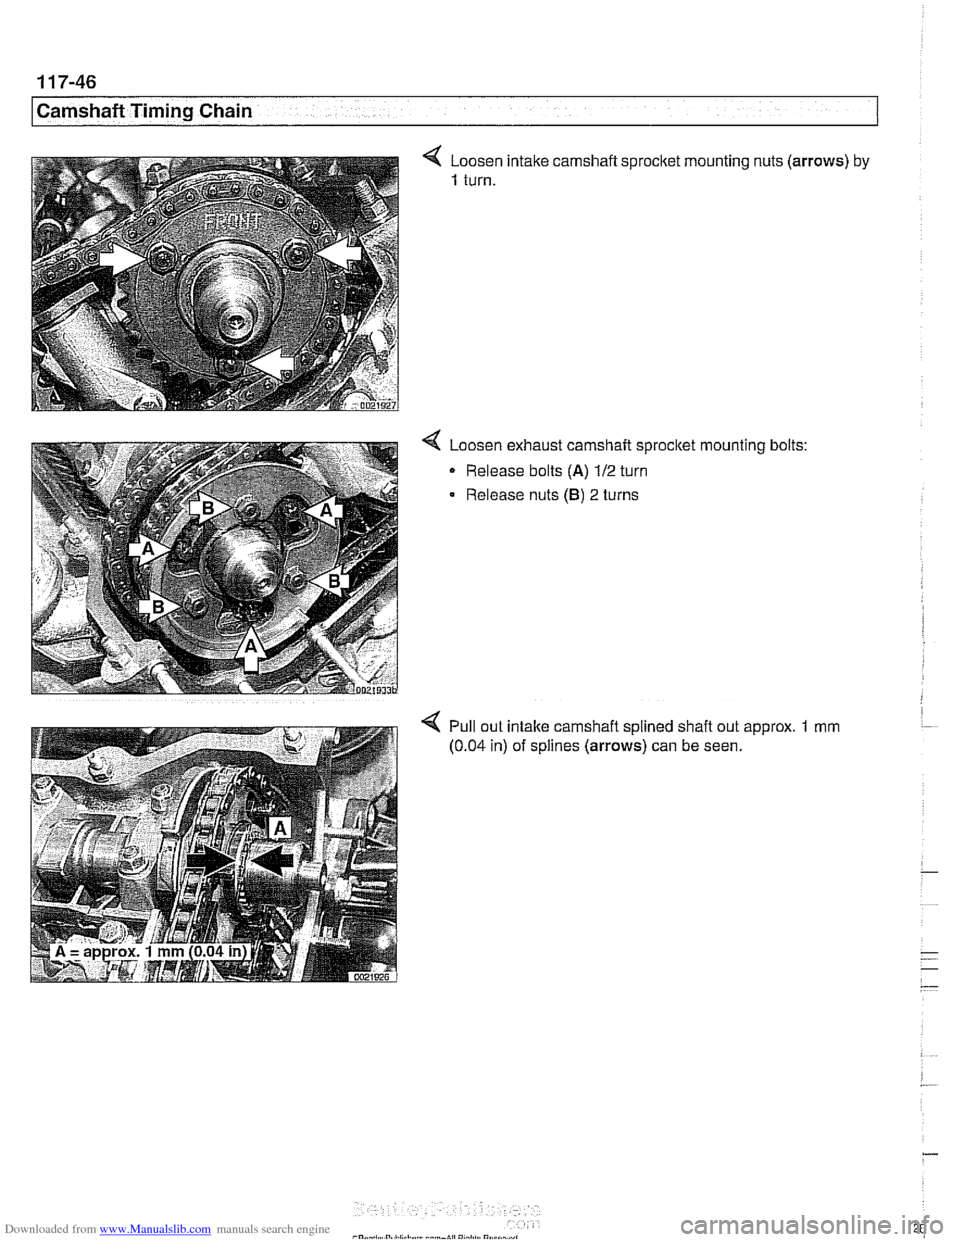
4 Loosen intake camshaft sprocket mounting nuts (arrows) by
1 turn.
Loosen exhaust camshaft sprocltet mounting bolts:
Release bolts
(A) 112 turn
Release nuts
(B) 2 turns
Pull out intake camshaft splined shaft out approx.
1 mm
(0.04 in) of splines (arrows) can be seen.
Page 285 of 1002
Downloaded from www.Manualslib.com manuals search engine
-- - -- - -- Camshaft Timing chain1
- Remove camshaft locking tools from rear of camshafts
- Remove BMW special tool 11 4 220 (adjustable primary
chain tensioner). Reinstall primary chain tensioner.
Tightening torque Primary chain tensioner to cylinder head
70
Nm (52 it-lb)
- Remove crankshaft locking tool from transmission bellhous-
ing. Reinstall sealing plug.
- Remove VANOS setup bracket from front of cylinder head
- lnstall VANOS control unit as described earlier in this group.
- Remove compressed air fitting (BMW special tool 11 3 450)
from VANOS control unit.
- Fit VANOS oil line banjo bolt with new seals. Attach oil line to
VANOS control unit.
Tightening torque
Oil line to VANOS control unit (banjo bolt) 32 Nm (24 H-lb)
- Remainder of installation is reverse of removal, noting the fol-
lowing:
lnstall spark plugs.
* lnstall intake camshaft plastic baffle prior to installing cylin-
der head cover. lnstall ignition coil packs and connect elec-
trical harness connectors.
Install radiator cooling fan.
- lnstall air filter housing and top engine cover.
Tightening torque Radiator cooling fan
(VISCOUS clutch) to 40 Nm (30 ft-lb)
coolant pump
Cyitnder head cover to cylinder head 10 Nm (89 in-lb)
Sparlc plug to cylinder head 25 Nm (18 ft-lb)
Page 290 of 1002
Downloaded from www.Manualslib.com manuals search engine
1 17-54
Camshaft Timing Chain
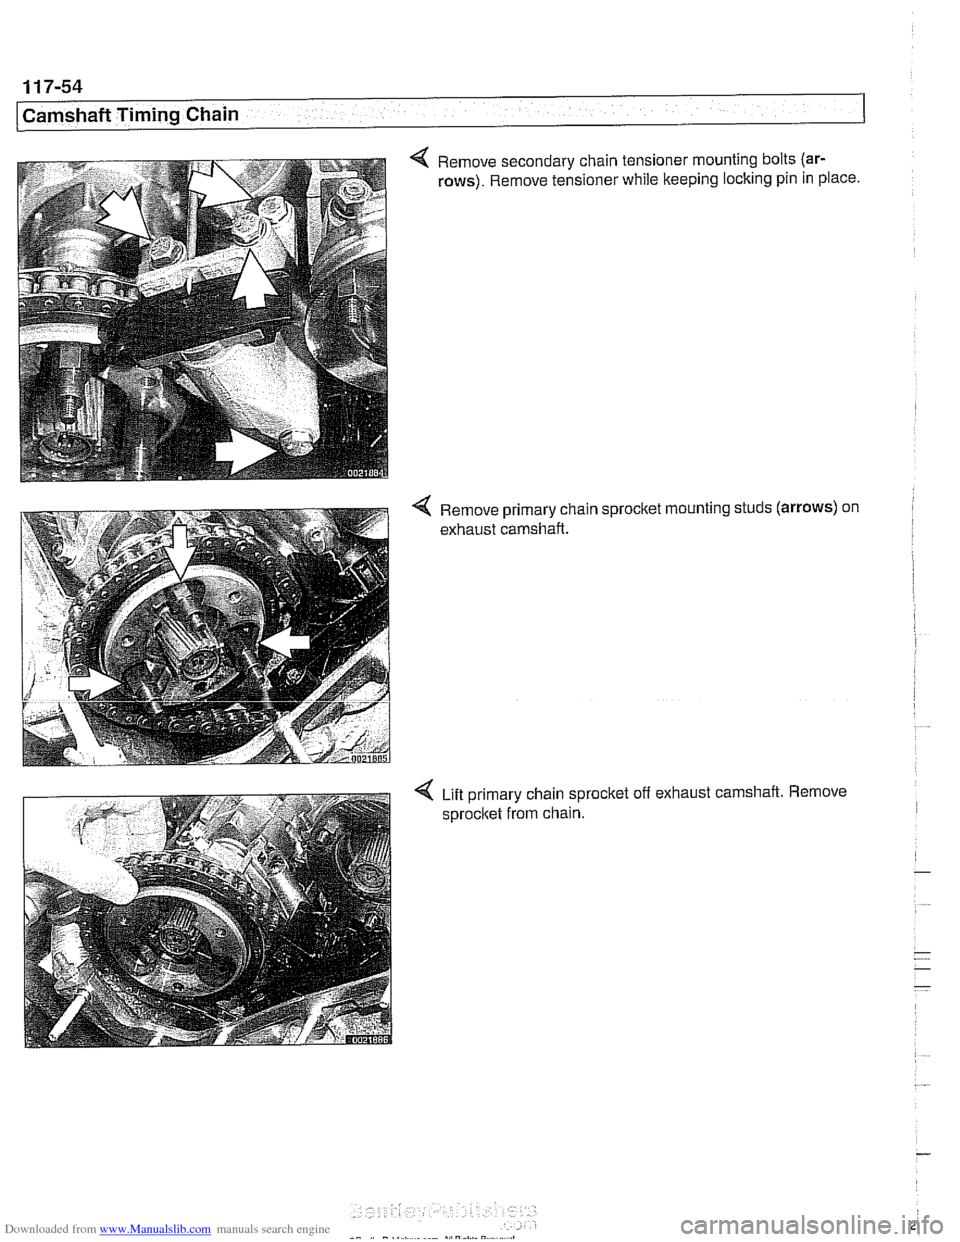
4 Remove secondary chain tensioner mounting bolts (ar-
rows).
Remove tensioner while keeping locking pin in place.
4 Remove primary chain sprocket mounting studs (arrows) on
exhaust camshaft.
4 Lift primary chain sprocltet off exhaust camshaft. Remove
sprocket from chain.
Page 291 of 1002
Downloaded from www.Manualslib.com manuals search engine
11 7-55
Camshaft Timing Chain
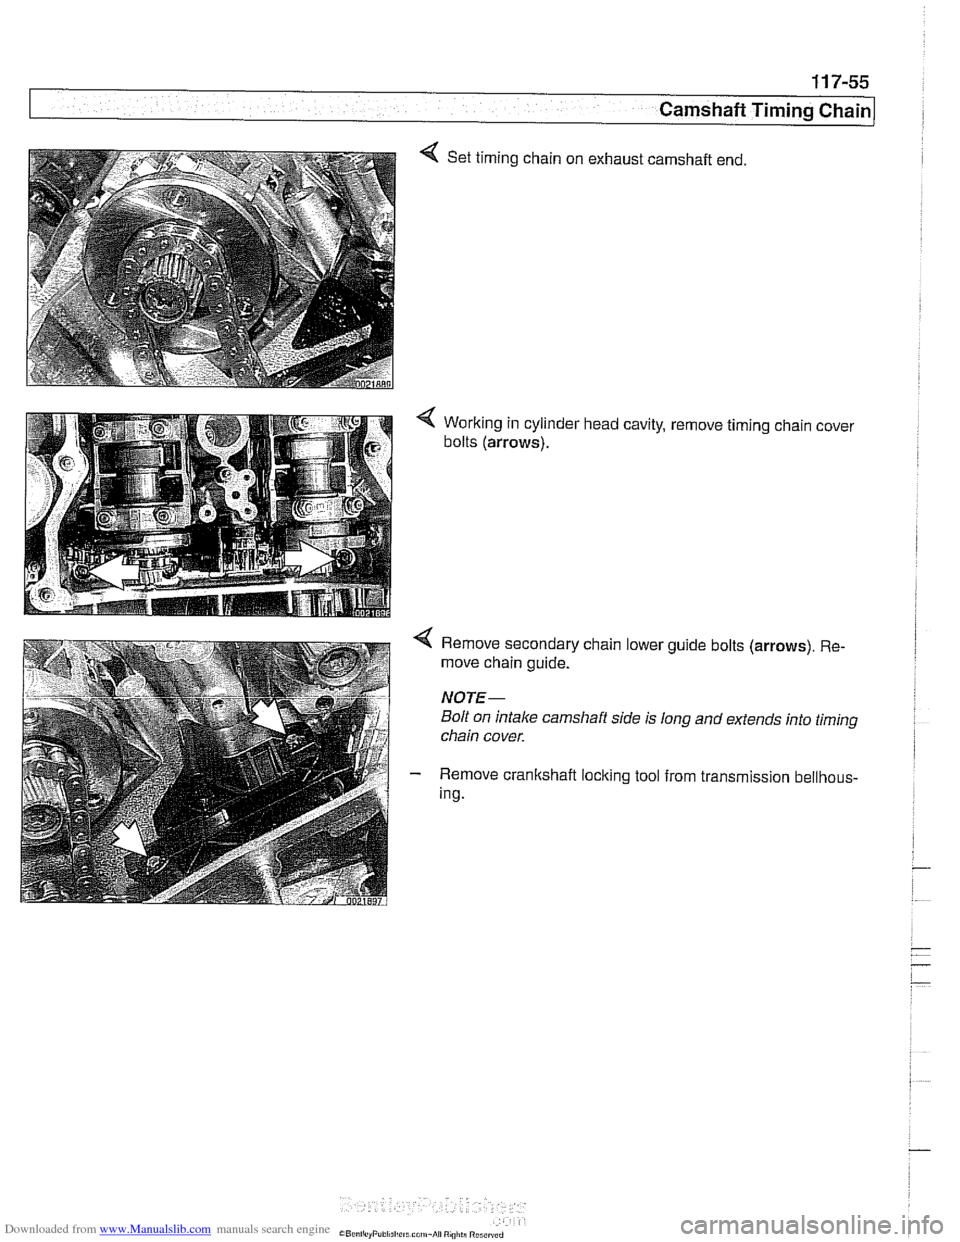
< Set timing chain on exhaust camshaft end
< Working in cylinder head cavity, remove timing chain cover
bolts
(arrows).
< Remove secondary chain lower guide bolts (arrows). Re-
move chain guide.
NOTE-
Bolt on intake camshaft side is long and extends into timing
chain cover.
- Remove crankshaft loclting tool from transmission bellhous-
ing.
Page 292 of 1002
Downloaded from www.Manualslib.com manuals search engine
~ ~~ ~
I Camshaft Timing Chain I --
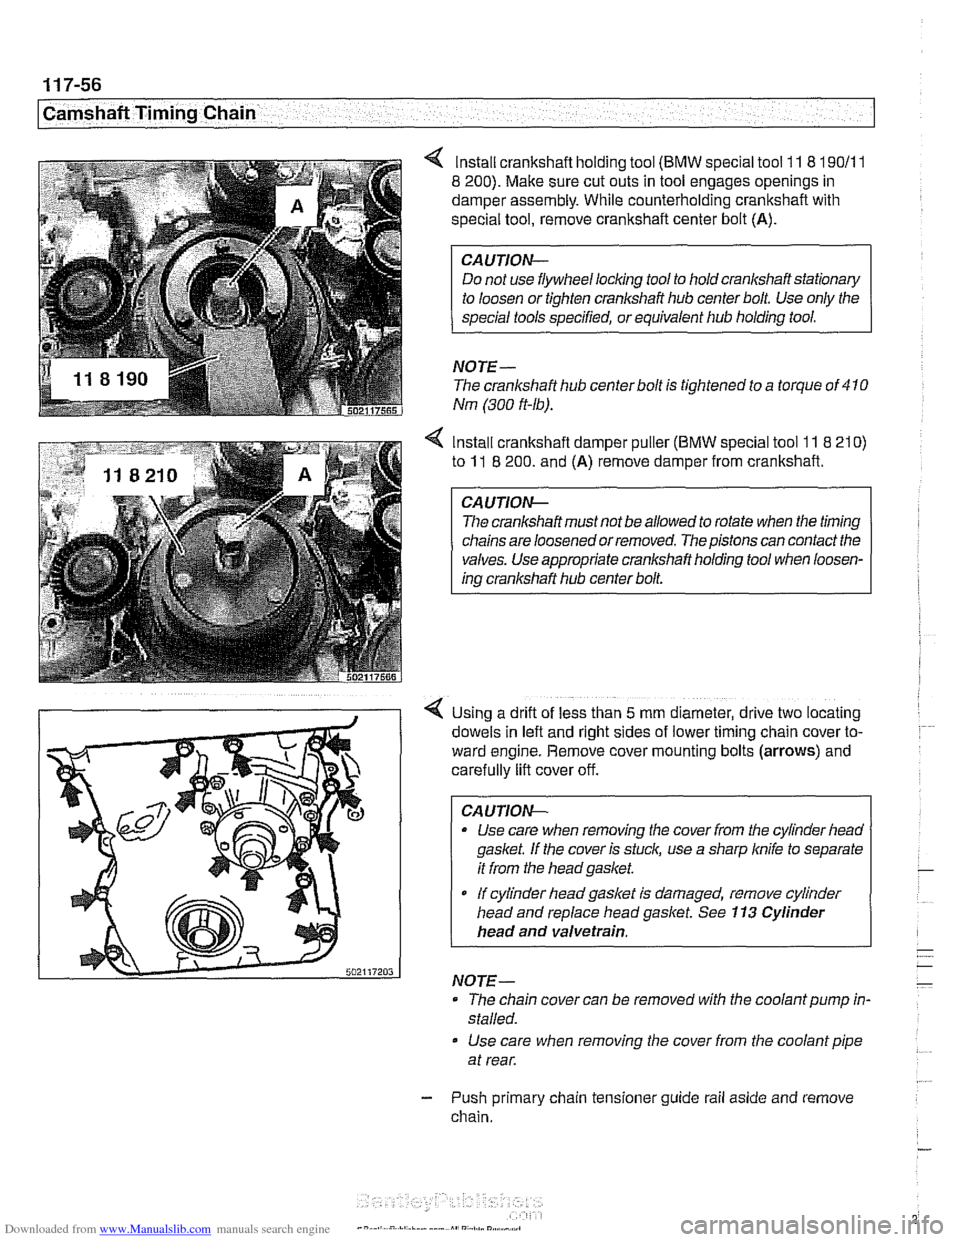
lnstall crankshaft holding tool (BMW special tool 11 8 190/11
8 200). Make sure cut outs in tool engages openings in
damper assembly. While counterholding crankshaft with
special tool, remove crankshaft center bolt (A).
CAUTION-
Do not use flywheel locking tool to hold crankshaft stationary
NOTE-
The crankshaft hub centerbolt is tightened to a torque of 410
Nm (300 ft-lb).
4 Install crankshaft damper puller (BMW special tool 11 8 210)
to 11 8 200. and (A) remove damper from crankshaft.
The crankshaft must not be allowed to rotate when the timing
chains are loosened or removed. The pistons can contact the
valves. Use appropriate crankshaft holding tool when loosen-
ing crankshaft hub center bolt.
Using a drift of less than
5 mm diameter, drive two locating
dowels in left and right sides of lower timing
cham cover to-
ward engine. Remove cover mounting bolts
(arrows) and
carefully lift cover off.
CA
UTION-
* Use care when removing the cover from the cylinder heao
gasket. If the cover is stuck, use a sharp
knife to separate
it from the headgasket.
If cylinder liead gasket Is damaged, remove cylinder
head and replace head gasket. See
113 Cylinder
head and valvetrain.
NOTE-
- The chain cover can be removed with the coolant pump in-
stalled.
Use care when removing the cover from the coolant pipe
at rear.
- Push primary chain tensioner guide rail aside and remove
chain.
Page 293 of 1002
Downloaded from www.Manualslib.com manuals search engine
... -.
rpp- --- Camshaft Timing Chain1
Timing chains, installing
(M52 TU and M54 engines)
CAUTIOI\C
The procedure outlined below assumes that the camshaits
are lockedin the
TDC installation position with speciallocling
tools as shown earliel:
- inspect timing chain sprockets. Inspect guide rail and ten-
sioner rail for damage. Replace any part that is worn
or dam-
aged.
NOTE-
If any sprockets are being replaced due to wear, the chain
should also be replaced.
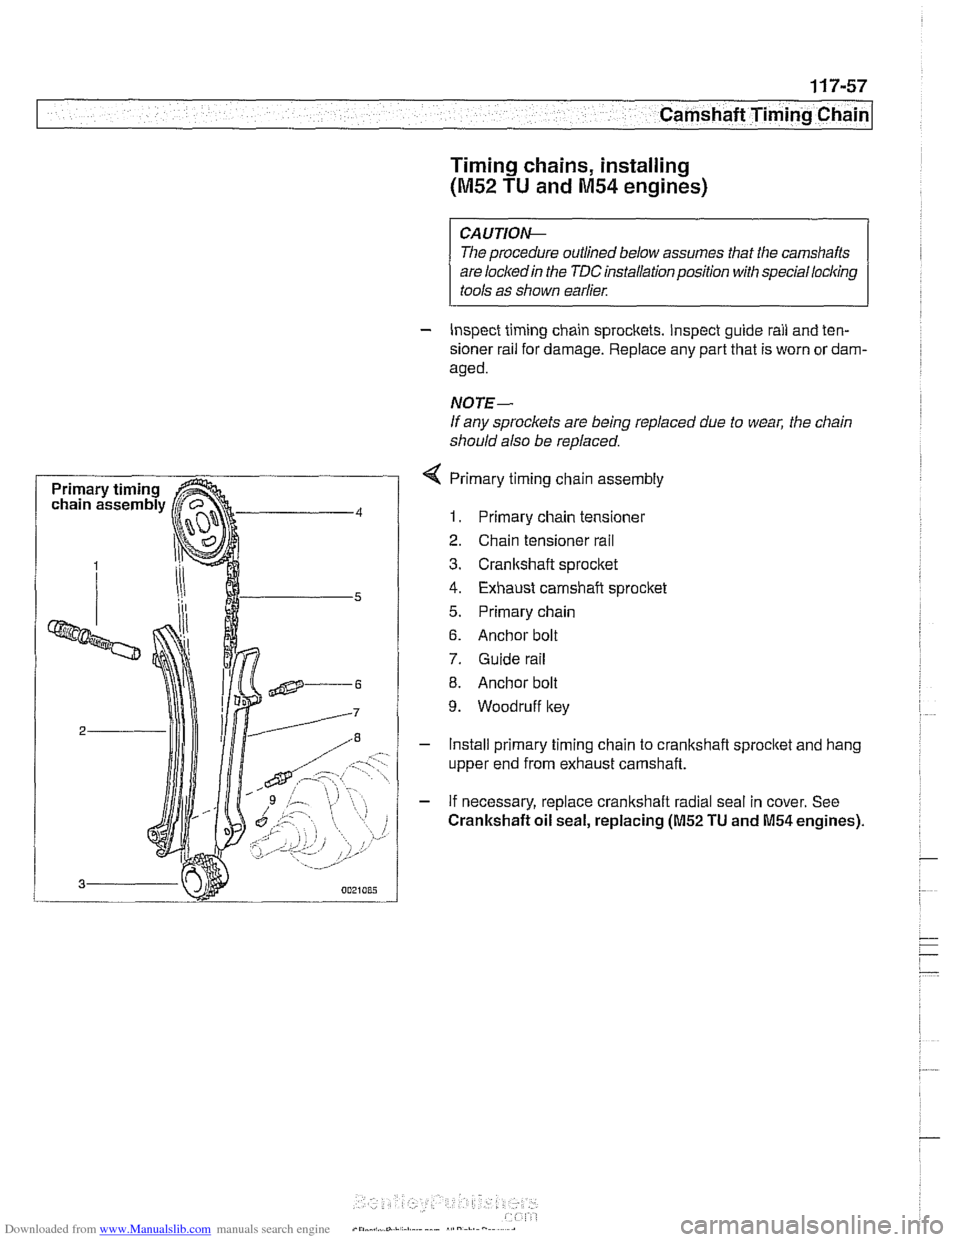
4 Primary timing chain assembly
1. Primary chain tensioner
2. Chain tensioner rail
3. Cranltshaft sprocket
4. Exhaust camshaft sprocket
5. Primary chain
6. Anchor bolt
7. Guide rail
8. Anchor bolt
9. Woodruff key
- Install primary timing chain to crankshaft sprocltet and hang
upper end from exhaust camshaft.
- If necessary, replace crankshaft radial seal in cover. See
Crankshaft oil seal, replacing (M52 TU and M54 engines).
Page 294 of 1002
Downloaded from www.Manualslib.com manuals search engine
(camshaft Timing Chain
- To install lower timing case cover:
- Clean cover and cylinder block sealing surfaces
Use new
gaskets and coolant pipe O-ring.
Remove timing chain cover dowel pins from engine block.
Drive timing cover dowels in until they just protrude slightly
from sealing surface.
Apply a small bead of silicon sealer (Three Bond 1209
63
or equivalent) to corners of cylinder head where timing
cover meets cylinder head and engine block.
Tap cover into position until firmly seated.
lnstall all bolts hand tight, including two Torx bolts from
above.
Install secondary chain lower guide.
Tighten cover mounting bolts alternately and in stages.
Tightening torque
Lower timing cover to cylinder
bloclc (M6) 10 Nrn (89 in-lb)
- Install oil pan with new gasket. See 119 Lubrication Sys-
tem.
Tightening torque
Oil pan
to engine bloclc (M6)
8.8 grade
10.9 grade 10 Nrn (89 in-lb)
12 Nm
(9 ft-lb)
- Align damper assembly with lteyway and tap into place. In-
sert new center bolt with washer.
CAUTION-
Inspect woodruff key for damage before installing hub
assembly.
- Attach special tools 11 8 20011 1 8 190 to damper assembly.
Counterhold damper with
11 8 190 while tightening center
bolt.
CAUTION-
Do not use BMW special tool 1 I 2 300 to hold crankshaft
stationary to tighten cranl(shaft hub center bolt. Use only
the special tools specified, or equivalent hub holding tool.
Have a second person hold special tool
11 8 190 while
tightening center crankshaft bolt.
Tightening torque Crankshaft hub to crankshaft 410 Nrn
(300
ft-lb)
Page 303 of 1002
Downloaded from www.Manualslib.com manuals search engine
Camshaft Timing chain1
- Disconnect negative cable (-) from battery.
CAUTION-
Prior to disconnecting the battery, read the battery discon-
nection cautions given
in 001 General Cautions and
Warnings.
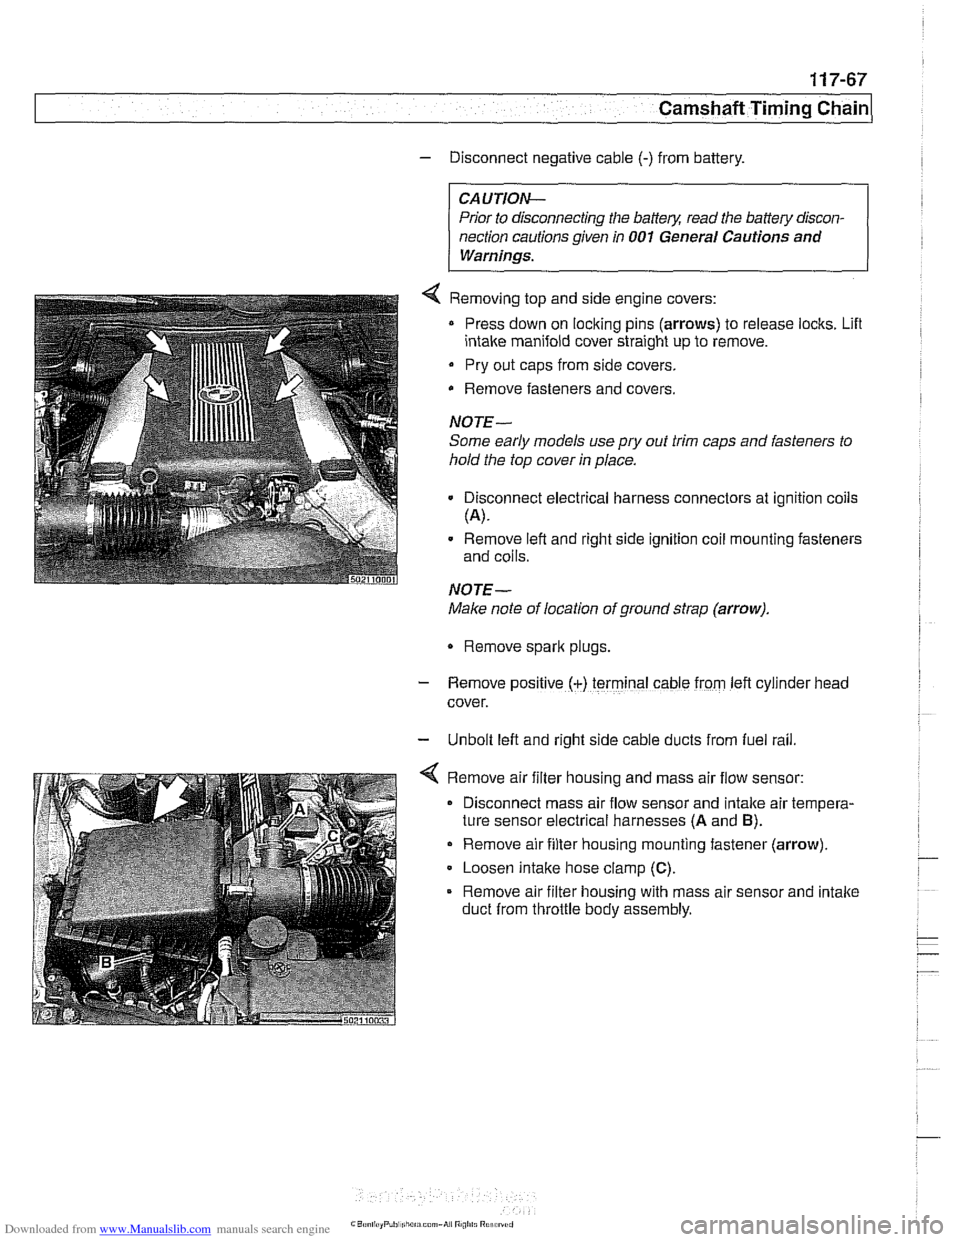
4 Removing top and side engine covers:
Press down on locking pins (arrows) to release locks. Lifl
intake manifold cover straight up to remove.
Pry out caps from side covers.
Remove fasteners
and covers.
NOTE-
Some early models use
pry out trim caps and fasteners to
hold the top cover in place.
Disconnect electrical harness connectors at ignition coils
(A).
Remove left and right side ignition coil mounting fasteners
and coils.
NOTE-
Make note of location of ground strap (arrow).
Remove spark plugs.
- Remove posltlve (+) terminal cable from left cylrnder head
cover.
- Unbolt left and right side cable ducts from fuel rail
Remove air filter housing and mass air flow sensor:
Disconnect mass air flow sensor and intake air tempera-
ture sensor electrical harnesses
(A and B).
Remove air filter housing mounting fastener (arrow)
Loosen intake hose clamp
(C).
Remove air filter housing with mass air sensor and intake
duct from throttle body assembly.