BMW 540I SEDAN 2000 Owners Manual
Manufacturer: BMW, Model Year: 2000, Model line: 540I SEDAN, Model: BMW 540I SEDAN 2000Pages: 217, PDF Size: 1.69 MB
Page 161 of 217
161n
RepairsIndexOverview Controls Car care Technology Data
Any authorized BMW center will be glad
to inform you of the advisability, legal
requirements and factory recommenda-
tions with regard to technical modifica-
tions on the car. For this purpose, the
center requires the Vehicle Identifica-
tion Number and, in some cases, also
the engine number.
Light-Emitting Diodes (LEDs)Light-emitting diodes installed behind
translucent lenses serve as the light
source for many of the controls and dis-
plays in your vehicle. The concept be-
hind their operation is related to that
employed for lasers, and they are offi-
cially designated as Class 1 light-emit-
ting diodes.
Do not remove the protective lens
and avoid staring directly at the
unfiltered beam for extended periods
(several hours), as inflammation of the
iris could result.<
Technical modifications
Page 162 of 217
162n
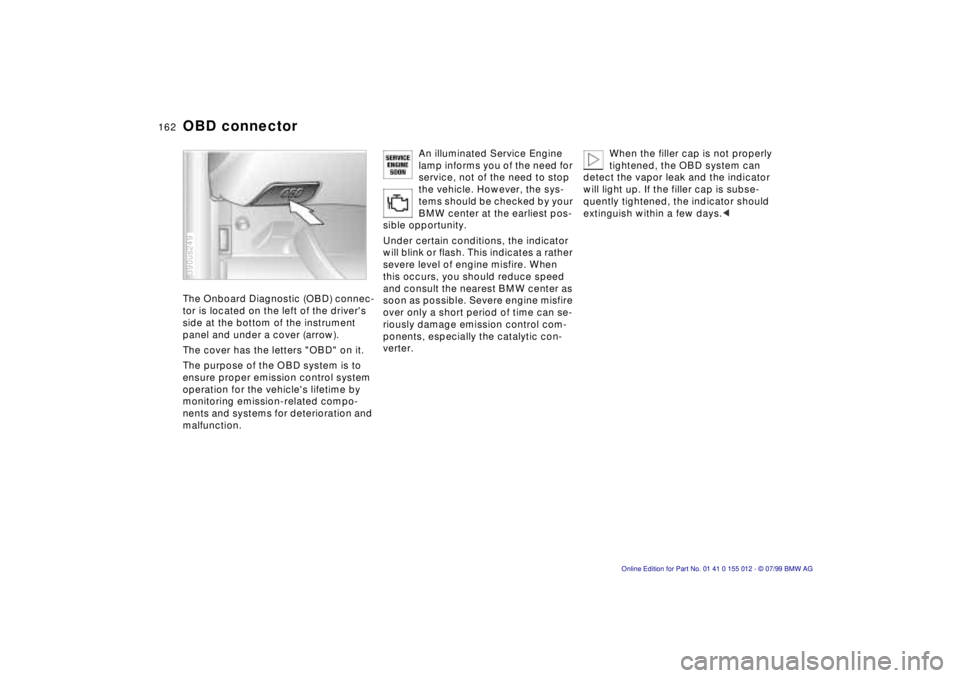
OBD connectorThe Onboard Diagnostic (OBD) connec-
tor is located on the left of the driver's
side at the bottom of the instrument
panel and under a cover (arrow).
The cover has the letters "OBD" on it.
The purpose of the OBD system is to
ensure proper emission control system
operation for the vehicle's lifetime by
monitoring emission-related compo-
nents and systems for deterioration and
malfunction.390us249
An illuminated Service Engine
lamp informs you of the need for
service, not of the need to stop
the vehicle. However, the sys-
tems should be checked by your
BMW center at the earliest pos-
sible opportunity.
Under certain conditions, the indicator
will blink or flash. This indicates a rather
severe level of engine misfire. When
this occurs, you should reduce speed
and consult the nearest BMW center as
soon as possible. Severe engine misfire
over only a short period of time can se-
riously damage emission control com-
ponents, especially the catalytic con-
verter.
When the filler cap is not properly
tightened, the OBD system can
detect the vapor leak and the indicator
will light up. If the filler cap is subse-
quently tightened, the indicator should
extinguish within a few days.<
Page 163 of 217
163n
RepairsIndexOverview Controls Car care Technology Data
Page 164 of 217
164n
Page 165 of 217
Overview
Controls and features
Operation, care
and maintenance
Owner service procedures
Technical data
Index Advanced technology
165n
RepairsIndexOverview Controls Car care Technology Data
Replacement procedures:
Onboard tool kit166
Wiper blades166
Lamps and bulbs167
Changing tires173
Battery176
Fuses178
In case of electrical
malfunction:
Fuel filler door180
Sliding/Tilt sunroof180
Tailgate181
Assistance, giving and
receiving:
Jump-starting182
Towing the vehicle183
Page 166 of 217
166n
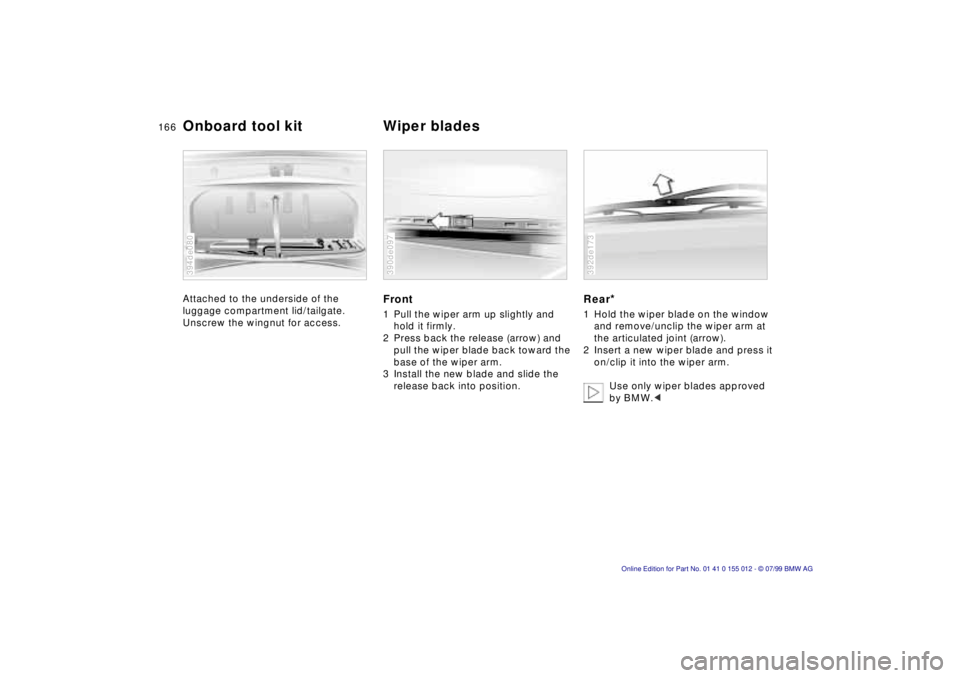
Attached to the underside of the
luggage compartment lid/tailgate.
Unscrew the wingnut for access.
394de080
Front1 Pull the wiper arm up slightly and
hold it firmly.
2 Press back the release (arrow) and
pull the wiper blade back toward the
base of the wiper arm.
3 Install the new blade and slide the
release back into position.390de097
Rear
*
1 Hold the wiper blade on the window
and remove/unclip the wiper arm at
the articulated joint (arrow).
2 Insert a new wiper blade and press it
on/clip it into the wiper arm.
Use only wiper blades approved
by BMW.< 392de173
Onboard tool kit Wiper blades
Page 167 of 217
167n
RepairsIndexOverview Controls Car care Technology Data
Lamps and bulbsThe lamps and bulbs make essential
contributions to the safety of your vehi-
cle. For this reason, follow the instruc-
tions below carefully when replacing a
bulb. If you are not familiar with any of
the procedures, consult your authorized
BMW center.
Do not touch the glass portion of a
new bulb with your bare hands
since even small amounts of impurities
burn into the surface and reduce the
service life of the bulb. Use a clean
cloth, paper napkin, or a similar mate-
rial, or hold the bulb by its metallic
base.<
A replacement bulb set is available from
your BMW center.
Whenever working on the electri-
cal system, switch off the electri-
cal accessory you are working on or
disconnect the cable from the negative
terminal of the battery. Failure to do this
could result in short circuits.
To prevent injuries and damage, comply
with any instructions provided by the
bulb manufacturer.<
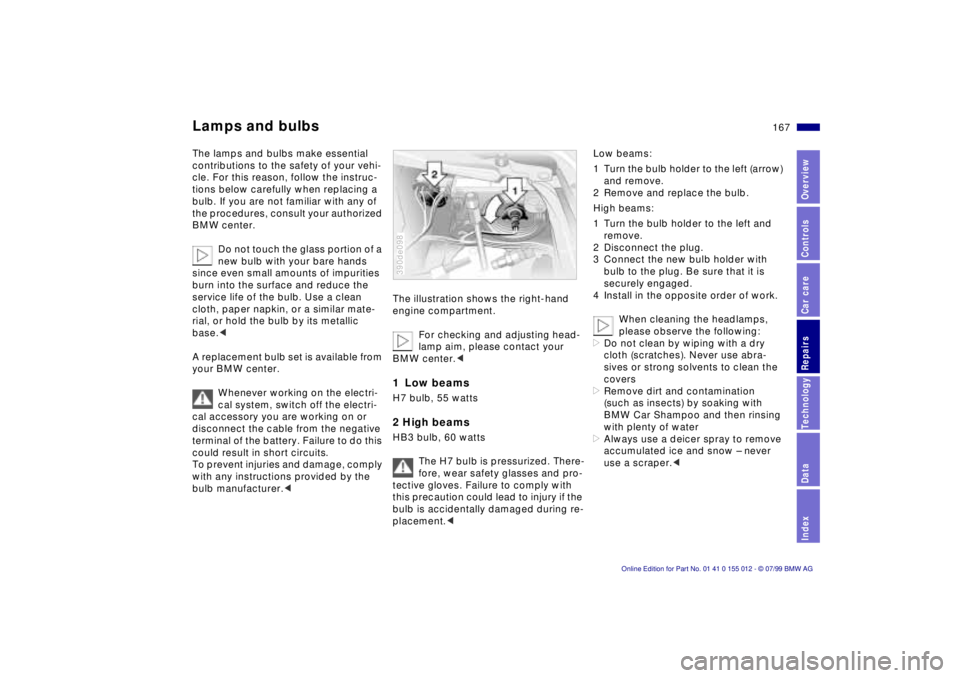
The illustration shows the right-hand
engine compartment.
For checking and adjusting head-
lamp aim, please contact your
BMW center.< 1 Low beams H7 bulb, 55 watts 2 High beamsHB3 bulb, 60 watts
The H7 bulb is pressurized. There-
fore, wear safety glasses and pro-
tective gloves. Failure to comply with
this precaution could lead to injury if the
bulb is accidentally damaged during re-
placement.< 390de098
Low beams:
1 Turn the bulb holder to the left (arrow)
and remove.
2 Remove and replace the bulb.
High beams:
1 Turn the bulb holder to the left and
remove.
2 Disconnect the plug.
3 Connect the new bulb holder with
bulb to the plug. Be sure that it is
securely engaged.
4 Install in the opposite order of work.
When cleaning the headlamps,
please observe the following:
>Do not clean by wiping with a dry
cloth (scratches). Never use abra-
sives or strong solvents to clean the
covers
>Remove dirt and contamination
(such as insects) by soaking with
BMW Car Shampoo and then rinsing
with plenty of water
>Always use a deicer spray to remove
accumulated ice and snow Ð never
use a scraper.<
Page 168 of 217
168n
Lamps and bulbsXenon lamps
*
The operating life of these lamp units is
extremely long and the likelihood of fail-
ure very low, provided that they are not
switched on and off a very great num-
ber of times. If one of these bulbs
should nevertheless fail, it is possible to
continue driving with great caution us-
ing the fog lamps, provided traffic laws
in your area do not prohibit this.
Because of the extremely high
voltages involved, any work on the
lighting system should be carried out by
technically-qualified personnel only.
Otherwise, there is a risk of fatal in-
jury.<
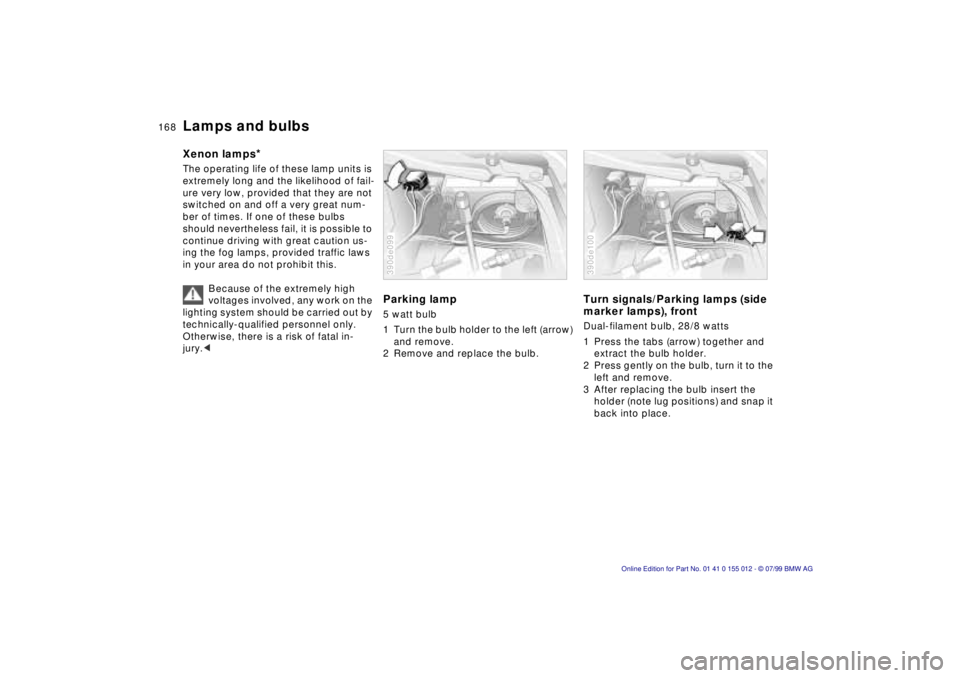
Parking lamp5 watt bulb
1 Turn the bulb holder to the left (arrow)
and remove.
2 Remove and replace the bulb.390de099
Turn signals/Parking lamps (side
marker lamps), frontDual-filament bulb, 28/8 watts
1 Press the tabs (arrow) together and
extract the bulb holder.
2 Press gently on the bulb, turn it to the
left and remove.
3 After replacing the bulb insert the
holder (note lug positions) and snap it
back into place.390de100
Page 169 of 217
169n
RepairsIndexOverview Controls Car care Technology Data
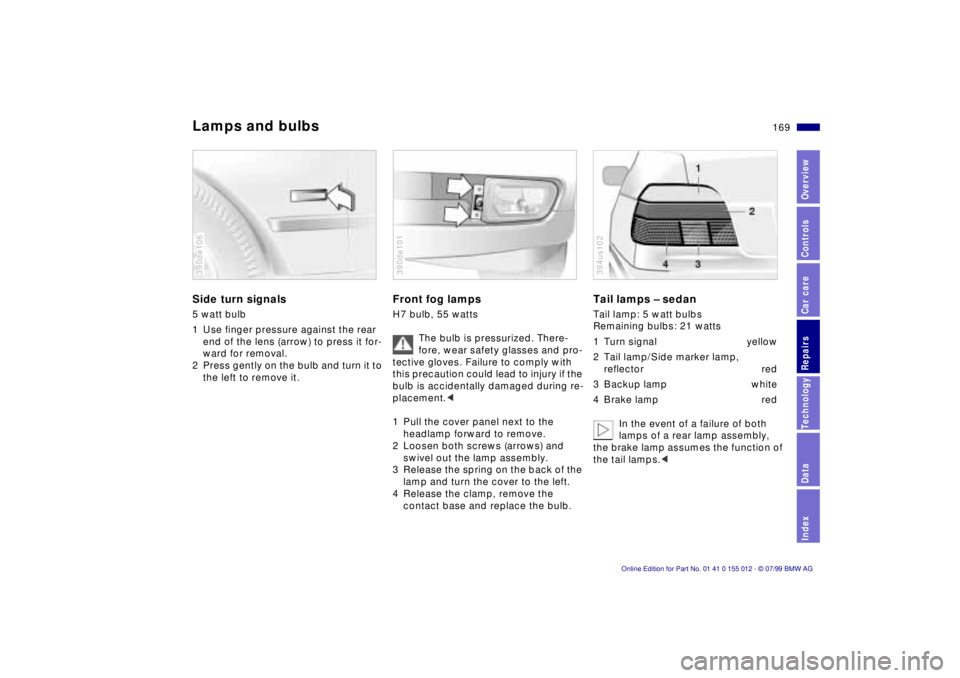
Lamps and bulbsSide turn signals 5 watt bulb
1 Use finger pressure against the rear
end of the lens (arrow) to press it for-
ward for removal.
2 Press gently on the bulb and turn it to
the left to remove it.390de106
Front fog lampsH7 bulb, 55 watts
The bulb is pressurized. There-
fore, wear safety glasses and pro-
tective gloves. Failure to comply with
this precaution could lead to injury if the
bulb is accidentally damaged during re-
placement.<
1 Pull the cover panel next to the
headlamp forward to remove.
2 Loosen both screws (arrows) and
swivel out the lamp assembly.
3 Release the spring on the back of the
lamp and turn the cover to the left.
4 Release the clamp, remove the
contact base and replace the bulb.390de101
Tail lamps Ð sedanTail lamp: 5 watt bulbs
Remaining bulbs: 21 watts
1 Turn signal yellow
2 Tail lamp/Side marker lamp,
reflector red
3 Backup lamp white
4 Brake lamp red
In the event of a failure of both
lamps of a rear lamp assembly,
the brake lamp assumes the function of
the tail lamps.< 394us102
Page 170 of 217
170n
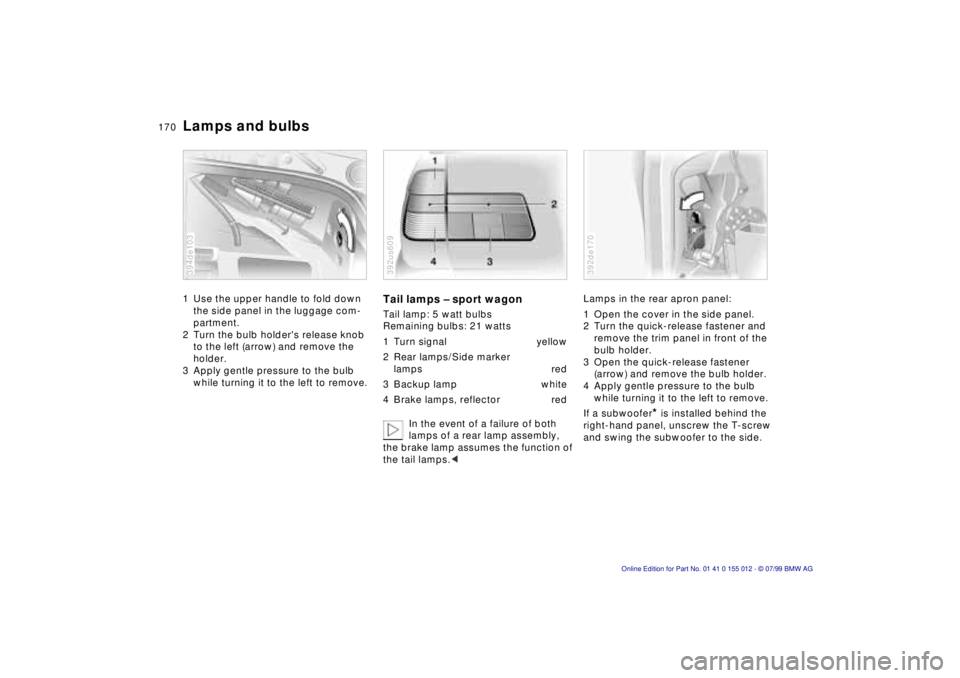
Lamps and bulbs1 Use the upper handle to fold down
the side panel in the luggage com-
partment.
2 Turn the bulb holder's release knob
to the left (arrow) and remove the
holder.
3 Apply gentle pressure to the bulb
while turning it to the left to remove.394de103
Tail lamps Ð sport wagonTail lamp: 5 watt bulbs
Remaining bulbs: 21 watts
1 Turn signal yellow
2 Rear lamps/Side marker
lamps red
3 Backup lamp white
4 Brake lamps, reflector red
In the event of a failure of both
lamps of a rear lamp assembly,
the brake lamp assumes the function of
the tail lamps.< 392us609
Lamps in the rear apron panel:
1 Open the cover in the side panel.
2 Turn the quick-release fastener and
remove the trim panel in front of the
bulb holder.
3 Open the quick-release fastener
(arrow) and remove the bulb holder.
4 Apply gentle pressure to the bulb
while turning it to the left to remove.
If a subwoofer
* is installed behind the
right-hand panel, unscrew the T-screw
and swing the subwoofer to the side.
392de170