BMW 540I SEDAN 2003 Owners Manual
Manufacturer: BMW, Model Year: 2003, Model line: 540I SEDAN, Model: BMW 540I SEDAN 2003Pages: 187, PDF Size: 2.3 MB
Page 161 of 187
161n
OverviewControlsMaintenanceRepairsDataIndex
Changing a wheel16. Wheels with hub covers:
Position the hub cover and press it
on tightly
17. If equipped with lug bolt covers:
Align the arrow on the cover with
the line in the wheel and press the
cover into place
18. Check and correct the tire inflation
pressure at the earliest opportunity.
For vehicles with Tire Pressure
Monitor (RDC)
*:
After mounting the spare tire or cor-
recting the inflation pressure, reac-
tivate the system. Refer to
page 101.
The vehicle jack is designed for
changing wheels only. Do not
attempt to raise another vehicle model
with it or to raise any load of any kind.
To do so could cause accidents and
personal injury.
To ensure continued safety, have the
lug bolts checked with a calibrated
torque wrench [torque specification
72 lb-ft (100 Nm)] at the earliest
opportunity.<
When storing the wheel, take care to
ensure that you do not damage the
retaining pin in the spare tire recess.
If light-alloy wheels other than original
BMW light-alloy wheels have been
mounted, it may be necessary to use
different lug bolts for those wheels.
Replace the defective tire as soon as
possible and have the new wheel/tire
balanced.
Protect valve inserts against dirt using
screw-on valve stem caps. Dirty valve
stems frequently lead to slow pressure
loss.
Size 255/40 R17 94 W
* tires on
the rear axle:
In the event of a flat tire, it may be nec-
essary to mount the spare tire of dif-
ferent size at the rear. This tire is suit-
able for use in all load and speed
ranges. Nevertheless, you should
remount a tire of the correct size as
soon as possible.<
Page 162 of 187
162n
Battery Fuses
Battery posts, terminals and other
components contain lead and lead
compounds. Wash hands after han-
dling.<
Battery careThe battery is maintenance-free, that is,
the original electrolyte will normally last
for the service life of the battery under
moderate climatic conditions.
For all questions that regard the
battery, please consult your BMW
center. The battery is completely main-
tenance-free; the following section is
provided for your information only.<
Do not disconnect the battery
when the engine is running, as the
ensuing voltage surge would damage
the vehicle's onboard electronics.<
Charging the batteryWhen charging the battery in the
vehicle, leave the engine off at all times.
Connect the charge cables to the termi-
nals in the engine compartment (for ter-
minal locations, refer to "Jump-starting"
on page 164).
Return used batteries to a recy-
cling point or your BMW center.
Maintain the battery in an upright posi-
tion for transport and storage. Secure
the battery against tilting during trans-
port.<
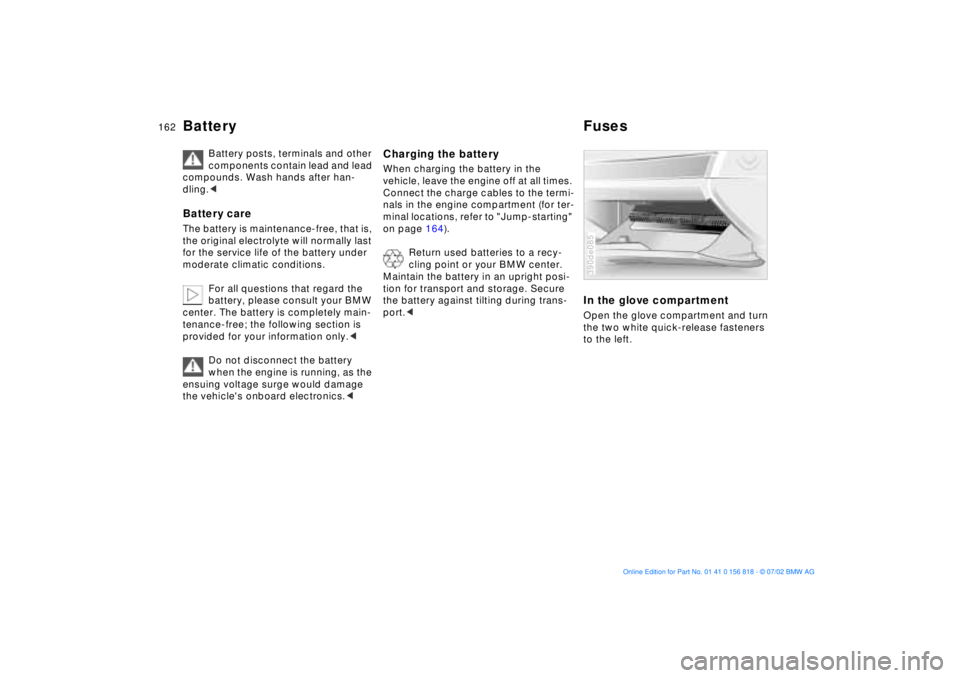
In the glove compartmentOpen the glove compartment and turn
the two white quick-release fasteners
to the left.390de085
Page 163 of 187
163n
OverviewControlsMaintenanceRepairsDataIndex
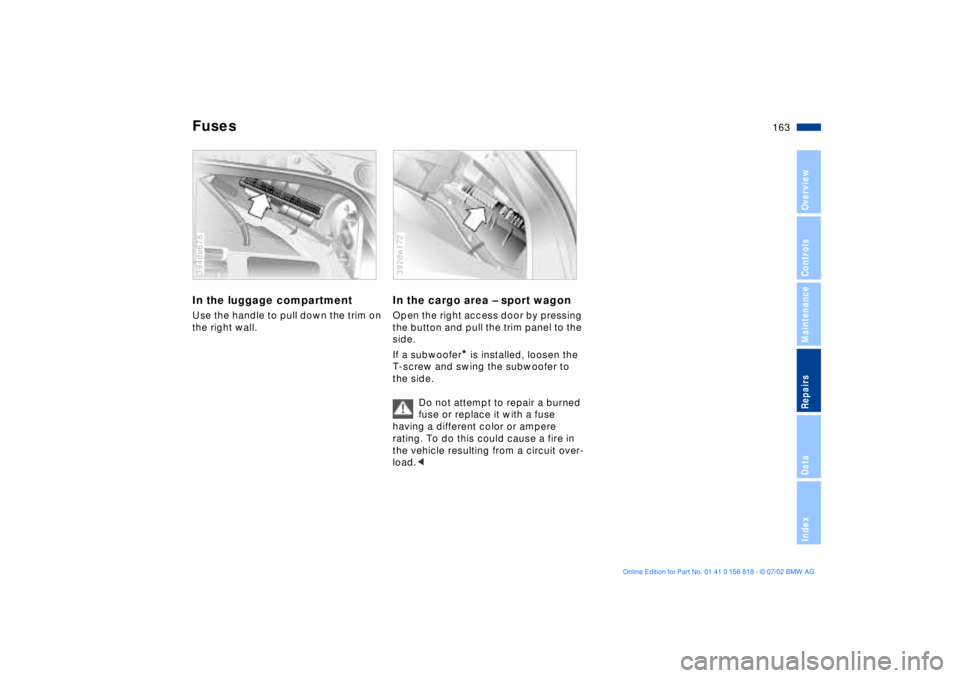
FusesIn the luggage compartmentUse the handle to pull down the trim on
the right wall.394de678
In the cargo area Ð sport wagonOpen the right access door by pressing
the button and pull the trim panel to the
side.
If a subwoofer
* is installed, loosen the
T-screw and swing the subwoofer to
the side.
Do not attempt to repair a burned
fuse or replace it with a fuse
having a different color or ampere
rating. To do this could cause a fire in
the vehicle resulting from a circuit over-
load.<
392de172
Page 164 of 187
164n
Do not use spray starter fluids to start
the engine.
When your battery is discharged you
can used two jumper cables to start
your vehicle with power from the bat-
tery in a second vehicle. You can also
use the same method to help start
another vehicle. Always use jumper
cables with fully insulated handles on
the terminal clamps.
Do not touch high-voltage wiring
and cables on a running engine.
Contact with components carrying high
voltage can be harmful or fatal. Care-
fully observe the following instructions
to avoid personal injury and/or damage
to one or both vehicles.<
1. Ensure that the battery in the sup-
port vehicle is also rated at
12 volts. This information is pro-
vided on the top of the battery
casing
2. Do not disconnect your battery from
your vehicle's electrical system.
Switch off all electrical accessories
in both vehicles
3. Make absolutely certain that there
is no contact between the body-
work of the two vehicles Ð short cir-
cuit hazard
4. Start the engine on the support
vehicle and allow it to run
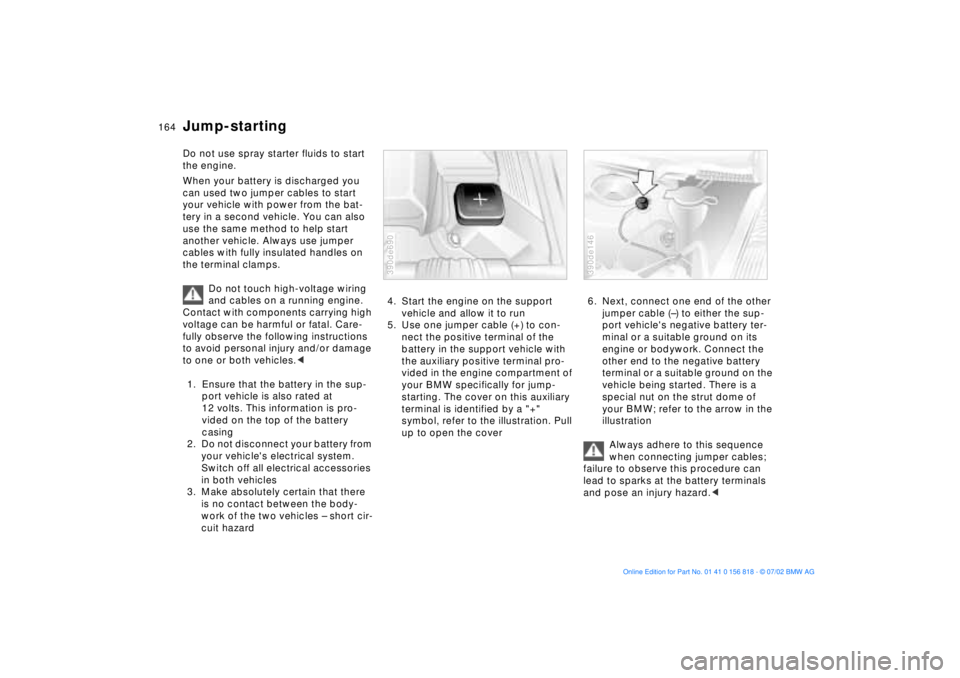
5. Use one jumper cable (+) to con-
nect the positive terminal of the
battery in the support vehicle with
the auxiliary positive terminal pro-
vided in the engine compartment of
your BMW specifically for jump-
starting. The cover on this auxiliary
terminal is identified by a "+"
symbol, refer to the illustration. Pull
up to open the cover390de690
6. Next, connect one end of the other
jumper cable (Ð) to either the sup-
port vehicle's negative battery ter-
minal or a suitable ground on its
engine or bodywork. Connect the
other end to the negative battery
terminal or a suitable ground on the
vehicle being started. There is a
special nut on the strut dome of
your BMW; refer to the arrow in the
illustration
Always adhere to this sequence
when connecting jumper cables;
failure to observe this procedure can
lead to sparks at the battery terminals
and pose an injury hazard.< 390de146
Jump-starting
Page 165 of 187
165n
OverviewControlsMaintenanceRepairsDataIndex
Jump-starting Towing the vehicle7. Start the support vehicle's engine
and let it run at an increased idling
speed for a few minutes. Start the
engine on the vehicle needing the
jump-start, and allow it to run as
usual. If the first start attempt is not
successful, wait a few minutes
before another attempt in order to
allow the discharged battery to
recharge
8. Before disconnecting the jumper
cables let the engines run for a few
minutes
9. Then disconnect the jumper cables
in reverse sequence.
Depending on the cause of the fault,
have the battery recharged by your
BMW center.
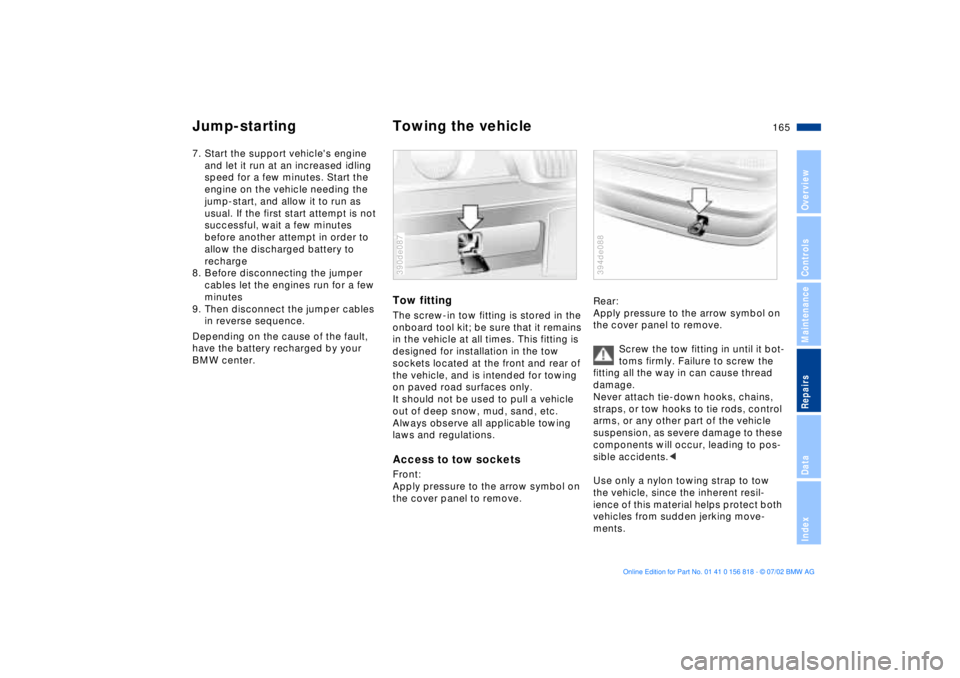
Tow fittingThe screw-in tow fitting is stored in the
onboard tool kit; be sure that it remains
in the vehicle at all times. This fitting is
designed for installation in the tow
sockets located at the front and rear of
the vehicle, and is intended for towing
on paved road surfaces only.
It should not be used to pull a vehicle
out of deep snow, mud, sand, etc.
Always observe all applicable towing
laws and regulations.Access to tow socketsFront:
Apply pressure to the arrow symbol on
the cover panel to remove.390de087
Rear:
Apply pressure to the arrow symbol on
the cover panel to remove.
Screw the tow fitting in until it bot-
toms firmly. Failure to screw the
fitting all the way in can cause thread
damage.
Never attach tie-down hooks, chains,
straps, or tow hooks to tie rods, control
arms, or any other part of the vehicle
suspension, as severe damage to these
components will occur, leading to pos-
sible accidents.<
Use only a nylon towing strap to tow
the vehicle, since the inherent resil-
ience of this material helps protect both
vehicles from sudden jerking move-
ments.394de088
Page 166 of 187
166n
Towing the vehicle
The towed vehicle should always
be the lighter of the two vehicles.
If this is not the case, it is no longer
possible to control vehicle response.<
Tow-startingIt is not possible to start the engine of
vehicles equipped with an automatic
transmission by towing or pushing.
For instructions on jump-starting: refer
to page 164.
Never attempt to use your vehicle to
push another vehicle, since damage to
the energy-absorbing bumpers could
result.
Towing a vehicle with automatic
transmission1. Place the selector lever in position N
2. Towing speed:
Max. 45 mph (70 km/h)
3. Towing distance:
Max. 95 miles (150 km)
4. Leave the ignition key in position 1 to
ensure that the brake lamps, turn
signal indicators, horn and wind-
shield wipers remain operative, and
to prevent the steering lock from
engaging
5. Switch on the hazard warning
flashers (observe official regulations).
Find some means of identifying the
vehicle in tow, for instance, place a sign
or warning triangle in the rear window.
Make sure that the ignition key
remains in position 1 even when
the electrical system has failed to pre-
vent the steering lock from engaging.
The steering and brakes are without
power-assist when the engine is off.
This means that increased effort is
required for steering and braking.<
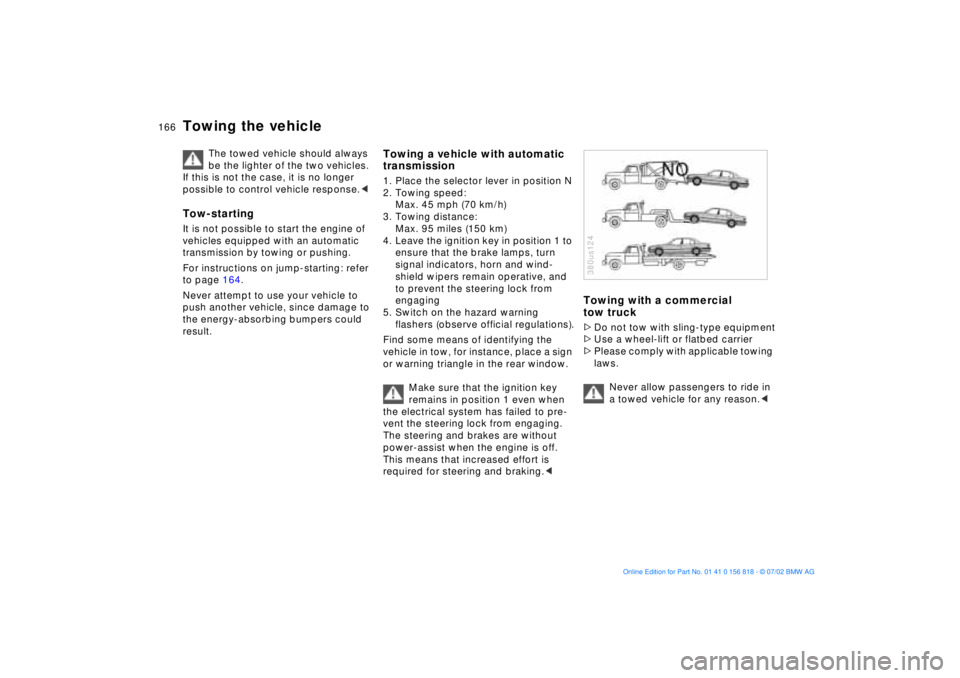
Towing with a commercial
tow truck>Do not tow with sling-type equipment
>Use a wheel-lift or flatbed carrier
>Please comply with applicable towing
laws.
Never allow passengers to ride in
a towed vehicle for any reason.< 380us124
Page 167 of 187

167n
OverviewControlsMaintenanceRepairsDataIndex
Page 168 of 187
168n
Page 169 of 187
169n
OverviewControlsMaintenanceRepairsDataIndex
Overview
Controls and features
Operation, maintenance
Owner service procedures
Index Technical data
Index
Page 170 of 187
170n
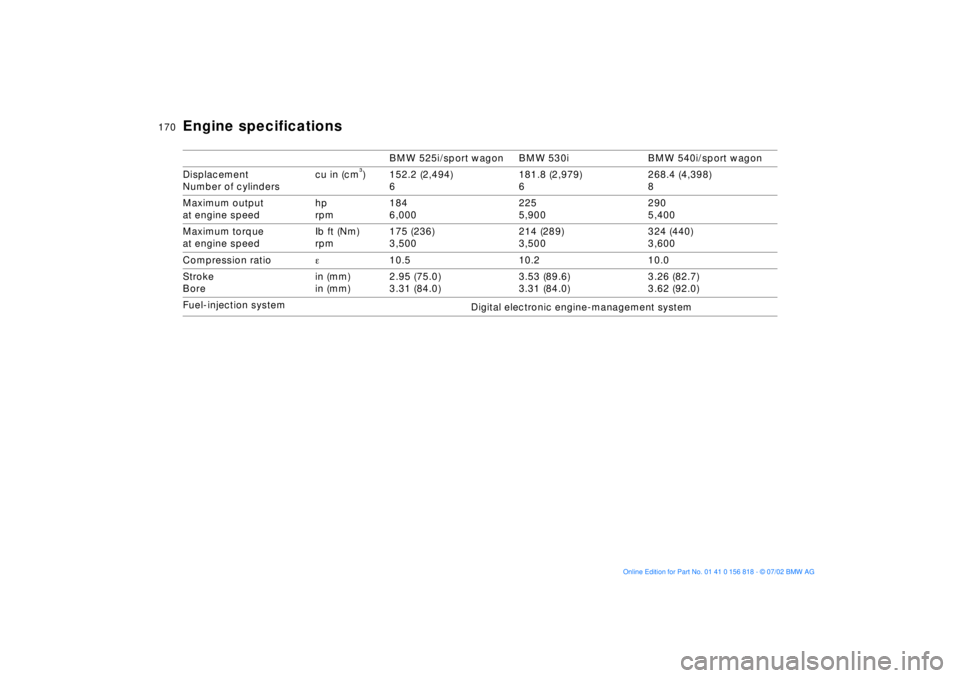
BMW 525i/sport wagon BMW 530i BMW 540i/sport wagon
Displacement
Number of cylinderscu in (cm
m) 152.2 (2,494)
6181.8 (2,979)
6268.4 (4,398)
8
Maximum output
at engine speedhp
rpm184
6,000225
5,900290
5,400
Maximum torque
at engine speedIb ft (Nm)
rpm175 (236)
3,500214 (289)
3,500324 (440)
3,600
Compression ratioe10.5 10.2 10.0
Stroke
Borein (mm)
in (mm)2.95 (75.0)
3.31 (84.0)3.53 (89.6)
3.31 (84.0)3.26 (82.7)
3.62 (92.0)
Fuel-injection system
Digital electronic engine-management system
Engine specifications