BMW 550I 2007 Owners Manual
Manufacturer: BMW, Model Year: 2007, Model line: 550I, Model: BMW 550I 2007Pages: 273, PDF Size: 8.96 MB
Page 131 of 273
Driving tips
129Reference
At a glance
Controls
Communications
Navigation
Entertainment
Mobility
1,400 lbs. and there will be five 150-lb. pas-
sengers in your vehicle, the amount of avail-
able cargo and luggage load capacity is
650 lbs.:
1,400 lbs. minus 750 lbs. = 650 lbs.
5.Determine the combined weight of luggage
and cargo being loaded on the vehicle. That
weight may not safely exceed the available
cargo and luggage load capacity calculated
in step 4.
6.If your vehicle will be towing a trailer, part of
the load from your trailer will be transferred
to your vehicle. Consult the manual for
transporting a trailer to determine how this
may reduce the available cargo and luggage
load capacity of your vehicle.
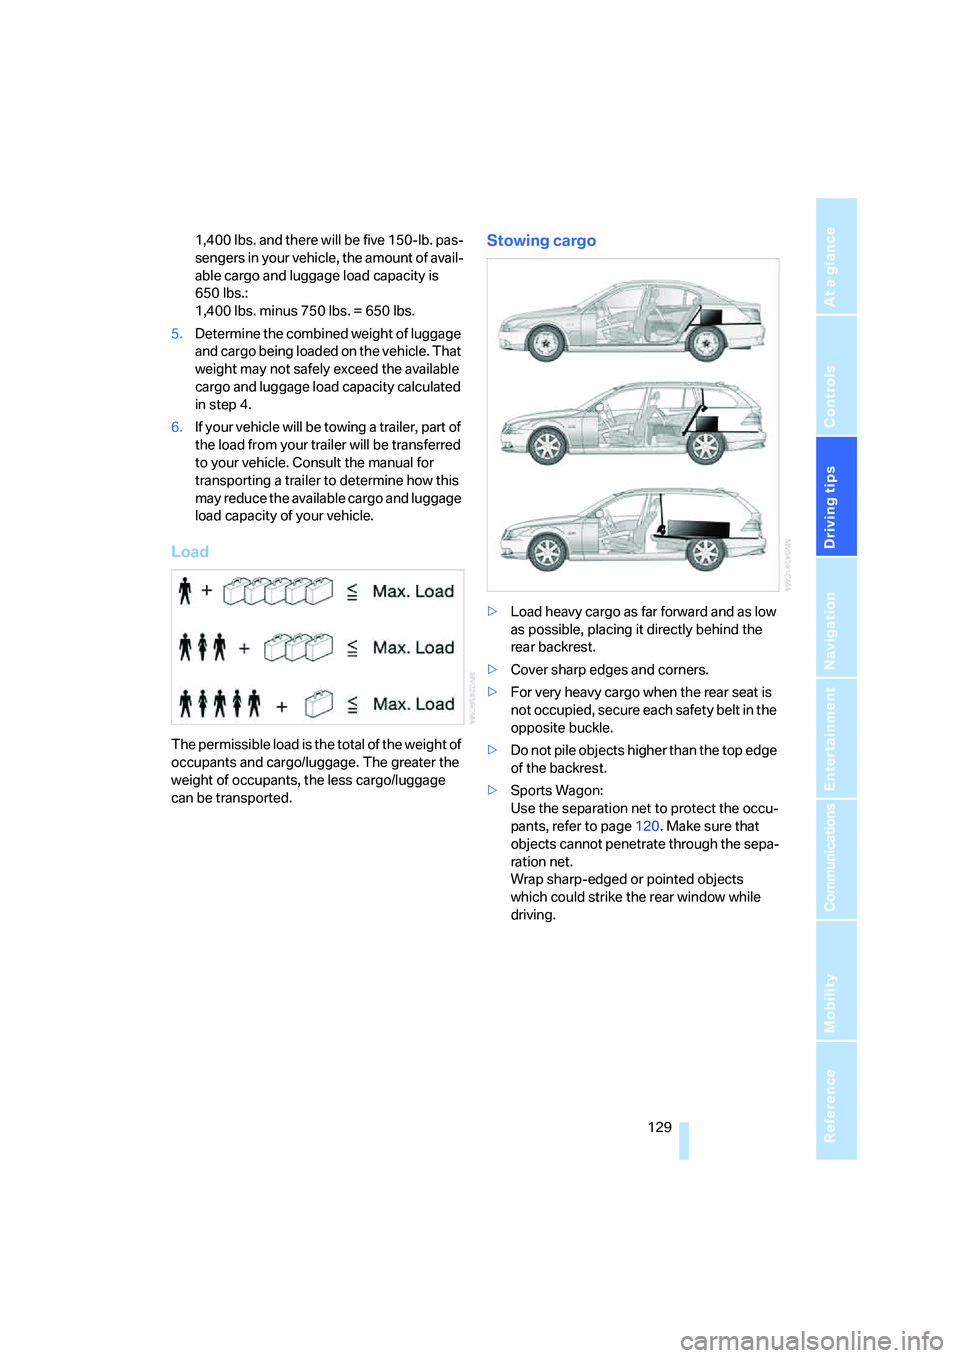
Load
The permissible load is the total of the weight of
occupants and cargo/luggage. The greater the
weight of occupants, the less cargo/luggage
can be transported.
Stowing cargo
>Load heavy cargo as far forward and as low
as possible, placing it directly behind the
rear backrest.
>Cover sharp edges and corners.
>For very heavy cargo when the rear seat is
not occupied, secure each safety belt in the
opposite buckle.
>Do not pile objects higher than the top edge
of the backrest.
>Sports Wagon:
Use the separation net to protect the occu-
pants, refer to page120. Make sure that
objects cannot penetrate through the sepa-
ration net.
Wrap sharp-edged or pointed objects
which could strike the rear window while
driving.
Page 132 of 273
Things to remember when driving
130
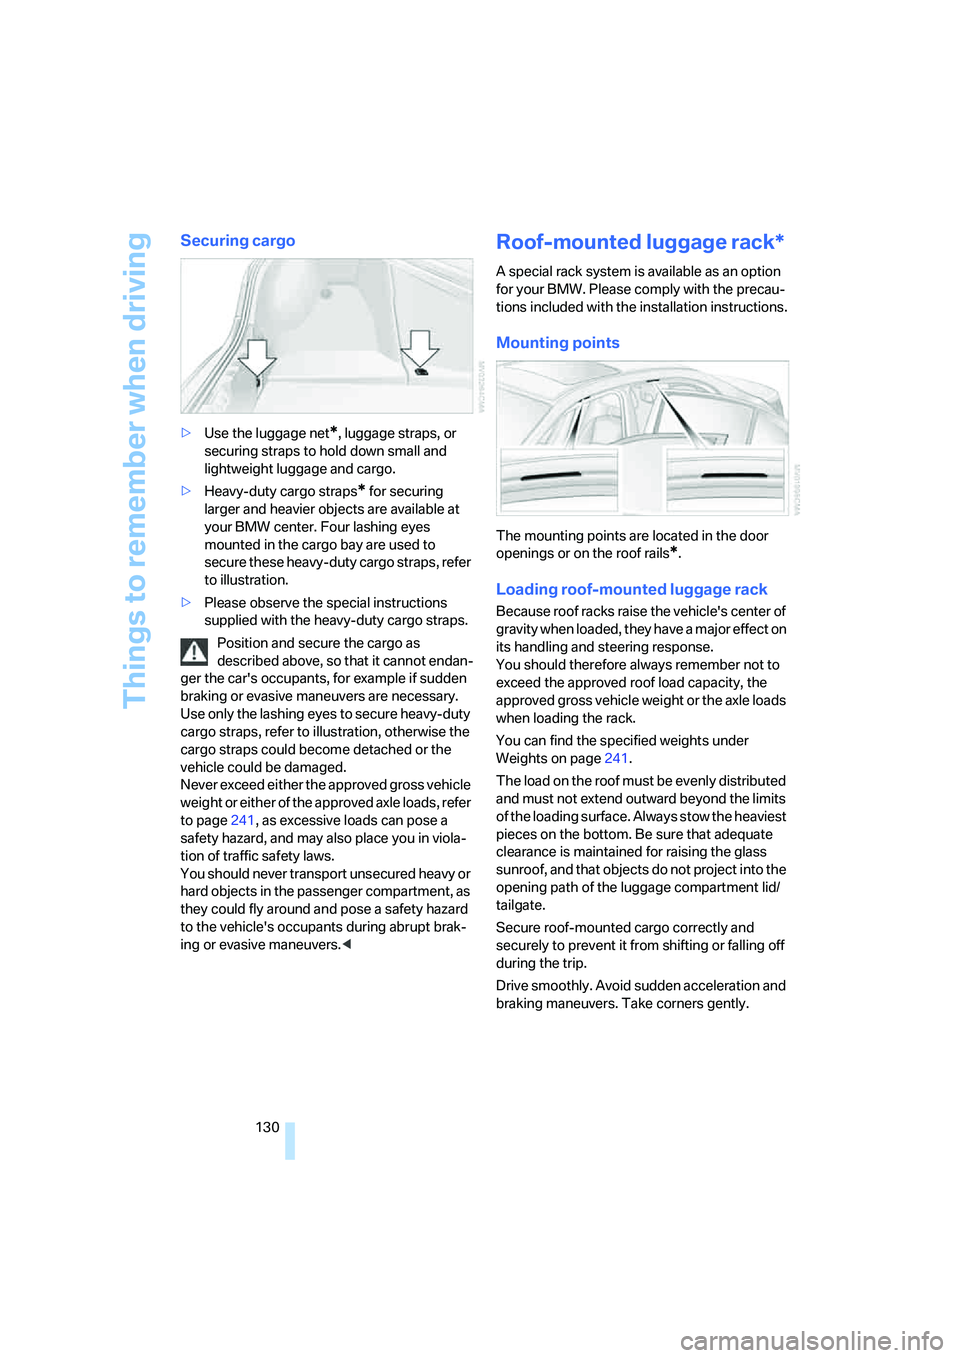
Securing cargo
>Use the luggage net*, luggage straps, or
securing straps to hold down small and
lightweight luggage and cargo.
>Heavy-duty cargo straps
* for securing
larger and heavier objects are available at
your BMW center. Four lashing eyes
mounted in the cargo bay are used to
secure these heavy-duty cargo straps, refer
to illustration.
>Please observe the special instructions
supplied with the heavy-duty cargo straps.
Position and secure the cargo as
described above, so that it cannot endan-
ger the car's occupants, for example if sudden
braking or evasive maneuvers are necessary.
Use only the lashing eyes to secure heavy-duty
cargo straps, refer to illustration, otherwise the
cargo straps could become detached or the
vehicle could be damaged.
Never exceed either the approved gross vehicle
weight or either of the approved axle loads, refer
to page241, as excessive loads can pose a
safety hazard, and may also place you in viola-
tion of traffic safety laws.
You should never transport unsecured heavy or
hard objects in the passenger compartment, as
they could fly around and pose a safety hazard
to the vehicle's occupants during abrupt brak-
ing or evasive maneuvers.<
Roof-mounted luggage rack*
A special rack system is available as an option
for your BMW. Please comply with the precau-
tions included with the installation instructions.
Mounting points
The mounting points are located in the door
openings or on the roof rails
*.
Loading roof-mounted luggage rack
Because roof racks raise the vehicle's center of
gravity when loaded, they have a major effect on
its handling and steering response.
You should therefore always remember not to
exceed the approved roof load capacity, the
approved gross vehicle weight or the axle loads
when loading the rack.
You can find the specified weights under
Weights on page241.
The load on the roof must be evenly distributed
and must not extend outward beyond the limits
of the loading surface. Always stow the heaviest
pieces on the bottom. Be sure that adequate
clearance is maintained for raising the glass
sunroof, and that objects do not project into the
opening path of the luggage compartment lid/
tailgate.
Secure roof-mounted cargo correctly and
securely to prevent it from shifting or falling off
during the trip.
Drive smoothly. Avoid sudden acceleration and
braking maneuvers. Take corners gently.
Page 133 of 273

Driving tips
131Reference
At a glance
Controls
Communications
Navigation
Entertainment
Mobility
Page 134 of 273
Page 135 of 273
Navigation
This chapter describes how you can
enter destinations and specify your route
so that your navigation system guides you
reliably to your destination.
Navigation
Page 136 of 273
Starting navigation system
134
Starting navigation system
Your navigation system can use satellites to
ascertain the precise position of your vehicle
and guide you reliably to any destination you
enter.
Navigation DVD
The navigation system requires a special navi-
gation DVD. The latest version is available at
your BMW center.
Inserting navigation DVD
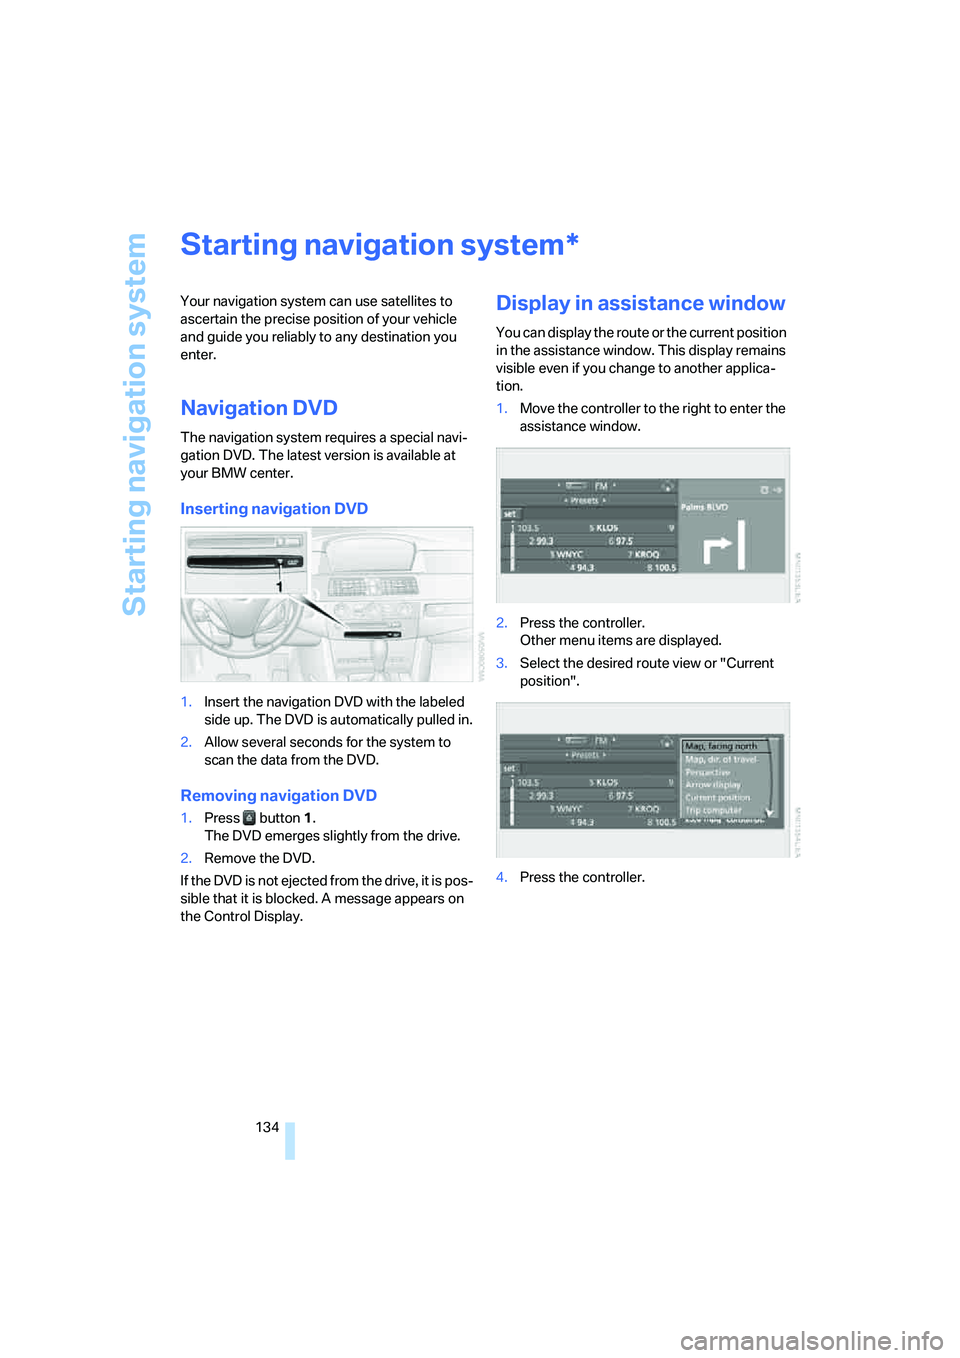
1.Insert the navigation DVD with the labeled
side up. The DVD is automatically pulled in.
2.Allow several seconds for the system to
scan the data from the DVD.
Removing navigation DVD
1.Press button 1.
The DVD emerges slightly from the drive.
2.Remove the DVD.
If the DVD is not ejected from the drive, it is pos-
sible that it is blocked. A message appears on
the Control Display.
Display in assistance window
You can display the route or the current position
in the assistance window. This display remains
visible even if you change to another applica-
tion.
1.Move the controller to the right to enter the
assistance window.
2.Press the controller.
Other menu items are displayed.
3.Select the desired route view or "Current
position".
4.Press the controller.
*
Page 137 of 273
Navigation
Driving tips
135Reference
At a glance
Controls
Communications
Entertainment
Mobility
Destination entry
In entering your destination you can select from
among the following options:
>Entering a destination manually, see below
>Entering destination via voice*, refer to
page138
>Selecting destination using information,
refer to page141
>Selecting destination from a list, refer to
Destination list, page141
>Selecting destination from address book,
refer to page142
>Selecting home address, refer to page144
After selecting your destination you can pro-
ceed to start the destination guidance, refer to
page147.
Operating navigation system
Enter data only when the vehicle is sta-
tionary, and always give priority to the
applicable traffic regulations in the event of any
contradiction between traffic and road condi-
tions and the instructions issued by the naviga-
tion system. If you do not observe this precau-
tion, you can endanger the vehicle occupants
and other road users.<
iDrive, for explanation of principle, refer to
page16.
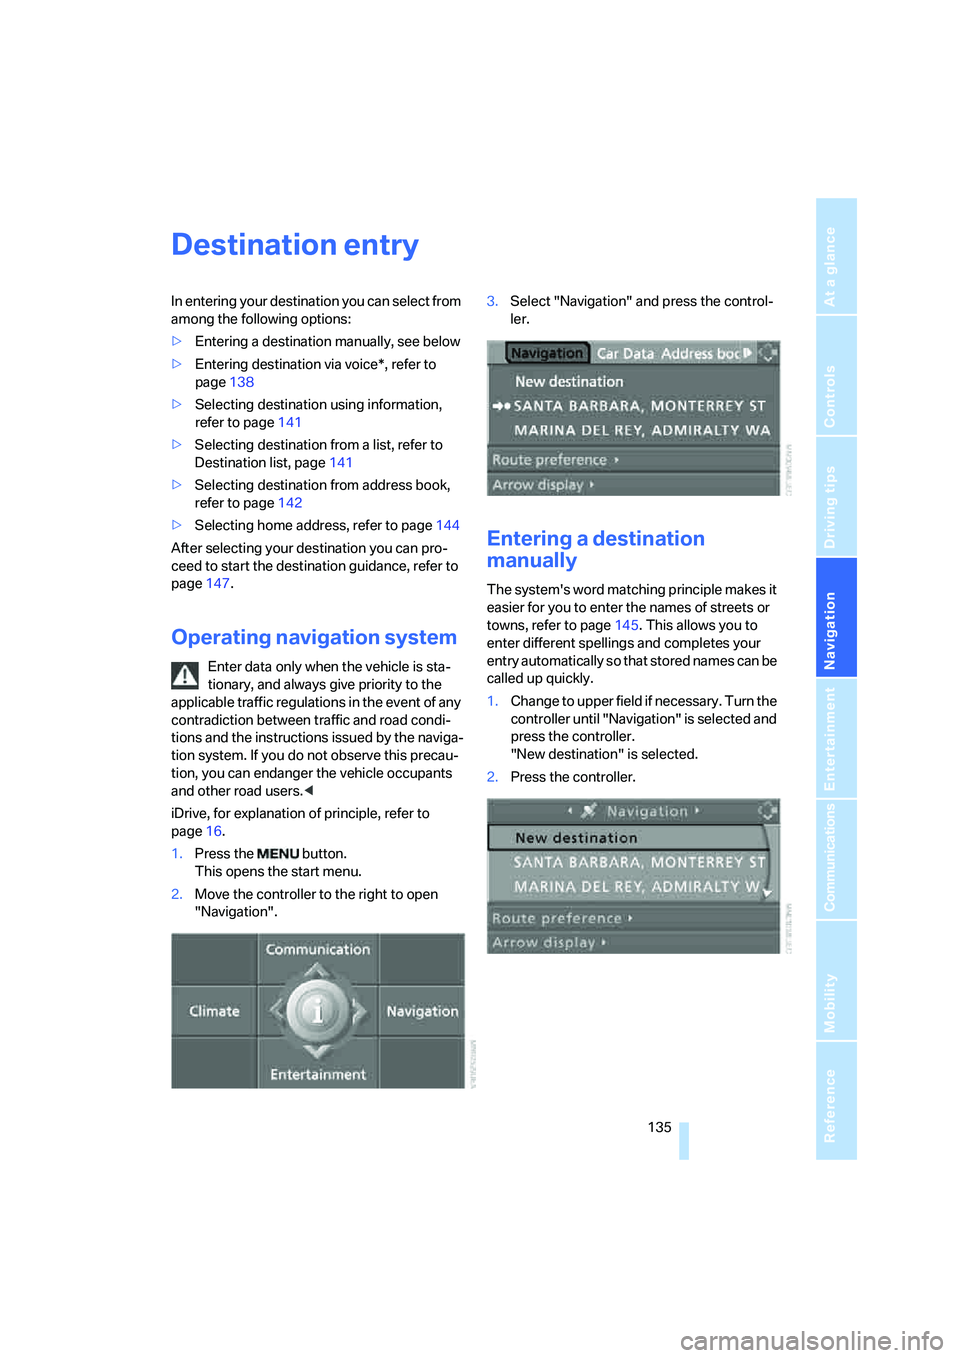
1.Press the button.
This opens the start menu.
2.Move the controller to the right to open
"Navigation".3.Select "Navigation" and press the control-
ler.
Entering a destination
manually
The system's word matching principle makes it
easier for you to enter the names of streets or
towns, refer to page145. This allows you to
enter different spellings and completes your
entry automatically so that stored names can be
called up quickly.
1.Change to upper field if necessary. Turn the
controller until "Navigation" is selected and
press the controller.
"New destination" is selected.
2.Press the controller.
Page 138 of 273
Destination entry
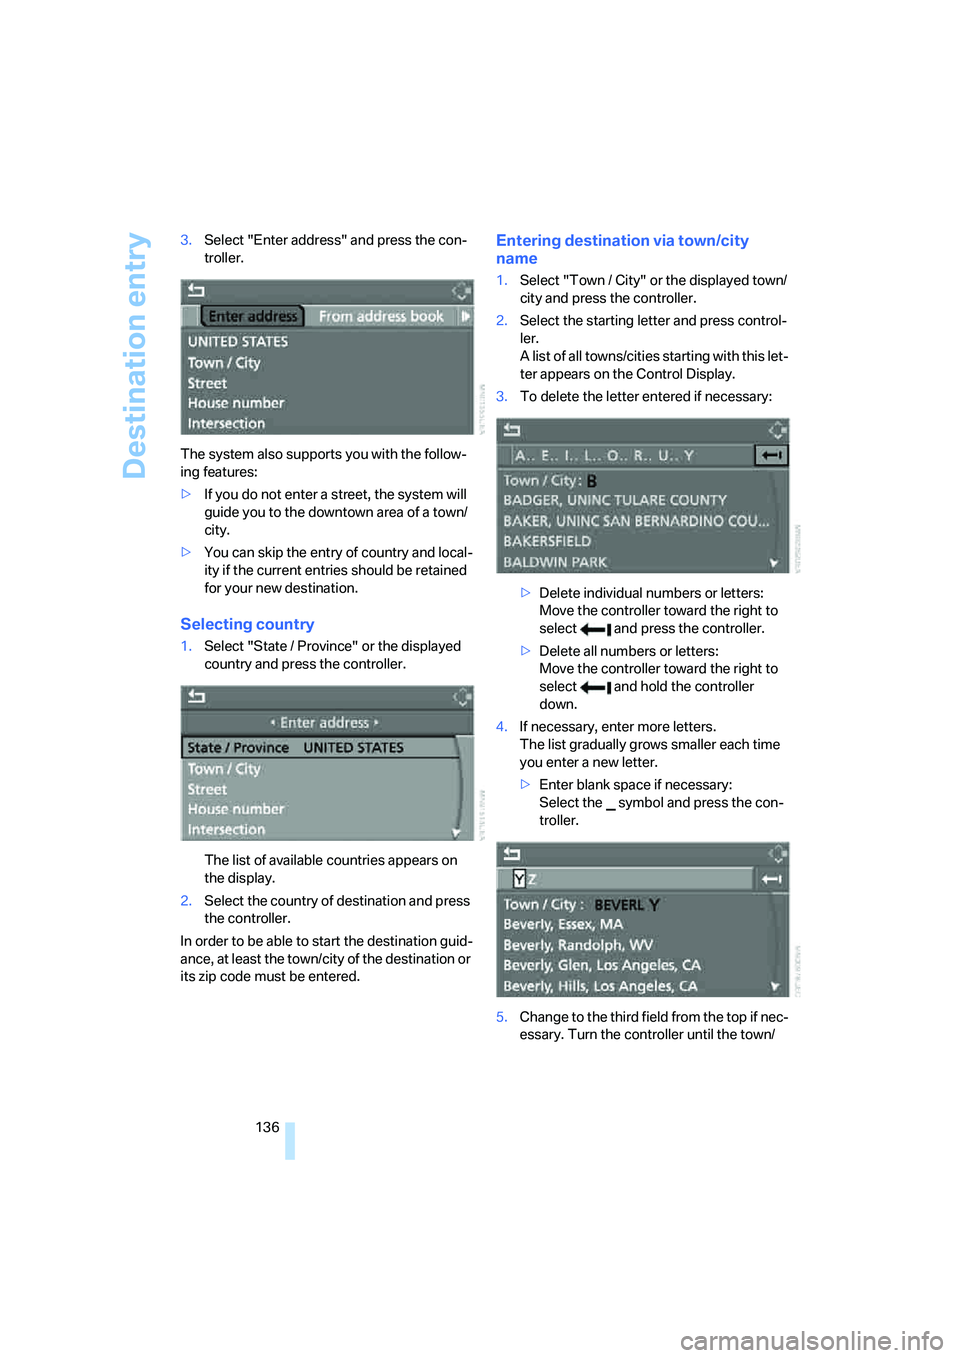
136 3.Select "Enter address" and press the con-
troller.
The system also supports you with the follow-
ing features:
>If you do not enter a street, the system will
guide you to the downtown area of a town/
city.
>You can skip the entry of country and local-
ity if the current entries should be retained
for your new destination.
Selecting country
1.Select "State / Province" or the displayed
country and press the controller.
The list of available countries appears on
the display.
2.Select the country of destination and press
the controller.
In order to be able to start the destination guid-
ance, at least the town/city of the destination or
its zip code must be entered.
Entering destination via town/city
name
1.Select "Town / City" or the displayed town/
city and press the controller.
2.Select the starting letter and press control-
ler.
A list of all towns/cities starting with this let-
ter appears on the Control Display.
3.To delete the letter entered if necessary:
>Delete individual numbers or letters:
Move the controller toward the right to
select and press the controller.
>Delete all numbers or letters:
Move the controller toward the right to
select and hold the controller
down.
4.If necessary, enter more letters.
The list gradually grows smaller each time
you enter a new letter.
>Enter blank space if necessary:
Select the symbol and press the con-
troller.
5.Change to the third field from the top if nec-
essary. Turn the controller until the town/
Page 139 of 273
Navigation
Driving tips
137Reference
At a glance
Controls
Communications
Entertainment
Mobility
city name is selected from the list and press
the controller.
Entering destination by zip code
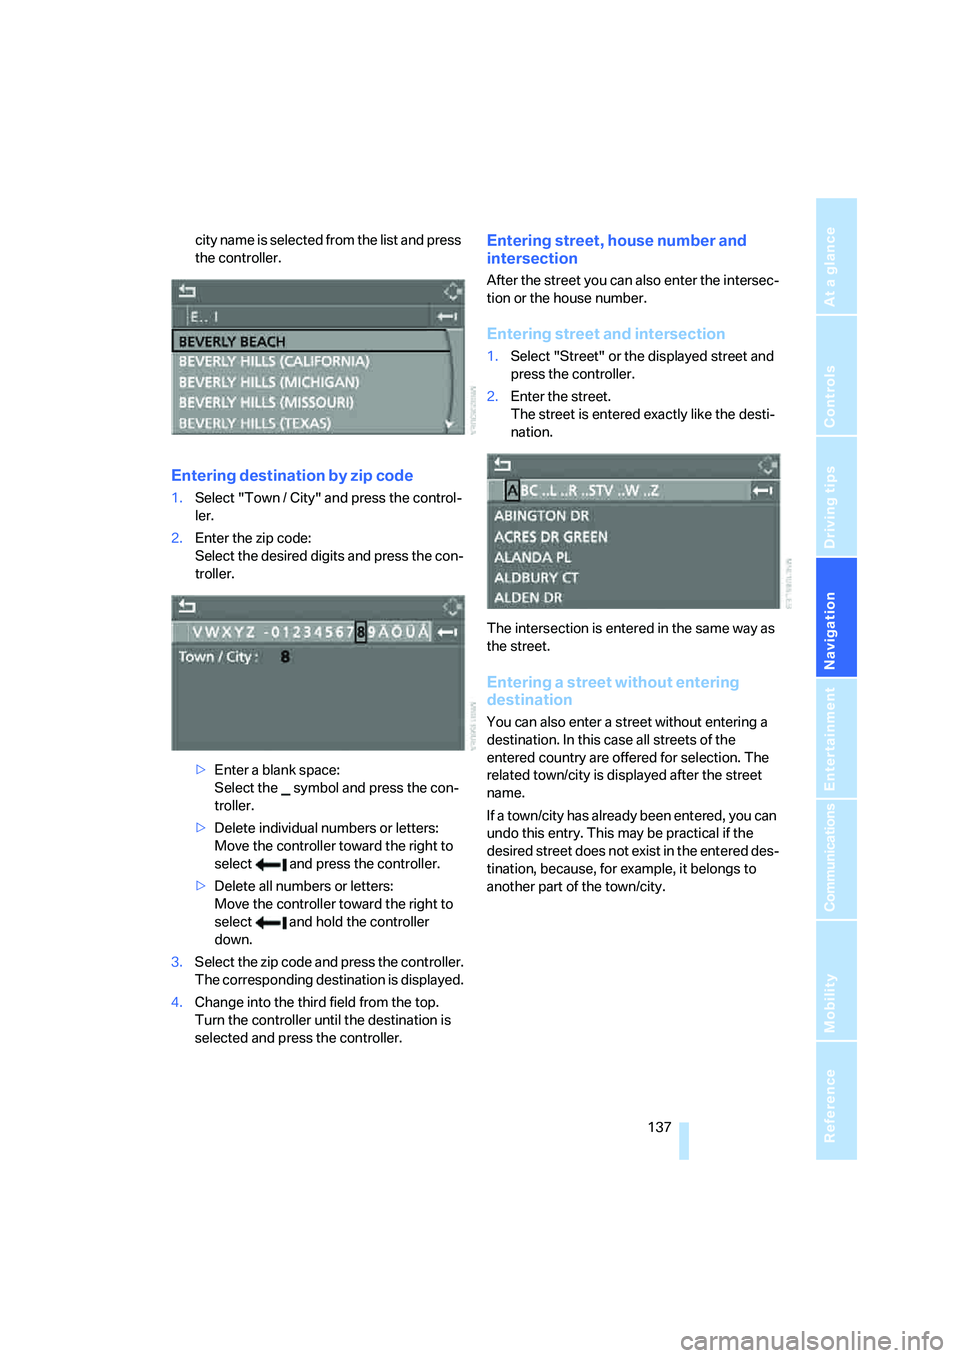
1.Select "Town / City" and press the control-
ler.
2.Enter the zip code:
Select the desired digits and press the con-
troller.
>Enter a blank space:
Select the symbol and press the con-
troller.
>Delete individual numbers or letters:
Move the controller toward the right to
select and press the controller.
>Delete all numbers or letters:
Move the controller toward the right to
select and hold the controller
down.
3.Select the zip code and press the controller.
The corresponding destination is displayed.
4.Change into the third field from the top.
Turn the controller until the destination is
selected and press the controller.
Entering street, house number and
intersection
After the street you can also enter the intersec-
tion or the house number.
Entering street and intersection
1.Select "Street" or the displayed street and
press the controller.
2.Enter the street.
The street is entered exactly like the desti-
nation.
The intersection is entered in the same way as
the street.
Entering a street without entering
destination
You can also enter a street without entering a
destination. In this case all streets of the
entered country are offered for selection. The
related town/city is displayed after the street
name.
If a town/city has already been entered, you can
undo this entry. This may be practical if the
desired street does not exist in the entered des-
tination, because, for example, it belongs to
another part of the town/city.
Page 140 of 273
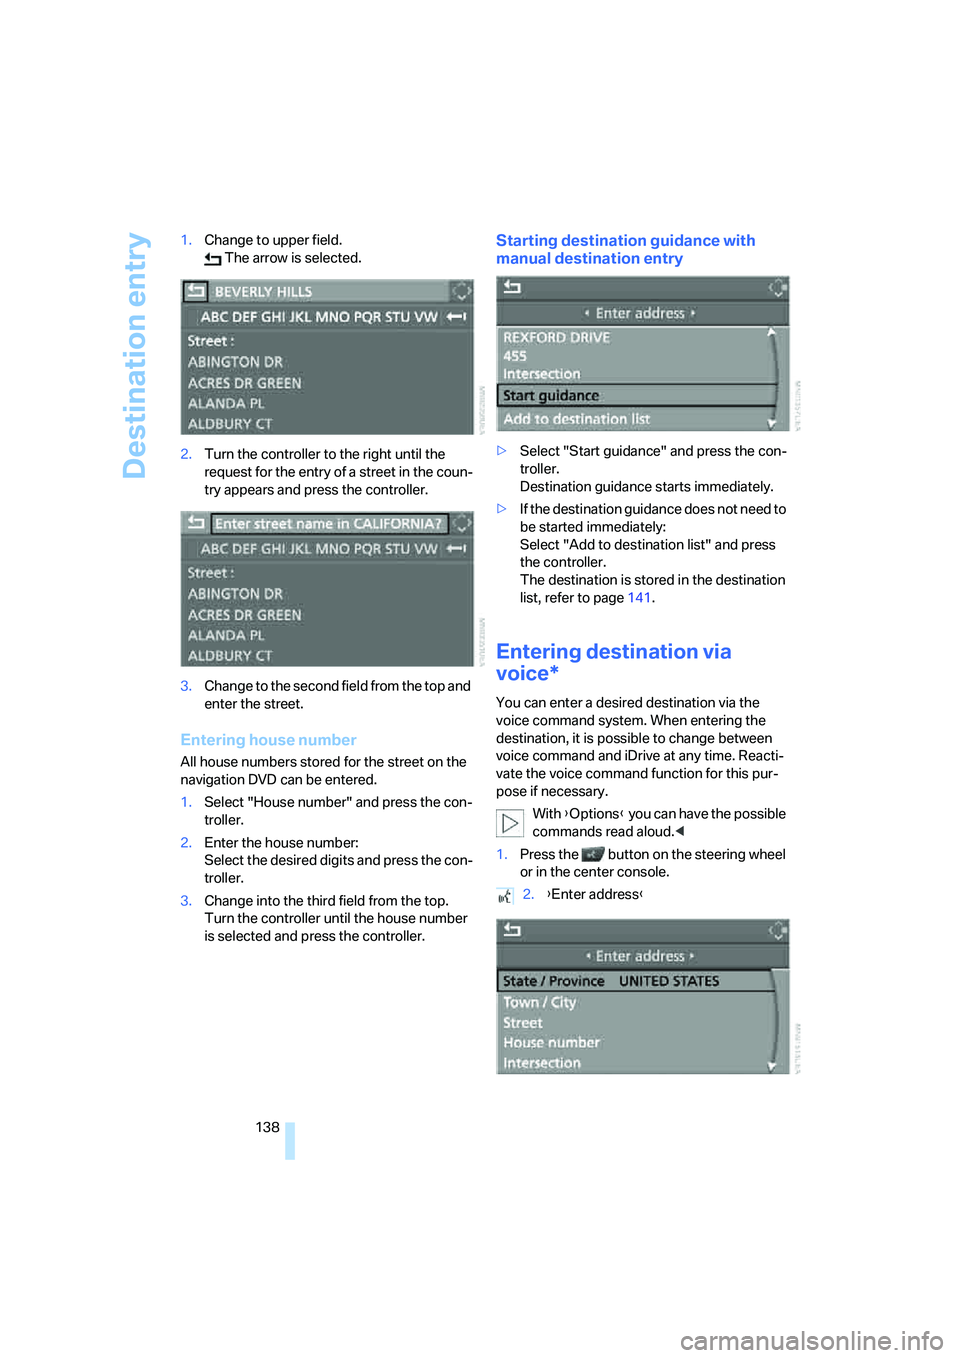
Destination entry
138 1.Change to upper field.
The arrow is selected.
2.Turn the controller to the right until the
request for the entry of a street in the coun-
try appears and press the controller.
3.Change to the second field from the top and
enter the street.
Entering house number
All house numbers stored for the street on the
navigation DVD can be entered.
1.Select "House number" and press the con-
troller.
2.Enter the house number:
Select the desired digits and press the con-
troller.
3.Change into the third field from the top.
Turn the controller until the house number
is selected and press the controller.
Starting destination guidance with
manual destination entry
>Select "Start guidance" and press the con-
troller.
Destination guidance starts immediately.
>If the destination guidance does not need to
be started immediately:
Select "Add to destination list" and press
the controller.
The destination is stored in the destination
list, refer to page141.
Entering destination via
voice*
You can enter a desired destination via the
voice command system. When entering the
destination, it is possible to change between
voice command and iDrive at any time. Reacti-
vate the voice command function for this pur-
pose if necessary.
With {Options} you can have the possible
commands read aloud.<
1.Press the button on the steering wheel
or in the center console.
2.{Enter address}