navigation system BMW 650I CONVERTIBLE 2007 E64 User Guide
[x] Cancel search | Manufacturer: BMW, Model Year: 2007, Model line: 650I CONVERTIBLE, Model: BMW 650I CONVERTIBLE 2007 E64Pages: 254, PDF Size: 7.93 MB
Page 39 of 254
Controls
37Reference
At a glance
Driving tips
Communications
Navigation
Entertainment
Mobility
Comfort access*
Comfort access enables you to access your
vehicle without having to hold the remote con-
trol in your hand. It is sufficient to carry the
remote control with you, e.g. in your jacket
pocket. The vehicle automatically detects the
related remote control in the immediate vicinity
or in the interior.
Comfort access supports the following func-
tions:
>Unlocking/locking vehicle
>Comfort closing with Coupe
>Opening luggage compartment lid sepa-
rately
>Starting engine
Functional requirement
>The vehicle or the luggage compartment lid
can only be locked if the vehicle detects that
the remote control you are carrying is out-
side the vehicle.
>The next unlocking and locking cycle is not
possible until after approx. 2 seconds.
>The engine can only be started if the vehicle
detects that the remote control is located in
the vehicle.
Comparison with ordinary remote
control
You can control the functions mentioned previ-
ously with the comfort access or by pressing
the buttons on the remote control. Before doing
so, please familiarize yourself with the informa-
tion on opening and closing, starting on
page28.
The special features when using comfort
access are described below.
Should a short delay occur when opening
or closing the windows, the glass sunroof
or the convertible top, the system is checking
whether a remote control is located in the vehi-
cle. Please repeat opening or closing if neces-
sary.<
Unlocking
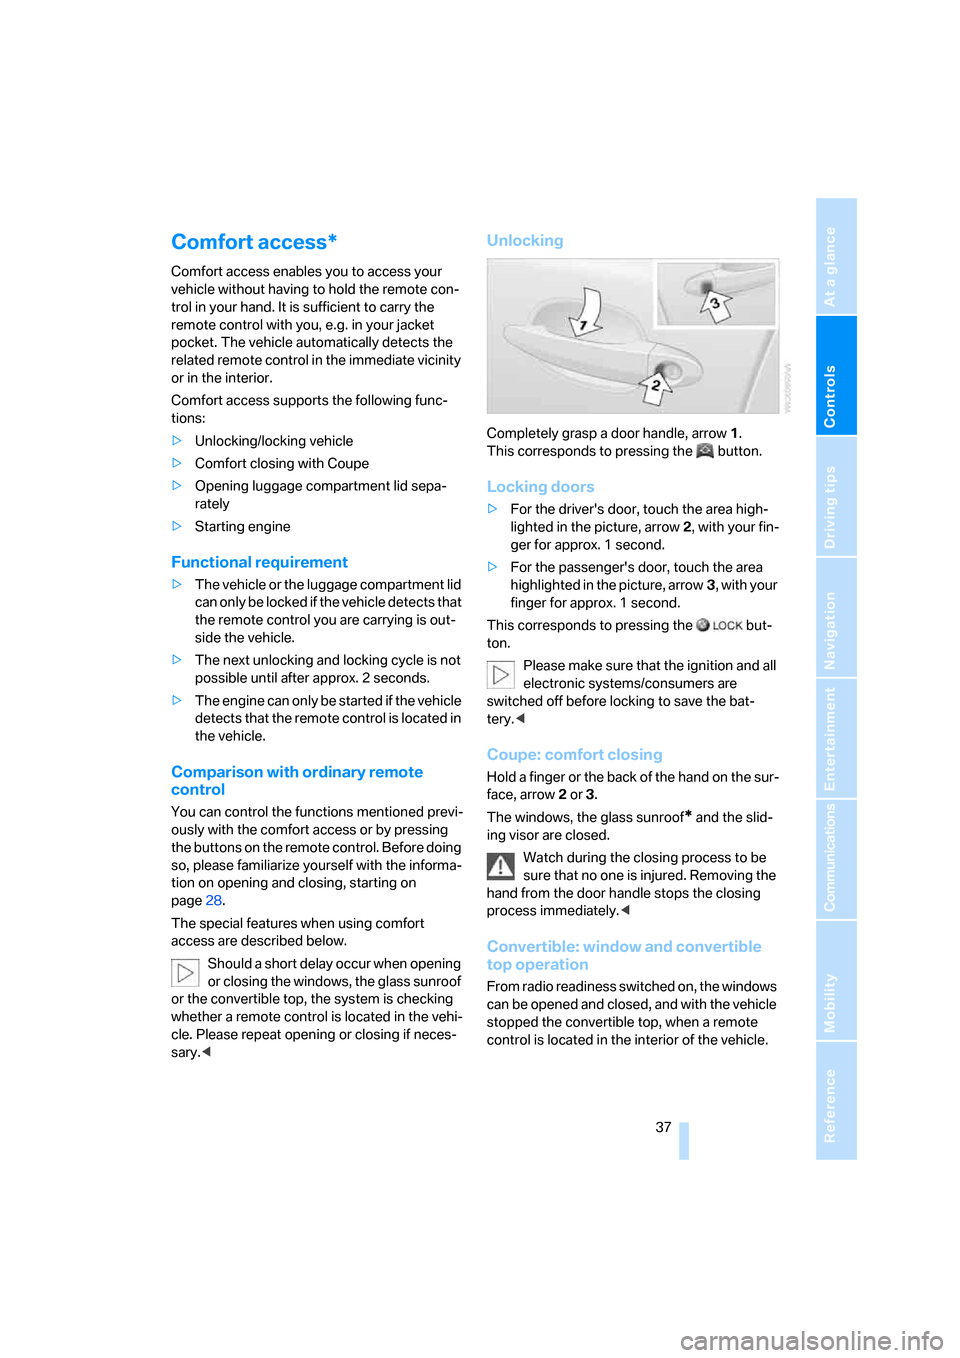
Completely grasp a door handle, arrow1.
This corresponds to pressing the button.
Locking doors
>For the driver's door, touch the area high-
lighted in the picture, arrow2, with your fin-
ger for approx. 1 second.
>For the passenger's door, touch the area
highlighted in the picture, arrow3, with your
finger for approx. 1 second.
This corresponds to pressing the but-
ton.
Please make sure that the ignition and all
electronic systems/consumers are
switched off before locking to save the bat-
tery.<
Coupe: comfort closing
Hold a finger or the back of the hand on the sur-
face, arrow2 or 3.
The windows, the glass sunroof
* and the slid-
ing visor are closed.
Watch during the closing process to be
sure that no one is injured. Removing the
hand from the door handle stops the closing
process immediately.<
Convertible: window and convertible
top operation
From radio readiness switched on, the windows
can be opened and closed, and with the vehicle
stopped the convertible top, when a remote
control is located in the interior of the vehicle.
Page 43 of 254
Controls
41Reference
At a glance
Driving tips
Communications
Navigation
Entertainment
Mobility
Coupe:
Glass sunroof, electric with
raise function*
To prevent injuries, exercise care when
closing the glass sunroof and keep it in
your field of vision until it is shut.
Always take along the remote control when you
leave the vehicle; otherwise, children could, for
example, operate the roof and injure them-
selves.<
Raising and closing glass sunroof
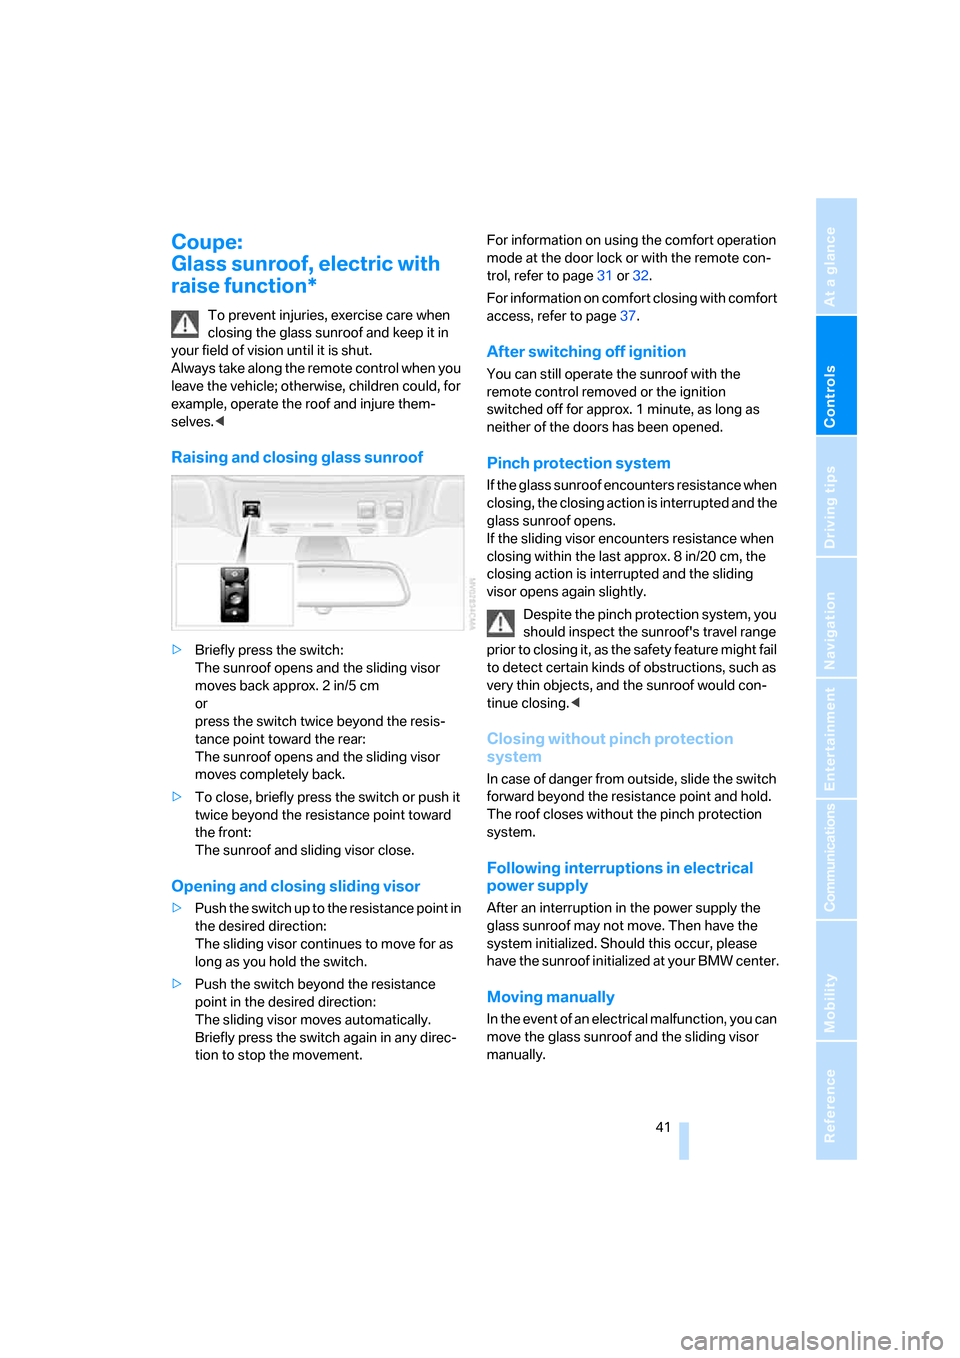
>Briefly press the switch:
The sunroof opens and the sliding visor
moves back approx. 2 in/5 cm
or
press the switch twice beyond the resis-
tance point toward the rear:
The sunroof opens and the sliding visor
moves completely back.
>To close, briefly press the switch or push it
twice beyond the resistance point toward
the front:
The sunroof and sliding visor close.
Opening and closing sliding visor
>Push the switch up to the resistance point in
the desired direction:
The sliding visor continues to move for as
long as you hold the switch.
>Push the switch beyond the resistance
point in the desired direction:
The sliding visor moves automatically.
Briefly press the switch again in any direc-
tion to stop the movement.For information on using the comfort operation
mode at the door lock or with the remote con-
trol, refer to page31 or32.
For information on comfort closing with comfort
access, refer to page37.
After switching off ignition
You can still operate the sunroof with the
remote control removed or the ignition
switched off for approx. 1 minute, as long as
neither of the doors has been opened.
Pinch protection system
If the glass sunroof encounters resistance when
closing, the closing action is interrupted and the
glass sunroof opens.
If the sliding visor encounters resistance when
closing within the last approx. 8 in/20 cm, the
closing action is interrupted and the sliding
visor opens again slightly.
Despite the pinch protection system, you
should inspect the sunroof's travel range
prior to closing it, as the safety feature might fail
to detect certain kinds of obstructions, such as
very thin objects, and the sunroof would con-
tinue closing.<
Closing without pinch protection
system
In case of danger from outside, slide the switch
forward beyond the resistance point and hold.
The roof closes without the pinch protection
system.
Following interruptions in electrical
power supply
After an interruption in the power supply the
glass sunroof may not move. Then have the
system initialized. Should this occur, please
have the sunroof initialized at your BMW center.
Moving manually
In the event of an electrical malfunction, you can
move the glass sunroof and the sliding visor
manually.
Page 51 of 254
Controls
49Reference
At a glance
Driving tips
Communications
Navigation
Entertainment
Mobility
Seats
Note before adjusting
Never attempt to adjust your seat while
operating the vehicle. The seat could
respond with unexpected movement and the
ensuing loss of vehicle control could lead to an
accident.
On the front passenger side as well, do not tilt
the backrest too far toward the rear. Failure to
observe this precaution can prevent the belt
from providing effective protection against
injury, as the passenger could slide under the
belt in an accident.<
Also follow the instructions regarding damage
to the safety belt on page53.
Convertible: with the wind deflector fitted,
do not incline the front seat backrests too
far backward if the seat is to be moved back to
the end position. Otherwise, the wind deflector
will be damaged.<
Adjusting seat
To ensure that the safety systems con-
tinue to provide optimized protection,
please follow the adjustment instructions on
page48.<
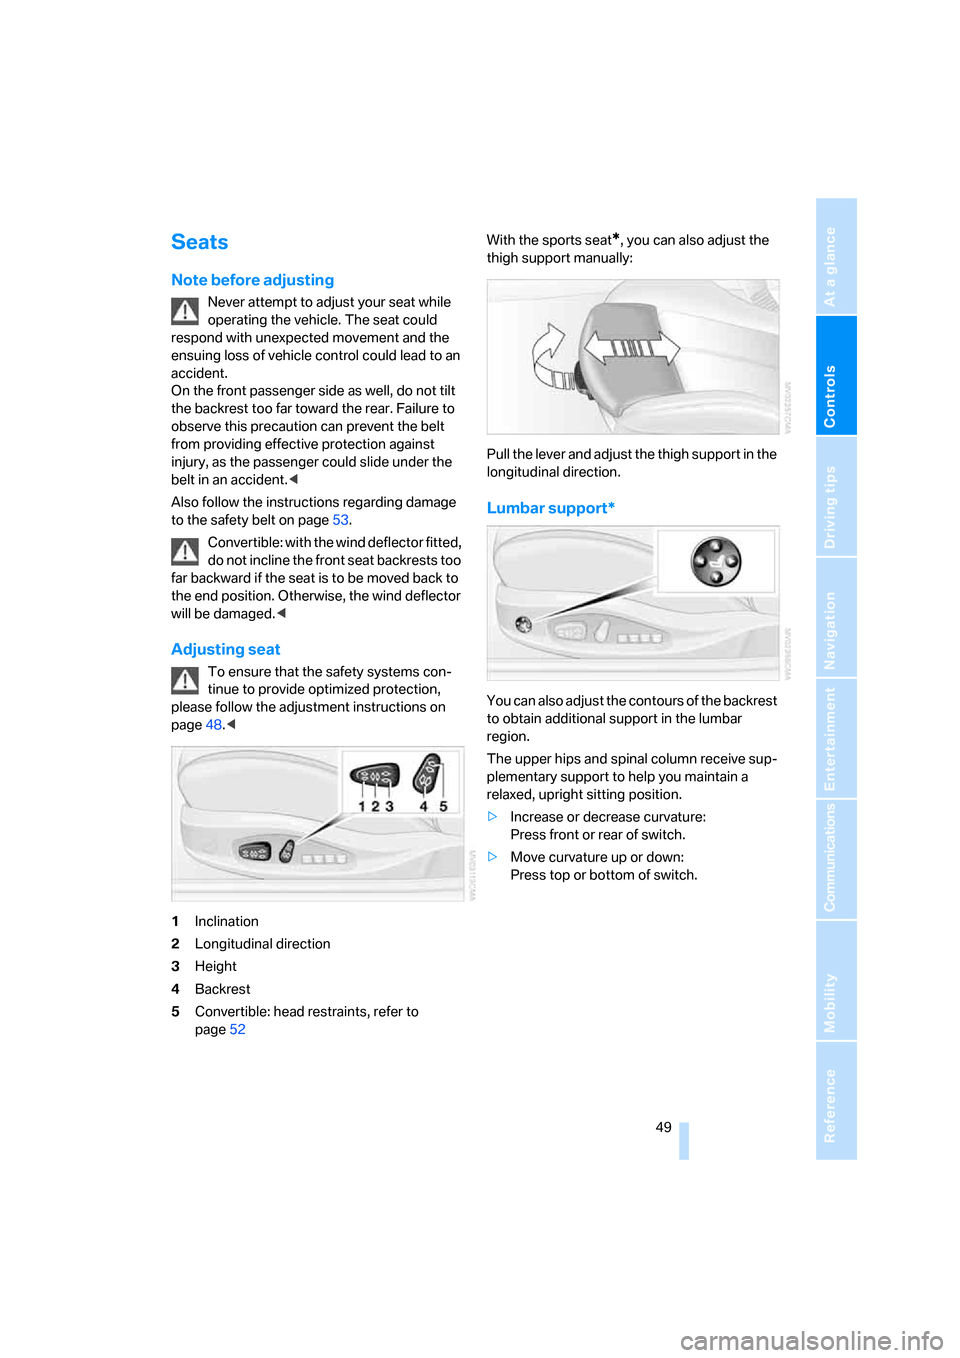
1Inclination
2Longitudinal direction
3Height
4Backrest
5Convertible: head restraints, refer to
page52With the sports seat
*, you can also adjust the
thigh support manually:
Pull the lever and adjust the thigh support in the
longitudinal direction.
Lumbar support*
You can also adjust the contours of the backrest
to obtain additional support in the lumbar
region.
The upper hips and spinal column receive sup-
plementary support to help you maintain a
relaxed, upright sitting position.
>Increase or decrease curvature:
Press front or rear of switch.
>Move curvature up or down:
Press top or bottom of switch.
Page 55 of 254
Controls
53Reference
At a glance
Driving tips
Communications
Navigation
Entertainment
Mobility
Lock backrest warning lamp:
Lights up when the backrest is not
locked. At the same time, a message is
shown on the Control Display.
Safety belts
To ensure that the safety systems con-
tinue to provide optimized protection,
please follow the adjustment instructions on
page48.<
Before every drive, make sure that safety belts
are being worn at all of the occupied seats. Air-
bags complement the safety belt as an addi-
tional safety device, but they do not represent a
substitute.
Fastening
Make sure you hear the latch plate engage in
the belt buckle.
Releasing
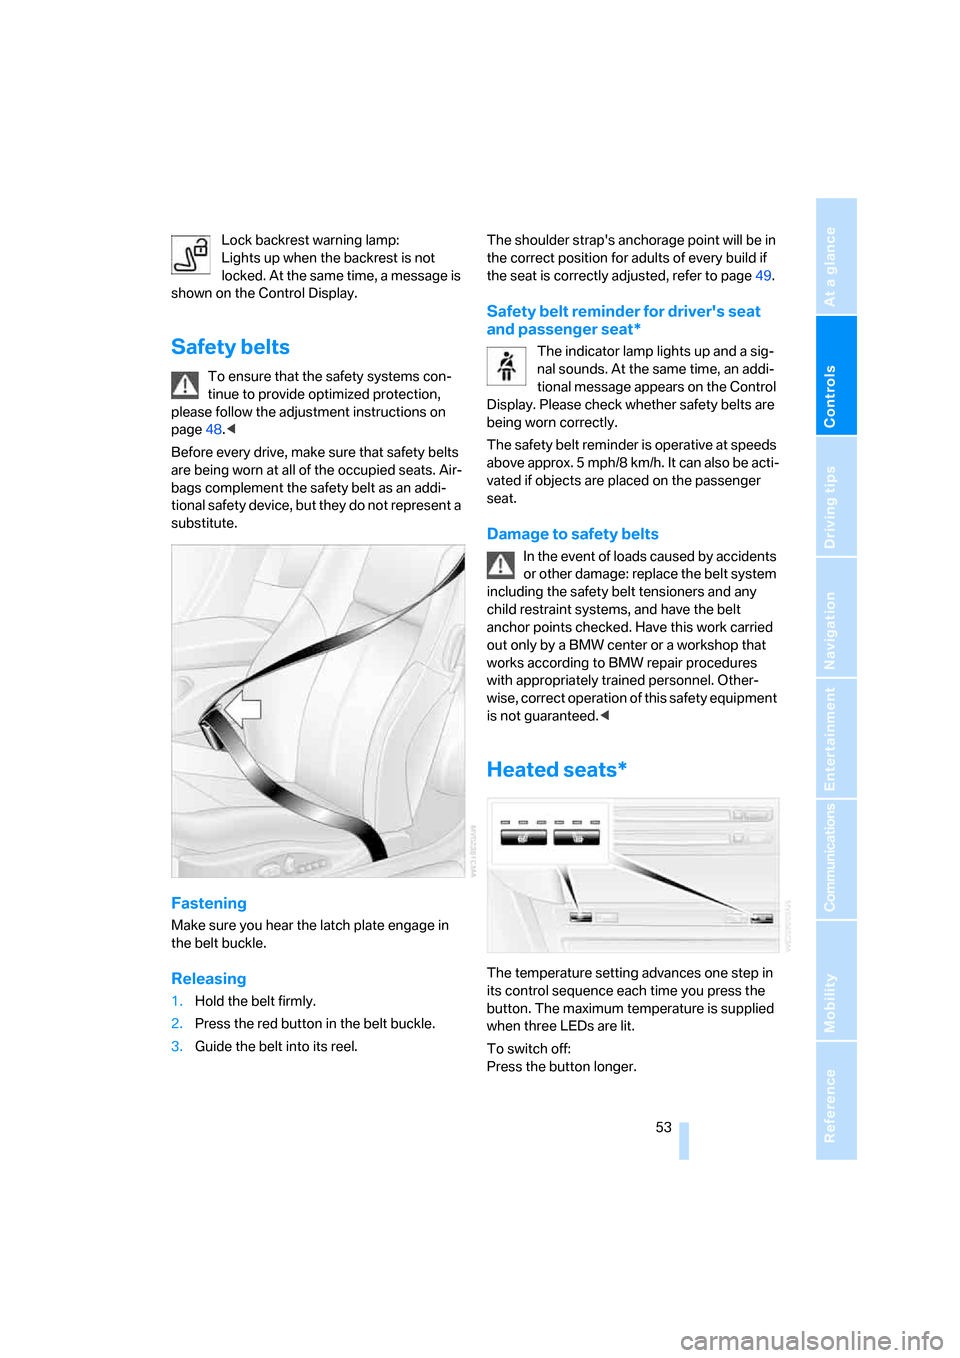
1.Hold the belt firmly.
2.Press the red button in the belt buckle.
3.Guide the belt into its reel.The shoulder strap's anchorage point will be in
the correct position for adults of every build if
the seat is correctly adjusted, refer to page49.
Safety belt reminder for driver's seat
and passenger seat*
The indicator lamp lights up and a sig-
nal sounds. At the same time, an addi-
tional message appears on the Control
Display. Please check whether safety belts are
being worn correctly.
The safety belt reminder is operative at speeds
above approx. 5 mph/8 km/h. It can also be acti-
vated if objects are placed on the passenger
seat.
Damage to safety belts
In the event of loads caused by accidents
or other damage: replace the belt system
including the safety belt tensioners and any
child restraint systems, and have the belt
anchor points checked. Have this work carried
out only by a BMW center or a workshop that
works according to BMW repair procedures
with appropriately trained personnel. Other-
wise, correct operation of this safety equipment
is not guaranteed.<
Heated seats*
The temperature setting advances one step in
its control sequence each time you press the
button. The maximum temperature is supplied
when three LEDs are lit.
To switch off:
Press the button longer.
Page 59 of 254
Controls
57Reference
At a glance
Driving tips
Communications
Navigation
Entertainment
Mobility
Transporting children safely
The right place for children
Do not leave children unattended in the
vehicle; otherwise, they could endanger
themselves and other persons, e.g. by opening
the doors.<
Children always in the rear
Accident research shows that the safest place
for children is in the back.
Children younger than 13 years of age or
with a height under 5 ft/150 cm may only
be transported in the rear in child restraint sys-
tems which correspond to the age, weight and
height of the child. Otherwise, there is an
increased danger of injury in an accident.<
Children 13 years of age or older must wear a
safety belt as soon as a suitable child restraint
system can no longer be used due to their age,
size and weight.
Exception for front passenger seat
Should it be necessary to use a child
restraint system on the front passenger
seat, the front, knee and side airbags on the
passenger side must be deactivated. Other-
wise, there is an increased risk of injury for the
child if the airbags are triggered, even with a
child restraint system.<
For more information on automatic deactivation
of the front passenger airbags, refer to page95.
Installing child restraint
systems
Follow child restraint system manufac-
turer's instructions for the selection,
installation and use of child restraint systems.
Otherwise, the degree of protection they offer
may be reduced.<
On front passenger seat
After mounting a child restraint system on
the front passenger seat, make sure that
the front and side airbags on the front passen-
ger side are deactivated, as otherwise there is
an increased risk of injury if the airbags are trig-
gered.<
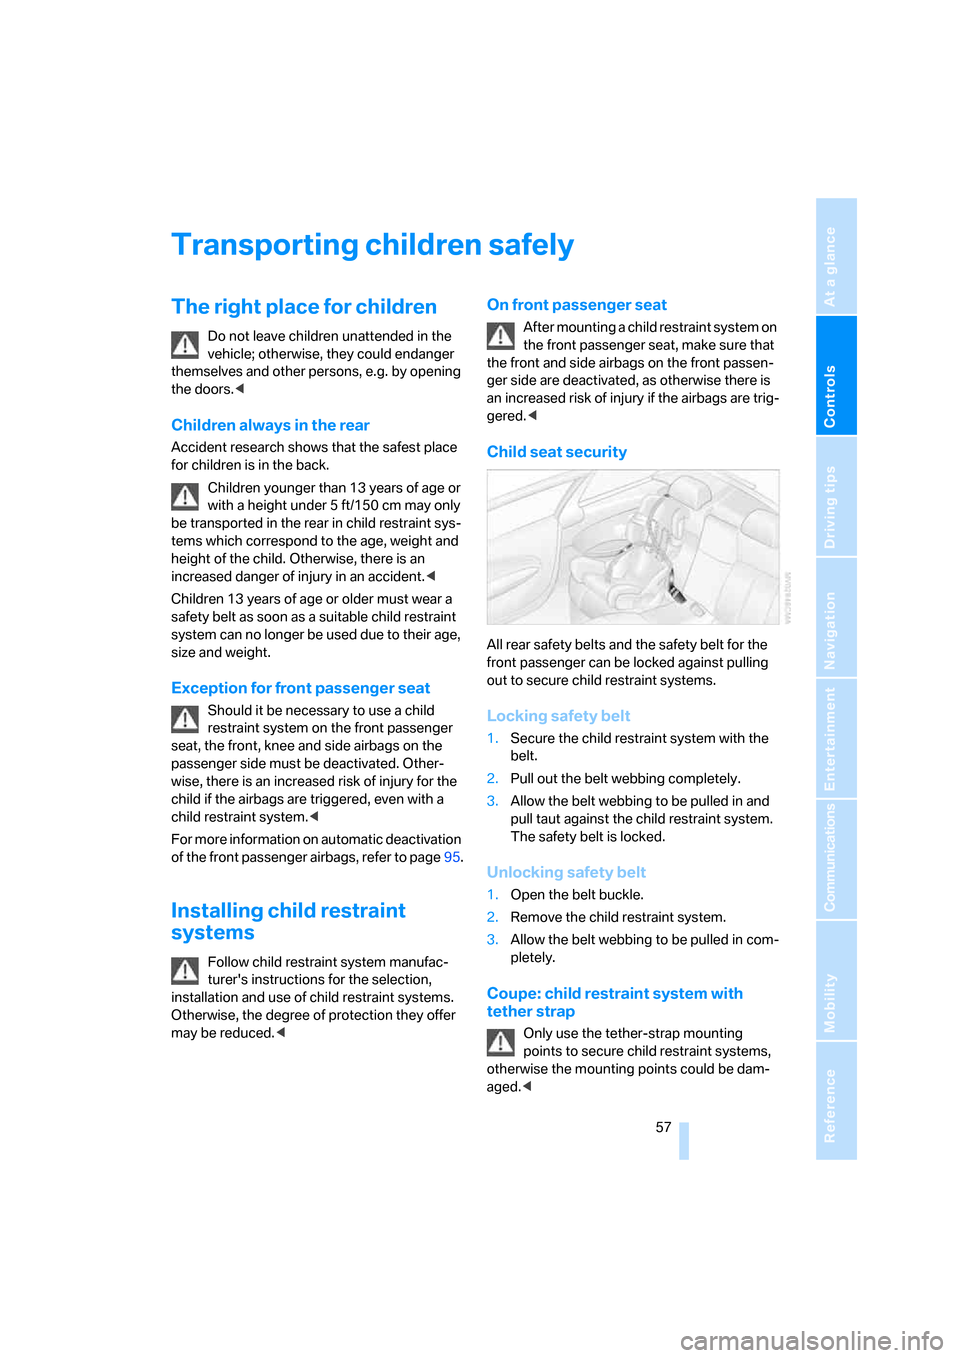
Child seat security
All rear safety belts and the safety belt for the
front passenger can be locked against pulling
out to secure child restraint systems.
Locking safety belt
1.Secure the child restraint system with the
belt.
2.Pull out the belt webbing completely.
3.Allow the belt webbing to be pulled in and
pull taut against the child restraint system.
The safety belt is locked.
Unlocking safety belt
1.Open the belt buckle.
2.Remove the child restraint system.
3.Allow the belt webbing to be pulled in com-
pletely.
Coupe: child restraint system with
tether strap
Only use the tether-strap mounting
points to secure child restraint systems,
otherwise the mounting points could be dam-
aged.<
Page 61 of 254
Controls
59Reference
At a glance
Driving tips
Communications
Navigation
Entertainment
Mobility
Driving
Ignition lock
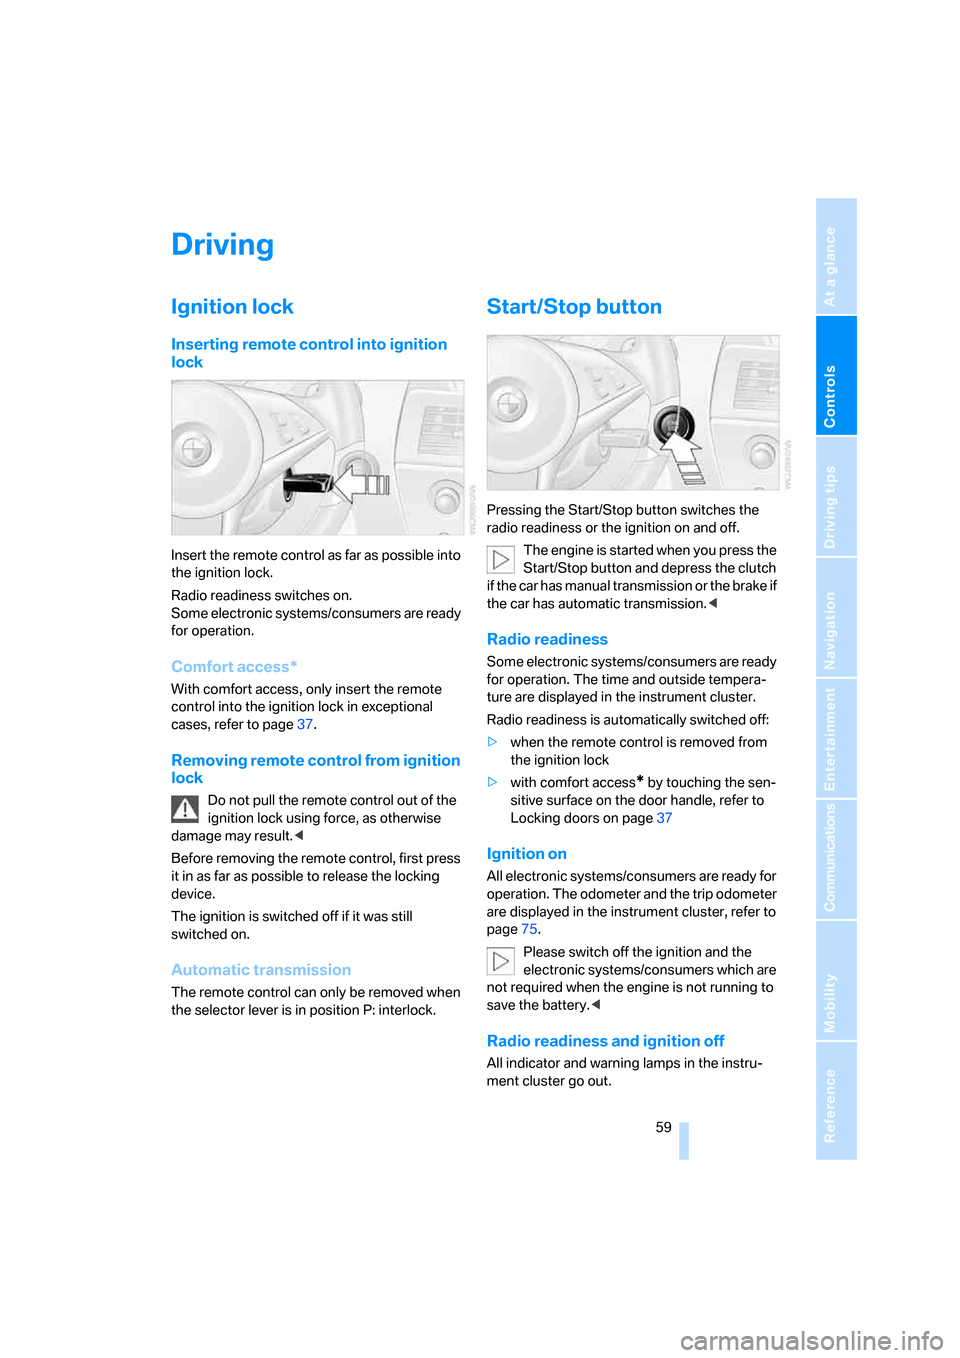
Inserting remote control into ignition
lock
Insert the remote control as far as possible into
the ignition lock.
Radio readiness switches on.
Some electronic systems/consumers are ready
for operation.
Comfort access*
With comfort access, only insert the remote
control into the ignition lock in exceptional
cases, refer to page37.
Removing remote control from ignition
lock
Do not pull the remote control out of the
ignition lock using force, as otherwise
damage may result.<
Before removing the remote control, first press
it in as far as possible to release the locking
device.
The ignition is switched off if it was still
switched on.
Automatic transmission
The remote control can only be removed when
the selector lever is in position P: interlock.
Start/Stop button
Pressing the Start/Stop button switches the
radio readiness or the ignition on and off.
The engine is started when you press the
Start/Stop button and depress the clutch
if the car has manual transmission or the brake if
the car has automatic transmission.<
Radio readiness
Some electronic systems/consumers are ready
for operation. The time and outside tempera-
ture are displayed in the instrument cluster.
Radio readiness is automatically switched off:
>when the remote control is removed from
the ignition lock
>with comfort access
* by touching the sen-
sitive surface on the door handle, refer to
Locking doors on page37
Ignition on
All electronic systems/consumers are ready for
operation. The odometer and the trip odometer
are displayed in the instrument cluster, refer to
page75.
Please switch off the ignition and the
electronic systems/consumers which are
not required when the engine is not running to
save the battery.<
Radio readiness and ignition off
All indicator and warning lamps in the instru-
ment cluster go out.
Page 63 of 254
Controls
61Reference
At a glance
Driving tips
Communications
Navigation
Entertainment
Mobility
Automatic transmission*
1.Move selector lever into position P with
vehicle stopped.
2.Press the Start/Stop button.
3.Firmly apply the handbrake.
4.Remove the remote control from the igni-
tion lock, refer to page59.
Handbrake
The handbrake is primarily intended to prevent
the vehicle from rolling while parked; it brakes
the rear wheels.
Indicator lamp
The indicator lamp lights up, and a sig-
nal also sounds when starting off. The
handbrake is applied.
Indicator lamp for Canadian models.
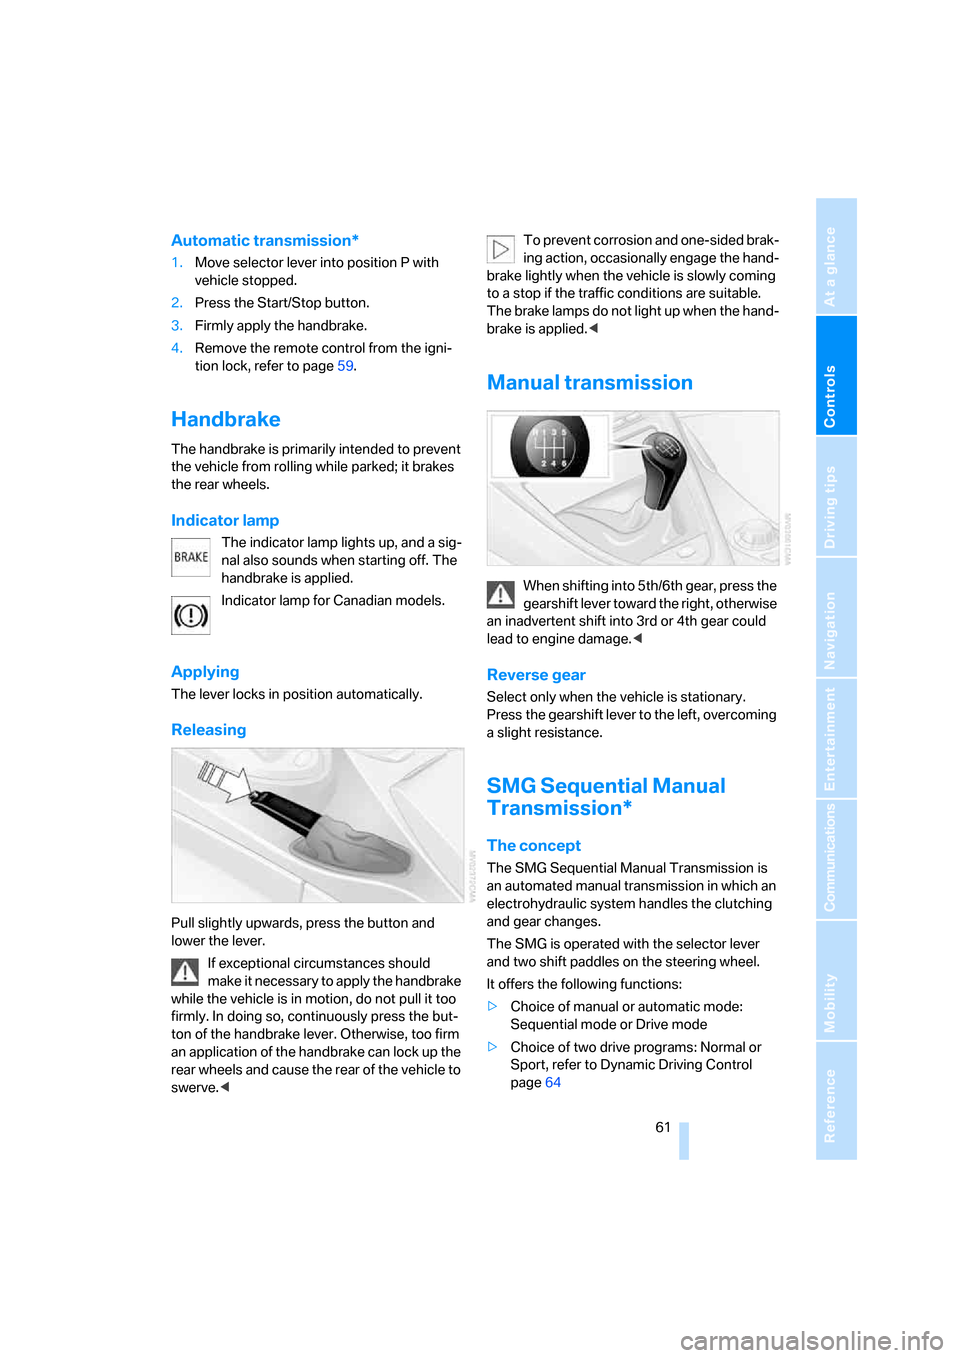
Applying
The lever locks in position automatically.
Releasing
Pull slightly upwards, press the button and
lower the lever.
If exceptional circumstances should
make it necessary to apply the handbrake
while the vehicle is in motion, do not pull it too
firmly. In doing so, continuously press the but-
ton of the handbrake lever. Otherwise, too firm
an application of the handbrake can lock up the
rear wheels and cause the rear of the vehicle to
swerve.
brake lightly when the vehicle is slowly coming
to a stop if the traffic conditions are suitable.
The brake lamps do not light up when the hand-
brake is applied.<
Manual transmission
When shifting into 5th/6th gear, press the
gearshift lever toward the right, otherwise
an inadvertent shift into 3rd or 4th gear could
lead to engine damage.<
Reverse gear
Select only when the vehicle is stationary.
Press the gearshift lever to the left, overcoming
a slight resistance.
SMG Sequential Manual
Transmission*
The concept
The SMG Sequential Manual Transmission is
an automated manual transmission in which an
electrohydraulic system handles the clutching
and gear changes.
The SMG is operated with the selector lever
and two shift paddles on the steering wheel.
It offers the following functions:
>Choice of manual or automatic mode:
Sequential mode or Drive mode
>Choice of two drive programs: Normal or
Sport, refer to Dynamic Driving Control
page64
Page 67 of 254
Controls
65Reference
At a glance
Driving tips
Communications
Navigation
Entertainment
Mobility
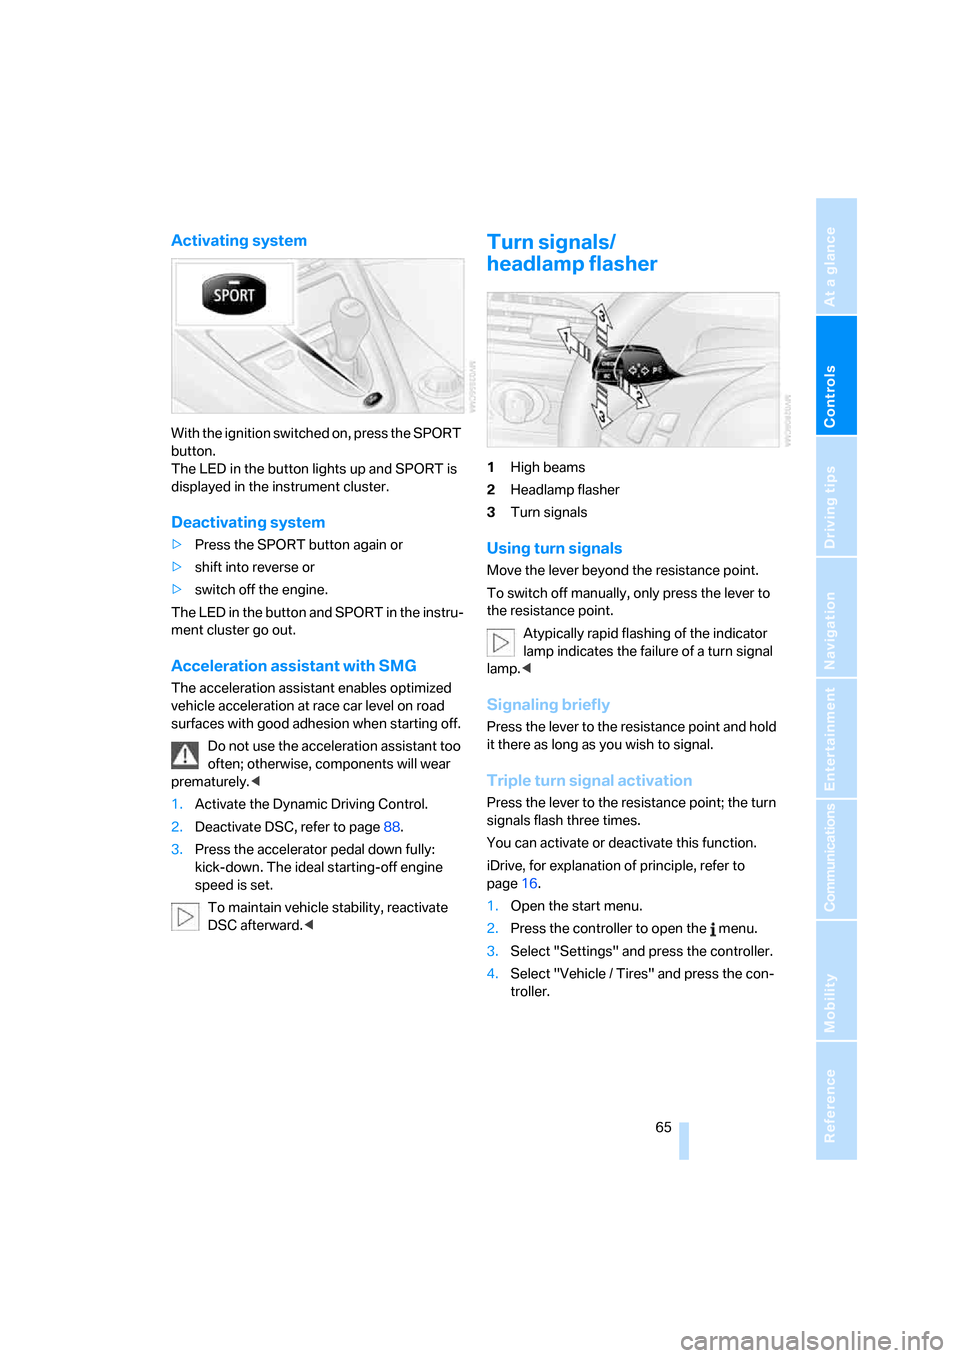
Activating system
With the ignition switched on, press the SPORT
button.
The LED in the button lights up and SPORT is
displayed in the instrument cluster.
Deactivating system
>Press the SPORT button again or
>shift into reverse or
>switch off the engine.
The LED in the button and SPORT in the instru-
ment cluster go out.
Acceleration assistant with SMG
The acceleration assistant enables optimized
vehicle acceleration at race car level on road
surfaces with good adhesion when starting off.
Do not use the acceleration assistant too
often; otherwise, components will wear
prematurely.<
1.Activate the Dynamic Driving Control.
2.Deactivate DSC, refer to page88.
3.Press the accelerator pedal down fully:
kick-down. The ideal starting-off engine
speed is set.
To maintain vehicle stability, reactivate
DSC afterward.<
Turn signals/
headlamp flasher
1High beams
2Headlamp flasher
3Turn signals
Using turn signals
Move the lever beyond the resistance point.
To switch off manually, only press the lever to
the resistance point.
Atypically rapid flashing of the indicator
lamp indicates the failure of a turn signal
lamp.<
Signaling briefly
Press the lever to the resistance point and hold
it there as long as you wish to signal.
Triple turn signal activation
Press the lever to the resistance point; the turn
signals flash three times.
You can activate or deactivate this function.
iDrive, for explanation of principle, refer to
page16.
1.Open the start menu.
2.Press the controller to open the menu.
3.Select "Settings" and press the controller.
4.Select "Vehicle / Tires" and press the con-
troller.
Page 69 of 254
Controls
67Reference
At a glance
Driving tips
Communications
Navigation
Entertainment
Mobility
Cleaning windshield, headlamps and
BMW Night Vision camera*
Pull the lever, arrow4:
The system sprays washer fluid against the
windshield and activates the wipers for a brief
period.
With the vehicle lighting switched on, the head-
lamps and the BMW Night Vision camera are
also cleaned simultaneously at suitable inter-
vals.
Do not use the washers if there is any
danger that the fluid will freeze on the
windshield. If you do so, your vision could be
obscured. To avoid freezing, use a washer fluid
antifreeze, refer to Washer fluid. Do not use
washers when the washer fluid reservoir is
empty, as this will damage the washer pump.<
Windshield washer nozzles
Both windshield washer nozzles are automati-
cally heated with the engine running or the igni-
tion switched on.
Washer fluid
Washer fluid antifreeze is flammable.
Always keep it well away from sparks and
open flames, and store it in tightly closed con-
tainers well out of the reach of children. Always
follow the instructions for use provided on the
containers.<
Filler neck for washer fluid
All washer nozzles are supplied from one reser-
voir.Fill with water and – if required – with a washer
antifreeze, according to manufacturer's recom-
mendations.
In order to maintain the mixture ratio, mix
the washer fluid before filling.<
Capacity
Capacity approx. 5.3 US quarts/5 liters.
Cruise control
The concept
The cruise control is available for use at speeds
of approx. 20 mph/30 km/h and higher. The
vehicle stores and maintains the speed that you
set using the lever mounted on the steering col-
umn.
Do not use the cruise control under driv-
ing conditions that do not permit a con-
stant speed, e.g. when driving on winding
roads, in heavy traffic or in poor road conditions
such as snow, rain, ice, and loose road surface.
Otherwise, you could lose control of the vehicle
and cause an accident.<
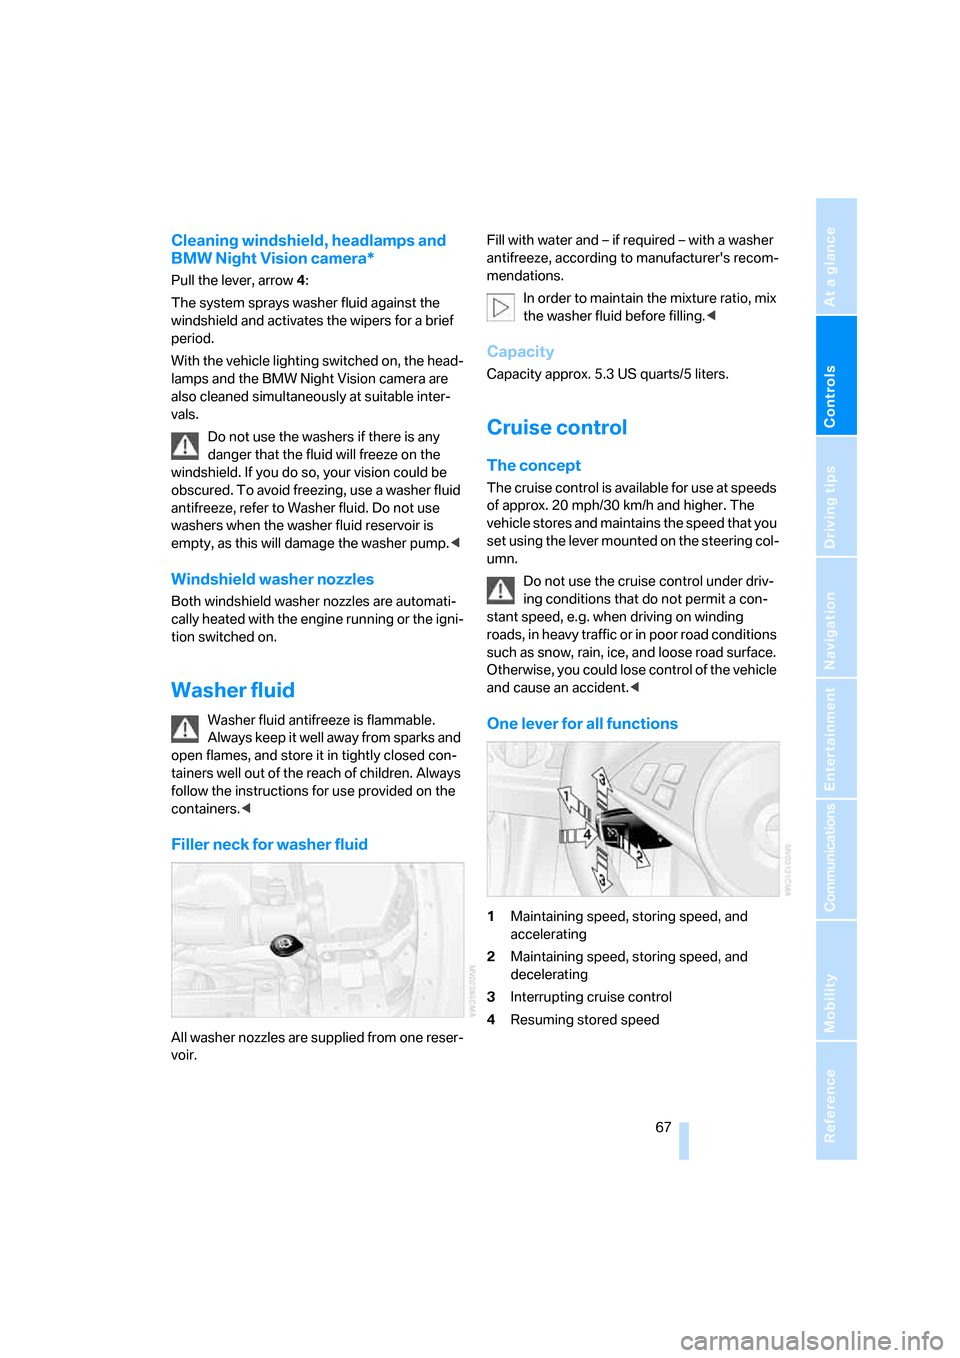
One lever for all functions
1Maintaining speed, storing speed, and
accelerating
2Maintaining speed, storing speed, and
decelerating
3Interrupting cruise control
4Resuming stored speed
Page 71 of 254
Controls
69Reference
At a glance
Driving tips
Communications
Navigation
Entertainment
Mobility
distance setting between your vehicle and the
vehicle ahead. You can vary the distance, which
is also speed-dependent. Based on your
selected distance setting, the system automat-
ically decreases the throttle setting and lightly
applies the brakes if necessary. The vehicle
brake lamps will automatically light up to signal
a following driver to take action. In addition, it
may be necessary for the vehicle or the driver to
downshift, depending on the kind of transmis-
sion your vehicle is equipped with, to maintain
the distance setting selected. If the vehicle
ahead speeds up or when the lane ahead
becomes clear, your vehicle will accelerate to
the speed you have selected by increasing the
throttle setting and shifting gears automatically
or with the aid of the driver as needed. Your
selected speed will also be held when driving
downhill, however it can be dropped below
when driving uphill if the engine output is insuf-
ficient.
The minimum desired speed is 20 mph or
30 km/h, and the maximum desired speed
110 mph or 180 km/h.
Active cruise control is not and must not
be used as a collision avoidance/warning
system.<
Since this active cruise control system is
a new technology and operates differ-
ently from conventional cruise control systems
which you may be accustomed to, you are
strongly urged to read all of the pages relating
to this system before use. Pay special attention
to the information contained in the Things to
know about active cruise control section begin-
ning on page72.<
Professional* navigation system
If a navigation DVD is in the drive, refer to
page126, the system adjusts the accelerating
and braking behavior of the vehicle to the road
you are driving on.
To ensure that the system is informed of
the current course of the road, always use
the latest navigation DVD if possible.
unknown, e.g. when it has left the mapped
region.
Brake pedal feel
>When the system brakes and you also
depress the brake pedal, a somewhat differ-
ent braking feeling results.
>Any noises produced during automatic
braking are normal.
Manual transmission
You can shift gears with the cruise control acti-
vated. If you drive for extended periods at very
high or very low engine speeds, then a shifting
command is issued or the system is deacti-
vated.
SMG
If you drive for extended periods at very high
engine speeds in Sequential mode, then a shift-
ing command is issued or the system is deacti-
vated.
In the Drive mode, the SMG acts similarly to an
automatic transmission in the D position.
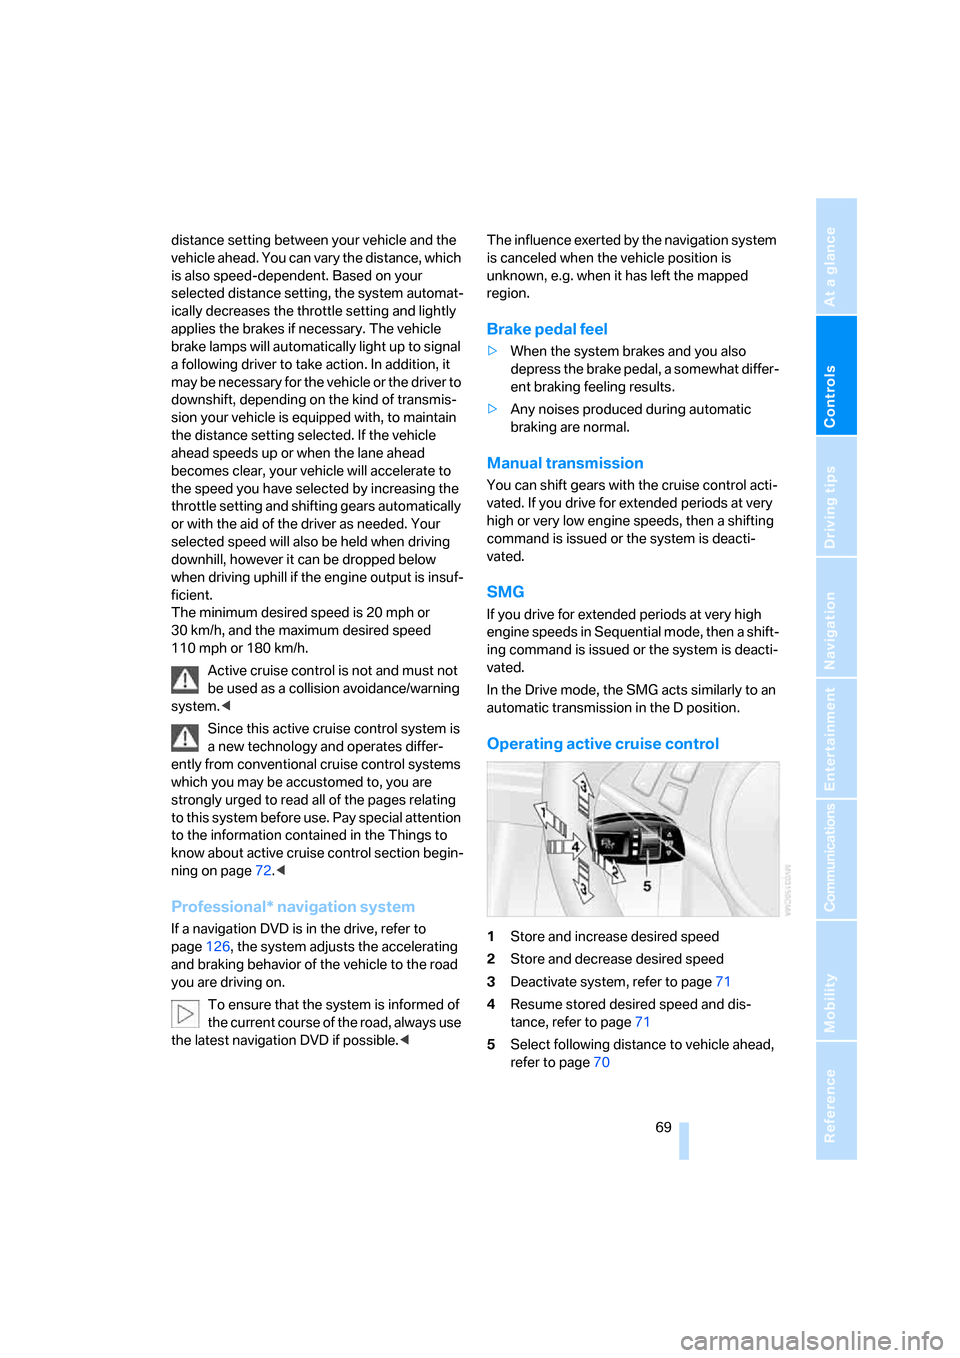
Operating active cruise control
1Store and increase desired speed
2Store and decrease desired speed
3Deactivate system, refer to page71
4Resume stored desired speed and dis-
tance, refer to page71
5Select following distance to vehicle ahead,
refer to page70