tow BMW 650I CONVERTIBLE 2009 E64 Owner's Manual
[x] Cancel search | Manufacturer: BMW, Model Year: 2009, Model line: 650I CONVERTIBLE, Model: BMW 650I CONVERTIBLE 2009 E64Pages: 272, PDF Size: 9.16 MB
Page 9 of 272
7Reference
At a glance
Controls
Driving tips
Communications
Navigation
Entertainment
Mobility
Service and warranty
We recommend that you read this publication
thoroughly.
Your BMW is covered by the following warran-
ties:
>New Vehicle Limited Warranty
>Rust Perforation Limited Warranty
>Federal Emissions System Defect Warranty
>Federal Emissions Performance Warranty
>California Emission Control System Limited
Warranty
Detailed information about these warranties is
listed in the Service and Warranty Information
Booklet for US models or in the Warranty and
Service Guide Booklet for Canadian models.
Reporting safety defects
For US customers
The following applies only to vehicles owned
and operated in the US.
If you believe that your vehicle has a defect
which could cause a crash or could cause injury
or death, you should immediately inform the
National Highway Traffic Safety Administration
(NHTSA) in addition to notifying BMW of North
America, LLC, P.O. Box 1227, Westwood, New
Jersey 07675-1227, Telephone (800) 831-
1117.
If NHTSA receives similar complaints, it may
open an investigation, and if it finds that a safety
defect exists in a group of vehicles, it may order
a recall and remedy campaign. However,
NHTSA cannot become involved in individual
problems between you, your dealer, or BMW of
North America, LLC.
To contact NHTSA, you may call the Vehicle
Safety Hotline toll-free at 1-888-327-4236
(TTY: 1-800-424-9153); go to
http://www.safercar.gov; or write to: Adminis-
trator, NHTSA, 400 Seventh Street, SW.,
Washington, DC 20590. You can also obtain
other information about motor vehicle safety
from http://www.safercar.gov
For Canadian customers
Canadian customers who wish to report a
safety-related defect to Transport Canada,
Defect Investigations and Recalls, may call 1-
800-333-0510 toll-free from anywhere in Can-
ada or 1-613-993-9851 from the Ottawa region
and from other countries, or contact Transport
Canada by mail at: Transport Canada, ASFAD,
Place de Ville, Tower C, 330 Sparks Street,
Ottawa, ON, K1A 0N5.
You can also obtain other information about
motor vehicle safety from http://www.tc.gc.ca
Page 38 of 272
Opening and closing
36
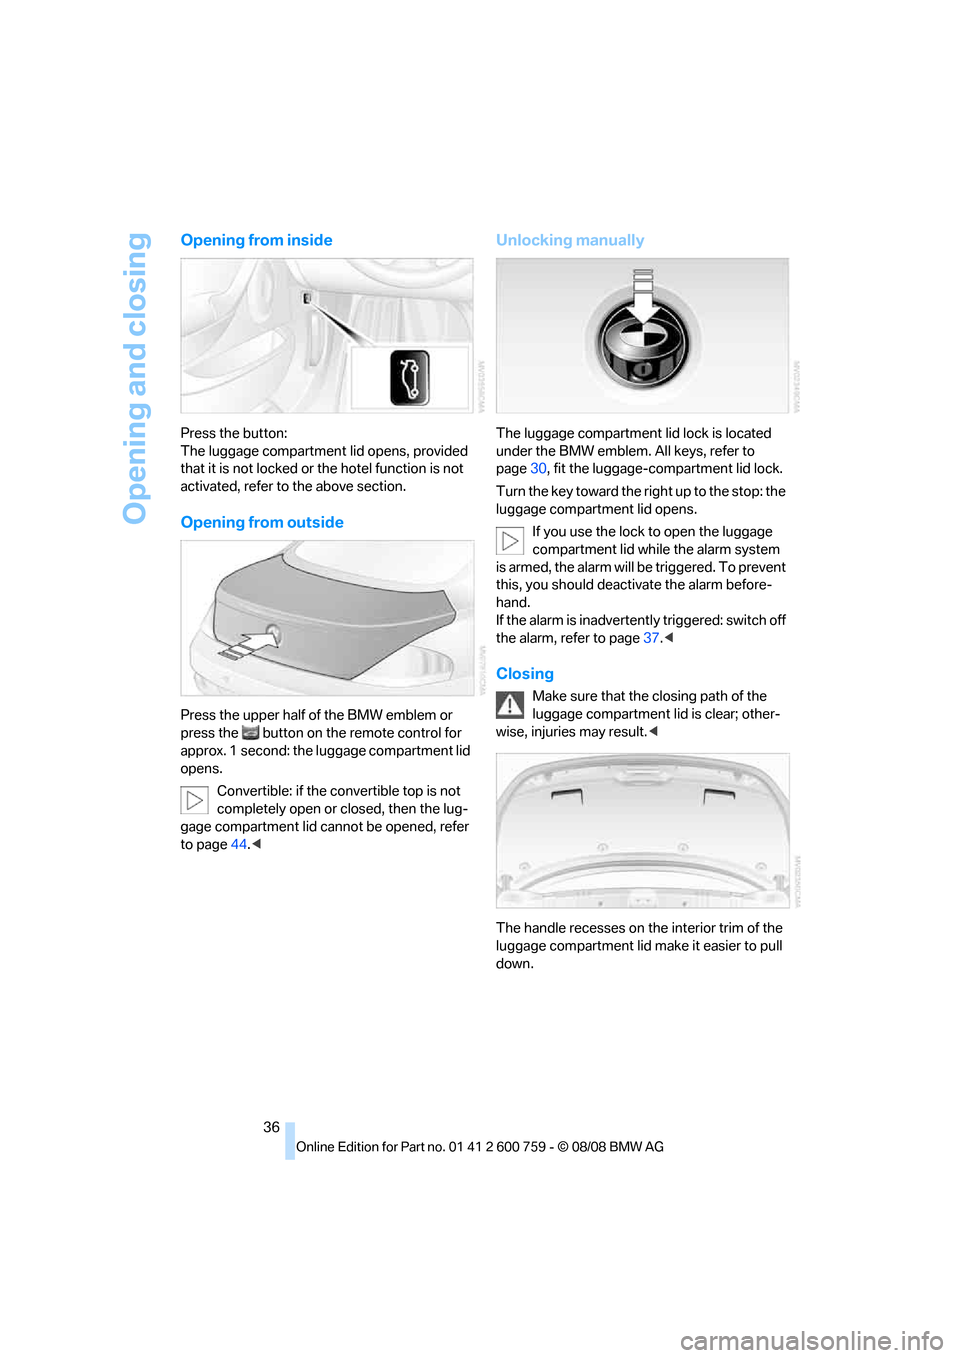
Opening from inside
Press the button:
The luggage compartment lid opens, provided
that it is not locked or the hotel function is not
activated, refer to the above section.
Opening from outside
Press the upper half of the BMW emblem or
press the button on the remote control for
approx. 1 second: the luggage compartment lid
opens.
Convertible: if the convertible top is not
completely open or closed, then the lug-
gage compartment lid cannot be opened, refer
to page44.<
Unlocking manually
The luggage compartment lid lock is located
under the BMW emblem. All keys, refer to
page30, fit the luggage-compartment lid lock.
Turn the key toward the right up to the stop: the
luggage compartment lid opens.
If you use the lock to open the luggage
compartment lid while the alarm system
is armed, the alarm will be triggered. To prevent
this, you should deactivate the alarm before-
hand.
If the alarm is inadvertently triggered: switch off
the alarm, refer to page37.<
Closing
Make sure that the closing path of the
luggage compartment lid is clear; other-
wise, injuries may result.<
The handle recesses on the interior trim of the
luggage compartment lid make it easier to pull
down.
Page 39 of 272
Controls
37Reference
At a glance
Driving tips
Communications
Navigation
Entertainment
Mobility
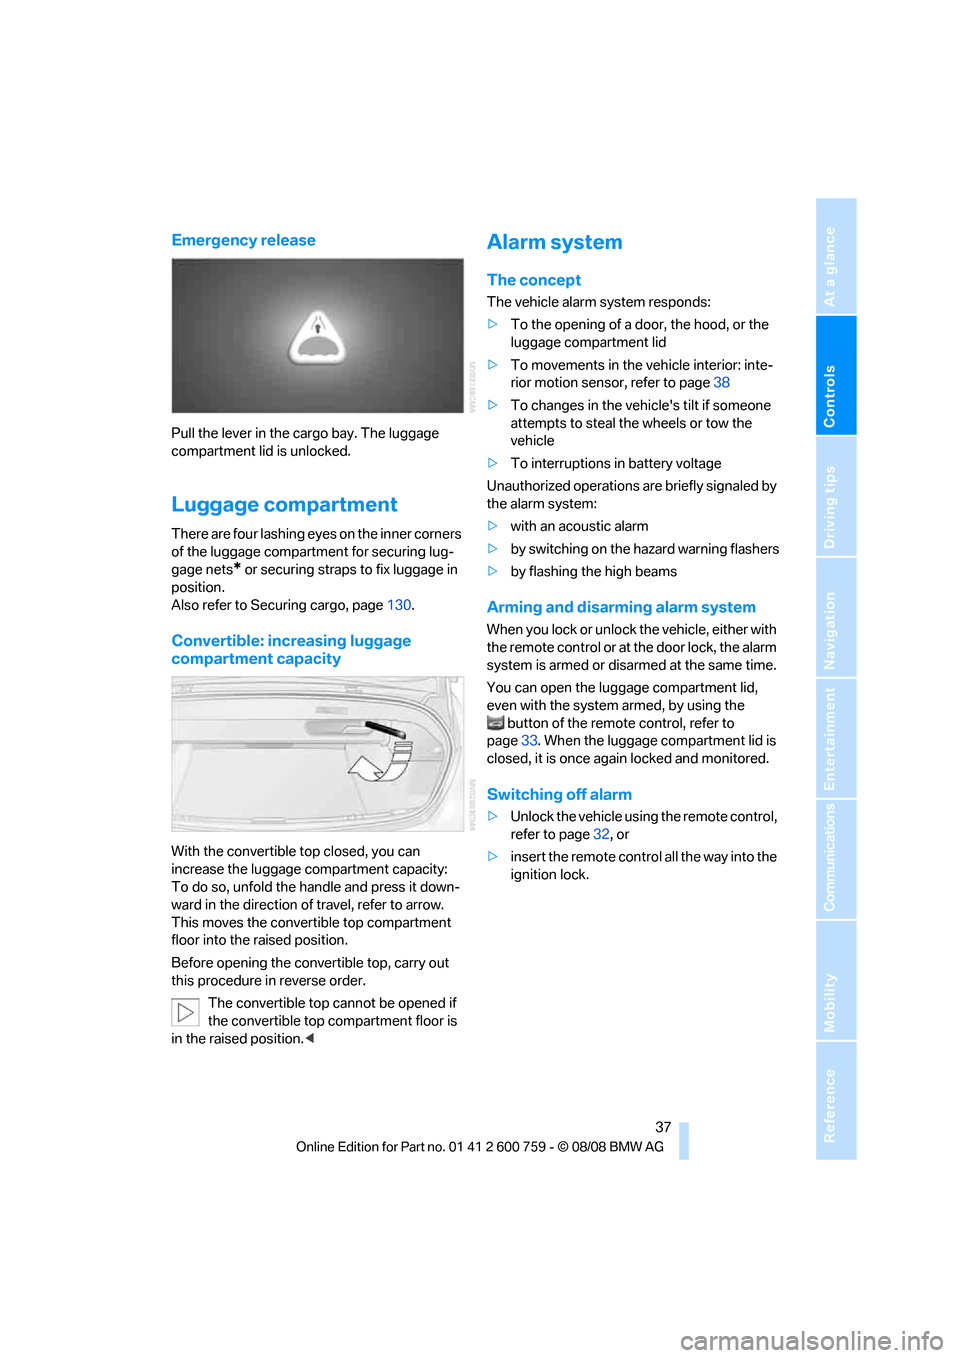
Emergency release
Pull the lever in the cargo bay. The luggage
compartment lid is unlocked.
Luggage compartment
There are four lashing eyes on the inner corners
of the luggage compartment for securing lug-
gage nets
* or securing straps to fix luggage in
position.
Also refer to Securing cargo, page130.
Convertible: increasing luggage
compartment capacity
With the convertible top closed, you can
increase the luggage compartment capacity:
To do so, unfold the handle and press it down-
ward in the direction of travel, refer to arrow.
This moves the convertible top compartment
floor into the raised position.
Before opening the convertible top, carry out
this procedure in reverse order.
The convertible top cannot be opened if
the convertible top compartment floor is
in the raised position.<
Alarm system
The concept
The vehicle alarm system responds:
>To the opening of a door, the hood, or the
luggage compartment lid
>To movements in the vehicle interior: inte-
rior motion sensor, refer to page38
>To changes in the vehicle's tilt if someone
attempts to steal the wheels or tow the
vehicle
>To interruptions in battery voltage
Unauthorized operations are briefly signaled by
the alarm system:
>with an acoustic alarm
>by switching on
the hazard warning flashers
>by flashing the high beams
Arming and disarming alarm system
When you lock or unlock the vehicle, either with
the remote control or at the door lock, the alarm
system is armed or disarmed at the same time.
You can open the luggage compartment lid,
even with the system armed, by using the
button of the remote control, refer to
page33. When the luggage compartment lid is
closed, it is once again locked and monitored.
Switching off alarm
>Unlock the vehicle using the remote control,
refer to page32, or
>insert the remote control all the way into the
ignition lock.
Page 40 of 272
Opening and closing
38
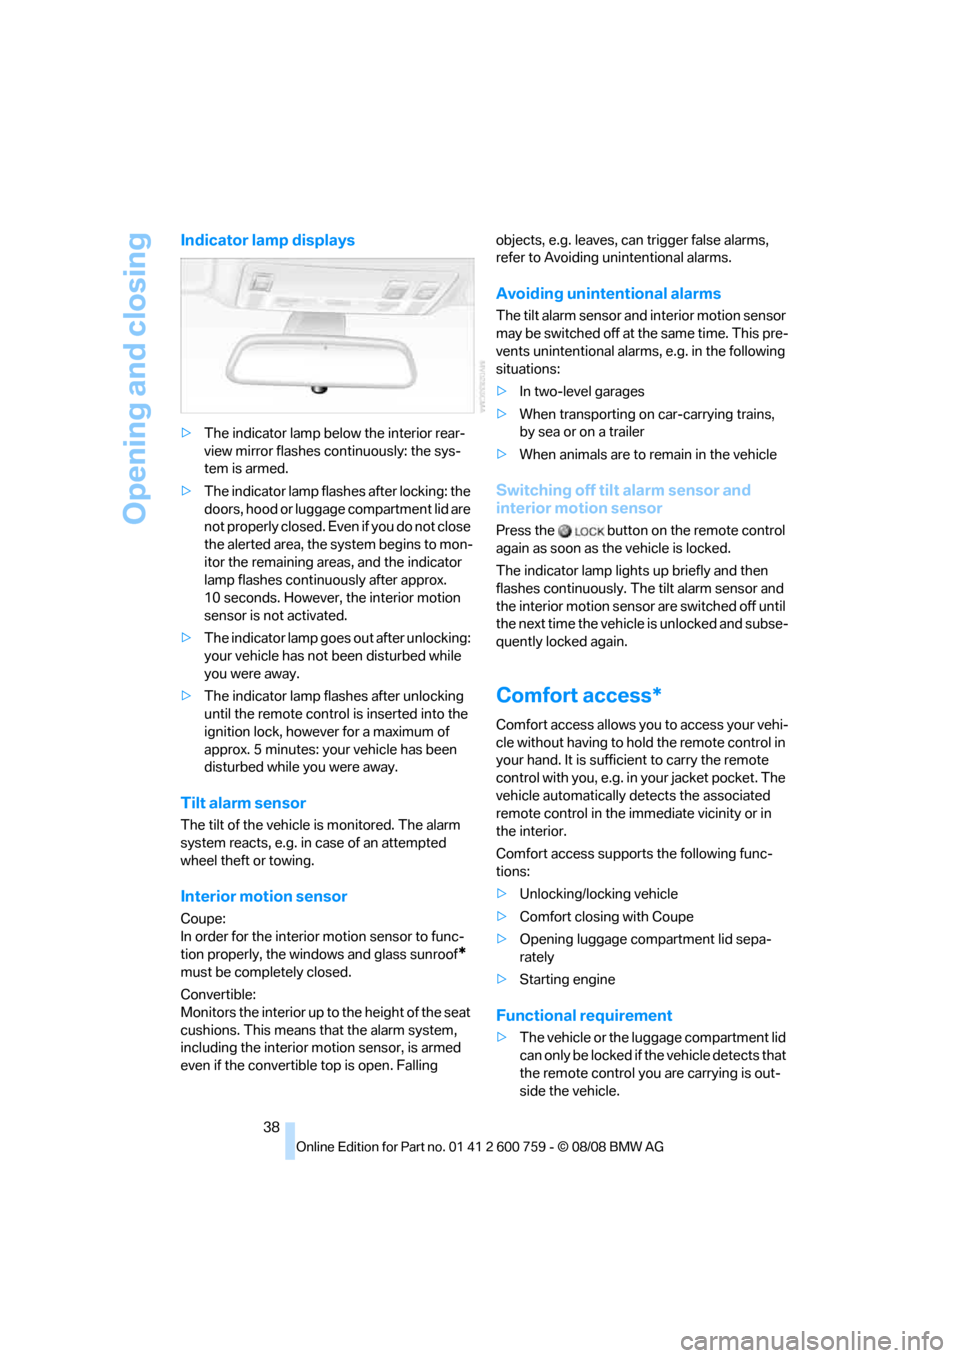
Indicator lamp displays
>The indicator lamp below the interior rear-
view mirror flashes continuously: the sys-
tem is armed.
>The indicator lamp flashes after locking: the
doors, hood or luggage compartment lid are
not properly closed. Even if you do not close
the alerted area, the system begins to mon-
itor the remaining areas, and the indicator
lamp flashes continuously after approx.
10 seconds. However, the interior motion
sensor is not activated.
>The indicator lamp goes out after unlocking:
your vehicle has not been disturbed while
you were away.
>The indicator lamp flashes after unlocking
until the remote control is inserted into the
ignition lock, however for a maximum of
approx. 5 minutes: your vehicle has been
disturbed while you were away.
Tilt alarm sensor
The tilt of the vehicle is monitored. The alarm
system reacts, e.g. in case of an attempted
wheel theft or towing.
Interior motion sensor
Coupe:
In order for the interior motion sensor to func-
tion properly, the windows and glass sunroof
*
must be completely closed.
Convertible:
Monitors the interior up to the height of the seat
cushions. This means that the alarm system,
including the interior motion sensor, is armed
even if the convertible top is open. Falling objects, e.g. leaves, can trigger false alarms,
refer to Avoiding unintentional alarms.
Avoiding unintentional alarms
The tilt alarm sensor and interior motion sensor
may be switched off at the same time. This pre-
vents unintentional alarms, e.g. in the following
situations:
>In two-level garages
>When transporting on car-carrying trains,
by sea or on a trailer
>When animals are to remain in the vehicle
Switching off tilt alarm sensor and
interior motion sensor
Press the button on the remote control
again as soon as the vehicle is locked.
The indicator lamp lights up briefly and then
flashes continuously. The tilt alarm sensor and
the interior motion sensor are switched off until
the next time the vehicle is unlocked and subse-
quently locked again.
Comfort access*
Comfort access allows you to access your vehi-
cle without having to hold the remote control in
your hand. It is sufficient to carry the remote
control with you, e.g. in your jacket pocket. The
vehicle automatically detects the associated
remote control in the immediate vicinity or in
the interior.
Comfort access supports the following func-
tions:
>Unlocking/locking vehicle
>Comfort closing with Coupe
>Opening luggage compartment lid sepa-
rately
>Starting engine
Functional requirement
>The vehicle or the luggage compartment lid
can only be locked if the vehicle detects that
the remote control you are carrying is out-
side the vehicle.
Page 44 of 272
Opening and closing
42 You can close the rear window in the
same manner by pulling the switch.
>Press the switch beyond the resistance
point:
The rear window opens automatically.
Pressing the switch again stops the
opening movement.
Briefly press button 1 again to deactivate the
function. The LEDs go out.
The rear window opens and closes auto-
matically when you open or close the con-
vertible top.<
For information on using the convenient opera-
tion mode at the door lock or with the remote
control, refer to page32 or34.
Coupe: For information on comfort closing with
comfort access, refer to page39.
After switching off ignition
You can still operate the windows with the
remote control removed or the ignition
switched off for approx. 1 minute, as long as
neither of the doors has been opened.
Pinch protection system
If the closing force exceeds a specific value as a
window closes, the closing action is interrupted
and the window reopens slightly.
Despite the pinch protection system,
inspect the window's travel path prior to
closing it, as the safety system might fail to
detect certain kinds of obstructions, such as
thin objects, and the window would continue
closing.
Do not install any accessories in the range of
movement of the windows, otherwise the pinch
protection system will be impaired.
Convertible: the rear side windows and rear
window are not equipped with a pinch protec-
tion system. Therefore, watch the rear side win-
dows and the rear window during closing, oth-
erwise injuries can occur.<
Closing without pinch protection
system
In case of danger from outside or if, for example,
ice on the window prevents normal closing, pro-
ceed as follows:
1.Pull the switch beyond the resistance point
and hold. The pinch protection system is
limited and the window opens slightly if the
closing force exceeds a certain value.
2.Pull the switch beyond the resistance point
and hold again within approx. 4 seconds.
The window closes without the pinch pro-
tection system.
Coupe:
Glass sunroof, electric with
raise function*
The glass sunroof and sliding visor are opera-
tional whenever the ignition is switched on.
To prevent injuries, exercise care when
closing the glass sunroof and keep it in
your field of vision until it is shut.
Always take along the remote control when you
leave the vehicle, otherwise children could, for
example, operate the roof and injure them-
selves.<
Raising and closing glass sunroof
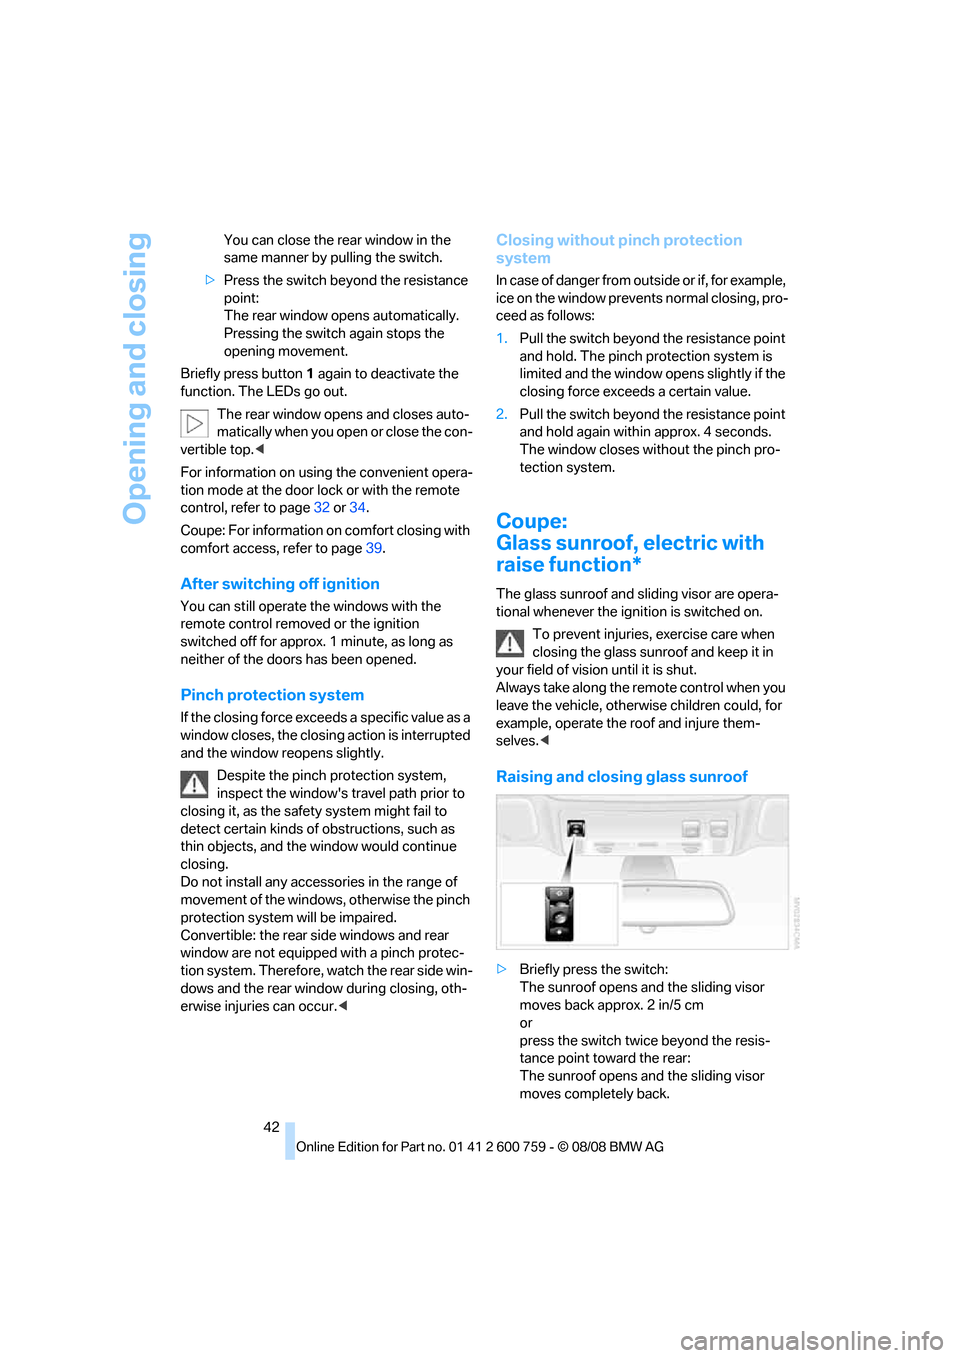
>Briefly press the switch:
The sunroof opens and the sliding visor
moves back approx. 2 in/5 cm
or
press the switch twice beyond the resis-
tance point toward the rear:
The sunroof opens and the sliding visor
moves completely back.
Page 45 of 272
Controls
43Reference
At a glance
Driving tips
Communications
Navigation
Entertainment
Mobility
>To close, briefly press the switch or push it
twice beyond the resistance point toward
the front:
The sunroof and sliding visor close.
Opening and closing sliding visor
>Push the switch up to the resistance point in
the desired direction:
The sliding visor continues to move for as
long as you hold the switch.
>Push the switch beyond the resistance
point in the desired direction:
The sliding visor moves automatically.
Briefly press the switch again in any direc-
tion to stop the movement.
For information on using the convenient opera-
tion mode at the door lock or with the remote
control, refer to page32 or34.
For information on comfort closing with comfort
access, refer to page39.
Pinch protection system
If the glass sunroof encounters resistance when
closing, the closing action is interrupted and the
glass sunroof opens.
If the sliding visor encounters resistance when
closing within the last approx. 8 in/20 cm, the
closing action is interrupted and the sliding
visor opens again slightly.
Despite the pinch protection system,
inspect the sunroof's travel path prior to
closing it, as the safety system might fail to
detect certain kinds of obstructions, such as
very thin objects, and the sunroof would con-
tinue closing.<
Closing without pinch protection
system
In case of danger from outside, slide the switch
forward beyond the resistance point and hold.
The roof closes without the pinch protection
system.
Following interruptions in electrical
power supply
After an interruption in the power supply the
glass sunroof may not move. Then have the system initialized. Should this occur, please
have the sunroof initialized at your BMW center.
Moving manually*
In the event of an electrical malfunction, you can
move the glass sunroof and the sliding visor
manually.
Glass sunroof
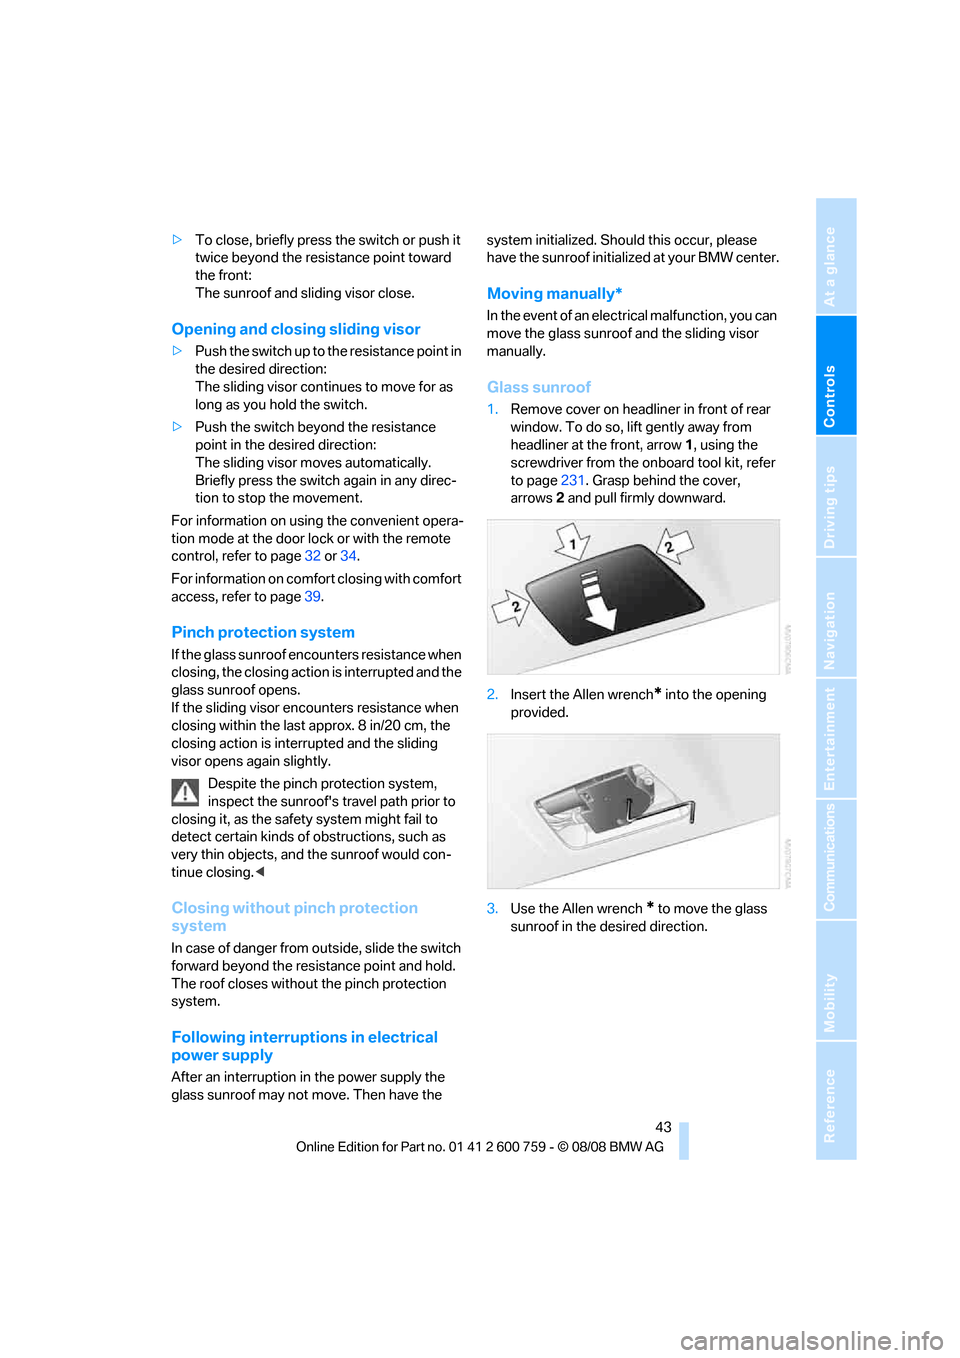
1.Remove cover on headliner in front of rear
window. To do so, lift gently away from
headliner at the front, arrow1, using the
screwdriver from the onboard tool kit, refer
to page231. Grasp behind the cover,
arrows2 and pull firmly downward.
2.Insert the Allen wrench
* into the opening
provided.
3.Use the Allen wrench
* to move the glass
sunroof in the desired direction.
Page 49 of 272
Controls
47Reference
At a glance
Driving tips
Communications
Navigation
Entertainment
Mobility
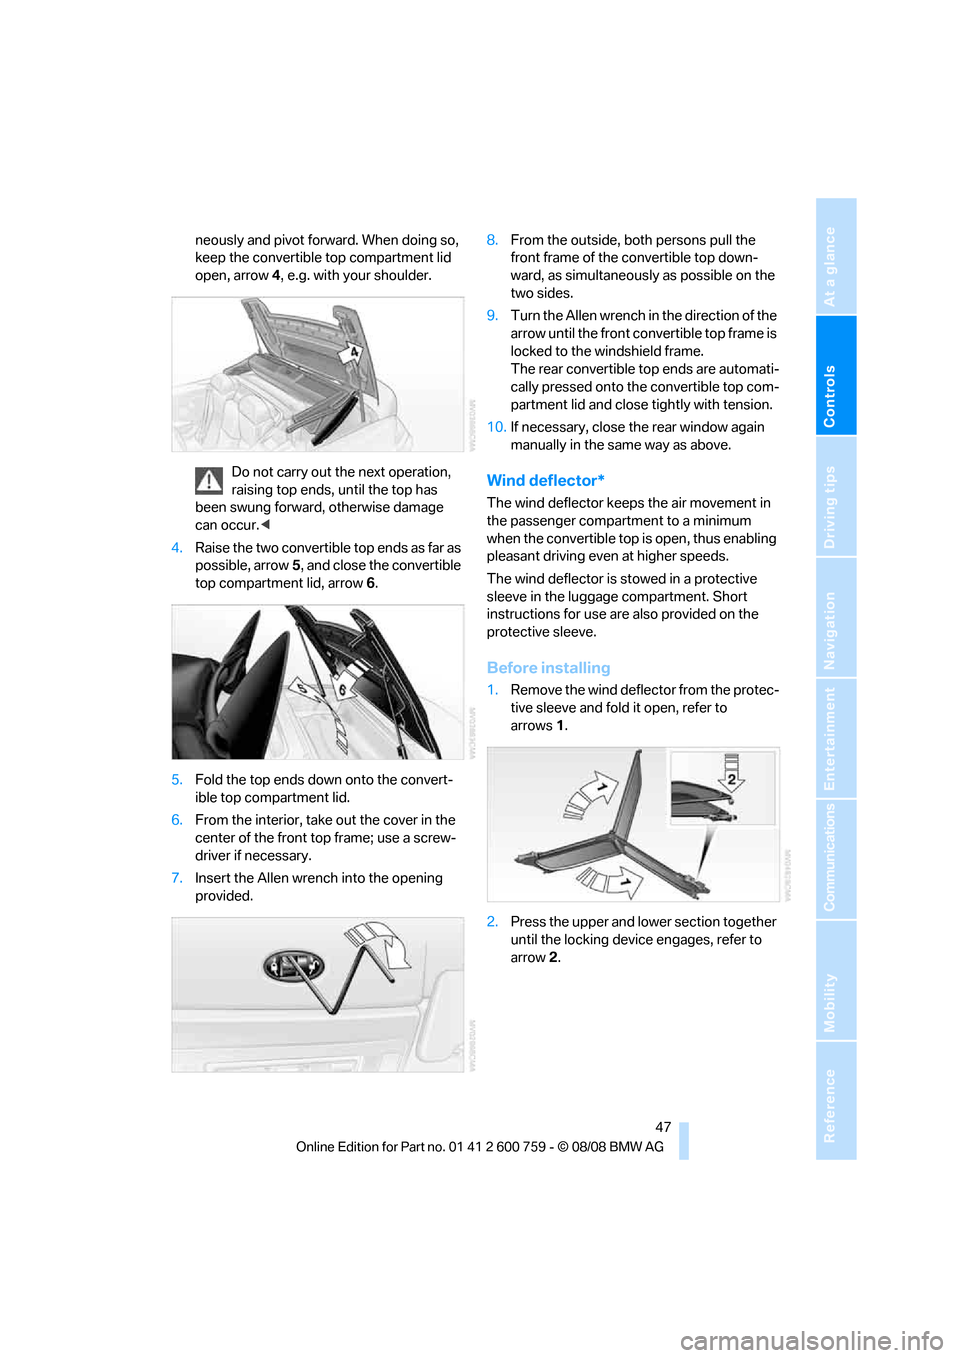
neously and pivot forward. When doing so,
keep the convertible top compartment lid
open, arrow4, e.g. with your shoulder.
Do not carry out the next operation,
raising top ends, until the top has
been swung forward, otherwise damage
can occur.<
4.Raise the two convertible top ends as far as
possible, arrow5, and close the convertible
top compartment lid, arrow6.
5.Fold the top ends down onto the convert-
ible top compartment lid.
6.From the interior, take out the cover in the
center of the front top frame; use a screw-
driver if necessary.
7.Insert the Allen wrench into the opening
provided.8.From the outside, both persons pull the
front frame of the convertible top down-
ward, as simultaneously as possible on the
two sides.
9.Turn the Allen wrench in the direction of the
arrow until the front convertible top frame is
locked to the windshield frame.
The rear convertible top ends are automati-
cally pressed onto the convertible top com-
partment lid and close tightly with tension.
10.If necessary, close the rear window again
manually in the same way as above.
Wind deflector*
The wind deflector keeps the air movement in
the passenger compartment to a minimum
when the convertible top is open, thus enabling
pleasant driving even at higher speeds.
The wind deflector is stowed in a protective
sleeve in the luggage compartment. Short
instructions for use are also provided on the
protective sleeve.
Before installing
1.Remove the wind deflector from the protec-
tive sleeve and fold it open, refer to
arrows1.
2.Press the upper and lower section together
until the locking device engages, refer to
arrow2.
Page 55 of 272
Controls
53Reference
At a glance
Driving tips
Communications
Navigation
Entertainment
Mobility
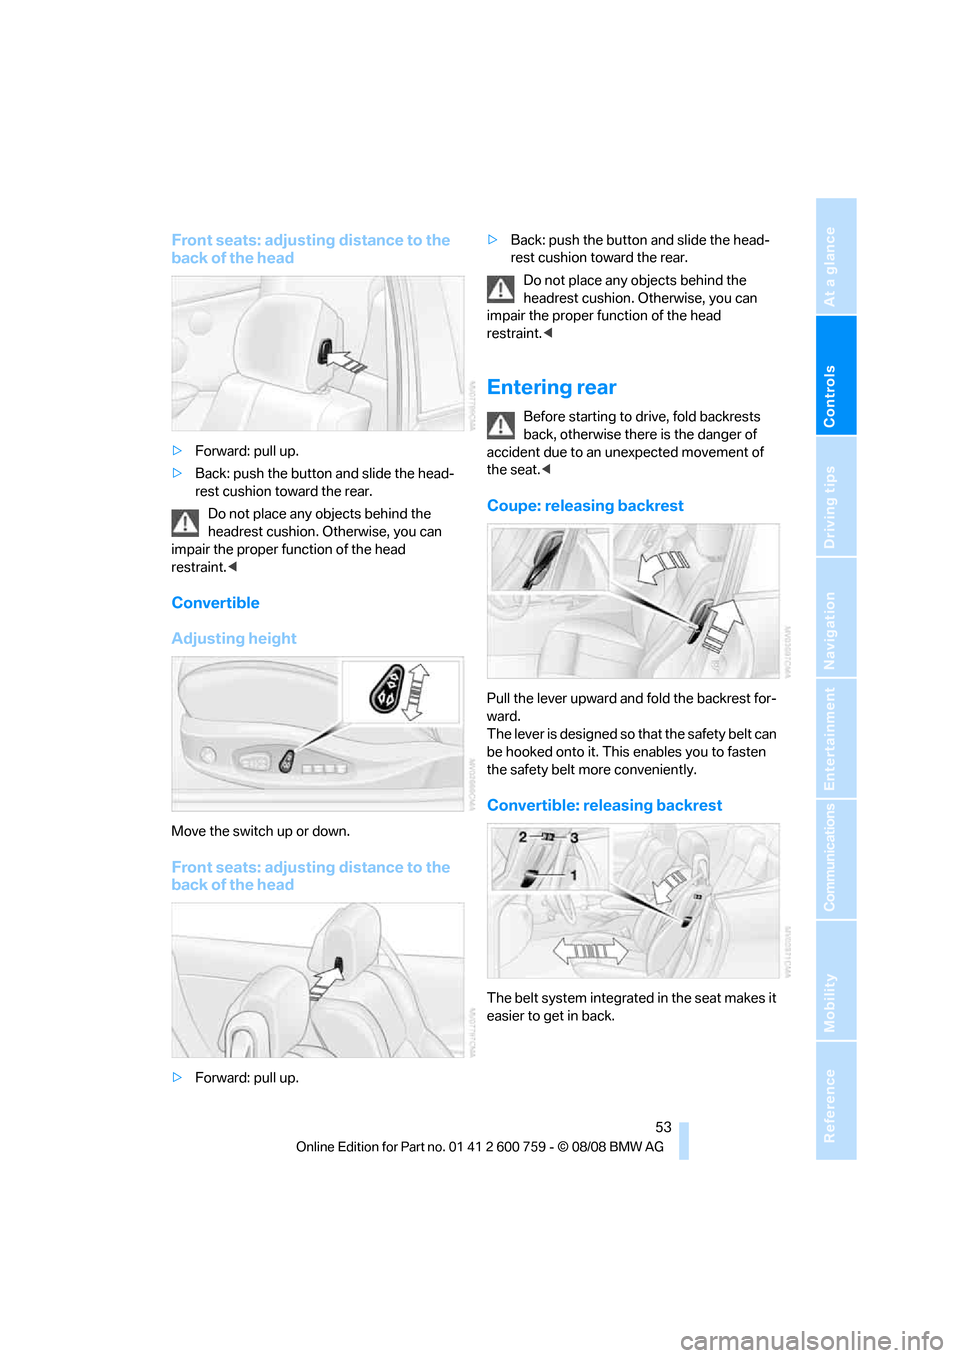
Front seats: adjusting distance to the
back of the head
>Forward: pull up.
>Back: push the button and slide the head-
rest cushion toward the rear.
Do not place any objects behind the
headrest cushion. Otherwise, you can
impair the proper function of the head
restraint.<
Convertible
Adjusting height
Move the switch up or down.
Front seats: adjusting distance to the
back of the head
>Forward: pull up.>Back: push the button and slide the head-
rest cushion toward the rear.
Do not place any objects behind the
headrest cushion. Otherwise, you can
impair the proper function of the head
restraint.<
Entering rear
Before starting to drive, fold backrests
back, otherwise there is the danger of
accident due to an unexpected movement of
the seat.<
Coupe: releasing backrest
Pull the lever upward and fold the backrest for-
ward.
The lever is designed so that the safety belt can
be hooked onto it. This enables you to fasten
the safety belt more conveniently.
Convertible: releasing backrest
The belt system integrated in the seat makes it
easier to get in back.
Page 64 of 272
Driving
62
Handbrake
The handbrake is primarily intended to prevent
the vehicle from rolling while parked; it brakes
the rear wheels.
Indicator lamp
The indicator lamp lights up, and a sig-
nal sounds when you drive away. The
handbrake is applied.
Indicator lamp for Canadian models.
Applying
The lever locks in position automatically.
Releasing
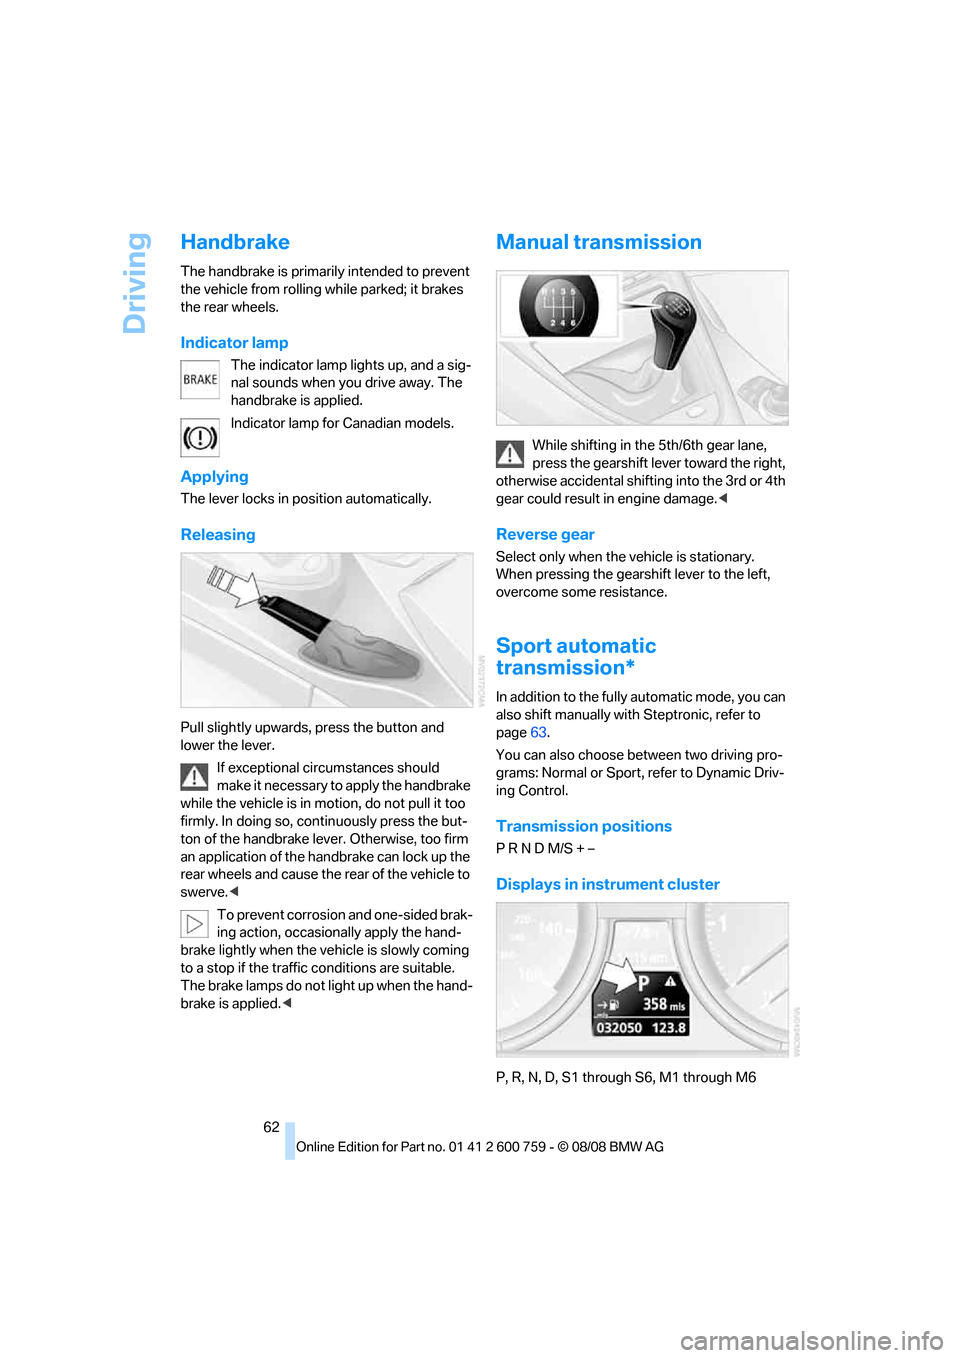
Pull slightly upwards, press the button and
lower the lever.
If exceptional circumstances should
make it necessary to apply the handbrake
while the vehicle is in motion, do not pull it too
firmly. In doing so, continuously press the but-
ton of the handbrake lever. Otherwise, too firm
an application of the handbrake can lock up the
rear wheels and cause the rear of the vehicle to
swerve.<
To prevent corrosion and one-sided brak-
ing action, occasionally apply the hand-
brake lightly when the vehicle is slowly coming
to a stop if the traffic conditions are suitable.
The brake lamps do not light up when the hand-
brake is applied.<
Manual transmission
While shifting in the 5th/6th gear lane,
press the gearshift lever toward the right,
otherwise accidental shifting into the 3rd or 4th
gear could result in engine damage.<
Reverse gear
Select only when the vehicle is stationary.
When pressing the gearshift lever to the left,
overcome some resistance.
Sport automatic
transmission*
In addition to the fully automatic mode, you can
also shift manually with Steptronic, refer to
page63.
You can also choose between two driving pro-
grams: Normal or Sport, refer to Dynamic Driv-
ing Control.
Transmission positions
P R N D M/S + –
Displays in instrument cluster
P, R, N, D, S1 through S6, M1 through M6
Page 65 of 272
Controls
63Reference
At a glance
Driving tips
Communications
Navigation
Entertainment
Mobility
The transmission mode and the currently
selected gear are displayed.
Engaging transmission position
>Do not leave the transmission position P
until the engine is running: interlock.
>With the vehicle stationary, depress the
brake pedal before shifting out of P or N;
otherwise the shift command will not be
executed: shiftlock.
To prevent the vehicle from creeping
after you select a driving position,
maintain pressure on the brake pedal until
you are ready to start.<
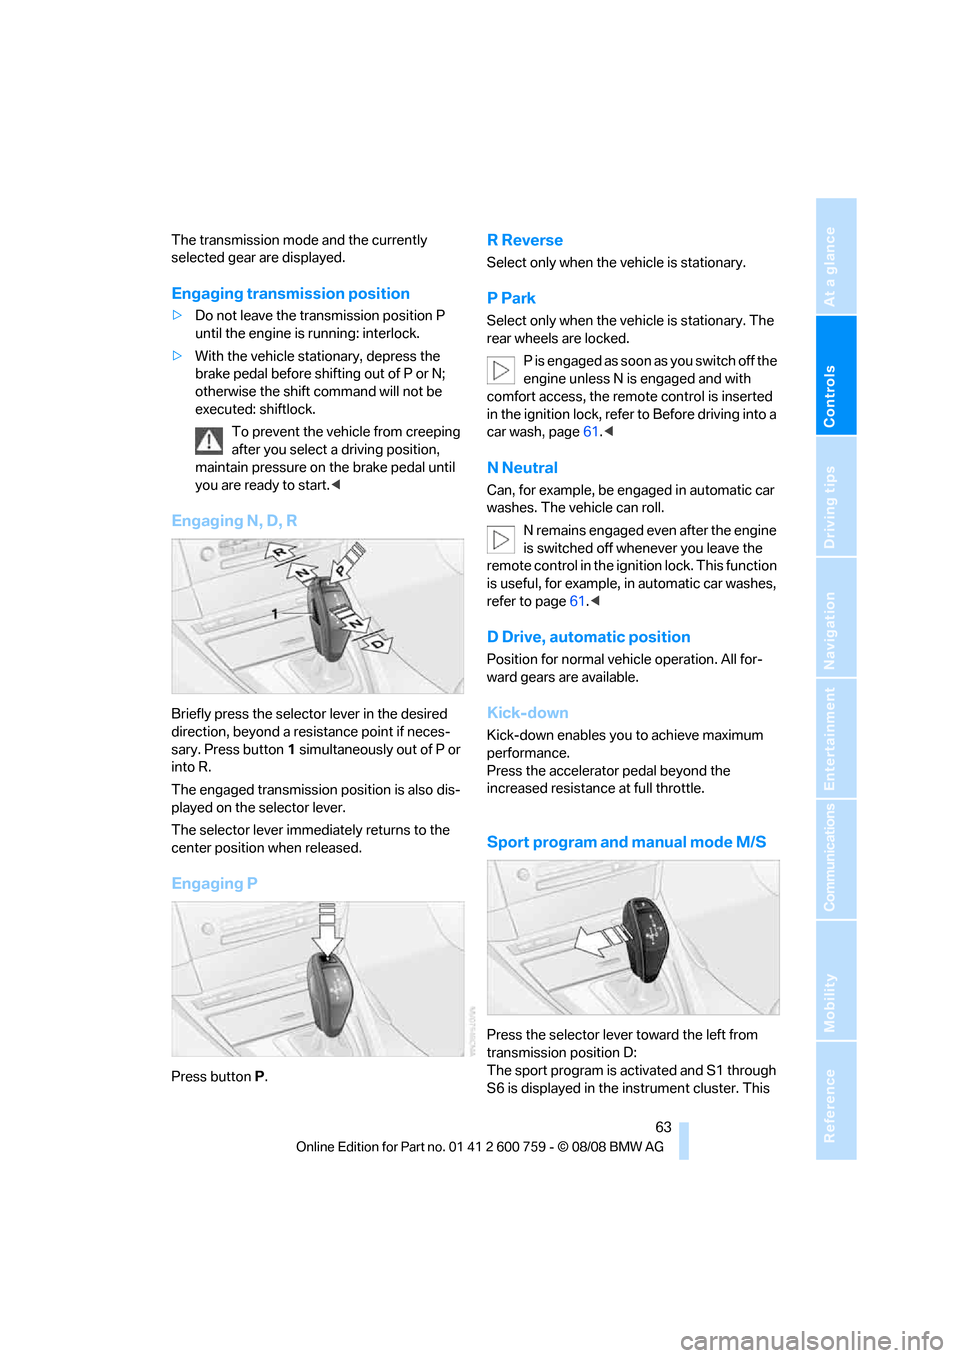
Engaging N, D, R
Briefly press the selector lever in the desired
direction, beyond a resistance point if neces-
sary. Press button1 simultaneously out of P or
into R.
The engaged transmission position is also dis-
played on the selector lever.
The selector lever immediately returns to the
center position when released.
Engaging P
Press buttonP.
R Reverse
Select only when the vehicle is stationary.
P Park
Select only when the vehicle is stationary. The
rear wheels are locked.
P is engaged as soon as you switch off the
engine unless N is engaged and with
comfort access, the remote control is inserted
in the ignition lock, refer to Before driving into a
car wash, page61.<
N Neutral
Can, for example, be engaged in automatic car
washes. The vehicle can roll.
N remains engaged even after the engine
is switched off whenever you leave the
remote control in the ignition lock. This function
is useful, for example, in automatic car washes,
refer to page61.<
D Drive, automatic position
Position for normal vehicle operation. All for-
ward gears are available.
Kick-down
Kick-down enables you to achieve maximum
performance.
Press the accelerator pedal beyond the
increased resistance at full throttle.
Sport program and manual mode M/S
Press the selector lever toward the left from
transmission position D:
The sport program is activated and S1 through
S6 is displayed in the instrument cluster. This