Rear BMW 7 SERIES 2016 G11 Manual Online
[x] Cancel search | Manufacturer: BMW, Model Year: 2016, Model line: 7 SERIES, Model: BMW 7 SERIES 2016 G11Pages: 314, PDF Size: 7.9 MB
Page 202 of 314
Overview
Camera
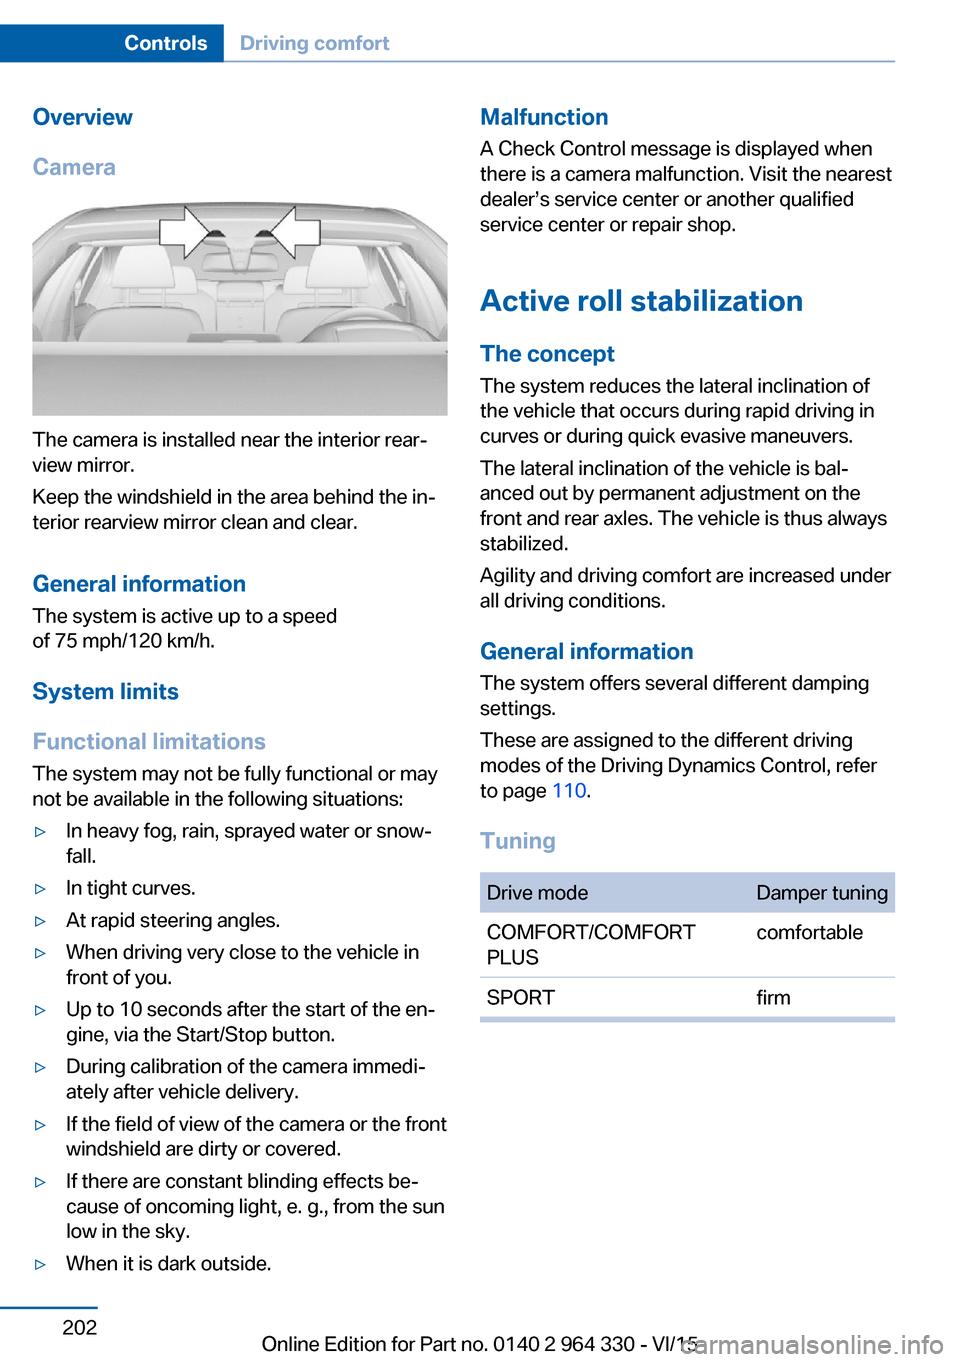
The camera is installed near the interior rear‐
view mirror.
Keep the windshield in the area behind the in‐
terior rearview mirror clean and clear.
General information
The system is active up to a speed
of 75 mph/120 km/h.
System limits
Functional limitations The system may not be fully functional or may
not be available in the following situations:
▷In heavy fog, rain, sprayed water or snow‐
fall.▷In tight curves.▷At rapid steering angles.▷When driving very close to the vehicle in
front of you.▷Up to 10 seconds after the start of the en‐
gine, via the Start/Stop button.▷During calibration of the camera immedi‐
ately after vehicle delivery.▷If the field of view of the camera or the front
windshield are dirty or covered.▷If there are constant blinding effects be‐
cause of oncoming light, e. g., from the sun
low in the sky.▷When it is dark outside.Malfunction
A Check Control message is displayed when
there is a camera malfunction. Visit the nearest
dealer’s service center or another qualified
service center or repair shop.
Active roll stabilization
The concept The system reduces the lateral inclination of
the vehicle that occurs during rapid driving in
curves or during quick evasive maneuvers.
The lateral inclination of the vehicle is bal‐
anced out by permanent adjustment on the
front and rear axles. The vehicle is thus always
stabilized.
Agility and driving comfort are increased under
all driving conditions.
General information
The system offers several different damping
settings.
These are assigned to the different driving
modes of the Driving Dynamics Control, refer
to page 110.
TuningDrive modeDamper tuningCOMFORT/COMFORT
PLUScomfortableSPORTfirmSeite 202ControlsDriving comfort202
Online Edition for Part no. 0140 2 964 330 - VI/15
Page 203 of 314
Climate controlVehicle features and options
This chapter describes all standard, country-
specific and optional features offered with the
series. It also describes features that are not
necessarily available in your car, e. g., due to
the selected options or country versions. This
also applies to safety-related functions and
systems. The respectively applicable country
provisions must be observed when using the
respective features and systems.
Automatic climate control Overview
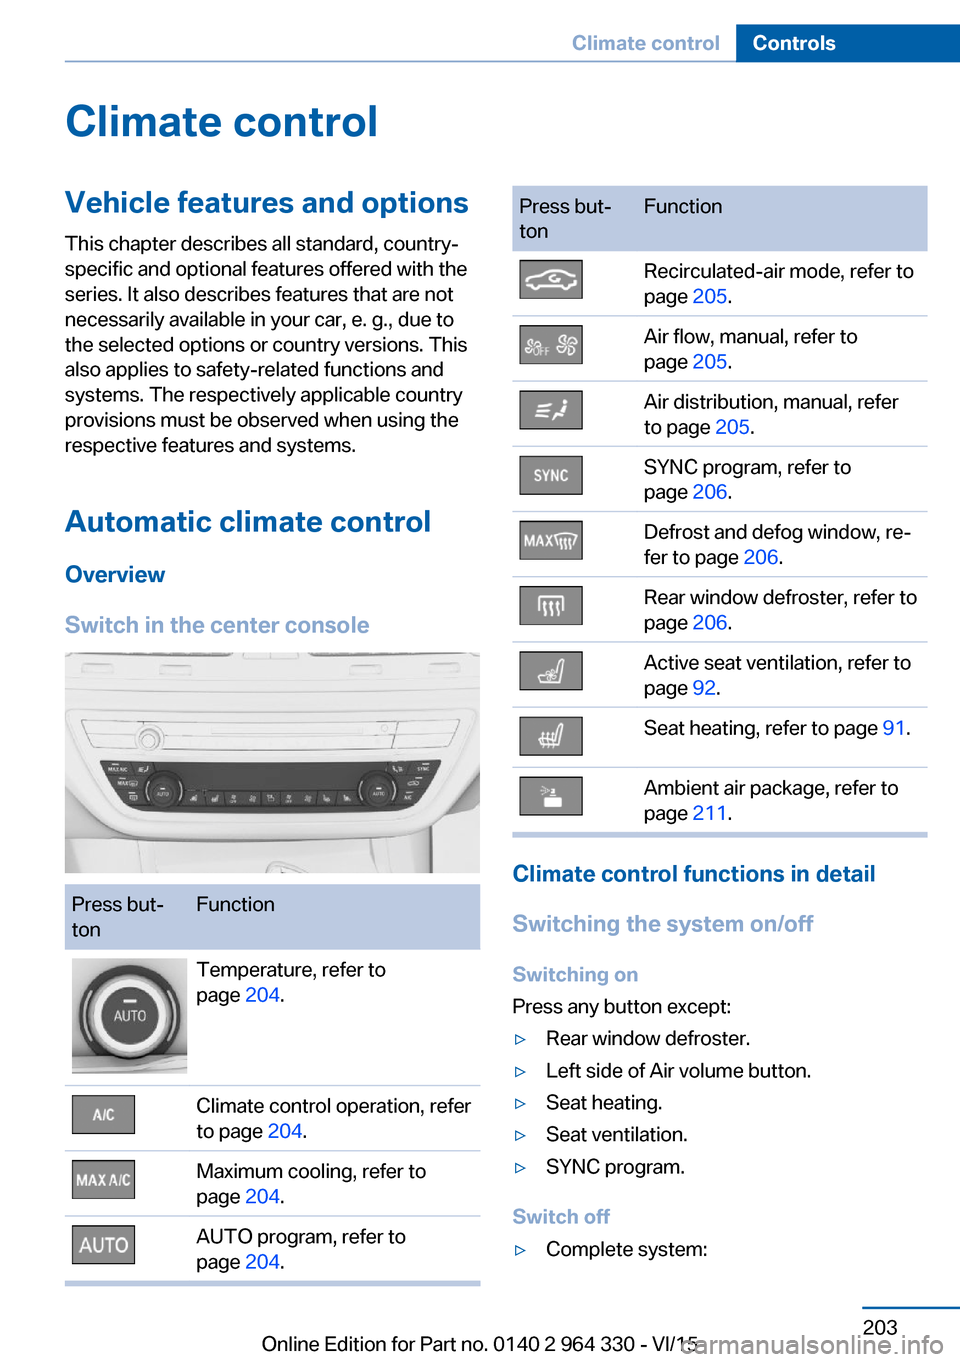
Switch in the center consolePress but‐
tonFunctionTemperature, refer to
page 204.Climate control operation, refer
to page 204.Maximum cooling, refer to
page 204.AUTO program, refer to
page 204.Press but‐
tonFunctionRecirculated-air mode, refer to
page 205.Air flow, manual, refer to
page 205.Air distribution, manual, refer
to page 205.SYNC program, refer to
page 206.Defrost and defog window, re‐
fer to page 206.Rear window defroster, refer to
page 206.Active seat ventilation, refer to
page 92.Seat heating, refer to page 91.Ambient air package, refer to
page 211.
Climate control functions in detail
Switching the system on/off
Switching on
Press any button except:
▷Rear window defroster.▷Left side of Air volume button.▷Seat heating.▷Seat ventilation.▷SYNC program.
Switch off
▷Complete system:Seite 203Climate controlControls203
Online Edition for Part no. 0140 2 964 330 - VI/15
Page 206 of 314
If there is window condensation, press
the button on the driver's side to uti‐
lize the condensation sensor.
SYNC program Press button.
The current settings on the driver's
side for temperature, air flow, air distribution,
and AUTO program are transferred to the front
passenger side and to the left and right rear.
To switch off, press the button again.
The program is switched off if the settings on
the front passenger side or in the rear are
changed.
Defrosts windows and removes
condensation
Press button.
Ice and condensation are quickly re‐
moved from the windshield and the front side
windows.
For this purpose, point the side vents onto the
side windows as needed.
Adjust air flow with the program active. If there is window condensation, you
can also switch on the air conditioning
or press the button to utilize the condensation
sensor.
Rear window defroster Press button.
The rear window defroster switches
off automatically after a certain period of time.
Microfilter/activated-charcoal filter
The microfilter removes dust and pollen from
the incoming air.
The activated-charcoal filter removes gaseous
pollutants from the outside air that enters the
vehicle.This combined filter should be replaced during
scheduled maintenance, refer to page 279, of
your vehicle.
Ventilation
Setting The air flow directions can be individually ad‐
justed:▷Direct ventilation:
The air flow is directly pointed onto the
person. The air flow heats or cools noticea‐
bly, depending on the adjusted tempera‐
ture.▷Indirect ventilation:
If the vents are fully or partly closed, the air
is directly routed into the car's interior.
Indirect ventilation can also be adjusted on
the Control Display.
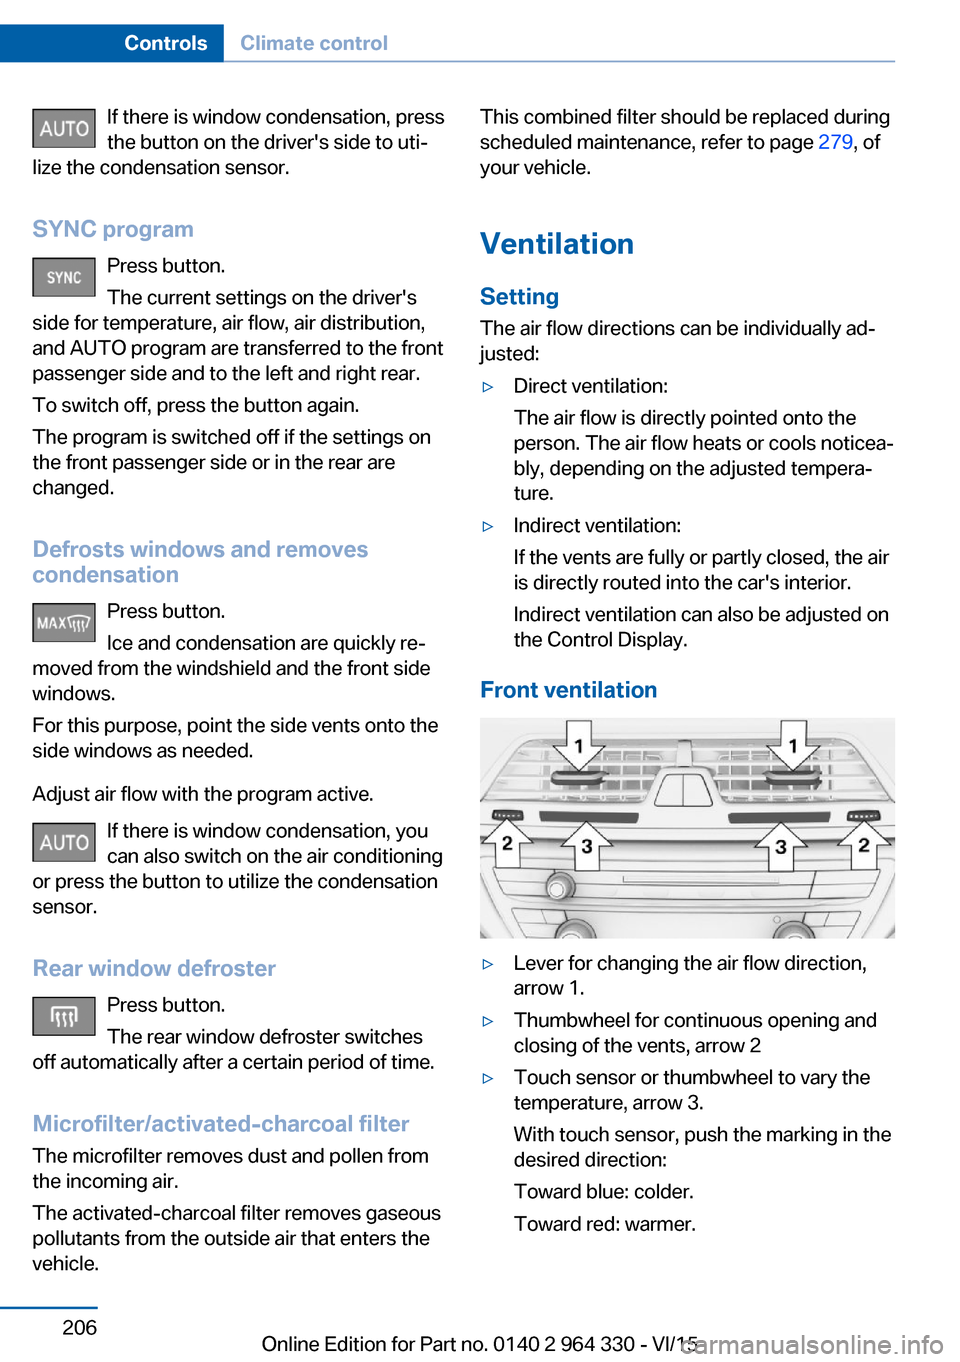
Front ventilation
▷Lever for changing the air flow direction,
arrow 1.▷Thumbwheel for continuous opening and
closing of the vents, arrow 2▷Touch sensor or thumbwheel to vary the
temperature, arrow 3.
With touch sensor, push the marking in the
desired direction:
Toward blue: colder.
Toward red: warmer.Seite 206ControlsClimate control206
Online Edition for Part no. 0140 2 964 330 - VI/15
Page 207 of 314
The set interior temperature for the driver
and passenger are not changed.
Adjusting the ventilation
▷Ventilation for cooling:
Direct vent in your direction when vehicle's
interior is too hot.▷Draft-free ventilation:
Adjust the vent to let the air flow past the
occupants.
Indirect ventilation
Air is indirectly routed into the car's interior.
About iDrive:
1."My Vehicle"2."Vehicle settings"3."Climate functions"4."Indirect ventilation"
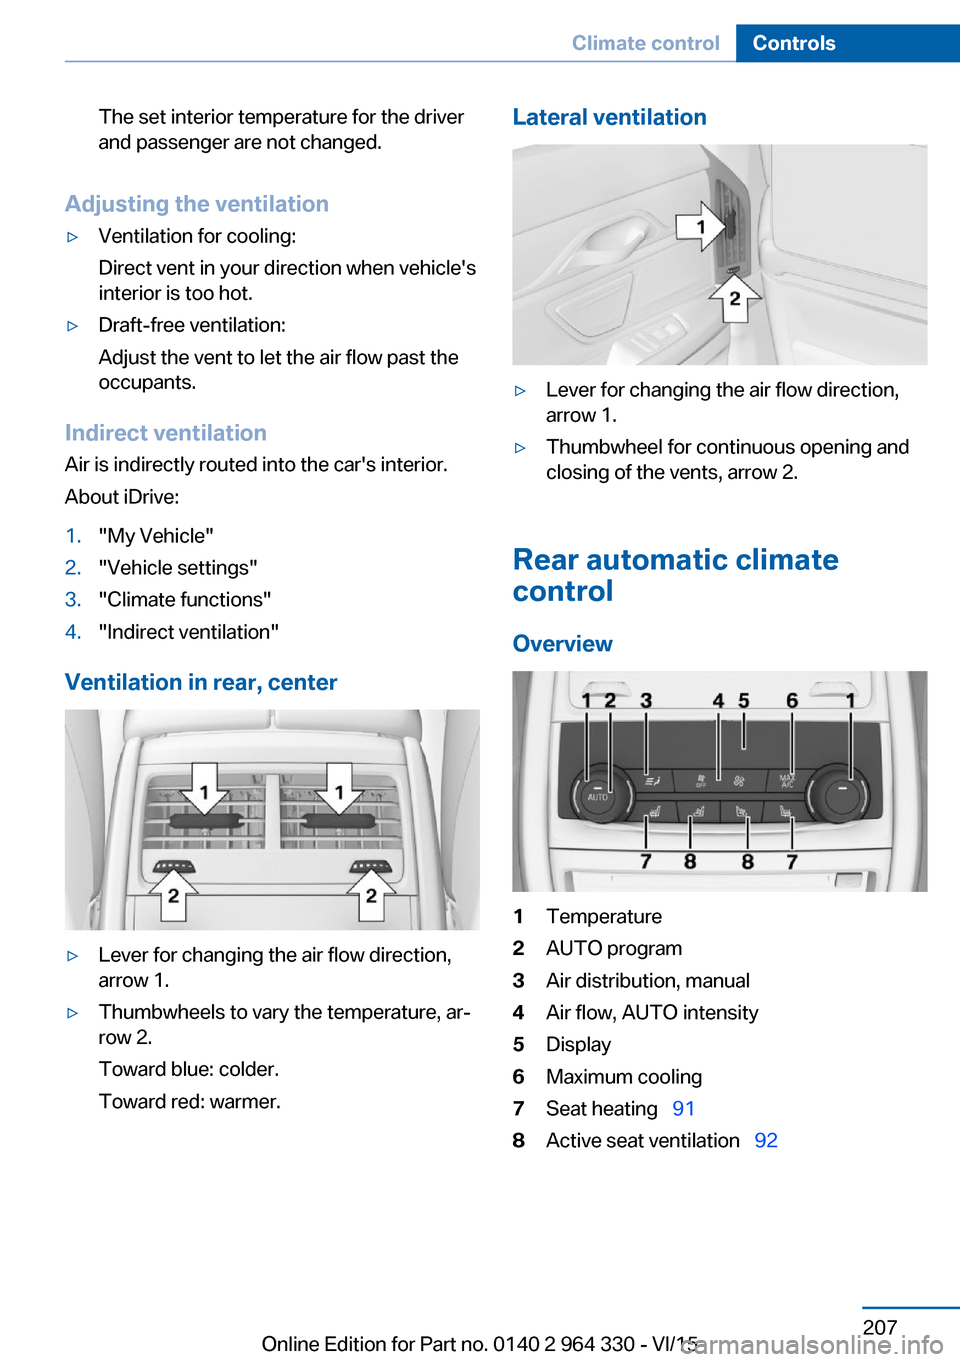
Ventilation in rear, center
▷Lever for changing the air flow direction,
arrow 1.▷Thumbwheels to vary the temperature, ar‐
row 2.
Toward blue: colder.
Toward red: warmer.Lateral ventilation▷Lever for changing the air flow direction,
arrow 1.▷Thumbwheel for continuous opening and
closing of the vents, arrow 2.
Rear automatic climate
control
Overview
1Temperature2AUTO program3Air distribution, manual4Air flow, AUTO intensity5Display6Maximum cooling7Seat heating 918Active seat ventilation 92Seite 207Climate controlControls207
Online Edition for Part no. 0140 2 964 330 - VI/15
Page 208 of 314
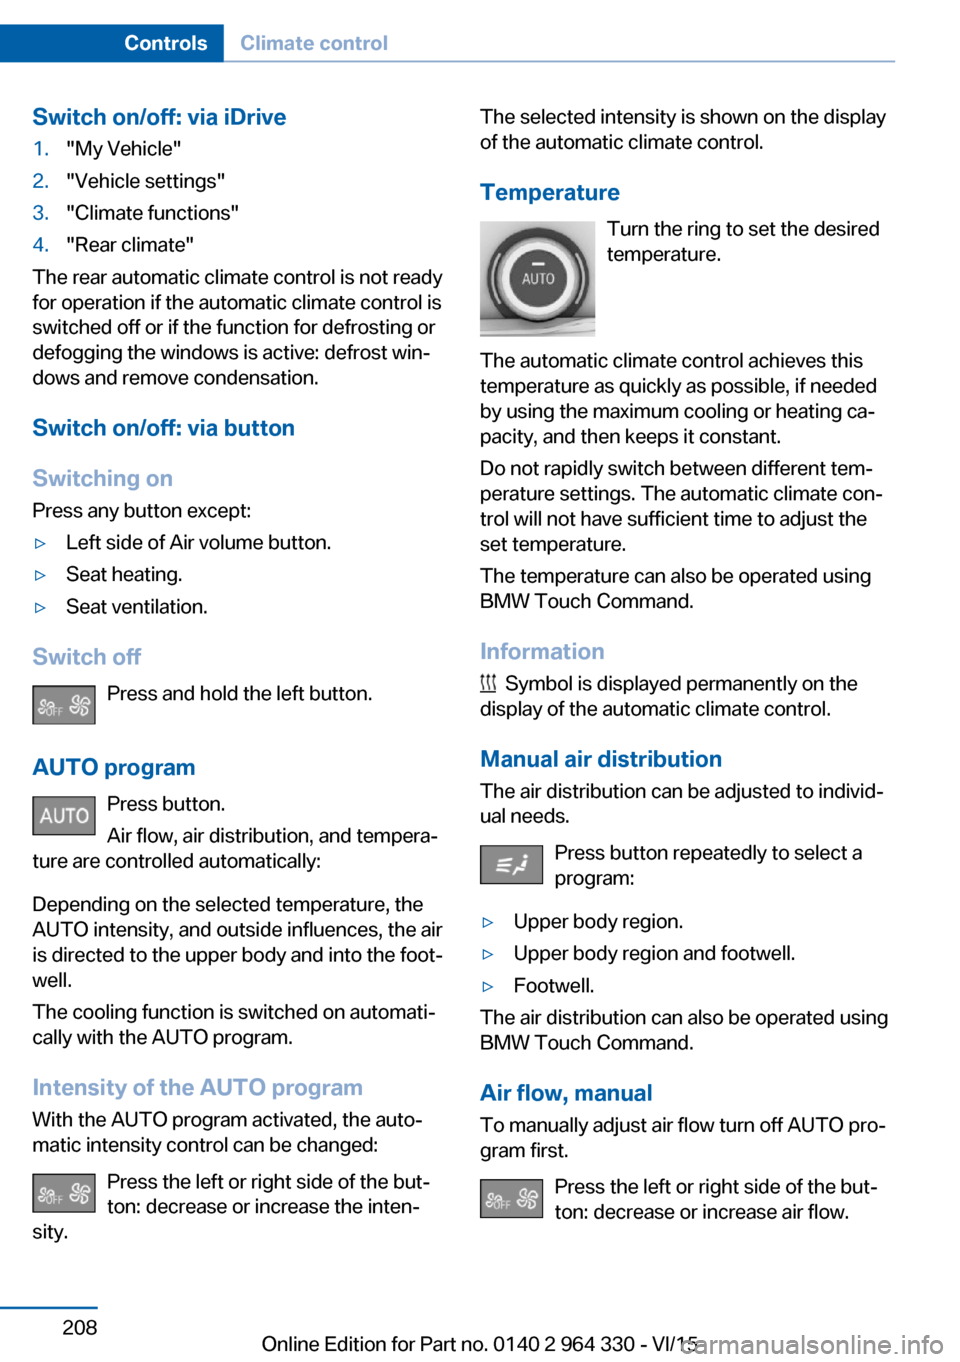
Switch on/off: via iDrive1."My Vehicle"2."Vehicle settings"3."Climate functions"4."Rear climate"
The rear automatic climate control is not ready
for operation if the automatic climate control is
switched off or if the function for defrosting or
defogging the windows is active: defrost win‐
dows and remove condensation.
Switch on/off: via button
Switching on Press any button except:
▷Left side of Air volume button.▷Seat heating.▷Seat ventilation.
Switch off
Press and hold the left button.
AUTO program Press button.
Air flow, air distribution, and tempera‐
ture are controlled automatically:
Depending on the selected temperature, the
AUTO intensity, and outside influences, the air
is directed to the upper body and into the foot‐
well.
The cooling function is switched on automati‐
cally with the AUTO program.
Intensity of the AUTO programWith the AUTO program activated, the auto‐
matic intensity control can be changed:
Press the left or right side of the but‐
ton: decrease or increase the inten‐
sity.
The selected intensity is shown on the display
of the automatic climate control.
Temperature Turn the ring to set the desired
temperature.
The automatic climate control achieves this
temperature as quickly as possible, if needed
by using the maximum cooling or heating ca‐
pacity, and then keeps it constant.
Do not rapidly switch between different tem‐
perature settings. The automatic climate con‐
trol will not have sufficient time to adjust the
set temperature.
The temperature can also be operated using
BMW Touch Command.
Information
Symbol is displayed permanently on the
display of the automatic climate control.
Manual air distribution
The air distribution can be adjusted to individ‐
ual needs.
Press button repeatedly to select a
program:
▷Upper body region.▷Upper body region and footwell.▷Footwell.
The air distribution can also be operated using
BMW Touch Command.
Air flow, manual To manually adjust air flow turn off AUTO pro‐
gram first.
Press the left or right side of the but‐
ton: decrease or increase air flow.
Seite 208ControlsClimate control208
Online Edition for Part no. 0140 2 964 330 - VI/15
Page 210 of 314
tion. Do not switch on parked-car heating in
enclosed areas.◀
WARNING
During parked-car heating operation,
high temperatures can occur underneath the
body, e.g. caused by the exhaust gas system. If
combustible materials, such as leaves or grass,
come in contact with hot parts of the exhaust
gas system, these materials can ignite. There
is risk of fire. Make sure that no combustible
materials can come in contact with hot vehicle
parts during parked-car heating operation.◀
At external temperatures below 32 ℉/0 ℃, wa‐
ter vapor occurs that emerges from below the
vehicle.
Functional requirements▷The vehicle is in the idle or operating readi‐
ness state.▷Battery is sufficiently charged.▷Parked-car heating: the fuel tank is filled to
above the reserve range.
Open the vents to allow air to flow out.
Switching on/off directly
There are different ways to switch the system
on or off.
It switches of automatically after some time.
The system continues to run for some time af‐
ter being switched off.
Via the automatic climate controlbutton
When the vehicle is in standby state, parked-
car ventilation can be switched on or off via the
automatic climate control buttons.
Press any button except:
▷Rear window defroster.▷Left side of Air volume button.▷Seat heating.▷Seat ventilation.▷SYNC program.
Via the iDrive
Parked-car ventilation can be switched on or
off via iDrive.
1."My Vehicle"2."Vehicle settings"3."Climate functions"4."Comfort ventilation" or "Comfort heating/
ventilation"5."Activate now"
symbol on the automatic climate control
signals to switched on system.
Via BMW display key Parked-car ventilation and parked-car heating
can be switched on or off via the BMW display
key.
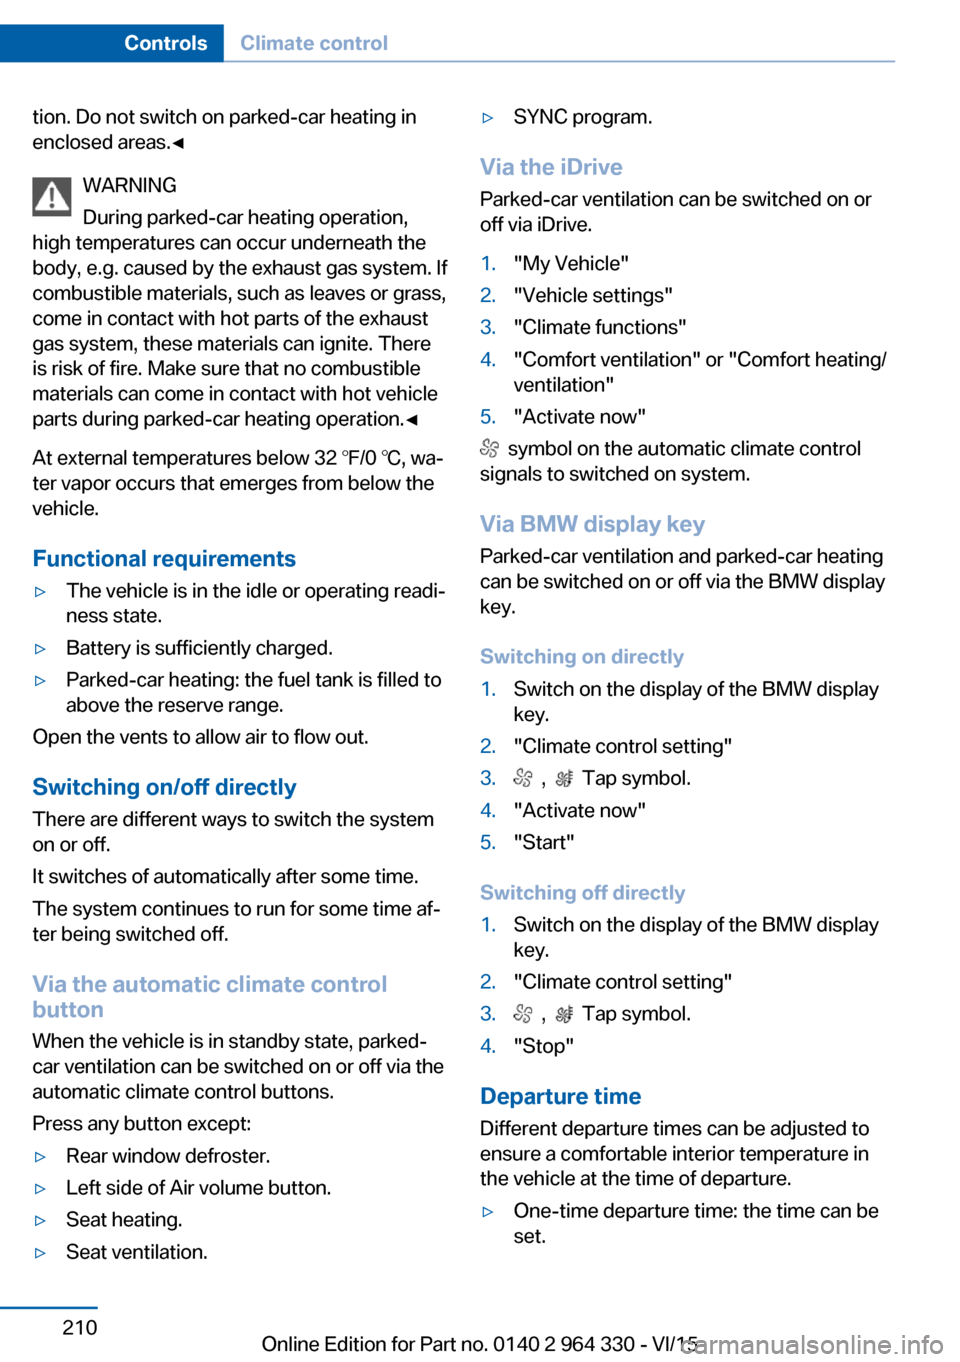
Switching on directly
1.Switch on the display of the BMW display
key.2."Climate control setting"3. , Tap symbol.4."Activate now"5."Start"
Switching off directly
1.Switch on the display of the BMW display
key.2."Climate control setting"3. , Tap symbol.4."Stop"
Departure time
Different departure times can be adjusted to
ensure a comfortable interior temperature in
the vehicle at the time of departure.
▷One-time departure time: the time can be
set.Seite 210ControlsClimate control210
Online Edition for Part no. 0140 2 964 330 - VI/15
Page 215 of 314
Interior equipmentVehicle features and optionsThis chapter describes all standard, country-
specific and optional features offered with the
series. It also describes features that are not
necessarily available in your car, e. g., due to
the selected options or country versions. This
also applies to safety-related functions and
systems. The respectively applicable country
provisions must be observed when using the
respective features and systems.
Universal Integrated Remote Control
The concept The universal garage door opener can operate
up to 3 functions of remote-controlled sys‐
tems such as garage door drives or lighting
systems. The universal garage door opener re‐
places up to 3 different hand-held transmitters.
To operate the remote control, the buttons on
the interior rearview mirror must be program‐
med with the desired functions. The hand-held
transmitter for the particular system is required
in order to program the remote control.
Before selling the vehicle, delete the stored
functions for the sake of security.
Information WARNING
Body parts can be jammed when operat‐
ing remote-controlled systems, e.g. the garage
door, using the universal garage door opener.
There is risk of injuries or risk of property dam‐
age. Make sure that the area of movement of
the respective system is clear during program‐
ming and operation. Also follow the safety in‐
structions of the hand-held transmitter.◀Compatibility
If this symbol is printed on the packag‐
ing or in the instructions of the system
to be controlled, the system is gener‐
ally compatible with the universal garage door opener.
If you have any questions, please contact:▷A dealer’s service center or another quali‐
fied service center or repair shop.▷www.homelink.com on the Internet.
HomeLink is a registered trademark of Gentex
Corporation.
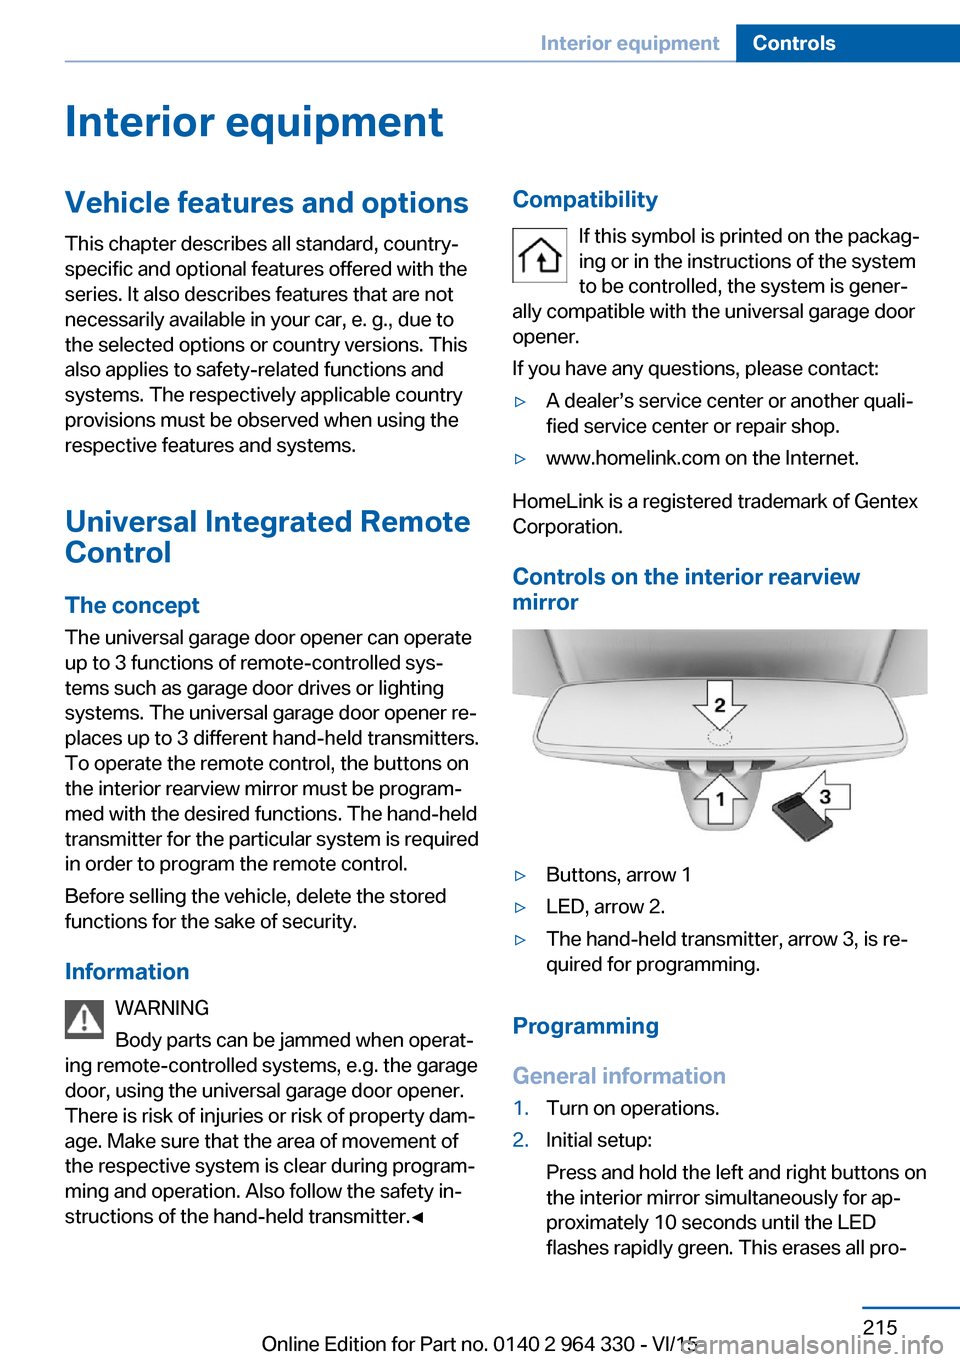
Controls on the interior rearview
mirror
▷Buttons, arrow 1▷LED, arrow 2.▷The hand-held transmitter, arrow 3, is re‐
quired for programming.
Programming
General information
1.Turn on operations.2.Initial setup:
Press and hold the left and right buttons on
the interior mirror simultaneously for ap‐
proximately 10 seconds until the LED
flashes rapidly green. This erases all pro‐Seite 215Interior equipmentControls215
Online Edition for Part no. 0140 2 964 330 - VI/15
Page 216 of 314
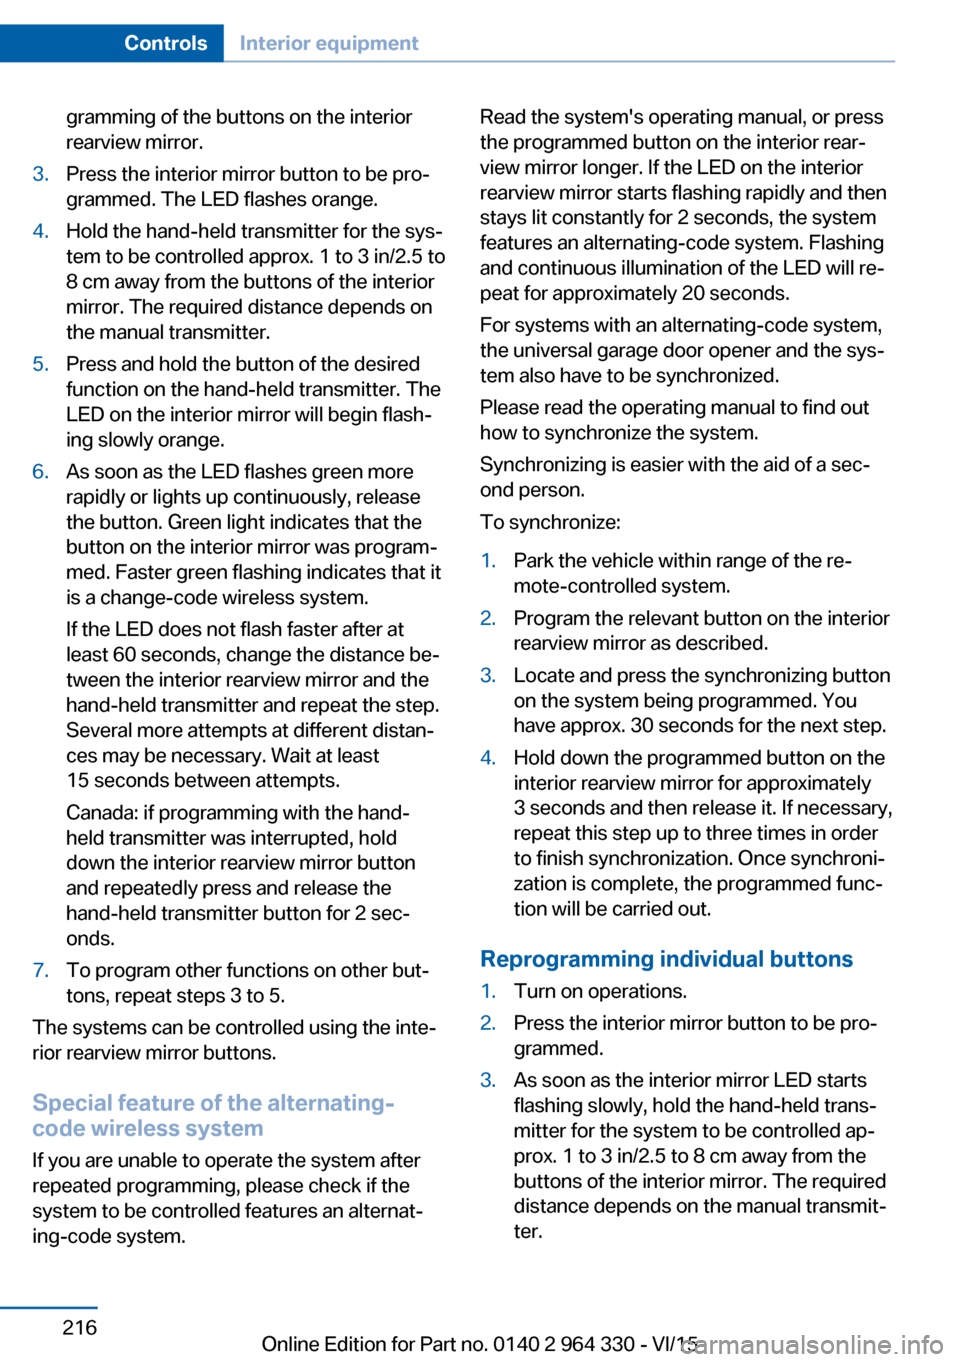
gramming of the buttons on the interior
rearview mirror.3.Press the interior mirror button to be pro‐
grammed. The LED flashes orange.4.Hold the hand-held transmitter for the sys‐
tem to be controlled approx. 1 to 3 in/2.5 to
8 cm away from the buttons of the interior
mirror. The required distance depends on
the manual transmitter.5.Press and hold the button of the desired
function on the hand-held transmitter. The
LED on the interior mirror will begin flash‐
ing slowly orange.6.As soon as the LED flashes green more
rapidly or lights up continuously, release
the button. Green light indicates that the
button on the interior mirror was program‐
med. Faster green flashing indicates that it
is a change-code wireless system.
If the LED does not flash faster after at
least 60 seconds, change the distance be‐
tween the interior rearview mirror and the
hand-held transmitter and repeat the step.
Several more attempts at different distan‐
ces may be necessary. Wait at least
15 seconds between attempts.
Canada: if programming with the hand-
held transmitter was interrupted, hold
down the interior rearview mirror button
and repeatedly press and release the
hand-held transmitter button for 2 sec‐
onds.7.To program other functions on other but‐
tons, repeat steps 3 to 5.
The systems can be controlled using the inte‐
rior rearview mirror buttons.
Special feature of the alternating-
code wireless system
If you are unable to operate the system after
repeated programming, please check if the
system to be controlled features an alternat‐
ing-code system.
Read the system's operating manual, or press
the programmed button on the interior rear‐
view mirror longer. If the LED on the interior
rearview mirror starts flashing rapidly and then
stays lit constantly for 2 seconds, the system
features an alternating-code system. Flashing
and continuous illumination of the LED will re‐
peat for approximately 20 seconds.
For systems with an alternating-code system,
the universal garage door opener and the sys‐
tem also have to be synchronized.
Please read the operating manual to find out how to synchronize the system.
Synchronizing is easier with the aid of a sec‐
ond person.
To synchronize:1.Park the vehicle within range of the re‐
mote-controlled system.2.Program the relevant button on the interior
rearview mirror as described.3.Locate and press the synchronizing button
on the system being programmed. You
have approx. 30 seconds for the next step.4.Hold down the programmed button on the
interior rearview mirror for approximately
3 seconds and then release it. If necessary,
repeat this step up to three times in order
to finish synchronization. Once synchroni‐
zation is complete, the programmed func‐
tion will be carried out.
Reprogramming individual buttons
1.Turn on operations.2.Press the interior mirror button to be pro‐
grammed.3.As soon as the interior mirror LED starts
flashing slowly, hold the hand-held trans‐
mitter for the system to be controlled ap‐
prox. 1 to 3 in/2.5 to 8 cm away from the
buttons of the interior mirror. The required
distance depends on the manual transmit‐
ter.Seite 216ControlsInterior equipment216
Online Edition for Part no. 0140 2 964 330 - VI/15
Page 217 of 314
4.Likewise, press and hold the button of the
desired function on the hand-held trans‐
mitter.5.Release both buttons as soon as the inte‐
rior mirror LED flashes more rapidly or
lights up continuously. The LED flashing
more rapidly or being continuously light up
indicates that the button on the interior
mirror has been programmed. The system
can then be controlled by the button on the
interior rearview mirror.
If the LED does not flash faster after at
least 60 seconds, change the distance and
repeat the step. Several more attempts at
different distances may be necessary. Wait
at least 15 seconds between attempts.
Canada: if programming with the hand-
held transmitter was interrupted, hold
down the interior rearview mirror button
and repeatedly press and release the
hand-held transmitter button for 2 sec‐
onds.
Controls
WARNING
Body parts can be jammed when operat‐
ing remote-controlled systems, e.g. the garage
door, using the universal garage door opener. There is risk of injuries or risk of property dam‐
age. Make sure that the area of movement of
the respective system is clear during program‐
ming and operation. Also follow the safety in‐
structions of the hand-held transmitter.◀
The system, such as the garage door, can be
operated using the button on the interior mirror
while the drive or operating readiness is
switched on. To do this, hold down the button
within receiving range of the system until the
function is activated. The interior rearview mir‐
ror LED stays lit while the wireless signal is be‐
ing transmitted.
Deleting stored functions
Press and hold the left and right button on the
interior mirror simultaneously for approxi‐ mately 10 seconds until the LED flashes rap‐
idly green. All stored functions are deleted.
The functions cannot be deleted individually.
Sun visor Glare shield
Fold the sun visor down or up.
Glare shield from the side
Folding out1.Fold the sun visor down.2.Unhook it from the holder and swing it to
the side.3.Move it back to the desired position.
Folding up
Proceed in the reverse order to close the sun
visor.
Vanity mirror A vanity mirror is located in the sun visor be‐
hind a cover. When the cover is opened, the
mirror lighting switches on.
Ashtray
Front
Opening
1.Push the cover forward until it engages be‐
hind the cup holders. Push the cover for‐Seite 217Interior equipmentControls217
Online Edition for Part no. 0140 2 964 330 - VI/15
Page 218 of 314
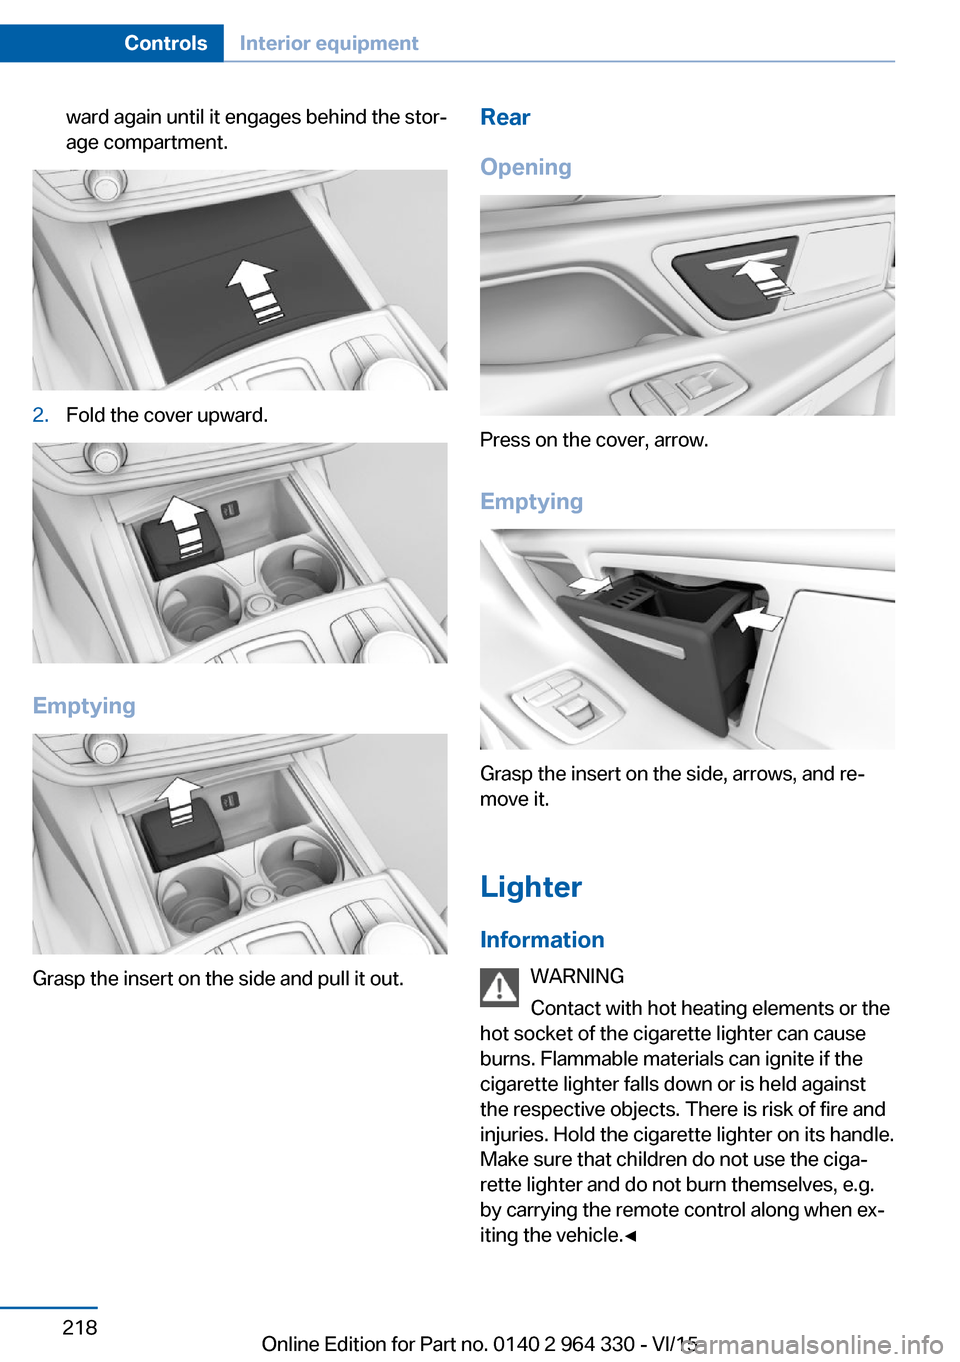
ward again until it engages behind the stor‐
age compartment.2.Fold the cover upward.
Emptying
Grasp the insert on the side and pull it out.
Rear
Opening
Press on the cover, arrow.
Emptying
Grasp the insert on the side, arrows, and re‐
move it.
Lighter Information WARNING
Contact with hot heating elements or the
hot socket of the cigarette lighter can cause
burns. Flammable materials can ignite if the
cigarette lighter falls down or is held against
the respective objects. There is risk of fire and
injuries. Hold the cigarette lighter on its handle.
Make sure that children do not use the ciga‐
rette lighter and do not burn themselves, e.g.
by carrying the remote control along when ex‐
iting the vehicle.◀
Seite 218ControlsInterior equipment218
Online Edition for Part no. 0140 2 964 330 - VI/15