key BMW 740I 1998 Owners Manual
[x] Cancel search | Manufacturer: BMW, Model Year: 1998, Model line: 740I, Model: BMW 740I 1998Pages: 211, PDF Size: 1.68 MB
Page 5 of 211
© 1998 BMW AG
Munich, Germany
Reprinting, including excerpts, only with the
written consent of BMW AG, Munich.
Order no. 01 41 9 791 187
US English VIII/98
Printed in Germany
Printed on environmentally friendly paper
(bleached without chlorine, suitable for recycling).
4n
Notes on the Owner's Manual
We have made every effort to ensure
that you are able to find what you need
in this Owner's Manual as quickly as
possible. The fastest way to find certain
topics is by using the detailed index at
the end. If you desire an initial overview
of your vehicle, this can be found in the
first chapter. The detailed list of con-
tents that directly follows the summary
of contents is intended to stimulate
your curiosity regarding your BMW and
to encourage you to read the manual.
Should you wish to sell your BMW at
some time in the future, please remem-
ber to hand over the Owner's Manual to
the new owner; it is part of the vehicle.
If you have any additional questions, an
authorized BMW center will be glad to
advise you.
Symbols used
These sections contain vital infor-
mation – please read the accom-
panying text passages carefully, both
for your own safety and to prevent dam-
age to your BMW.
<
These passages contain informa-
tion on special and unique fea-
tures of your vehicle.
<
Indicates special information on
recycling.
<
<
Indicates the end of a note.
*
Indicates special equipment, country-
specific equipment and optional extras.
Indicates that you should consult
the relevant section of this Owner's
Manual for information on a particular
part or assembly.
Alerts you to functions which can
be adjusted for individual drivers
by your authorized BMW center ("Car
Memory" or "Key Memory"). Refer to
page 53.
<
The individual vehicle
On buying your BMW, you have de-
cided in favor of a model with individu-
alized equipment and features. This
Owner's Manual describes all models
and equipment that BMW offers within
the same group.
We hope you will understand that
equipment and features are included
which you might not have chosen for
your vehicle. Any differences can easily
be identified, since all optional acces-
sories and special equipment are
marked with an asterisk
*
.
If your BMW features equipment which
is not described in this Owner's Manual
(car radio or telephone, for instance),
Supplementary Owner's Manuals are
enclosed. We ask you to read these
manuals as well.
Page 11 of 211

Contents
Overview
Controls and features
Cockpit16
Instrument cluster18
Indicator and warning lamps20
Multifunction steering wheel
(MFL)23
Hazard warning flashers24
Warning triangle24
First-aid kit24
Refueling25
Fuel specifications25
Tire inflation pressure26
Locks and security systems:
Keys30
Electronic vehicle
immobilizer31
Central locking system32
Door locks – outside32
Radio remote control33
Door locks – inside36
Luggage compartment lid37
Luggage compartment39
Alarm system40
Electric power windows42
Security glass43
Sliding/Tilt sunroof44
Adjustments:
Seats46
Steering wheel49
Mirrors50
Seat, mirror and steering wheel
memory51
Car Memory, Key Memory53
Passenger safety systems:
Safety belts54
Airbags55
Child restraints57
Child restraint installation58
Child-safety locks58
Driving:
Steering/Ignition lock59
Starting engine59
Switching off engine60Parking brake61
Automatic transmission62
Automatic transmission with
Steptronic65
Turn signal/Headlamp flasher68
Washer/Wiper system/Rain
sensor68
Rear window defroster70
Cruise control70
Everything under control:
Odometer, outside temperature
display72
Tachometer72
Energy control73
Fuel gauge73
Temperature gauge74
Service Interval Display74
Check Control 75
Multi-Information Display
(MID)78
Digital clock79
Onboard computer84
Technology for safety and
convenience:
Park Distance Control PDC90
Automatic Stability Control plus
Traction (ASC+T)/Dynamic Sta-
bility Control (DSC)92
Electronic Damper Control
(EDC)93
Tire Pressure Control (RDC)94
Page 21 of 211
20n
Indicator and warning lamps
Technology that monitors itself
Many of the systems of your BMW mon-
itor themselves automatically, both dur-
ing engine starts and while you are driv-
ing. Indicator and warning lamps that
are identified by "
l
" are tested for
proper functioning whenever the igni-
tion key is turned. They each light up
once for different periods of time.
If a fault should occur in one of these
systems, the corresponding lamp does
not go out after the engine is started or
it lights up while the vehicle is moving.
You will see how to react to this below.
Red: Stop immediately
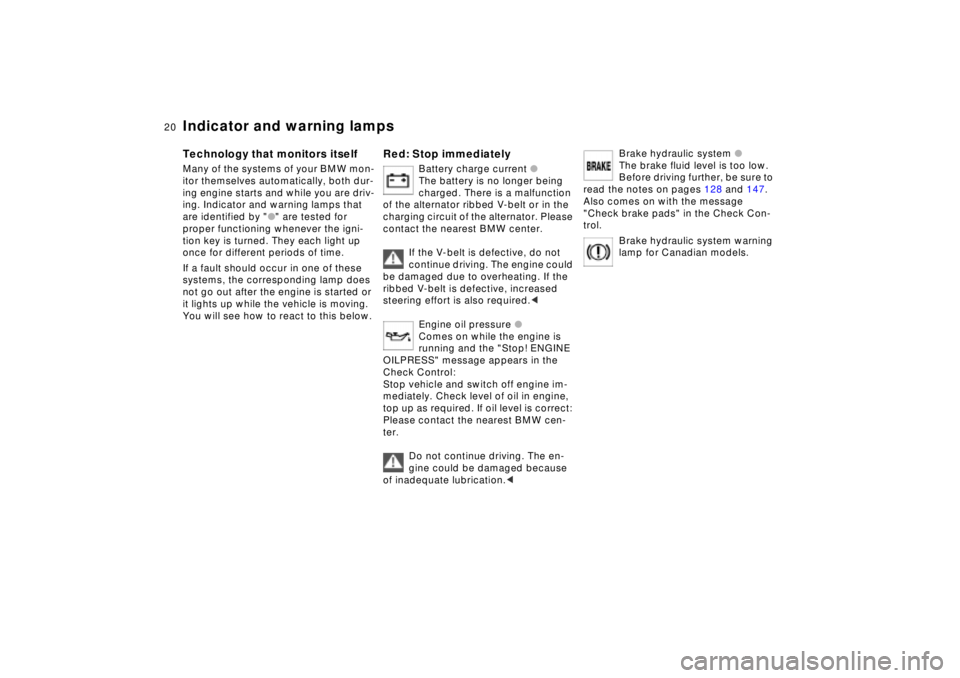
Battery charge current
l
The battery is no longer being
charged. There is a malfunction
of the alternator ribbed V-belt or in the
charging circuit of the alternator. Please
contact the nearest BMW center.
If the V-belt is defective, do not
continue driving. The engine could
be damaged due to overheating. If the
ribbed V-belt is defective, increased
steering effort is also required.
<
Engine oil pressure
l
Comes on while the engine is
running and the "Stop! ENGINE
OILPRESS" message appears in the
Check Control:
Stop vehicle and switch off engine im-
mediately. Check level of oil in engine,
top up as required. If oil level is correct:
Please contact the nearest BMW cen-
ter.
Do not continue driving. The en-
gine could be damaged because
of inadequate lubrication.
<
Brake hydraulic system
l
The brake fluid level is too low.
Before driving further, be sure to
read the notes on pages 128 and 147.
Also comes on with the message
"Check brake pads" in the Check Con-
trol.
Brake hydraulic system warning
lamp for Canadian models.
Page 24 of 211
23n
RepairsIndexOverview Controls Car care Technology Data
Multifunction steering wheel (MFL)
The controls integrated in the multi-
function steering wheel are provided so
that you can operate a number of ac-
cessories quickly and without being
distracted from traffic conditions. You
may operate:
>
Some of the functions of the radio,
the CD and cassette modes
>
The recirculated-air mode of the air
conditioner or
>The steering wheel heating
>The cruise control and
>Selected cellular phone functions.
In order to operate a system via
the MFL, the corresponding sys-
tem controls must be switched on.<
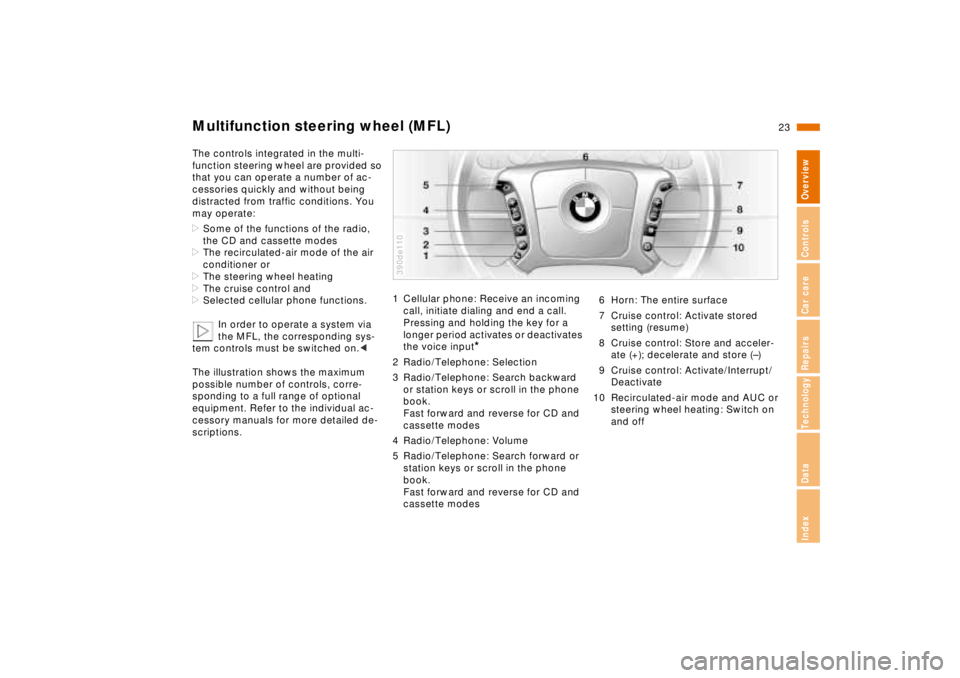
The illustration shows the maximum
possible number of controls, corre-
sponding to a full range of optional
equipment. Refer to the individual ac-
cessory manuals for more detailed de-
scriptions.
1 Cellular phone: Receive an incoming
call, initiate dialing and end a call.
Pressing and holding the key for a
longer period activates or deactivates
the voice input
*
2 Radio/Telephone: Selection
3 Radio/Telephone: Search backward
or station keys or scroll in the phone
book.
Fast forward and reverse for CD and
cassette modes
4 Radio/Telephone: Volume
5 Radio/Telephone: Search forward or
station keys or scroll in the phone
book.
Fast forward and reverse for CD and
cassette modes390de110
6 Horn: The entire surface
7 Cruise control: Activate stored
setting (resume)
8 Cruise control: Store and acceler-
ate (+); decelerate and store (–)
9 Cruise control: Activate/Interrupt/
Deactivate
10 Recirculated-air mode and AUC or
steering wheel heating: Switch on
and off
Page 29 of 211
28n
Locks and security systems:
Keys30
Electronic vehicle
immobilizer31
Central locking system32
Door locks – outside32
Radio remote control33
Door locks – inside36
Luggage compartment lid37
Luggage compartment39
Alarm system40
Electric power windows42
Security glass43
Sliding/Tilt sunroof44
Adjustments:
Seats46
Steering wheel49
Mirrors50
Seat, mirror and steering wheel
memory51
Car Memory, Key Memory53
Passenger safety systems:
Safety belts54
Airbags55
Child restraints57
Child restraint installation58
Child-safety locks58
Driving:
Steering/Ignition lock59
Starting engine59
Switching off engine60
Page 31 of 211
30n
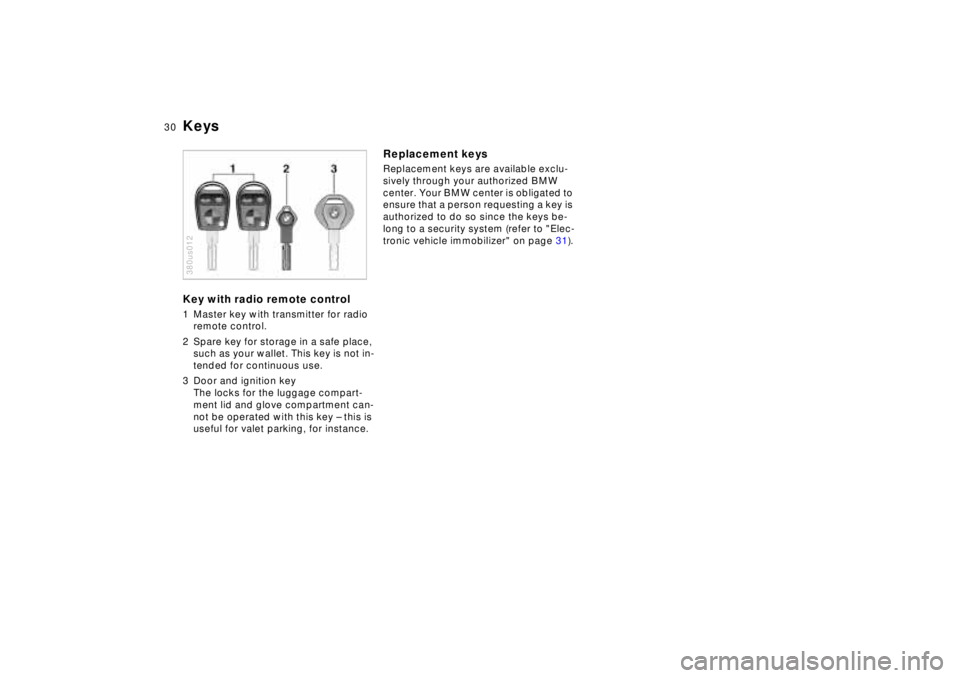
KeysKey with radio remote control1 Master key with transmitter for radio
remote control.
2 Spare key for storage in a safe place,
such as your wallet. This key is not in-
tended for continuous use.
3 Door and ignition key
The locks for the luggage compart-
ment lid and glove compartment can-
not be operated with this key – this is
useful for valet parking, for instance.380us012
Replacement keysReplacement keys are available exclu-
sively through your authorized BMW
center. Your BMW center is obligated to
ensure that a person requesting a key is
authorized to do so since the keys be-
long to a security system (refer to "Elec-
tronic vehicle immobilizer" on page 31).
Page 32 of 211
31n
RepairsIndexOverview Controls Car care Technology Data
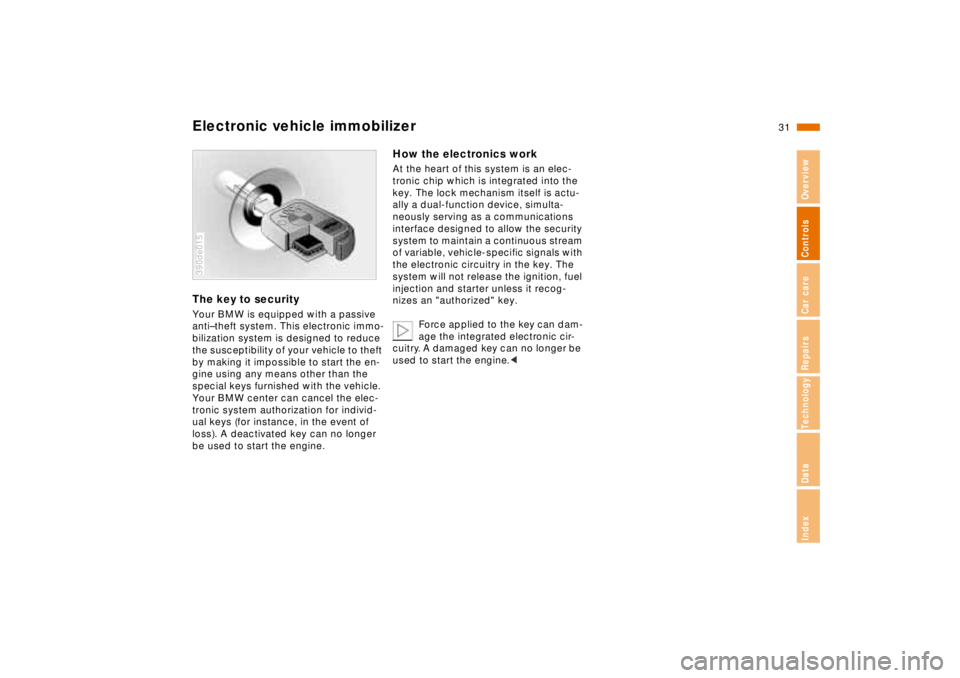
Electronic vehicle immobilizerThe key to securityYour BMW is equipped with a passive
anti–theft system. This electronic immo-
bilization system is designed to reduce
the susceptibility of your vehicle to theft
by making it impossible to start the en-
gine using any means other than the
special keys furnished with the vehicle.
Your BMW center can cancel the elec-
tronic system authorization for individ-
ual keys (for instance, in the event of
loss). A deactivated key can no longer
be used to start the engine.390de015
How the electronics workAt the heart of this system is an elec-
tronic chip which is integrated into the
key. The lock mechanism itself is actu-
ally a dual-function device, simulta-
neously serving as a communications
interface designed to allow the security
system to maintain a continuous stream
of variable, vehicle-specific signals with
the electronic circuitry in the key. The
system will not release the ignition, fuel
injection and starter unless it recog-
nizes an "authorized" key.
Force applied to the key can dam-
age the integrated electronic cir-
cuitry. A damaged key can no longer be
used to start the engine.<
Page 33 of 211
32n
Central locking system Door locks – outsideThe conceptThe central locking system is ready for
operation as soon as you close the
driver's door. The system engages and
releases the locks on the
>doors
>luggage compartment lid
>fuel filler door.
The central locking system can be
operated
>from outside via the driver's door or
luggage compartment lock and with
the remote control
>from inside via the central locking
button.
The fuel filler door remains unlocked
when you activate the system from in-
side the vehicle.
The anti-theft system is automatically
armed whenever you activate the cen-
tral locking system from outside the ve-
hicle. The alarm system is also acti-
vated or deactivated.
In the event of an accident, the central
locking system unlocks automatically
(only those doors which were not
locked separately with the safety lock
buttons). Refer to page 36. In addition,
the hazard warning flashers and interior
lamps come on.
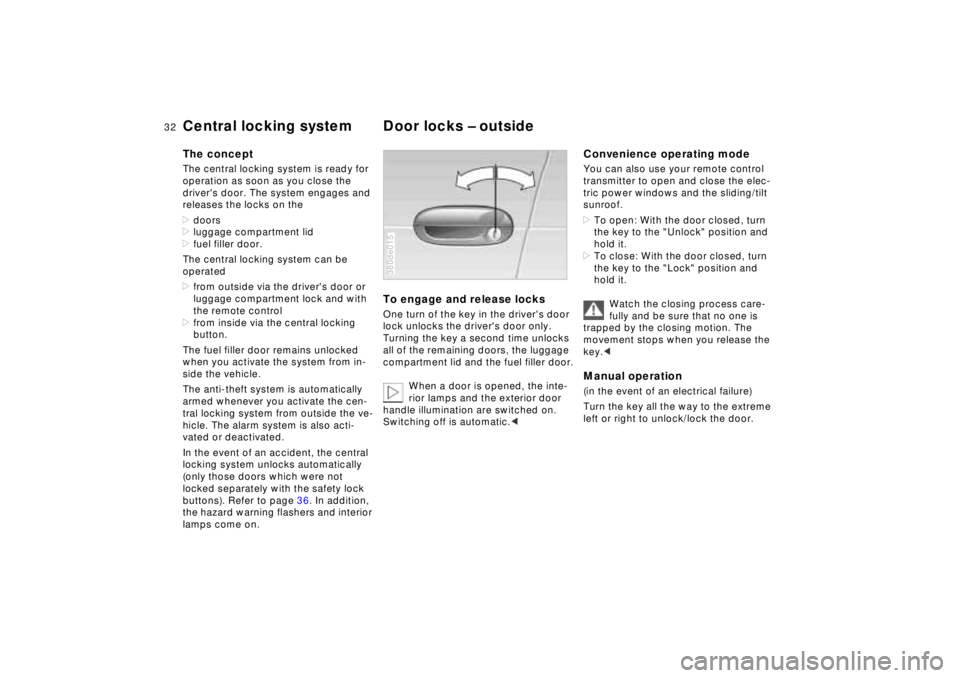
To engage and release locksOne turn of the key in the driver's door
lock unlocks the driver's door only.
Turning the key a second time unlocks
all of the remaining doors, the luggage
compartment lid and the fuel filler door.
When a door is opened, the inte-
rior lamps and the exterior door
handle illumination are switched on.
Switching off is automatic.< 380de015
Convenience operating modeYou can also use your remote control
transmitter to open and close the elec-
tric power windows and the sliding/tilt
sunroof.
>To open: With the door closed, turn
the key to the "Unlock" position and
hold it.
>To close: With the door closed, turn
the key to the "Lock" position and
hold it.
Watch the closing process care-
fully and be sure that no one is
trapped by the closing motion. The
movement stops when you release the
key.< Manual operation(in the event of an electrical failure)
Turn the key all the way to the extreme
left or right to unlock/lock the door.
Page 34 of 211
33n
RepairsIndexOverview Controls Car care Technology Data
Radio remote controlThe remote control makes opening and
locking the doors of your vehicle very
convenient. Furthermore, it provides
three additional functions which can
only be executed by means of the re-
mote control:
>Switching on the interior lamps and il-
luminating the exterior door handles.
With this function, you can also
"search for" your vehicle, when
parked in an underground garage, for
instance
>To open luggage compartment lid
The luggage compartment lid will
open slightly, regardless of whether
the lid was previously locked or un-
locked
>Panic Mode
In case of danger, you can trigger an
alarm.
The anti-theft system is also deacti-
vated/activated simultaneously with
the unlocking or locking of the vehicle,
and the alarm system is disarmed/
armed.
When the vehicle is unlocked, the inte-
rior lamps and the exterior door handle
illumination are switched on.
Master keysKeys with a transmitter for remote con-
trol are master keys. Refer to page 30.
Since children might be able to
lock the doors from the inside,
take the vehicle's keys with you so that
the vehicle can be opened again from
the outside at any time.<
Every transmission is indicated by a
light signal. If the signal no longer lights
up when a button is pressed and lock-
ing with the remote control no longer
functions:
Change the battery. Refer to page 168.380us644
Unlocking and convenience
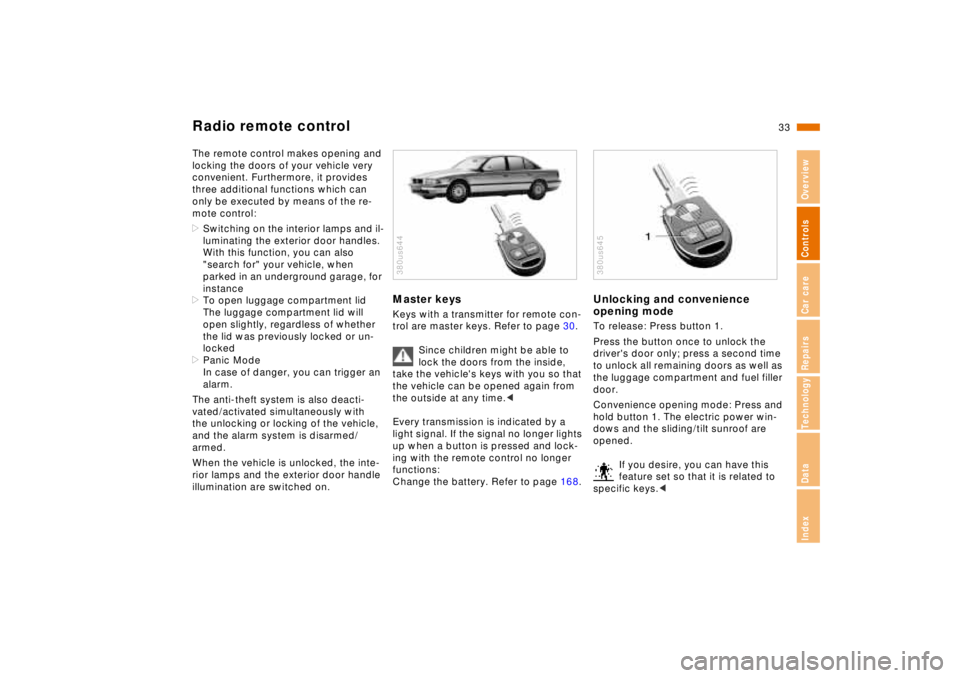
opening modeTo release: Press button 1.
Press the button once to unlock the
driver's door only; press a second time
to unlock all remaining doors as well as
the luggage compartment and fuel filler
door.
Convenience opening mode: Press and
hold button 1. The electric power win-
dows and the sliding/tilt sunroof are
opened.
If you desire, you can have this
feature set so that it is related to
specific keys.< 380us645
Page 37 of 211
36n
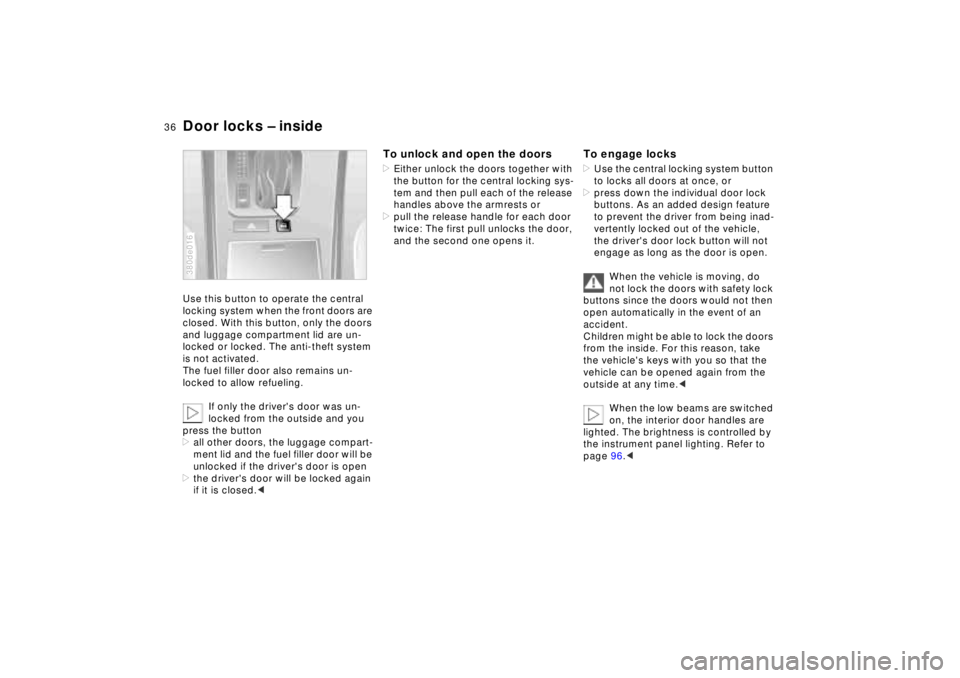
Door locks – insideUse this button to operate the central
locking system when the front doors are
closed. With this button, only the doors
and luggage compartment lid are un-
locked or locked. The anti-theft system
is not activated.
The fuel filler door also remains un-
locked to allow refueling.
If only the driver's door was un-
locked from the outside and you
press the button
>all other doors, the luggage compart-
ment lid and the fuel filler door will be
unlocked if the driver's door is open
>the driver's door will be locked again
if it is closed.< 380de016
To unlock and open the doors>Either unlock the doors together with
the button for the central locking sys-
tem and then pull each of the release
handles above the armrests or
>pull the release handle for each door
twice: The first pull unlocks the door,
and the second one opens it.
To engage locks>Use the central locking system button
to locks all doors at once, or
>press down the individual door lock
buttons. As an added design feature
to prevent the driver from being inad-
vertently locked out of the vehicle,
the driver's door lock button will not
engage as long as the door is open.
When the vehicle is moving, do
not lock the doors with safety lock
buttons since the doors would not then
open automatically in the event of an
accident.
Children might be able to lock the doors
from the inside. For this reason, take
the vehicle's keys with you so that the
vehicle can be opened again from the
outside at any time.<
When the low beams are switched
on, the interior door handles are
lighted. The brightness is controlled by
the instrument panel lighting. Refer to
page 96.<